Synology have sent us their DS210j DiskStation NAS for review. See how it does!
Product on Review: Synology DiskStation DS210j
Manufacturer: Synology
Street Price: Around £150

Synology are a well known name in the NAS (Network Attached Storage) market. Certainly whenever I think ‘NAS’ their name is pretty much at the top of the list for producing well reviewed and highly regarded hardware.
Dave was fortunate enough to review their excellent DS410 nearly 4 months ago and was very impressed. I have received their DS210j – a model sat in their base user group that has the title ‘Home to Small Office’. I’m interested to see how it performs and what features it offers!
Here’s a little from Synology themselves:
Founded in 2000, Synology is a young and energetic company dedicated to developing high-performance, reliable, versatile, and environmentally-friendly Network Attached Storage (NAS) products. Our goal is to deliver user-friendly solutions and solid customer service to satisfy the needs of businesses, home offices, individual users and families.
Founded in 2000, Synology is a young and energetic company dedicated to developing high-performance, reliable, versatile, and environmentally-friendly Network Attached Storage (NAS) products. Our goal is to deliver user-friendly solutions and solid customer service to satisfy the needs of businesses, home offices, individual users and families.
Specifications
Follow the link provided to compare the specifications of the Synology DS210j against its fellow Synology NAS products: http://www.synology.com/enu/products/compare_spec.php
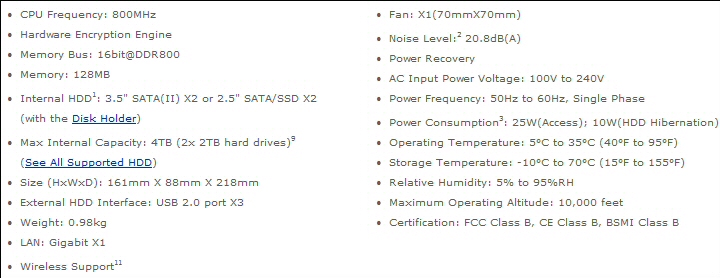
Its specification may not be at the sharp end of Synology’s product range but it does carry many of the features of its more expensive brethren.
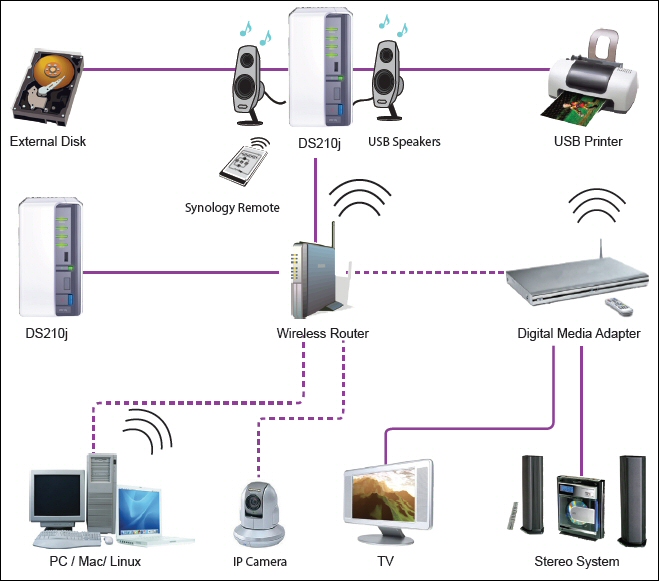
| Here’s what Synology have to say about the DS210j: Synology Disk Station DS210j is designed to provide a cost-effective file storage and backup solution with RAID protection for home users. The system firmware, Synology DiskStation Manager 2.3, delivers rich features for multimedia enjoyments, worry-free backup, Internet sharing, and energy-saving options. |
Packaging and extras
The Synology DS210j arrived in an uncluttered and tidy looking parcel – only a sticker on the side outlined the contents within.
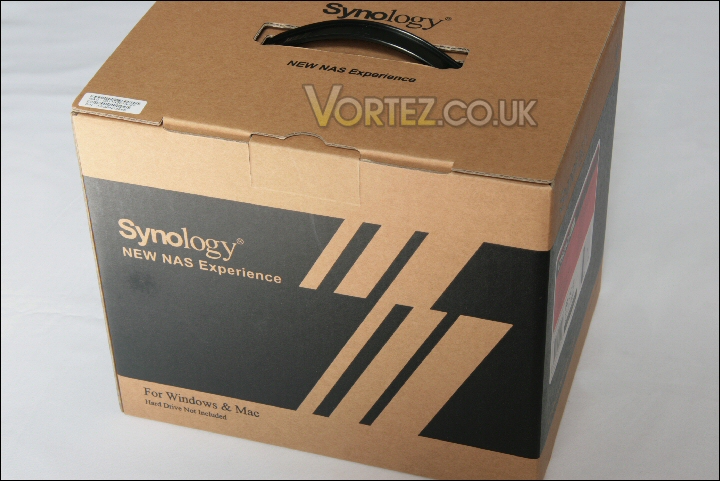
Packaging.
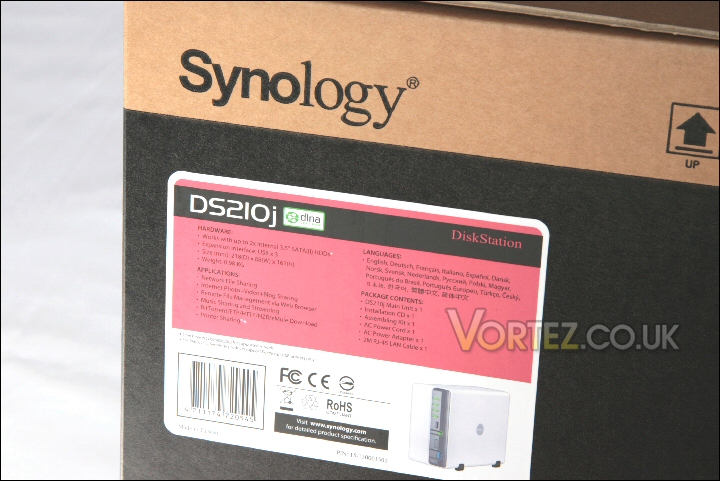
Contents label.
The packaging provided ample protection for the NAS device. The DS210j was cradled in a cardboard frame and protected from scratches by a soft foam bag. All other additional accessories were contained in an internal box alongside the NAS. These included all the fixing screws for the install of the HDD’s and secure build of the NAS exterior, the power brick and kettle lead and a single Cat5 cable for connection to your network.
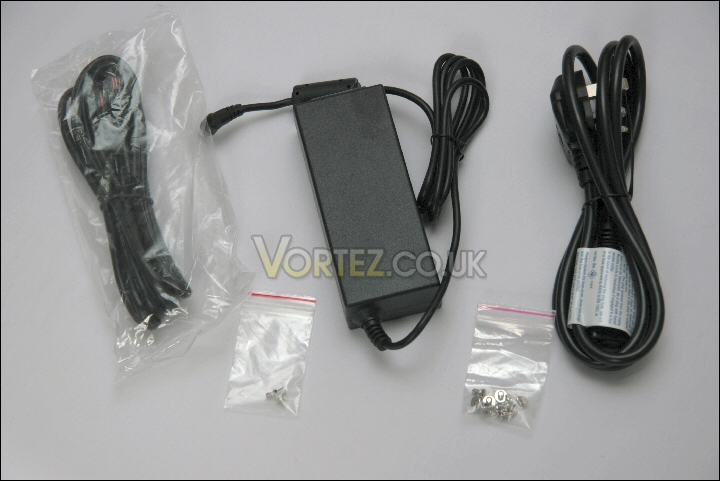
Power brick, cabling and screws.
Also included were a couple of printed manuals and guidelines on usage as well as a utility disk.
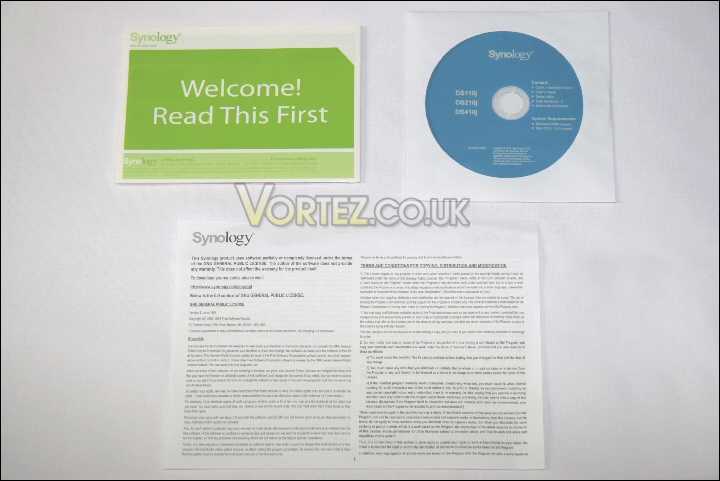
Manuals and utility disk.
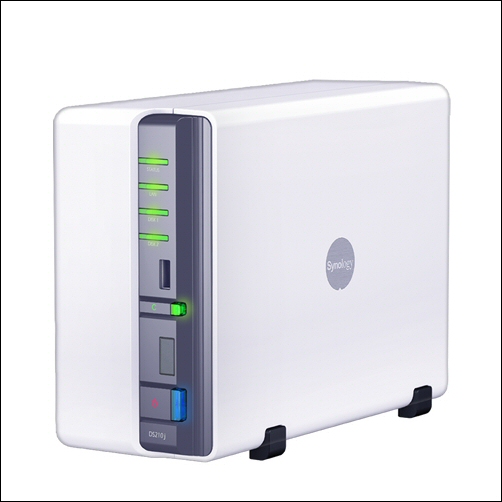
Synology DS210j
Once unpacked we can see that the DS210j is from a lower range than the recently reviewed DS410. Rather than a metal frame and dark businesslike appearance we have a plastic outer cocoon in an ‘Apple like’ creamy white livery.
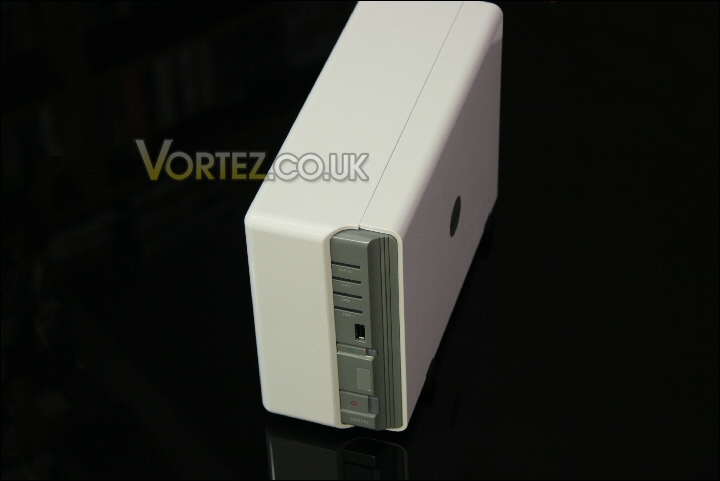
The DiskStation DS210j.
The grey section at the front of the DS210j contains some control buttons and the relevant status lights. Also present is a convenient USB socket which allows data to be transferred to and from the NAS from an external drive.
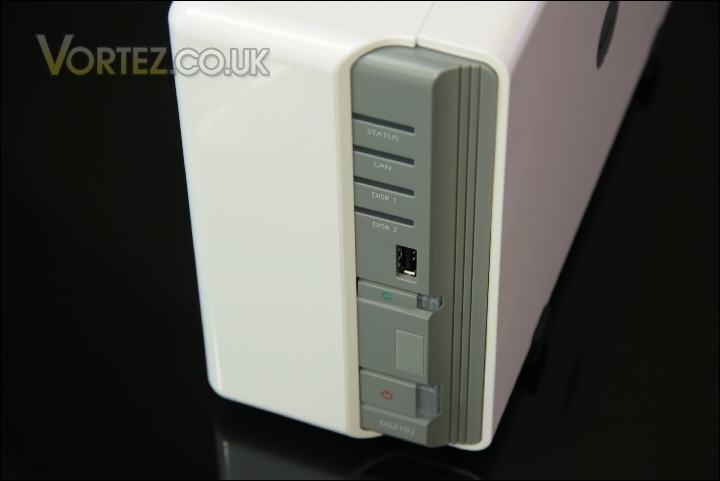
DS210j front.
The rear (the first metal part yet) contains a 70mm cooling fan, gigabit lan socket, two USB 2.0 sockets, an AC socket for power and a small reset button.
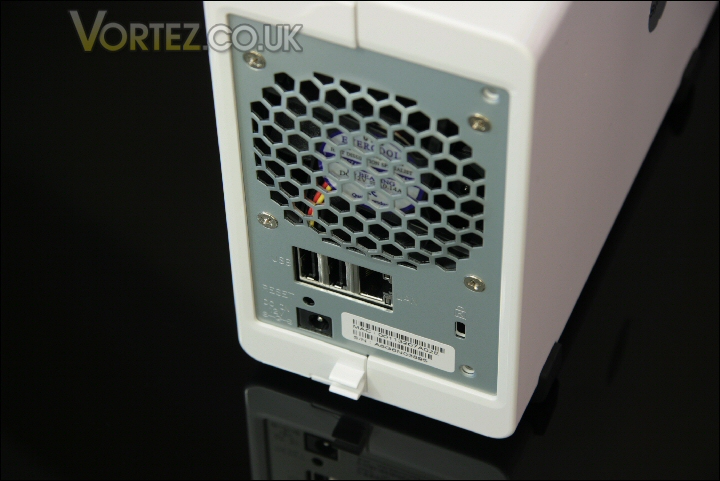
Unit rear.
Whilst not massively interesting the underside does contain an intake vent for cool air. Might be worth considering where you place the DS210j as this vent might end up hoovering copious volumes of dust up from the surfaces nearby. I certainly wouldn’t consider leaving it on a carpet for example.
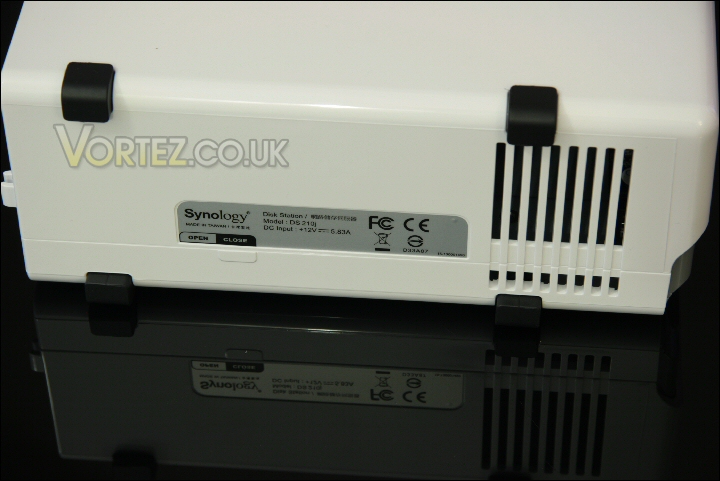
Base of the DS210j.
Also on the base is a label with a mark to show the open and closed positions of the case – when slid to the open position the left and right sections of the case separate ready for install.
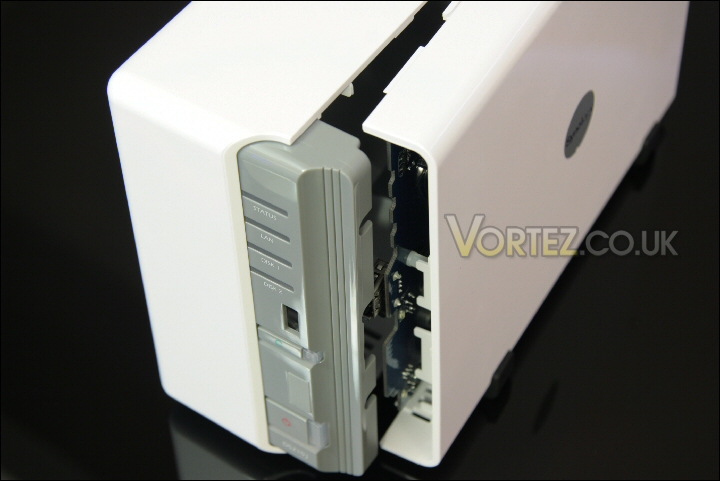
Case seperation.
DS210j internals
Once opened you’re greeted with a simple looking metal HDD caddy. It’s certainly not a confusing layout and nothing needs to be removed or prepared to begin installing your drives.
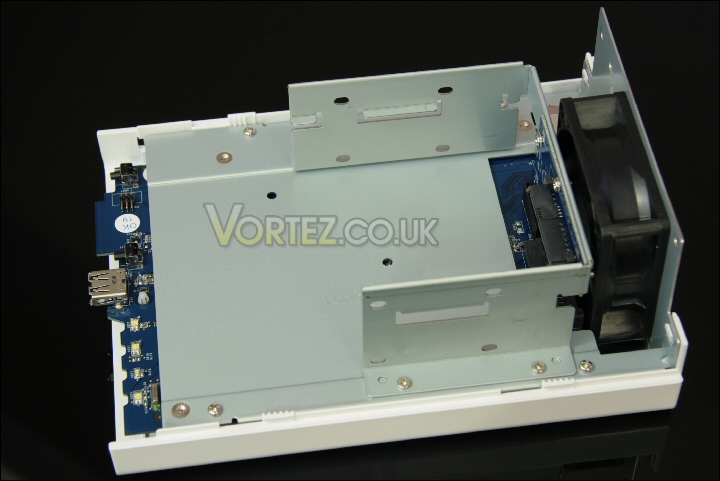
The internal metal frame.
The back of the DS210j sports a set of SATA sockets and the 70mm cooling fan.
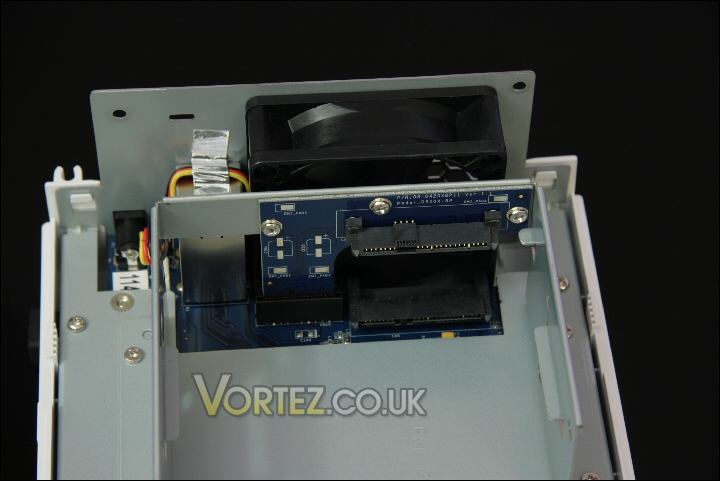
70mm fan and SATA sockets.
At the opposite end of the NAS is the button, led and USB portion of the PCB that makes up the front panel of the unit.
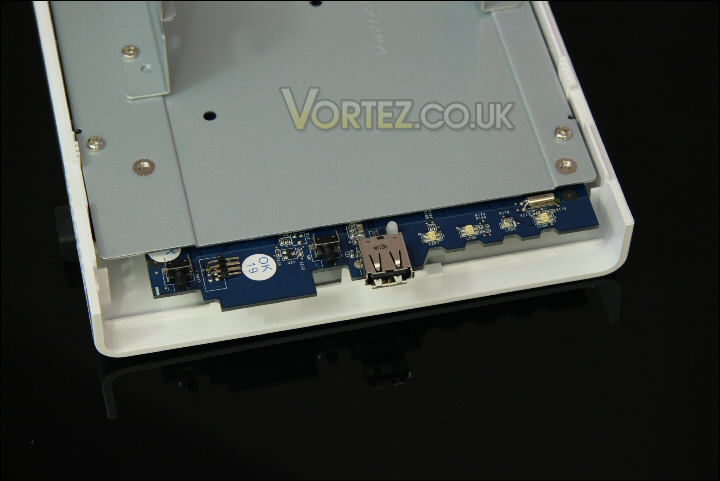
Front panel section.
It’s not needed for installation but since I was feeling nosey I removed the four retaining screws that held the PCB and frame to the lower portion of the plastic case and revealed the underside of the DS210j. As you can see it’s not merely a simple storage controller but more a mini PC. You can clearly see the 800MHz Marvell Kirkwood passive CPU in the center of the PCB and to the left of that the smaller 128MB Elpida memory chip.
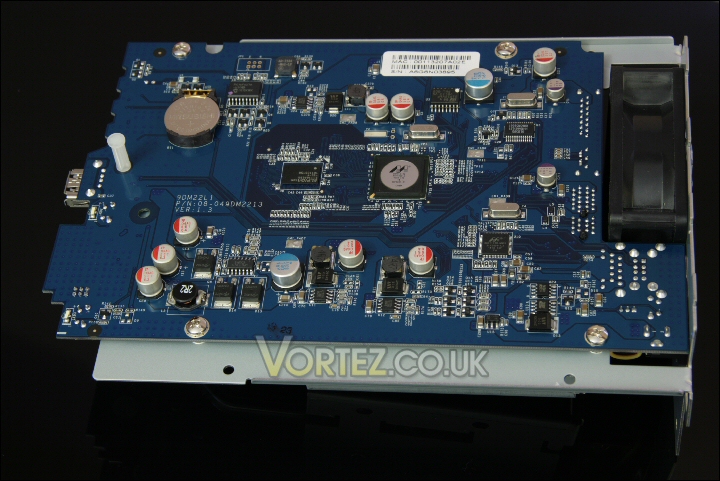
The DS210j PCB.
Hardware installation
I picked up two Hitachi 500GB drives for the review. There’s a massive list of compatible drives on Synology’s website so it’s worth checking compatibility before you spend your cash on a couple of expensive drives.
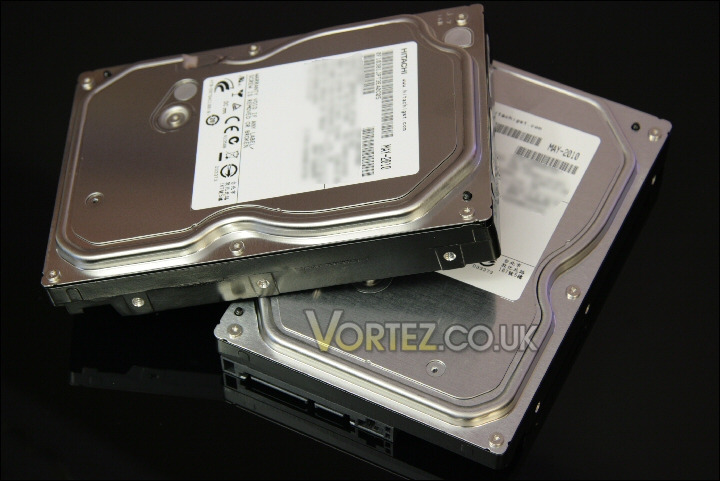
Two brand new drives.
When plugged into their respective SATA sockets the HDD’s are easily secured in place with the screws Synology kindly bundled with the DS210j.
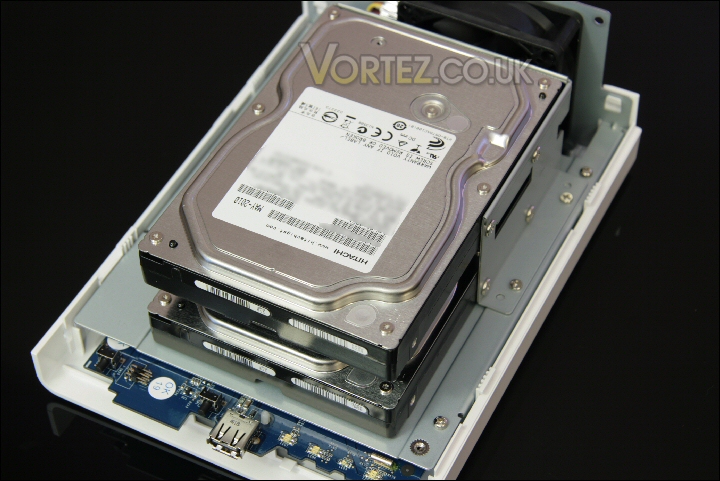
Securely in place.
As the casing is reattached there are a couple of small screws that need to be inserted in the rear of the case.
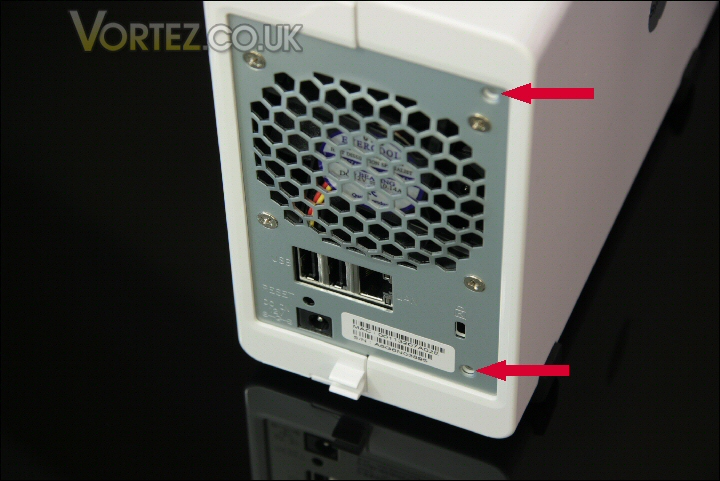
Only two screws needed to secure case.
Once done you’re ready to plug it in and power it up. With just the power cable plugged in you’re greeted by a blue power LED, two green LED’s for each of the HDD’s and a flashing orange status LED. The LAN LED lights up when it’s plugged into a network and the status light turns green when a storage volume is created on the HDD’s.
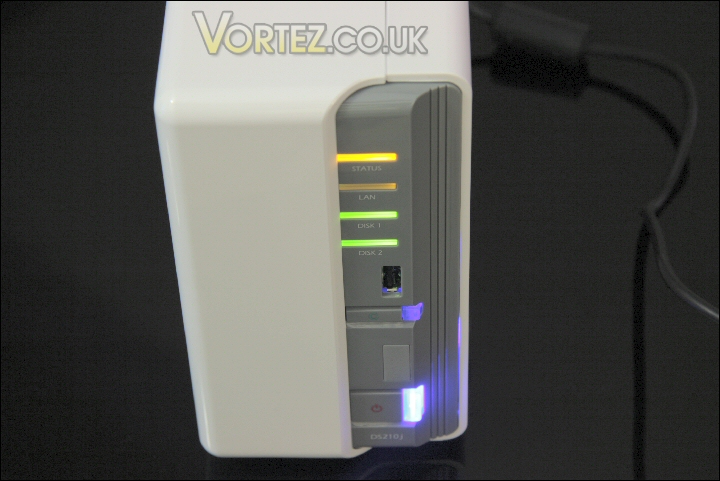
Powered up!
Software disk and DSM 2.3 install
The disk supplied with the DS210j includes a selection of guides and configuration aids covering various features of the Synology NAS. The most important item listed on the disk is the ‘Synology Assistant’ which is a utility to set up and configure Synology Server on your brand new Synology NAS.
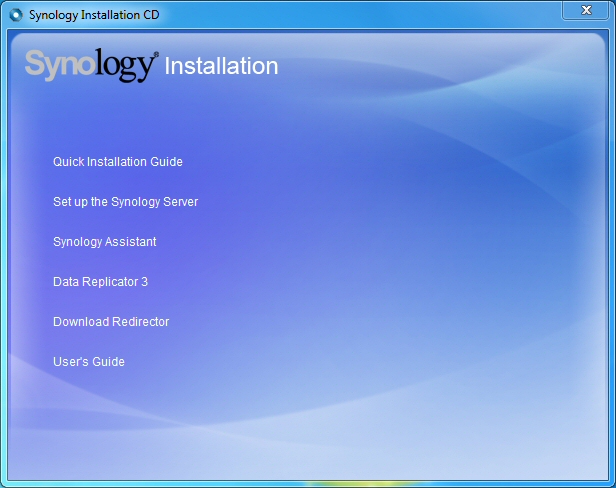
Install disk options.
Once activated you are taken to the Synology Assistant front page. This is the program bundled with the DS210j and is the current 2.3 variety. (There is a 3.0 variety which I will look at later)
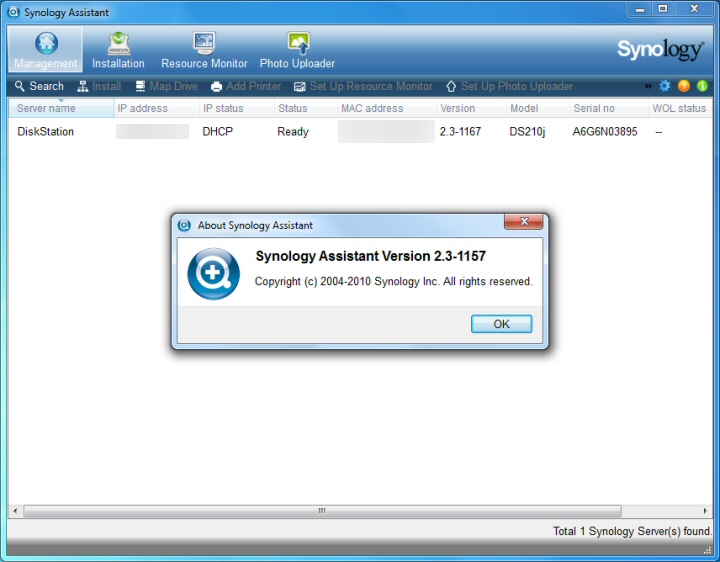
The Synology Assistant.
From here you can search for your Synology device and connect to it to begin configuring and using it. Once connected the Setup Wizard within Synology Assistant guides you through the process of installing DSM (DiskStation Manager).
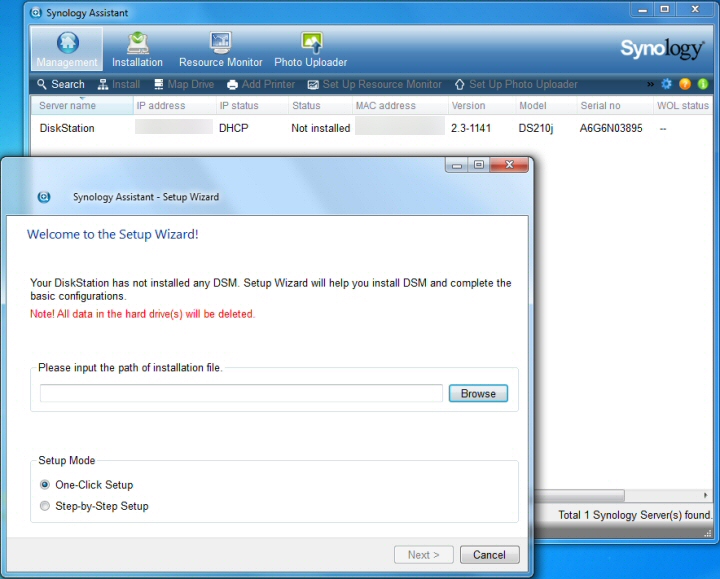
Find the .pat file containing DSM.
DSM is a full control suite using a web based interface run exclusively from the DS210j itself. Installation doesn’t take long at all and your constantly updated at every stage so never have one of those ‘has it frozen’ moments!
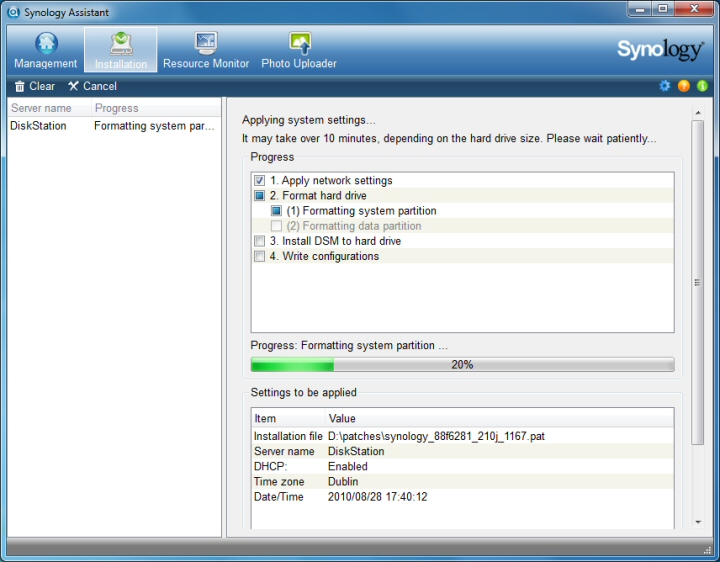
Install is a breeze.
Synology Assistant and DSM 2.3
Synology Assistant has a couple of useful features that are mirrored by DSM but beyond that Synology Assistant’s most important function is to install DSM like we have seen. Once installed it is then available to connect to DSM and monitor the DiskStations technical status.
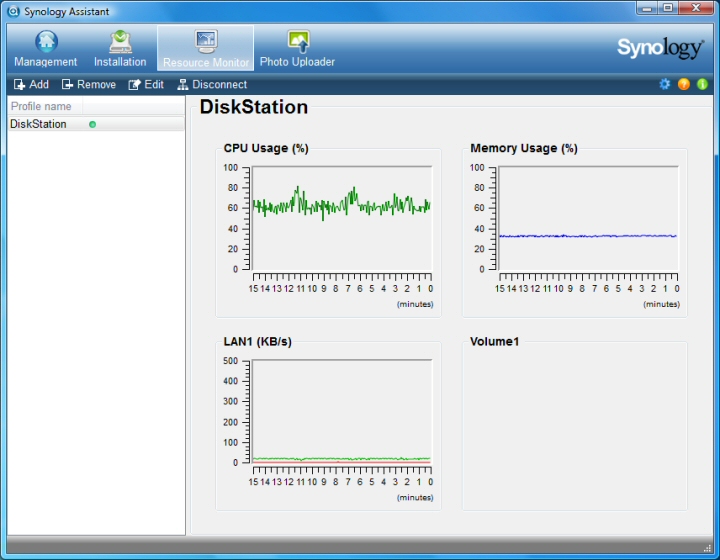
Resource monitor in Synology Assistant.
Moving over to the Bundled DiskStation Manager 2.3 which operates within a web browser window and can be activated through the Synology Assistant ‘connect’ option. You’re initially greeted by a standard logon screen which requires a username and password.
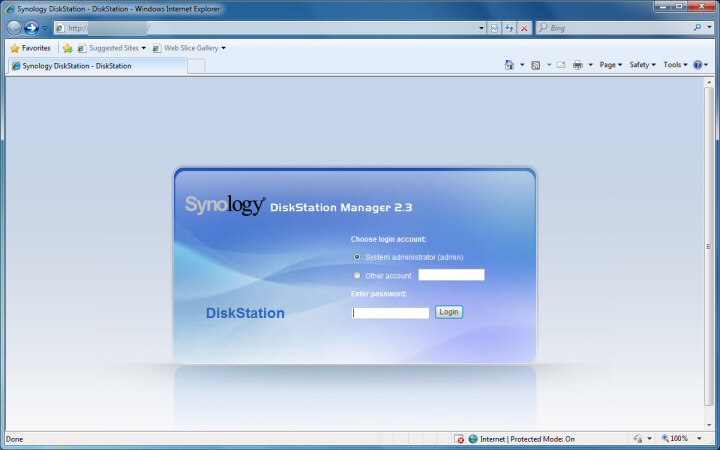
DSM 2.3 logon screen.
The main page provides you with a simplified wizard style interface.
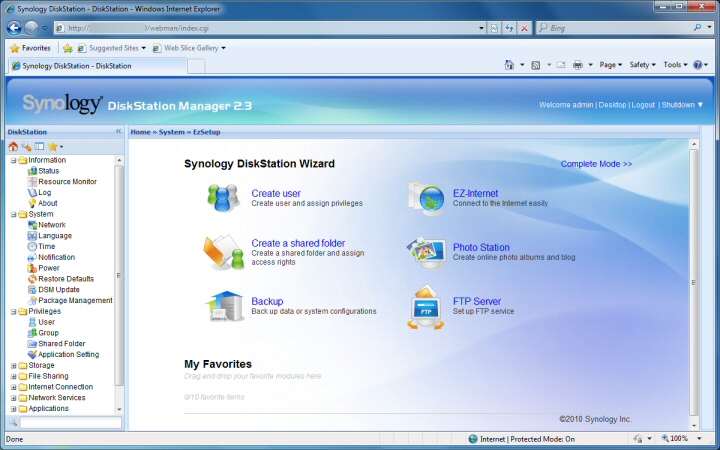
DSM 2.3 main screen.
Although many of the additional features are listed down the left side of the screen you can call up a fully featured view by clicking on the ‘Complete Mode > >’ link at the top right of the wizard window. As you can see it’s a far more comprehensive view but could be overwhelming to novice users.
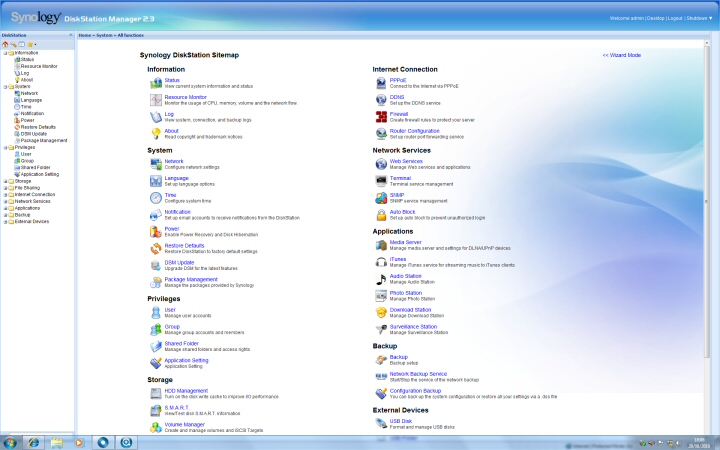
Complete mode is certainly busy!
As I mentioned earlier Dave reviewed the DS410 a few months back and took a close look at the functionality of DSM 2.3 so rather than go over stuff that’s already been covered I’ll send you here:
http://www./contentteller/articles_pages/synology_diskstation_ds410_review,5.html
http://www./contentteller/articles_pages/synology_diskstation_ds410_review,5.html
DiskStation Manager 3.0 Beta
Besides checking that it was basically functional and stable I only used DSM 2.3 to upgrade the DiskStation to DSM 3.0 Beta. This process was also slick and straightforward. Download the relevant .pat file and then point the DSM Update suite to it and let it do the rest.
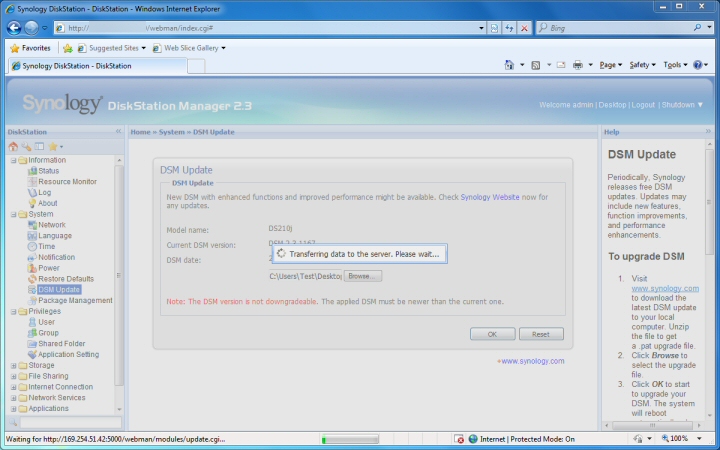
Updating to DSM 3.0 from within DSM 2.3!
It’s not the fastest process in the world but there’s barely any intervention needed throughout it just completes and reboots.
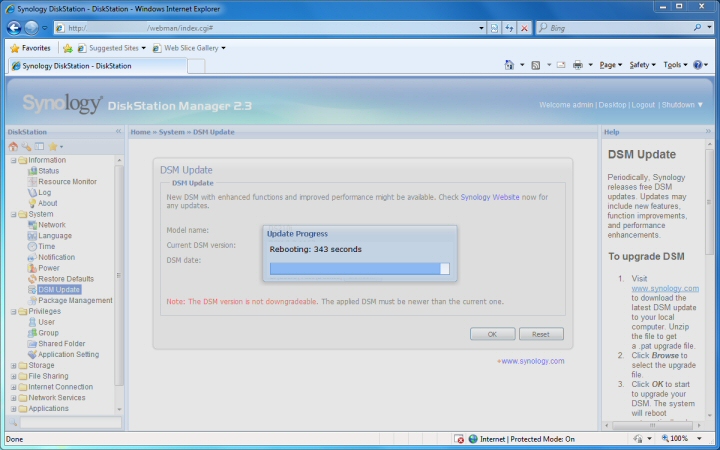
Automatically reboots.
DSM V3 Beta has an even more streamlined look. The logon screen is simple yet good looking.
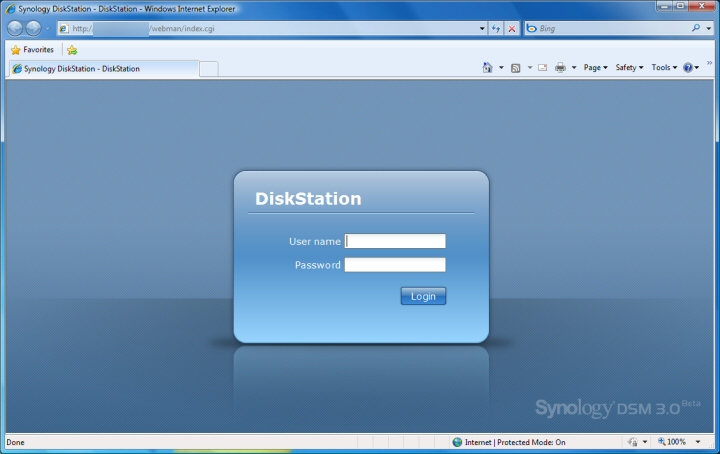
Logon screen.
Again DSM 3.0 welcomes you with a very simple quick start interface who’s options lead the user to wizard style step by step set up routines. It’s certainly a very welcoming interface to something that is surprisingly complex.
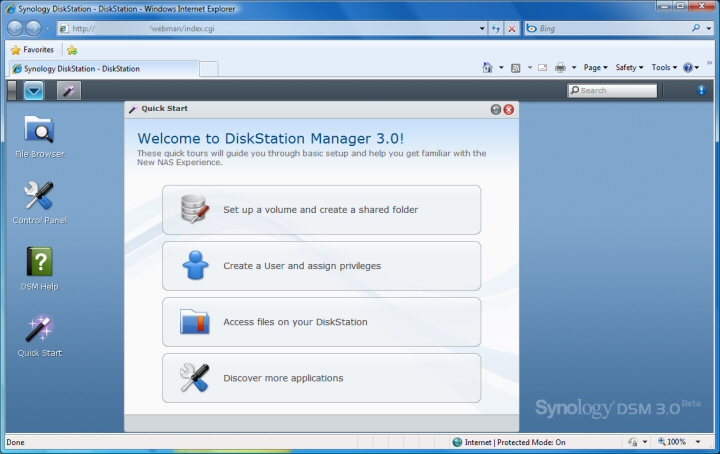
Quick start interface.
The first three options cover fairly standard setup options some of which are virtually identical to those covered by Dave in his DS410 review. Volume creation and file sharing setup routines… certainly required for the set up and day to day use of the DiskStation NAS.
Volume creation
Creating the volume is a simple if time consuming process. The wizard guides you through every stage beginning with the storage mode – here you have the opportunity to choose a Synology based Hybrid RAID setup or you can specifically choose a type that best suits the setup, backup and usage requirements.
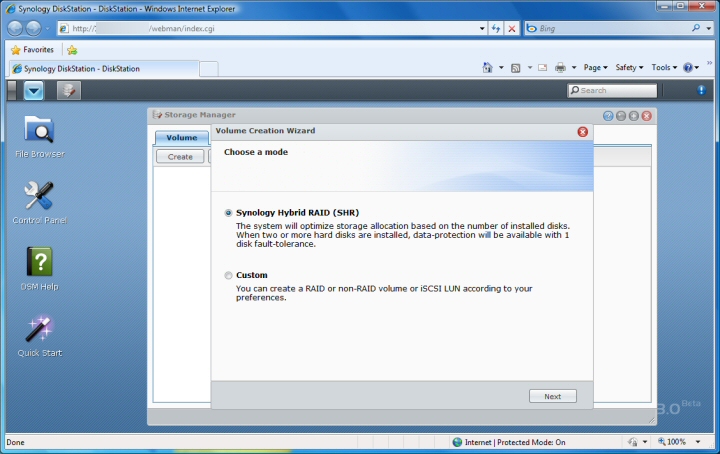
The guiding hand of the wizard.
Since the DS210j only houses two drives I figured that the Hybrid RAID would probably setup a Raid 1 mirrored drive for better data protection since there are identical copies of the data on each drive. DSM 3.0 did just this – it listed the drives that would be used and asked for clarification on erasing them for the new volume creation.
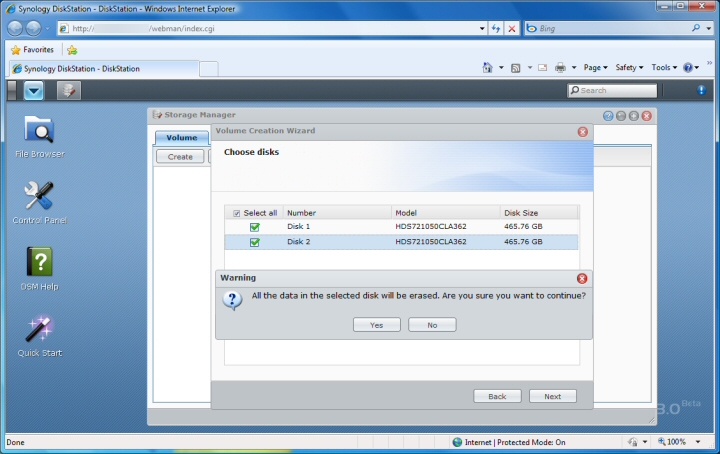
DSM 3.0 final check.
The parity check for the drives takes the greatest time. For the 500GB drives I would say that the parity consistency process took almost an hour.
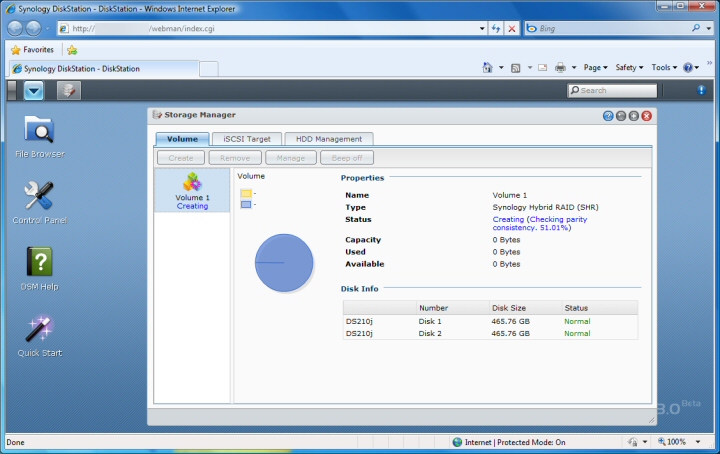
Parity checking… snore!
The final stage was the file system creation and once complete I had a storage drive offering just over 450GB of storage. Some of the total was of course taken up by DSM 3.0 Beta which resides on the drive.
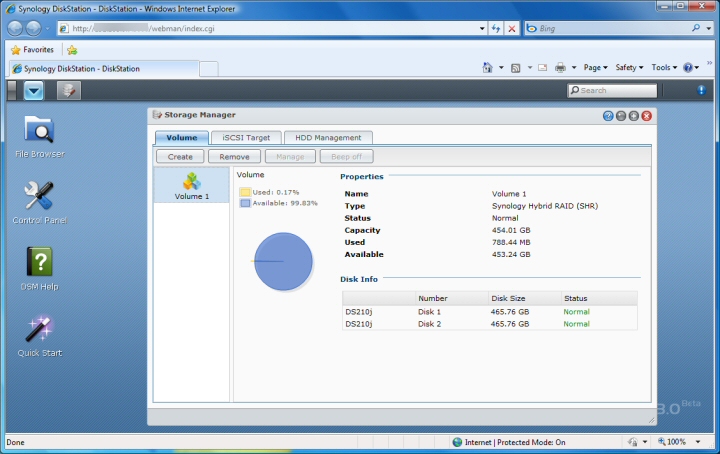
Volume ready to go.
This section also includes a management section that includes HDD info and also the operating temperatures of the drives which is useful!
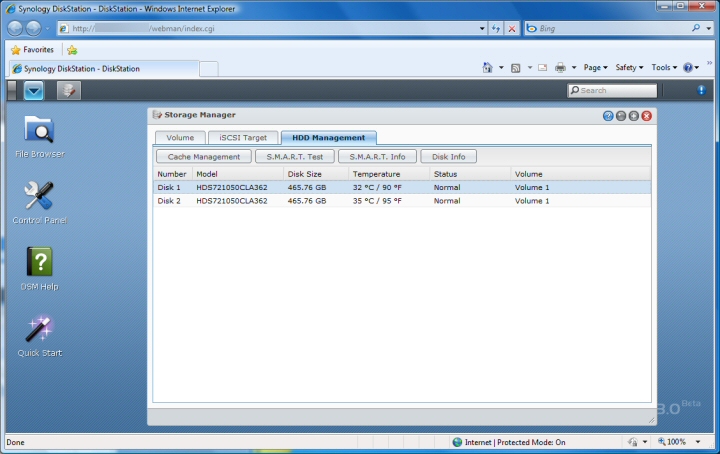
Temp monitoring included.
User and file management
Creating users and assigning access rights is easily done in the user management section. Not only can individual access be managed but entire user groups can be added to easily manage access to the NAS.
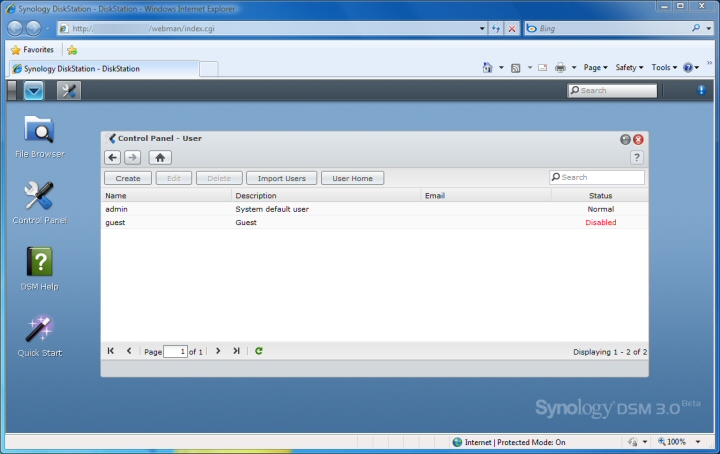
User management console.
File access and management is also made easy in the File Browser and File Station suites and FTP access. The former allows quick and easy monitoring and configuration of file status – indeed from here you can transfer, duplicate, erase, zip and manage the access rights on any of the files held on the DiskStation.
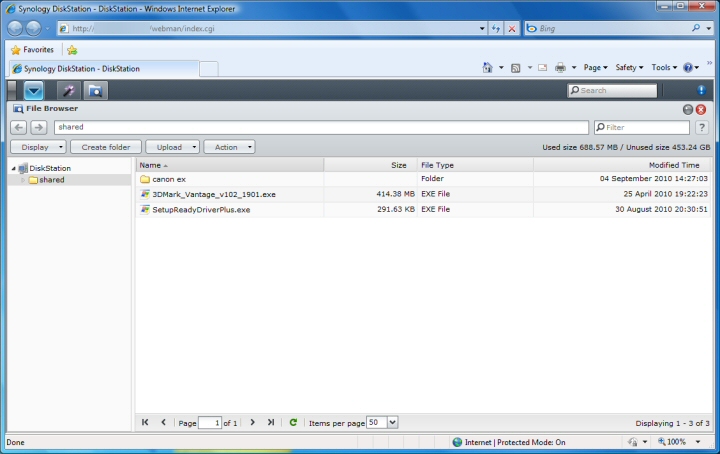
File browser is very useful and effective.
File Station 3 allows HTTP file access. It’s activated within DSM – a selection of options allow port choice and more.
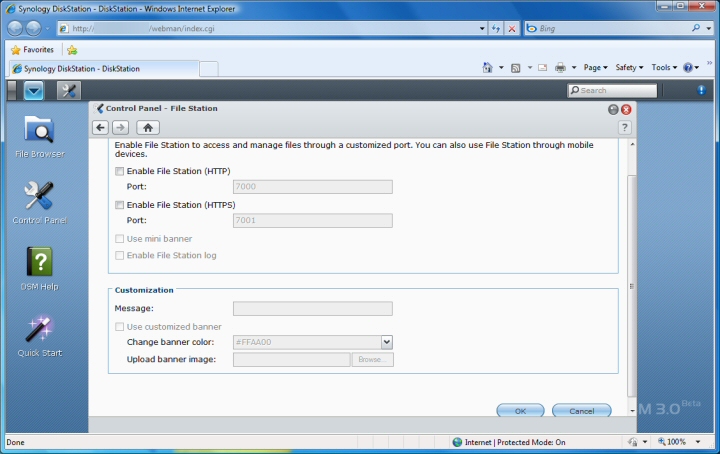
FS3 setup.
Once active your files can be managed in much the same way as within DSM.
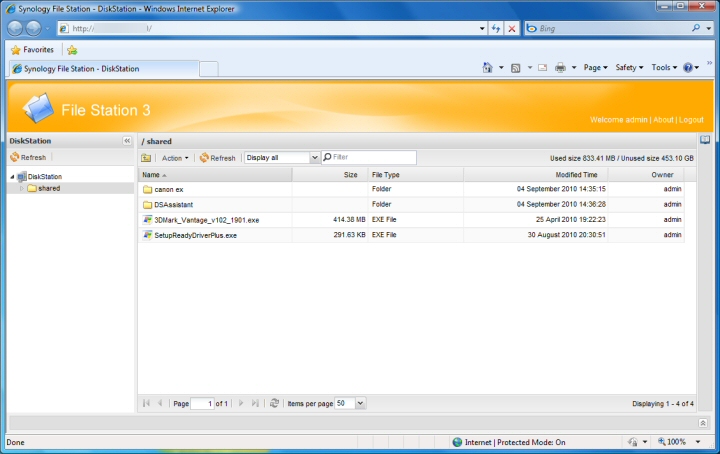
File Station 3 management interface.
As also mentioned FTP access can be activated too – just enter the required settings and you’re away.
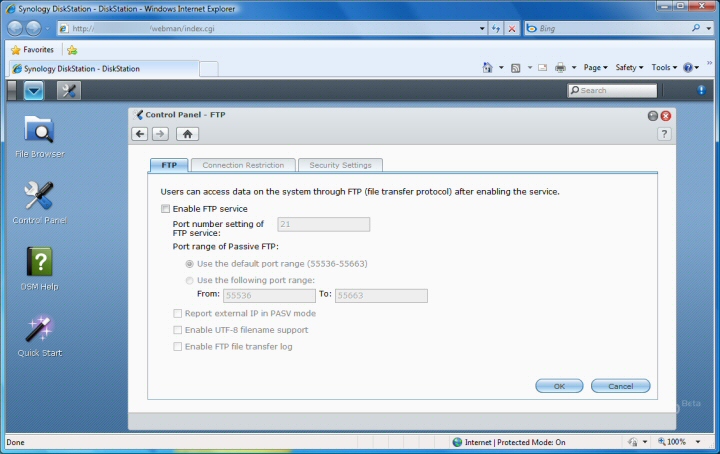
FTP.
Additional applications
The final quick start option was to ‘Discover more applications’ and clicking on this button does indeed offer a great deal of additional functionality. As you can see the DiskStation offers some great media, mail and security based features.
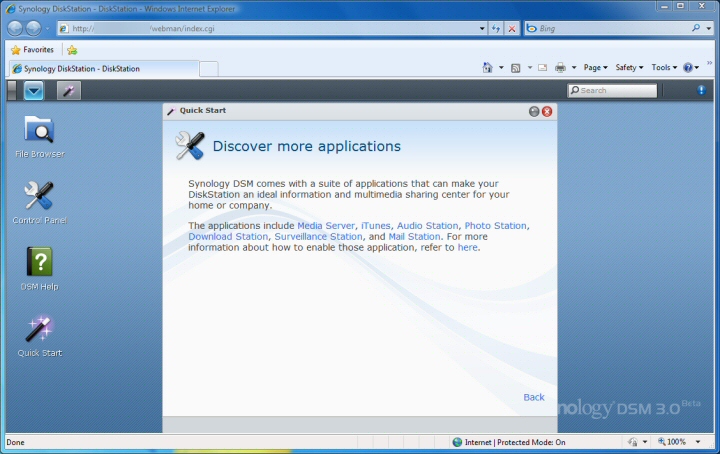
Many applications on offer.
Media Server and Audio Station 2 cover all your audio visual needs.
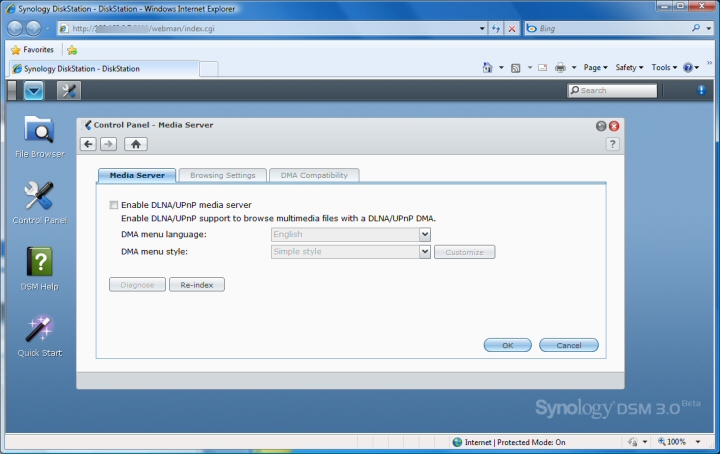
Media Server.
Each can be set up quickly and easily thanks to the integrated step by step wizards.
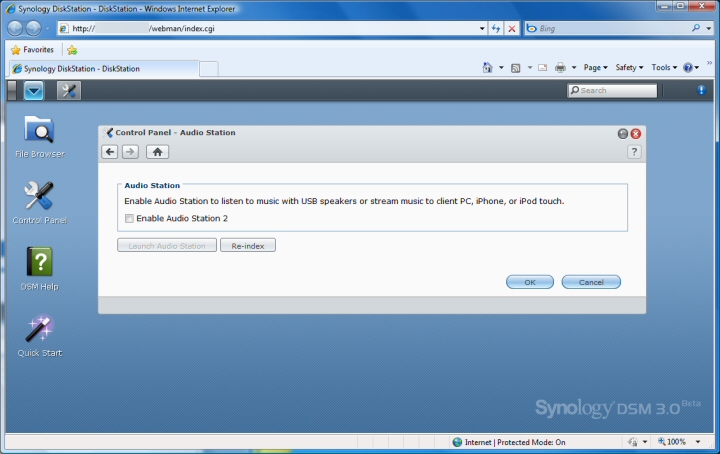
Audio Station.
Surveillance Station 5 was another welcome but surprising feature. Activate the feature and within 30 seconds the utility is up and running and ready to go.
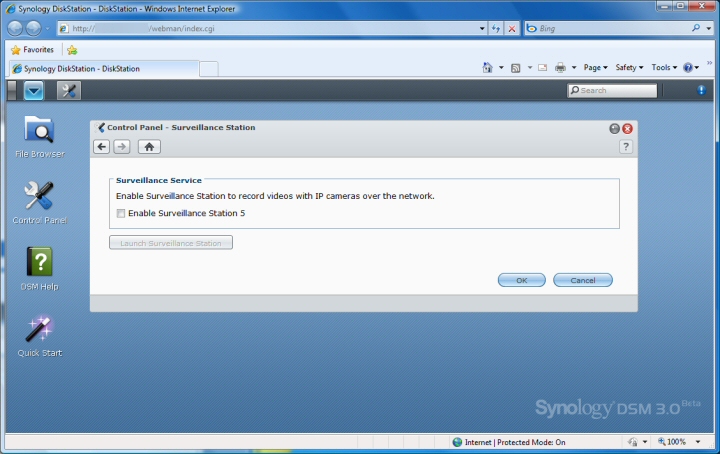
Surveillance application setup.
Whilst being one of the least powerful Synology NAS units the DS210j is still able to support up to 5 IP webcams – certainly more than enough for the average home user.
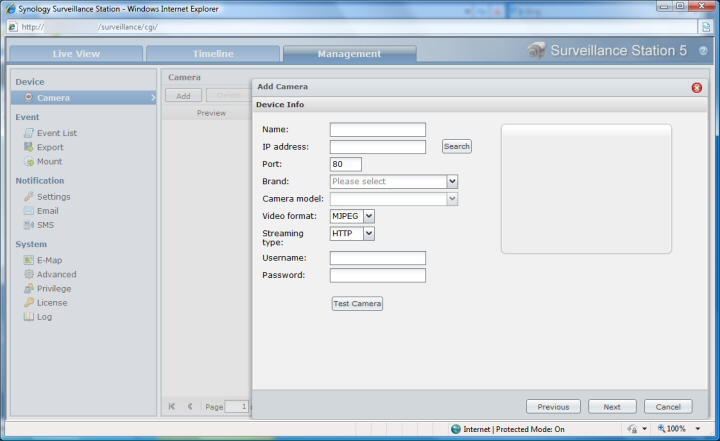
Surveillance Station suite.
Manager and control panel
Additional features and options reside in the dropdown management and control panel windows. The first includes a simple list of important options including resource monitoring, storage management, system info, etc…
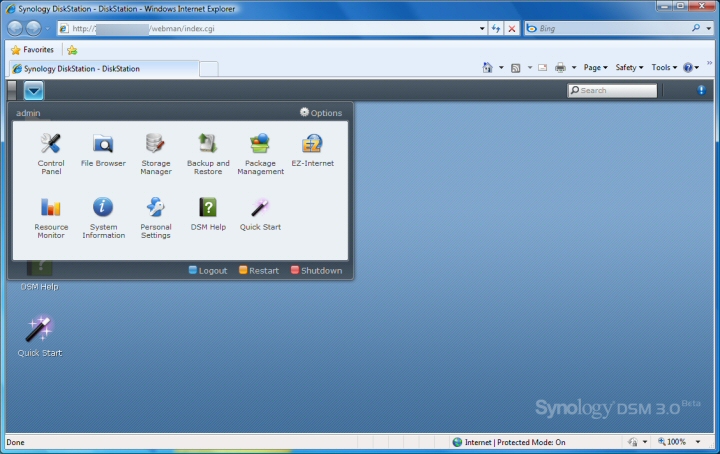
Drop down managemnt window.
Like the Synology Assistant the Resource Monitor is available here in DSM 3.0 Beta. It’s virtually identical and comes up with the same three graphs. The only difference here is that when you click on a certain graph you get an enlarged and more detailed version pop up nearby. In the screenshot you can see that the CPU monitor has been brought up – note the additional information showing the various processes currently active and their individual usage ranking. Incredibly useful in either identifying rogue processes or just over exuberant usage.
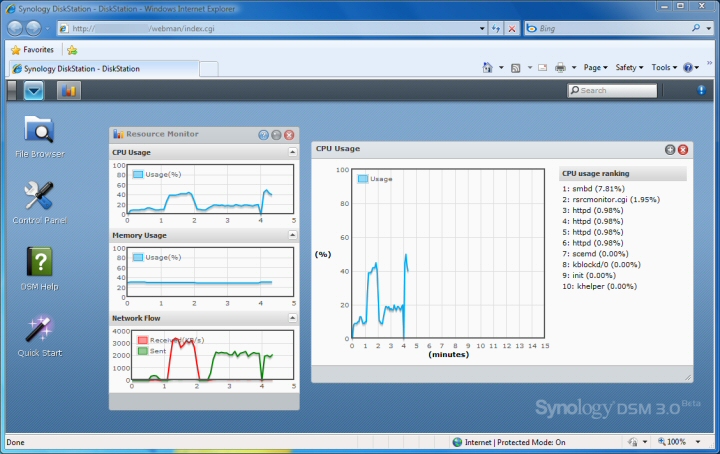
Resource Monitor within DSM 3.0 Beta.
Moving on we find that the control panel is far more comprehensive and is certainly more of a ‘system admin’ style layout giving instant access to all the important infrastructure on offer.
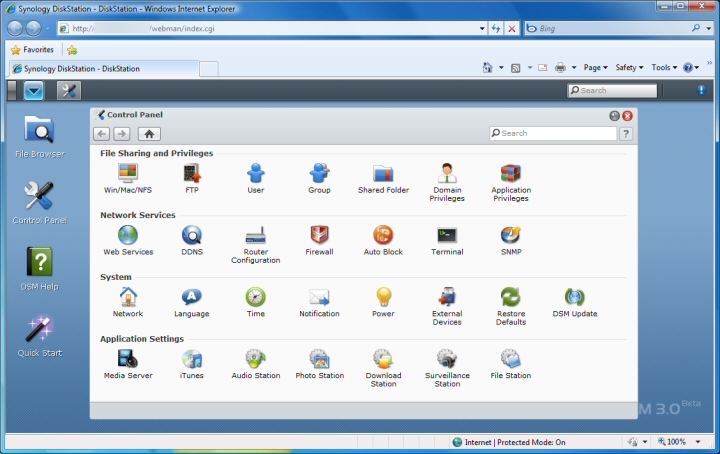
Control panel.
Some of the features here have been covered – one useful one especially since it’s the primary reason for getting a NAS is the power section. From here you can schedule power on and off, hibernation timings, fan speeds (selectable by drive size – 3.5″ or 2.5″) and even UPS control so that data is retained in the event of power loss.
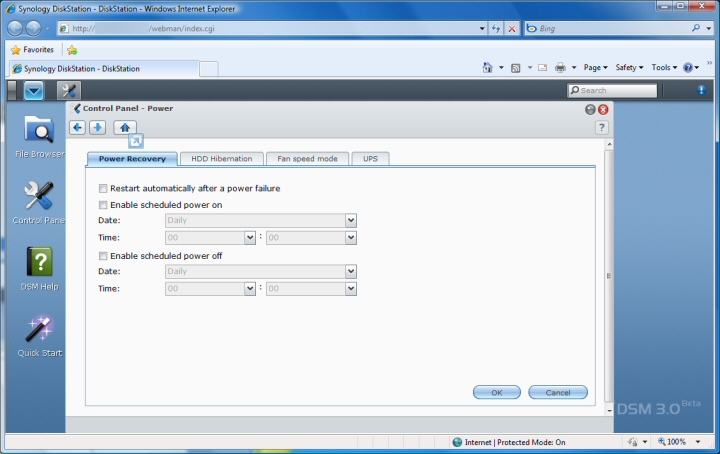
Power control features.
I must also mention that I took the opportunity to install the new 3.0 Synology Assistant. It’s virtually identical in functionality to the 2.3 I’d been using and allows much the same monitoring and drive control.
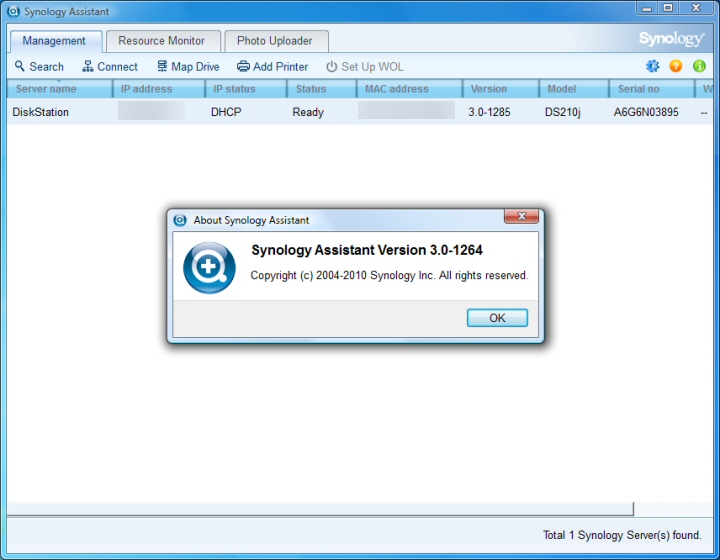
Synology Assistant 3.0.
I particularly like the quick and easy drive mapping feature which utilises a simple wizard process. 30 seconds later and your DiskStation drive is mapped into My Computer.
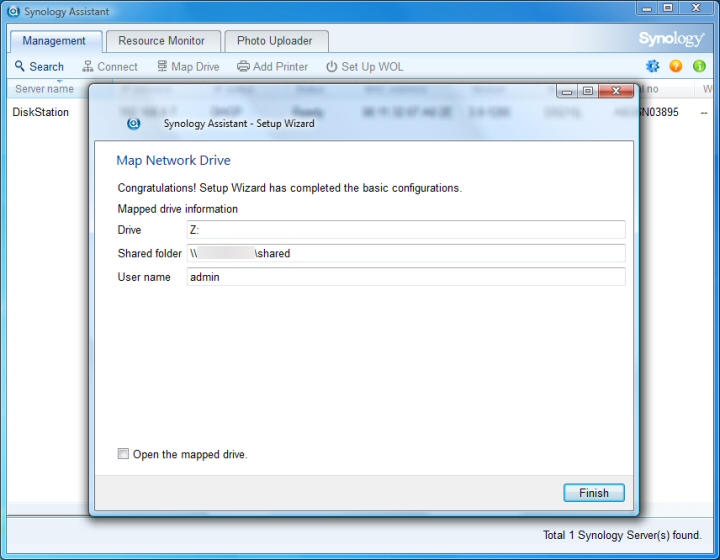
Easy drive mapping.
Conclusion
Well what can I say. The DS210j might be one of the cheapest and lowest specified models on Synology\’s books but it\’s still one heck of a useful device. Indeed, I can personally say that I had considered NAS devices to be nothing more than glorified external HDD\’s… I could not have been more wrong.
The Synology DiskStation DS210j.
The DS210j does everything I have asked with the minimum of fuss. It\’s done it quietly and competently and pretty much immediately at all times. Like Dave with his review of the DS410 I was certainly a novice to NAS but there was no need to worry. Synology have designed their Assistants and DiskStation Managers to guide you through every step needed to set up whatever feature you like.
It\’s been an absolute pleasure to use and review. There\’s certainly one more convert to NAS thanks to Synology and their DiskStation DS210j and because of that I give it the Vortez Hardware Gold award
Pros
+ Easy installation of both hardware and software
+ A great number of features including media support and even surveillance
+ Very well priced
+ Software utility is very effective
+ Software wizards and guides make the NAS incredibly easy to setup and use
+ Integration into home networks seems straightforward, reliable and robust
Cons
– Plastic casing isn\’t particularly pretty
+ Easy installation of both hardware and software
+ A great number of features including media support and even surveillance
+ Very well priced
+ Software utility is very effective
+ Software wizards and guides make the NAS incredibly easy to setup and use
+ Integration into home networks seems straightforward, reliable and robust
Cons
– Plastic casing isn\’t particularly pretty
Vortez Hardware would like to thank Synology for supplying the DS210j NAS for review. Discuss this review on our forums.