







Newly established BitFenix have sent over their first product the Colossus for review. Will it be a colossal success?
Product on Review: BitFenix Colossus
Manufacturer and Sponsor: BitFenix
MSRP: £135

Back on April 12 2010 a new company named BitFenix was formed. Striving to bring truly innovative products to the scene, BitFenix is a very interesting brand – Gigabyte have already shown great interest in the brand. With such strong competition in the market, particularly in the chassis category they are certainly brave.
Today we will be looking at the first product to launch from BitFenix. A full tower case called the Colossus. The Colossus focuses on expandability and cable management by offering a variety of options from within. Available in two colours, I have the white variant today and I will be honest with you – I’ve been looking forward to getting my hands on the Colossus since its release. It looks very interesting.

BitFenix Take:
Introducing Colossus – the PC chassis for the uncompromising enthusiast. Offering unmatched expandability, security, and cooling all wrapped up in a modern and elegant body, Colossus represents months of intensive research, product development, and meticulous design. The result is a chassis like no other; a chassis that serves as an ideal enclosure for the most colossal gaming rigs.
Specifications
Materials SECC, ABS
Color (Int/Ext) Black/Black or White/White
Dimensions (WxHxD) 245 x 558 x 582 mm (ATX Full Tower)
Motherboard Sizes Mini-ITX, mATX, ATX, E-ATX
5.25″ Drive Bays x 5 (1 x external 3.5″; tool-free)
3.5″ Drive Bays x 7
2.5″ Drive Bays x 7 (using standard 3.5″ drive bays)
Cooling Front 1 x 230mm
Cooling Rear 1 x 140mm (optional)
Cooling Side Panel n/a
Cooling Top 1 x 230mm (or 1 x 140/120mm optional)
Cooling Bottom 1 x 140/120mm (optional)
PCI Slots 8 (tool-free)
I/O 2 x USB3.0, 2 x USB2.0, eSATA, Audio
Power Supply PS2 ATX (bottom, multi direction)
If you prefer to watch a quick video tour of the Colossus, below is a short youtube video review of this case:
[youtube]Pg4RF68eWHM[/youtube]
Exterior (1)
The Colossus arrives in a artful black box, with plenty of imagery to show the case off inside. The below photo is in fact the rear side of the box, the front side the courier had decided to plaster in sticky labels! The features are all listed on the Colossus’s box, emphasising such aspects as USB3 support, fan control, light adjustability and good cooling. As with all cases, inside the box is wrapped in a clear plastic sheet and supported by polystyrene posts.
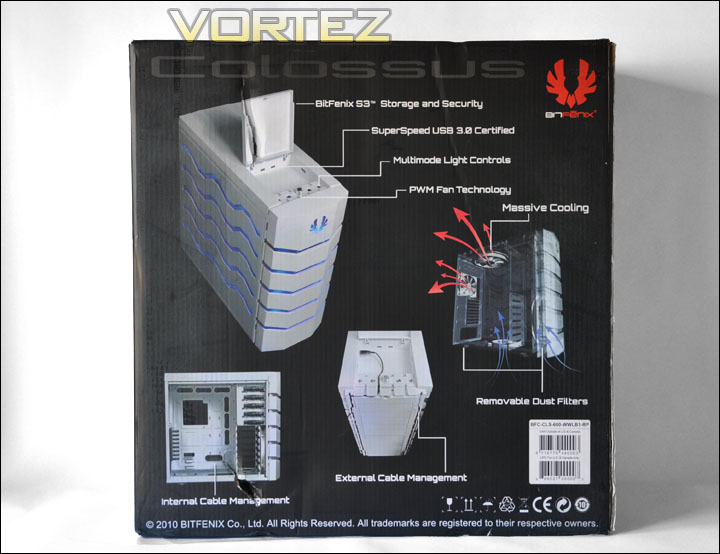
The rear of the BitFenix Colossus box
Lifting the Colossus out of the box, not only do you notice the distinguishable looks but you also notice the immense weight of the entire unit. BitFenix haven’t included the overall weight of the Colossus on their website but the courier identified the entire package as approximately 18KG. So you can expect the overall right with components installed to be over 20KG. Very heavy indeed. The main reason for such heaviness are the side panels, removing these you will realise straight away.
The Colossus certainly has plenty of character, its contours and styling are unlike anything currently on the market. There are lines leading from one inside, across the front and over the other side. These channels contain the lighting system.
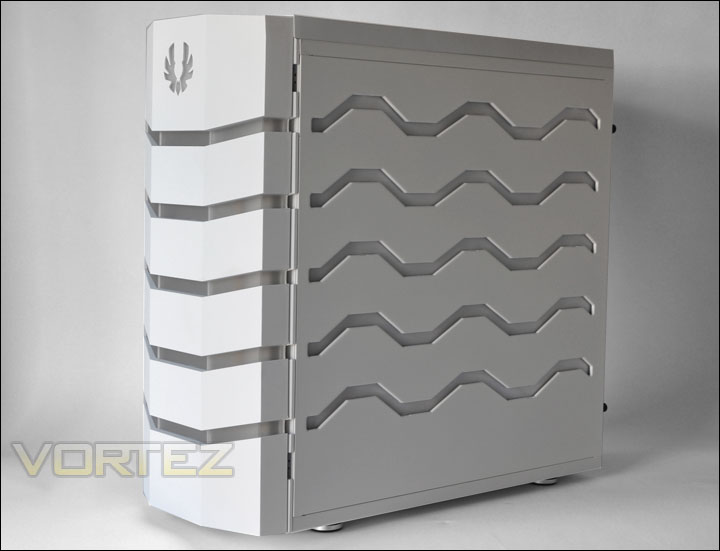
The right side of the Colossus
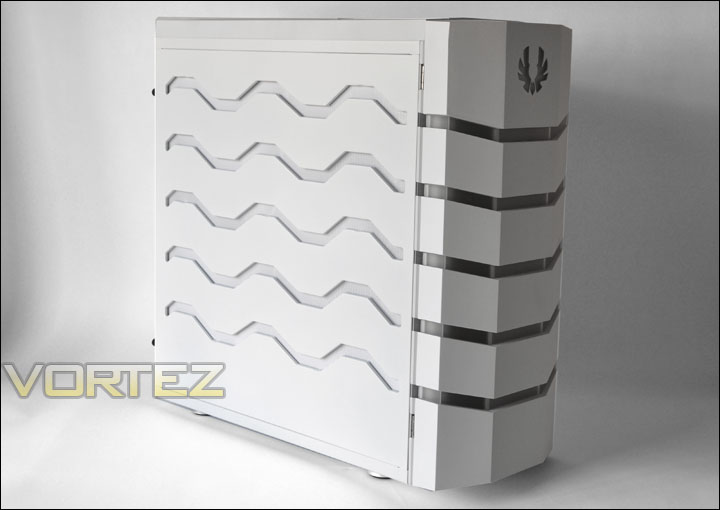
The left side of the Colossus, exactly the same as the right side
Examining the front of the Colossus shows a very clean looking, modern approach to case design. Personally I really like the look of this case, I think it looks unique and will I am sure look superb in the gaming den. At the top, directly in the centre is the BitFenix logo. As well as the channels below, this will illuminate when the system has power.
To the rear side, starting at the bottom there is an opening there for mounting the PSU at the very bottom. Above this 8 expansion slots for multiple graphic card configuration or other devices that support PCI/PCIe. Strangely, the Colossus stands out from traditional case design by refraining from including a rear exhaust fan. But, have no fear there is a top mounting 230mm fan. Bear in mind that heat does rise, so this isn’t such a bad idea. In the tests later, I will be installing a 140mm fan to examine overall thermal performance. Above this perforated steel are four rubber outlets incase you wanted to install a water-cooling setup within.
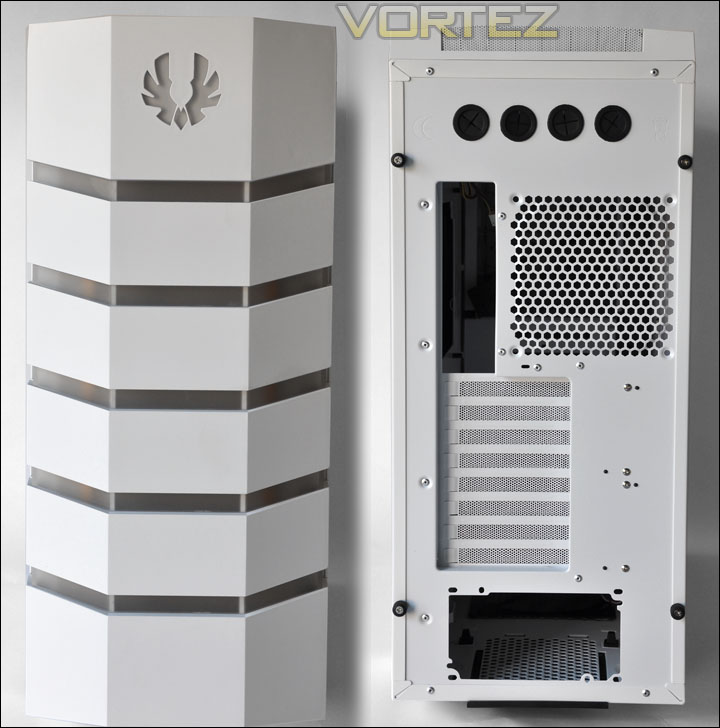
The front and back of the Colossus
Exterior (2)
The front of the case actually acts as a door. Opening this door reveals 5 x 5.25″ bays and a locking mechanism. Provided with the Colossus is a set of keys, these keys unlock the BitFenix S3 compartment at the top. With this unlocked you can lift a lid up to reveal an assortment of controls.
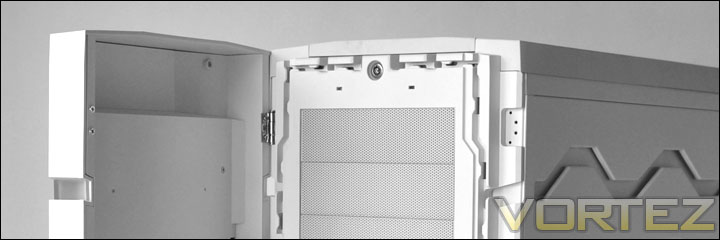
With the door open access to the 5 x 5.25″ bays and the S3 compartment
The first set of controls you will see are below. A reset button, power button, fan control and two lighting control buttons to switch between colours (red, blue or none). Around this area are channels to route cabling from this area, down into/away from the case.
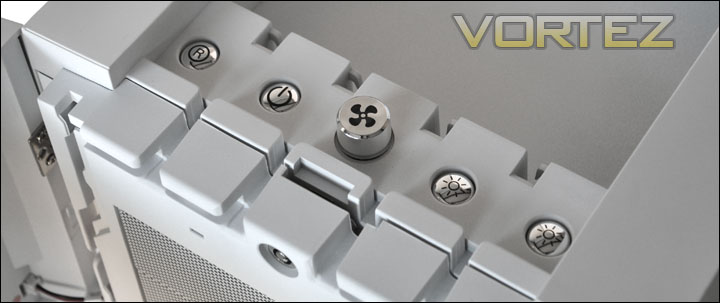
Front panel controls, some nicely finished buttons
Into the compartment there are various ports in the 3 sides. Firstly 2 x USB2 ports, headphone and microphone slots. Then 2 x USB3 ports and lastly an eSATA port. The USB3 ports have USB cables threaded through inside the case – inside is provided a motherboard to USB adapter. The first of this kind I have seen, most USB3 ready cases require you to thread the USB cable to the very rear I/O section of the motherboard. It’s good to see this move from BitFenix.
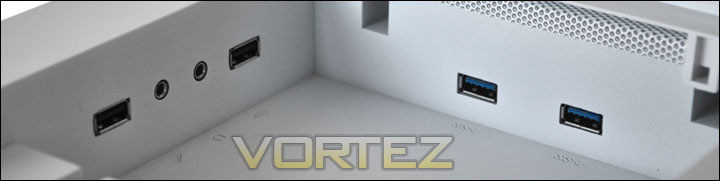
USB ports and headphone/microphone sockets on the Colossus. USB3 indicated in blue
Further along the top there is mesh section, providing an outlet for the airflow from the 230mm fan underneath.
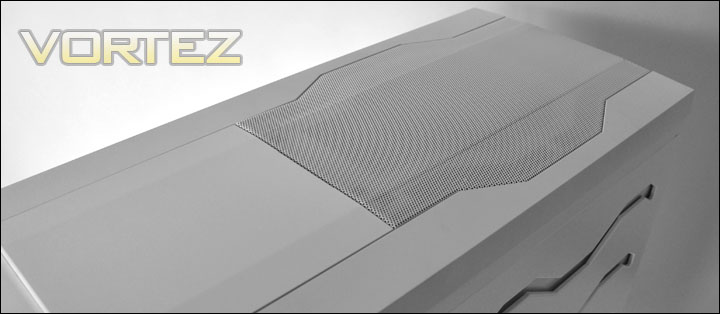
The top of the Colossus with mesh panelling for the 230mm fan
Interior (1)
As I mentioned earlier the side panels constitute for a great deal of the 18KG the Colossus comes in at removing these side panels you immediately realise they are very sturdy and will dampen any noise from within.
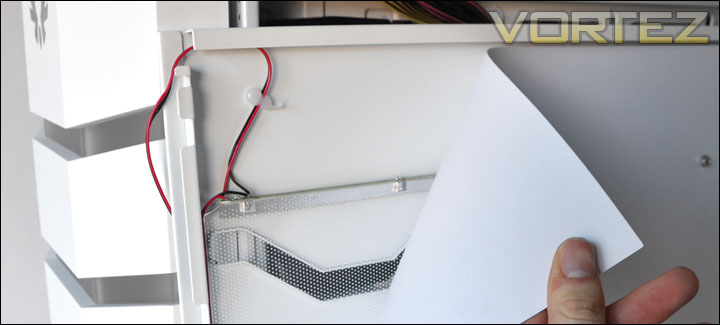
The inside of the side panel – white plastic sheet, Perspex and cable
Looking at the side of the prominent side of the Colossus with the side panel off you are met with a wealth of expanse. If you take a quick look at the specifications you will be aware the Colossus is very wide (245mm) and deep (582mm) offering plenty of space to enthusiasts. Around the motherboard there are up to 6 rubber outlets for cable management and a rather large cut-out for the CPU cooler backplate.
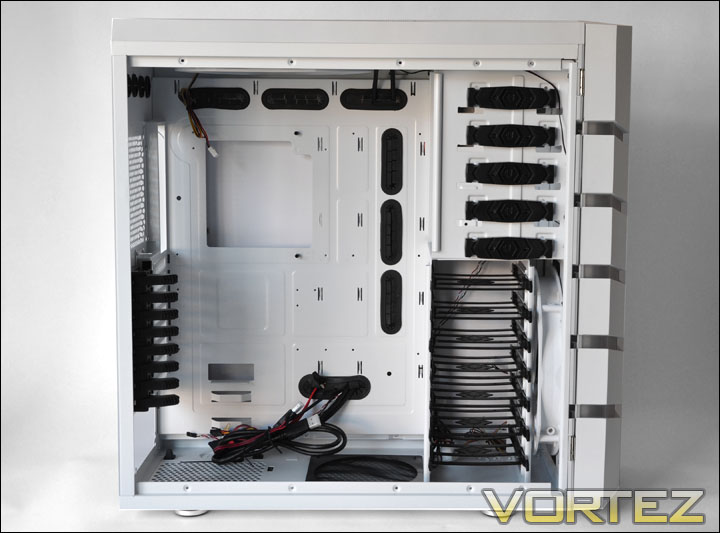
The prominent side of the Colossus with the side panel off
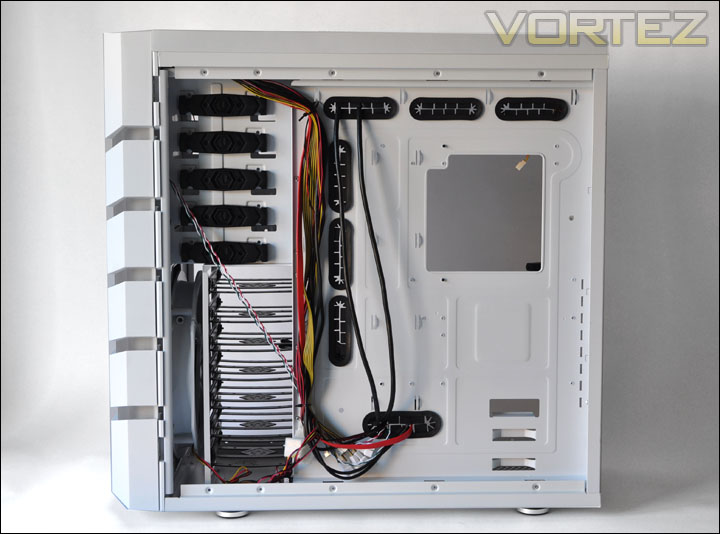
The reverse side, showing very good routing for cables
Inside the case is a small box containing essentials such as screws, cable ties, a 5.25″ to 3.5″ adapter tray, cable management clips, and a 2.5″ front bezel cover.
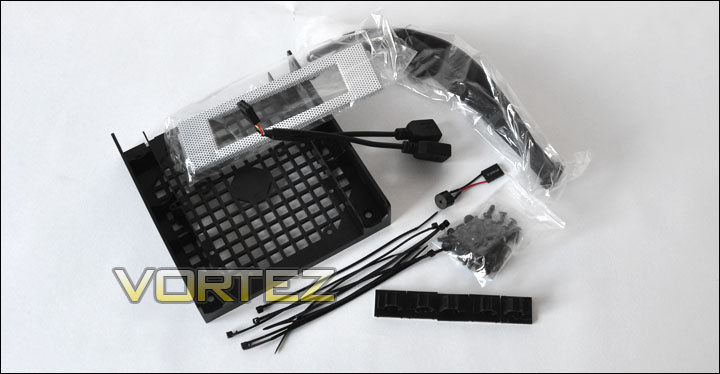
Bundles accessories that contain essential bits and pieces
Interior (2)
Starting at the bottom there are rubber struts for supporting the bottom of the PSU. Underneath the perforated mesh a filter is positioned that can be easily removed for cleaning.
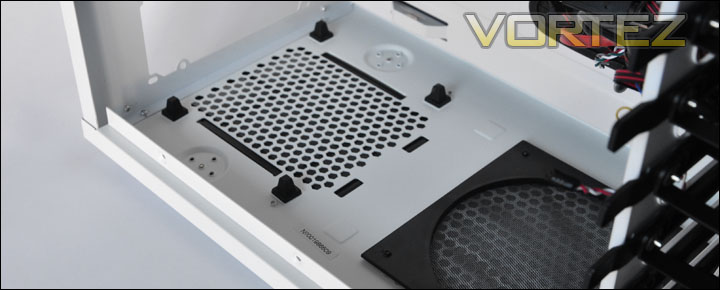
The mounting area for the PSU featuring rubber mounts
Further up, there is a tool-less mechanism for fixing expansion cards into the Colossus. All you have to do to install a device here is move the lever back, remove the expansion plate, and move the lever into the lock position.
A total of 8 slots, presenting many options and of course you won’t need to get the screwdriver out which is always a bonus.
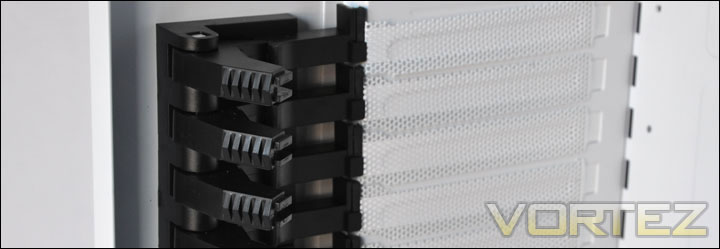
Tool-less expansion mechanism
Taking a look at the rear of the case and the top, there is a space for the 140mm fan to be installed, again – outlets for the water-cooling option and the huge 230mm fan at the very top. This fan is 3-pin so it will need to be installed onto a fan header on the motherboard.
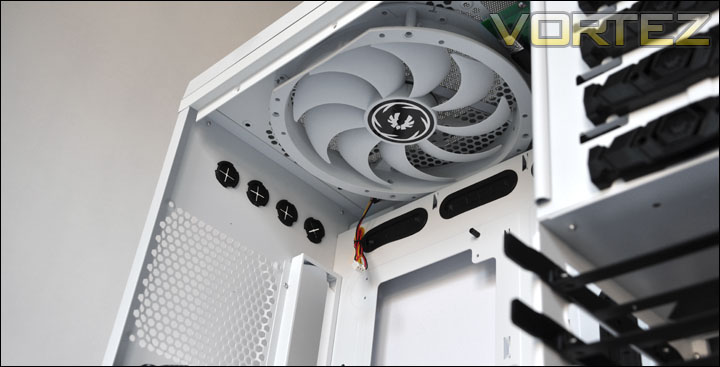
A closer look at the cooling inside the Colossus. The huge 230mm fan
Moving across the front side of case internals, we have another tool-less design mechanism for the 5.25″ bays. This is by way of a button that is pressed when the drive is slid into the space. A nice impression of the BitFenix is present on each of the buttons. BitFenix have certainly styled the Colossus very well, these little details show attention to detail. Something that some companies sadly miss out.
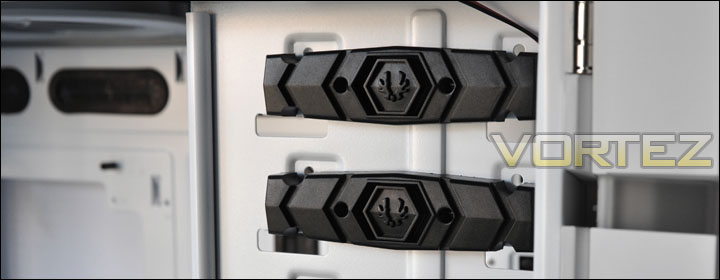
Tool-less mechanism for the installation of optical drives
Lastly we come to the HDD rack. There are a total of 7 x 3.5″ plastic frames here. These frames are the only element of the Colossus that concern me a little, when examining one of the frames I actually broke it (you can see this on the video review on youtube). Bitfenix should really have made the plastic on these frames a bit more sturdy in order for them to 1 – be stronger and 2 – fit inside the HDD rack better as they currently without anything installed inside fall into the next bay if light pressure is applied.
Behind this HDD cage is another 230mm fan. This fan acts as an intake and will blow against the HDD area, across the motherboard.
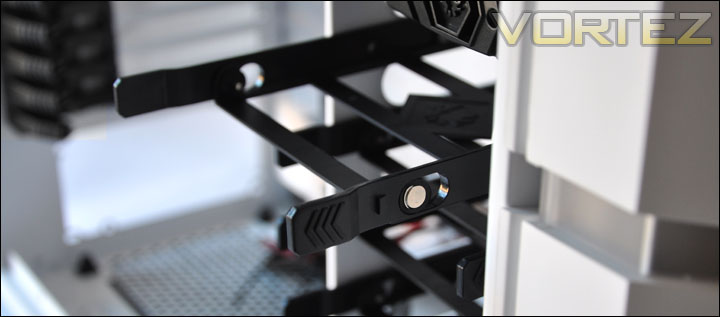
3.5″ frame for attaching HDD inside
Installation
Due to the massive expanse within the Colossus and the generous amounts of tool-less mechanisms inside, the installation is a breeze. The only thing you need to get a screwdriver out for is securing the PSU into place and fixing the motherboard down. Aside from that, everything is as I have said – tool-less. You will be able to tell from the below photo that I was able to keep the inside of the Colossus tidy, this is without much effort too.
With regards to graphics cards, the Colossus will entertain the biggest cards on the market. Pictured below is the HD5870, but there is an additional 8cm meaning cards as big as the HD5970 will fit inside no problem.
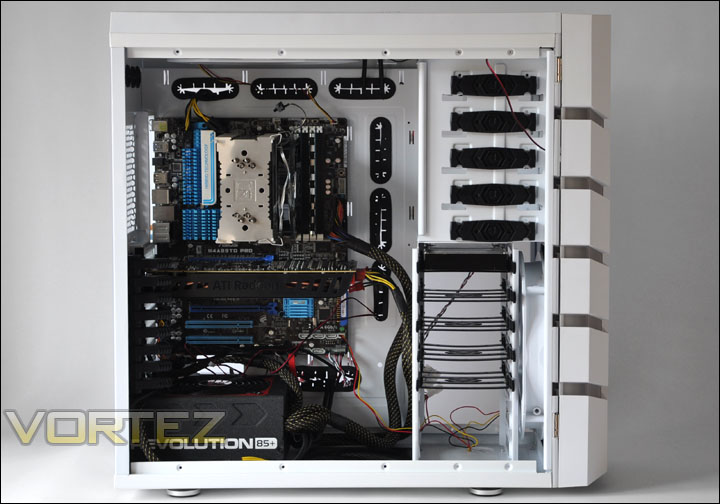
Installation complete, lots of space around the motherboard
Around the ATX motherboard there is massive amounts of space. So if you intend on installing a smaller form factor inside, you are certain to have even more! What I like especially about the Colossus was the ability to be able to thread the eATX 12v power behind the motherboard tray. This is made possible because there are cut-outs around the motherboard and at the top (as pictured) usually I am not able to thread this cable over the back of the motherboard but with the Colossus this is possible.
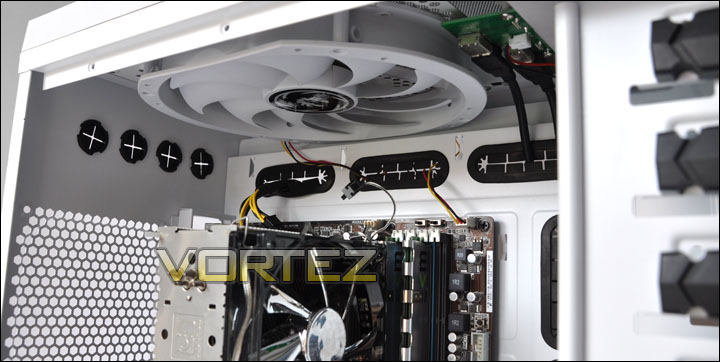
Plenty of space around the motherboard
On the reverse side – behind the motherboard tray there is again significant clearance here – the biggest I have seen on any case. Meaning you are able to hide even more cables behind the motherboard tray. I measured this clearance gap at 4cm.
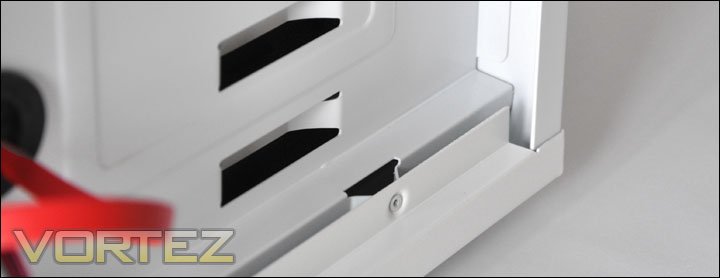
Clearance behind the motherboard tray
Moving up to the CPU backplate on this side, there is ample space here to get at the backplate and easily remove it. This is the AM3 socket in the photo below.
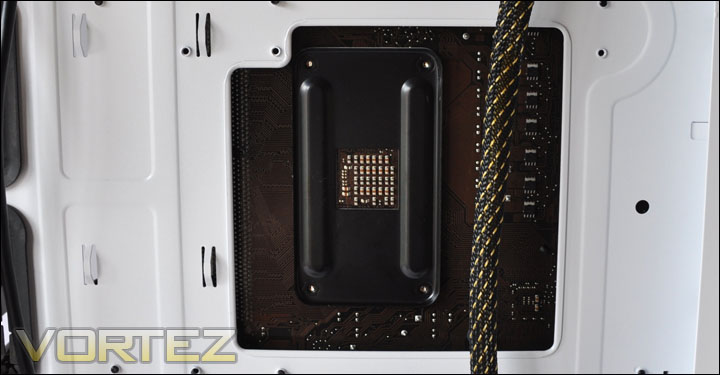
Lots of space around the CPU backplate
Installed within the Colossus I have the Noctua NH-U12P CPU Cooler, this heatsink is approximately 158mm in height with 4cm of clearance between the top of the heatpipes and the side panel. So the Colossus then provides good clearance for tall heatsinks.
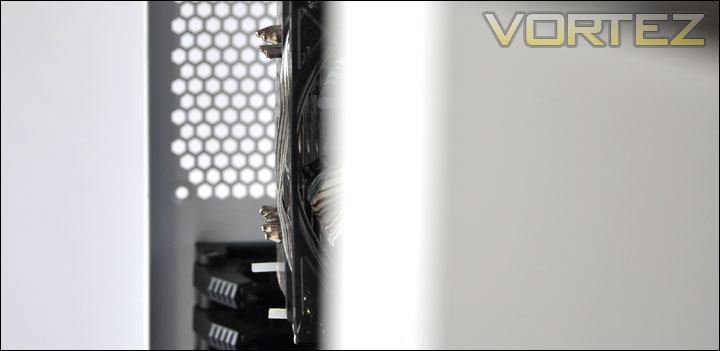
Good clearance for tall heatsinks
Earlier I mentioned my gripe with the HDD frames, with the drive now seated inside the frame the firmness is improved greatly. The frame slides into the bay with no worry of it falling into another bay. There is no movement at all once the drive is locked inside the bay. I still feel the materials could be improved in this area though.
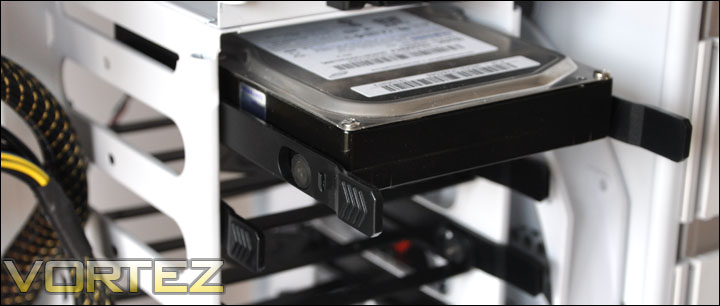
The HDD installed within the frame. Attaching is very simple and requires no screws
When everything is in, don’t forget to attach the cables labeled LED-L and LED-R to the side panels. This routes a connection through to the buttons on the front panel so that you can swap between colours or even turn the lights off. There is also a molex that will need a connection to the PSU in order for the lighting system to work.
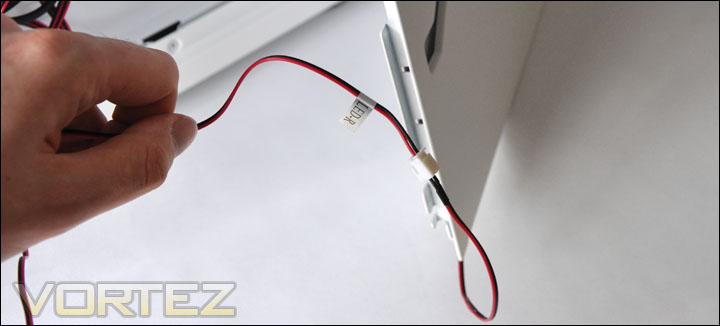
LED cables must be attached for the buttons on the front panel to work
Powered Up
The Colossus is a visually impressive case, it stands tall and proud and I personally think the white version of this case oozes style and character. But going one step further BitFenix have equipped the Colossus with an indulging lighting system.
You can swap between red or blue, enable a soft pulsating glow within these colours or even switch the lights off the choice is yours. But I think you will agree that the below photos depict the Colossus in a very atmospheric way. This case is sure to bring plenty of ambience to any surroundings.
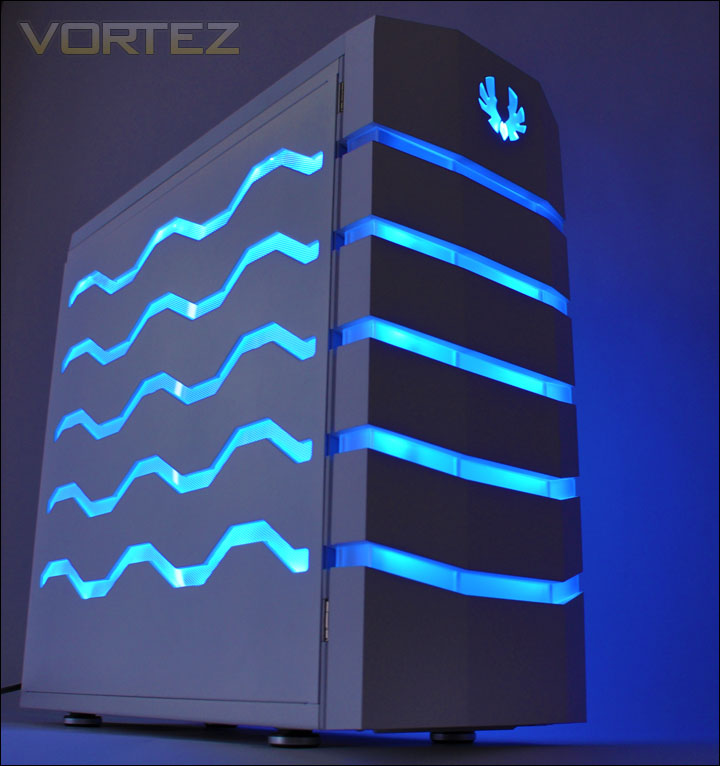
The Colossus in all its glowing splendour
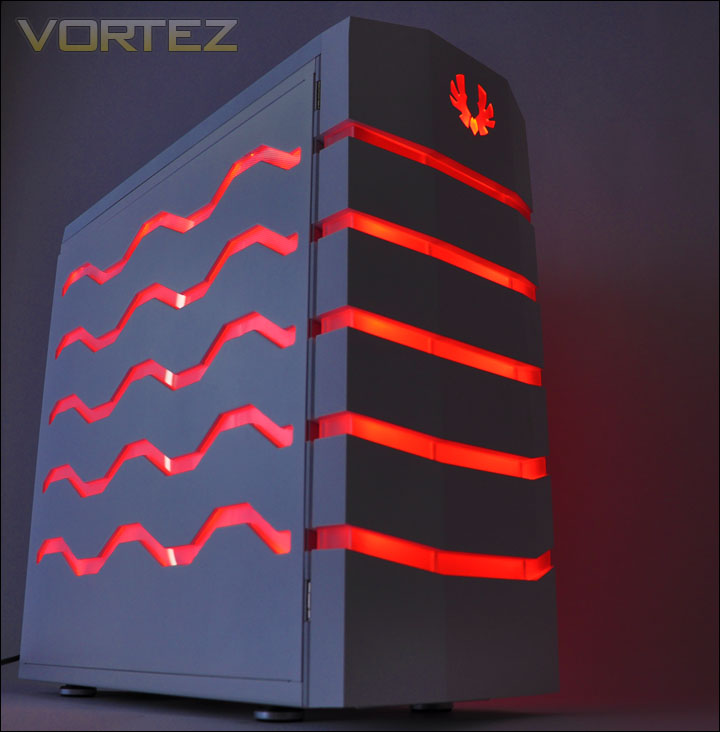
If blue isn’t your forte, red is available too
Thermal Performance
The BitFenix Colossus has two rather large pre-installed fans, measuring in at 230mm at piece. Now, as mentioned previously there is no rear exhaust fan included with this case but for the purpose of testing I will be installing a Noctua NF-P14.
To discover the thermal performance of the Colossus I will record idle temperatures after 20 minutes from a cold boot. I will then stress the system and temperatures will again be monitored after a 30 minute have elapsed. All fans are set to low during this test.
System Components
CPU AMD Phenom II X6 1055T 2.8GHz
Motherboard MSI 870A Fuzion
Graphics XFX HD5870
Memory 4GB Mushkin EM3-10666 DDR3
HDD Samsung Spinpoint 500GB SATA-II
PSU OCZ Fatal1ty 750W
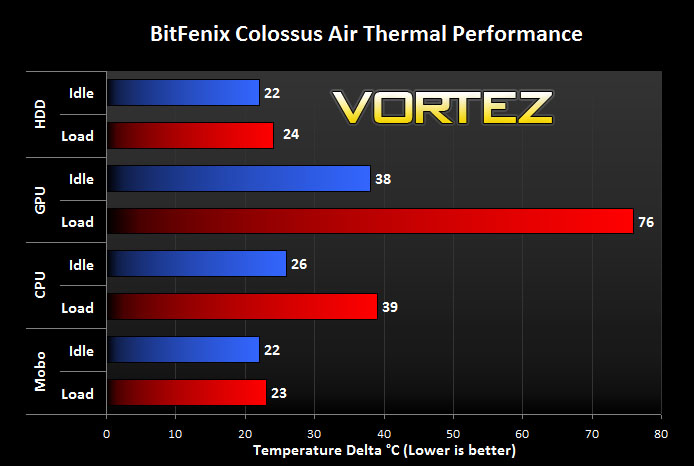
The thermal performance within the Colossus should not be underestimated. It actually follows similar results to the recently reviewed Antec LanBoy Air – but showing slight improvements. This shows impressive airflow is to be had within the Colossus. On the lowest setting the results were obtained, the noise levels from this fan speed configuration emits very low noise. The thick side panels aid the noise reduction, because moving the fans up to the highest setting causes little noise difference. BitFenix have cleverly devised a good method of dampening out the noise, but it does come at a cost – weight!
Conclusion
It goes without saying, for the first product from a newly established company the Colossus is a phenomenal achievement. BitFenix have a philosophy of bringing new and innovative products to the market, and in the Colossus they have certainly done this. It is unlike anything currently on the market. The white version I have looked at today has such distinctive and rich visual appearance – personally I really like it.
Incorporating tool-less design mechanisms throughout, the Colossus makes moving hardware into the case a breeze. This process isn’t made easy just by these devices though, the sheer expanse within means that you won’t be bumping into things and struggling for space to carefully arrange cables. The clearance around the motherboard is remarkable – but what is even more of a bonus is the clearance between the back of the motherboard tray and the side panel on the reverse side. Up to 4cm can be taken advantage of here meaning you can get the bigger 24-pin motherboard power cables looped around the back too.

There are many things we could commend BitFenix for in the Colossus. The S3 compartment is a wonderful idea, it takes good use of available space and even includes the newly introduced USB3 support. Inside this compartment you can store valuable items such as phones, mp3 players etc because the lid can be securely locked via a set of keys.
If I was to criticise the Colossus in any way it would have to be the weight of the unit. At 18KG without anything inside you will appreciate this is very heavy, so with components inside its going to exceed the 20KG mark. This weight is very much down to the side panels being so thick and including heavy materials within. This does have a positive affect though, it creates great dampening for fan noise.
At £130 the Colossus is a great buy. What you get for your money is a full tower case that has fantastic looks, a great lineup of included features, good cooling and lots of space. Can you tell I am impressed? Go and get one!
Pros
+ Unique and attractive
+ Tool-less throughout
+ Lots of space
+ Good cooling
+ Good value for a Full Tower
Cons
– Weight
+ Unique and attractive
+ Tool-less throughout
+ Lots of space
+ Good cooling
+ Good value for a Full Tower
Cons
– Weight

