







Building your own watercooling setup can be a daunting task. XSPC have made it easy with everything you need in one box; RayStorm 750 RS360 Kit.

Product on Review: XSPC RayStorm 750 RS360
Manufacturer and Sponsor: XSPC
Street Price: £157.99 (at time of review)
‘You’re going to do what’? Is normally the first question out of people’s mouths when you mention your intentions of watercooling your PC. To the uninitiated, water and sensitive,expensive electronics simply do not go well together.
In years gone by, watercooling was very much a dark art that went hand in hand with extreme overclocking. We would moan in the darkest corners of enthusiast forums about incompatible waterblocks, flow rates, debate which size tubing worked best and not least, which additive to use. While some of these discussions are still debated to this day, watercooling is much more mainstream and the extreme enthusiasts have since moved on to dry ice and liquid nitrogen to satisfy their cooling desires. DICE and LN2 though are still temporary measures, a quick fix for that World record run and while dangerous, they are the chosen materials for sub-zero cooling. The pitfall with subzero cooling is it is unsuitable for 24/7 operation. Many will argue that vapor change units also give subzero cooling however, they are for the most part, noisy, expensive, bulky and take time to warm up (cool down), sometimes up to five minutes before firing up the PC which negates the extra speed you would attain from using extreme cooling.
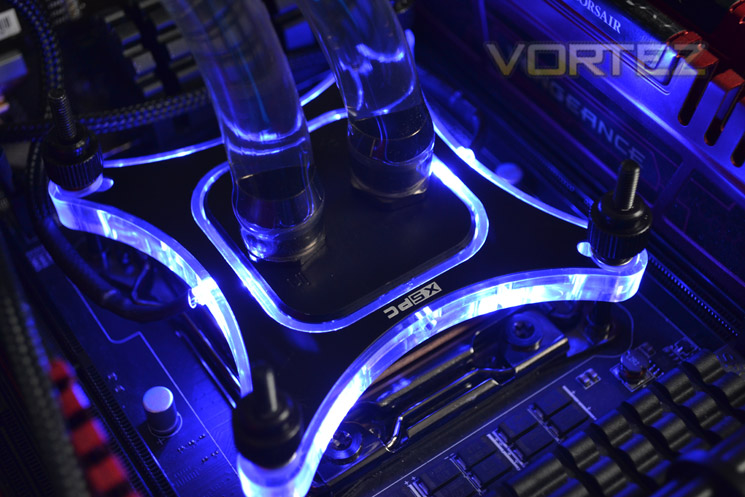
So, subzero is not the solution for 24/7 applications, vapor change is applicable but not very common for the reasons above. Water still remains one of the most efficient material to transfer heat and has perhaps evolved the most as an enthusiasts weapon in the battle against heat than most other cooling components. Today, it is possible to buy sealed units that are barely more difficult to instal than a standard heatsink. The general consensus is though that these units are little better than the high end air cooling heatsinks available. The choice was limited then to expensive custom built watercooling setups, enclosed pre-built watercooling units or aircooling.
Seeing a gap in the market, XSPC, a respected name in the custom watercooling arena, have put together a variety of their own components to create packages that take the hassle out of configuring your own custom watercooling setup by selecting all the components for you, right down to the nuts and bolts of the setup so the only thing you will need to add is water.
Today, we will be looking at the entry level XSPC watercooling kit, the XSPC RayStorm 750 RS360 and comparing this to enclosed watercooling (Corsair H100) and top end air cooling (Thermalright Silver Arrow SB-E).
Specification
Pump
– G1/4″ threads
– High quality acrylic
– Removable brushed aluminium faceplates
– Brass screw threads
– Low noise, low vibration (42dB Max)
– Pump performance: 750 lph
– Delivery head: 1.8m
– Voltage: 12V (4pin)
– Dimensions: 149 x 100 x 85mm (WxDxH)
– Two 5mm LED holes
– Individually pressure tested
Radiator
– High performance Copper fin Radiator
– Black Gloss Finish
– 19mm Flat tubes for reduced flow resistance
– 1 Row 11 Tubes
– Dimensions: 121x35x397mm (WxDxH)
– M4 Screws
– G1/4″ Ports
Waterblock
– Designed for Multi Core CPU’s
– High Performance Copper Base 56x56x3mm
– CNC Cut Acetal Top
– G1/4″ Threads
– 4x 3mm LED Holes
– Compatible with Most Compression Fittings
– Supports Sockets LGA775, 1156, 1155 and 1366 / 2011
Tubing
– 7/16″ (11.1mm) Inner Diameter
– 3/32″ (2.4mm) Wall Thickness
– 5/8″ (16mm) Outer Diameter
– Stain Resistant
– Max Temperature 60C
– Min Temperature -32C
– Designed for use with 1/2″ barbs and 7/16″ compression fittings
Packaging & Accessories
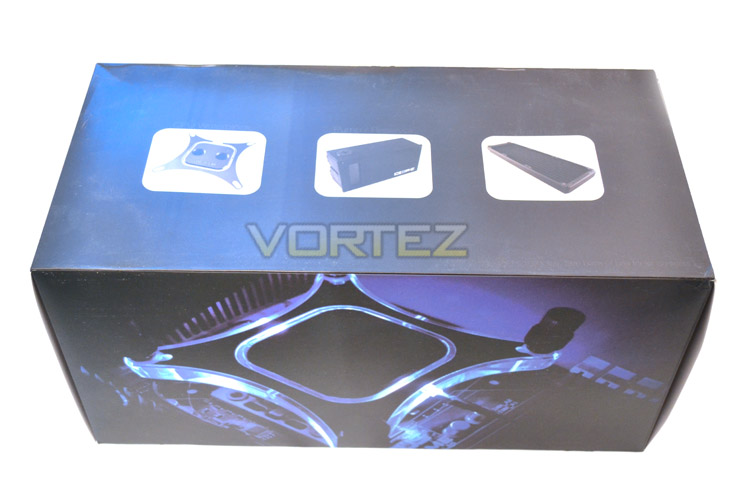
The package arrives in a rather large box measuring 45x22x22cm which is very stylishly designed with a picture of the Raystorm CPU block illuminated to one side and the main contents on the other. Other than the company logo there is no other detailing save for a tick box menu which tells us that the same packaging is used for the variety of combinations XSPC use in their watercooling kits.
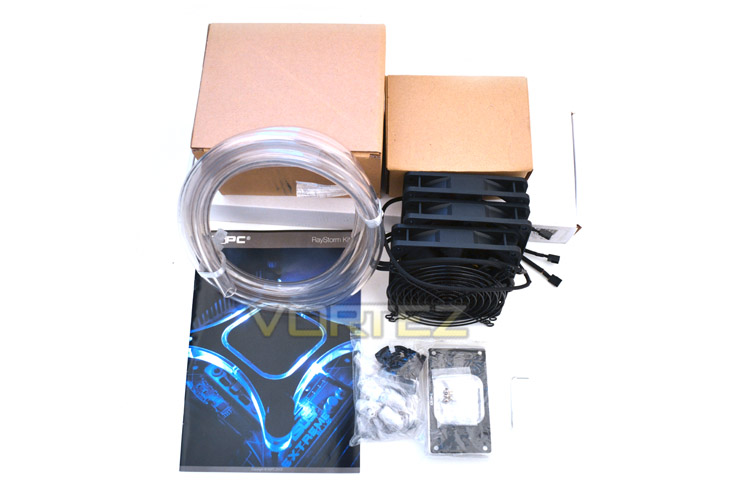
Extracting the contents is a bit of a Babushka doll affair with boxes inside boxes inside boxes. Once you have stripped most of the packaging away though we find the following components:
– RayStorm CPU Waterblock
– X2O 750 Pump/Reservoir
– RS360 Radiator
– G1/4″ to 1/2″ Barb (Black Chrome) x6
– Plastic Hose Clip x6
– XSPC 1650rpm 120mm Fan x3
– 120mm Fan Grill (Black) x3
– Intel and AMD RayStorm Brackets
– Socket 775, 1366 and 1155/1154 Backplates
– Socket LGA2011 mounting kit
– Socket AM2 and AM3 mounting kit
– 80mm to 120mm Radiator brackets
– 3mm Twin Blue LED with 4Pin Molex
– 5mm Blue LED with 4Pin Molex
– 2 Meters of Clear 7/16″ Hose
– 24pin ATX Bridge Tool
– K2 Thermal Paste
The kit is quite comprehensive and contains everything you would need to get you going save for coolant and additives. Considering that the kit comes with clear tubing, we can understand the omission of coolant as it allows the end user to decide which colour (if any) they wish to use in their watercooling system. We would have liked to have seen compression fittings in the kit as opposed to barbs. While the more experienced watercooling enthusiasts may still prefer barbs for their cleaner look (myself included), compression fittings are easier to use for the novice and are less likely to spring leaks in the system. This would however add a slight price increase to the kit and because XSPC have also included hose clips, they are forgiven on this point.
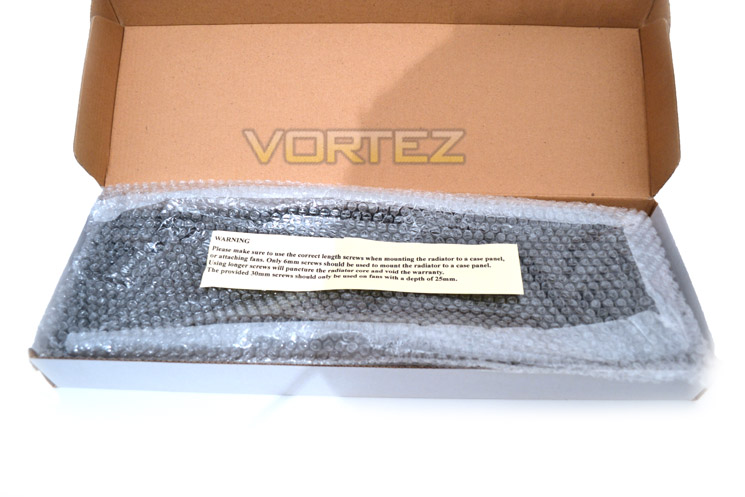
The general packaging was very good. Each delicate components was both boxed separately and wrapped in bubble wrap for further protection so every component should reach you in perfect condition.
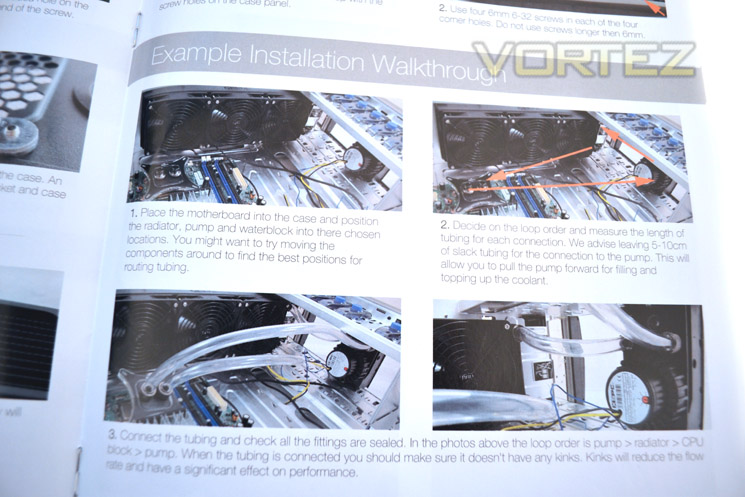
I was very impressed with the instruction manual which is very well written and with the addition of clear pictures and diagrams was easy to follow. Perhaps the most daunting area for new ‘watercoolers’ aside from choosing the components is actually building the kit into a system. It would be pointless bundling all the components together without adding a very good, easy to follow manual. Thankfully the instruction manual XSPC have included is excellent. It contains multiple step-by-step guides to make the installation of the kit very easy in any modern PC system.
Overall then, the packaging is well thought out, well chosen and despite the large box it arrives in, there is no spare space so it is very well designed. Every component is protected and thus I see no reason why this kit should not reach the owner in anything less than perfect condition.
Fixtures and fittings
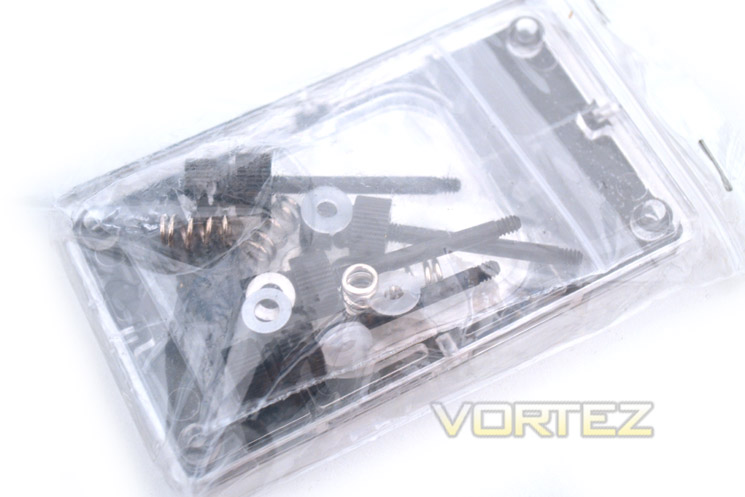
Upon opening each box you will be greeted with a set of fittings which is relevant to that component. Due to the modular design of the kit, many of these fittings are not required. So if you come to the end of your build and wonder ‘what’s this screw for’? Don’t worry, it is likely that it is for a different CPU mounting kit. To keep everything neat and tidy though we would recommended not opening and emptying the screws onto a desk, only empty the ones which are specifically required as per the instruction manual otherwise the installation could become very confusing, very quick.
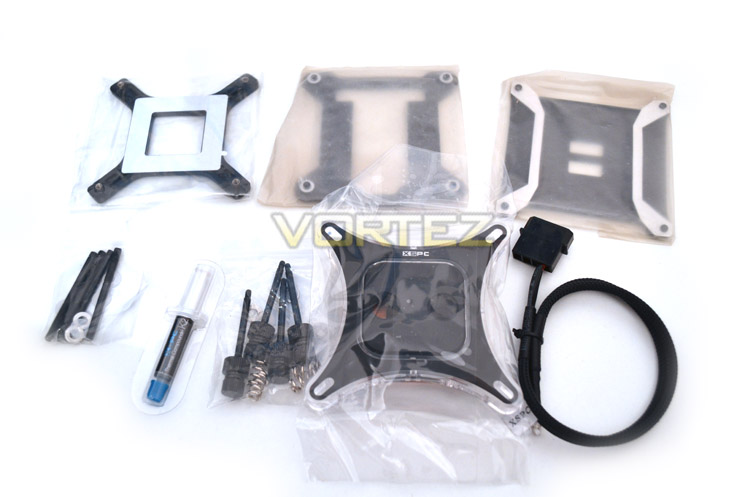
Above we see just some of the attachments that come with the Raystorm CPU block (discussed later). In the kit you get 3 backplates, four long thumb screws complete with springs and washer kit or a separate kit for LGA2011 which has 2 different thread sizes fir fitment to the socket itself. A small tube of K2 Thermal paste from XSPC is also included along with a MOLEX-LED lighting kit.
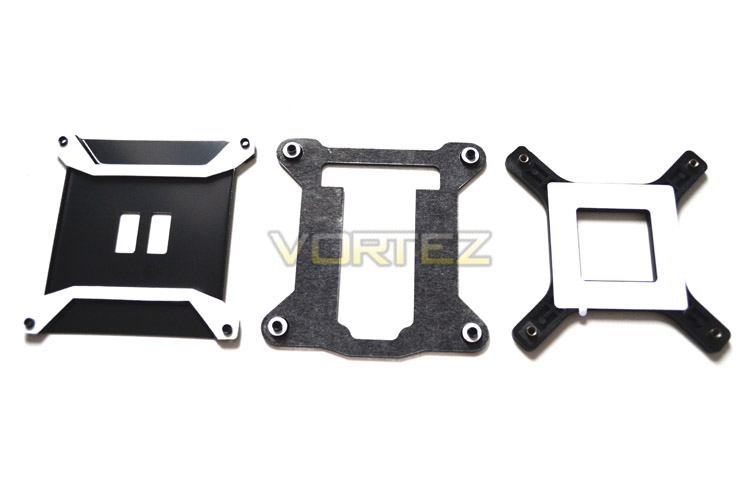
The kit comes with three backplates which affords fitment to Intel LGA775, 1366, 1155/1154, 2011 and socket AM2 and AM3.
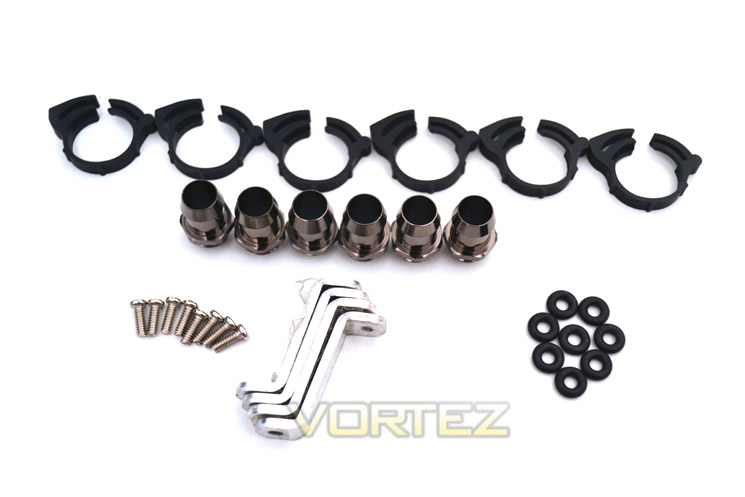
The watercooling fitments included in the package are, 6 1/2″ ‘black chrome’ barbs which are gun metal grey in colouration along with 6 plastic tube clips. Also included is a radiator bracket pack which allows fitting of the radiator externally should you not have room inside the PC case. This brackets also allow you to fit the 120mm (x3) radiator fan size to a 80mm fan hole should you mount externally which is great for those who may have an older style case with no rear 120MM fan space.

Three fan grills are included too which may appeal to those who mount the radiator externally which will prevent large objects (fingers) from getting chewed by the fans!
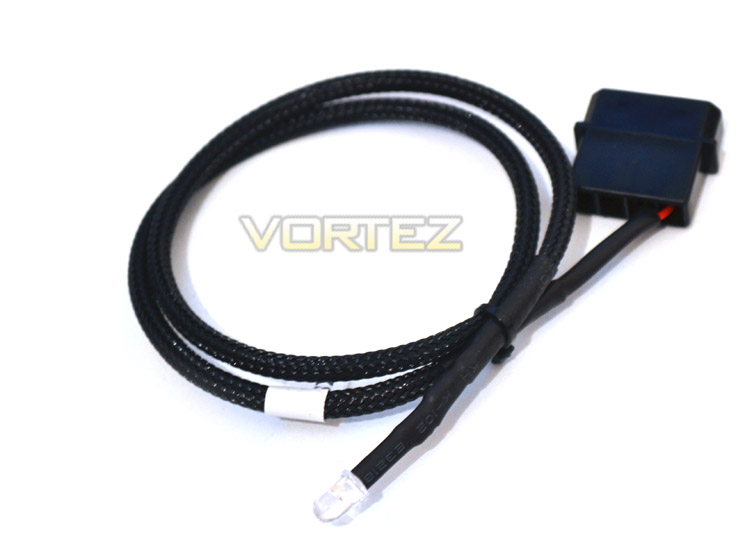
Both the CPU waterblock and the pump/reservoir combo are made of acrylic and have pre-drilled holes which allow the fitting of LED’s. If you like blue then you are in luck because both components have separate LED kits included in the package.
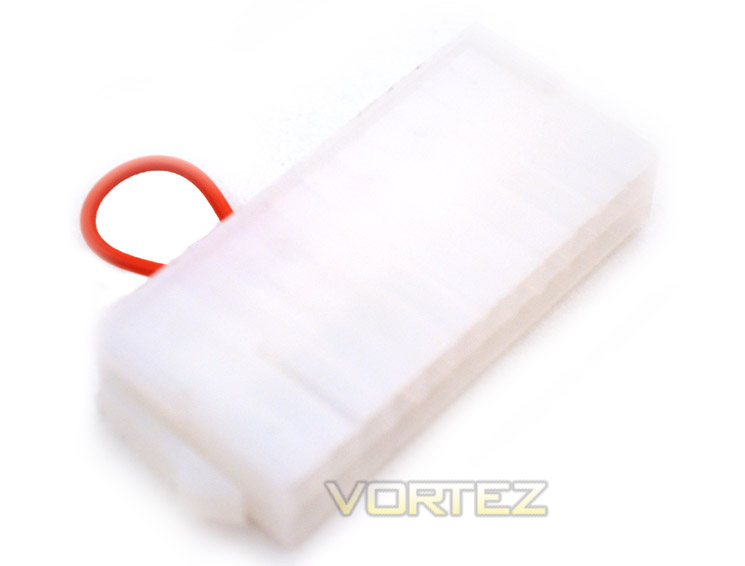
A great little addition to the kit is the PSU jump starter. This simple device is attached to the 24pin PSU cable to allow it to start and therefore allow you to ‘prime’ the watercooling setup. Normally, a psu would need to receive a signal from the motherboard to power up the PSU but priming a watercooling system, especially when leak testing, with all of your expensive system components such as the motherboard powered up while doing so is dangerous. Should your watercooling setup spring a leak while the motherboard is powered on, the chances are you could damage it so this cheap little bridge (it bridges the green ‘signal’ wire and black earth wires) allows you to power on the PSU without powering on your remaining components. It should be noted however that no power cables are attached to your PC while the PSU is jumped.
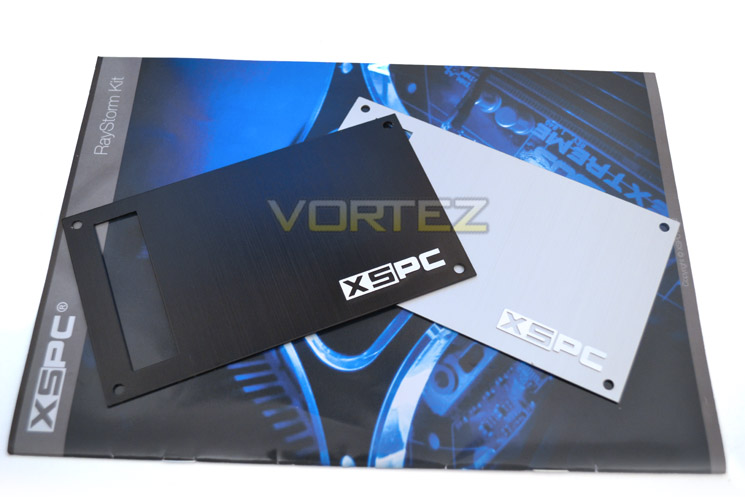
The reservoir has two faceplates which can be added for aesthetic value to match your case exterior. While the black faceplate would undoubtedly be the more popular, XSPC haven’t forgotten about those who prefer the silver aluminium look.
Let’s move on to the key system components…
Fans
Fans
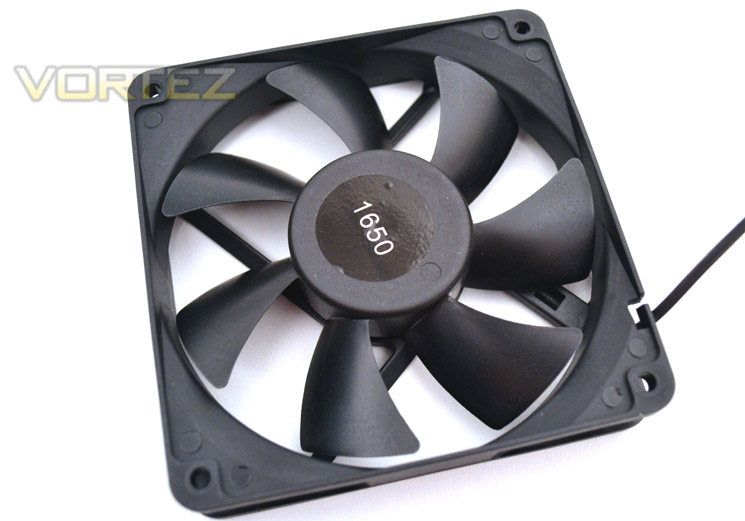
Three fans are included with the package. These will be used to cool the radiator down. The fans are 120mm in size and 25mm thick. A sticker atop of the fan blade hub tells use that these fans are rated to run at a maximum 1650rpm.
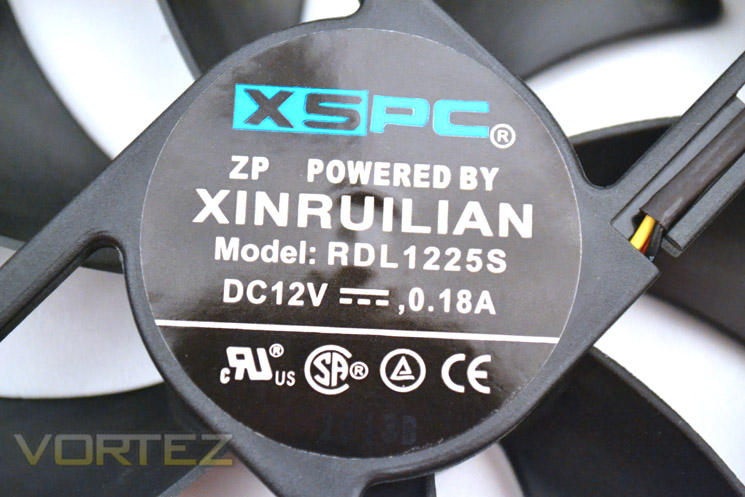
The fans are made from a company called XINRUILIAN. The RDL1225S fans are sleeve bearing fans and have a CFM rating of 65.2 along with a static pressure rating of 1.8mmH2O.
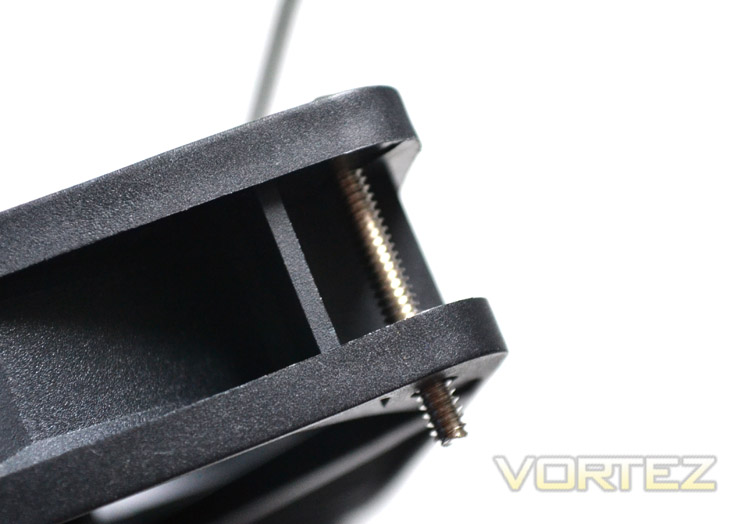
The fans are open cornered rather than closed which means that you can easily use your own screws to attach the fans should you wish or use the included, full length screws which go through the back of the fan and protrude just a few mm to ensure the radiator is not punctured. We would have liked black coloured screws to match the sleek black looks of the fan and radiator but this is just a minor point.
While inexpensive, if the specifications are to be believed then the fans appear to be quite impressive. The prrof however is in the pudding so they say so we wait with baited breath to see just how well they perform with the radiator on the next page.
Radiator
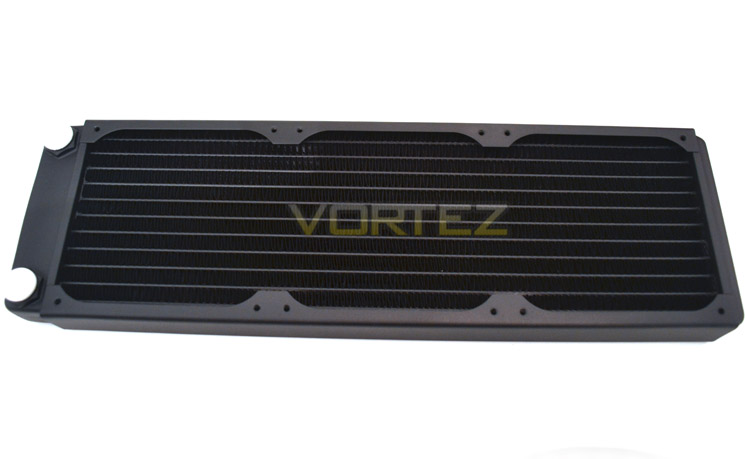
Included in our kit was the XSPC RS360 radiator. XSPC make a variety of kits, most of which come with either a 240 size or 360 size (double or triple 120mm fans). Their are also two radiator thickness sizes available, the RX which is 58.5mm thick or the RS (included in our kit) which is a little slimmer at 35mm thick. The dimensions of the RS360 are: 121x35x397mm (WxDxH).
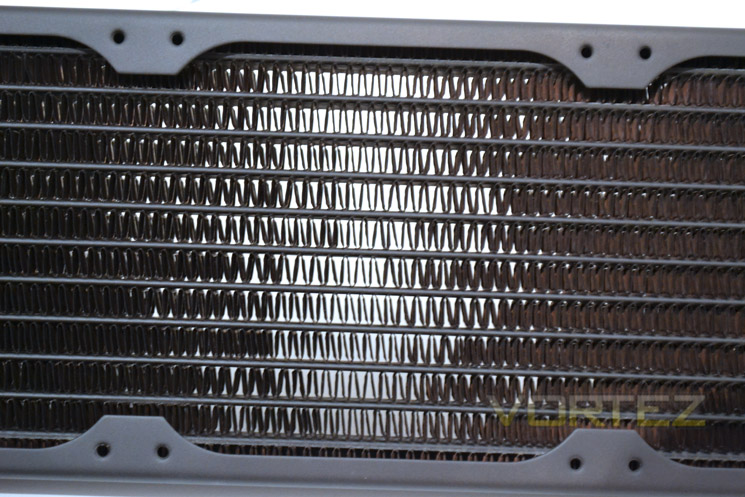
The general rule of thumb with radiators is that the bigger the surface area, the better it will be at dissipating heat. While this is true when all things are equal, a thin rad with a high FPI (fins per inch) can sometimes perform better but will need a very high speed/high CFM rad which equates to a lot of noise. The trade off is that the thin rad will fit in most systems whereas a thick rad will not. In short, it is not just the thickness of the radiator that needs to be considered but also the fin spacing on that radiator.
The FPI on our radiator is around the 15 FPI mark which is perhaps a little lower than expected for the ‘thin’ radiator. Perhaps XSPC are looking for the best balance between noise and performance?
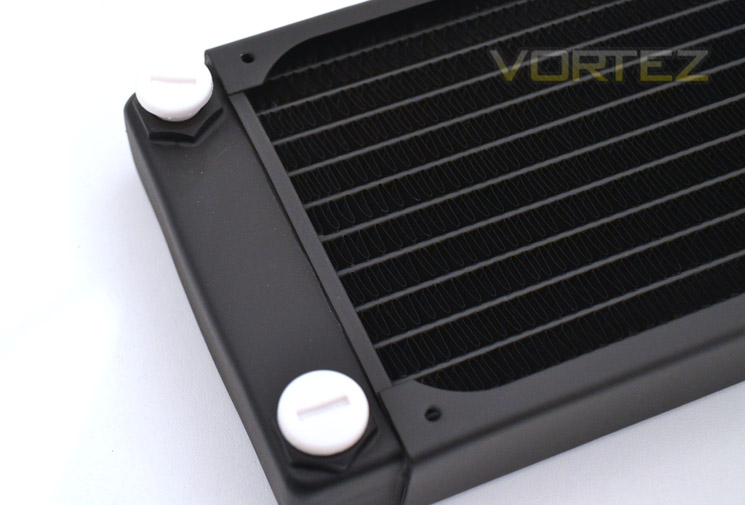
There is 1 row of 11 flattened tubes in the radiator, each measuring 1.9mm in thickness. There are two plugs that prevent unwated material from entering the radiator and while welding flux is no longer user in radiator construction, it is still good practice to rinse the radiator out prior to use with clean, distilled water to ensure no fragments are inside which could later cause a blockage and lower performance.
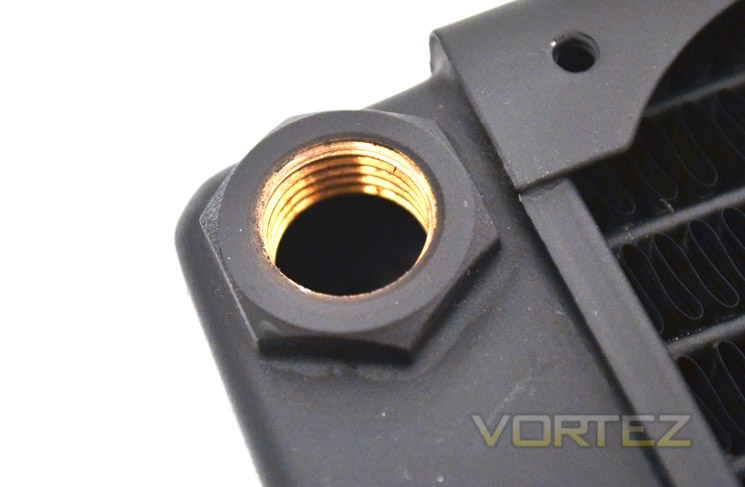
The radiators is primarily made from copper but as you can see from the picture above, it has brass inserts in the plenum chamber of G1/4 sizing which is pretty much the standard fitment these days.
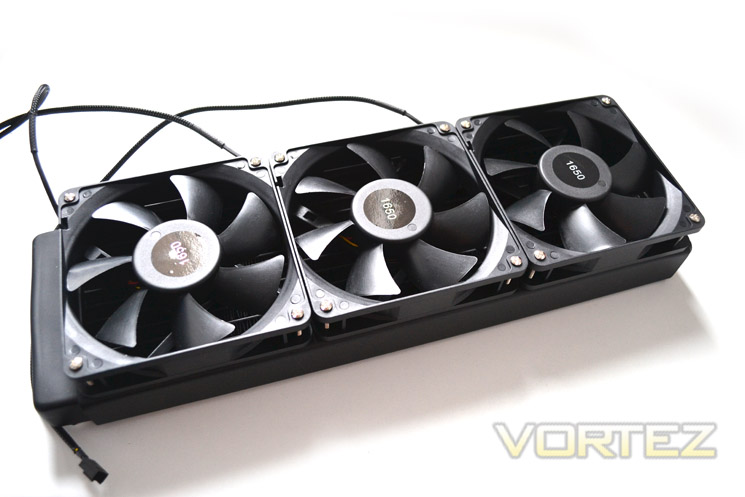
The fan spacing on the RS360 is 15mm which again, is the standard held by most, if not all manufacturers today. Fans can also be mounted on both sides of the radiator in a push/pull orientation. As there are only 3 fans included in our package, that is all we shall use. As the above picture shows, the fans will be used in a ‘push’ orientation (pushing air through the radiator).
X2O 750 Pump & Reservoir Combo
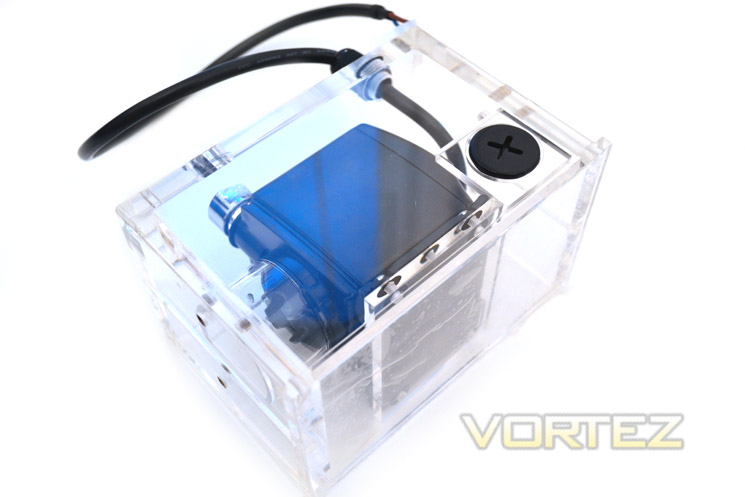
The included pump/reservoir is a combination unit rather than separate pump and reservoir. The pump is fully enclosed in the acrylic reservoir and thus cannot be serviced without breaking the reservoir. No maintenance schedule is suggested required though. The reservoir is made from clear acrylic and is 6mm to 13mm thick depending on strength required in any given area.
Here are the specifications of the X20 combo:
– G1/4″ threads
– High quality acrylic
– Removable brushed aluminium faceplates
– Brass screw threads
– Low noise, low vibration (42dB Max)
– Pump performance: 750 lph
– Delivery head: 1.8m
– Voltage: 12V (4pin)
– Dimensions: 149 x 100 x 85mm (WxDxH)
– Two 5mm LED holes
– Individually pressure tested
Included in our package is the shortened version which allows for easier routing of tubing and easier mounting which will fit in most, if not all cases that have 2x 5.25″ bays free.
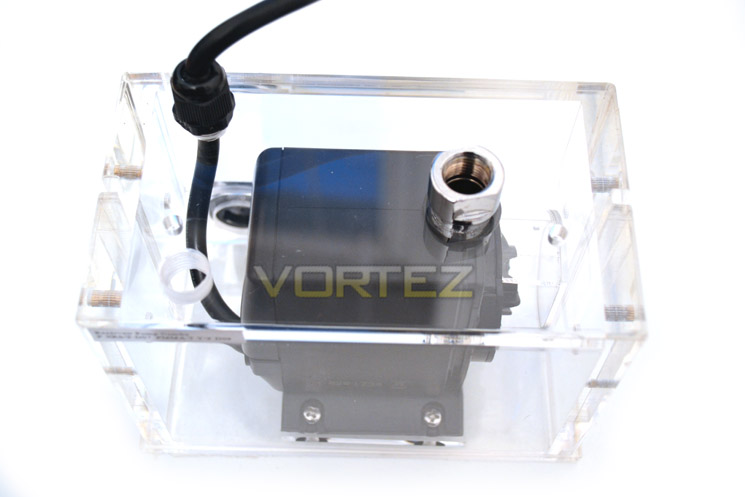
The pump itself is capable of outputting 750lph (litres per hour) which I guess is why they named this combination the ‘750’! The pump impellor features an acrylic shroud which prevents most air bubbles being sucked back into the system. To prevent any air being trapped under the impeller shroud, a tiny drill hole has been positioned centrally so this should be a cinch to bleed air from the setup.
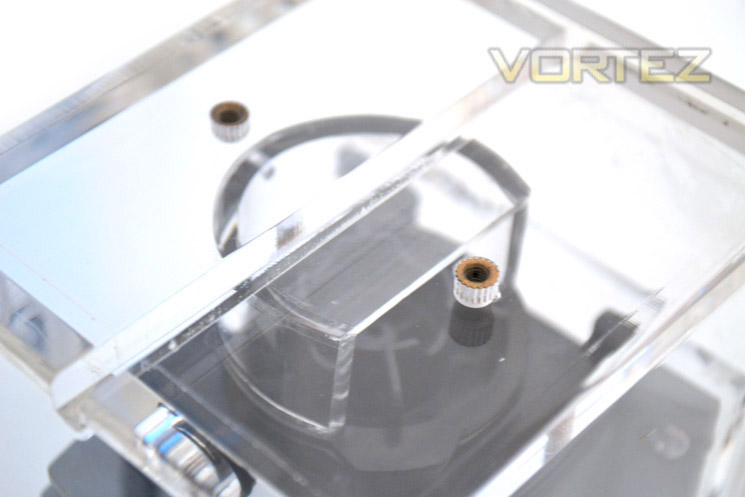
Water is sucked in here and expelled through a direct port with a G1/4 fitting. The return port is slightly lower which we thought was strange given that air bubbles will rise and thus the higher the port, the less chance there is of the current washing the bubbles back around to the impeller. Regardless, in use our reservations were unwarranted as the turbulence in the water was such that very few bubbles were created.
Brass inserts are positioned to the sides of the X2O to allow fitment in the drive bay. A nice feature of the reservoir is that XSPC have also pre-drilled 2 x 5mm holes for the blue LEDs which are included in the package.
Raystorm CPU Waterblock
The Raystorm CPU waterblock is regarded among enthusiasts as one of the best available. It is an Acetel and copper combination (main block) with an acrylic and aluminium hold down plate. Many assume this a replacement for the popular RASA waterblock. It is however a separate entity in that while the Raystorm is the new ‘high-end’ cpu waterblock from XSPC, the RASA is still in production for the RASA kits.
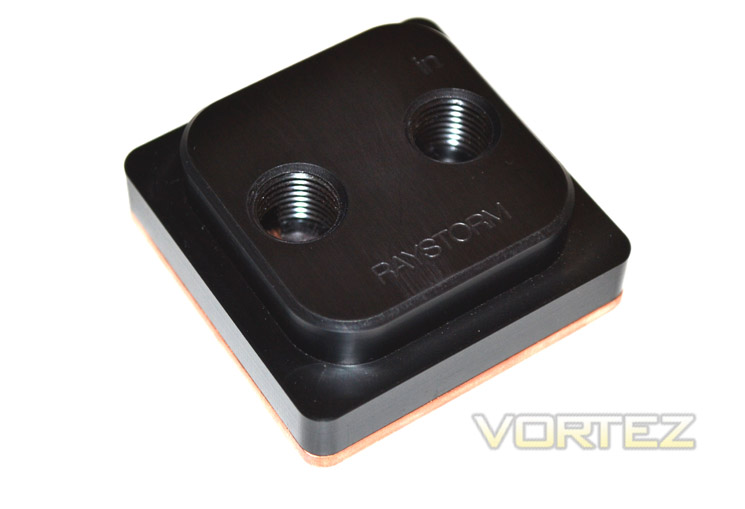
The upper section of the block is manufactured from CNC cut Acetel (polyoxymethylene, a very strong, ridid polymer which is perhaps better known as Delrin although this is actually a brand name from DuPont. The material is so strong, manufacturers from a variety of industries use it as a lightweight alternative to metal. It has excellent water resistance and has a flexural strength of – 406000 psi so your chances of damaging the top are very slim and thus it is safe to say it is much stronger than acrylic which is another common material used in CPU block tops.
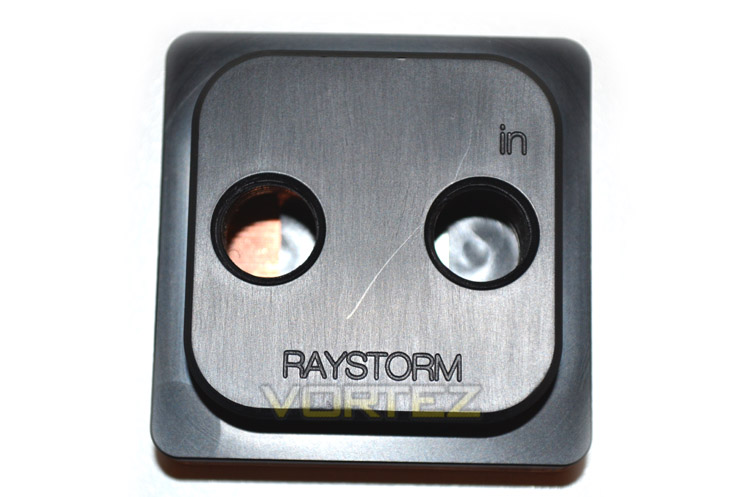
The Acetel top has a clearly labelled port: ‘in’ which is the inlet side of the waterblock. The reason why we have an inlet and an outlet side is that the interior of the block is such that there is a nozzle plate beneath the inlet which directs a jet of water to the grooved copper baseplate ensuring high pressure stream of water through the channels in the baseplate and back out through the outlet. Many high performance waterblocks use this tried and tested design to similar effect.
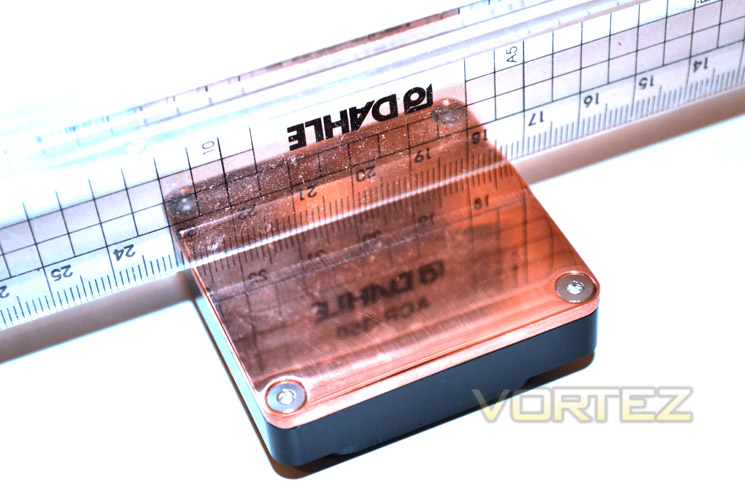
The base of the block is lapped to a mirrored finish. The RayStorm has a larger base than the RASA (56x56mm vs. 50x50mm). For maintenance, it is possible to remove the base plate from the acetel top by removing the four hex screws.
Let’s see how we got on with fitting the waterblock…
Raystorm Installation
For this review, we haven’t covered installation into a case because each case is different so while fitting the setup to our case might prove trouble free, your case could give completely different results. Therefore rather than give you a misleading representation of installing the kit which is dependent on the PC case the buyer has, we would prefer to give you an accurate, step by step description of how we found fitting the CPU block which, for most intents and purposes, will be the same for every potential purchaser regardless of socket type as the process is near identical.
For our fitment we will be using LGA2011 although the process is very similar to other fitments, an additional backplate (supplied) will need to be fitted to the motherboard for strengthening purposes. LGA 2011 does not need a backplate so we skipped that step.
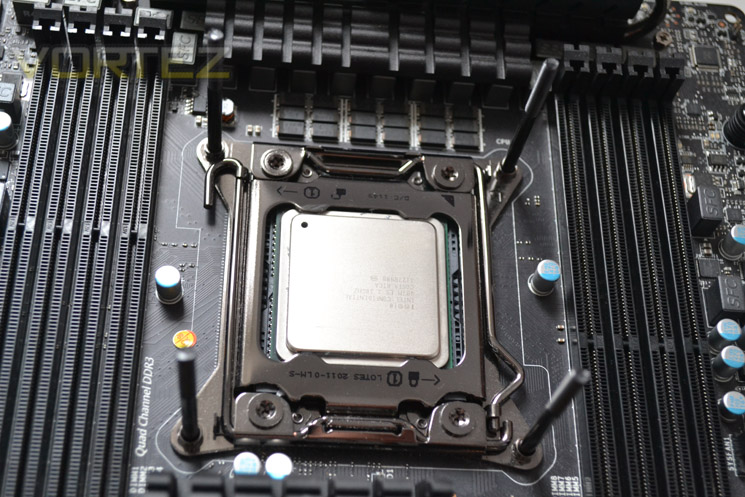
The first step was to fit the CPU block screws. LGA2011 has screw holes pre-drilled into the socket assembly. Finger tightness was all that was required.
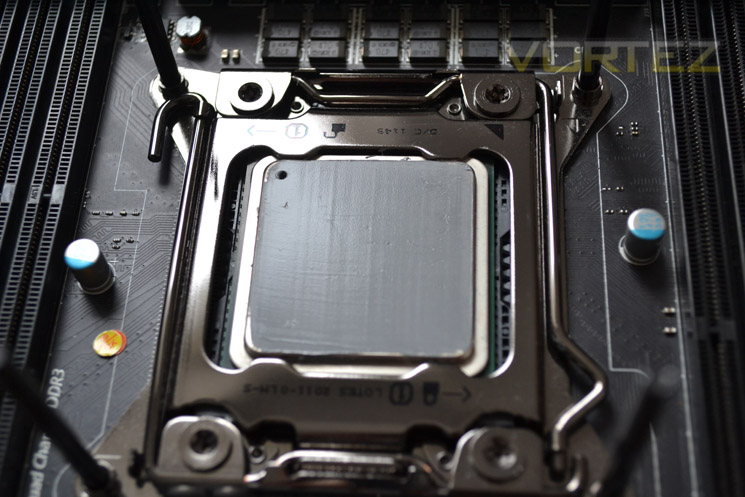
Application of CPU paste was next. We did a short comparison of the included K2 paste with our testing setup Arctic MX3 paste (see results section). There are a variety of methods of paste application, many of which have been and still are debated widely. I personally prefer the spread method which involves spreading the past as thinly as possible giving an even coverage across the CPU IHS. You may prefer the ‘BB’ sized blob or the ‘X’, there are drawbacks and benefits to all so just use whichever method suits you the best.
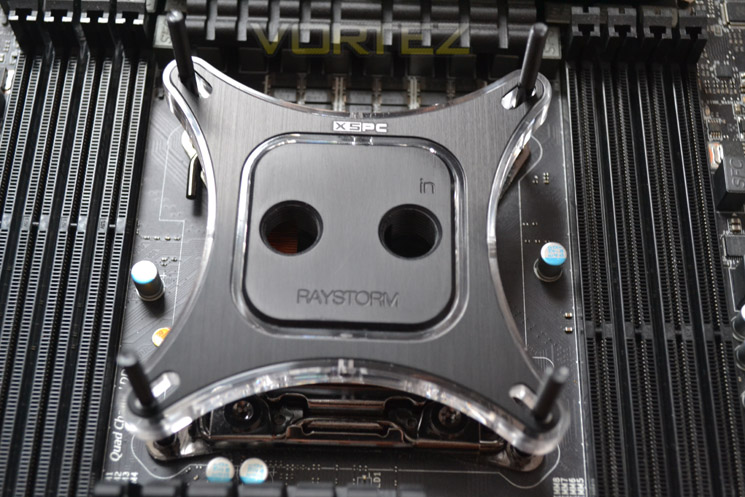
Next we postitioned the block over the CPU and gently lowered it. We then gave it a slight twist backwards and forwards to spread the paste even more before placing the acrylic and metal hold down plates over the screws and onto the block head, taking care that the metal plate which has XSPC written on it is correctly orientated and not upside down!
Do not be tempted to check the mount at this point as it could ruin the seal you have made with the CPU thermal interface material.
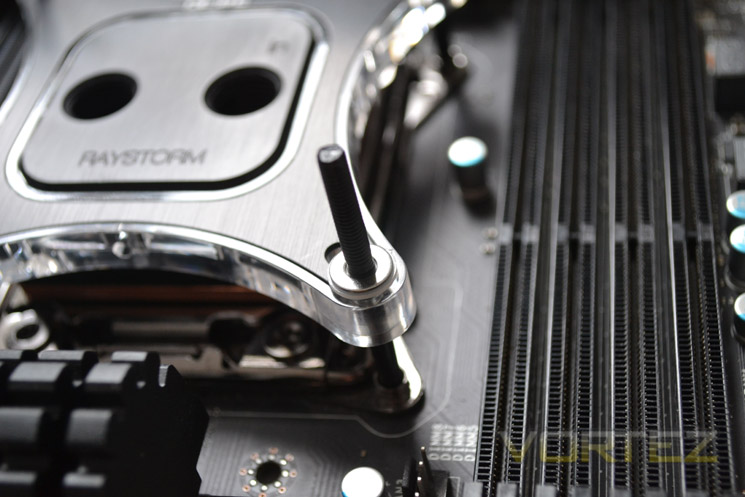
Then, we threaded the plastic and then the metal washers over the screws. The plastic washer will protect the hold down plate.
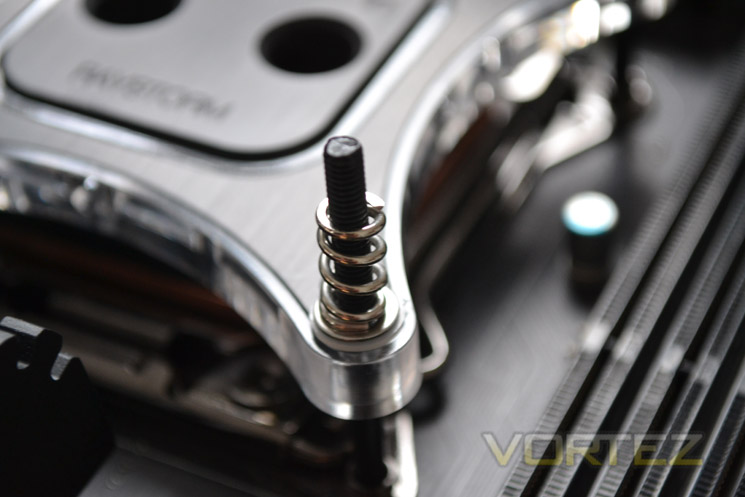
Next came the 4 springs in each corner.
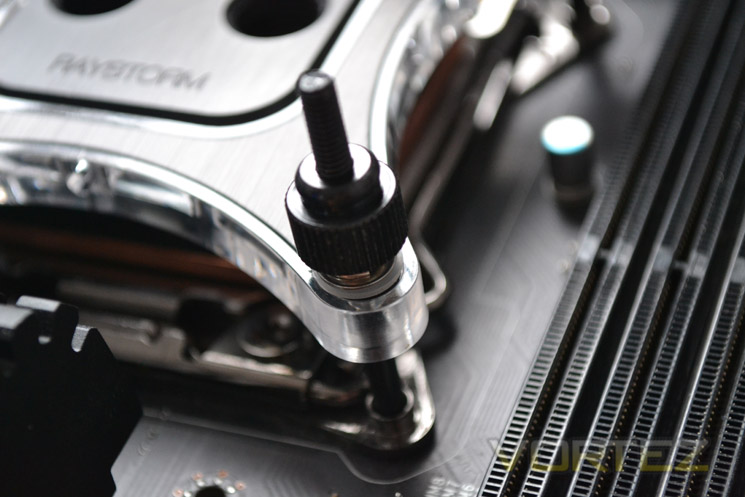
Now the important bit – the thumbscrews. Important because it is key to ensure even pressure is applied both during tightening and once fully tightened. If this is not achieved then the block could have more pressure to one side creating an uneven mount and thus poor heat transfer between the CPU and waterblock. To achieve a good even mount give each thumbscrew one twist at a time in a cross pattern (top right, bottom left, top right bottom left). Continue in this method until the thumbscrews will no longer turn using finger pressure only. Do not over tighten, especially with hand tools as the acrylic hold down plate could crack.
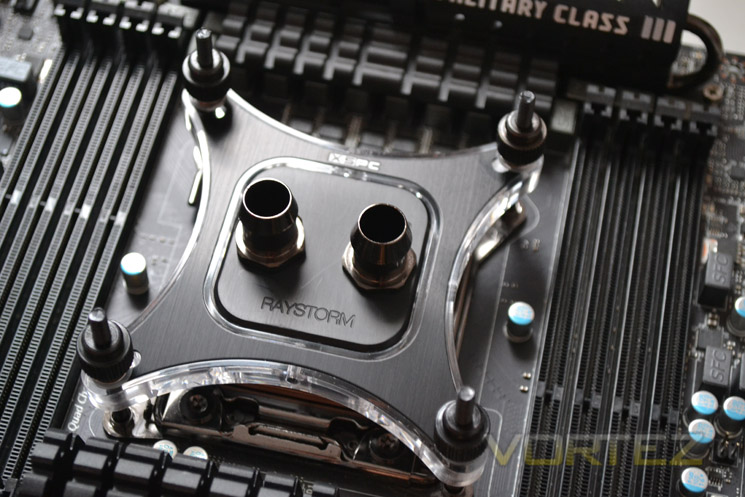
Finally, screw in the barbs. You may find this easier to do depending on the space you have available before positioning the CPU block. I prefer to screw the barbs in to finger tightness then, using a small adjustable spanner, give one last small twist to ‘nick’ the barb in place which ensures a perfect seal. Again, do not over tighten the barbs as this could damage the rubber ‘O’ ring which gives the barb its watertight seal.

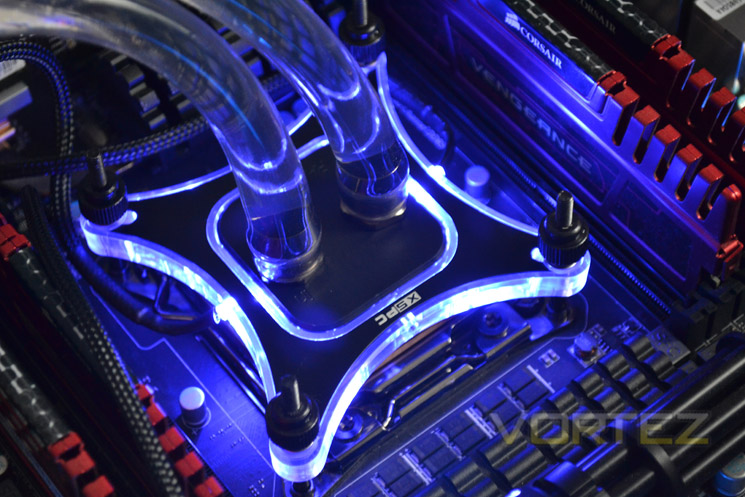
This step can be done at any stage but don’t forget to add the LED’s to both sides of the waterblock for that glow effect.
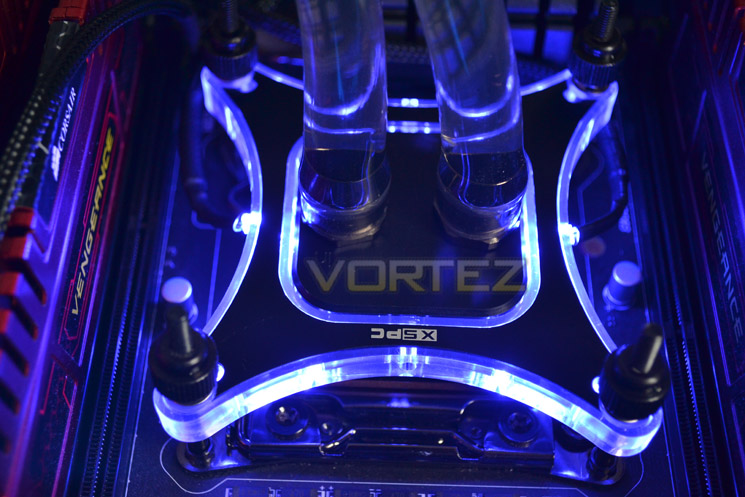
Last of all is fitting the tubing. Because the included barbs are 1/2″ and the tubing is 7/16’s an extremely tight fit is achieved. Just ensure when the tubing is cut, it is as straight as possible. Sharp scissors or a specific tube cutter are ideal for carrying out this task.
With the tubing cut and measured for length you can then attach the tubing which may be a little stiff and difficult to do but with a little pressure applied, it is achievable.
Vortez tip: Before attaching the tubing give the end a 20 second dip in hot water. This expands the tubing size slightly and makes it a little more flexible so it is easier to affix to the barb. Once cooled back down the tubing constricts over the barb which creates a watertight seal.
We didn’t use the plastic clips but if you feel the need for extra security then they are included in the package.
Job done. Now let’s see what the kit is capable of…
Test Setup & Methodology
There are many opinions on how air/watercooling should be tested. The huge variations in components used can have a beneficial or detrimental effect on the results, not least a case and its airflow properties. It is also reasonable to believe many cases will not afford the space required to fit large radiators, particularly 360 and 480 size without modification so testing a 120 size radiator inside a case against a 480 in a different environment would not produce consistent or more importantly, reliable results. Therefore, I believe the best form of testing is by using an open ‘test bed’ rather than an enclosed case.
A test bed offers identical cooling regardless of the object being tested. It neither relies upon case airflow to feed the heatsink and will not be affected by rising case temperatures. Ambient ‘environment’ temperatures can be measured accurately as case temperatures rise and fall more dramatically making delta temperature readouts inaccurate as this is dependent on both airflow, case temperature and environment temperature. As time goes on the case temperature will inevitably rise so a case temp taken at the beginning of the test to calculate delta will not be the same as in the middle or the end of the test. So, more items taken out of the equation, the more consistent (and accurate) the review will be.
Another area which I do not fully agree with when reviewing a product is the use of different fans. While I will concede this can give a very thorough examination of a cooling product, it detracts from what the product is sold as and instead of reviewing a product in the manner you receive it and giving your opinion on that basis, reviewing a product that has been modified is not objective and can add bias to a review which then diminishes the usefulness of the review of a product ‘as it is sold’. The caveat to this of course is repeated use. The Corsair H100 used in today’s cooling round up uses a thermal paste that is a one time only application. Any repeated applications mean you will have to buy your own TIM. It is also fair to assume most enthusiasts will have their preference of TIM and thus have a supply which will be re-applied. For this reason we will be using the same TIM (Arctic Cooling MX4) on all products tested to ensure consistency as far as possible. We do however like to test the effect of the change of TIM from that included in a product (if any) to that of our ‘control’ paste.
The crux of the matter when reviewing modular items is where to begin and where to stop. There are 100’s of fans on the market, 100’s of cases and a wide variety of TIMs, all of which can have an impact on performance. I therefore review products, where possible, ‘as is’; how you will receive it and compare it like for like with other products on the market ‘as is’. So, if a product is supplied with fans, I will use those that come packaged with it. Of course fans can have a great effect on the efficiency of a heatsink but that is a worry for the manufacturer and this should therefore be solved before the kit arrives to you. Most kits are after all ‘kits’, not custom components so there is little point in buying a kit if you intend to modify it, especially a watercooling kit as the foundation for such a product is to take the hassle out of specifying a lengthy component list, most of all which fan suits the product best!
We appreciate that there are many opinions on the right and the wrong way to test products. Some are overcomplicated, others are too basic while others are wildly inaccurate. We believe that with the testing methodology above, our results are consistent, accurate and most importantly, allow the user to make an informed choice on whether this product is right for them based on our own findings of how they will receive the product they pay for.
Mounting
Any product cooler is only as good as the mount. Without good contact area or an uneven mount, heat transfer from the CPU will be diminished so it is therefore important to test numerous times with different mounts.
To combat this we mount the cooler 5 times, removing the poorest result and dismissing this as a ‘bad mount’. An average is then taken from the remaining four results to give a final reading.
Temperature Test
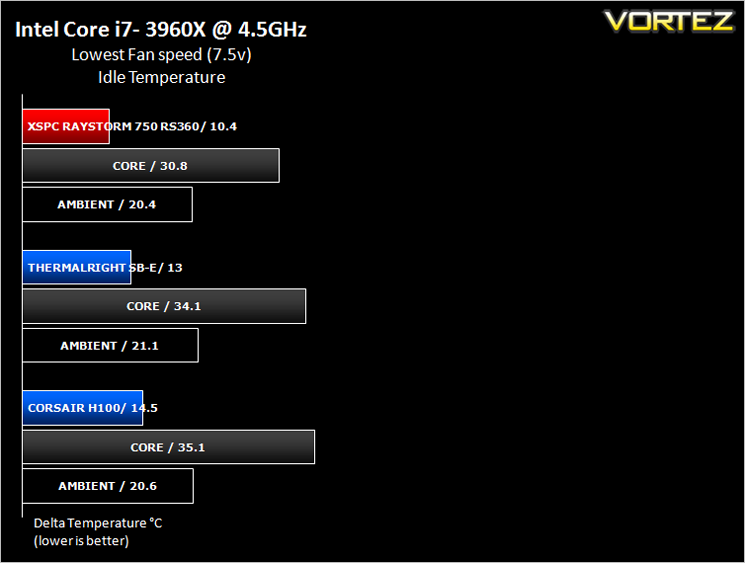
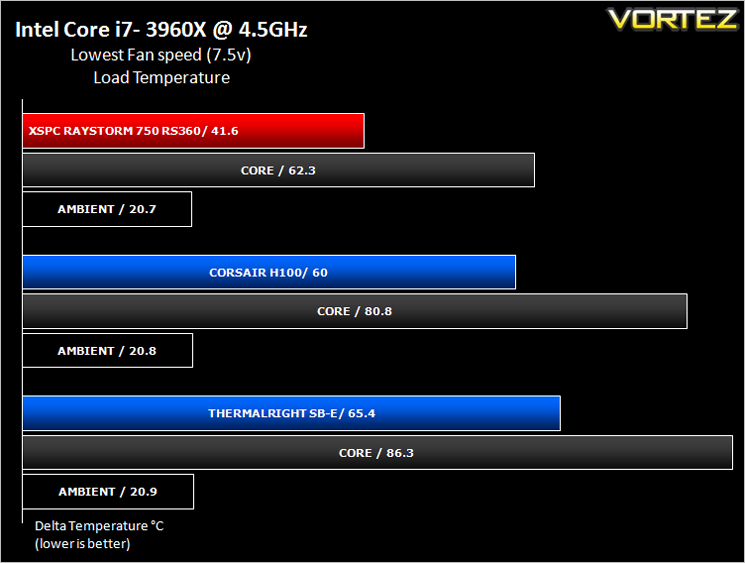
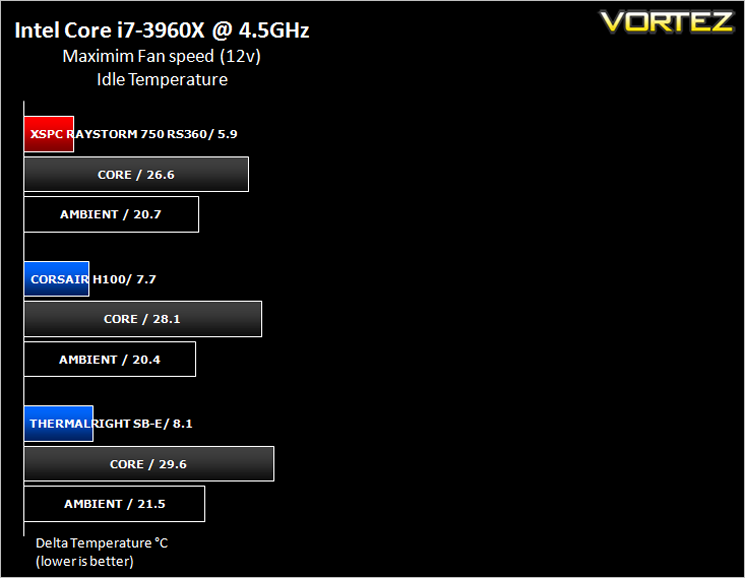
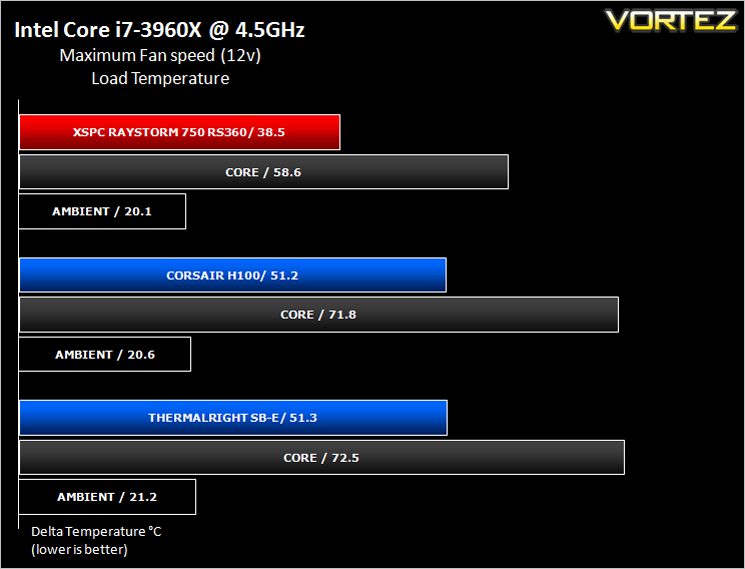
To accurately measure a coolers’ performance we use the ‘delta’ temperature. This is worked out by taking the ambient temperature away from the resultant temperature. So for example if a core temperature reading was 80c and the ambient temperature is 22c, the delta temp would be 80-22 = 58c. Delta temperature readings are used as this will eradicate (for the most part) the impact of ambient temperatures. An accurate thermometer is required to measure ambient (room) temp by which delta temperatures are calculated. The test room is cooled by air conditioning set to 20c however, room temperatures can still vary by upto a couple of degrees so a recording is taken at the beginning, middle and end of testing with an average reading calculated.
Idle temperatures are recorded with the system fully booted after a 20 minute idle time (no programs running save for identical background programs and processes). The max recorded temperature is then recorded using Real Temp for each core. An average of the 6 cores is then used to calculate the final temperature reading minus the ambient temperature to give us the delta temperature.
Load temperatures are recorded by using the latest LinX program. 20 runs with full memory usage. The max recorded temperature is then recorded using Real Temp for each core. An average of the 6 cores is then used to calculate the final temperature reading minus the ambient temperature to give us the delta temperature.
Test Bench
Motherboard: MSI X79 Big Bang X-Power II
CPU: Intel Core i7-3960X Extreme Edition
RAM – 16GB (4x4GB) GSKILL ARES DDR3 @ 2133MHz 9-11-10-28
Power Supply – ANTEC High Current Pro 1200W
Hard Drive – Kingston HyperX 240GB SSD
XSPC K2 Paste comparison
Most CPU coolers come accompanied with thermal paste provided by the manufacturer. For our CPU cooling tests we use Arctic Cooling’s MX4 Thermal Compound as our ‘control’ paste to ensure the results obtained are specific the to cooling apparatus and not the paste used.
This test was run at maximum fan speed with the CPU overclocked to 4.5GHz.
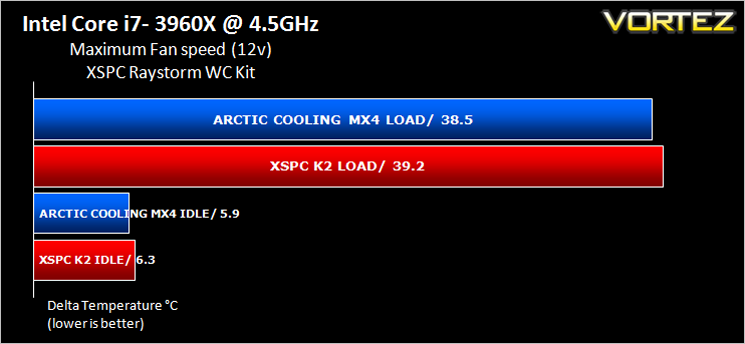
The results above tell us that the XSPC K2 is a high quality paste. While not quite as good as the MX-4, it was within a degree or so of Arctic Cooling’s finest which is a very good result indeed.
Performance: Low fan speeds
Performance: High Fan speeds
Conclusion
Venturing into the world of watercooling can be a daunting experience. After all, who in the right mind mixes water with electronics? Get it wrong and that’s exactly what could happen. There is a wealth of advice on enthusiast forums, some very good, others questionable while most are out of date such is the nature of watercooling – it advances very quickly and what was once the CPU block or radiator to ‘have’, they are soon surpassed by better ones. In short specifying your own watercooling components can be tricky for a first timer and potentially (if you get it wrong) dangerous. Couple this with not having a guide to hand when building the kit into your pc and the whole process becomes even more nerve jangling.
While specifying your own custom kit can often be higher performing than a pre-packaged kit, the components used in the XSPC are all very good. Perhaps the only weak point is the pump which is fine for a CPU only loop, adding other items such as a GPU block or mosfet/chipset blocks and a higher quality, more powerful pump would be better suited. We did however tally up the exact components used in the kit we reviewed today and it worked out over £40 more expensive! So you are getting quite a bargain here as far as watercooling goes.
In our tests, perhaps unexpectedly, the XSPC Raystorm 750 RS360 kit easily out performed the best air cooling and closed unit watercooling products has to offer but surprisingly by quite a large margin. For a little less than £160 you are getting a very capable selection of components not only perform extremely well together but also look the business. You will also receive credit from those who know what they are doing because with XSPC, you have a name that is well respected among watercooling enthusiasts.
If I had to suggest improvements to the kit, the pump is the obvious one. While it is perfectly adequate for this kit, adding additional items may warrant a more powerful version such as the Laing D5, which coincidentally XSPC have included in their more powerful kits. Hopefully, this pump will not replicate the slight rattle/humming noises we encountered during testing as the X2O res/pump combo which is one of the very few negatives in owning this kit – the pump is quiet but not silent. Aside from other minor points such as screw colouration (black please), there are few other negatives I can find. There was one more thing and this is perhaps the biggest drawback – the price. You will be in effect paying triple the cost of a high end air cooler which while not as high performing, is a lot quieter both at minimum and high speed fan settings. The trade off however, is that air cooling simply cannot compete with a good watercooling kit where temperature reduction is the ultimate aim and to that end, the XSPC RayStorm RS360 watercooling kit dominates.
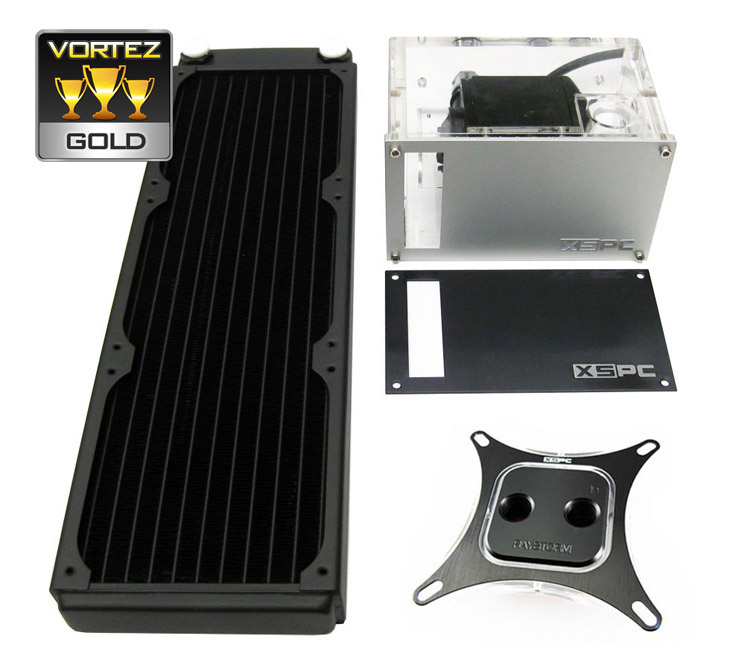
The XSPC Raystorm RS360 Watercooling Kit is one of those items that makes you smile. It has everything you need to get you up and running in no time and thanks to the well written instruction manual you can press the power on button, confident you are not going to destroy your pride and joy and end up with ‘wet feet’. This, coupled with a very competitive price means the product we have reviewed today is fully deserving of our Gold award.
Pros:
+ Excellent cooling performance
+ High Performing CPU Block
+ Quiet
+ Well specified components
+ Great Instruction Manual
Cons:
– Slight rattle and hum from the pump
+ Excellent cooling performance
+ High Performing CPU Block
+ Quiet
+ Well specified components
+ Great Instruction Manual
Cons:
– Slight rattle and hum from the pump

Click here for an explanation of our awards at Vortez.net.


