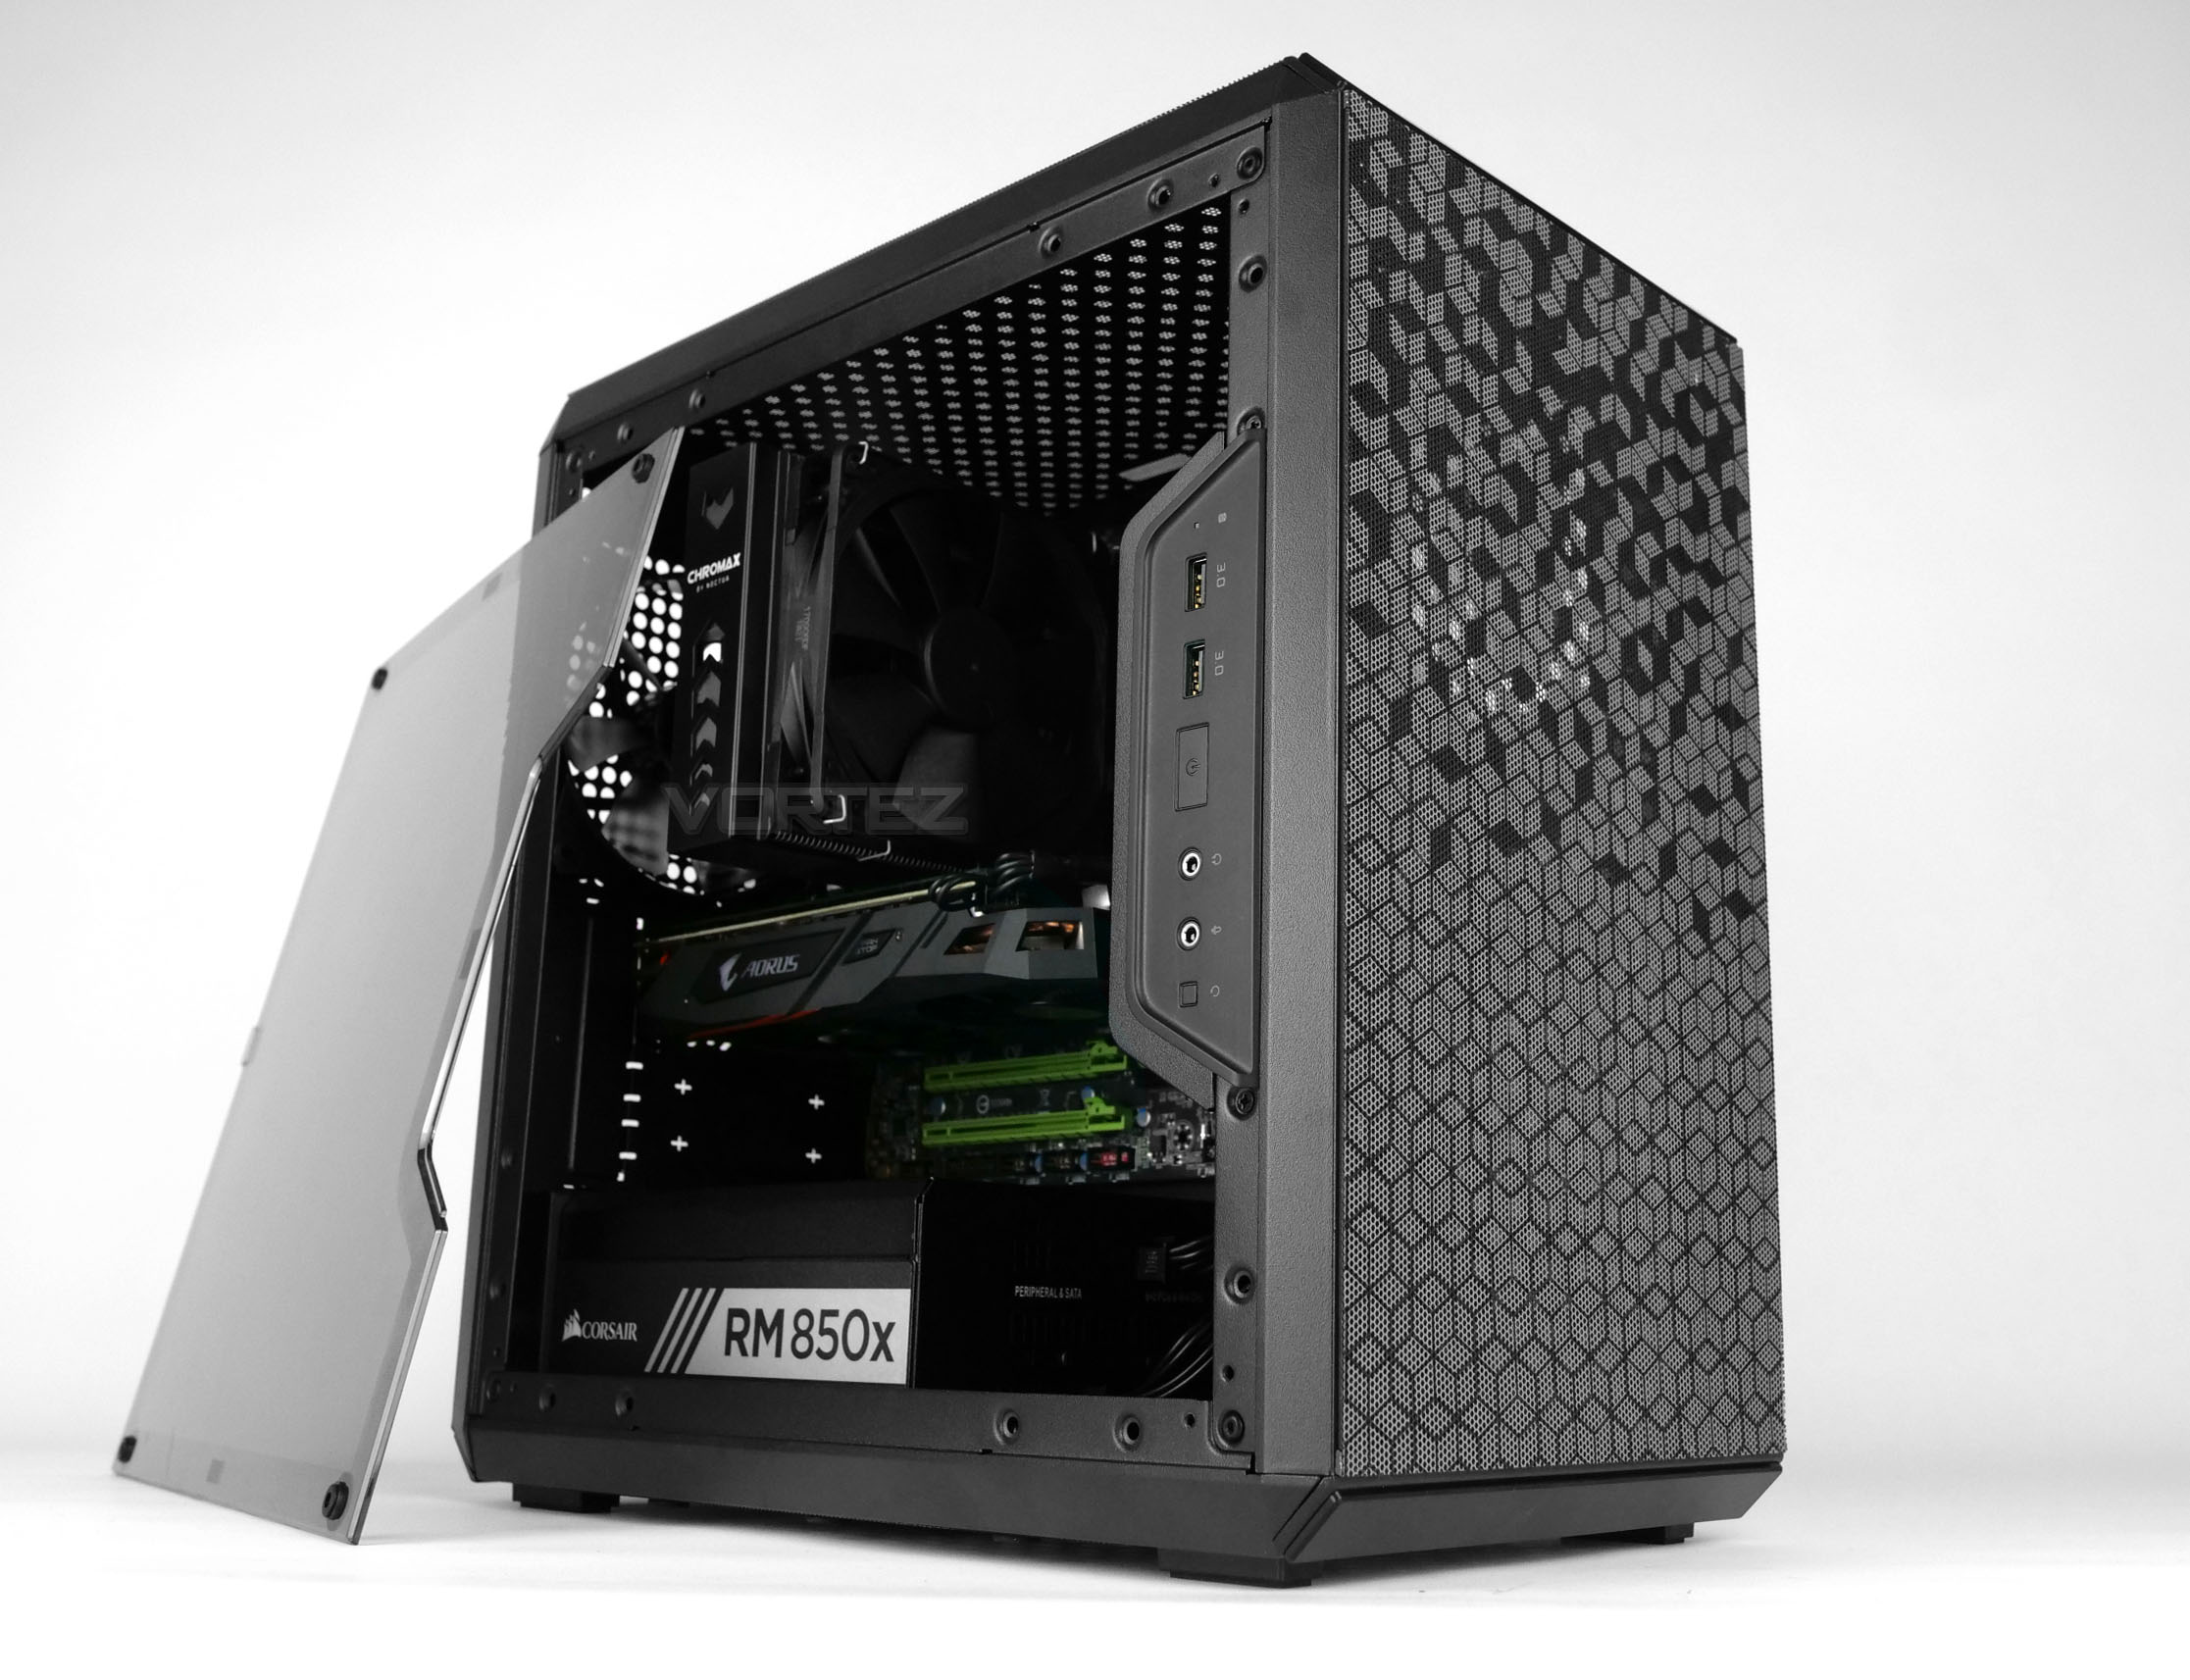
A new MasterBox computer chassis designed specifically for the Micro-ATX form factor. Q300L (MCB-Q300L-KANN-S00) might be small, but it’s feature-packed.

Product on Review: MasterBox Q300L
Manufacturer & Sponsor: Cooler Master
Street Price: £39.99 GBP / $39.99 USD / $50 AUD
Cooler Master are certainly no strangers to the world of computer case engineering, their portfolio stretches all the way back to the 90s with some of the most prolific designs coming from the HAF and COSMOS series. Not wanting to fall by the wayside, Cooler Master has brought to market their MasterBox series and there has been no shortage of models to fall under this collection.
Today we’ll be exploring the delights of a new Micro-ATX chassis by way of the MasterBox Q300L. Like the rest of the Q Series, Q300L utilises a compact design which still seeks to deliver on functionality. Inside this Mini Tower there is space for high-end kit and we can even use it in a vertical or horizontal orientation.
Sound interesting? Let’s take a look!
About Cooler Master
Cooler Master has done its utmost to build not only tangible incentives for innovation, but also a corporate culture that embraces change and creativity. The company rewards successful risk-taking by employees, regardless of whether it is rationalization of an administrative task that speeds up workflow, or a design improvement that enhances the functionality of device product. Innovation is also encouraged in the process of finding new applications for technological breakthroughs in products and services for Cooler Master customers. In fact, the ultimate aim of innovation at Cooler Master is always aims to enable technology to actually benefit customers. To provide this level of innovation, Cooler Master has built up elite R&  teams composed of outstanding engineers, many with advanced degrees, and including thermal, mechanical and materials engineers to provide specialized expertise in each of these fields. These superb teams take advantage of a sophisticated design process workflow that ensures efficiency and provides scope for innovations that are reflected in real-world enhancements. Strict process controls ensure maximum efficiency and quality at each step, beginning with thermal simulations, and proceeding to mechanical design, evaluation of mock-up samples, and on to experimental production runs, process testing, thermal and reliability testing, and finally pilot runs and mass production.
teams composed of outstanding engineers, many with advanced degrees, and including thermal, mechanical and materials engineers to provide specialized expertise in each of these fields. These superb teams take advantage of a sophisticated design process workflow that ensures efficiency and provides scope for innovations that are reflected in real-world enhancements. Strict process controls ensure maximum efficiency and quality at each step, beginning with thermal simulations, and proceeding to mechanical design, evaluation of mock-up samples, and on to experimental production runs, process testing, thermal and reliability testing, and finally pilot runs and mass production.Technical Specifications
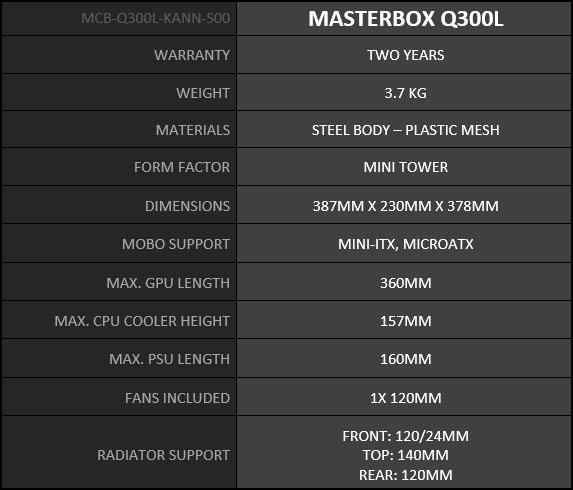
Below are the technical specifications surrounding MasterBox Q300L.
Video Review
For this review we’ve also created a YouTube video which highlights all of the key features, shows a full system install and identifies the good/bad points regarding this computer case. Click the video below or go to the Cooler Master Q300L Video Review.
First Look
Q300L arrives in an eco-friendly cardboard box which features some basic imagery of the chassis and lists the significant specifications. Inside, the case is covered in a clear plastic sheet and held in place with polystyrene blocks.
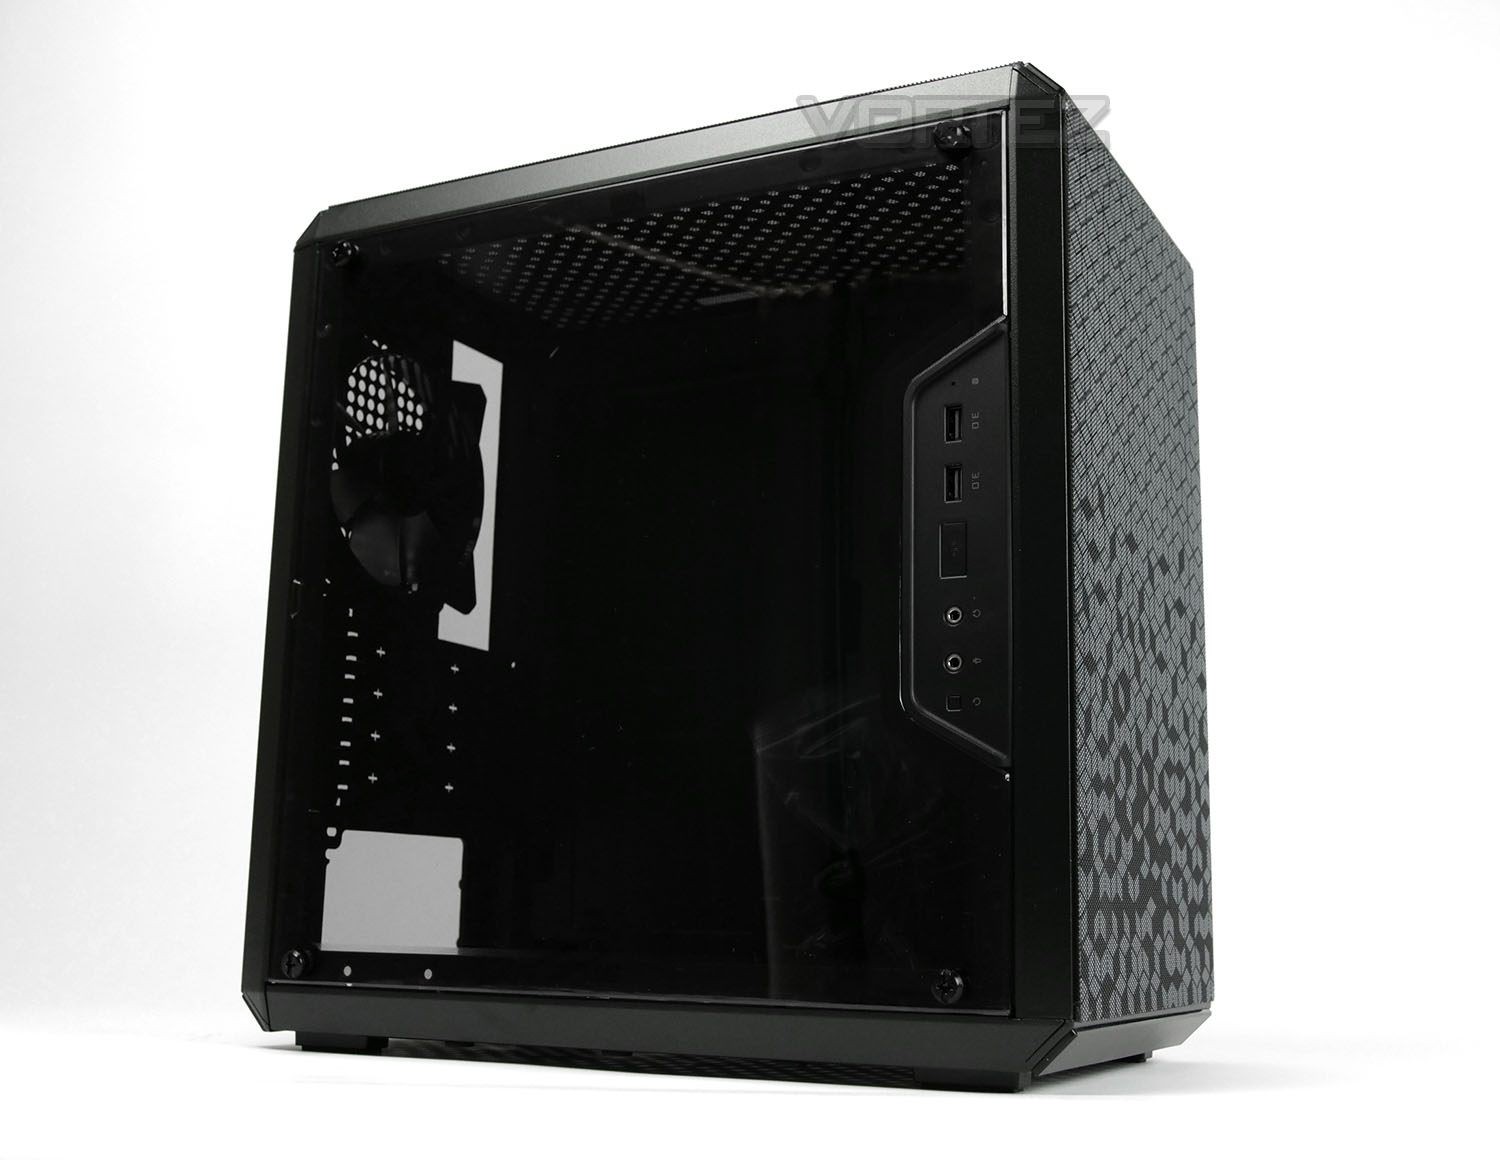
Removing Q300L from its packaging we are met by a pleasant looking computer case which adopts a stylish visual appearance. On the prominent side, the entire panel is transparent but unlike many modern enclosures nowadays, Q300L does not utilise tempered glass. The panel being used here is of plastic construction but still delivers the desired outcome – users are able to see a complete view of the installed system within. Four oversized screws secure this panel onto the chassis and there is front panel connectivity towards the front edge. (more on this over the page).
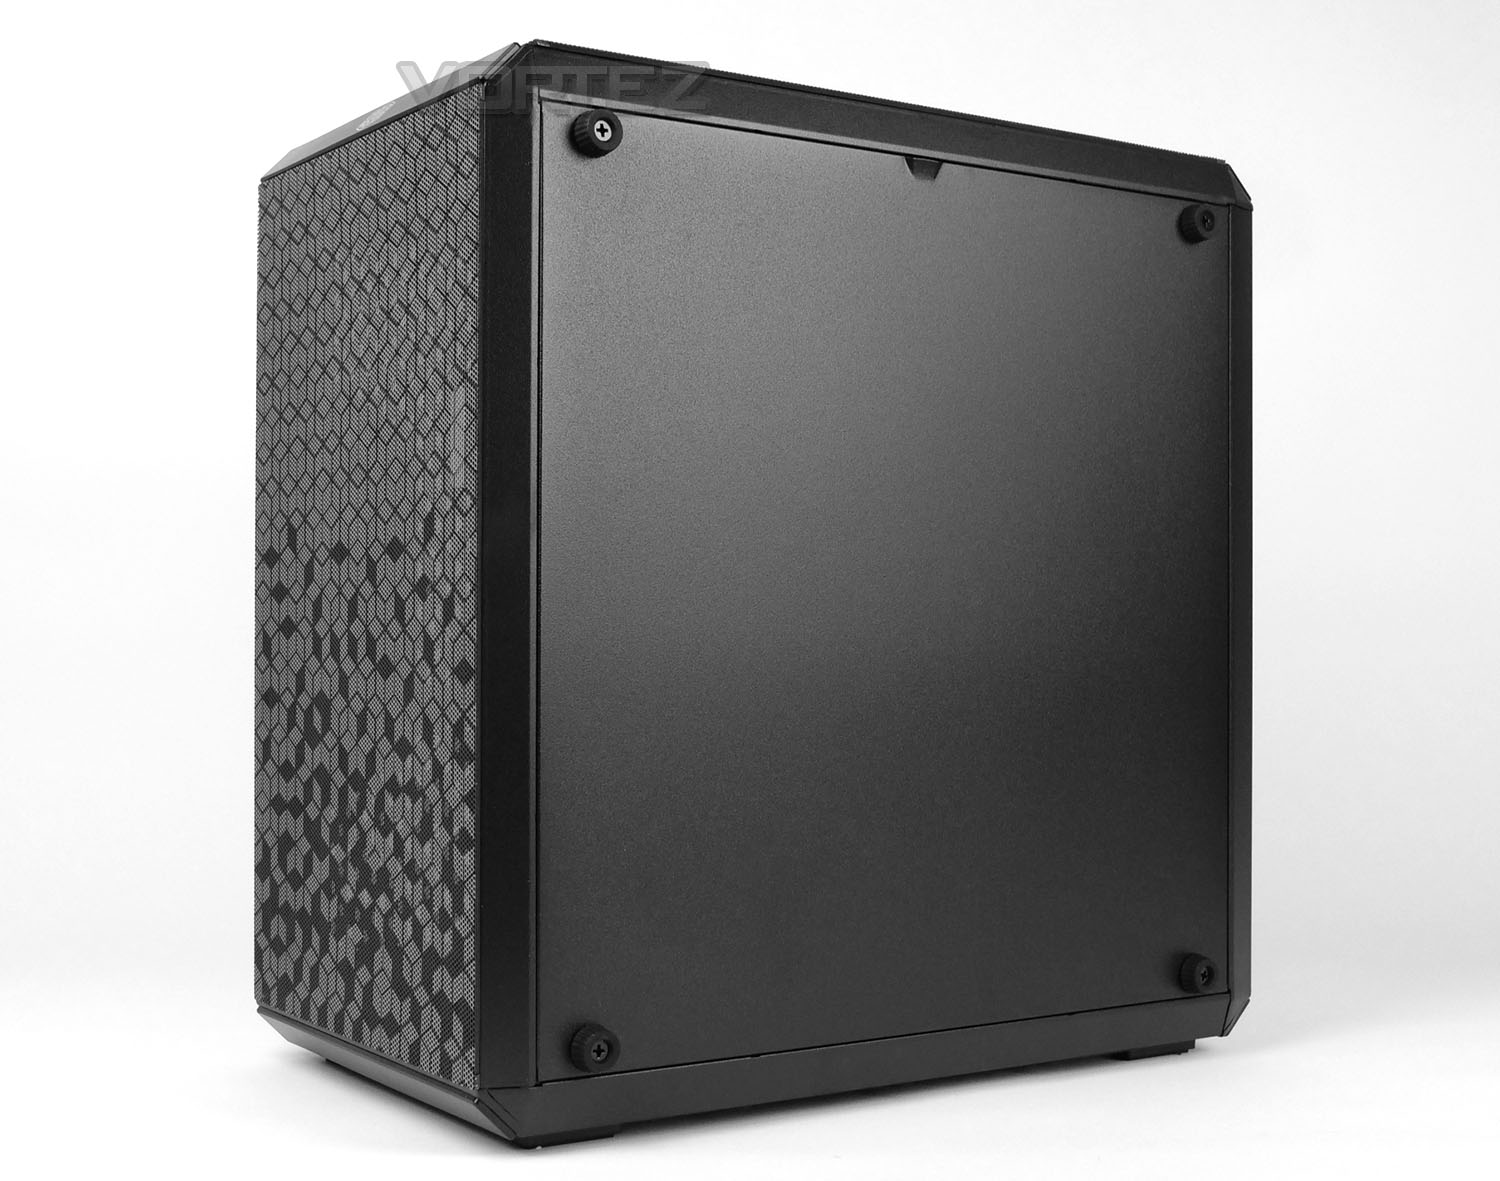
Over on the reverse side the panel is solid and of steel construction. In a similar way to the other side, this panel is detached via four oversized rubberised screws and simply lifts off rather than sliding backwards in a conventional way.
While Q300L can be positioned in the usual orientation as shown in the pictures above, we can also place the case down onto this reverse side in a desktop/landscape fashion and have the enclosure flat on the desk with the rubberised screws acting as feet.
On the next page we’ll explore the features in a more detail.
Exterior
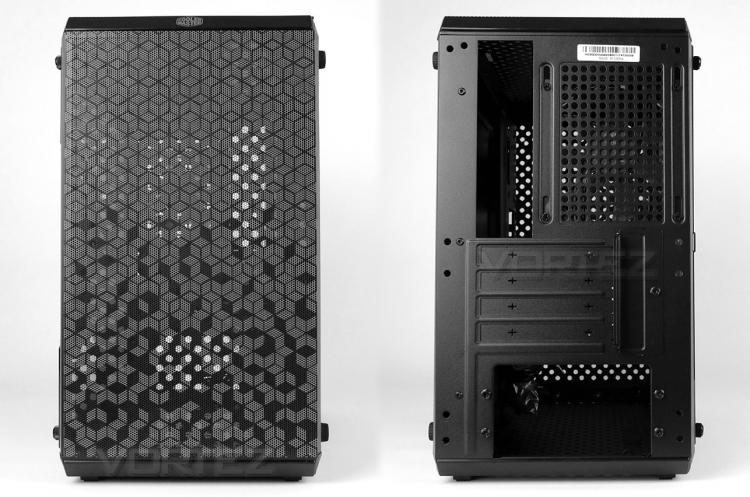
Taking a look at the front of Q300L we have a distinct design which not only looks attractive but also has the option to be reversed – the pattern seen above is printed on a magnetic dust filter which simply pulls away from the chassis. One thing we’d have liked to see differently in this department is the inclusion of a raised edge or lip to help prevent this sheet from moving around because it takes very little force for to move it out of place. Underneath this filter we can install 2x 120/140mm fans.
Around the back of the chassis there is an opening at the bottom for installing a PSU, four PCI covers, a pre-installed 120mm rear exhaust fan and an opening for the motherboard rear IO. The PCI covers are unfortunately disposable – meaning that once removed, you cannot reuse them again. So, it’s advisable to carefully plan which covers need removing prior to a system install, as otherwise you may end up with a gaping hole which cannot be covered up!
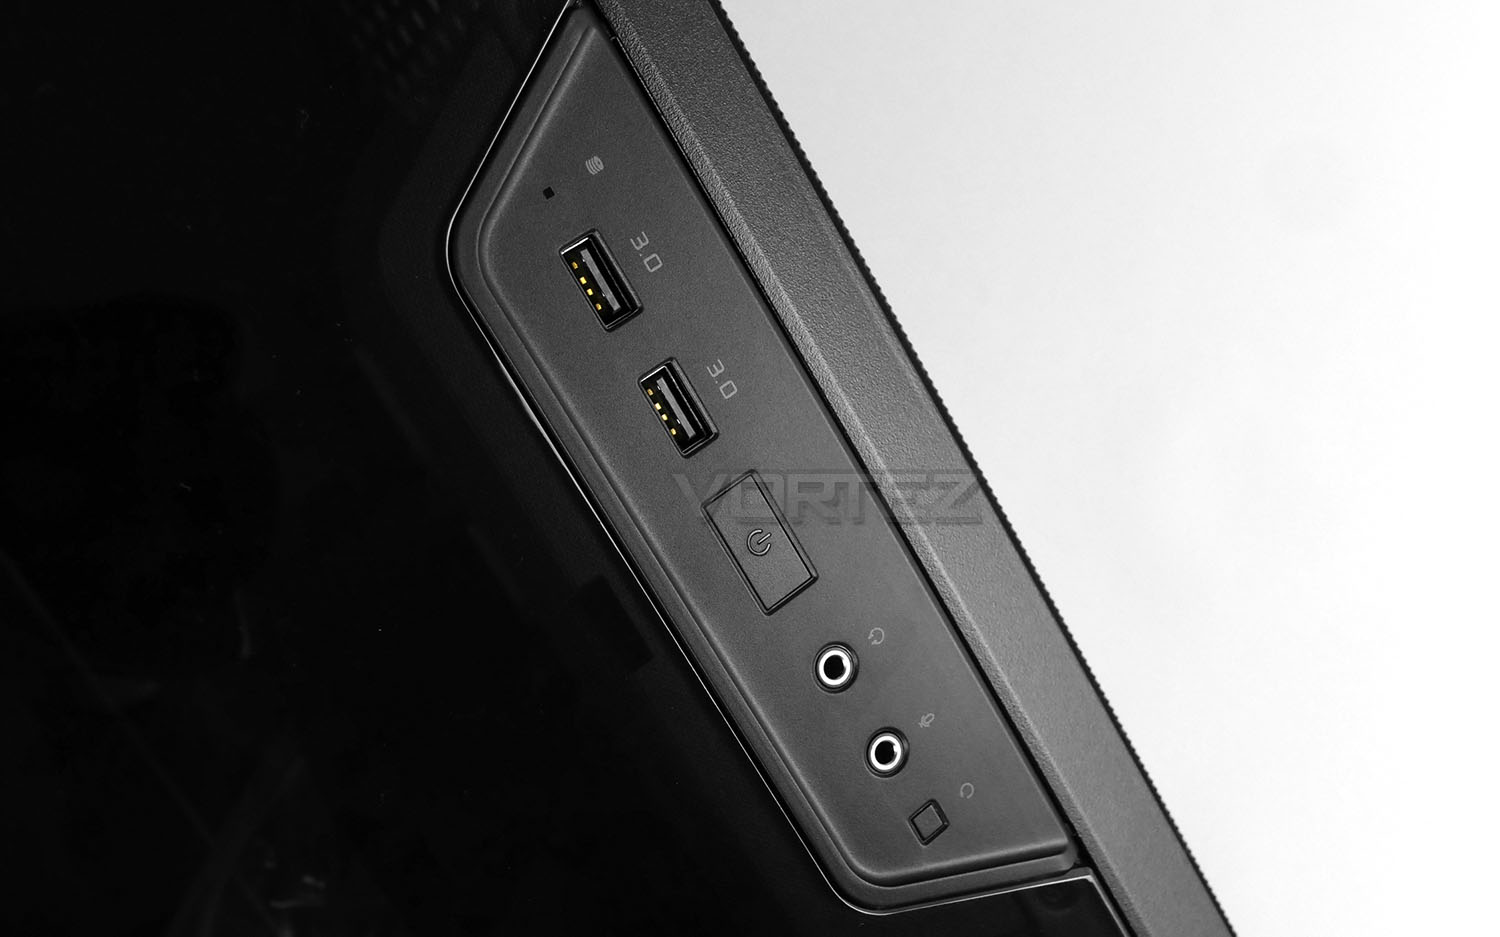
As mentioned on the previous page, the front panel controls are situated towards the front edge of Q300L and include: activity LED, 2x USB 3.0 ports, power button, headphone/microphone jacks and a reset button.
Due to the way in which Cooler Master has designed this case, this front panel module can actually be placed in a range of different positions to suit different orientations.
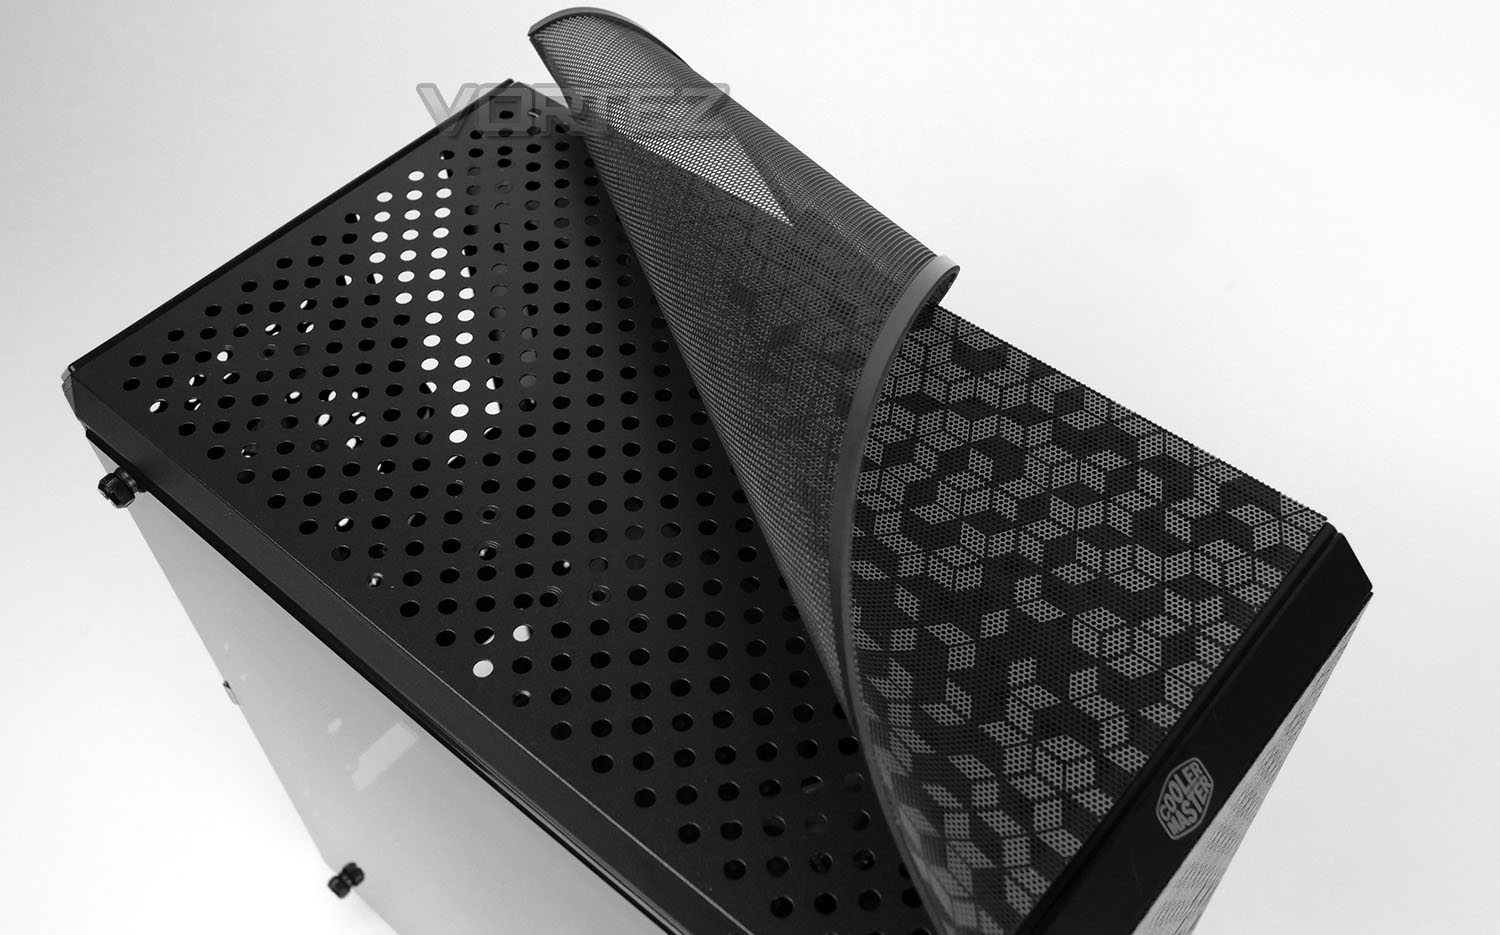
Up at the top of Q300L there is yet another magnetic filter with the same patterned design. Up at the top there is allocation for installing 2x 120mm fans. Again, just like the front panel – we’d have liked to see a lip to help keep the filter sheet in place as this can move out of place too easily.
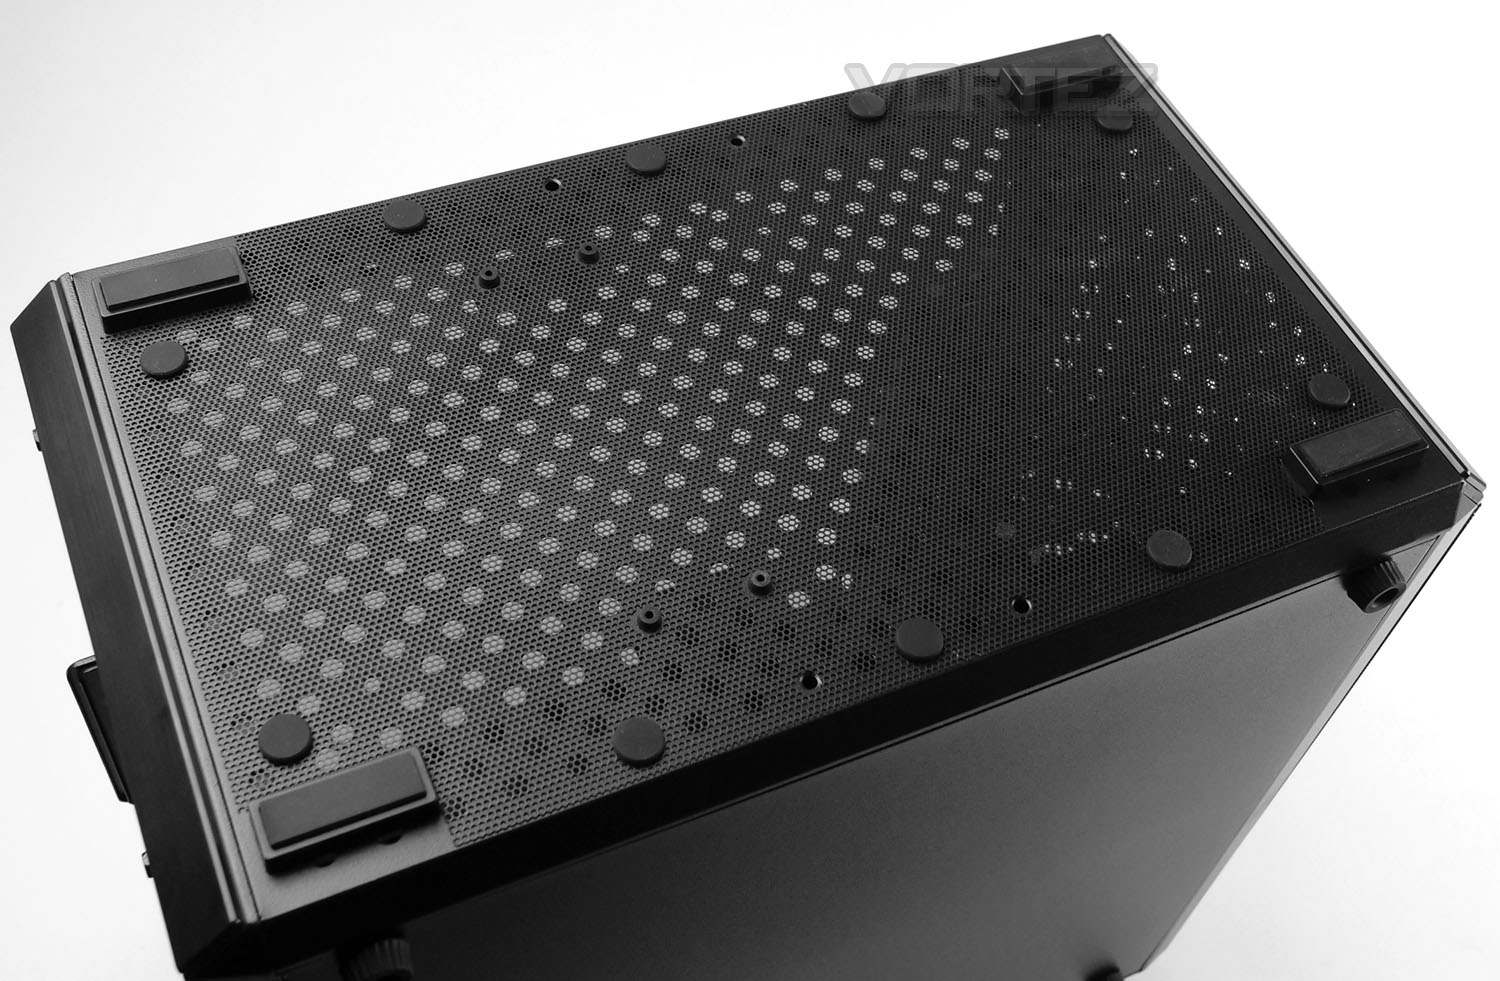
Flipping the case over onto the underside, we can see that Cooler Master has included four rubber feet to keep the case from slipping around on smooth surfaces and there is a large dust filter which will marry up to the PSU. As you can tell from the design here, to remove and clean you would need to flip the case onto its side – it cannot be easily removed while this side faces the floor.
Interior
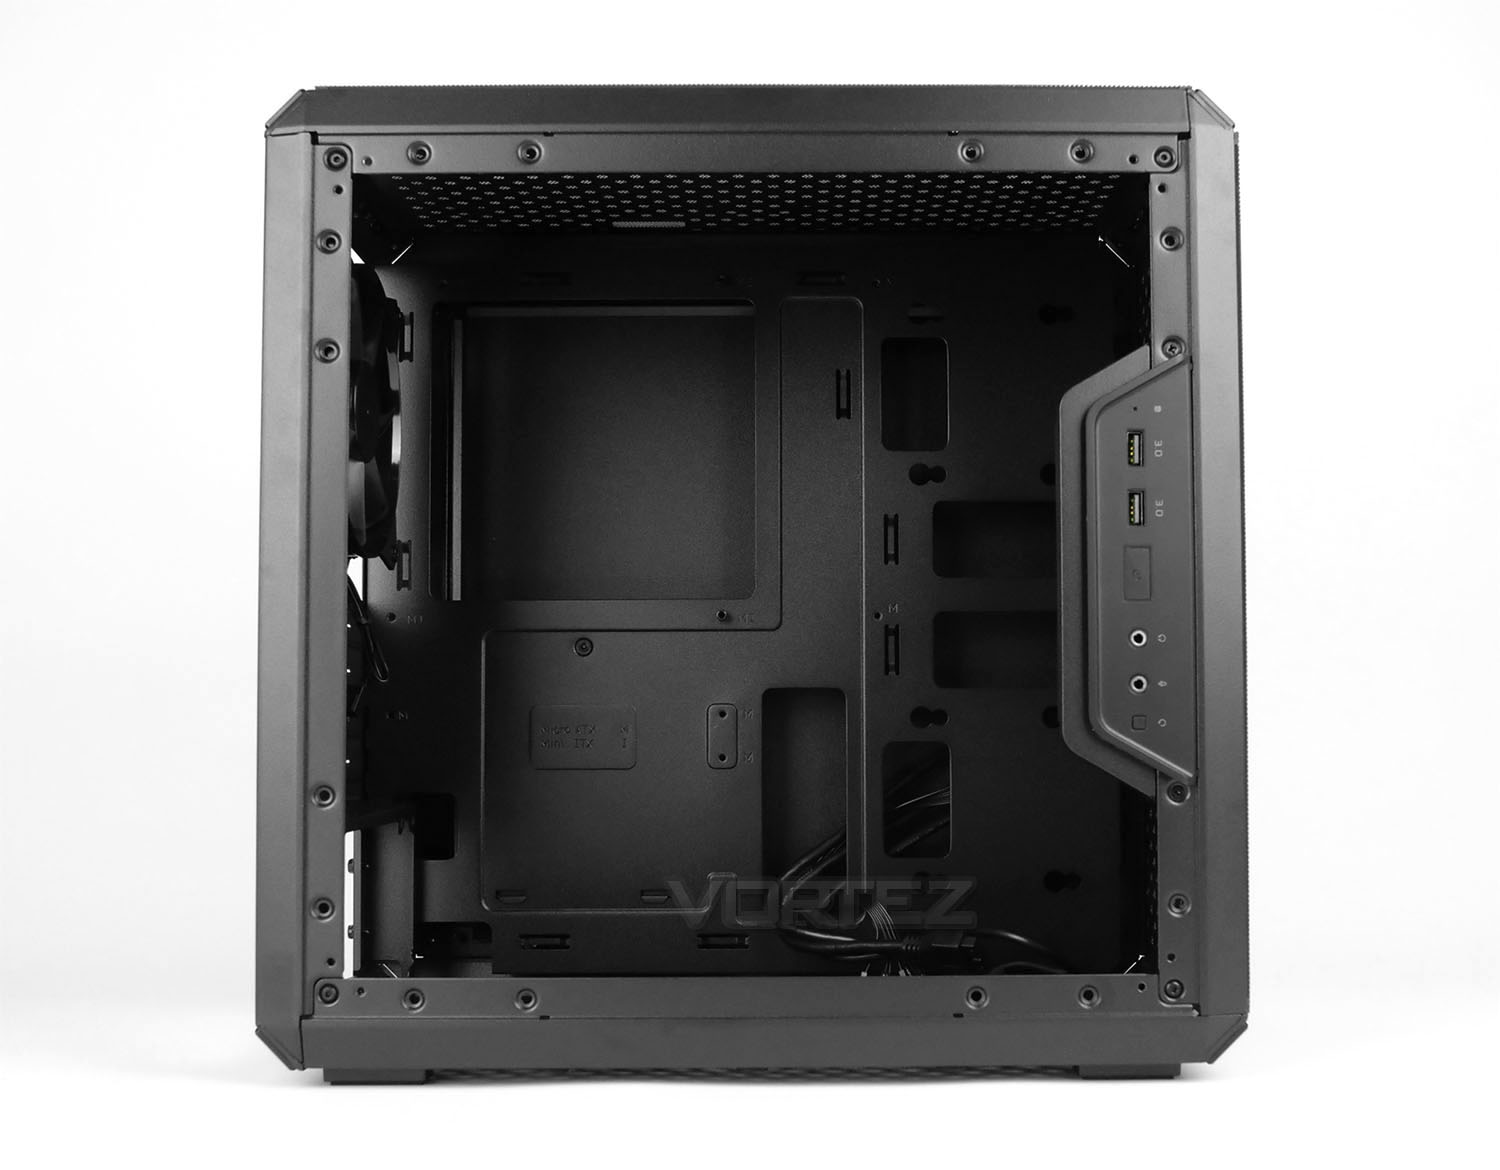
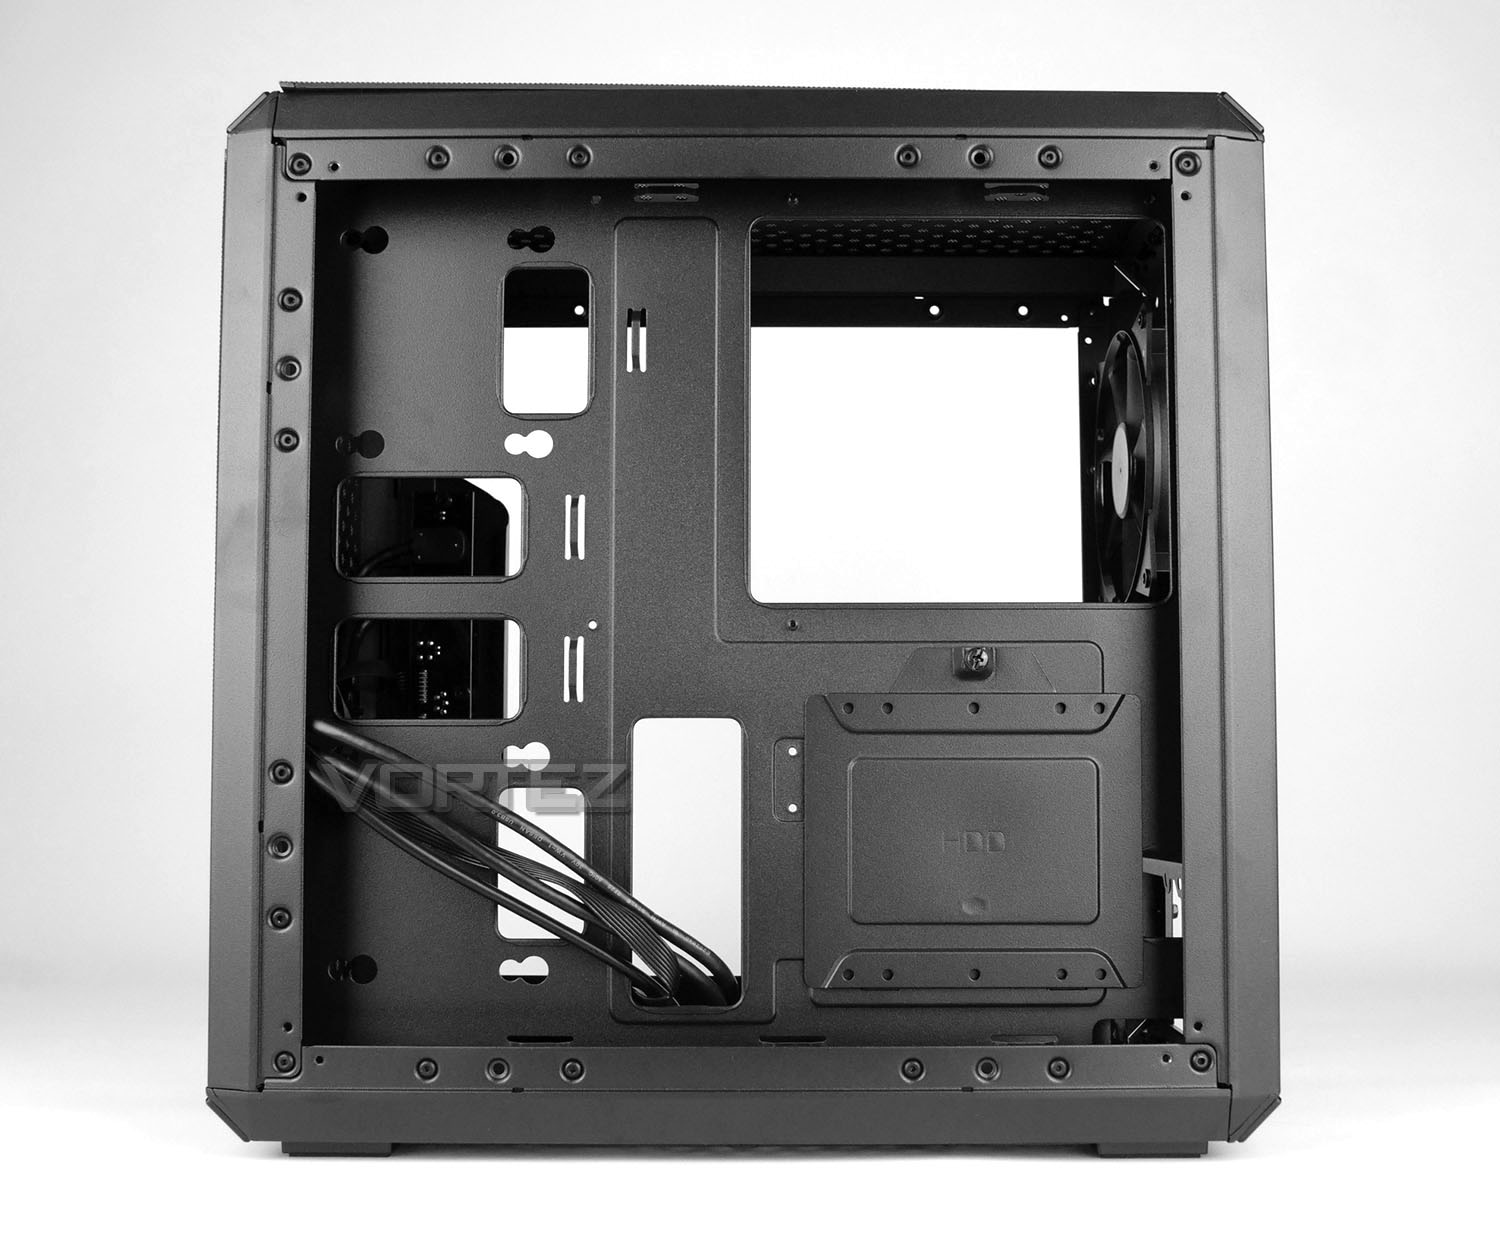
Removing both panels from Q300L we can now gain a better understanding of the internal design and features. This case can accommodate Micro ATX and Mini-ITX form factors and while being quite compact, still allows for a decent assortment of hardware to be installed. There is room for both 3.5” and 2.5” drives and reasonable space for maintaining good cable management as we’ll see later on!
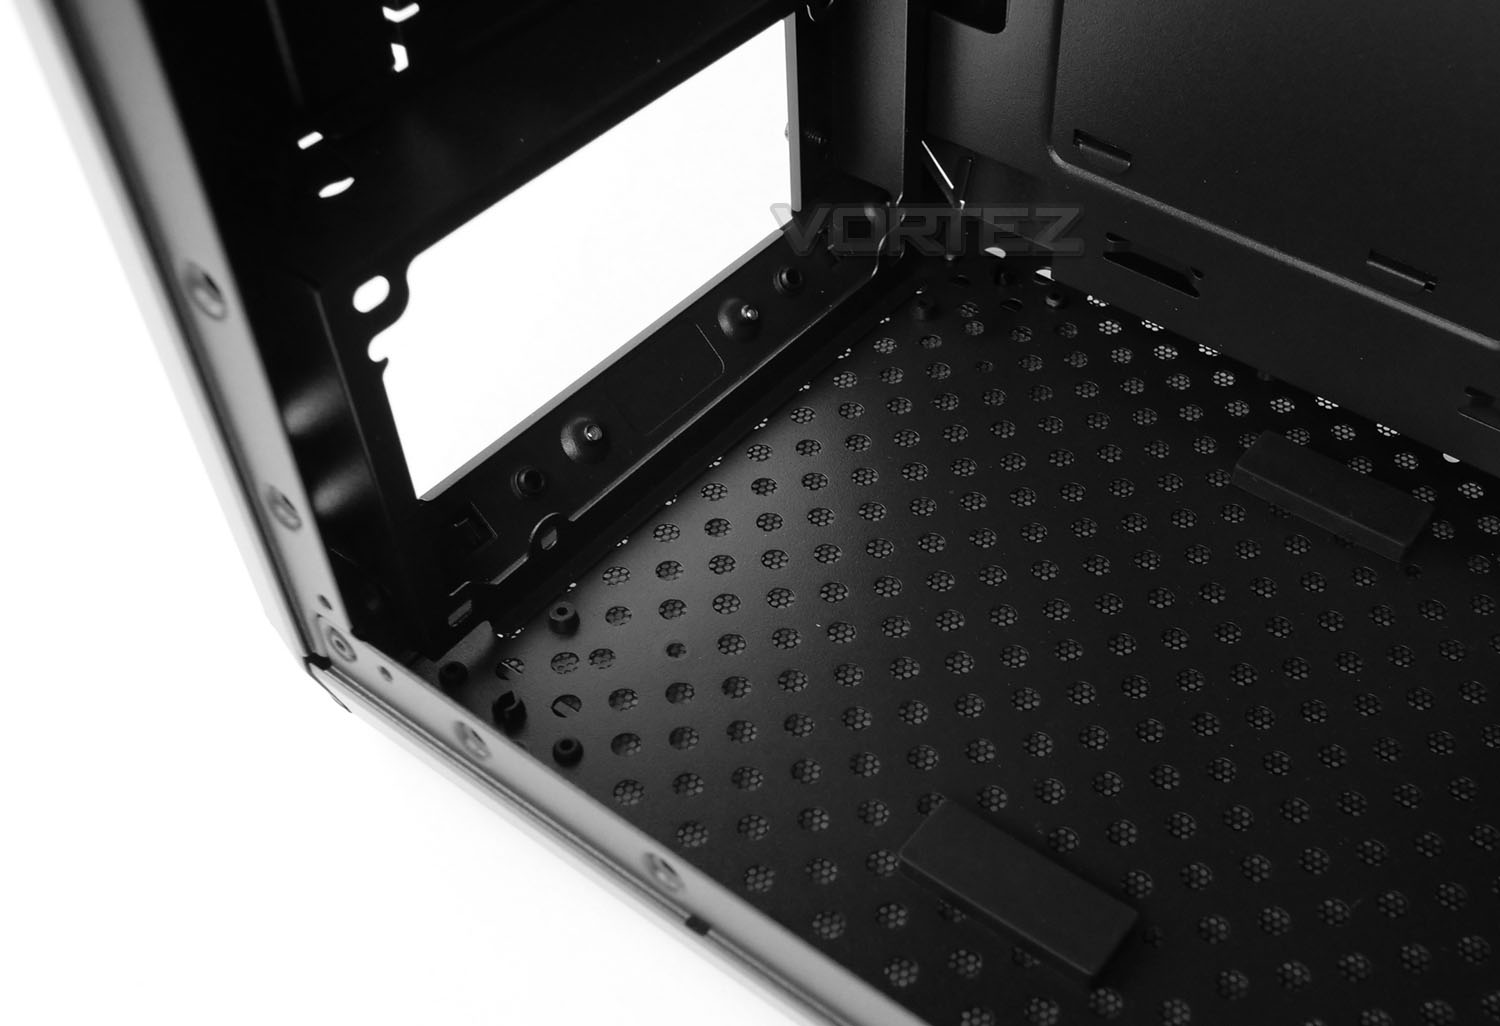
In the lower region we have the area for installing the PSU which we’re pleased to report has the rubber mounts for anti-vibration and soft cushioning. Quite a few cases which hold a bigger price-tag than Q300L lack this simple feature so this is well worth mentioning. Cooler Master has included an adapter bracket for installing the PSU – this will need to be removed and attached, before the unit goes in.
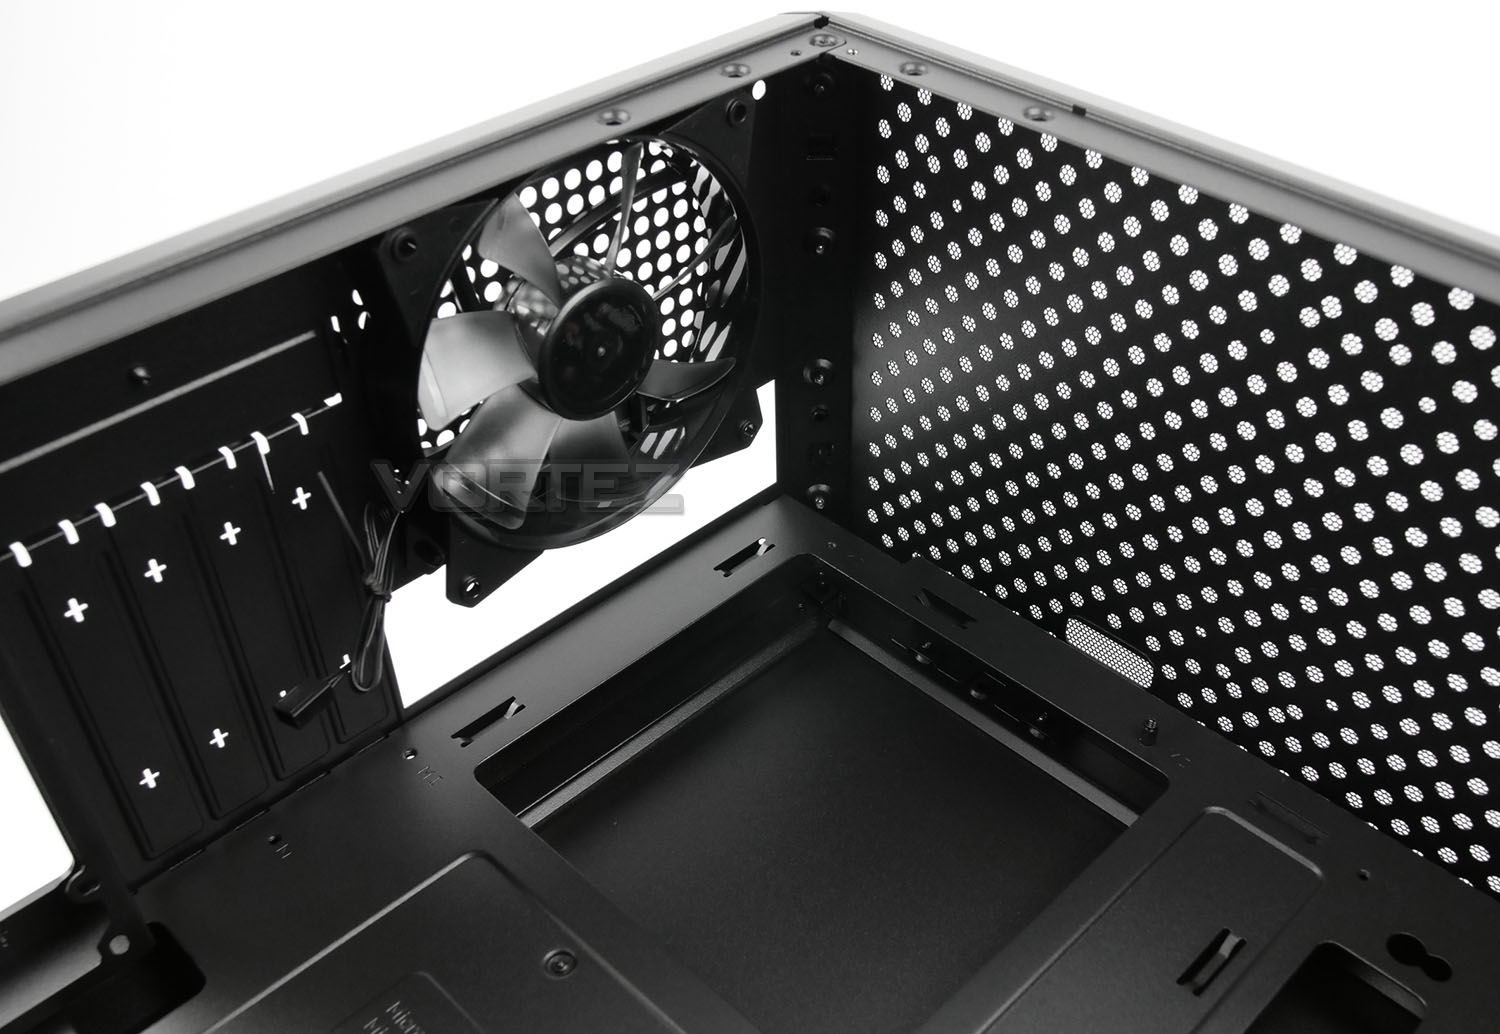
As we mentioned earlier, there are four PCI covers inside Q300L, all of which are disposable. Above this there is a 120mm rear exhaust fan which is the only fan found within this chassis, though there are optional spots such as those at the top of the case for installing additional cooling – the top can house 2x 120mm fans.
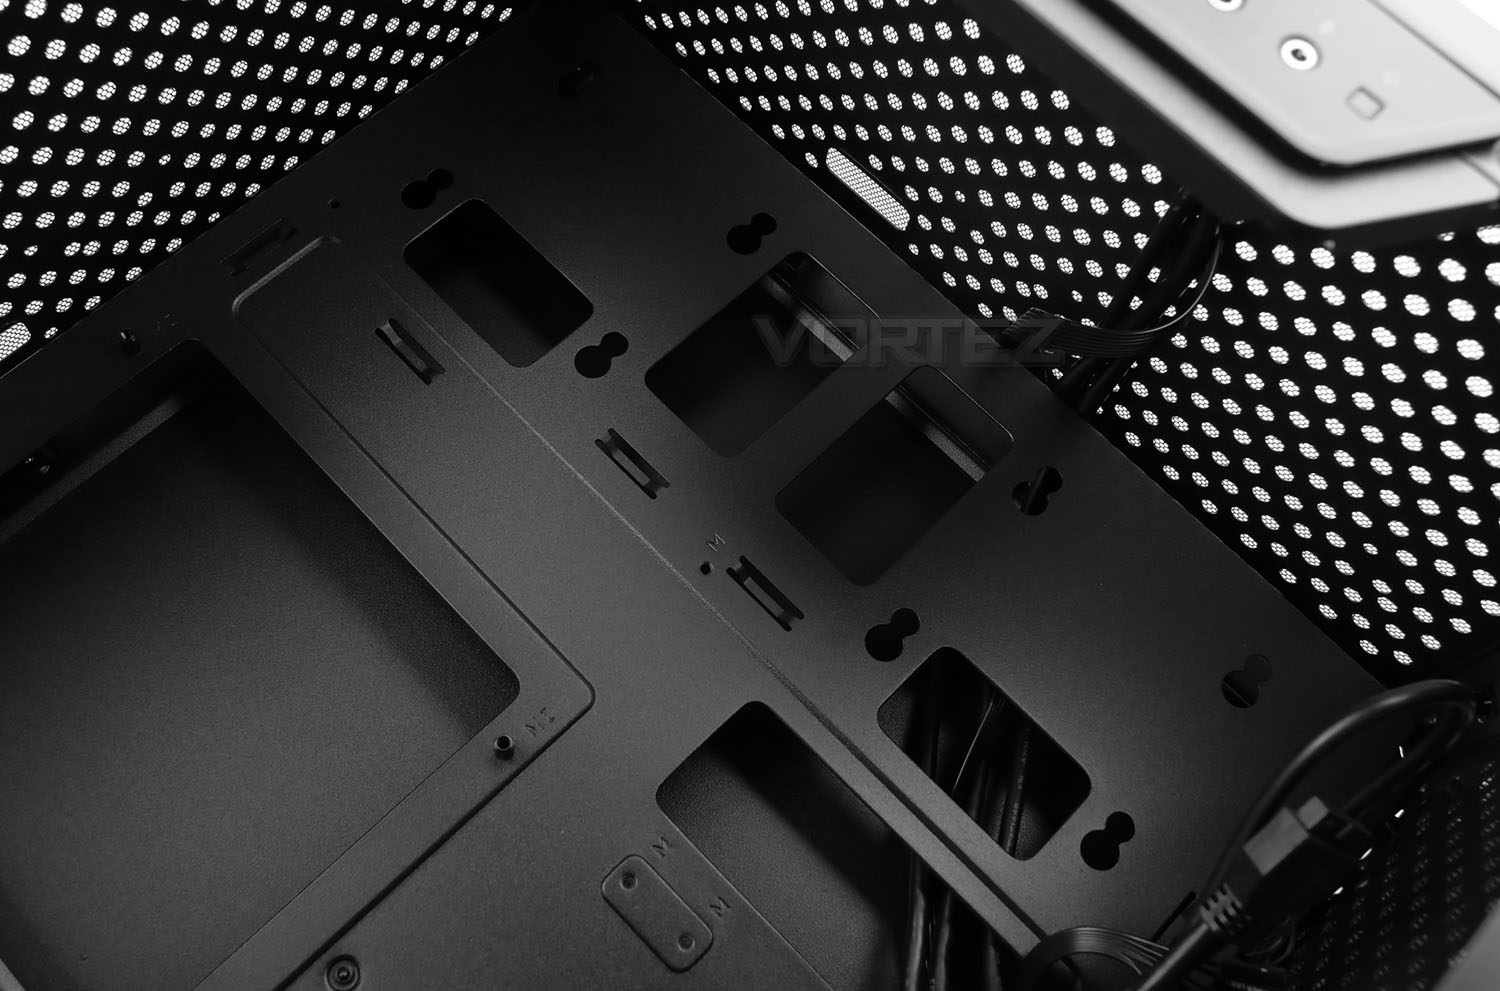
Towards the front of Q300L there are two sets of SSD mounts sat directly on the motherboard tray. For larger drives the back of the motherboard tray features a 3.5” drive adapter – on the next page we’ll install our test system inside this case and report back on the experience!
Installation
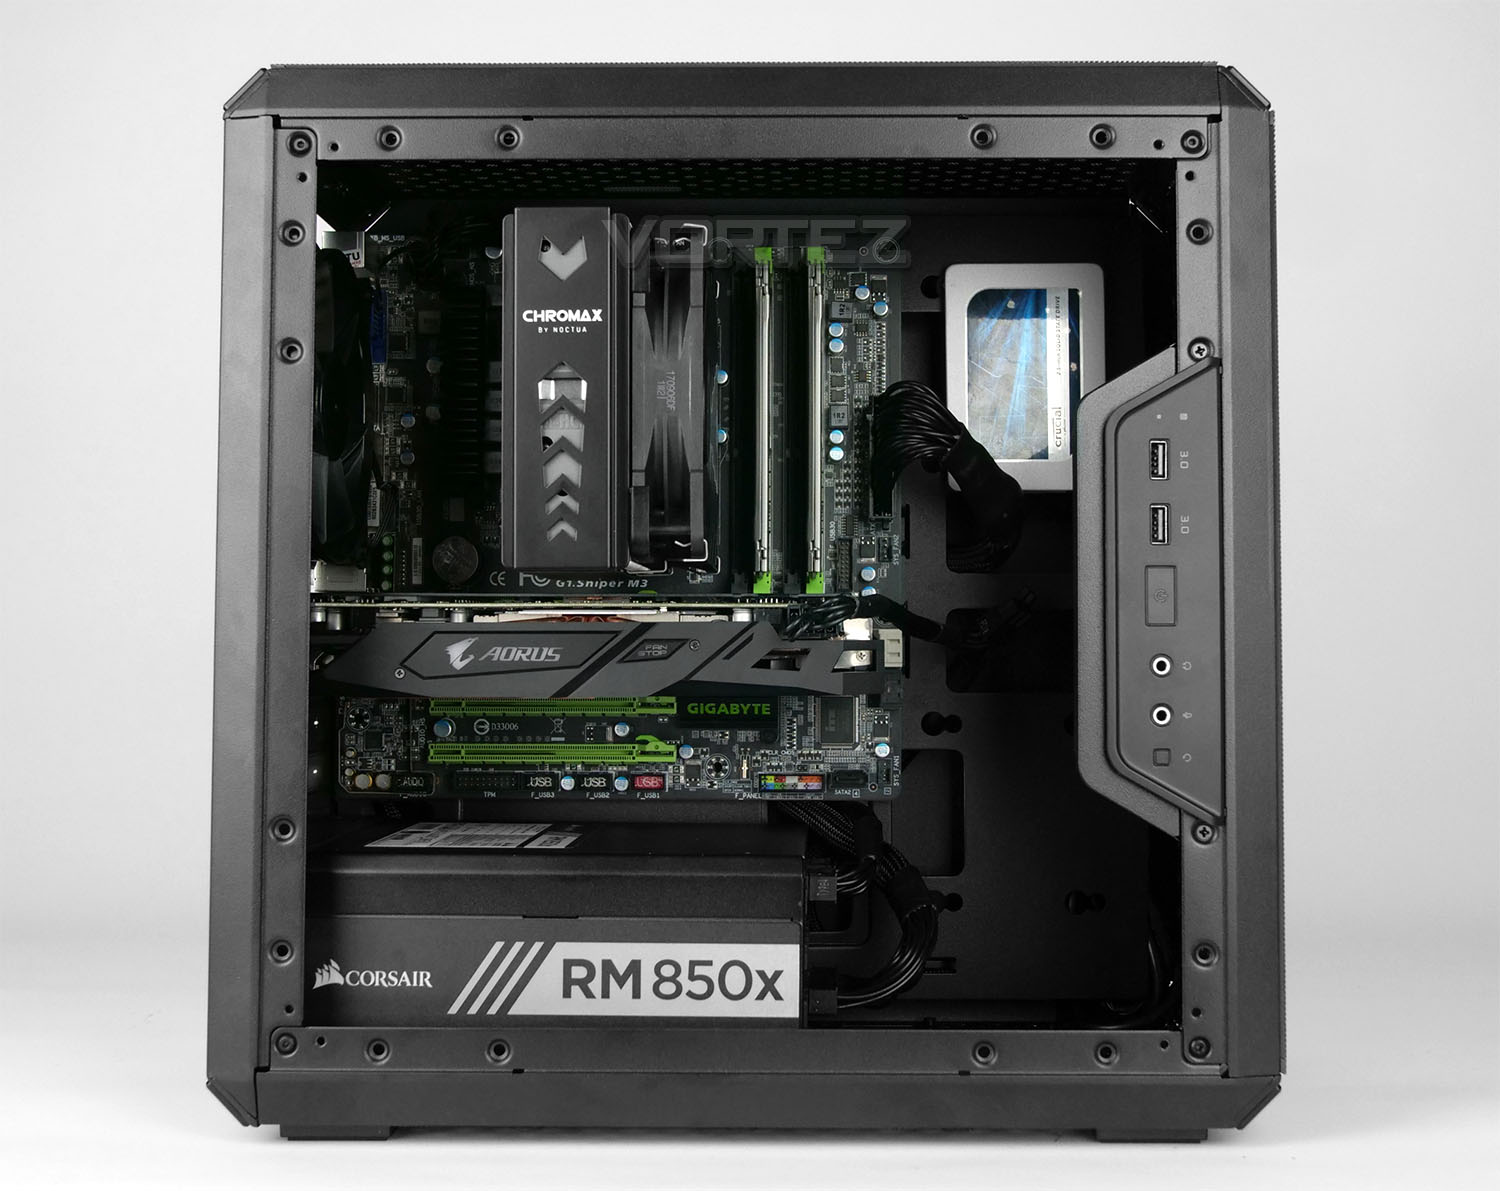
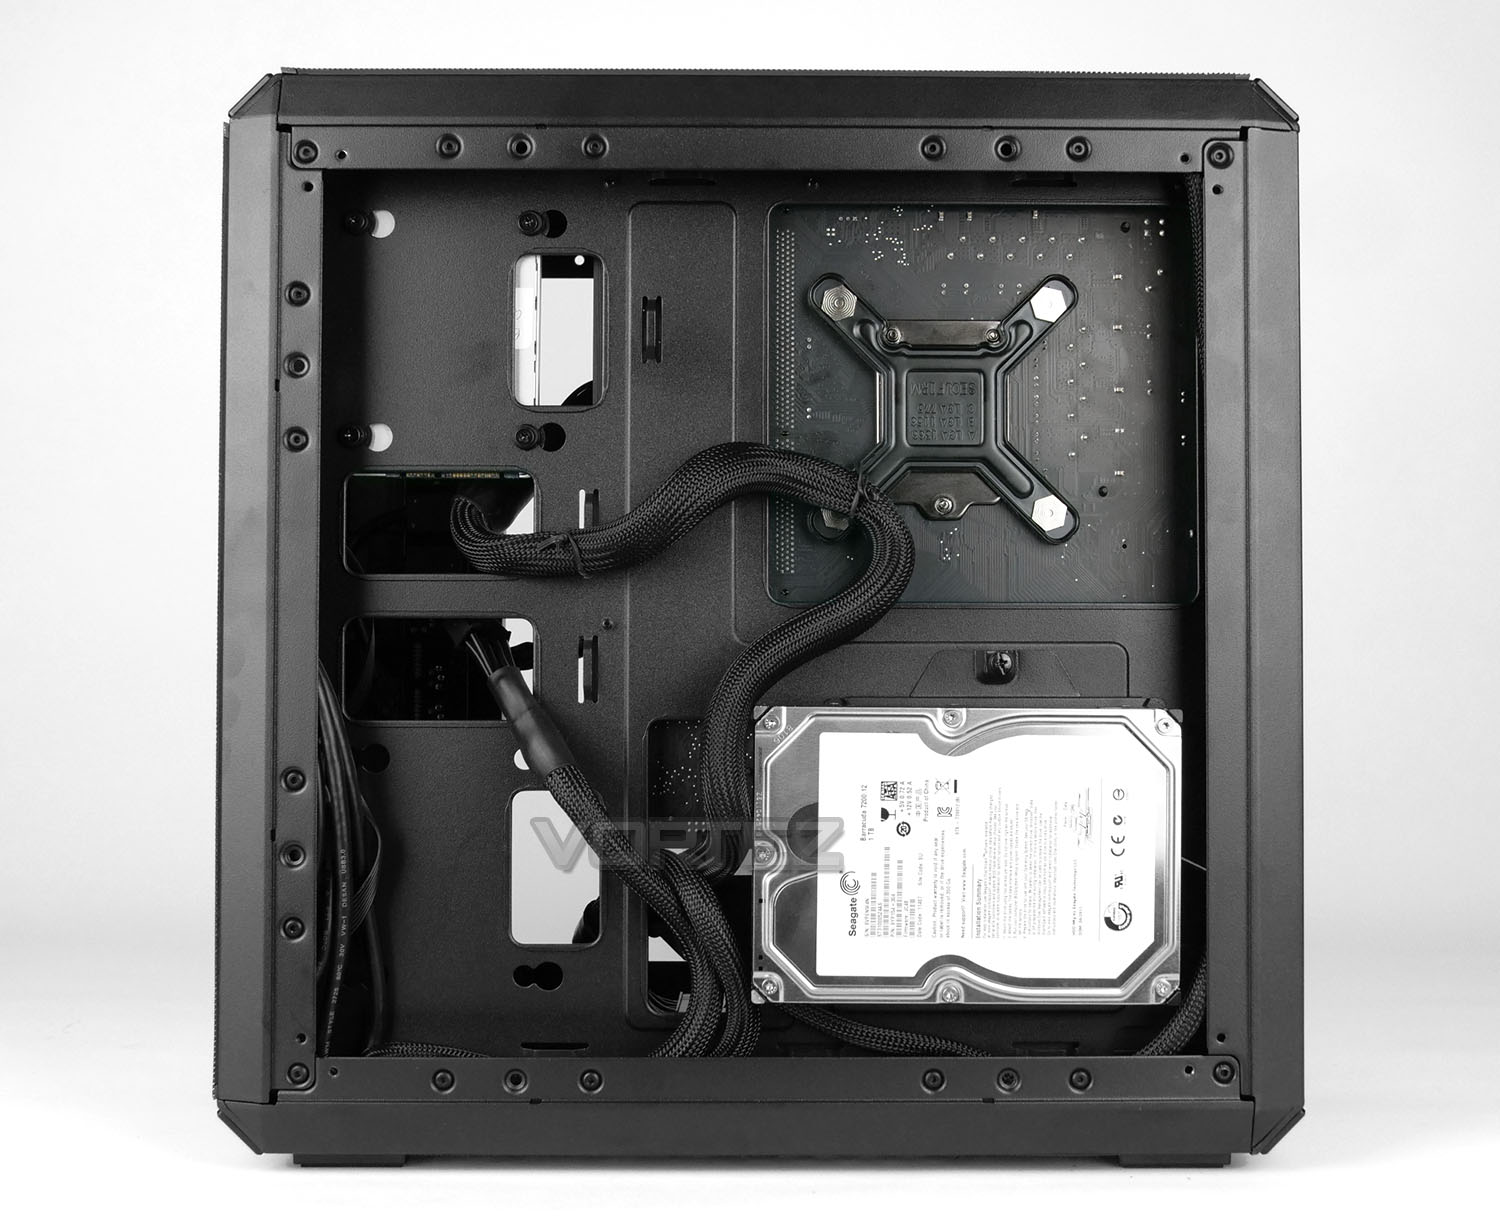
The installation process with Q300L is one which requires little effort thanks to the helpful design implementations that Cooler Master has employed. We were surprised by how much high-end kit this small, compact chassis can house and were even more impressed by how easy the cable management was to keep under control. The Q300L handled our Micro ATX test system with ease!
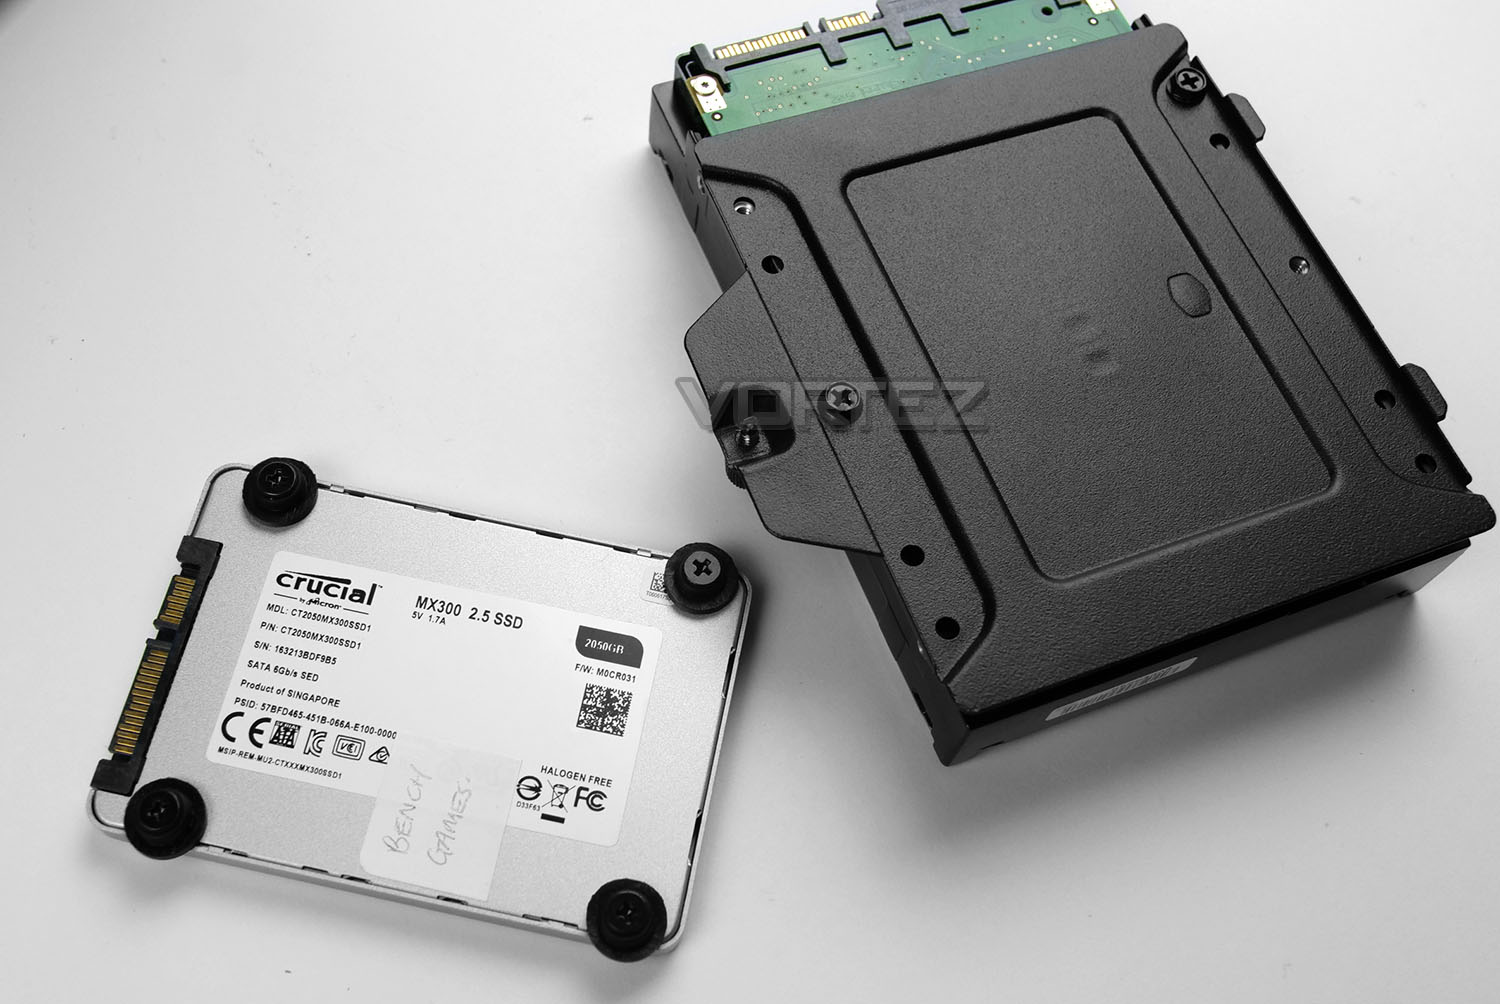
Installing such items as storage drives is very straightforward – for 2.5” drives, rubber plugs and screws just need attaching to the underside and then the drive just slides into the mounting holes on the motherboard tray. While for a larger mechanical drive like a 3.5”, the mounting bracket just needs detaching from the chassis and the drive sits on the bracket and screws just need to be applied to the underside as shown above.
Clearance: CPU Cooler, GPU, Cable Management
Space inside a computer chassis is very important as it establishes whether specific hardware will or won’t fit comfortably.
CPU Cooler
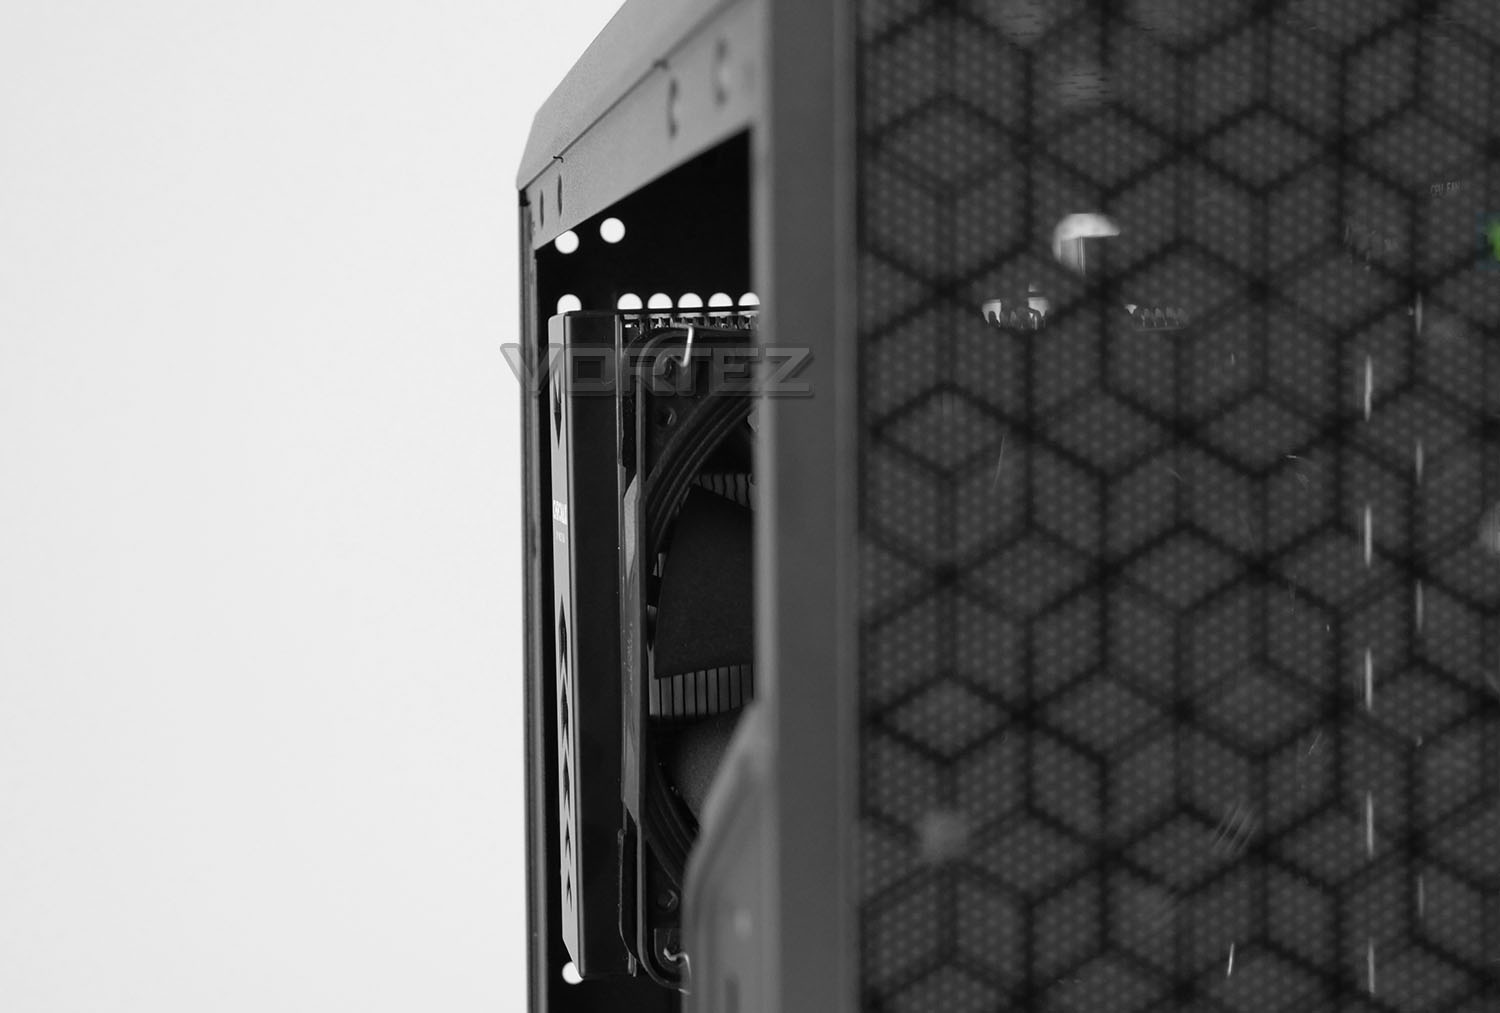
Cooler Master’s claims that Q300L can house CPU coolers up to 157mm rings true – we installed the Noctua NH-U12S which is 158mm (with the attached chromax cover – 160mm) and the side panel does indeed touch the top of the cooler, but not enough to create a problem.
Graphics Card
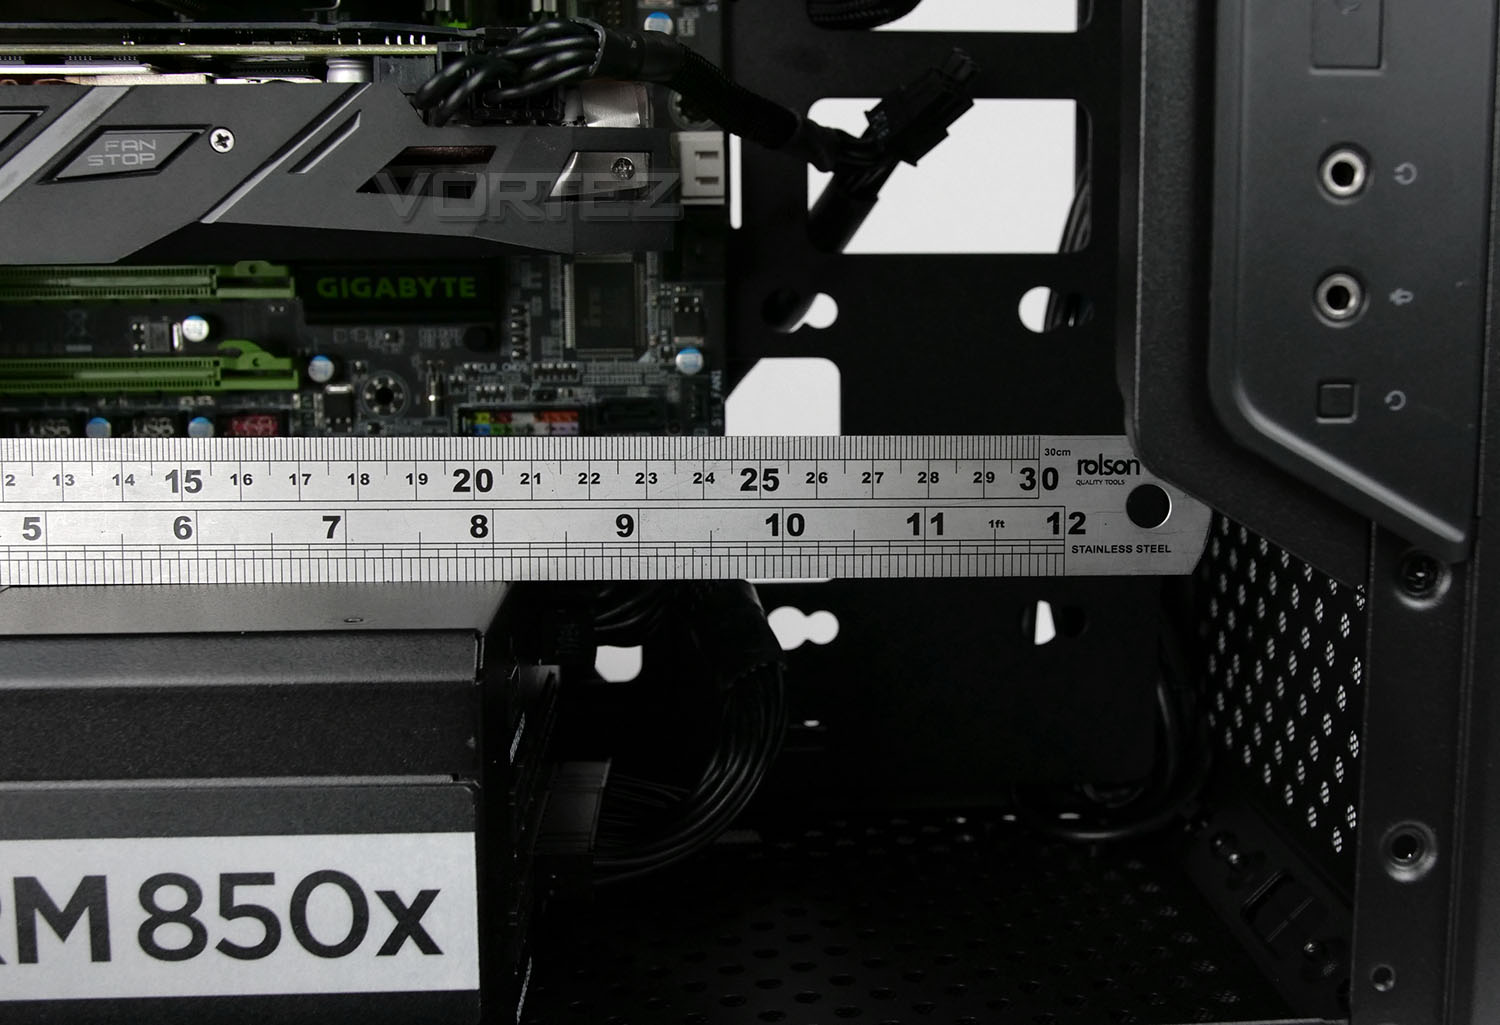
In the graphics card department there is plenty of space for high-performance options with up to around 360mm. Our graphics card (AORUS RX 570) measured just under 240mm and had surplus!
Cable Management
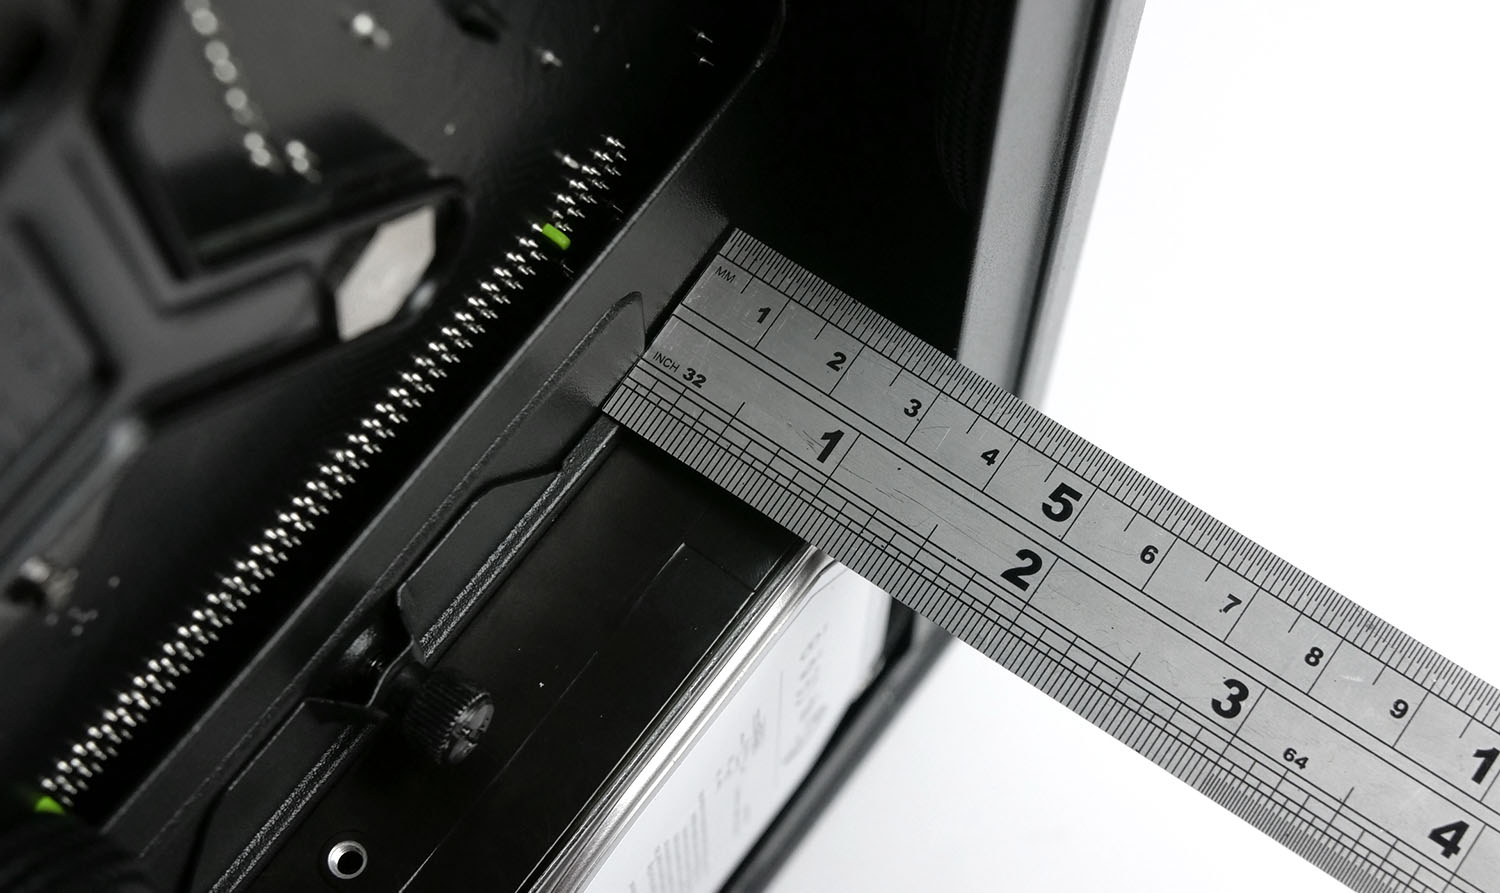
Behind the motherboard tray is the location where the bulk of cables will be tucked away – having sufificent space here is crucial for good cable management. In this area we have approximately 25mm to play with, allowing us to create a very tidy interior within Q300L.
Water Cooling
There are two areas inside Q300L for installing radiators – at the front and rear of the chassis. At the front we can install a 240mm or 120mm radiator while at the rear there is accommodation for 120mm.
Conclusion
There’s been strong emphasis on the Mini-ITX and full ATX computer cases in the last few years and you could argue that Micro ATX has been somewhat neglected. It’s nice to see Cooler Master designing for this form factor and in the Q300L we have a very intriguing solution.
As far as physical attraction is concerned, Q300L settles for middle of the road between gamers and minimalism. We think the patterned dust filters on the top and front of this case are stylish and add a unique degree of flair – though we would have liked to see a raised edge or lip to maintain straight fitment and prevent the filters from moving around too easily.
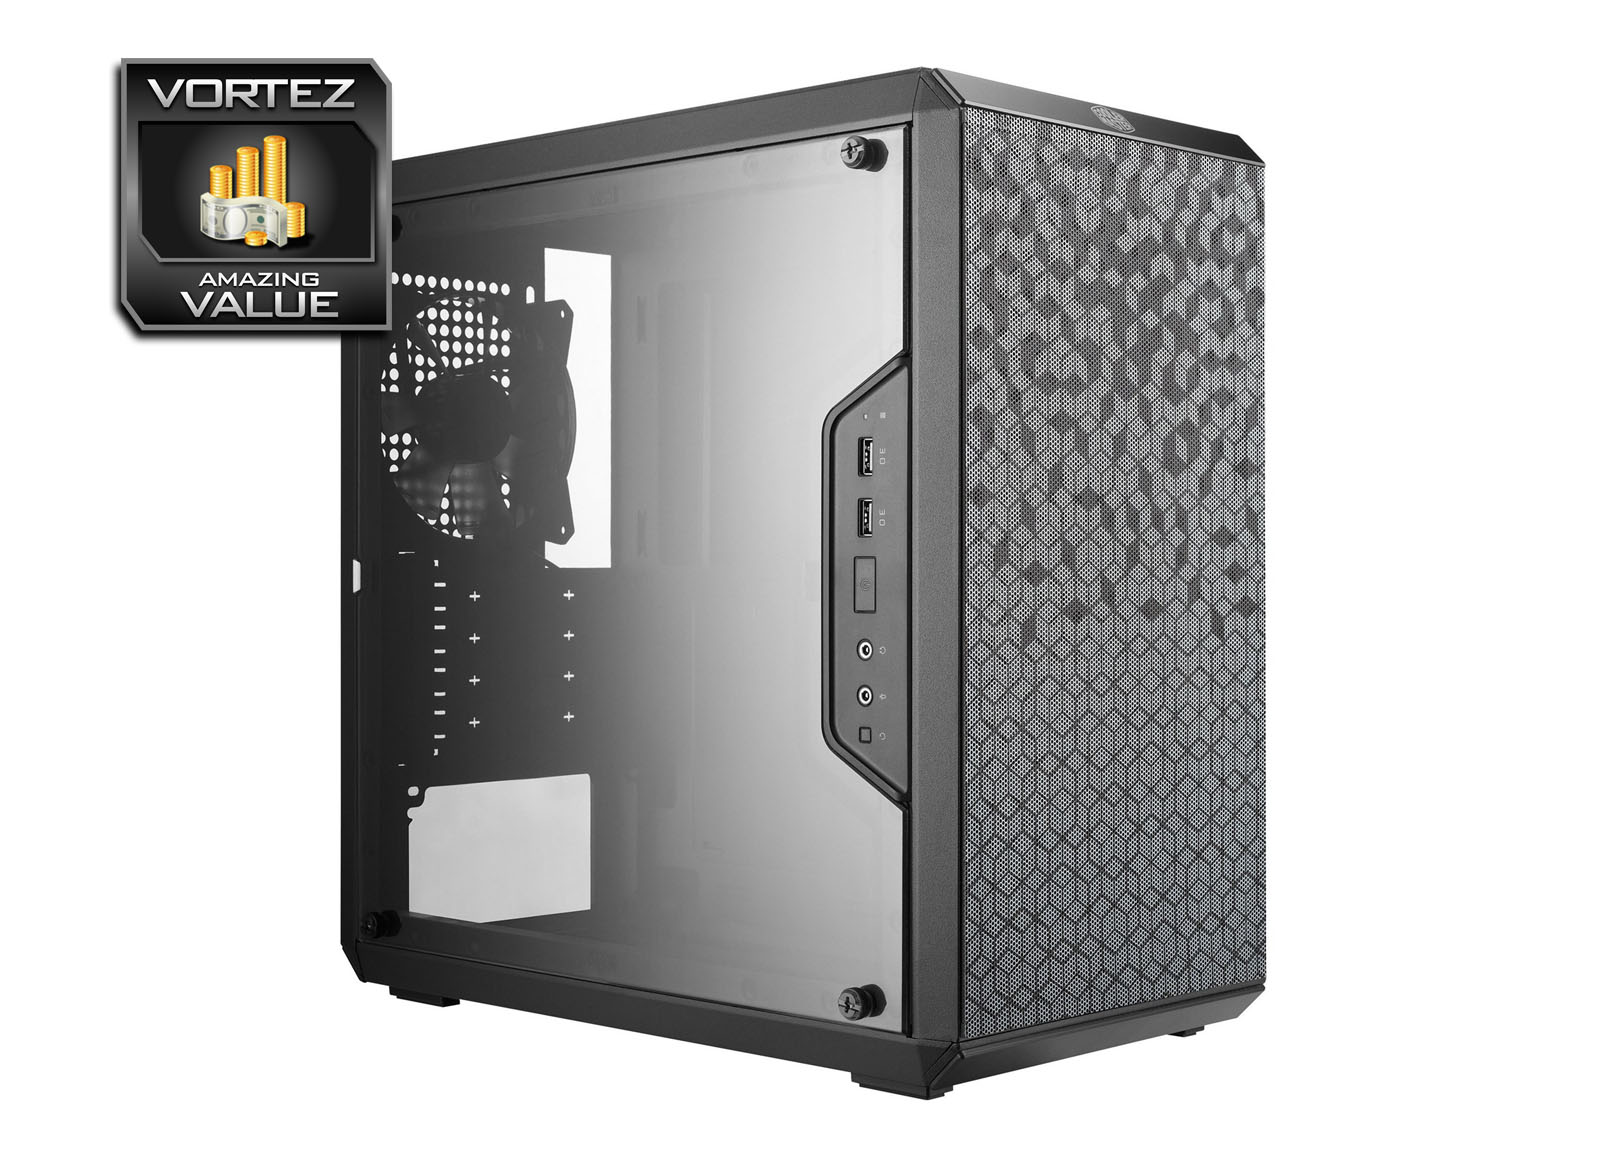
Although we are dealing with a budget oriented chassis (and one which is pretty tight on dimensions), Cooler Master has provided quite a feature-packed case for the short list. This enclosure can house a wealth of high-performance kit including big CPU coolers and large graphics cards. Storage is also catered for quite well with the option to accommodate both 2.5” and 3.5” drives. Fitting water cooling radiators inside Q300L does have its limitations – the largest being a 240mm and this can only be front-mounted.
Cable management is a particular highlight with Q300L and this is largely due to the huge cavity behind the motherboard tray. We were able to easily tuck away redundant cables as a result of the space and hooks available – in turn this assists with keeping the main chamber clean and tidy, which is especially important since the side panel is fully transparent.
The MasterBox Q300L arrives at a cost of just £39.99 GBP – $39.00 USD – $50 AUD. We do of course have just a single cooling fan pre-installed and there are certain cut-backs like disposable PCI covers but we still regard Q300L as a good value for money option for those wanting to tap into a good selection of features for a Micro-ATX build.
Looking for a quirky Micro-ATX computer case which has plenty of features and won’t burn a hole in your pocket? Consider the MasterBox Q300L!
Pros
+ Attractive design
+ Excellent value for money
+ Can lay vertically or horizontally
+ Magnetic dust filters
+ Can house high-end kit
+ Excellent cable management features
+ Accommodates 2.5” and 3.5” drives
Cons
– Disposable PCI covers
– Only one fan included
– Screw pack doesn’t reseal
+ Attractive design
+ Excellent value for money
+ Can lay vertically or horizontally
+ Magnetic dust filters
+ Can house high-end kit
+ Excellent cable management features
+ Accommodates 2.5” and 3.5” drives
Cons
– Disposable PCI covers
– Only one fan included
– Screw pack doesn’t reseal
Click here for an explanation of our awards at Vortez.net.
Stay connected with the Vortez Social Media pages:
Join in with the discussions on Discord