XPG, a subsidiary of ADATA, are moving from strength to strength in the PC industry. Today we evaluate their first effort within the all-in-one watercooling segment.

Product on Review: XPG LEVANTE 240
Manufacturer: XPG
Street Price: GBP £128.00 / USD $149.99
XPG were established by their parent company ADATA with the aim of providing customers with high-performance products, focussing mainly on memory kits and slowly evolving into a whole plethora of equipment, including all-in-one watercooling loops which we’ll look at today.
The XPG LEVANTE 240 features an Asetek closed-loop design, employed by many of the top AIO manufacturers, with performance that should be up there with the best thanks to a thermally optimised copper plate and 240mm radiator.
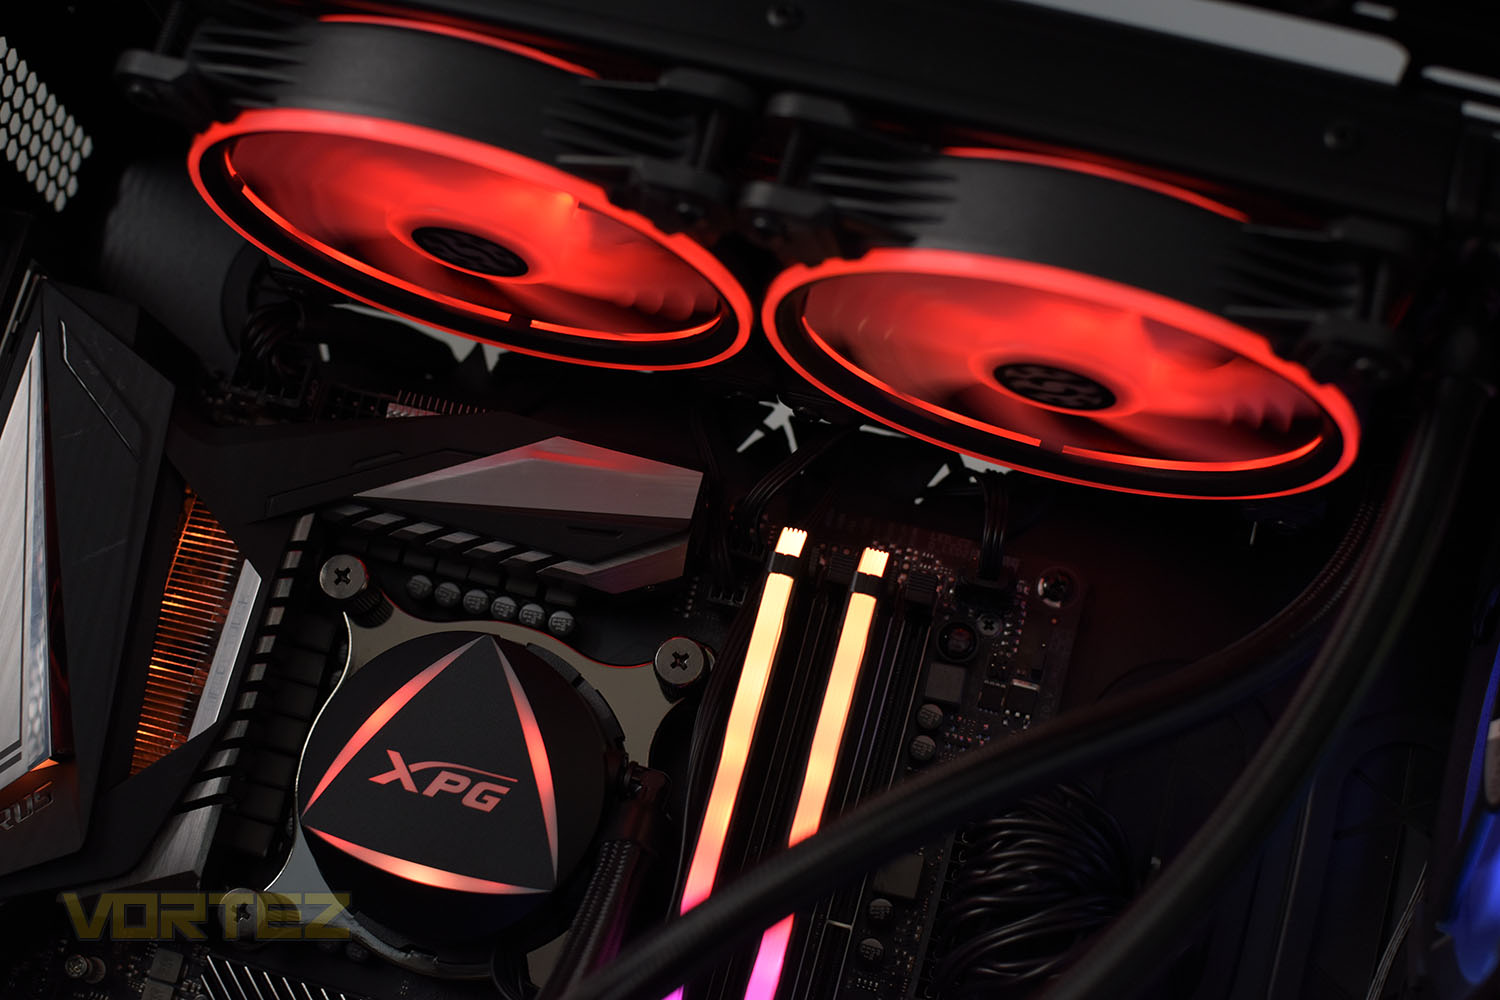
XPG have also equipped both the pump housing and 120mm radiator fans with RGB lighting to give your case a dash of colour and thanks to full Intel and AMD socket support, compatibility should be widespread. Intel’s latest LGA1200 socket should be supported also.
Packed with a 5-year warranty, the LEVANTE 240 offers more than most manufacturers, but the £128.00 price tag competes directly with other 240mm options. We’ll have to see if the performance figures speak for themselves.
XPG on the LEVANTE 240:
XPG LEVANTE 240 Addressable RGB CPU Cooler uses Asetek’s latest cooling solution to ensure CPU temperature management is at the highest quality and result. Its thermally optimized copper plate with 0.15mm-thin micro channel, providing large cooling area and boosting heat exchange efficiency.
Technical Specifications
Water Block Dimension (H*W*D): 86 x 72 x 36 mm
Water Block Material: Copper
CPU Socket Support:
Intel: LGA 1366,115x,2066,2011
AMD: AM4
Thermal Grease: Pre-applied
Radiator Dimension: 272 x 121 x 27 mm
Radiator Material: Aluminum
Tube: Sleeved Rubber tube
Fan size: 2 Fan Slots (120mm)
Fan Dimension: 120 x 120 x 25 mm
Bearing Type: Fluid Dynamic Bearing
Fan Speed: 600 ~ 2000RPM ± 10%
Fan Static Pressure: 1.42mm-H2O
Fan Air Flow: 61.5 CFM
Fan Noise: 34.0 dB (A)
Control Mode: PWM
Water Block Material: Copper
CPU Socket Support:
Intel: LGA 1366,115x,2066,2011
AMD: AM4
Thermal Grease: Pre-applied
Radiator Dimension: 272 x 121 x 27 mm
Radiator Material: Aluminum
Tube: Sleeved Rubber tube
Fan size: 2 Fan Slots (120mm)
Fan Dimension: 120 x 120 x 25 mm
Bearing Type: Fluid Dynamic Bearing
Fan Speed: 600 ~ 2000RPM ± 10%
Fan Static Pressure: 1.42mm-H2O
Fan Air Flow: 61.5 CFM
Fan Noise: 34.0 dB (A)
Control Mode: PWM
Packaging & Bundle
XPG’s trademark black and red colour scheme is represented on the packaging, with a clear and full image of the AIO on the front of the box. The small icons around the image also help to briefly show the main features that you’d be interested in.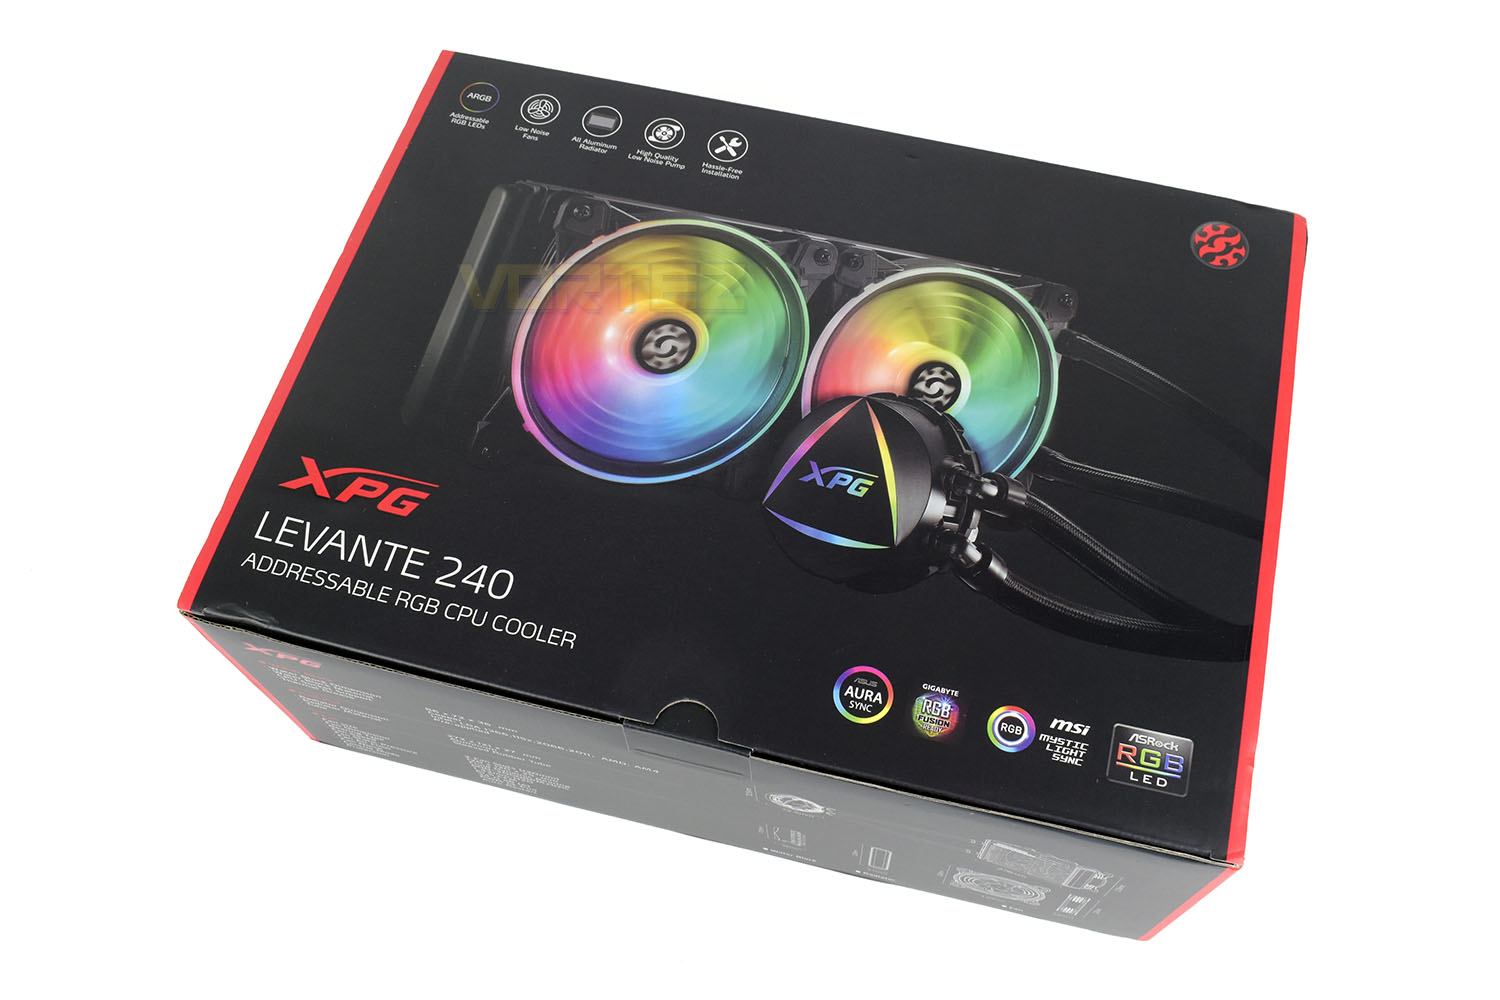
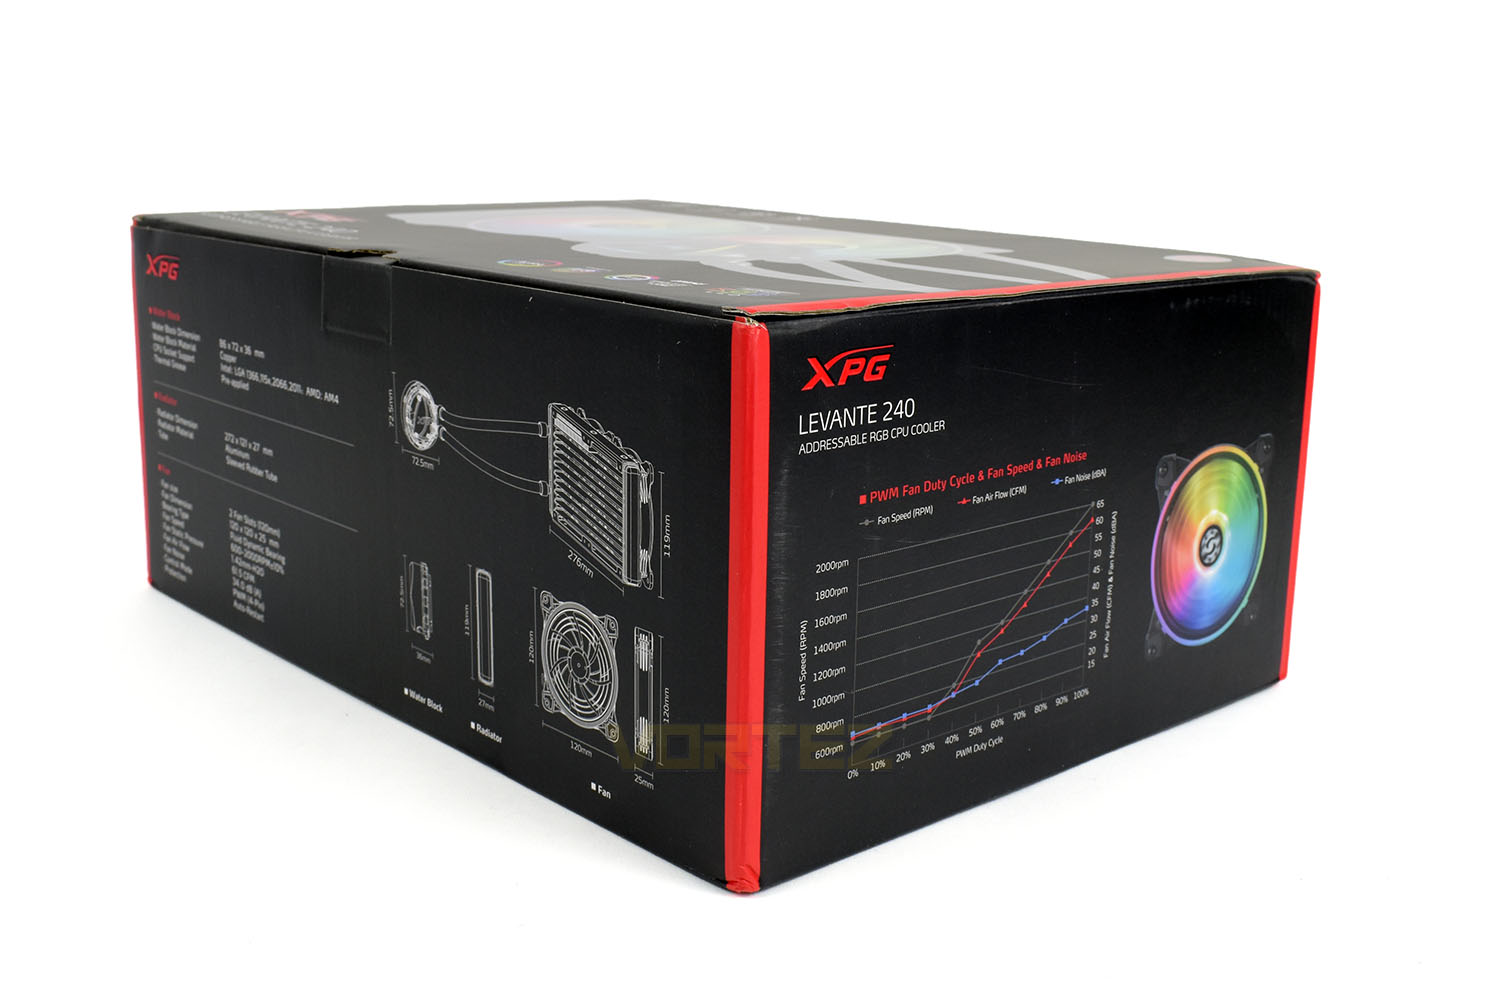
Because of the slightly unusual design of the packaging, where the front of the box opens up, the bottom isn’t used for any kind of details, instead XPG have used the four sides to give some specifics as well as detailed schematics of the individual pieces to help you ensure it’ll fit in your chassis.
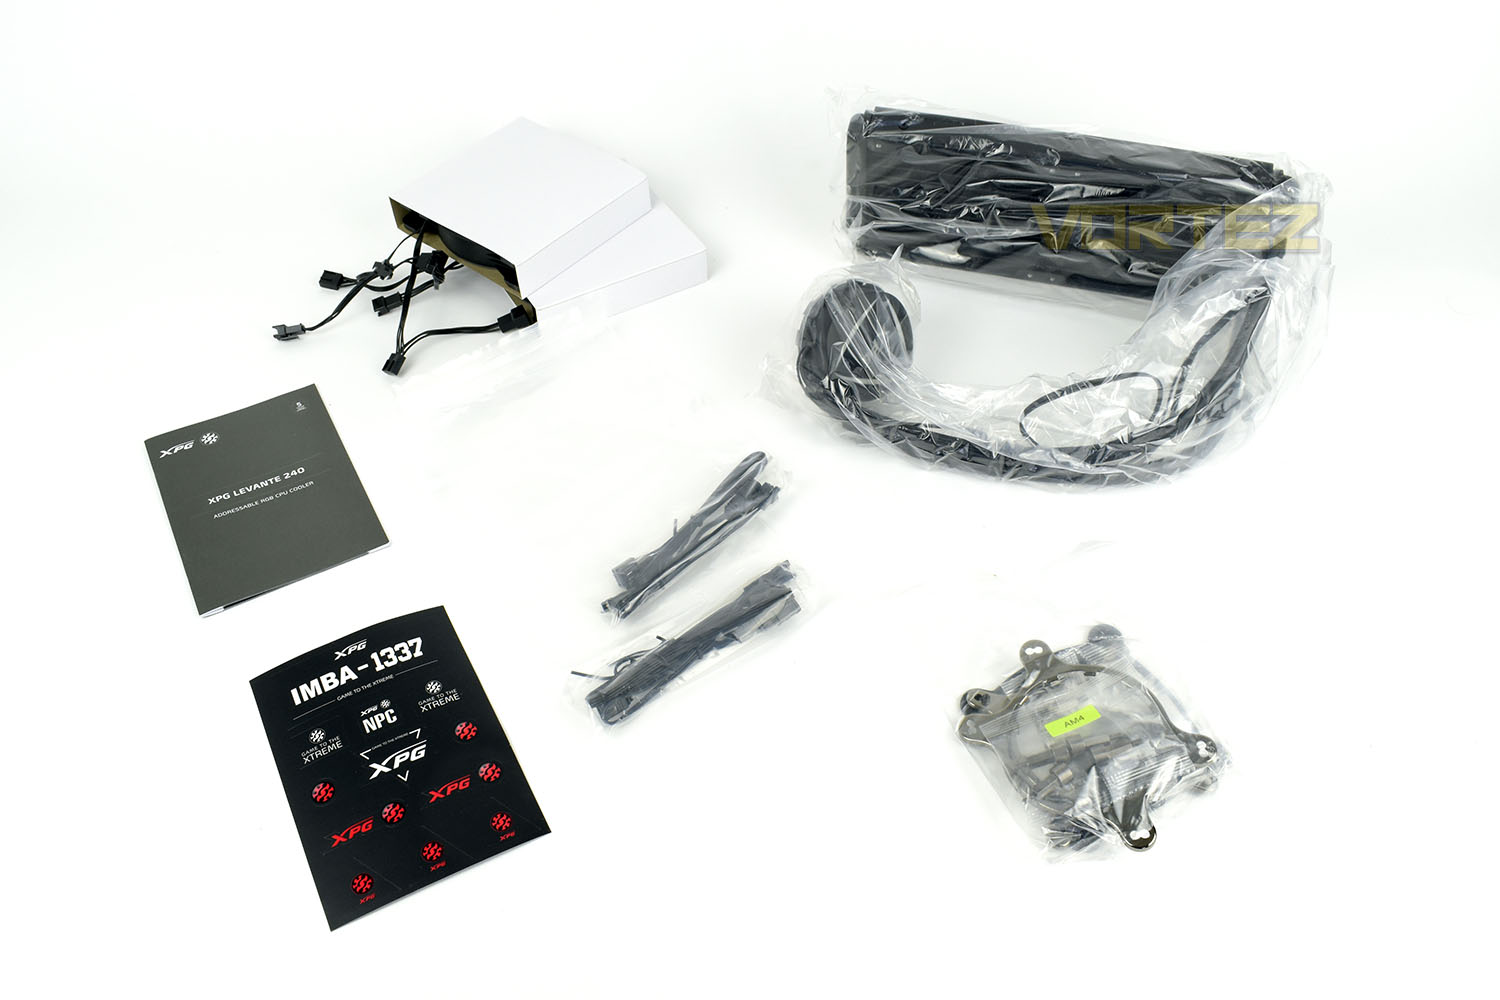
Alongside the AIO loop and 120mm fans, there’s mounting hardware for AMD and Intel, a couple of packets of extension cables, some fancy stickers and the instruction booklet.
Closer Look
Kicking off with the pump enclosure, at roughly 65mm across and only 35mm deep, it’s one of the smallest we’ve come across. The three white sections as well as the XPG logo are RGB-backlit.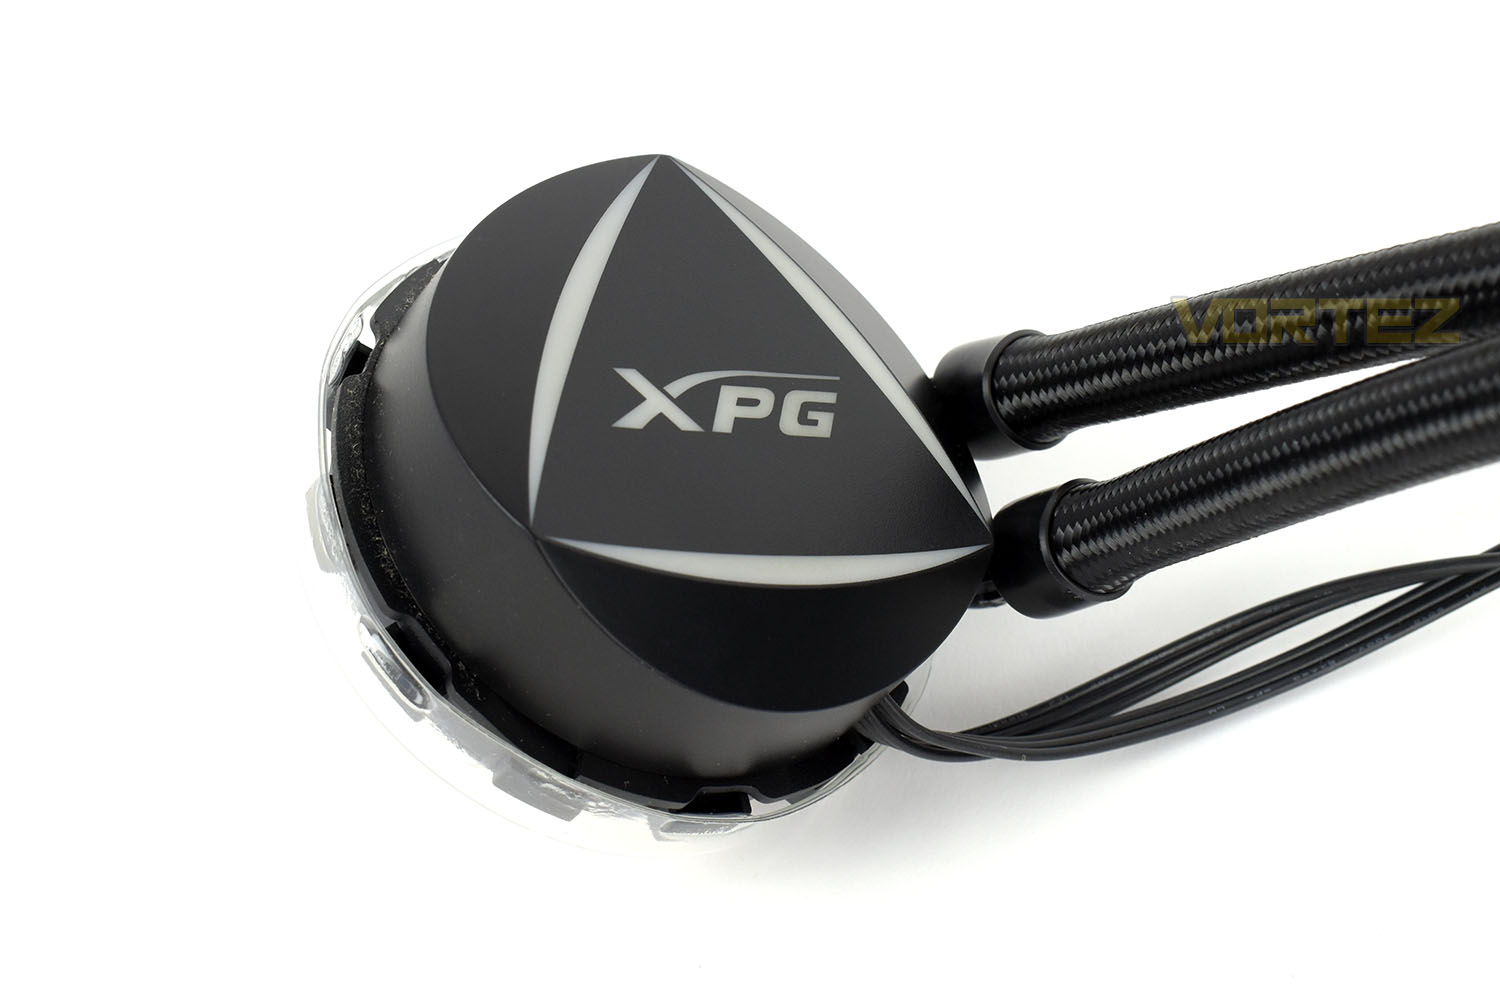
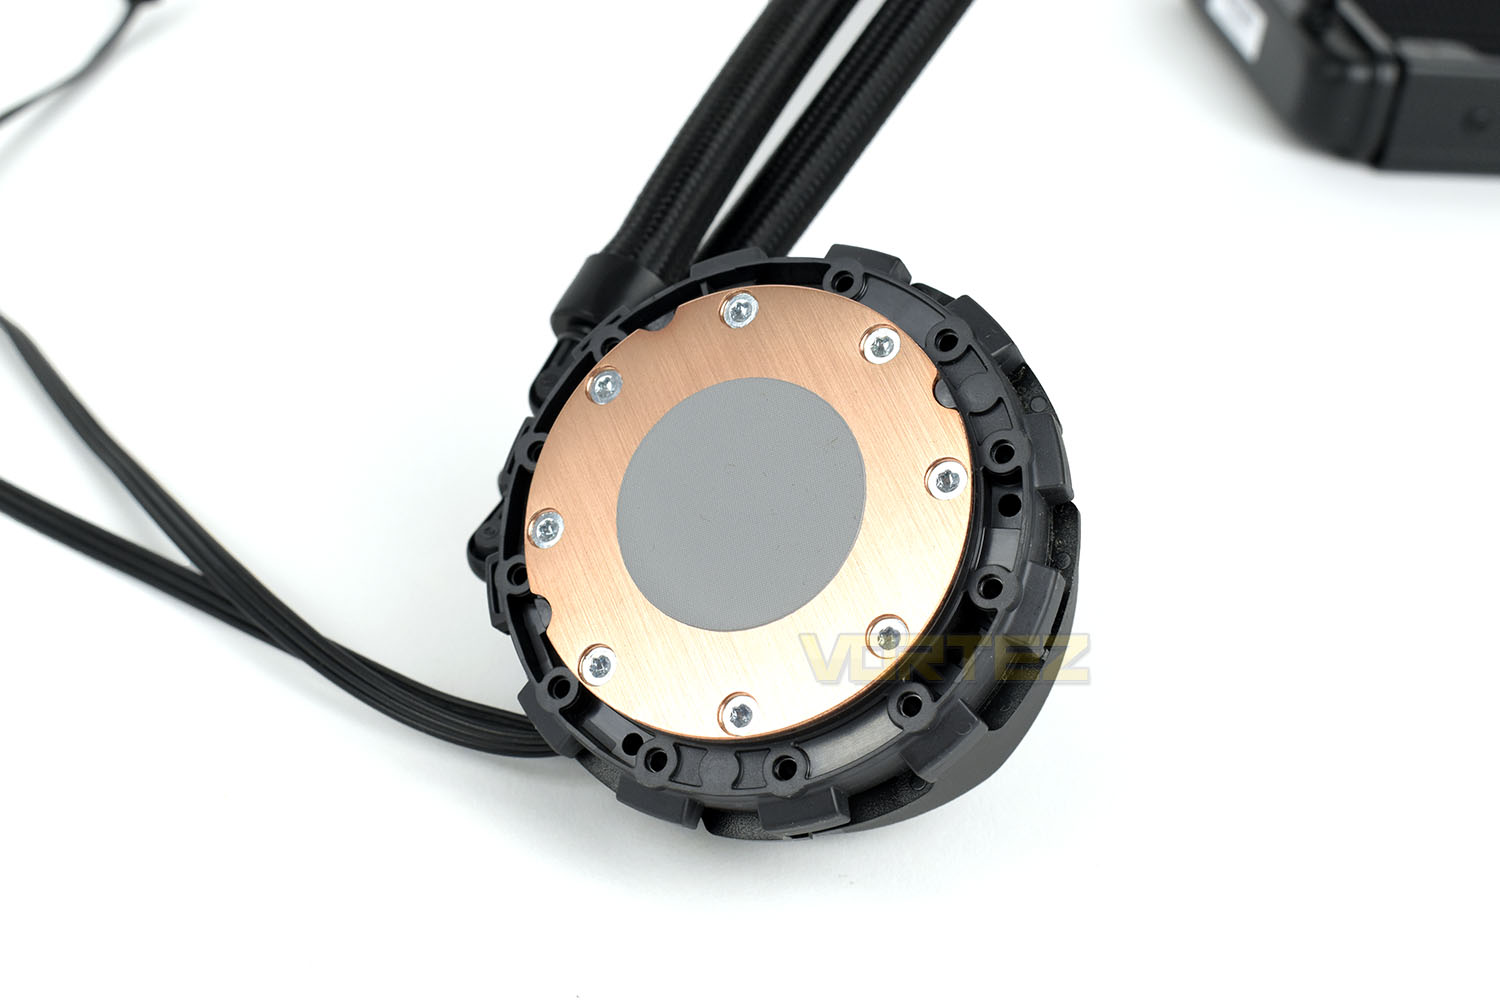
XPG pre-apply a carefully measured dose of thermal paste to the copper coldplate, making installation as easy as possible. No extra paste is included.
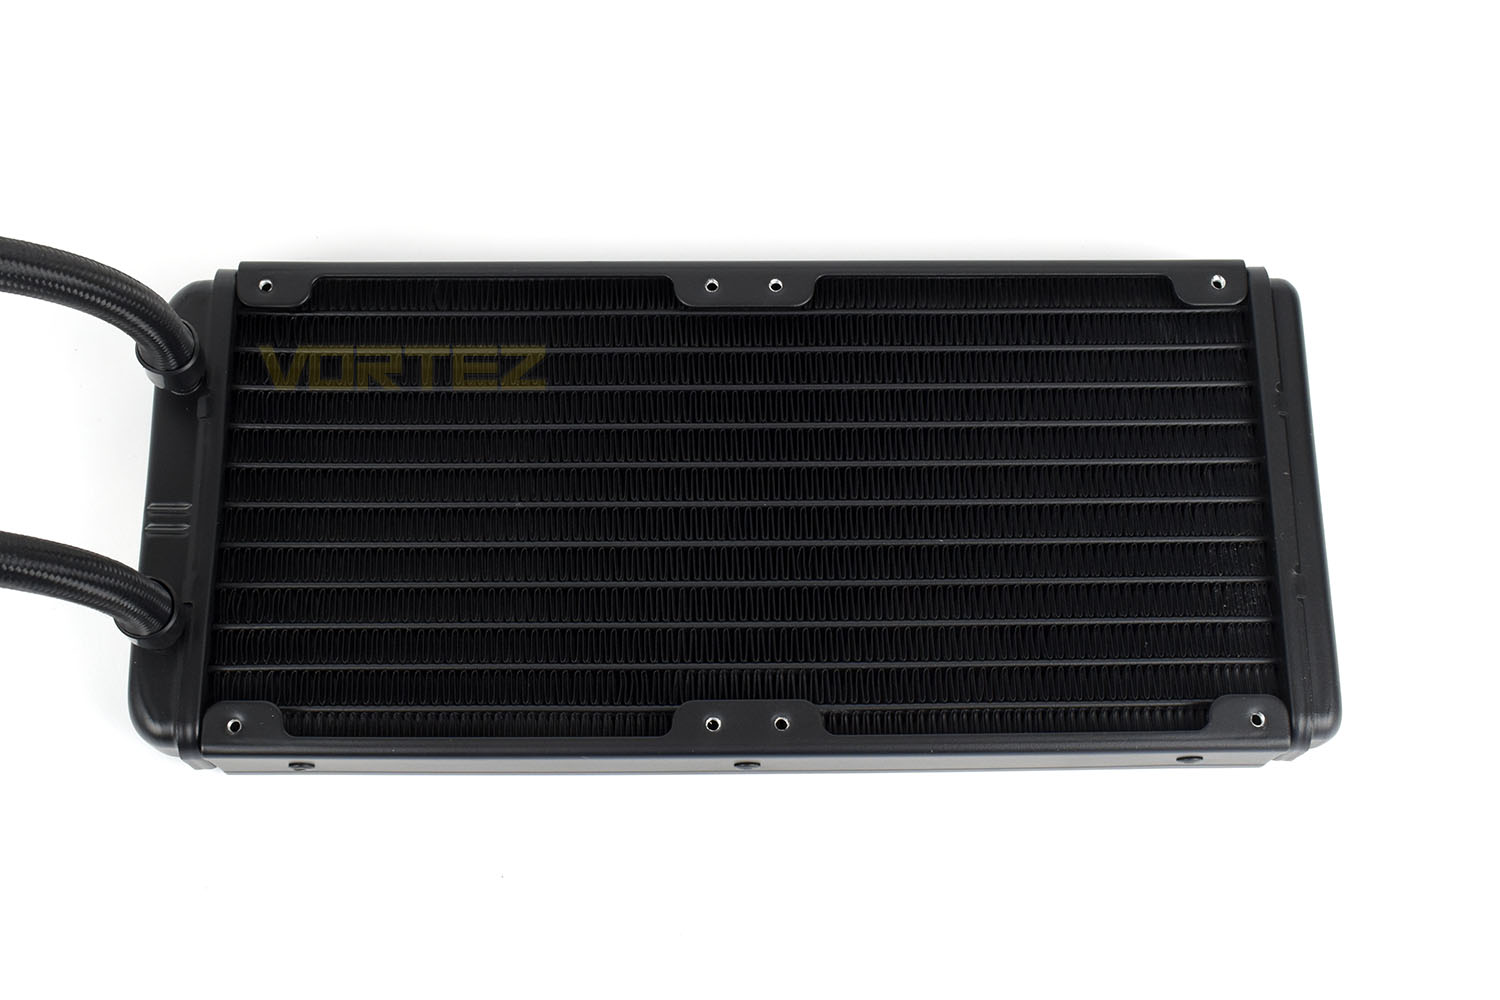
The 240mm radiator is fairly standard as far as AIOs go, there’s no branding on the edges or any frilly bits. It’s an all-aluminium construction for good heat dissipation.
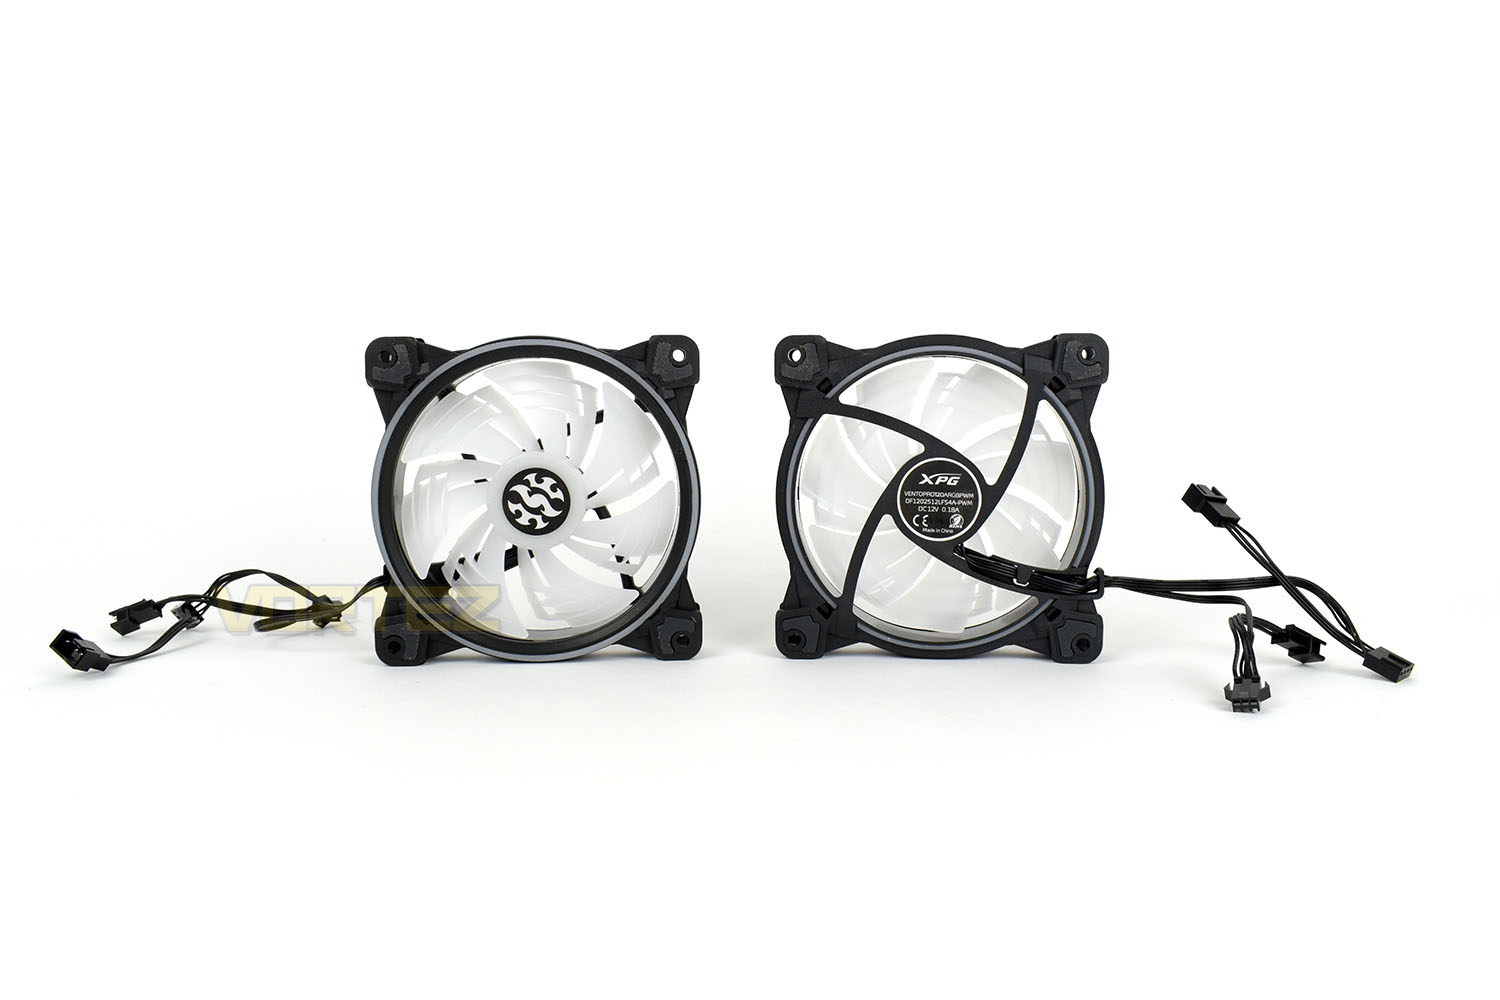
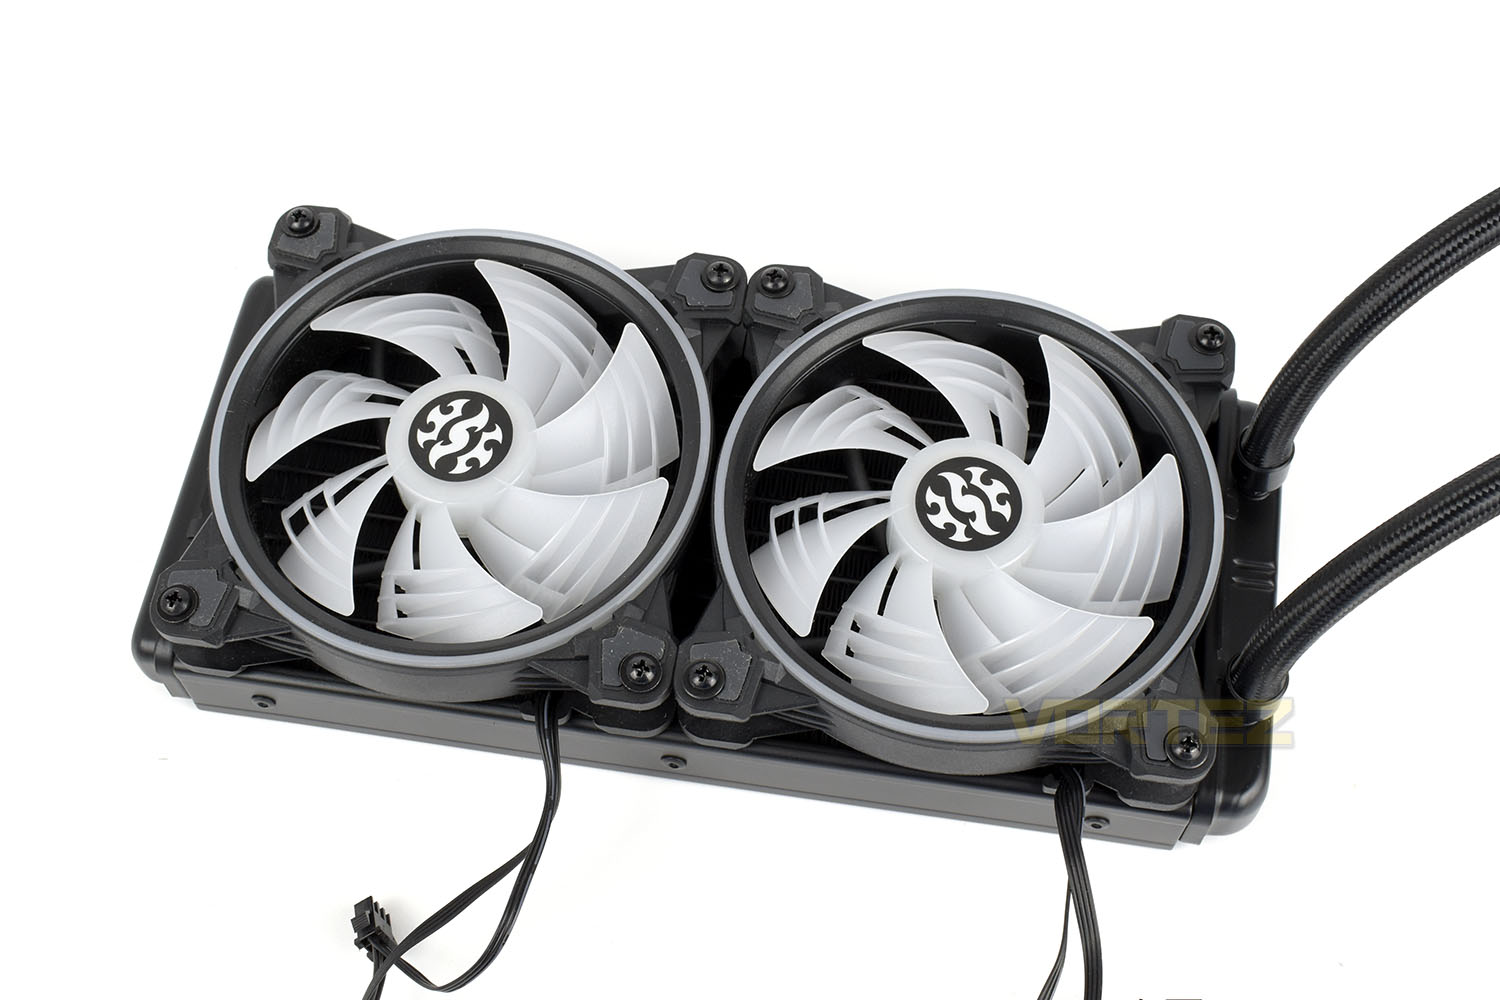
The two included 120mm PWM fans are packed with RGB lighting, both within the hub itself and the outer ring. The outer corners are rubber padded on both sides to help absorb vibrations, reducing noise output. The fan blades themselves feature a fancy design that is seemingly in place to help reduce noise and increase air throughput.
Bolting the fans onto the radiator is an easy affair, and against the black background it’s easier to see those fancy fan blades. The design is incredibly complex so we’ll be paying close attention to the fans for noise output.
RGB Lighting
Below is a demo of the RGB lighting, as you can see the bottom and left RGB sections on the pump enclosure appear to be faulty. We’ve tested this on our GIGABYTE Z390 AORUS MASTER and MSI Prestige X570 Creation with the same results from both.Installation
To begin the installation process, first you’ll need to pick out the Intel or AMD package from the bundle. Weirdly, only the AMD bag is labelled, with the other two bags being unlabelled. For experienced users this won’t be an issue at all but really the Intel bag should have a label on it for simplicity.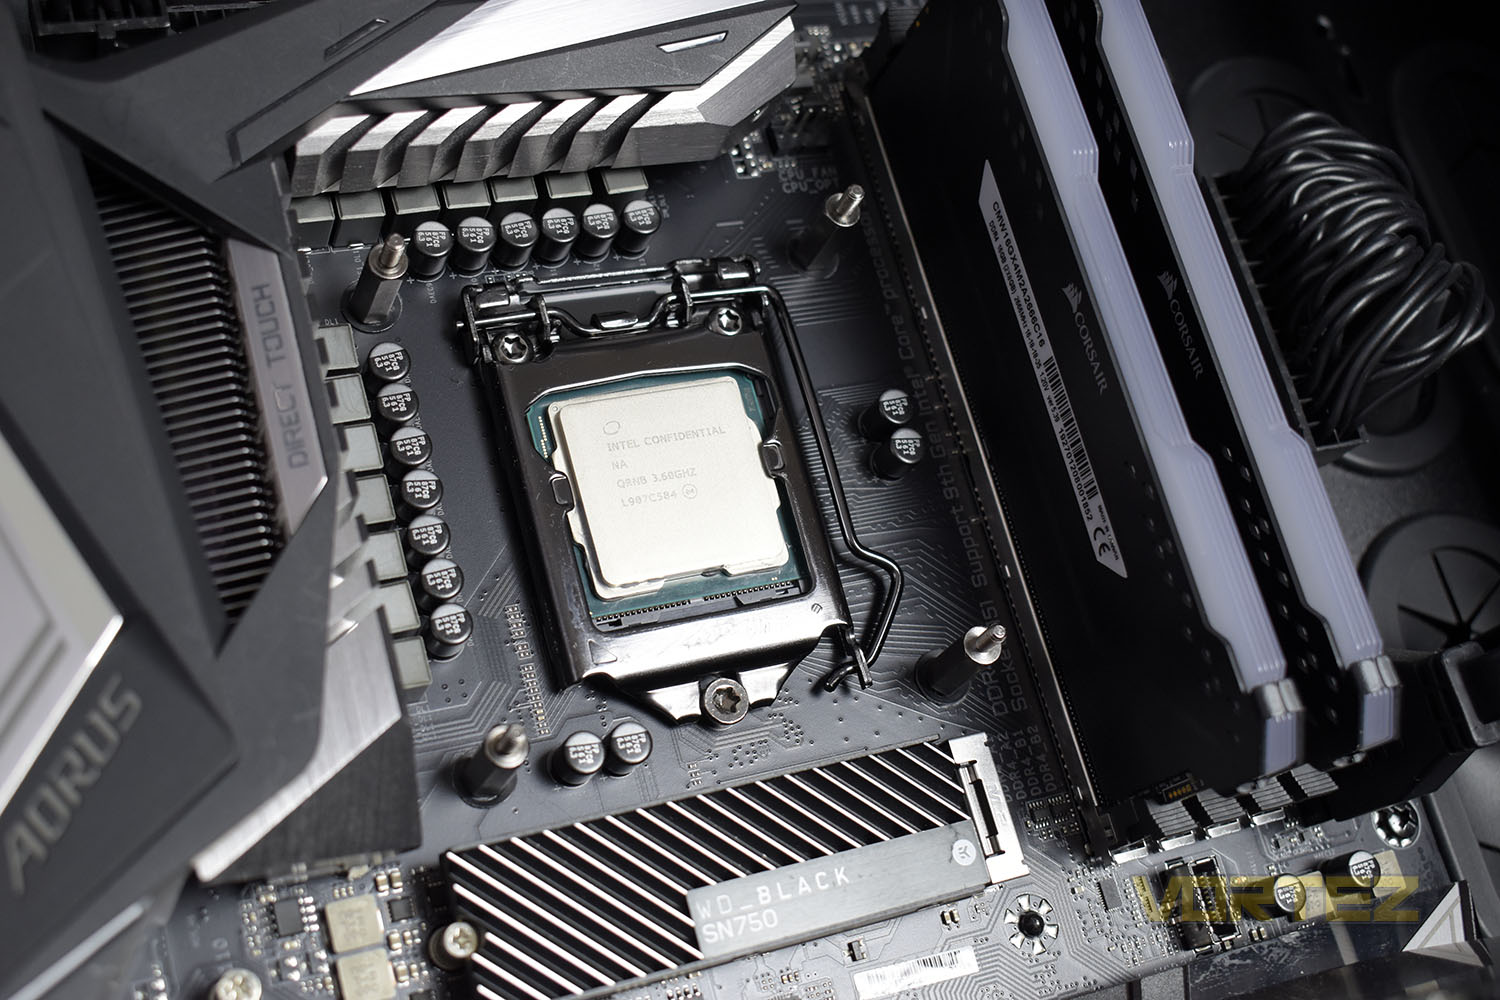
Next you need to push the backplate through the Intel mounting slots and screw the standoffs into the front.
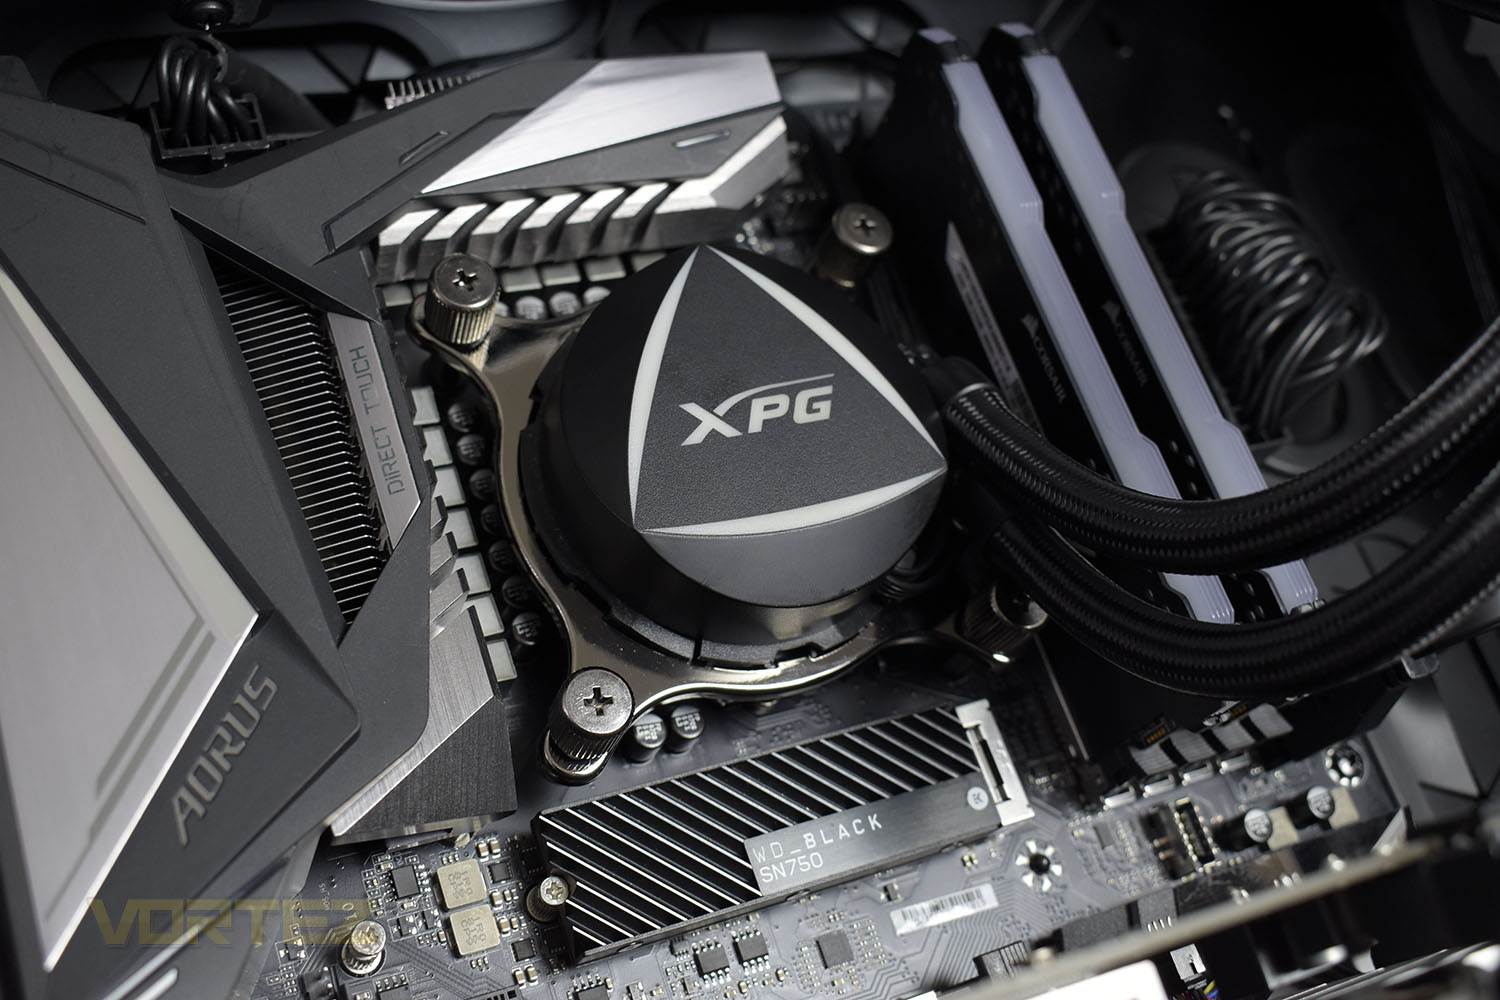
Then you’ll slot your AMD or Intel mounting plate onto the pump and line it up with the standoffs. The thumb screws are large enough to turn by hand and can then be nipped up to tight with a screwdriver.
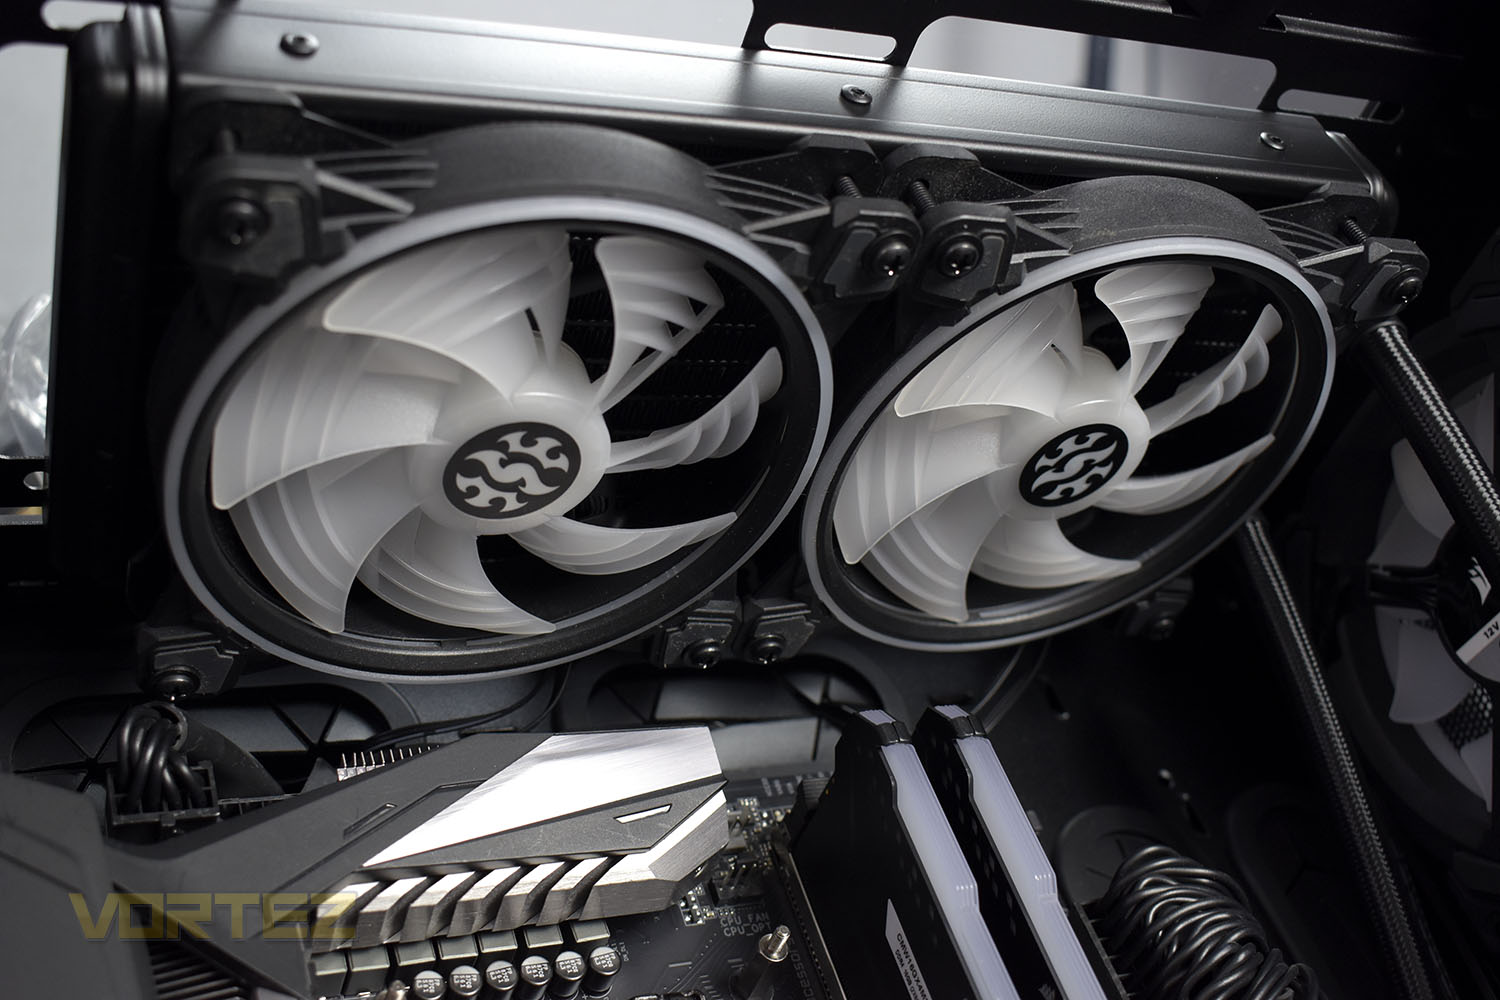
Once that’s in place, it’s time to install the radiator in the top of your case, having first ensured that you have the cables from the fans pointing towards the rear of your case so you can marry up the PWM and RGB connections behind the motherboard, keeping things neat and tidy.
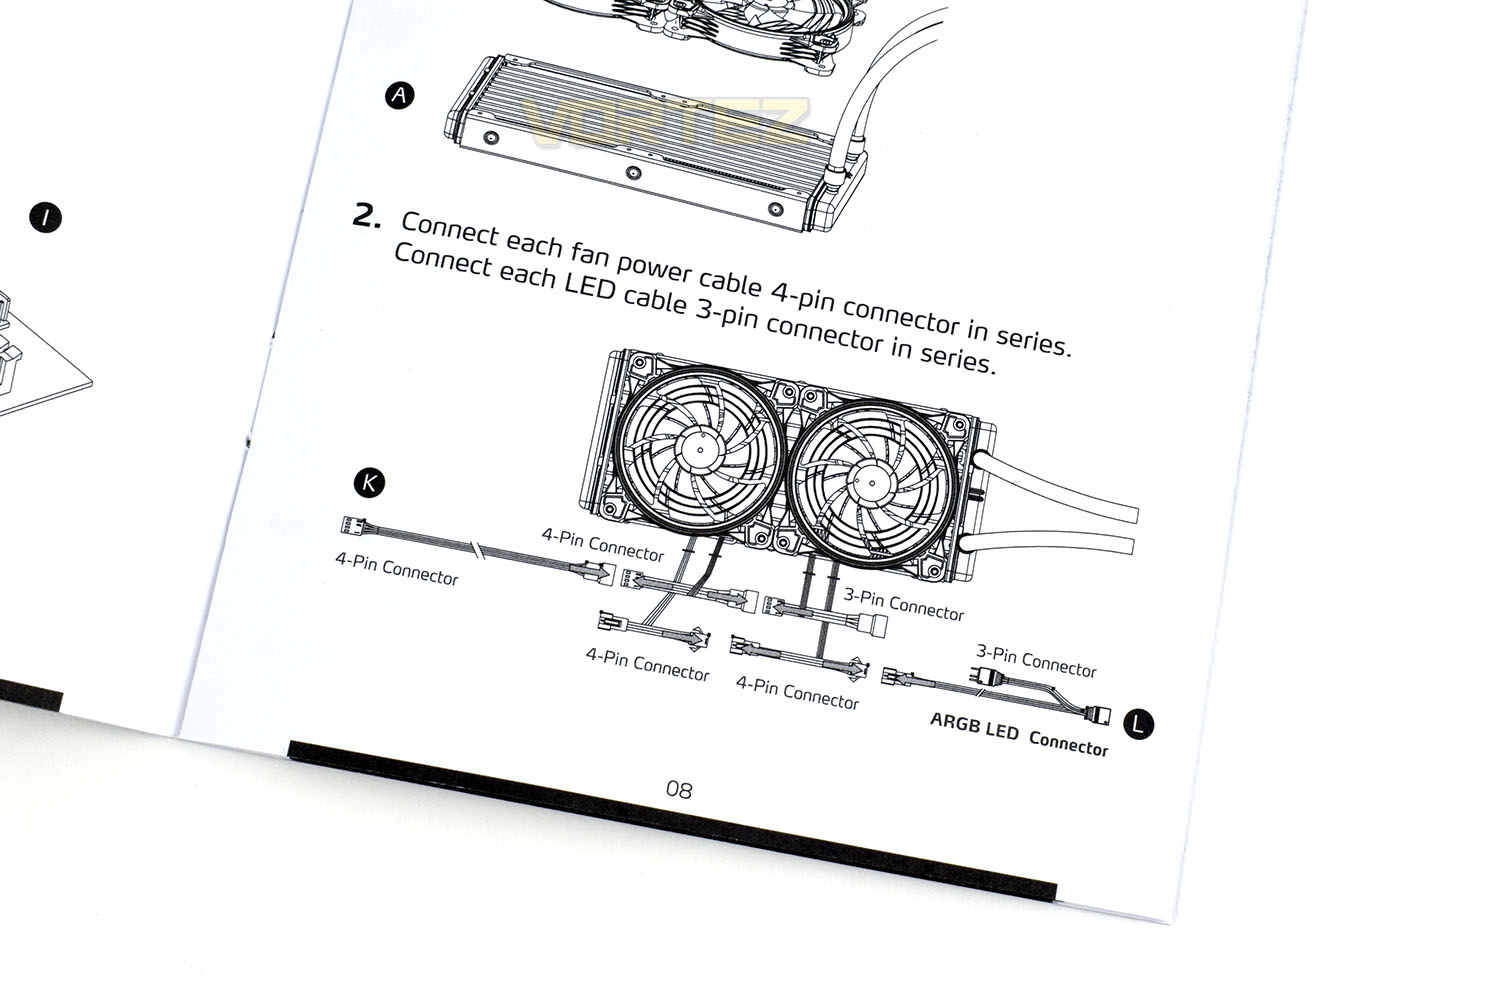
However, this is where the installation process, which has been largely hiccup free so far, to become a small nightmare. XPG have implemented an overly complex array of cables that you’re to join up and plug into the motherboard. You’re to daisy-chain the pump and fans for the RGB lighting, which you connect to an ARGB 5v connection on the motherboard, and then join the two 120mm fans together, plug into a secondary CPU fan slot and then wire up the pump to the motherboard. This is the most confusing wiring system we’ve encountered on an AIO. There are far more elegant and easier solutions than this; XPG definitely need to go back to the drawing board on this.
We also found the instruction manual to be worse than useless, it was giving the wrong information. If you pay close attention to the image below, in regards to connecting up the 4-pin PWM fan connections and 3-pin ARGB connections, the diagram isn’t labelled correctly. Look at the two 4-pin connections at the bottom, those are actually 3-pin cables, as it actually mentions in the instructions above the diagram! The pump unit also features an ARGB 3-pin connection, but the booklet doesn’t tell you how to install that, nor make any kind of mention of the cable at all. This feels rushed and definitely not the high-quality we expected when going into this review.
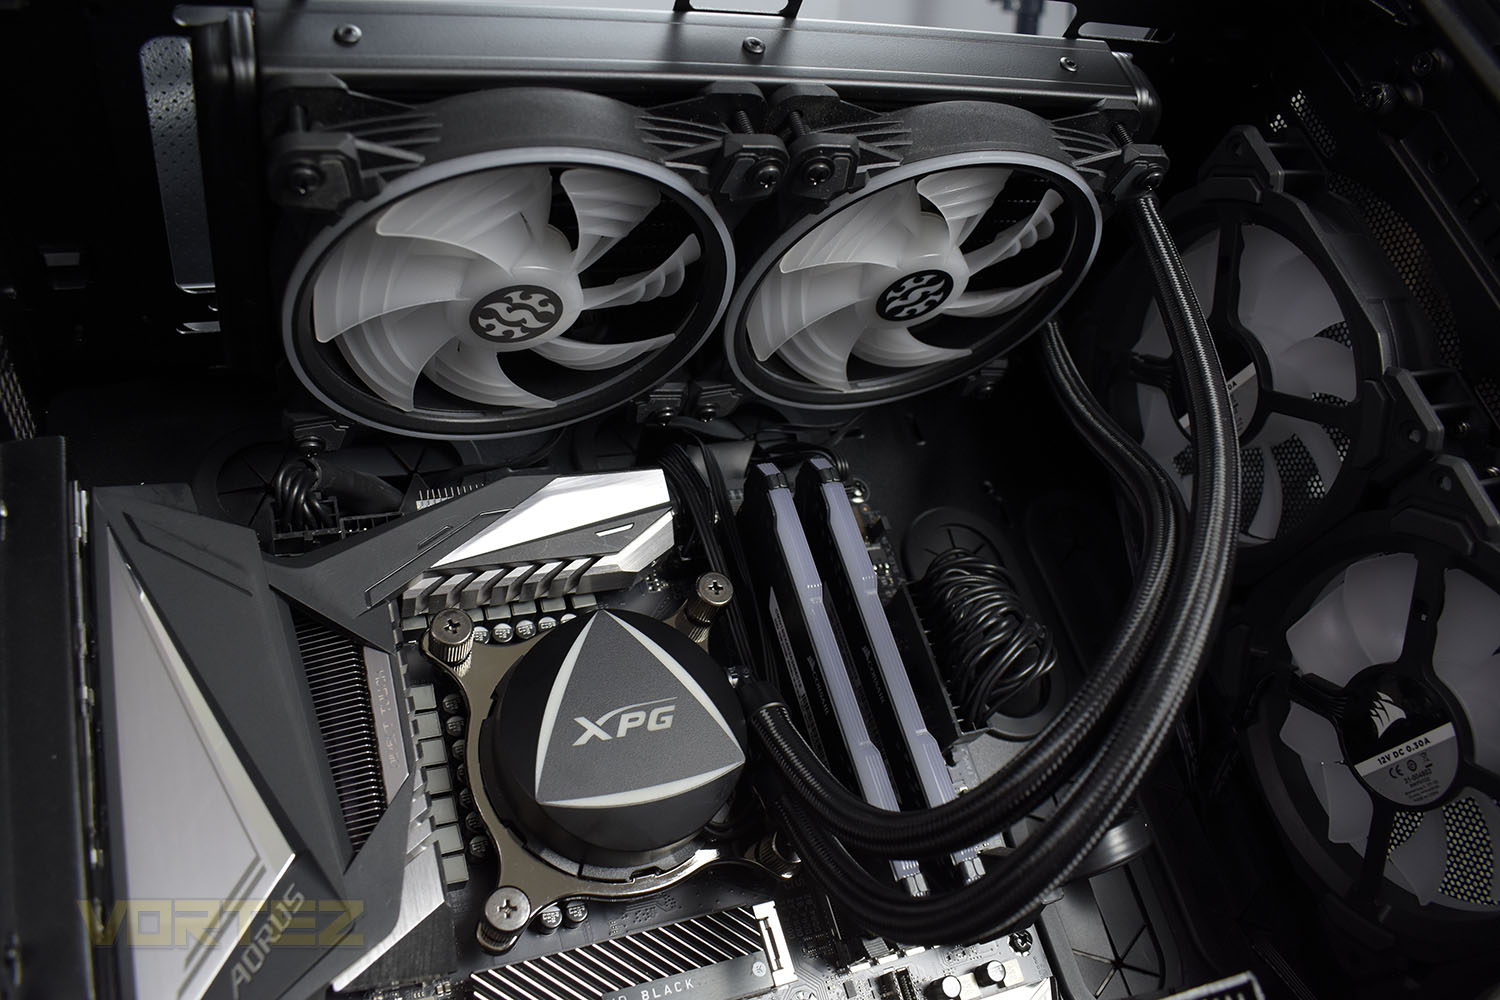
Once everything is installed, we’re sure you’ll agree it looks great even without the RGB lighting.
Test Setup & Methodology
Due to popular demand, we have retired the long-standing cooling rig that we once used and replaced it with a shiny new system with an Intel Core i7 9700K at its heart. This should benefit you, the reader, in a couple of ways. The first being it can provide you with results on a CPU that is currently available to buy and secondly, the mounting instructions on our installation page will be far more relevant than the outgoing LGA 2066 was, with its pre-installed backplate.We perform two individual testing routines with each CPU cooler that we receive – temperatures and acoustics. The system used is as follows and all tests are performed at stock frequencies.
Processor – Intel Core i7 9700K
Motherboard – GIGABYTE Z390 AORUS MASTER
Memory – Corsair Vengeance RGB PRO 16GB – 2666MHz – C16
Video Card – XFX AMD Radeon RX560
Power Supply – Corsair RM650x
Storage Drive – Western Digital Black SN750 1TB NVMe SSD
Case – Corsair Crystal Series 280X RGB
Monitor ASUS ROG SWIFT PG278Q
Motherboard – GIGABYTE Z390 AORUS MASTER
Memory – Corsair Vengeance RGB PRO 16GB – 2666MHz – C16
Video Card – XFX AMD Radeon RX560
Power Supply – Corsair RM650x
Storage Drive – Western Digital Black SN750 1TB NVMe SSD
Case – Corsair Crystal Series 280X RGB
Monitor ASUS ROG SWIFT PG278Q
To keep our tests consistent, we always review CPU coolers as they come out of the box – with their factory cooling fans, as the manufacturer intended and as the consumer expects. It should, however, be noted that we do not use supplied thermal paste but instead, Noctua NT-H1 paste to, again, ensure consistency. The paste is applied and the CPU allowed to run for a couple of hours, at idle, to ensure any and all updates or processes are completed to give a true idle reading.
In the first test we record the idle and load temperatures across a 60 second period, with the results logged to file. This way we can provide you with an accurate average temperature over a longer period, instead of, for example, a maximum or minimum temperature. We believe this is the fairest possible method and most representative of what is going on as temperatures will fluctuate even with a consistent load on the CPU. We have three case fans on the front of the PC running with the door closed for this test.
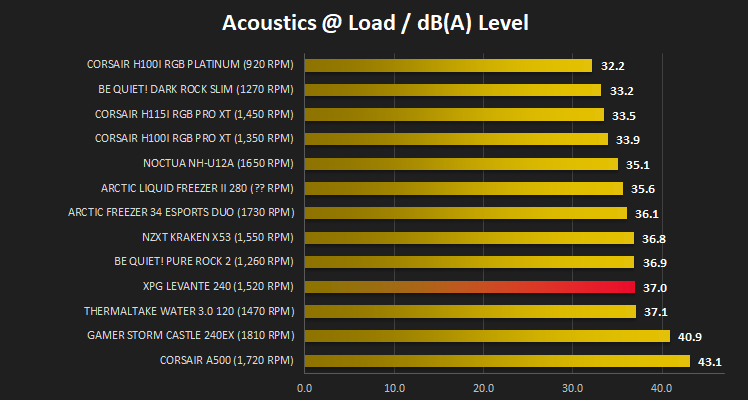
We aim to measure acoustics with our second test, this time with the three case fans on the front disabled and all other ambient noise reduced to an absolute minimum. Our testing room measures around 25dB(A) without the system running. We measure the system acoustics for 60 seconds with the microphone in a set and unchanging position with the chassis door removed completely. An average is then taken across the 60 seconds.
Benchmarks – Thermal Results
For thermal results we have all case fans running and only a single 120mm fan on our Corsair H100i Pro RGB radiator. We then measure the thermal results at idle, both at 1000 RPM and maximum RPM: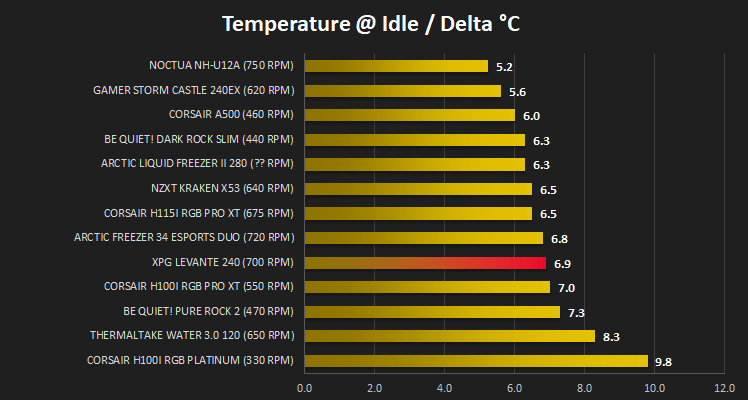
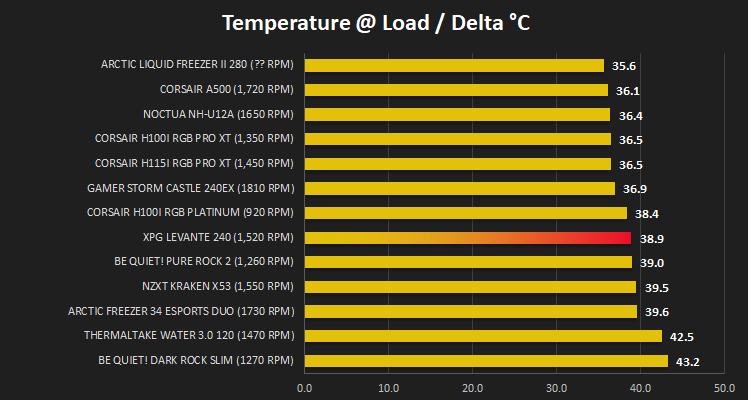
And then again after a 20 minute Stability Test within AIDA64:
Benchmarks – Acoustic Results
For our acoustic results, all other fans in the case are disabled and the Corsair’s H100i Pro RGB’s pump is turned down to quiet (roughly 1100 RPM) and measure the fan noise at 1000 RPM, both as a case fan and as a radiator fan: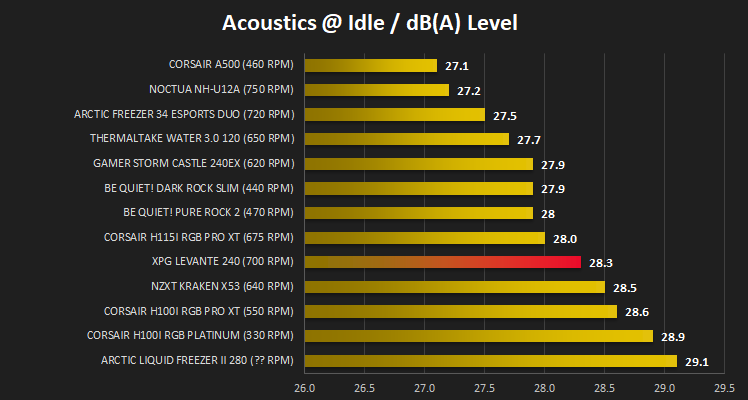
And then again at maximum RPM:
Conclusion
For a good number of years now, all-in-one watercooling loops have gained a huge market share in the CPU cooling segment, so obviously XPG fancied a piece of that pie. Unfortunately though, their first attempt feels incomplete.In terms of appearance the LEVANTE 240 scores well, the pump enclosure is tiny and looks the part. Something that we felt was missing is a hardware RGB controller; we’ve seen these included with plenty of similar-style AIOs in the past and, quite frankly, they’re often much easier than trying to tweak the RGB lighting from your motherboard software which can be prone to all kinds of issues, not least of which can be a pathetic range of options. All of that depends on your motherboard featuring the correct RGB header as well, which some won’t. An in-line, SATA-powered RGB controller should be included with an AIO at this price point, if no bespoke software is offered.
The installation, on the whole, went well, but the cabling felt poorly thought out, at best. There are, as evidenced by plenty of other manufacturers managing this without much trouble, far more elegant solutions to this aspect of an AIO installation. The instruction booklet also needs to be revised, added to and corrected.
Performance, usually the most important part of any CPU cooler review, is also lacklustre, particularly when compared to cheaper options from more well-established brands, such as CORSAIR, Thermaltake and NZXT. Don’t get us wrong, there’s nothing really wrong with the performance, but it doesn’t do much to get you excited.
All in all, XPG’s first effort in the AIO game feels like a bit of a flop. The appearance and RGB lighting are a couple of positives but the performance isn’t amazing and the installation is down there with the worst. One redeeming quality is the 5-year warranty, not many other AIO manufacturers dare offer such a lengthy guarantee. If they manage to knock a chunk off the price we can think about adjusting our verdict but there’s much better for less money out there.
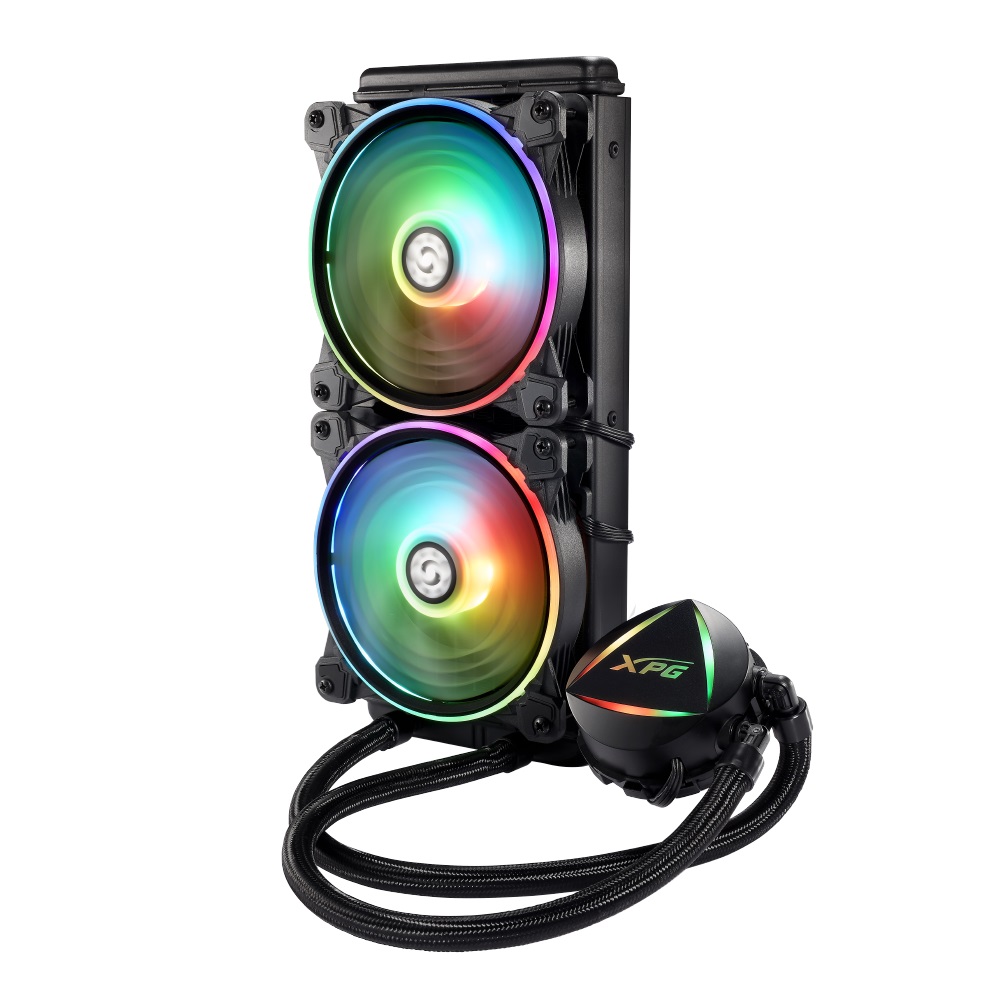
Looks good and offers reasonable performance but it doesn’t get close to justifying the asking price with its confusing installation and poor quality control.
Pros
+ Looks great when unlit
+ Length warranty period
Neutral
+- Performance isn’t amazing
Cons
– Pricey
– Terrible installation experience
– No hardline RGB controller
– Misinformative instruction booklet with missing information
– RGB lighting on the pump was faulty
+ Looks great when unlit
+ Length warranty period
Neutral
+- Performance isn’t amazing
Cons
– Pricey
– Terrible installation experience
– No hardline RGB controller
– Misinformative instruction booklet with missing information
– RGB lighting on the pump was faulty
Click here for an explanation of our awards at Vortez.net.
Stay connected with the Vortez Social Media pages: