







Ever wondered what it would be like to have a fully modular case? Antec have sent us the next step in case innovation.
Product on Review: Antec Lanboy Air
Manufacturer and Sponsor: Antec
MSRP: £160 / $250 / €180

When you think modular, you think power supplies. The ability to separate and recombine, that’s what the word modular means and it isn’t just the power supply that manufacturers Antec are wanting to incorporate this design concept into, its now with cases too.
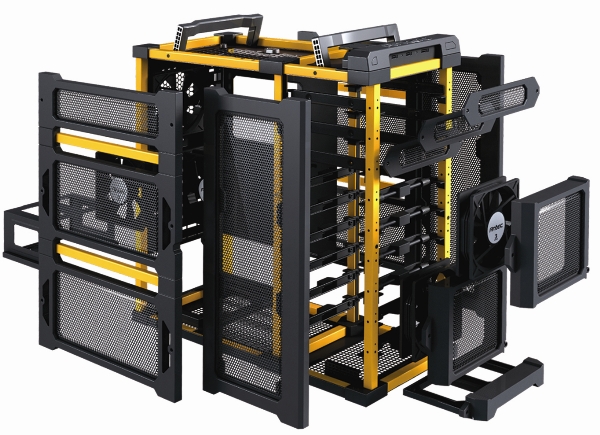
With inherent customisation about its structure, the Lanboy Air is the next step in open-air case innovation. The Lanboy Air hopes to give enthusiasts, gamers and modders the playground they always wanted – with the space for up to 15 fans, 11 drive bays, and support for up to 16″ on the graphics card this surely has to be the case to end all cases?
‘Transform and roll out’
Antec’s Take:
Meet the LanBoy Air. Nearly every part on this case, even the motherboard and PSU mounts, is modular and customizable. Up to 15 exhaust fans create positive air pressure inside the case that blows dust and heat out through panel perforations. Up front, the LanBoy Air’s AirMounts™ HDD mounting system literally suspends drives in mid-air for unsurpassable vibration and noise resistance. Along with its two internal 2.5″ SSD bays and a front-panel USB 3.0 port, the LanBoy Air is the last word in high-flexibility PC case design.
Features
Fully-modular chassis
Open-frame mesh panel construction
AirMounts™ HDD suspension mount system for up to 6 HDDs
11 drive bays:
– 6 x internal 3.5″ HDDs
– 3 x external 5.25″ HDDs
– 2 x internal bottom-mounted 2.5″ SSD bay
Advanced cooling system – up to 15 fans Standard fans:
– 2 x front variable-speed 120 mm blue LED fans with stepless control knobs
– 1 x rear 120 mm TwoCool™ blue LED fan
– 2 x side 120 mm TwoCool™ blue LED fans for graphics cards cooling
Optional fans:
– 2 x 120 mm fan for CPU and memory cooling
– 6 x 120 mm side drive bay fan
– 2 x 120 mm top fan
Water cooling support:
– Top water cooling radiator fitting
– ear water cooling grommets
8 expansion slots for triple graphics-card configurations
Maximum graphics card size: 16″ / 406 mm
Front ports:
– 1 x USB 3.0
– 2 x USB 2.0
– Audio (AC’97 and HDA compatible) In and Out
Motherboards: Mini-ITX, microATX, Standard ATX
Power supply not included
Net weight: 18.5 lb / 8.4 kg
Gross weight: 24.4 lb / 11 kg
Dimensions:
– 24.5″ (H) x 10.6″ (H) x 21.1″ (H)
– 546 mm (H) x 269 mm (W) x 536 mm
Exterior (1)
The Lanboy Air arrives in a white case box, the image printed on the side immediately attracts attention showing you that the case inside has many interchangeable parts. There is a badge on the front notifying that SSDs are supported within the Lanboy Air. Something that is certainly becoming a mandatory feature with new cases thesedays. To the rear of the box there is a breakdown of the significant features and inside the case is well protected with polystyrene supports and plastic wrapping.
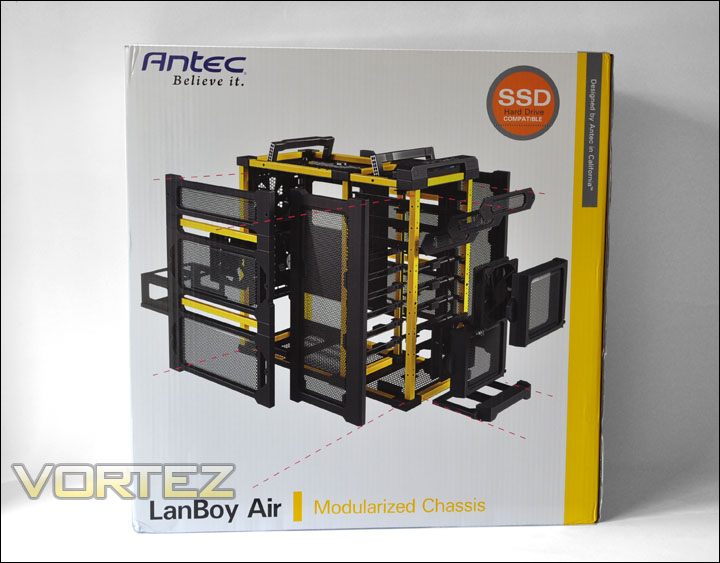
The Antec Lanboy Air Box
After removing the Lanboy Air from its box, the first thing apparent is its rather sharp looking edges. You could be forgiven for thinking the case below has just featured in the latest transformers movie, but not this isn’t bumblebee folks – but it does transform. Available in a variety of colours from blue, to red, to yellow the Lanboy Air is definitely an enclosure that stands out from anything else on the market today.
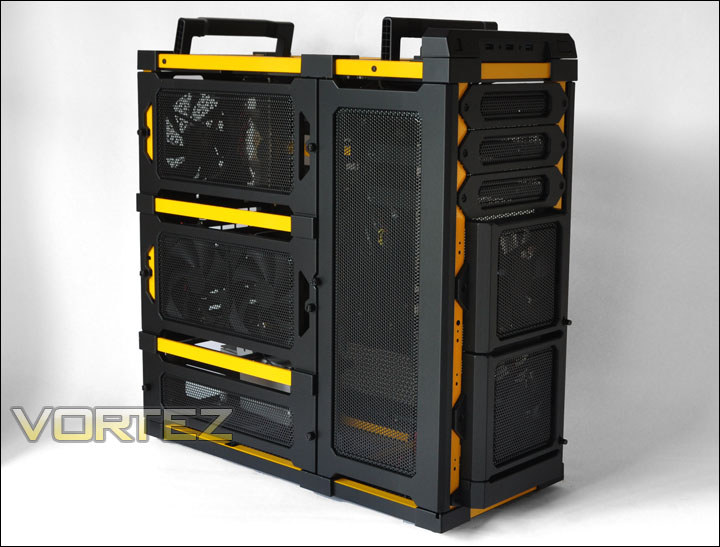
The left side
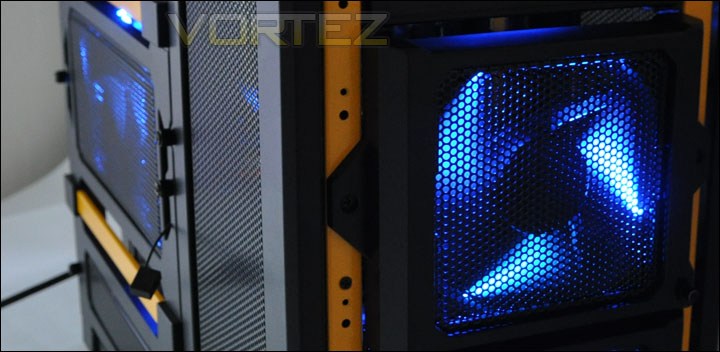
The typically prominent side is exactly the same as the side with the motherboard tray except there are two pre-installed 2 speed Antec 120mm LED fans mounted. The emphasis with this case is the sheer functionality, you can get to any spot you want to. No longer will you struggle to reach to feed a cable through. Each of the panels seen in the photos are secured by thumbscrews so getting in is simple and easy. The only downside to the exterior panelling is that because it is relatively open, dust is going to be its biggest prey.
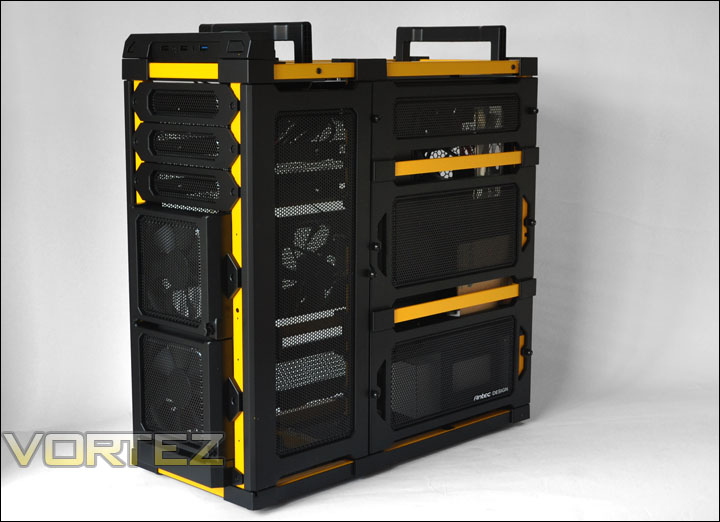
The right side, identical
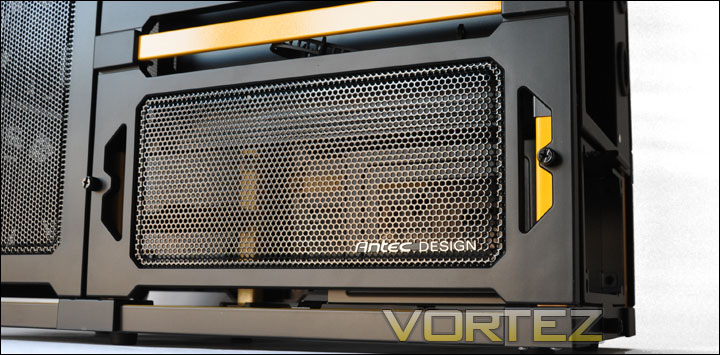
Thumbscrews hold the panels in place
Taking our attention to the front panel there is a nicely crafted ‘Antec’ emblem on the arch. From left to right we have various controls. The first of these is the power button, power/activity LEDs, 2 x USB2, audio ports for headphones and microphone, USB3 (blue) port and finally the reset button. The typical eSATA or firewire support is absent from the front of the Lanboy Air. Personally I think this is a good move, I’ve never once used these type of ports and neither has anyone I know of. Just the essentials are present.
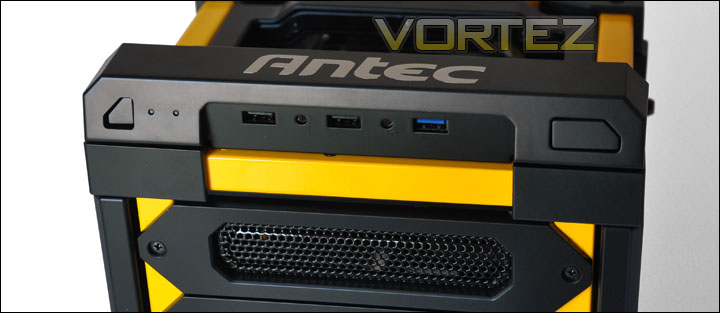
The front panel with essential controls
Exterior (2)
The front and rear of the Lanboy Air follows a fairly standard layout. The front has 3 x 5.25″ bays. Inside these bays there is the option to mount drives in 3 different orientations. To remove these covers the screwdriver does need to be used, but its not often you would be removing optical drives. Below these drive bays are two 120mm fan controlled LED fans. Similar to both the Antec Twelve Hundred and recent DF-85 there are small knobs that can be turned to control the fans up and down through the RPMs. As you can tell from the photo, these fan bays can also be removed by removing the screws.
Turning out attention to the rear of the case, although the side panels are removable using the thumbscrews you will notice there are still screws in various places down the left and right sides. The reason for this is because the entire back panel can be removed to gain full access into the case and move the motherboard tray in and out.
The rear exhaust fan is also 120mm and LED ready. There is a small control panel below the mesh giving you the ability to control the fan speed (low or high) and turn the LED on or off. There is a total of 7 expansion slots including an additional slot that comes with a bracket allowing the USB3 cable running from the front of the case to have a direct path to the I/O panel. Adjacent to this are two rubber loopholes for water-cooling support. At the bottom of the case is a PSU cage that is removable by removing a screw holding the case into place.
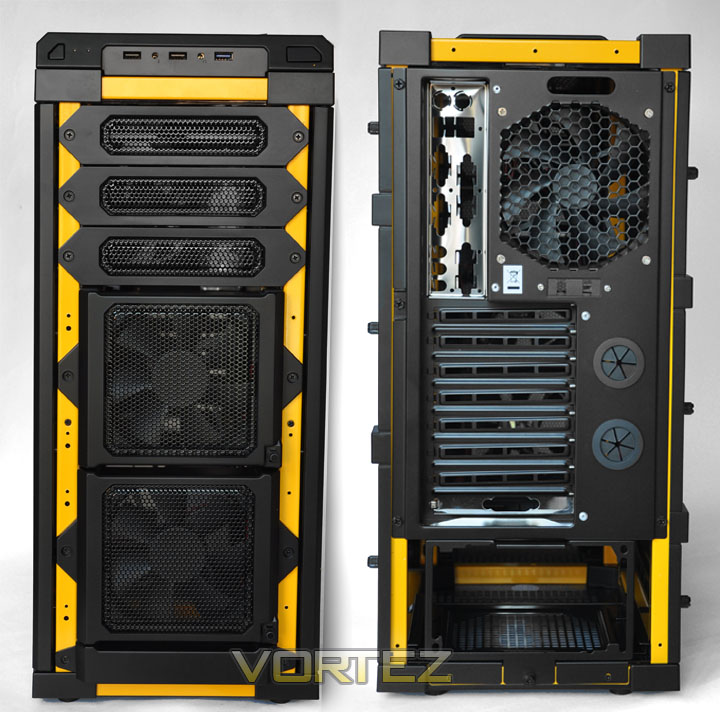
Front and rear of the Antec Lanboy Air
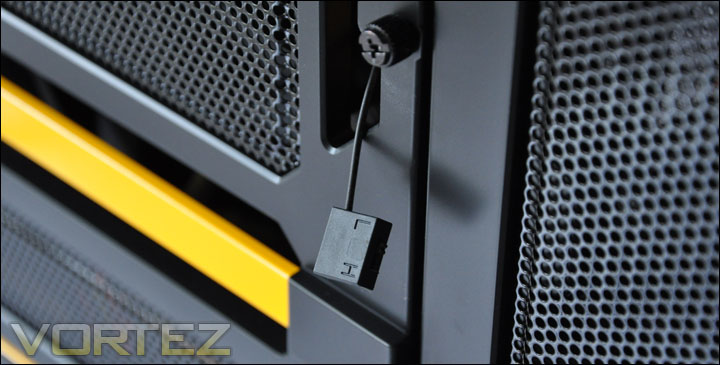
Fan control for the two 120mm side fans. Two speeds available
With the ability to remove so many panels and the space to access any area within the Lanboy Air, Antec have given this case the capability of holding up to 15 fans. That has to surely be a record? You may not want that amount of fans within the case (unless you are operating a wind farm) but the fact remains there is the option there for expanding.
At the top of the Lanboy Air there is enough space to fit water-cooling equipment so if fans aren’t your thing there is the option of liquid cooling instead.
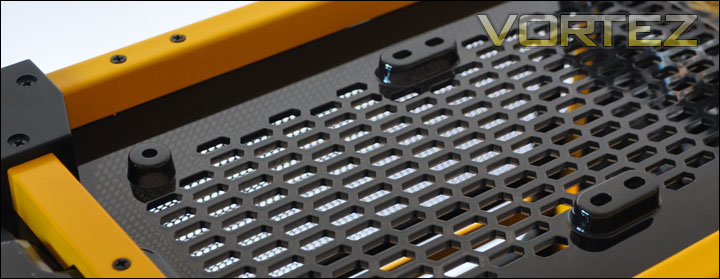
The top of the Lanboy Air, of which has radiator support
With the name ‘Lanboy’ this case should have mobility as a feature and sure enough it does. At the top there are two good quality handles that swivel away to conceal behind the framework. There is also the option of removing these handles entirely by removing the screws.
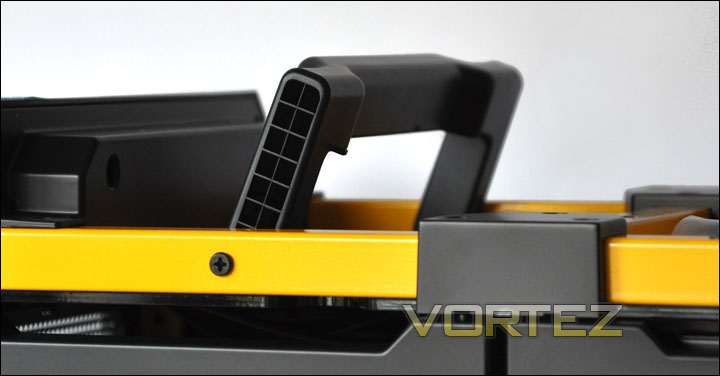
Handles – ideal for shifting the case to and from LAN parties
Interior (1)
The first thing to mention with the interior is the accessories bundled with the Lanboy Air. First of all there is a box and plastic wallet with instructions manual, cable ties and device mounting brackets. There are no screws present in this box because these can be found in the smart toolbox compartment that is fitted at the bottom of the front side of the Lanboy Air. See below image. Inside this toolbox are an assortment of screws, including self tappers for fan installation.
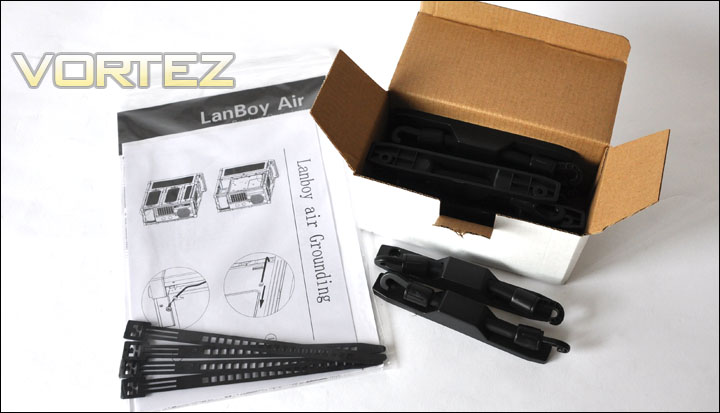
Manual, cable ties and elasticised device mounting brackets
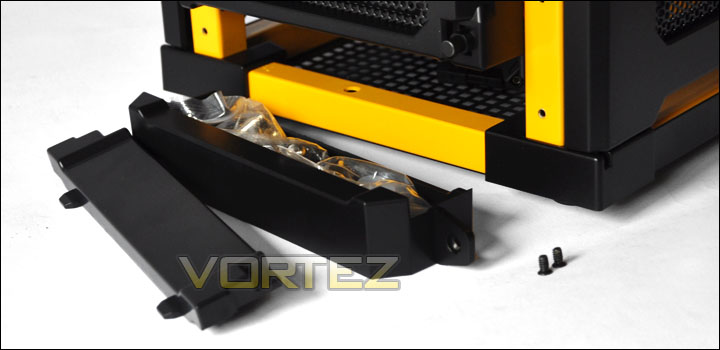
Toolbox compartment containing screws
The beauty of the Antec Lanboy Air is of course the functionality. No longer are we constrained to removing just the side panels, there is full access to every nook and cranny imaginable. Taking the side panels of the prominent side you can see the magnitude of how practical the Lanboy Air is. From the side there are two compartments, the larger space has a side panel containing two 120mm LED fans that have two speed controls. The smaller compartments operates like a swing door but is also removable.
The Lanboy Air supports ATX, mATX and mini-ITX form factors and there is clearance of up to 406mm / 16″ for graphics cards so rest assured – any card will fit inside this case.
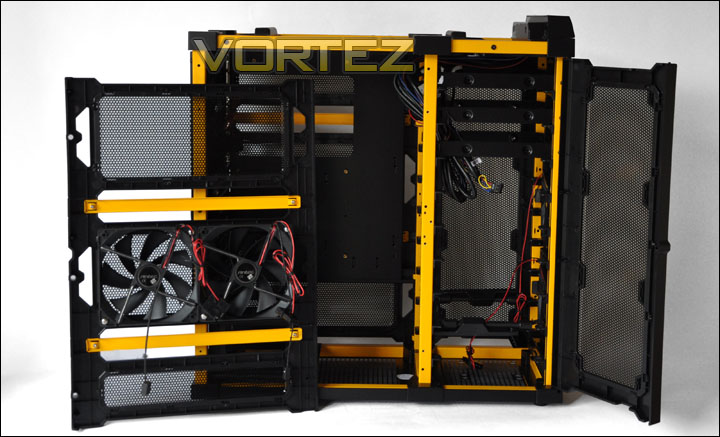
Side panel off and front side panel door open
On the reverse side, the structure follows similar suite, but we have access to a large motherboard back panel cut-out. There are hooks on the backside of the motherboard tray with cable ties already attached and an impressive clearance of 17mm between the motherboard tray and side panel. With both side panels entirely off, its easy to see how easy cable management is and there is great potential for a very tidy enclosure.
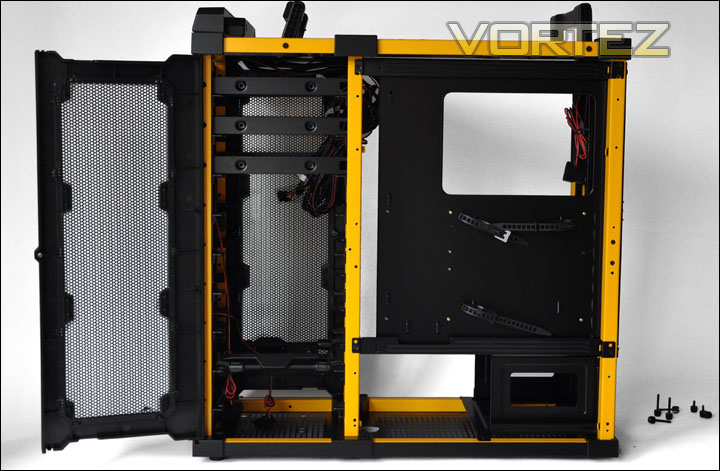
Behind the motherboard tray. A huge motherboard backplate cut-out
As I mentioned earlier, the PSU cage at the bottom of the Lanboy Air can be completely removed by removal of screw.
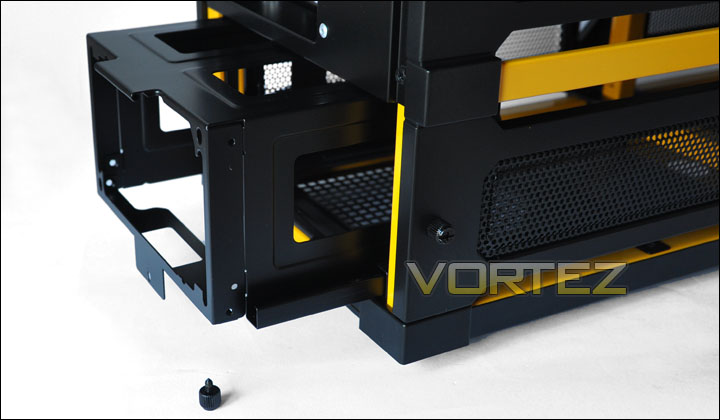
Interior (2)
With regards to mounting devices inside the Lanboy Air – 5.25″ optical drives are mounted a fairly standard by sliding the drive in and securing with screws. Drives in this area can be mounted in a variety of 3 different orientations – facing the front (standard) facing the side (the angle the photo below is showing) and facing the alternating side.
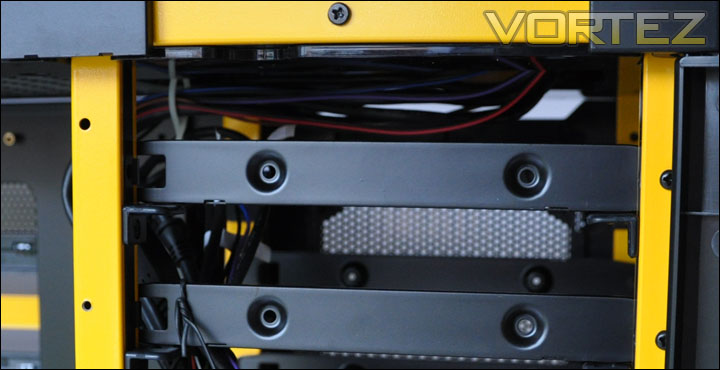
5.25″ drive mounting area
Beneath this is an area of vast space, unlike any other case on the market the Lanboy Air allows for 3.5″ and 2.5″ devices to be suspended by brackets that hook onto the case structure. These brackets have elasticated arms allowing the drive to float as it where.
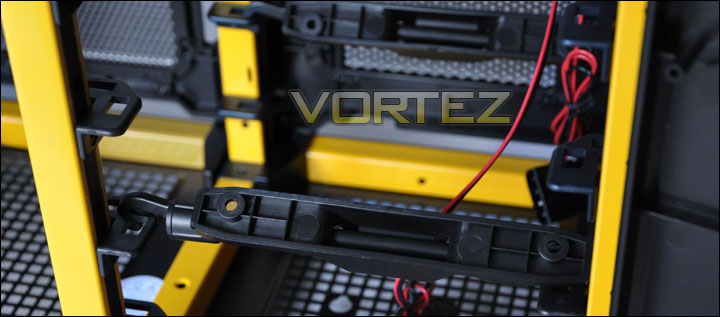
Brackets that allow 3.5″/2.5″ drives to suspend in the air
The inside rear end of the case features an LED ready 120mm rear exhaust fan. This uses a molex connector and as mentioned in the previous section can operate at low or high speed.
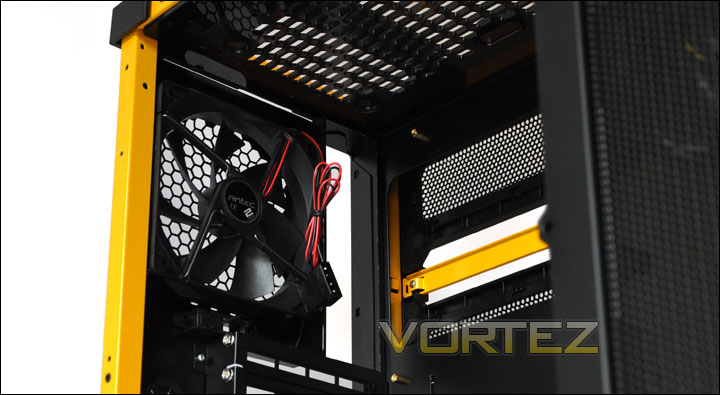
Rear 120mm exhaust fan
One of the significant features of the Lanboy Air is the ability to swap things around. The motherboard tray and PSU cage can be swapped round and moved. So by default the PSU will be mounted at the bottom, but if you want to you can move the cage to the upper section whilst moving the motherboard tray further down.
To remove the motherboard tray the rear of the case needs to be removed, this is very easy to do – it just requires the removal of four screws.
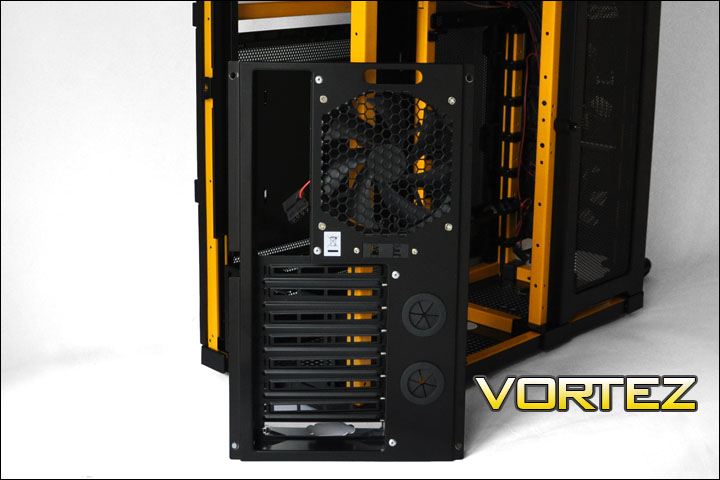
The rear of the case removed
With the rear of the case removed the motherboard tray can be slid out as soon as one screw is removed that holds it in place. This is an excellent idea, it makes building systems so much quicker. With so many options its quite obvious the Lanboy Air is a very functional, practical case – a modders dream.
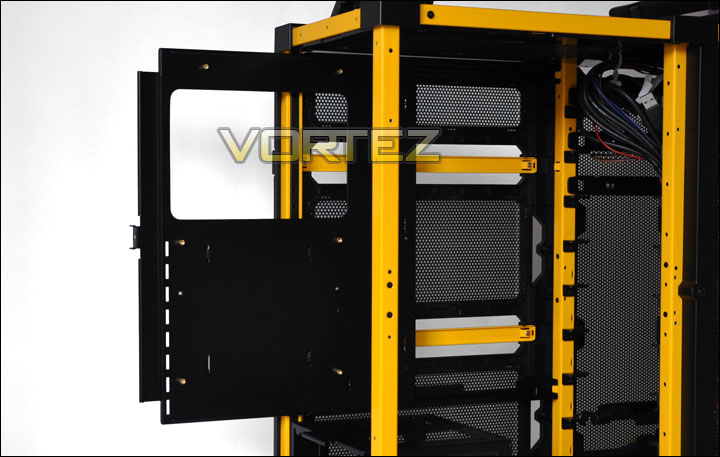
Motherboard tray slides out. Simple and easy
Over the page I will take you through the installation process with the Antec Lanboy Air.
Installation
Well, I can confirm that the installation was an absolute breeze. Getting the components into the case isn’t arduous by any means. Not only is it quick and easy, but cable management is something the Lanboy Air excels in. You are also given so many options when you come to seat different devices so to say this case is customisable is probably an understatement.
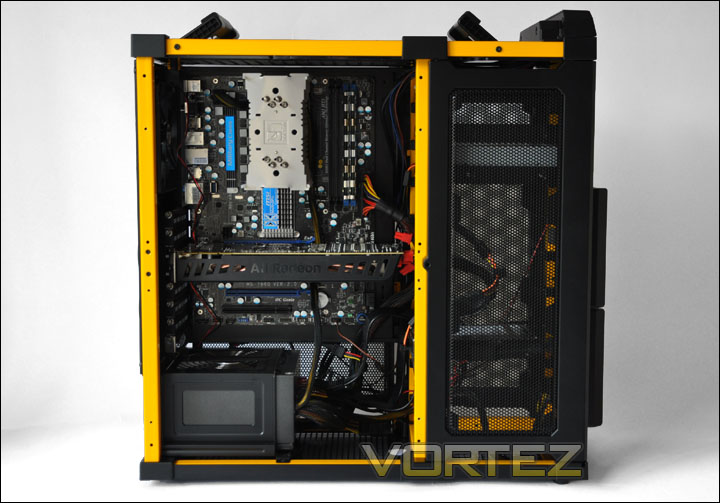
All components installed, lots of space, lots of options
Firstly the HDD mounting or 3.5″ mounting. All you need to do is attach two brackets to either side of the HDD. (It doesn’t matter which way around they face) Attach the four hooks into place, deciding which level you want to mount the device and voila the HDD is suspended into position.
As far as holding the drive into place – the bracket/elastic does stop the drive from falling but it doesn’t really keep the drive still or secure.
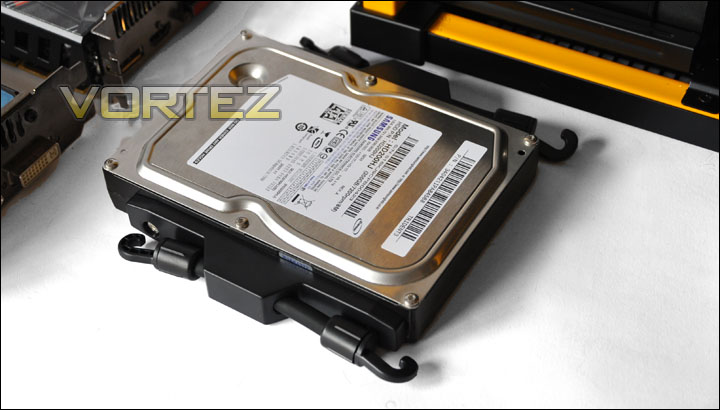
HDD bracket attached to the 3.5″ HDD
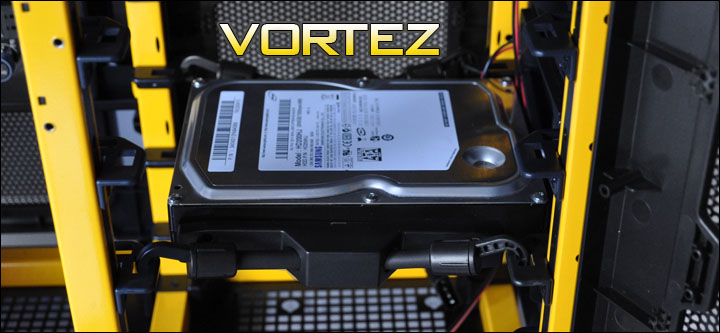
HDD suspended in place
The idea of removing the motherboard tray to install a fresh build or even upgrade is a great idea. To install the motherboard I removed the tray and installed the motherboard directly onto it – outside of the case. I kept the Noctua NH-U12P fixed onto the board to determine the overall clearance between the case structure and the top of the heatpipes. This cooler stands 158mm tall and quite remarkably is just short of 1mm. See photo below.
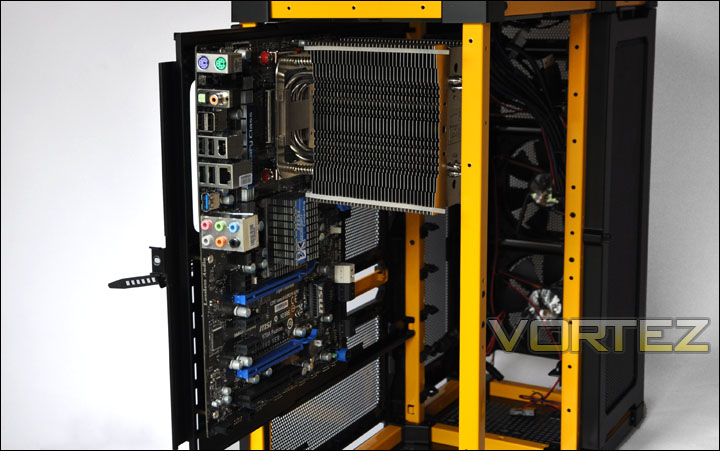
Sliding the tray back into the case with the motherboard attached
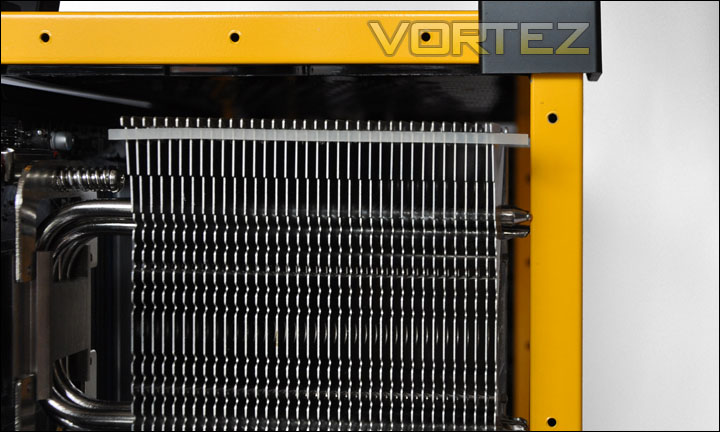
The heatpipes on the NH-U12P just touching the framework
Fortunately though, pressing the heatsink down with very little pressure whilst sliding the tray into the case allowed me to successfully move the motherboard into the case. If you have a cooler that is taller than 158mm you won’t be able to install the motherboard onto the tray externally – it will have to be done within the case. With the side panel on the clearance between the top of the heatpipes and the door is approximately 15mm.
Lastly, to install the PSU into the Lanboy Air the cage ideally has to be removed. This cage only has a single screw attaching it within the case so this isn’t a problem. Sliding the PSU into the cage, it fits just like a glove. To the very mm it fits perfectly – mounting holes lining up precisely. The cage feels strong and you get a sense of confidence with the material used here – not only on this cage but within the entirety of the Lanboy Air too.
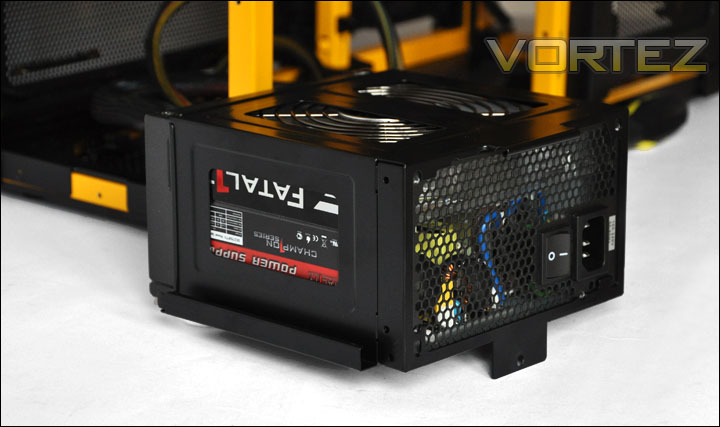
The PSU installed within the cage – fitting perfectly
Powered Up
Due to the Lanboy Air featuring LED fans I thought I would show you the case fully working and operational. Included with the case are 5 x 120mm LED fans that are very vibrant and give the case some ambience and character. If you really wanted to make this case illuminate there is the option of adding in a further 10 fans, now that really would brighten things up!
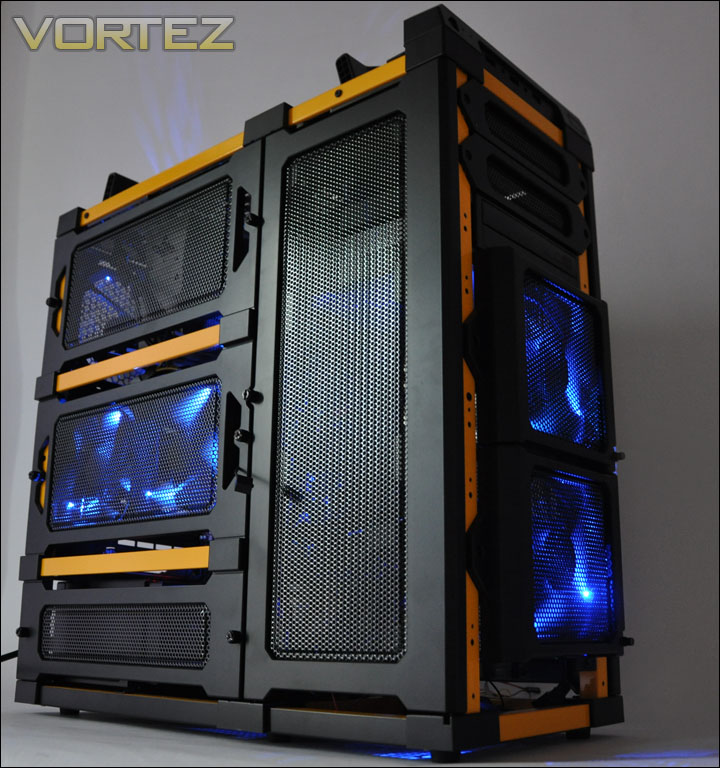
The Lanboy Air in all its LED splendour
Thermal Performance
Antec supply 5 x 120mm fans with the Lanboy Air making possibly hinting that one of its fortitudes could be cooling. With so many fans pre-installed we really need to monitor the thermal performance as this could identify a cooling victor in the midst. With the Lanboy Air having such a unique build structure, it will be an interesting investigation to see how well it cools the components.
So to discover the thermal performance of the Lanboy Air I will record idle temperatures after 20 minutes from a cold boot. I will then stress the system and temperatures will again be monitored after a 30 minute have elapsed. All fans are set to low during this test.
System Components
CPU AMD Phenom II X6 1055T 2.8GHz
Motherboard MSI 870A Fuzion
Graphics XFX HD5870
Memory 4GB Mushkin EM3-10666 DDR3
HDD Samsung Spinpoint 500GB SATA-II
PSU OCZ Fatal1ty 750W
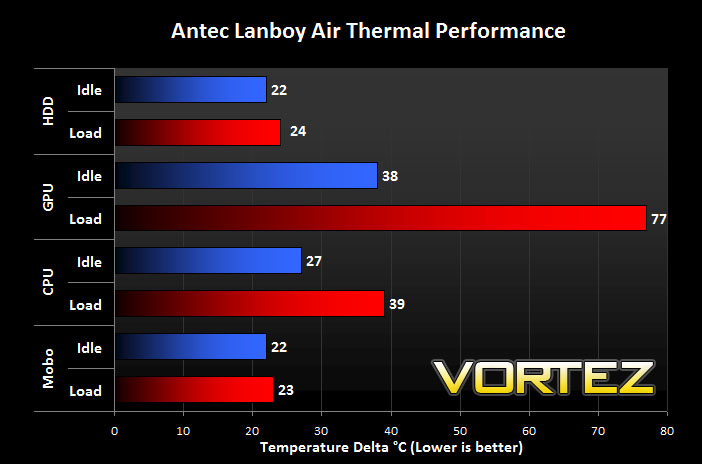
The idle temperatures within the Lanboy Air are reasonable, but where it excels is the load temperatures and afteral this is what we should be concerned with as shifted heat out of the case and cooling components is an important task.
Load temperatures are very impressive, the intake fans above the GPU and at the front of the case move air across the motherboard and out through the back effectively. Comparing to the previous case reviews I have performed recently with the exception of the graphics card (this has been altered) the temperatures are significantly lower. Both pleasing and inspiring. As mentioned above, the fans are all on the lowest setting – meaning the fans operate very quietly. Moving the fan speeds up and there is a noticeable difference in the noise but it isn’t disruptive by any means. With all the fans on low, this would be perfect for watching a movie. It’s hard to describe just how quiet these fans are at this setting but you barely notice that the fans are spinning.
Conclusion
Antec have had some tough criticism lately with the visual appearance of their cases splitting enthusiasts into ”love it” or “hate it” camps. Certainly today’s case under review will again be under this type of scrutiny from a visual aspect.
On first glance the Lanboy Air looks very retro indeed. It resembles something you might find in a DIY store – perhaps a toolbox? But as you spend time working with this case you begin to love it. Ok, it may not be the most attractive of enclosures but when you come to functionality this case is an absolute dream. If you have ever struggled installing components into a case or found it difficult to reach to certain areas you will understand why this case answers all of those dilemmas. These things aside, the Lanboy Air is not only a case of unrestricted space it will fare well with modders. This case is perfect for those who love to modify. The features, space and functionality is just begging to have those with the ability to unleash their skills.
I just love how you can customise so many aspects of the case. Antec have done an excellent job of constructing this case – bringing forth a case that has an abundance of available options.
The only issue that I can see with hindsight is that because this case is so open, with mesh panels on almost every side and gaps present – the issue of having dust enter the case could well be a problem. None of the fans have filters, similarly there are no filters on the side panels.
At a price-tag of £160 some may argue this is steep. Of course this all depends on what perspective you are looking at the Lanboy Air from. This case is built for gamers who want mobility, modders who want customisation and enthusiasts that want space. Unlike anything on the market to date, the Antec Lanboy Air is an extremely innovative, well thought out enclosure that will divide many case enthusiasts.
Pros
+ Exceptionally functional
+ Easy to move
+ Fan control on all 5 pre-installed fans
+ Very spacious
Cons
– Looks aren’t very appealing
– Will attract dust
+ Exceptionally functional
+ Easy to move
+ Fan control on all 5 pre-installed fans
+ Very spacious
Cons
– Looks aren’t very appealing
– Will attract dust
The Antec Lanboy Air is a very innovative case, but a few things take the gold from its grasp. I award the Lanboy Air the Silver award.

