The Arctic Z1-3D has evolved monitor arm design and introduced features that you don’t often see on these types of products.

Product on Review: Z1-3D
Manufacturer: Arctic
Street Price: £70.99 / $79.99
Arctic as a company are well known for their cooling solutions for PC. It may not be as widely-known, that they also manufacture audio gear as well as other accessories. Today we will be taking a look at one of these accessories, and that is in the form of the Z1-3D monitor arm.
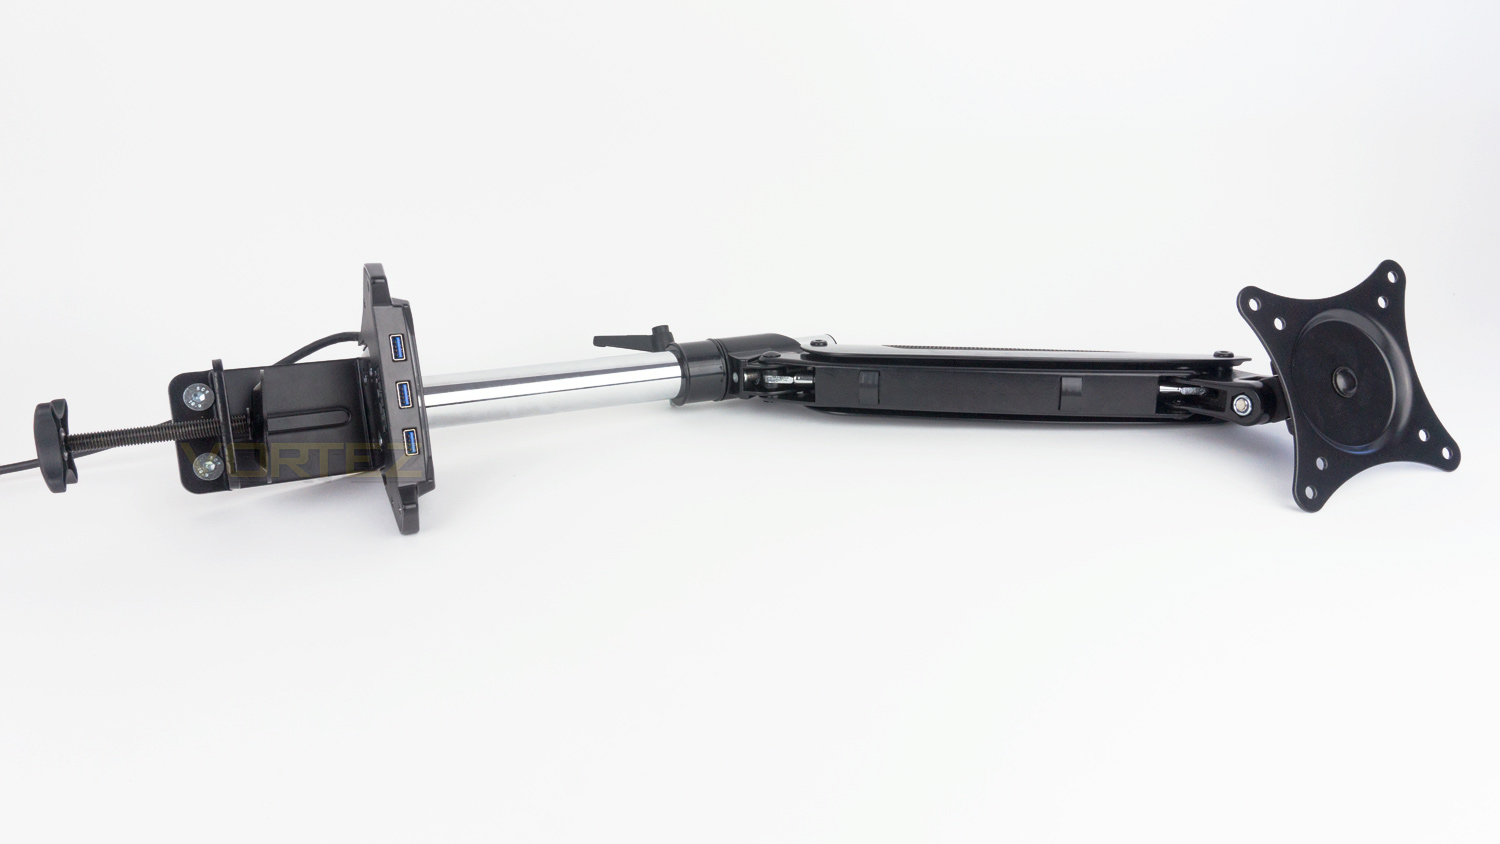
The Z1-3D takes the standard recipe for monitor arms and adds a few more complementary features. The main highlights to take away are the built-in powered USB hub that provides four high-speed USB 3.0 ports as well as an integrated gas-lift. Additional elements like the clever 3D design and also the included cable management features, further strengthen the appeal.
So the feature set looks quite strong, but can the Z1-3D get it right where it counts the most?
Arctic on the Z1-3D:
The Z1-3D monitor arm provides you a completely new sense of work at your screen. On top of the standard rotation, swivel and tilt, Z1-3D allows you to move your monitor in any direction.
Technical Specifications
Features
Tilt – +/- 45°
Swivel – 180°
Rotation – 360°
USB 3.0 hub – 4 USB 3.0 ports (mains powered)
Compatible with – Windows 10, 8.1, 7, Vista, XP, Mac OS, Linux
Compatibility
VESA Standard – 75 / 100
Maximum Monitor Weight – 8 kg (17.6 lbs)
LCD size: 13″ – 32″ (33.02cm – 81.28cm)
Table thickness – less than or equal to 65mm (6.5cm – 2.55”)
Size & Weight
Arm length – 110mm – 530mm (4.33” – 20.87”) (max with extension arm)
Pole height – 310mm (12.20”)
Weight – 3kg (6.6lbs)
Clamp dimensions – 75mm (H), 70mm x 70mm (Base)
USB hub cable length – 2m
Power adapter input – 100 -240V AC, 50-60Hz, 0.5A
Power adapter output – 5V DC, 2A
2 Year warranty
Tilt – +/- 45°
Swivel – 180°
Rotation – 360°
USB 3.0 hub – 4 USB 3.0 ports (mains powered)
Compatible with – Windows 10, 8.1, 7, Vista, XP, Mac OS, Linux
Compatibility
VESA Standard – 75 / 100
Maximum Monitor Weight – 8 kg (17.6 lbs)
LCD size: 13″ – 32″ (33.02cm – 81.28cm)
Table thickness – less than or equal to 65mm (6.5cm – 2.55”)
Size & Weight
Arm length – 110mm – 530mm (4.33” – 20.87”) (max with extension arm)
Pole height – 310mm (12.20”)
Weight – 3kg (6.6lbs)
Clamp dimensions – 75mm (H), 70mm x 70mm (Base)
USB hub cable length – 2m
Power adapter input – 100 -240V AC, 50-60Hz, 0.5A
Power adapter output – 5V DC, 2A
2 Year warranty
Packaging & Included Parts
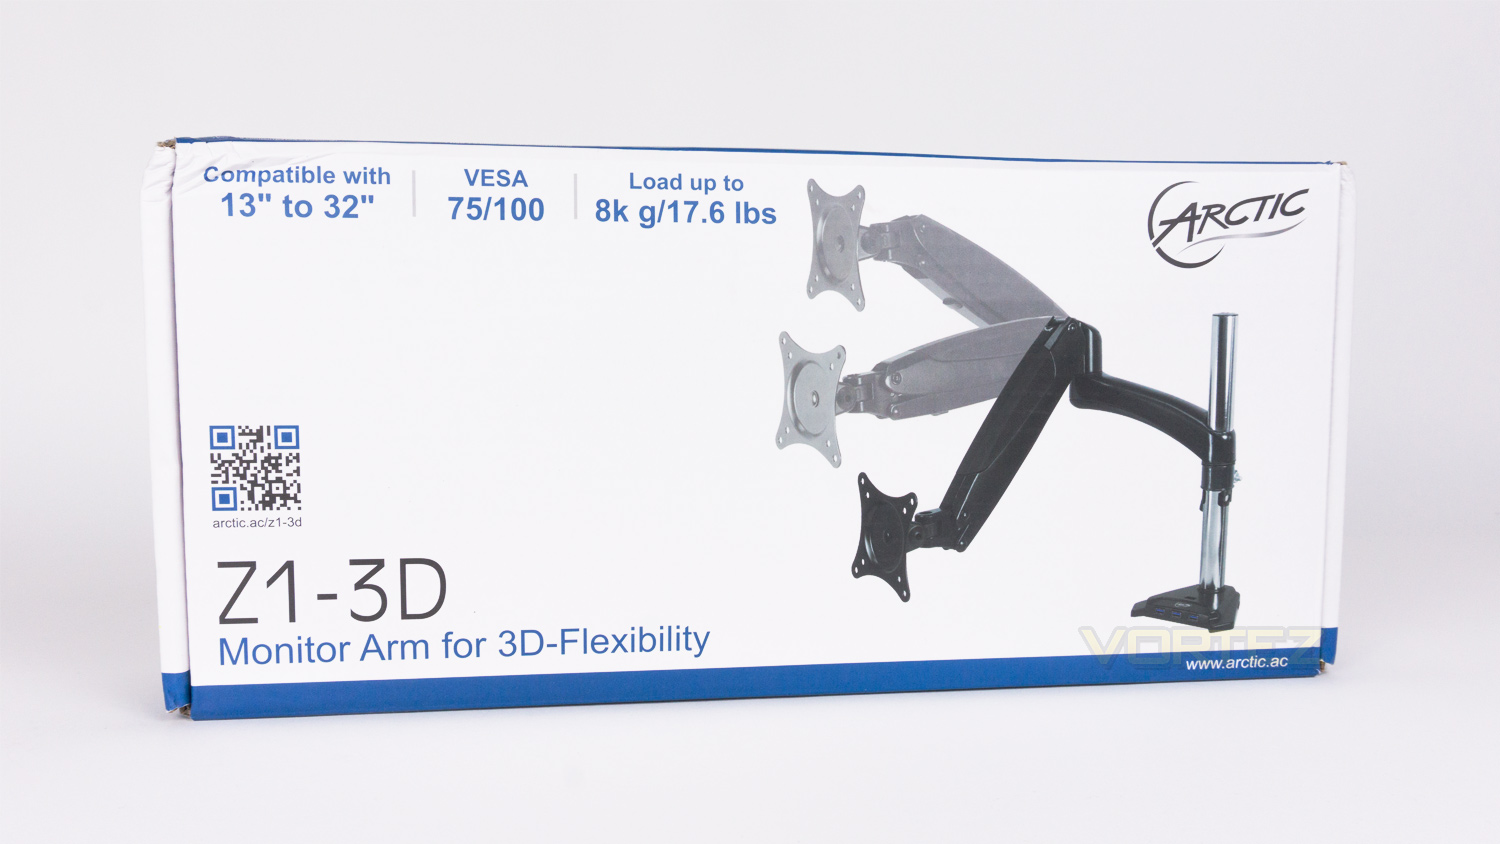
The Z1-3D comes in a very sturdy box with the Arctic logo in the top right corner and information about the Z1-3D in the top left.
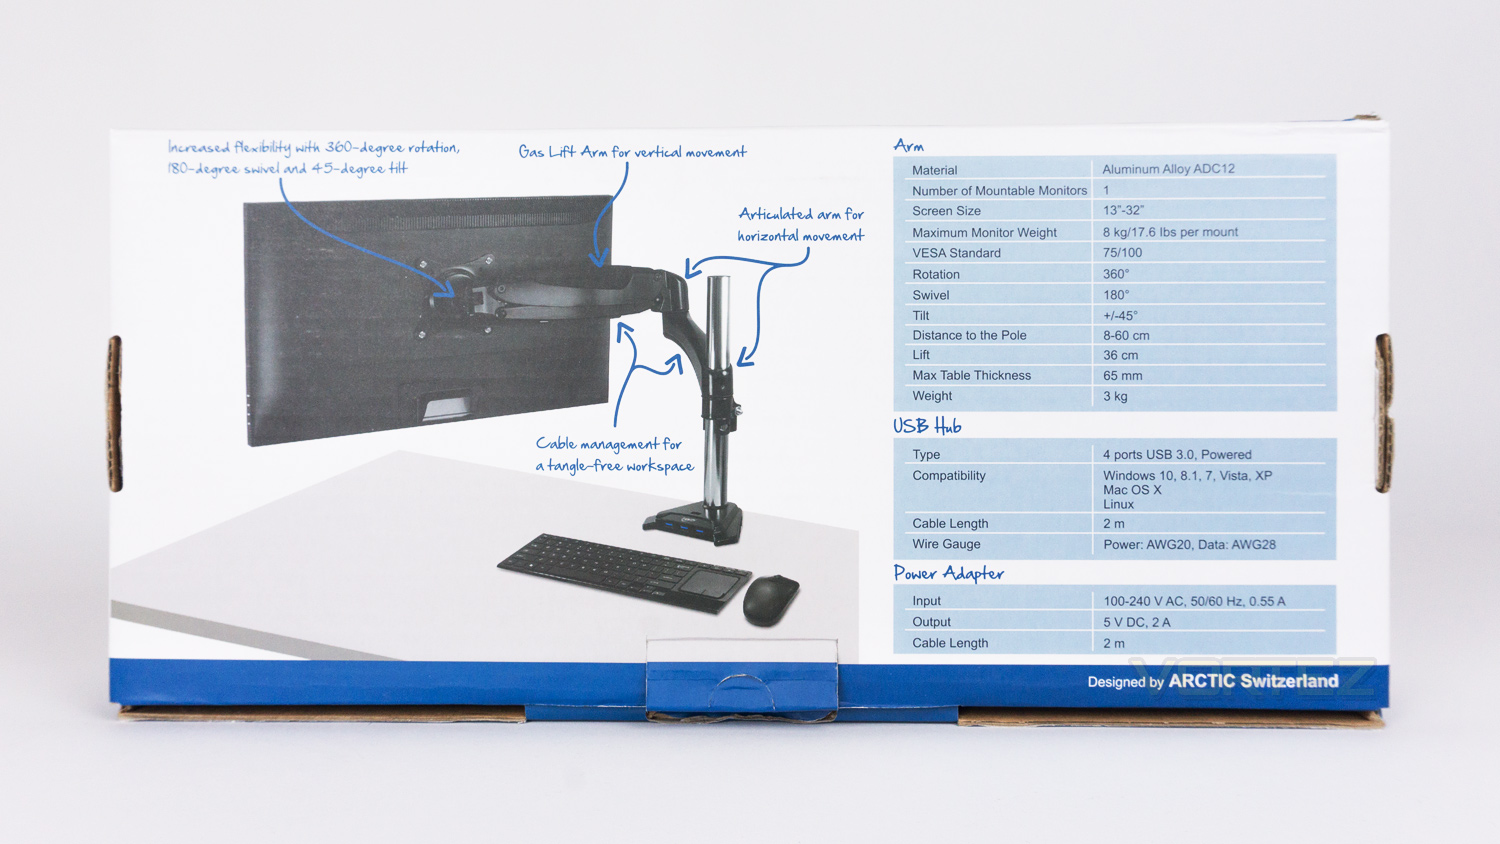
On the opposing side of the box there is a diagram with some of the key features, and to the right of that, there is a table of the specifications.
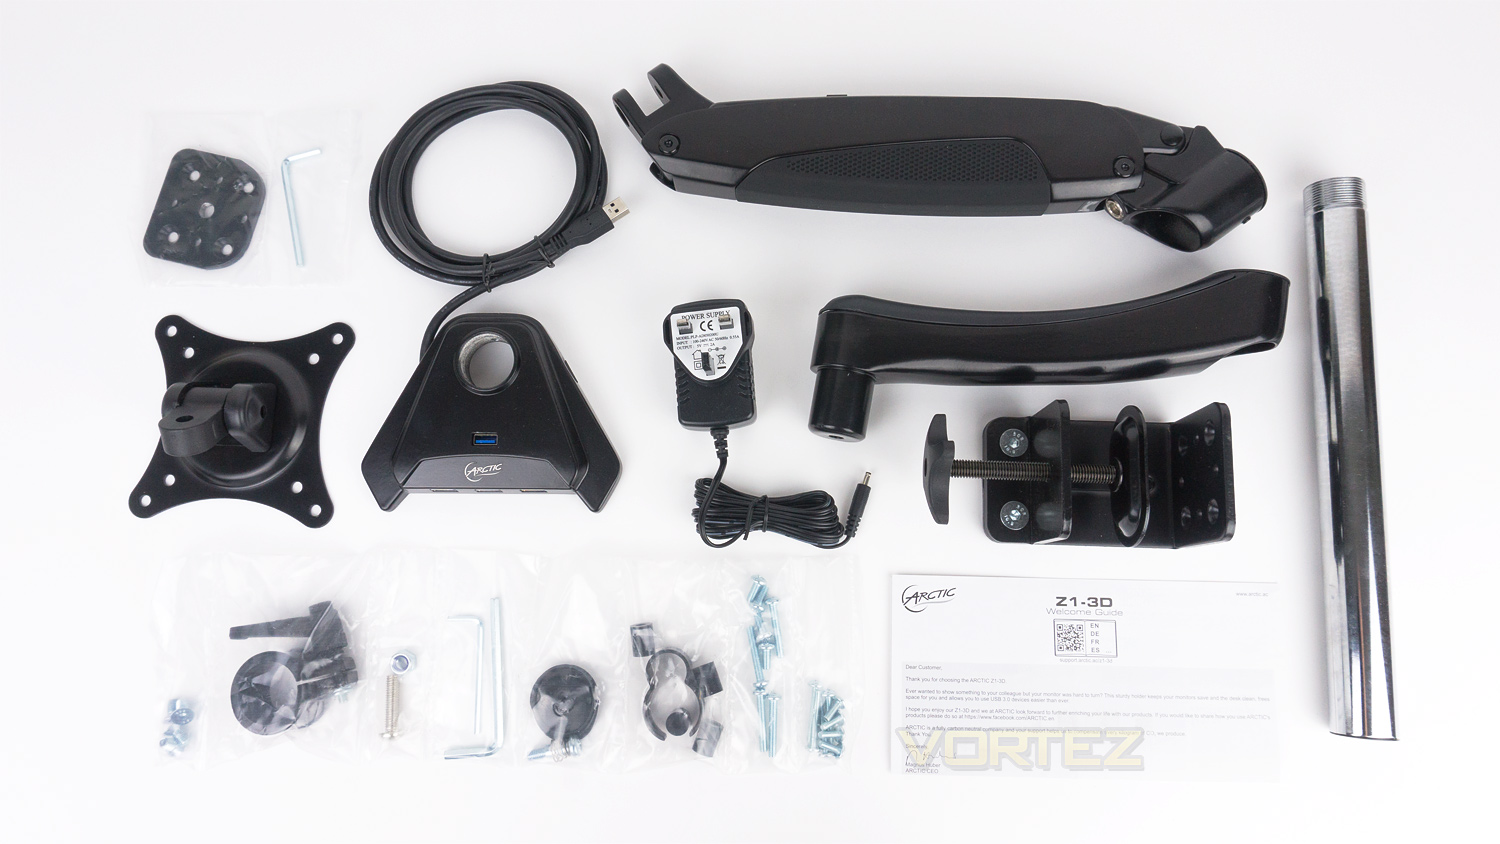
With the Z1-3D there is a huge selection of almost all the items needed to assemble the arm. The only thing that does not come included is a Philips head screwdriver which is required for the VESA mounting. The box does, however, include
1 x Pole
1 x Mounting head
1 x Pole clamp
1 x Cable clip
1 x Decoration plate
3 x Hex key (3mm, 4mm, 5mm)
1 x Grommet
1 x Gas spring arm
1 x Extension arm
1 x clamp
1 x USB hub
1 x UK power adapter (country specific)
4 x M4/M5 spacer
4 x M6 Screws (12mm)
4 x M5 Screws (12mm)
4 x M5 Screws (30mm)
4 x M4 Screws (12mm)
4 x M4 Screws (30mm)
1 x Spring screw
1 x Allen screw
1 x Nut
1 x User guide
Included Parts (Continued)
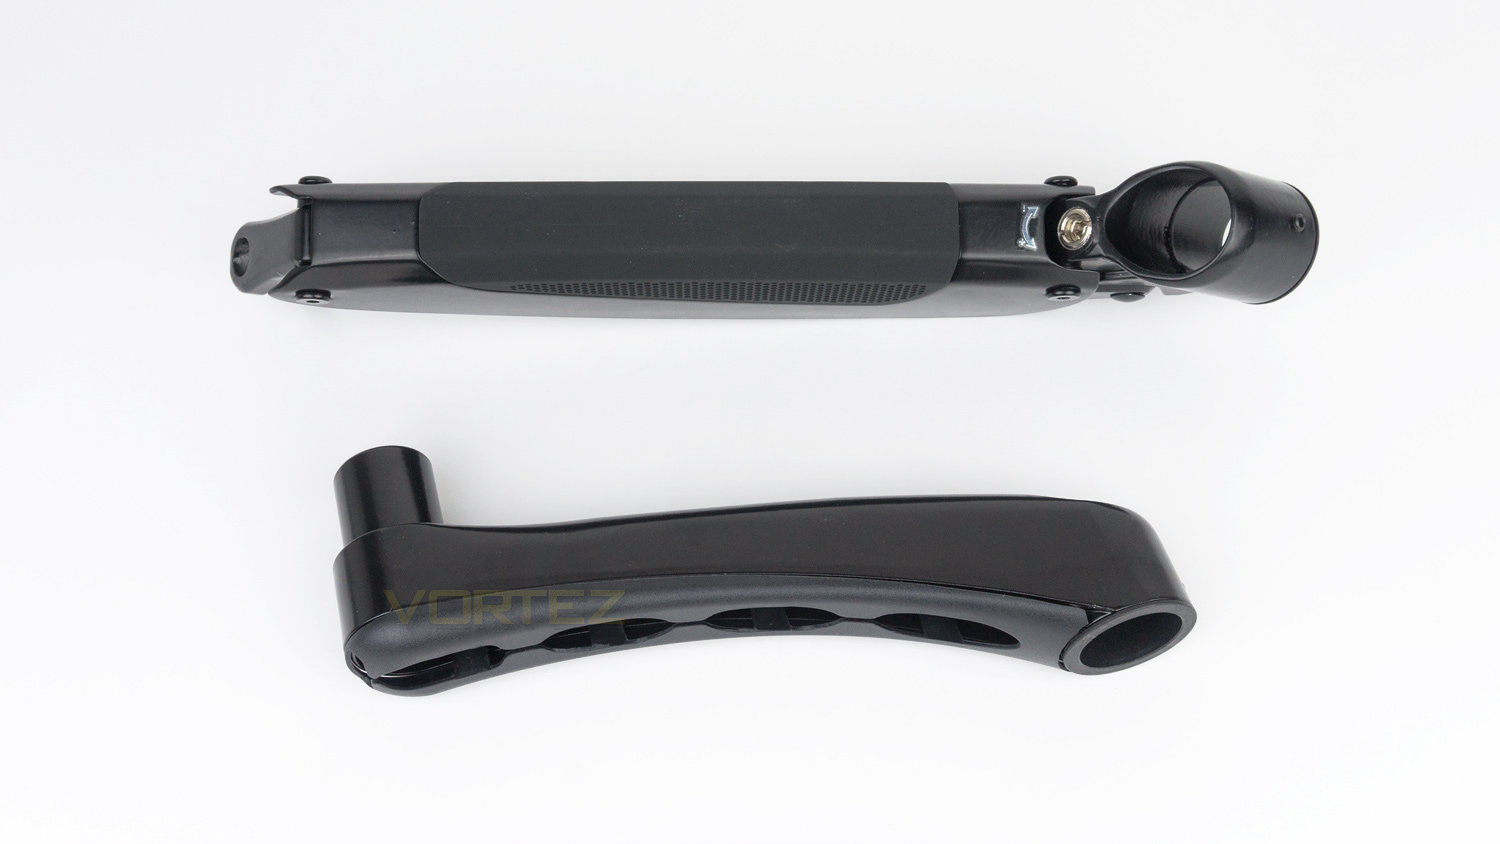
The main gas lift and extension arm are constructed from Aluminium which makes the relatively lightweight but also durable. The main arm features a rubberised top section whereas the extension arm features a plastic one. The main arm uses a gas-lift that enables it to be smoothly moved into the optimal position. The strength of the gas-lift can also be adjusted by using one of the included hex keys.

The clamp and grommet plate are made from metal and are very strong. The clamp uses a swivel to tighten mechanism that is older in design but very functional. The grommet plate is only required if you plan to permanently mount the arm to your desk.
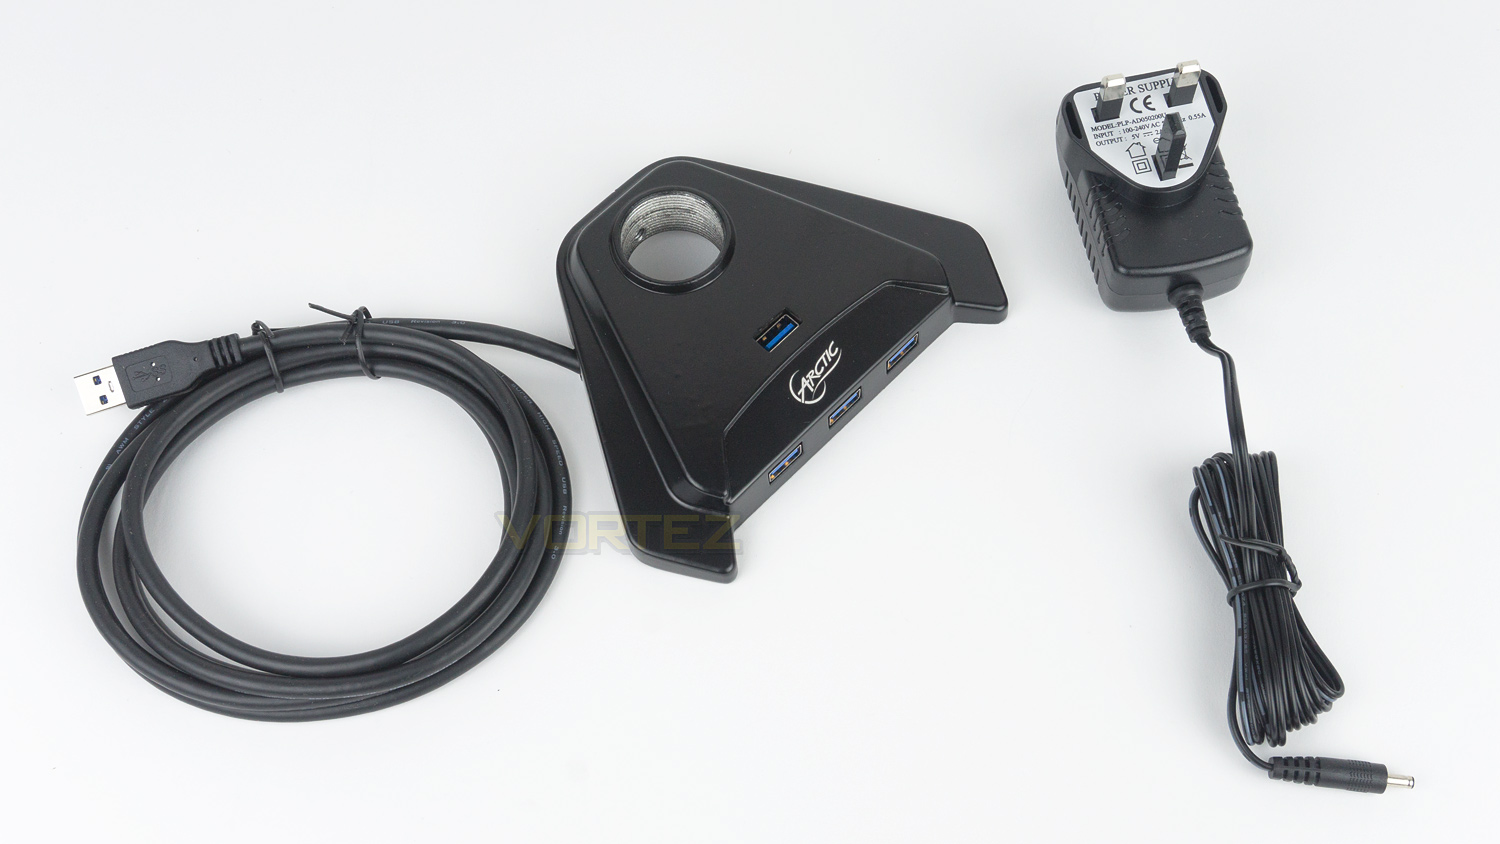
The USB hub is also made from a durable metal as it has to help support the weight of the arm as well as the monitor. The hub is powered by the mains and has 4 built-in USB 3.0 ports. The built-in cable is very thick and measures in at 2m, this would give you a good deal of slack to have your monitor a good distance away from your PC. The power adapter – UK in this case, is plastic and has a long cable with a barrel plug on the end.
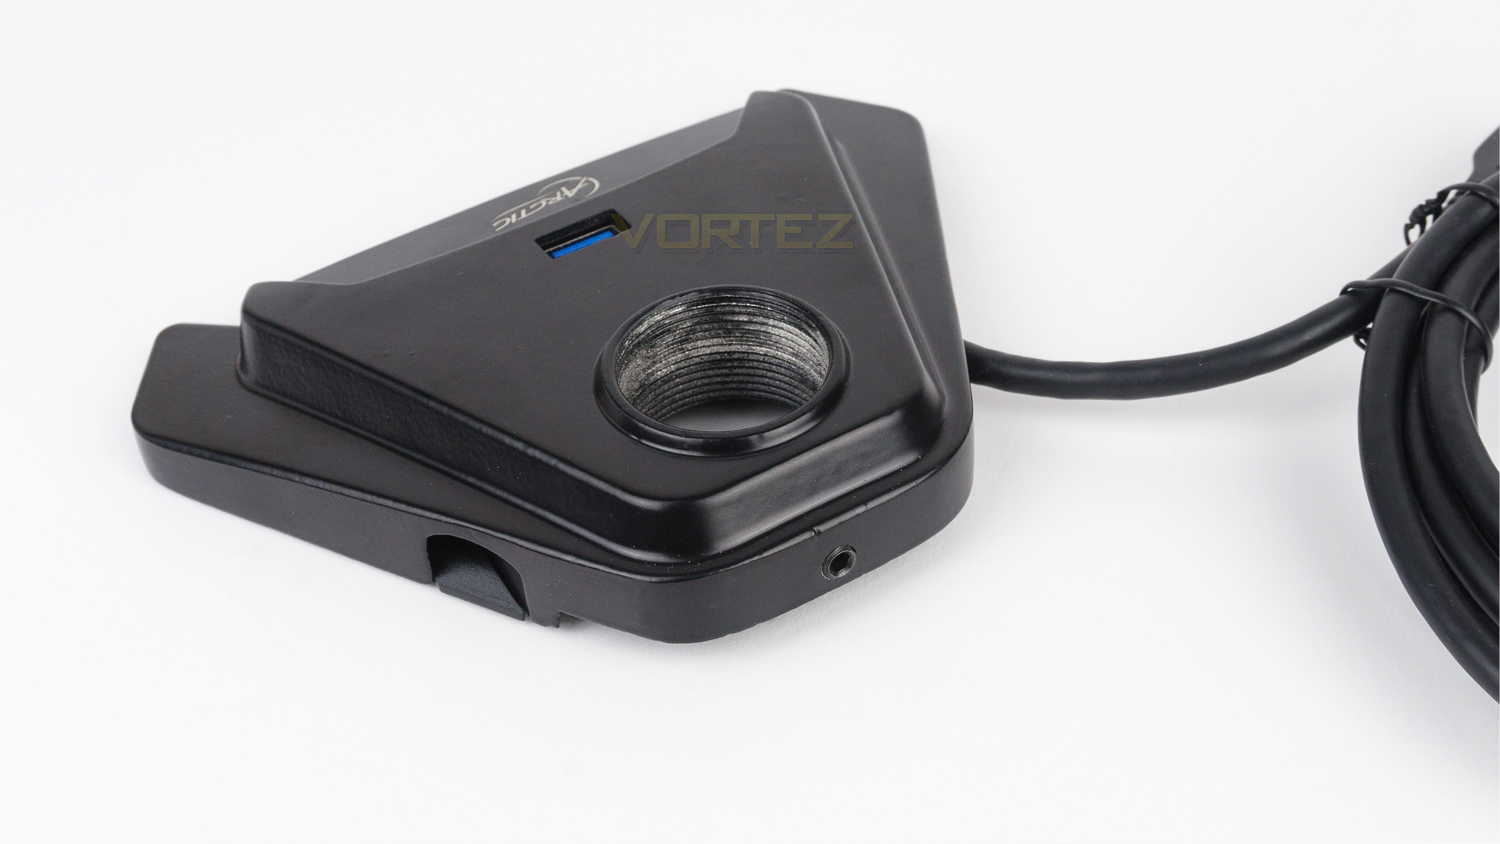
The rear of the USB hub provides access to the mains power input which is located inside a cut-out at the side. At the very most rear, there is a small hole that allows you to tighten the monitor pole once it has been installed.
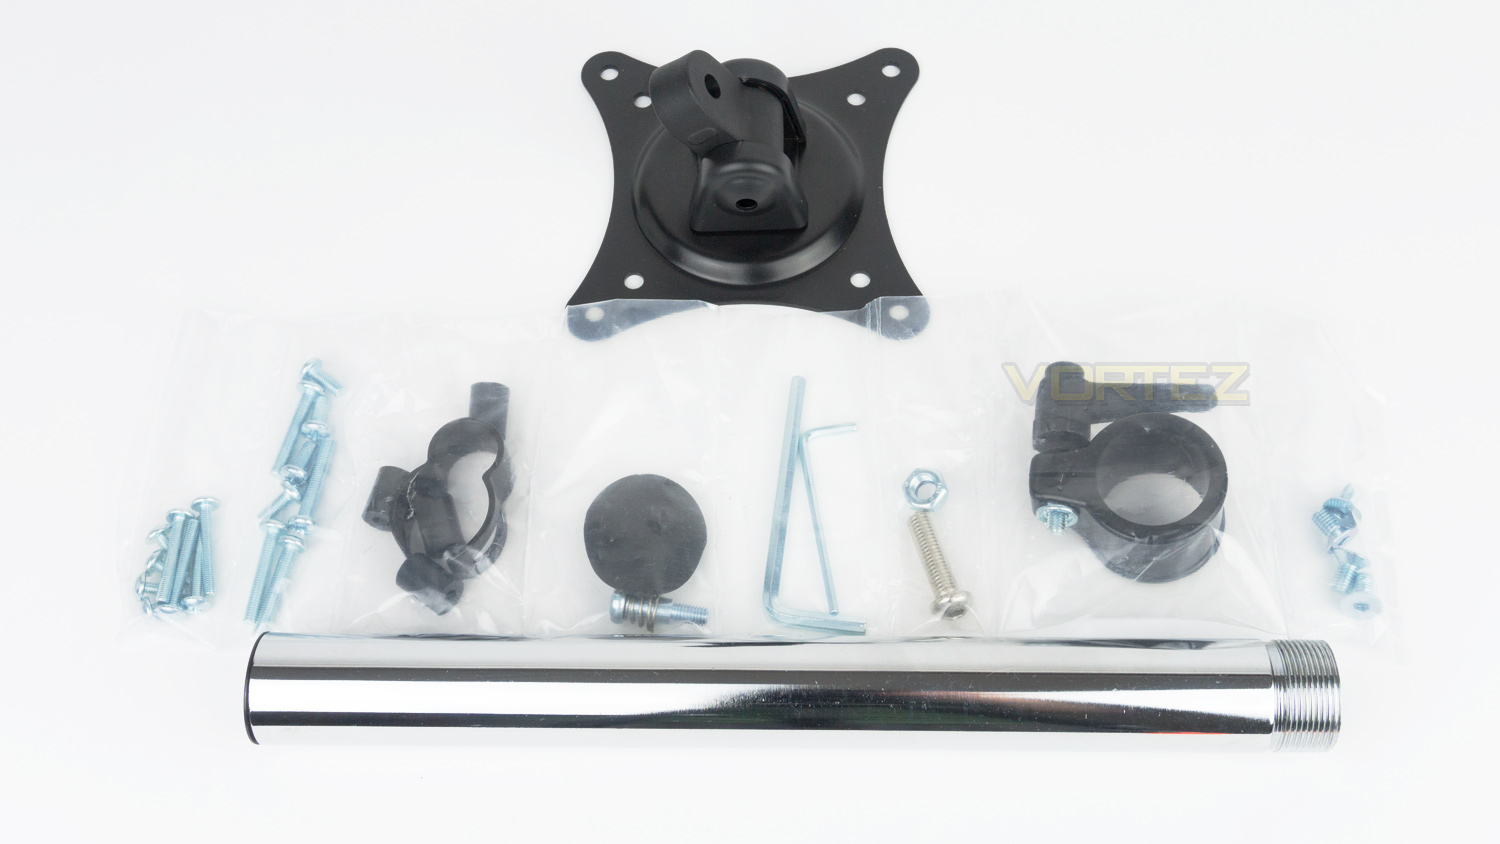
All the small accessories that come with the Z1-3D are high quality and are well made. The cable clip and pole clamp do feel a bit cheaper than the rest of the parts, but they are still strong enough to do their job. The VESA mounting head is again metal and feels robust; it’s also compatible with the 75/100 standard meaning it will work with most modern PC monitors. The pole is a high polished metal which is again quite premium in its construction.
Assembly & Finished Look
There are two main methods of mounting the Z1-3D to your desk. One method makes use of the clamp, and the other requires a hole to be cut out in your desk. We chose to opt for method one as it gives greater flexibility for positioning the monitor arm, whereas the second method is more permanent. If you do choose to go down the more permanent route, we would advise taking your time before making any modifications to your desk. The included documentation provides a very easy to understand step by step guide on how to assemble the arm and to mount it.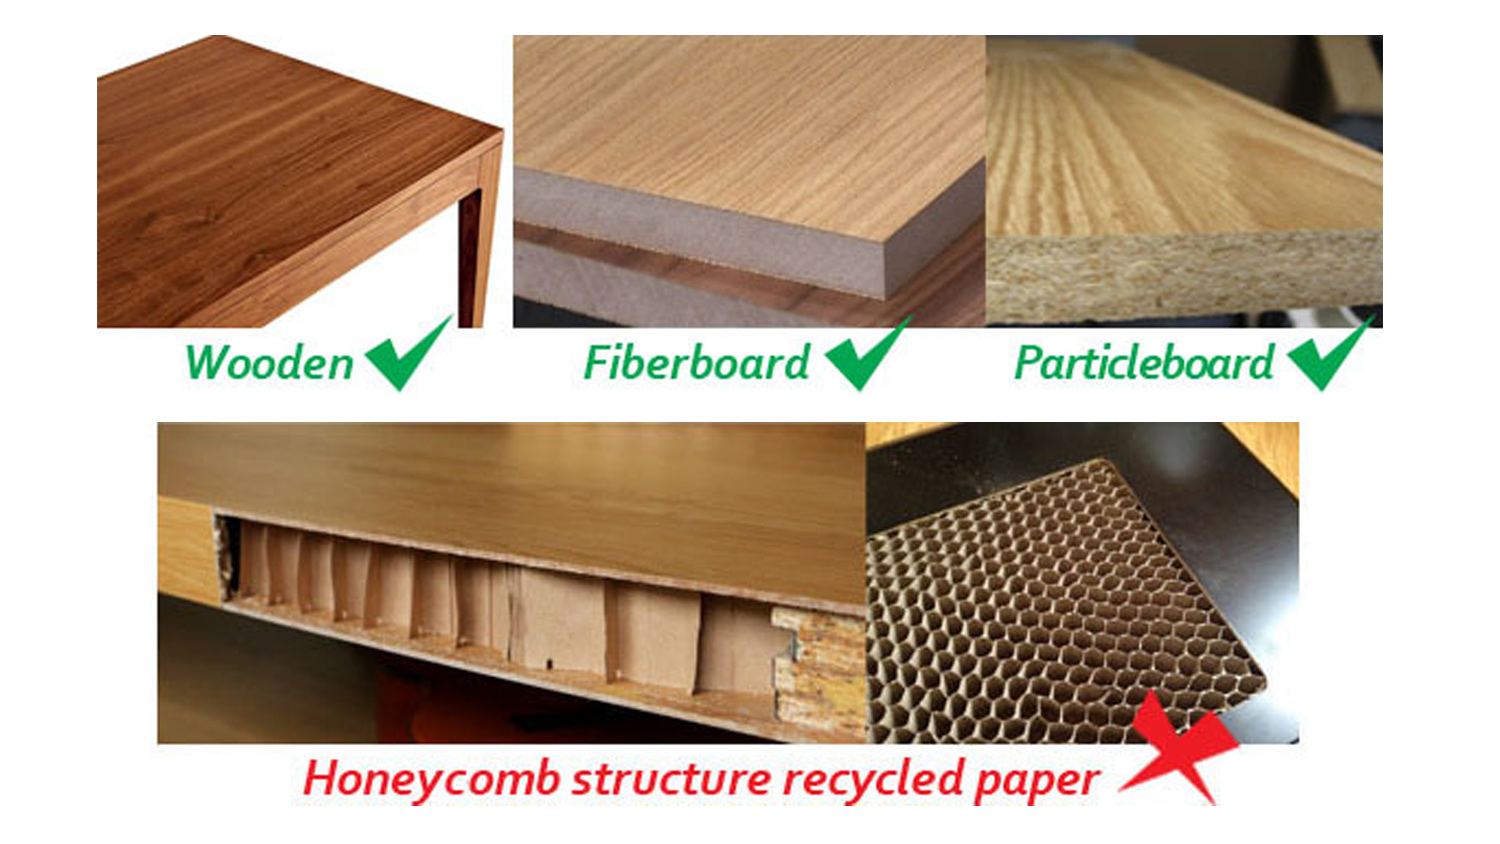
There are a few things to note before attempting any installation with the first being the maximum thickness of the desk. This is 65mm, so be sure to measure your desk beforehand. The next thing is the type of desk the Z1-3D can be mounted to. Arctic advise that desks which are made from a honeycomb structure recycled paper should not be used. Desks that are made from more durable materials such as fiberboard, wood and particleboard are okay to use. Also, make sure that you have a Philips head screwdriver to hand as you’ll require one for the installation process. It is also worth noting that this type of monitor arm should not be used with a glass desk as the pressure from the clamp system would break it. If you do wish to use a monitor arm, then wall mounting would be the best choice. Arctics, W1B would be a great an ideal pick as it offers great flexibility and built-in cable management.
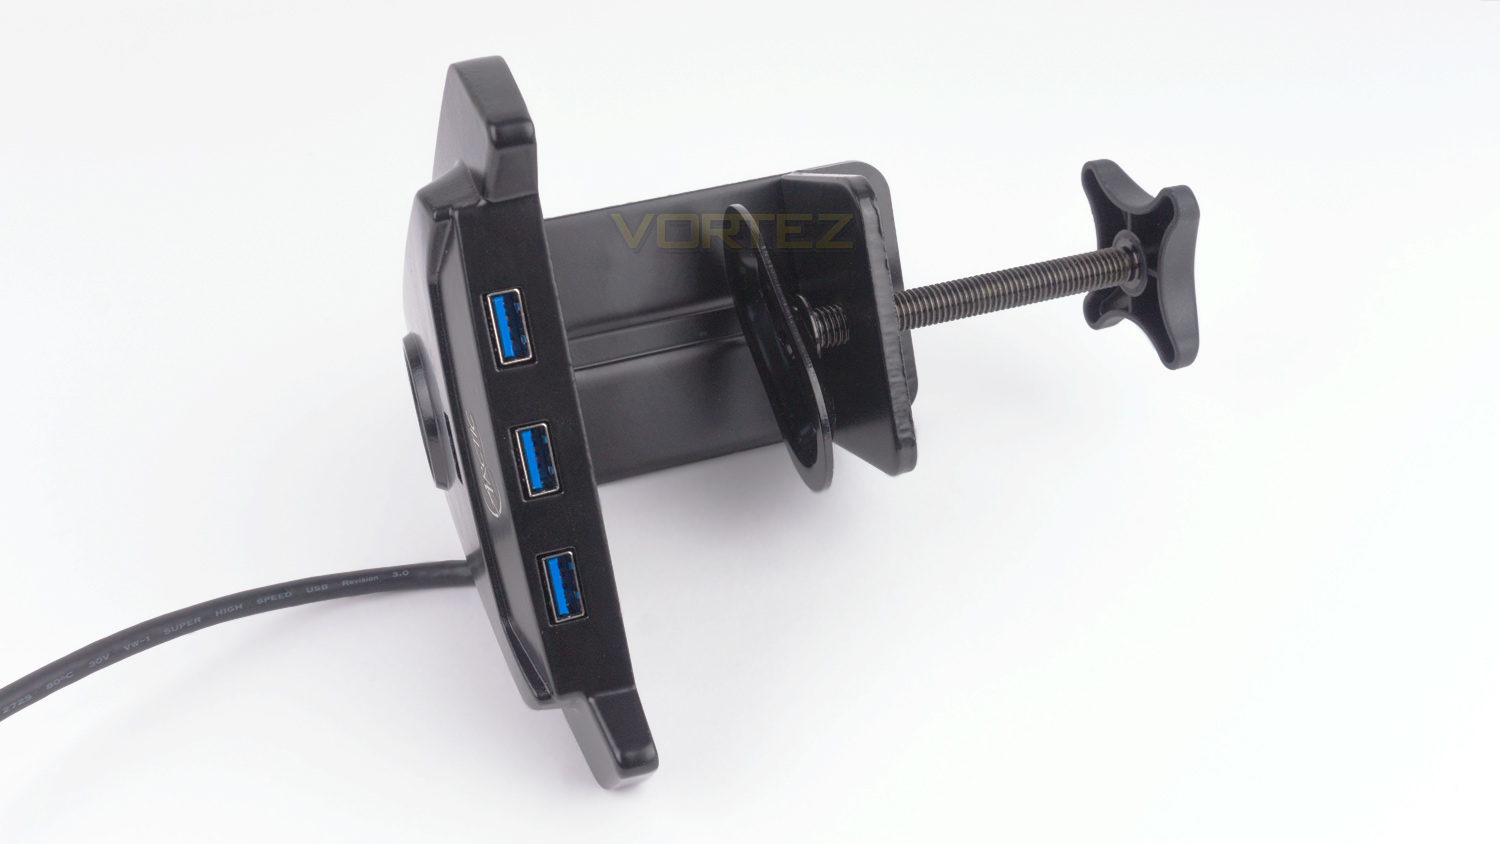
As we mentioned, we opted for mounting method one and the following will illustrate that. Step one of the assembly is very straightforward. You will need the M6 screws (12mm), the 4mm hex key, the USB hub and the clamp. All you then have to do is align the screw threads at the bottom of the USB hub with the holes in the clamp, then insert and partially tighten the screws in place. You will then use the hex key to fully tighten the screws ensuring that you don’t over-tighten them.

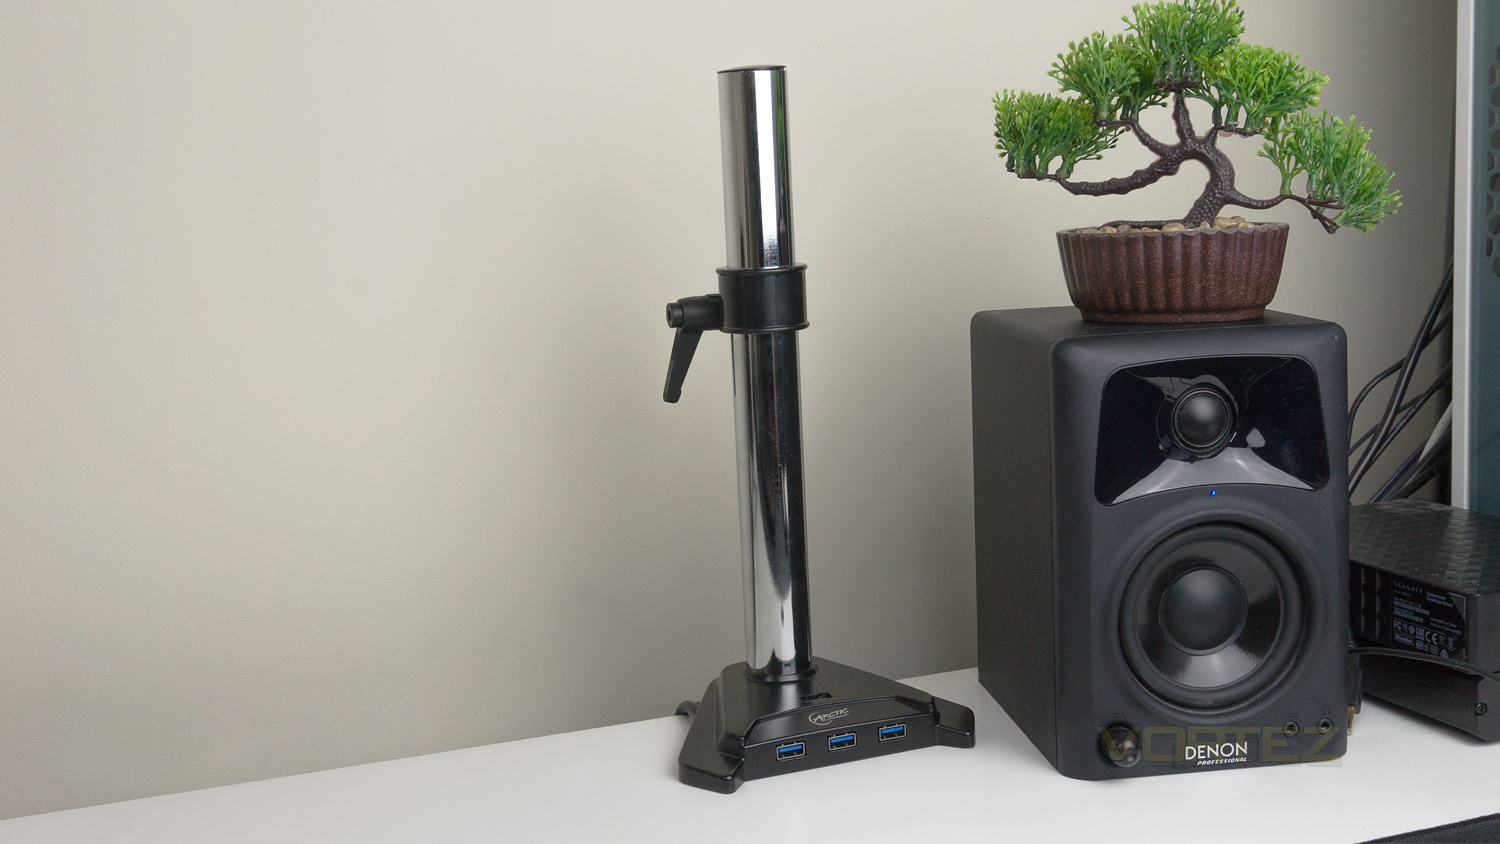
The next step is to mount the pole to the hub. There is a threaded mount at the top of the hub, and all you have to do is thread the pole into the threaded mount. Once tightened you can use the 3mm hex key to lock the pole into place. The next step is to then mount the clamp, and USB hub to your desk. First, you’ll need to loosen the clamp to make sure it fits around your desk. Once you place the clamp around your desk, you would then tighten the mechanism. We’d advise not to do this too tight at first, just to make sure that you are happy with the placement. Once you are, you can then tighten it, again making sure not to over-tighten it.
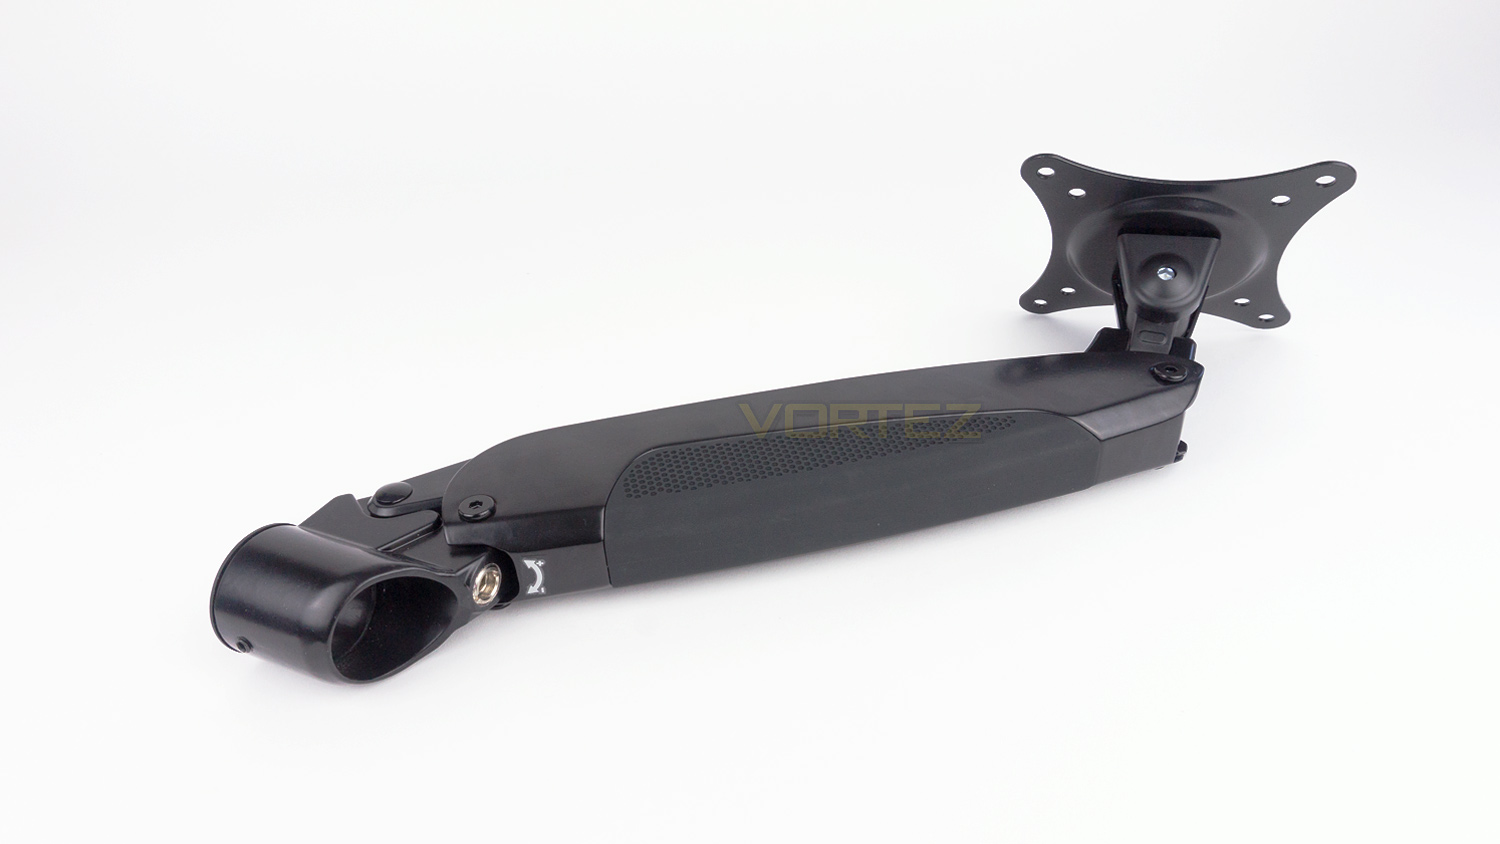
This step you attach the VESA mount to the gas-lift arm. For this, you’ll need the 5mm hex key, the nut and 30mm Allen screw. First, you have to align the VESA mount with the bracket on the arm, then insert the Allen screw through the centre. Next, you have to hold the nut in place on the underside of the arm and use your free hand to tighten the Allen screw into place.
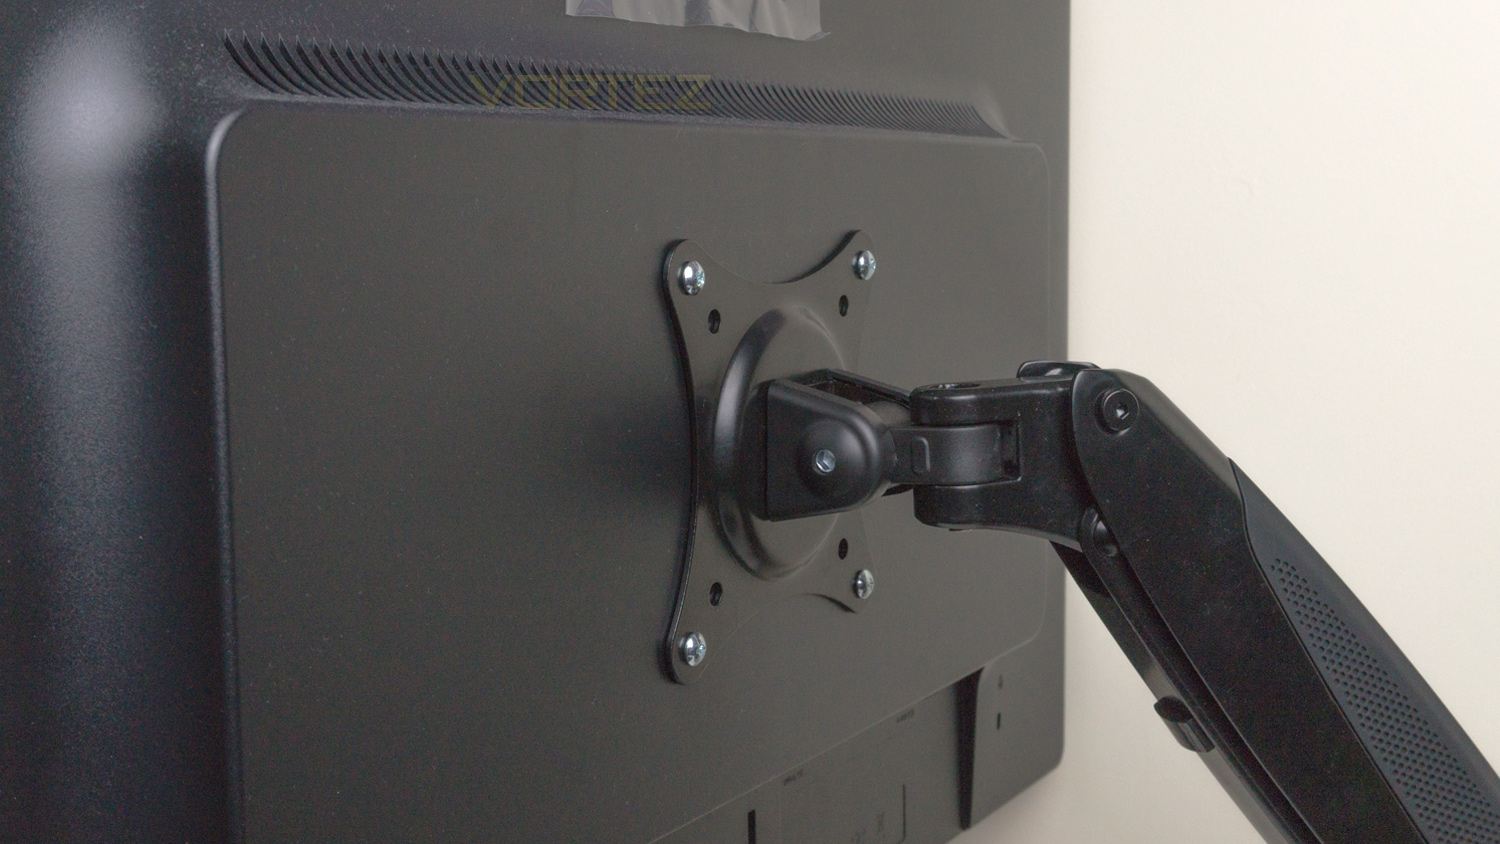
For this step, there are two ways to do it. One method would be to first attach the monitor to the VESA mount and then lift the entire thing and align it with the pole. The other would be the mount the arm onto the pole first and then mount the monitor to the VESA mount. We opted for the first method as we found that easier to manage. For this step, you will need either the M5 screw or the M4 screw depending on the thread type of the VESA mount on the back of your monitor. Also, you may require the spacer if your monitor isn’t perfectly flat. You will also need a Philips head screwdriver as one isn’t supplied. To install the VESA mounting head to the VESA mount on the monitor, you want to lay your monitor flat, while making sure to protect the screen to prevent any damage to it, then use the correct screws to attach the mounting head to the VESA mount on the monitor. You can then lift the whole thing and align the hole in the arm with the pole. Once in place, the next step is to find the correct position that suits you best.
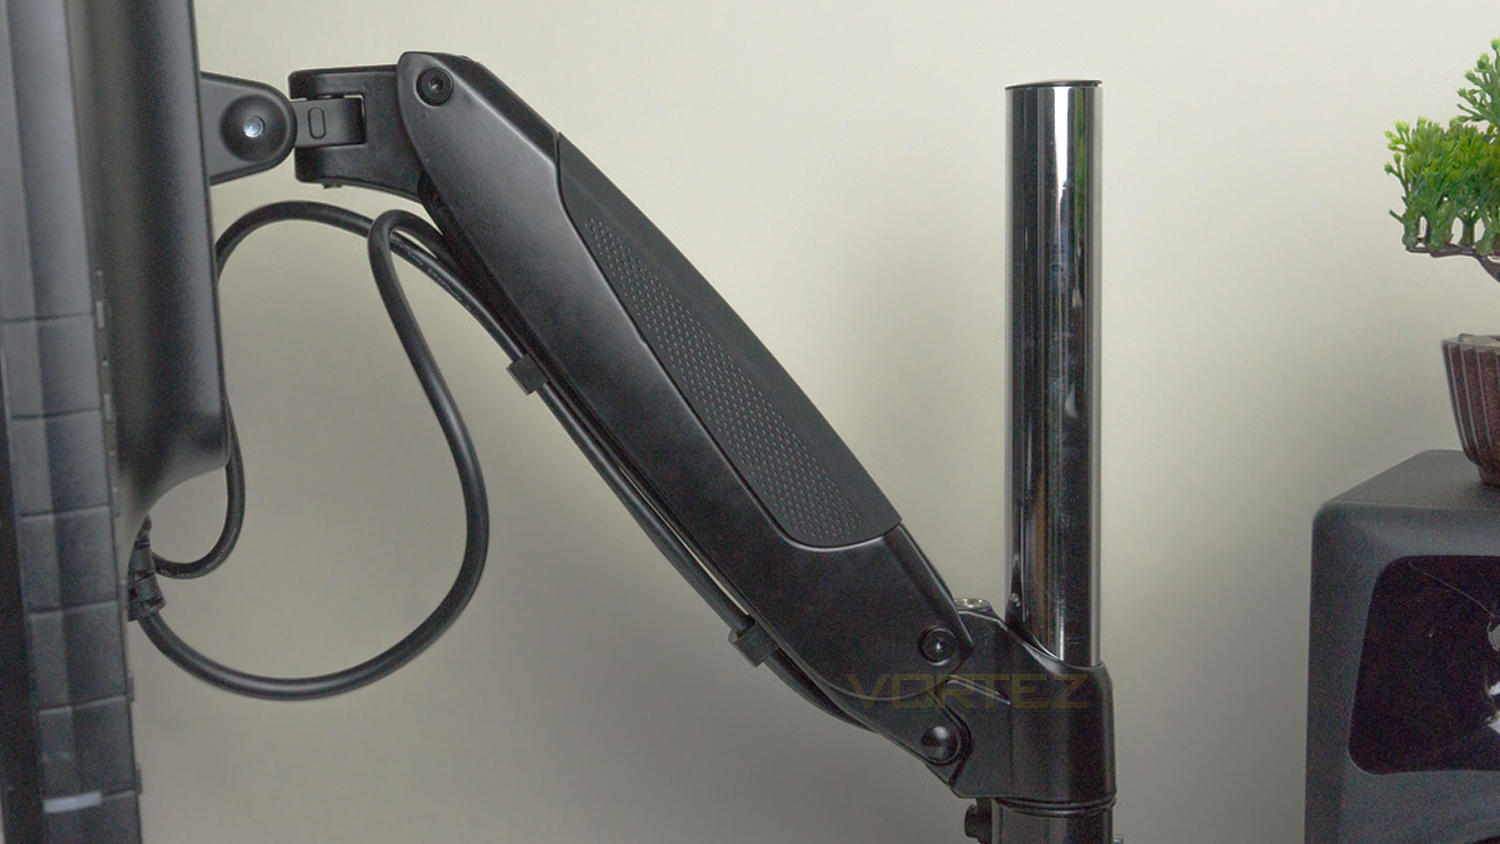
The next steps are to simply sort out the final positioning as well as plugging in the USB hub and to manage any cabling. Positioning is all about preference, and we’d advise taking your time to make sure that it is spot on. Once you are happy, you can then refer back to the manual and tighten all the areas that need it. The cable management is quite easy thanks to the built-in cable management clips and included cable clip. For the hub, all you require is a spare USB 3.0 port in your PC and access to a mains outlet.
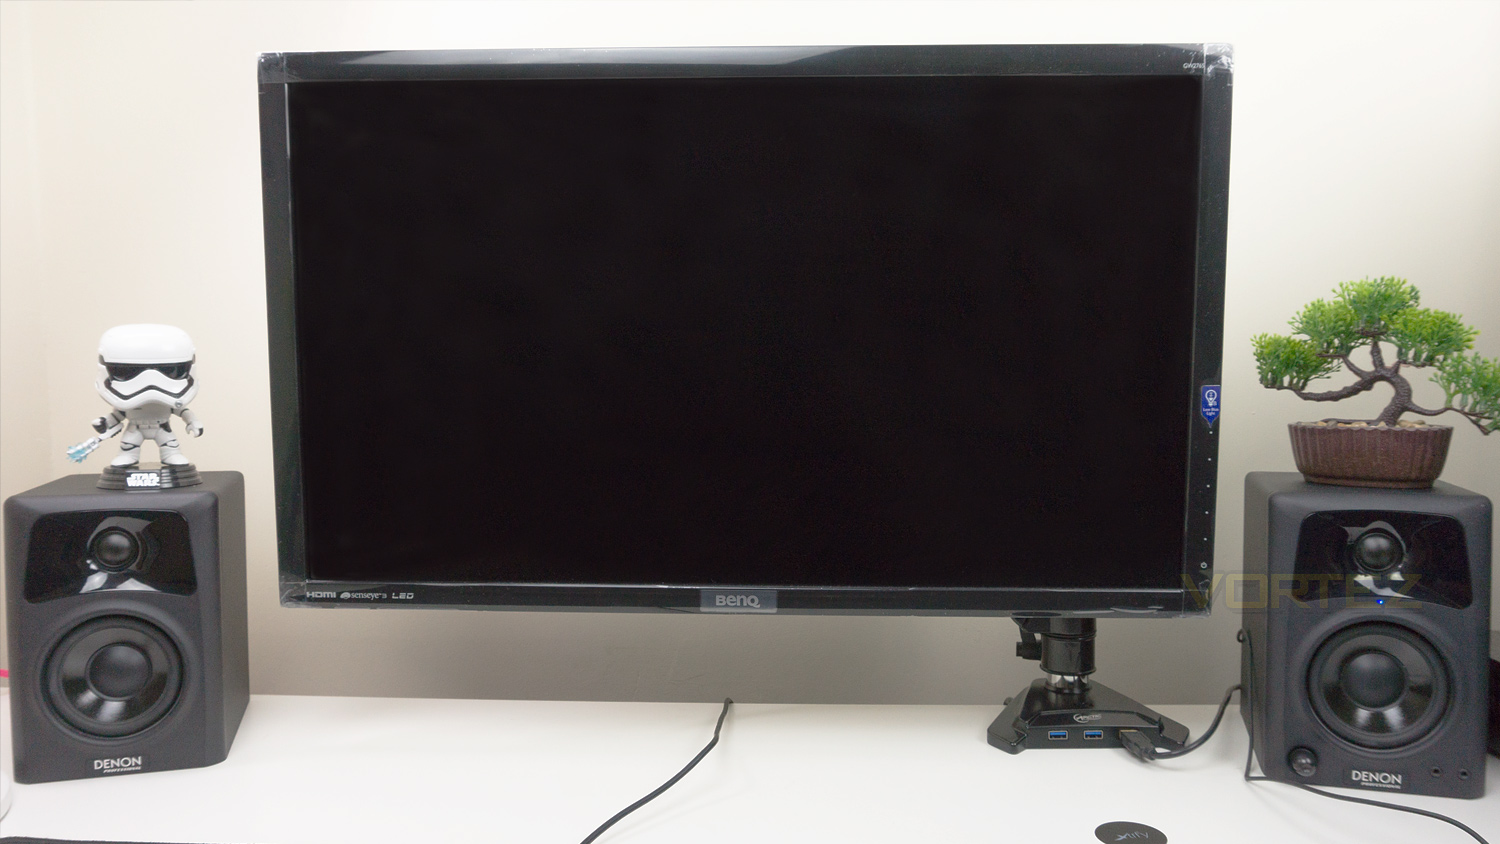
The finished look you can achieve is very nice and clean, especially when taking a bit of care with the cable management. The design of the hub does help to as all the cables outlets are located around the back.
Conclusion
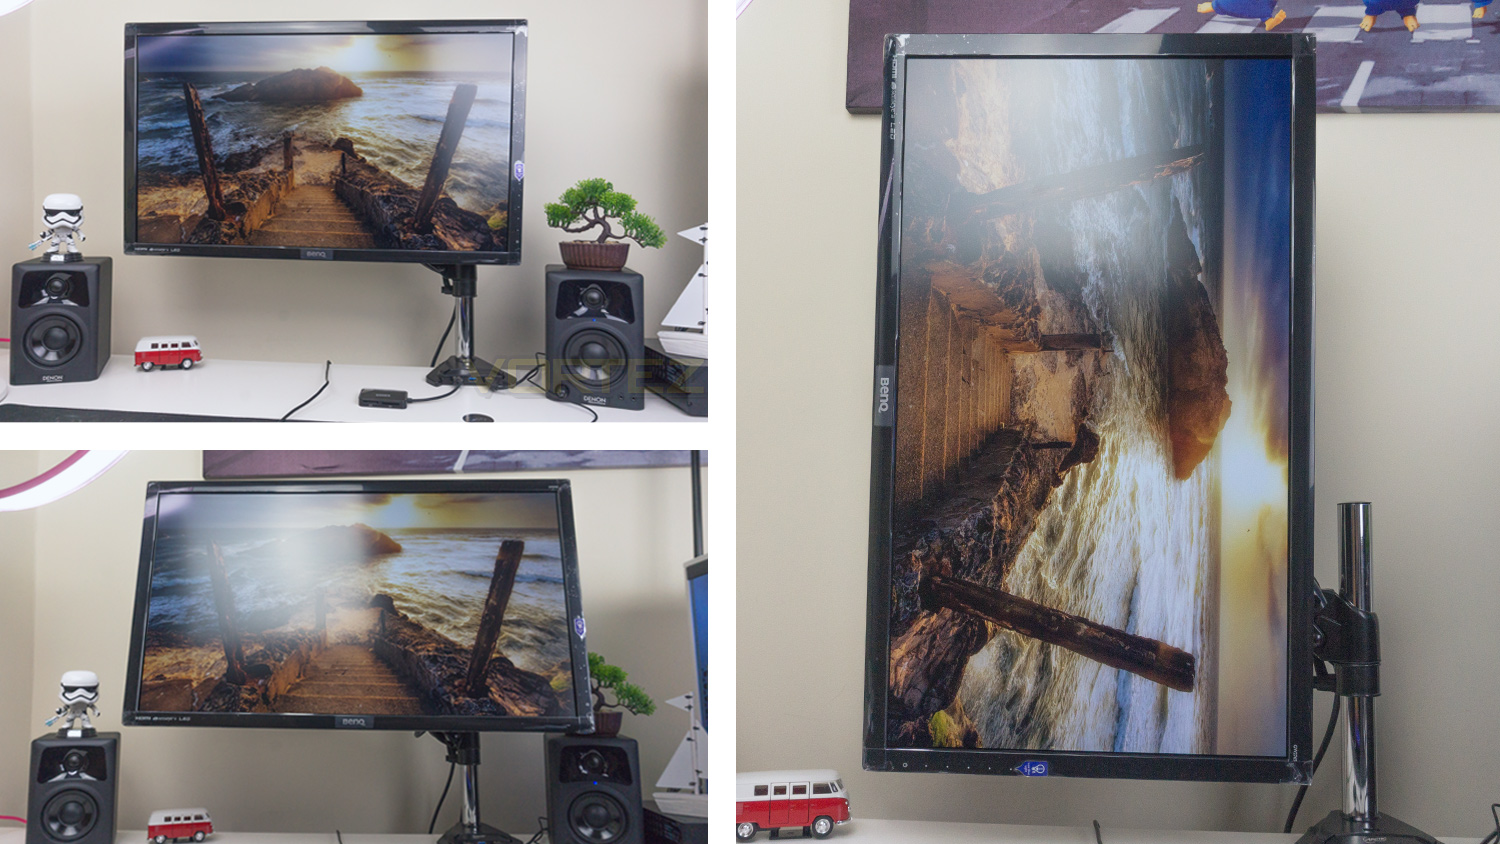
Performance wise the Z1-3D offers so much. In terms of flexibility, the gas-lift combined with the 3D design allows you to move and position your monitor in a multitude of ways, you can place the monitor vertically as well as adjust the height and distance away from your sitting position. This usually requires some minor dis-assembly or other adjustments to be made. With the Z1-3D all you have to do is simply move it. The only real thing that does require a bit of effort is to adjust the height, but everything else is taken care of. The 3D design allows the monitor to be rotated or swivelled a full 360° as well as up to a 45° tilt. With all this flexibility, you can position the arm in a way to improve the ergonomics and make it perfect for you; this is something that a lot of monitor stands cannot do. The cable management works great and allows you to achieve a really clean finish, the only minor issue with this is the built-in clips, these are not the most generous, and it is a bit of a squeeze to fit both the power and display cable in.
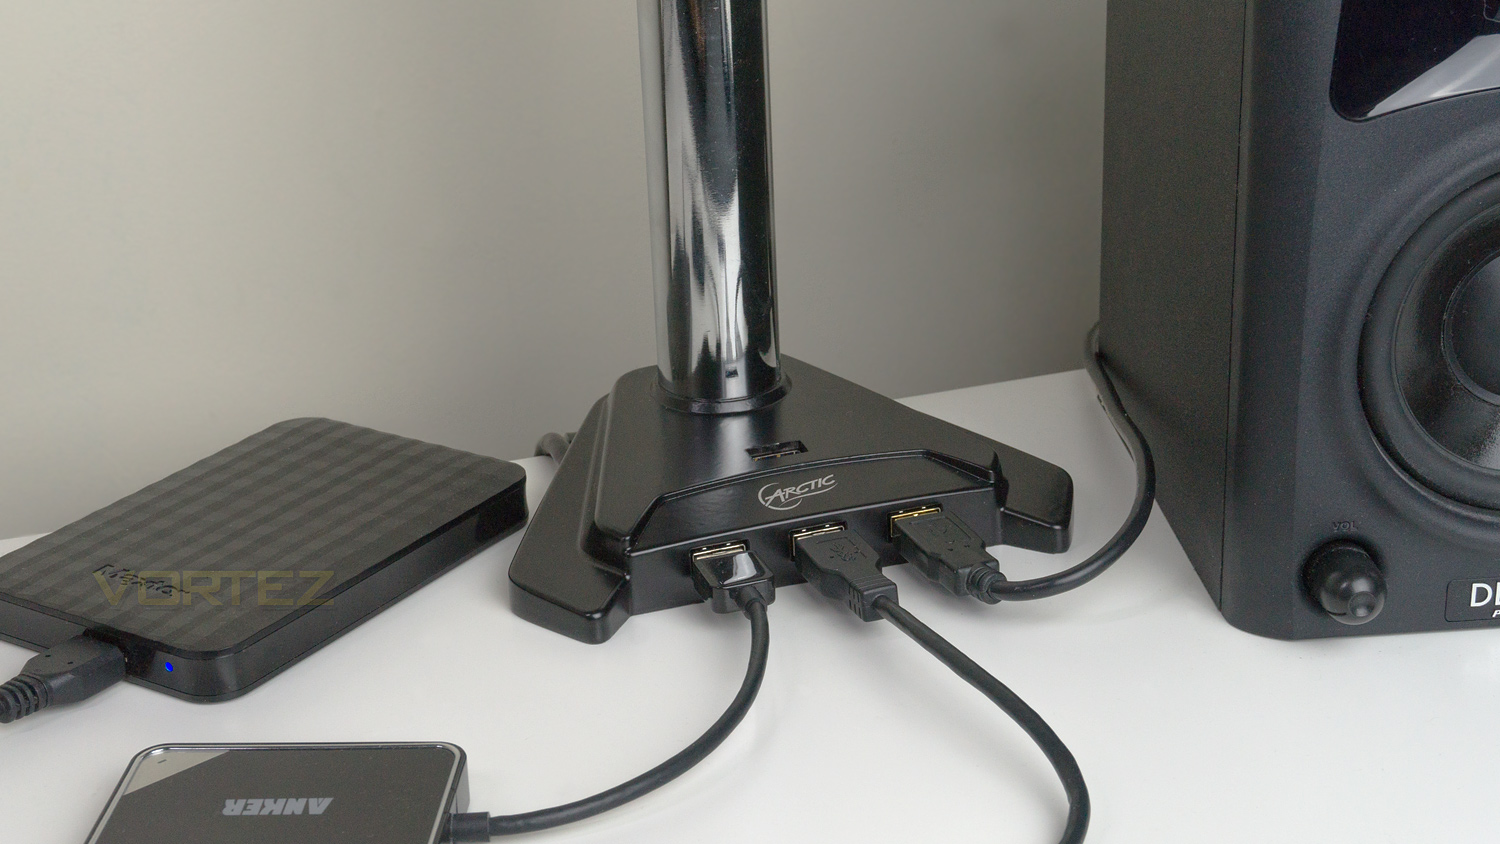
In conclusion, the Z1-3D from Arctic takes the standard monitor arm and enhances almost every aspect of it. This is evident as soon as you open the box as everything is carefully and individually packaged to make the assembly that much easier. This is not a clincher, but it does help improve the perceivable image that Arctic was aiming for. It then gets all the basics right as it nails home the build quality and also the design, both of which are fitting of the price tag. Then it’s additions like the USB hub, the gas-lift and 3D design where you start to get that additional value. The USB hub is both useful and fast; matching the speeds that were achieved on the front IO USB 3.0 ports as well as providing four additional ports to use for a USB flash drive or an SD card reader. The gas-lift and the 3D design easily allows you to tailor the position of the monitor to exactly where you’d like which is great for not only style but also ergonomics.
The Z1-3D is maybe a bit pricey for a monitor arm, and if it were just a simple monitor arm, then that price would be too big an ask. But seen as it offers so much more than just what a standard arm offers, then that price does start to make sense.
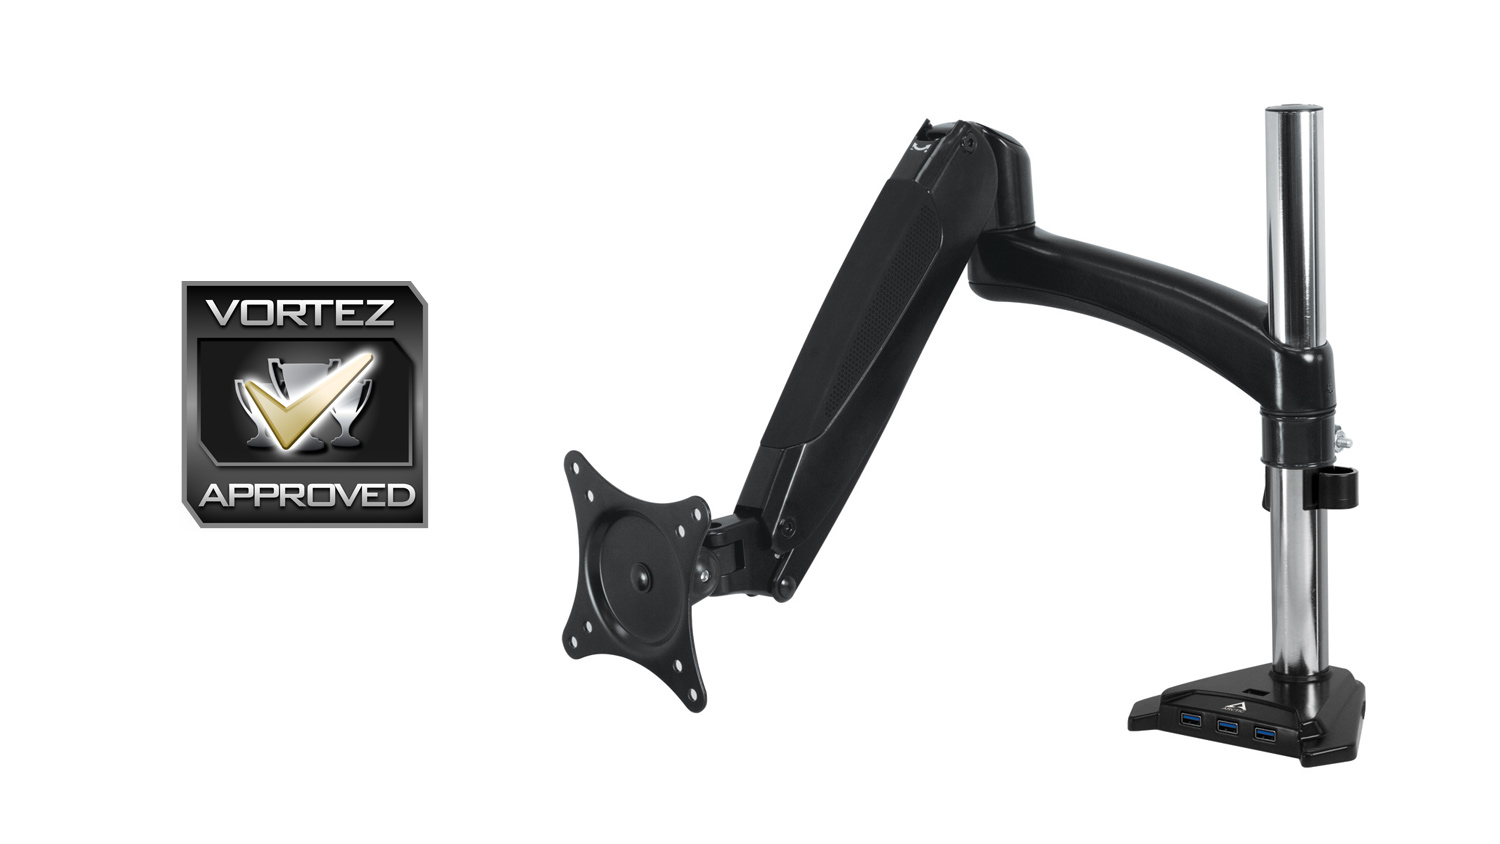
The Arctic Z1-3D is a great evolution of the monitor arm thanks to the integrated USB hub, clever design and attention to detail in the construction.
Pros
+ Great build quality
+ Well thought out design
+ Offers more flexibility than some monitor stands
+ Integrated four port USB hub
+ Solid cable management
Neutral
+- Could be a bit pricey for some
Cons
– None to note
+ Great build quality
+ Well thought out design
+ Offers more flexibility than some monitor stands
+ Integrated four port USB hub
+ Solid cable management
Neutral
+- Could be a bit pricey for some
Cons
– None to note
Click here for an explanation of our awards at Vortez.net.
Stay connected with the Vortez Social Media pages:
Join in with the discussions on Discord