The highly regarded formula of the Cooler Master Hyper 212 takes on another form, with the Black Edition, featuring a Nickel coating for a sleek look and improved radiation of heat.

Product on Review: Cooler Master Hyper 212 Black Edition
Manufacturer: Cooler Master
Street Price: GBP £29.99 / USD $29.99
Cooler Master’s name echoes around PC circles whenever an inexpensive CPU cooler is required but don’t confuse that with a lack of ability or high noise levels. Cooler Master have mastered the cheap and powerful cooler with the Hyper 212 and today we look at the latest iteration in, what can only be described as, an incredibly successful line up.
Today we unwrap the Cooler Master Hyper 212 Black Edition, finished with a nickel plating for the black appearance, while also enhancing radiation of heat from the fins. The top of the cooler features a new look with a brushed, anodised aluminium finished in gunmetal black. Cooler Master also claim to have improved the installation procedure.
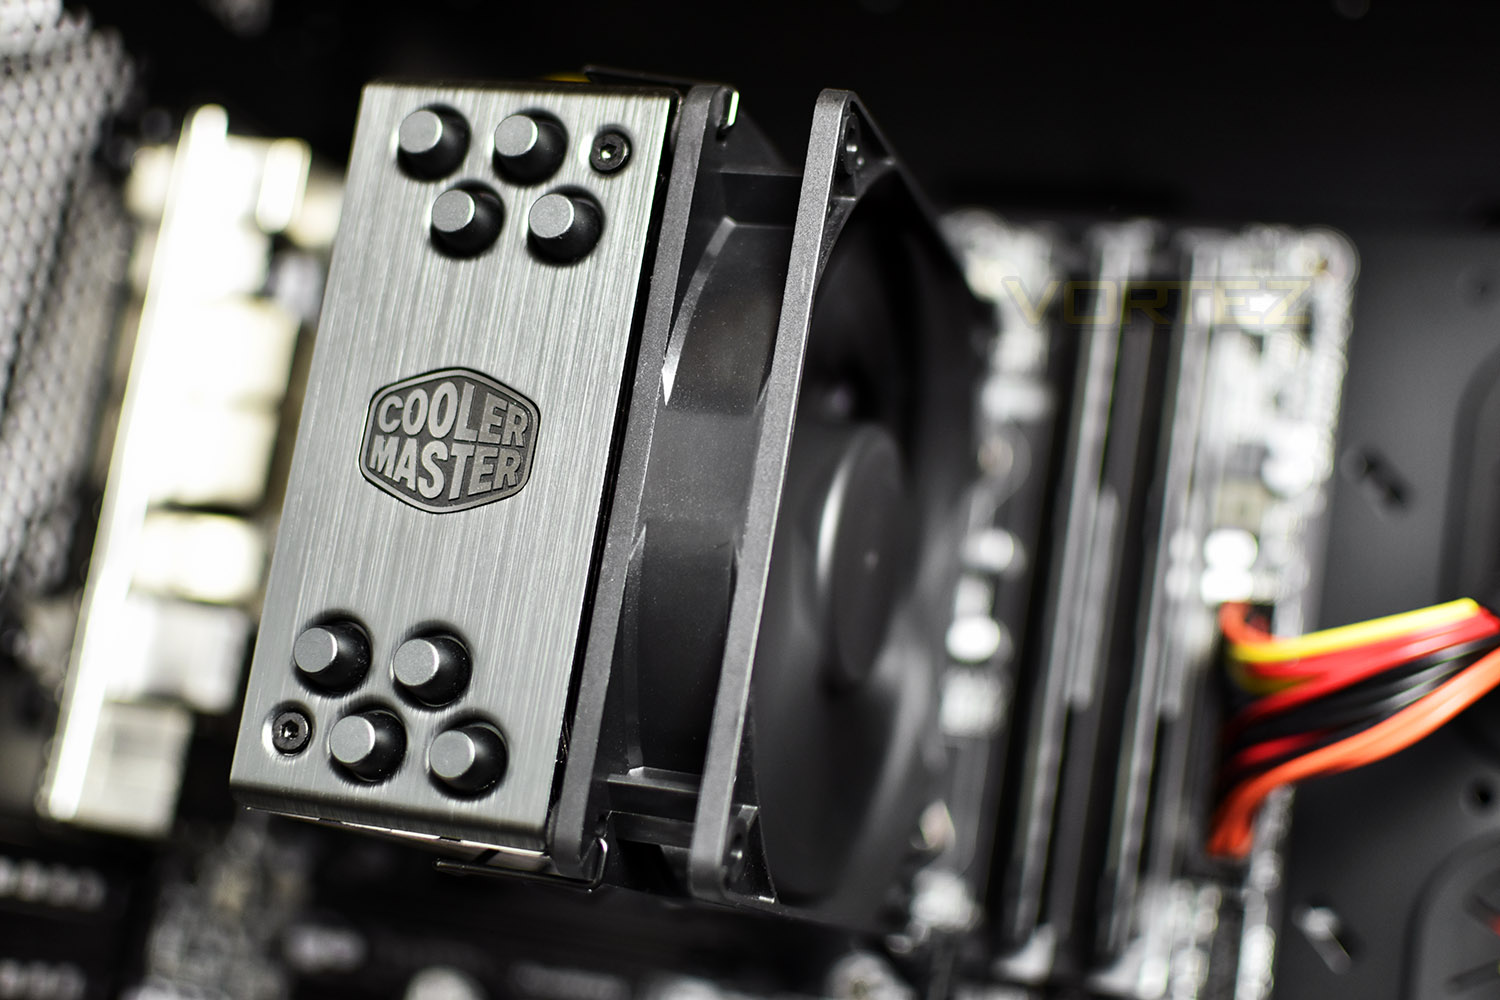
Obviously, finishing off the black look is a Cooler Master Silencio FP120 cooling fan which can be mounted in either a push or pull configuration, however Cooler Master provide mounting brackets for a 2nd fan if you require it.
With 4 heat pipes, a tried and tested design and their latest and quietest fan, and of course, the £29.99 price tag, how does the Hyper 212 Black Edition hold up against the competition?
Cooler Master on the Hyper 212 Black Edition:
The Hyper 212 Black Edition offers an improved installation process from previous models with the same best in class performance. The aluminum top cover, nickel plated jet black fins and metallic heat pipe caps gives the Hyper 212 Black Edition model an upgraded premium aesthetic appeal. The Hyper 212 Black Edition is equipped with a Silencio fan with exclusive Silent Drive IC technology.
Technical Specifications
Product Name: Hyper 212 Black Edition
Model number: RR-212S-20PK-R1
CPU Socket:
Intel®:
LGA 2066 / 2011-v3 / 2011 / 1151 / 1150 / 1155 / 1156 / 1366
AMD®:
AM4 / AM3+ / AM3 / AM2+ / AM2 / FM2+ / FM2 / FM1
Dimensions: 123.0(L) x 77.0(W) x 158.8(H) mm / 4.8(L) x 3.0(W) x 6.3(H) inch
Heat Sink Material: 4 Heat Pipes / Aluminum Fins / Direct Contact
Fan Dimensions: 120(L) x 120(W) x 25(H) mm / 4.7(L) x 4.7(W) x 1(H) inch
Fan Quantity: 1 PC
Fan Speed: 650-2,000 RPM (PWM) ± 10%
Fan Airflow: 42 CFM (Max)
Fan Air Pressure: 2.9 mmH2O
Fan MTTF: 160,000 Hours
Fan Noise Level: 6.5-26 dBA
Fan Power Connector: 4-Pin (PWM)
Fan Rated Voltage: 12 VDC
Fan Rated Current: 0.08 A
Fan Safety Current: 0.16 A
Fan Power Consumption: 0.96 W
Warranty: 2 years
Model number: RR-212S-20PK-R1
CPU Socket:
Intel®:
LGA 2066 / 2011-v3 / 2011 / 1151 / 1150 / 1155 / 1156 / 1366
AMD®:
AM4 / AM3+ / AM3 / AM2+ / AM2 / FM2+ / FM2 / FM1
Dimensions: 123.0(L) x 77.0(W) x 158.8(H) mm / 4.8(L) x 3.0(W) x 6.3(H) inch
Heat Sink Material: 4 Heat Pipes / Aluminum Fins / Direct Contact
Fan Dimensions: 120(L) x 120(W) x 25(H) mm / 4.7(L) x 4.7(W) x 1(H) inch
Fan Quantity: 1 PC
Fan Speed: 650-2,000 RPM (PWM) ± 10%
Fan Airflow: 42 CFM (Max)
Fan Air Pressure: 2.9 mmH2O
Fan MTTF: 160,000 Hours
Fan Noise Level: 6.5-26 dBA
Fan Power Connector: 4-Pin (PWM)
Fan Rated Voltage: 12 VDC
Fan Rated Current: 0.08 A
Fan Safety Current: 0.16 A
Fan Power Consumption: 0.96 W
Warranty: 2 years
Packaging & Bundle
The packaging is pretty simple, with a clear image of the product on the front and a title. Further details are found on the sides of the box, on the bright purple sections.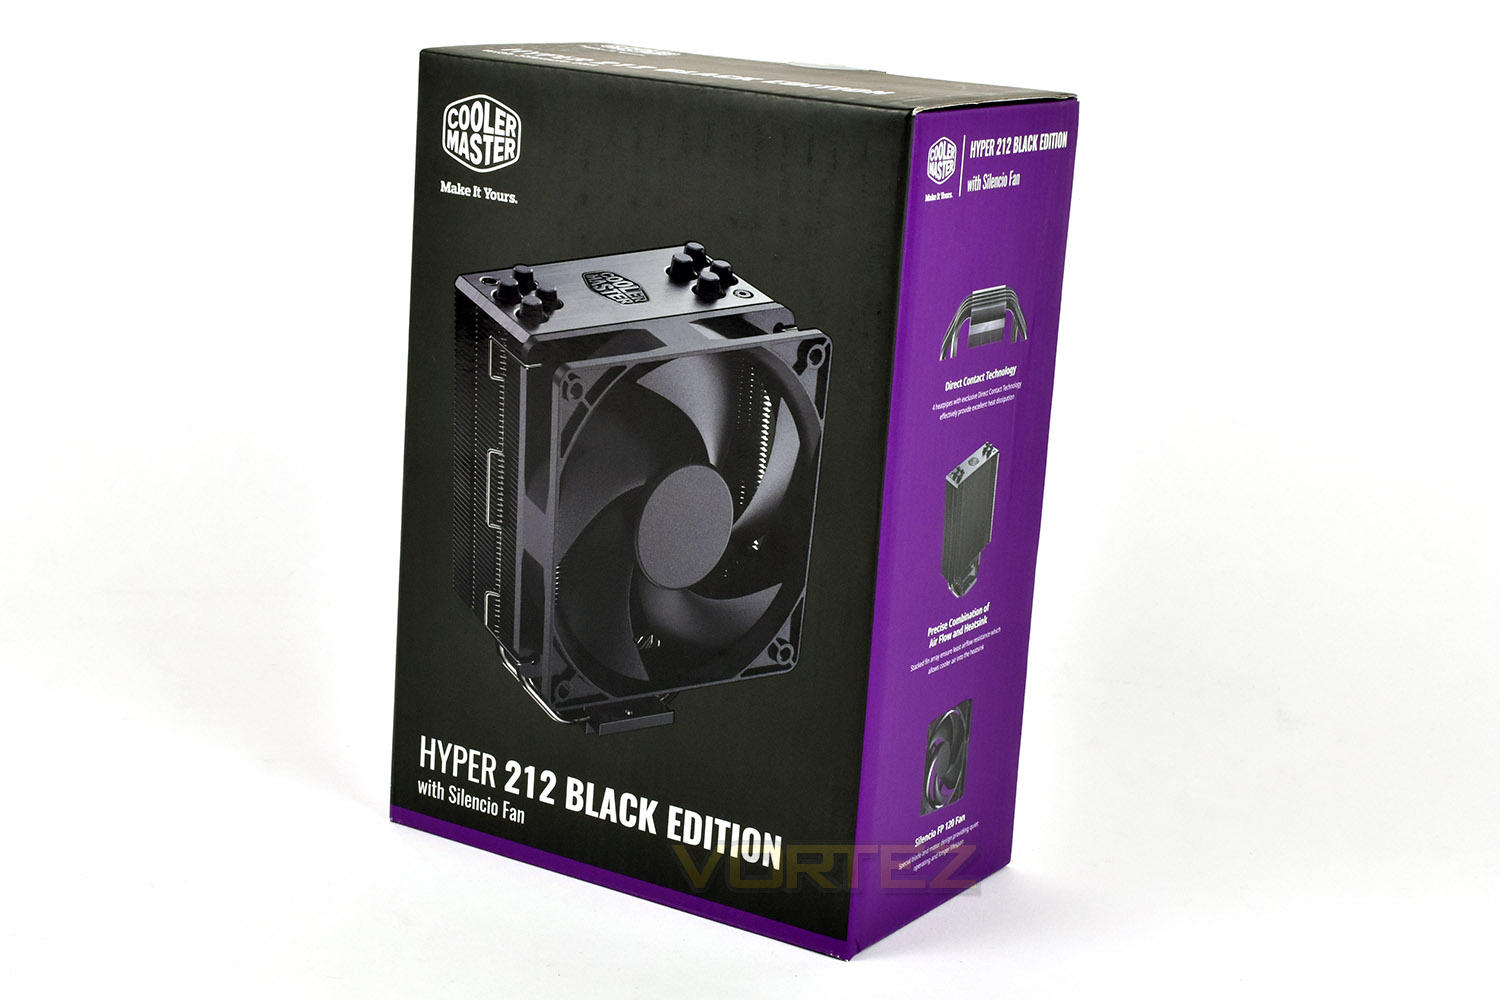
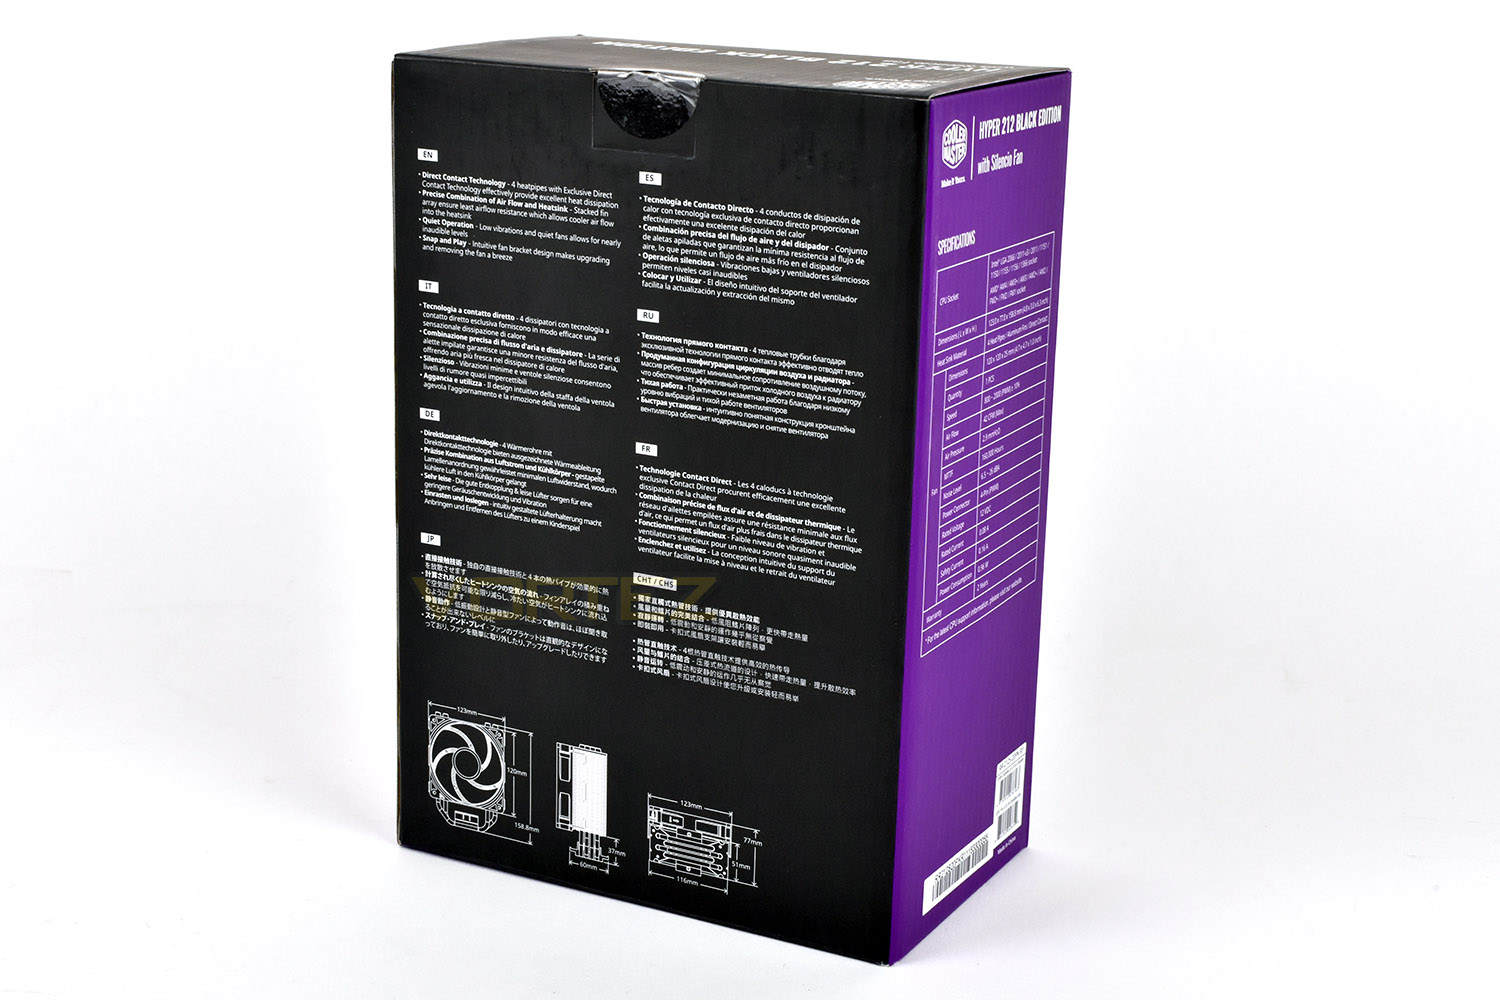
The back and sides are there for exact dimensions and specifications, to ensure the cooler will fit in your case. Height can often be an issue with taller coolers like this, so be sure to check that out.
Included with the Hyper 212 is a mounting backplate, fan splitter and fan bracket (if you happen to install a 2nd fan), mounting screws and AMD/Intel adaptors.
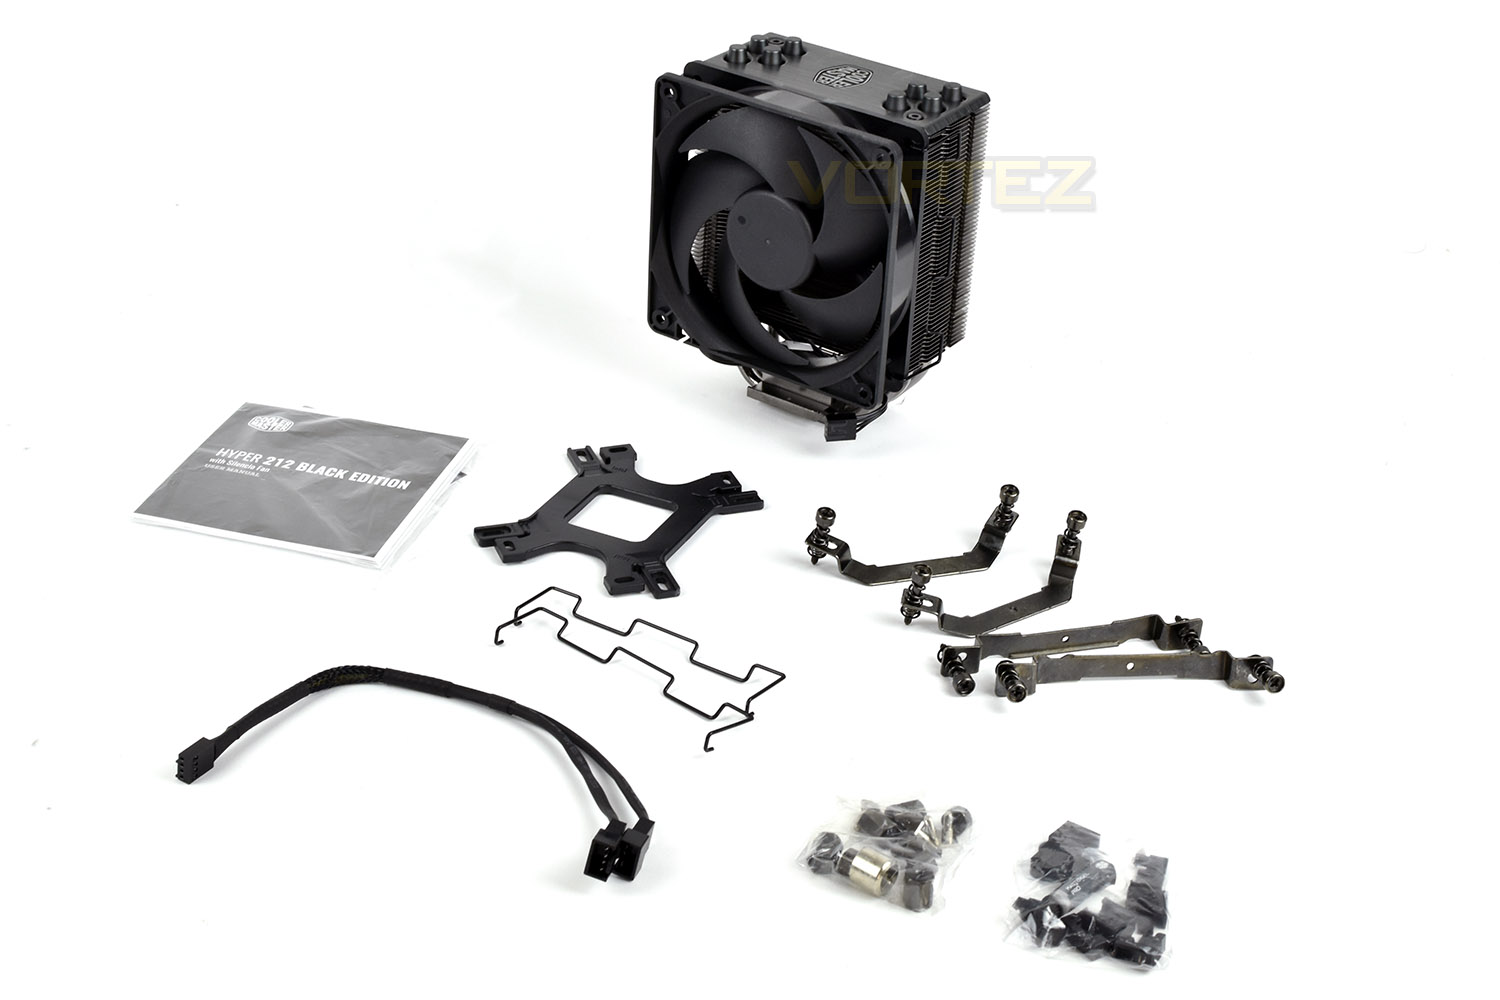
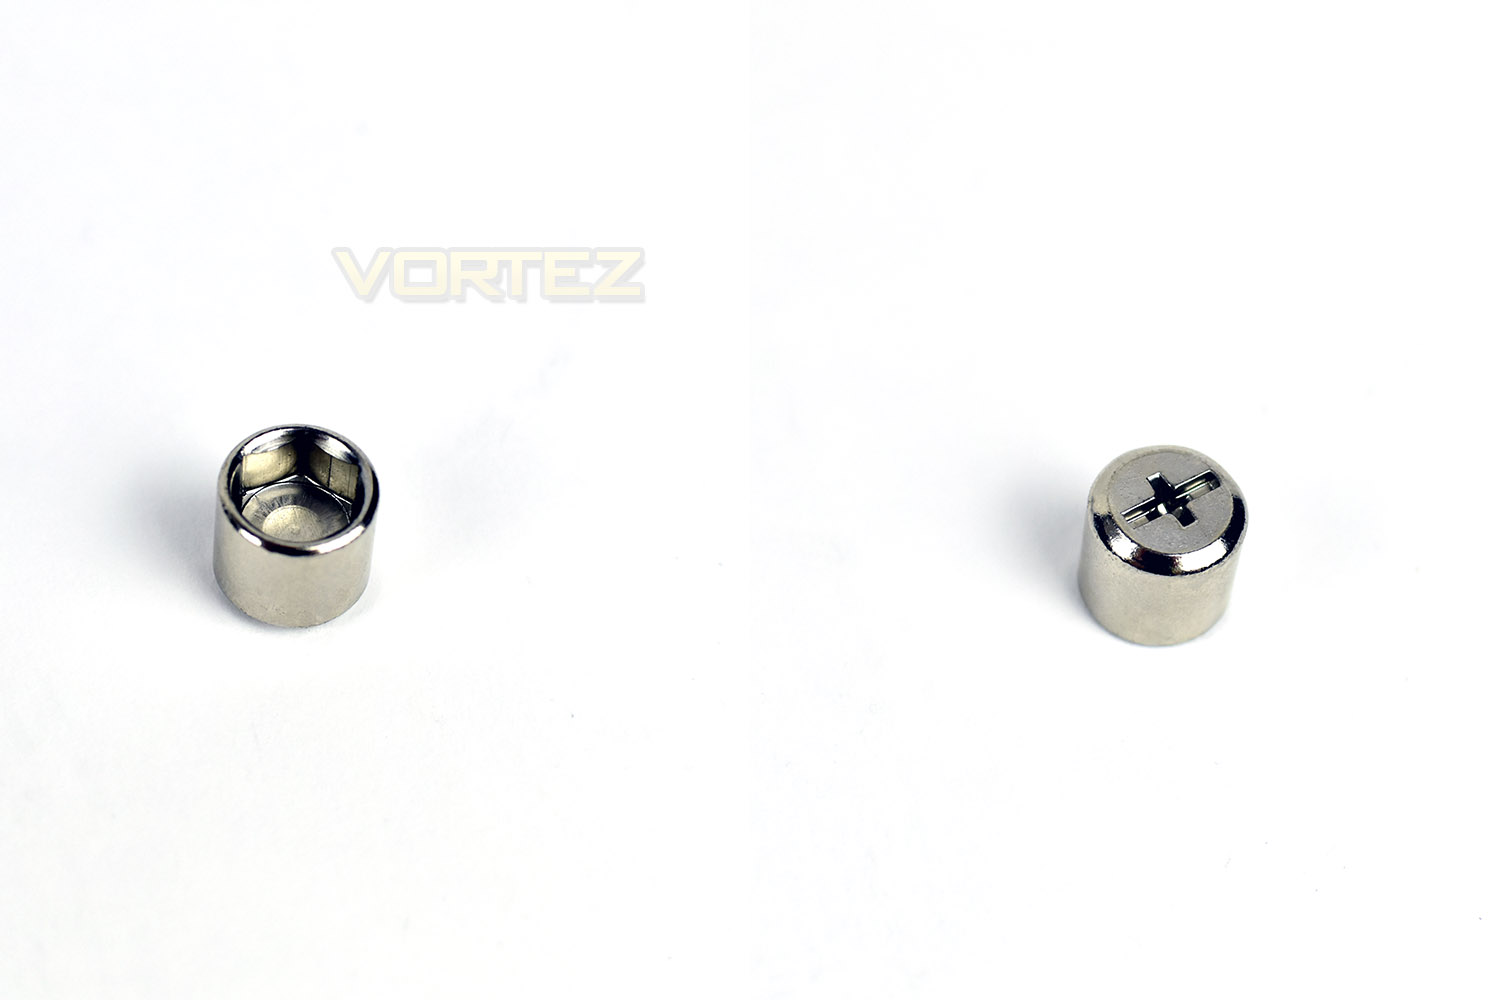
Cooler Master also provide a small socket set which can be tightened using a Phillips head screwdriver, this is used to install the mounting hardware into the backplate. Handy for those who don’t own a socket set.
Closer Look
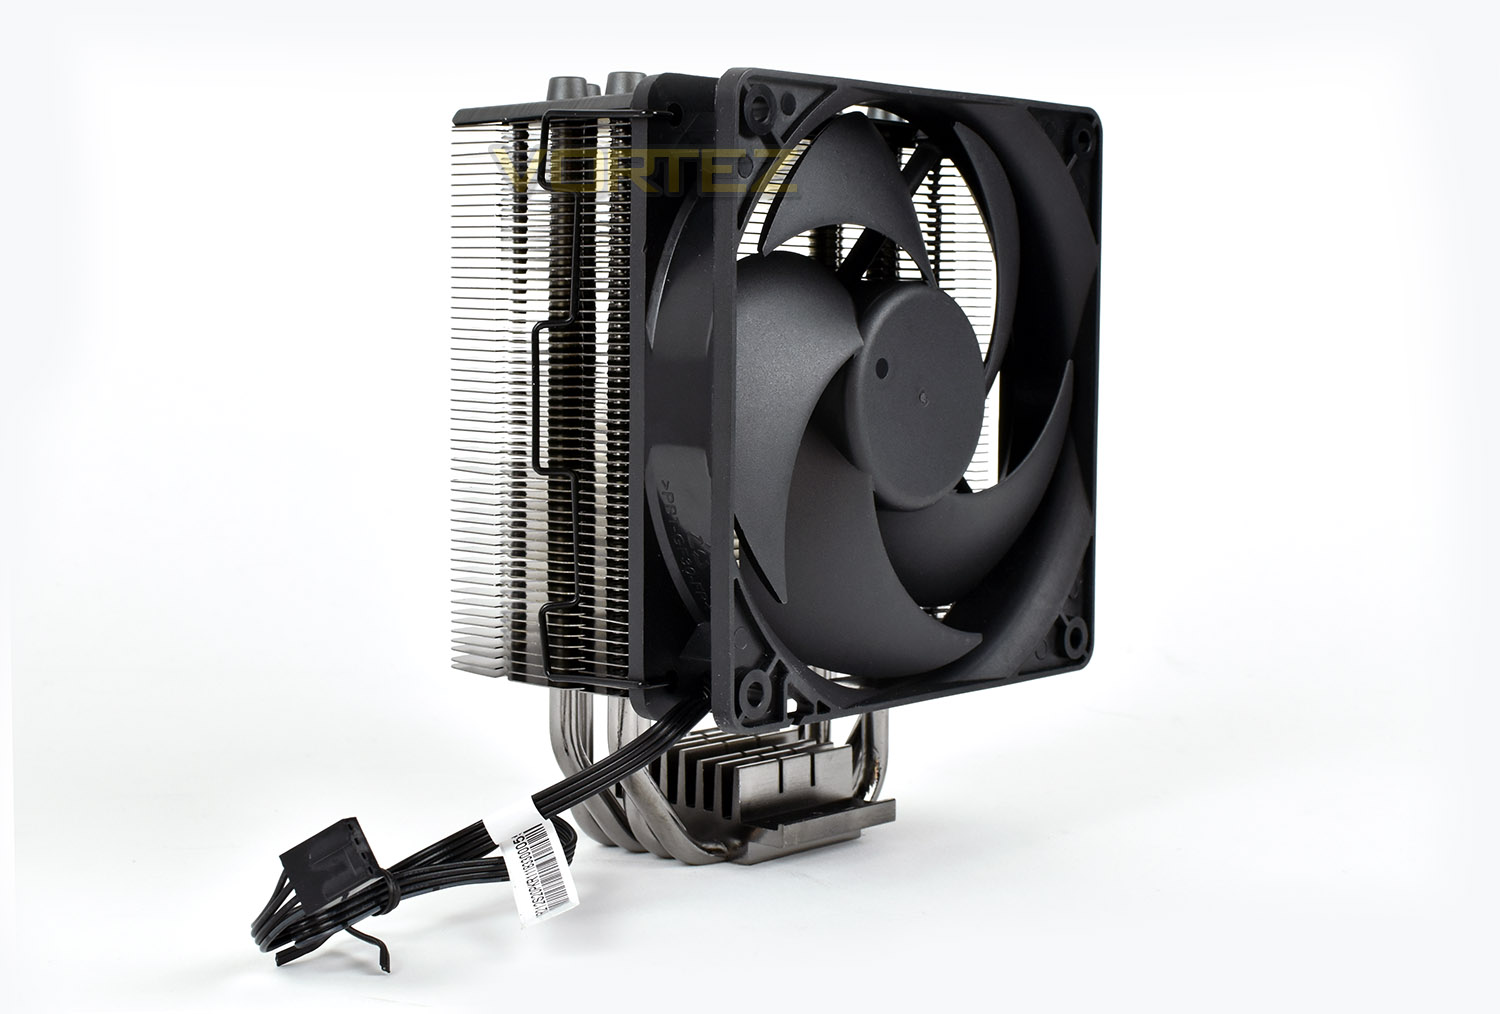
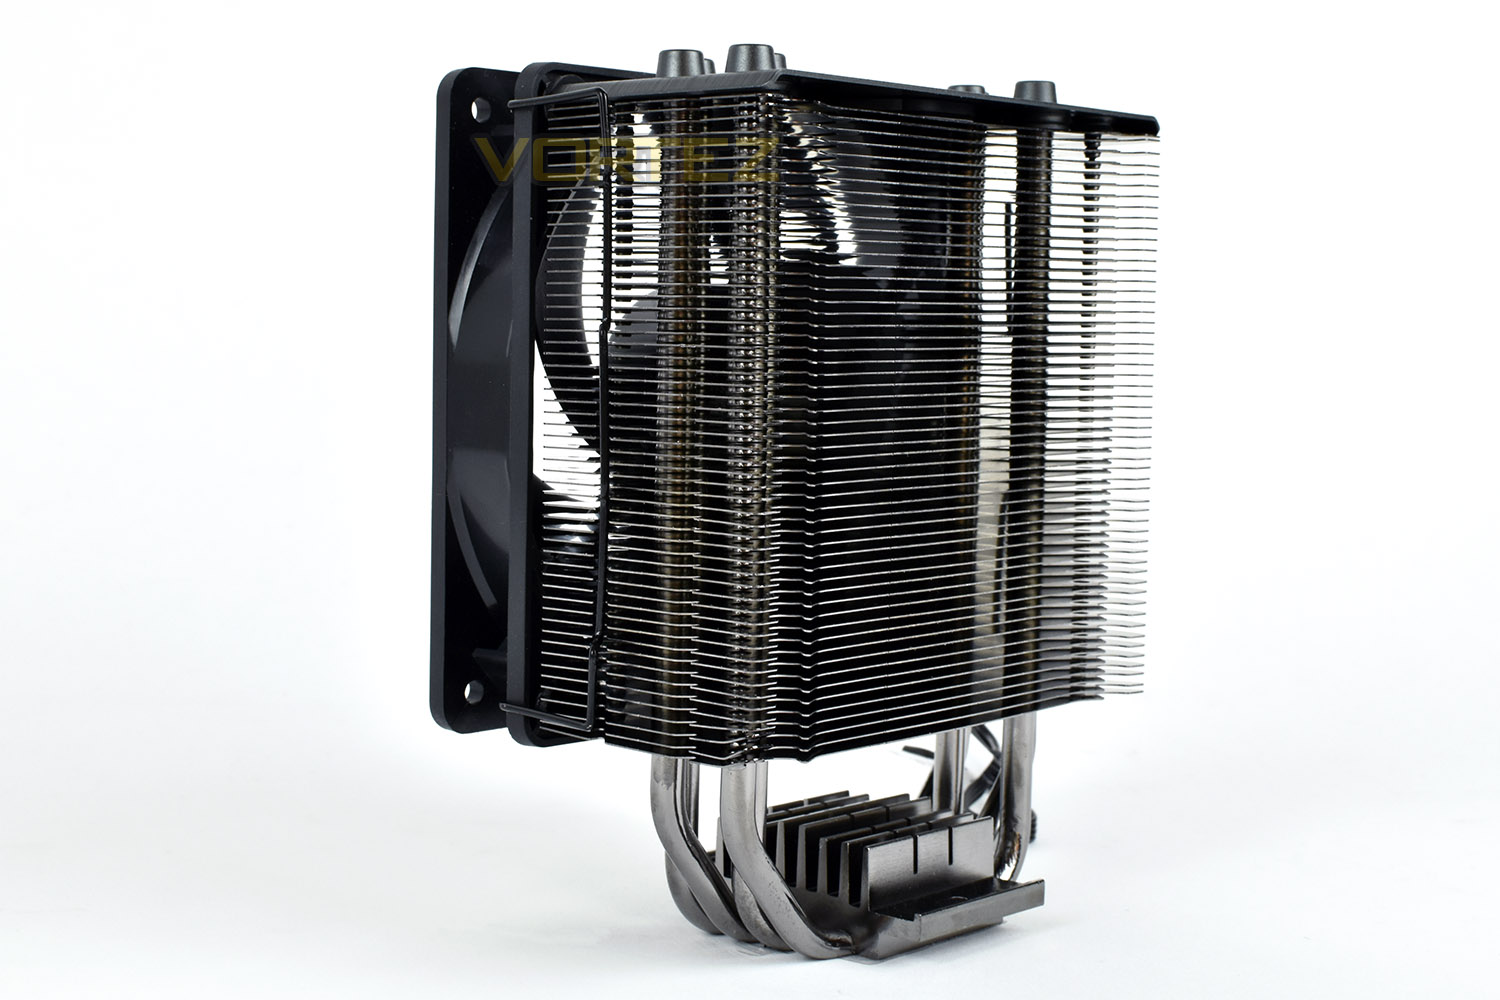
55 fins make up the vast majority of the dissipation area, connected to the CPU via 4 copper heatpipes. The bottom fin measures 39mm from the base of the CPU, so RAM clearance shouldn’t be a big issue so long as your modules don’t feature tall heatsinks.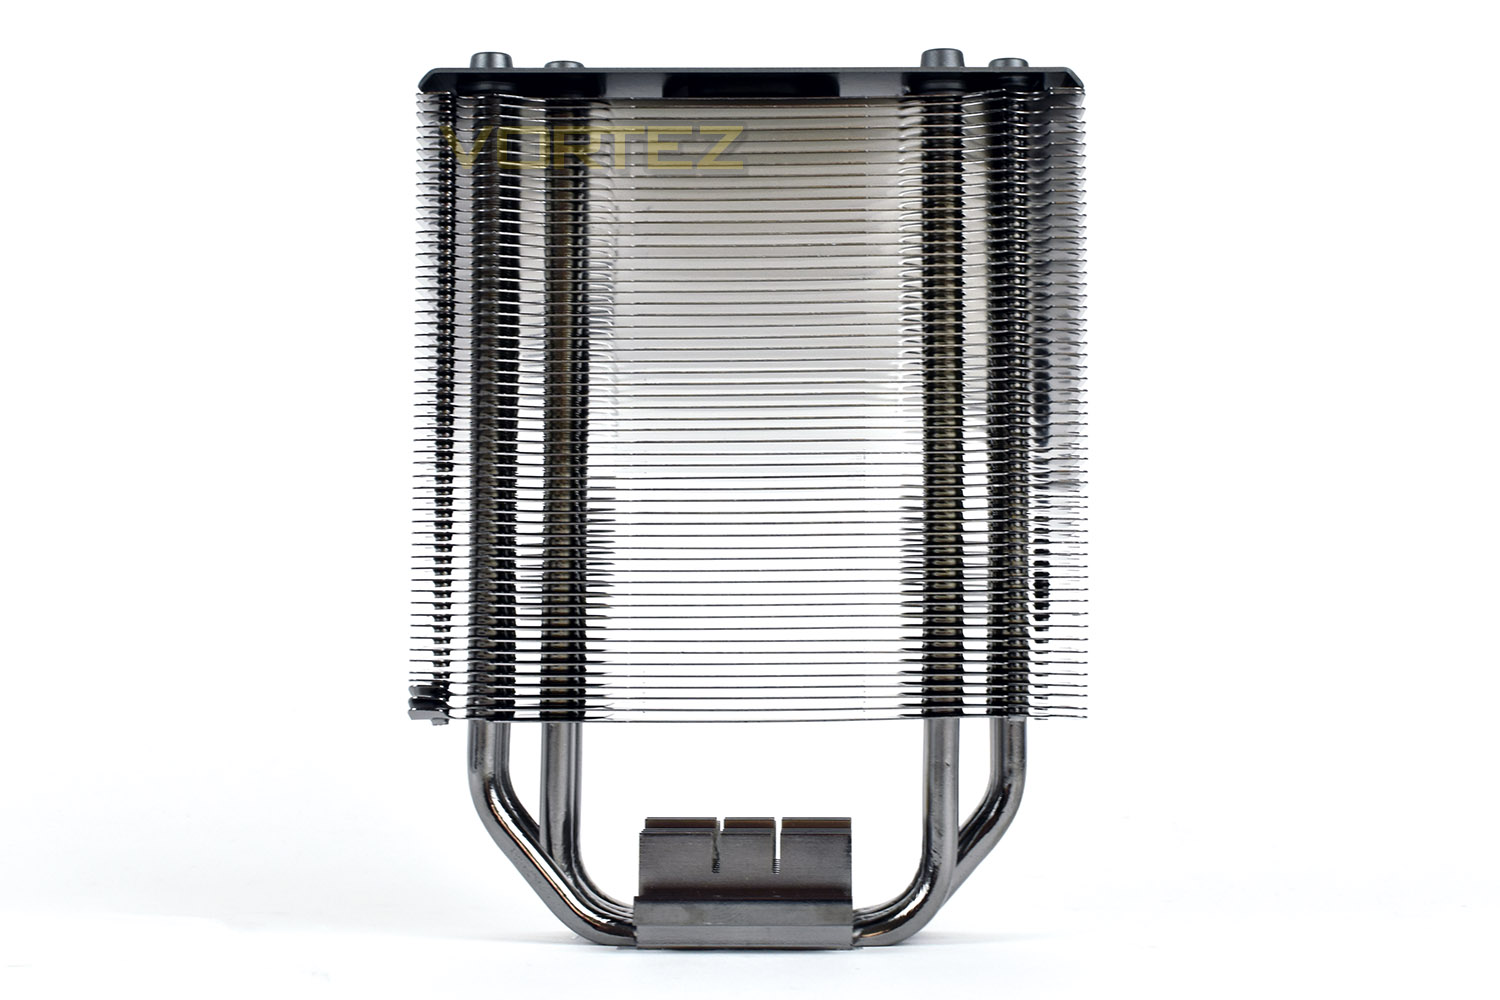
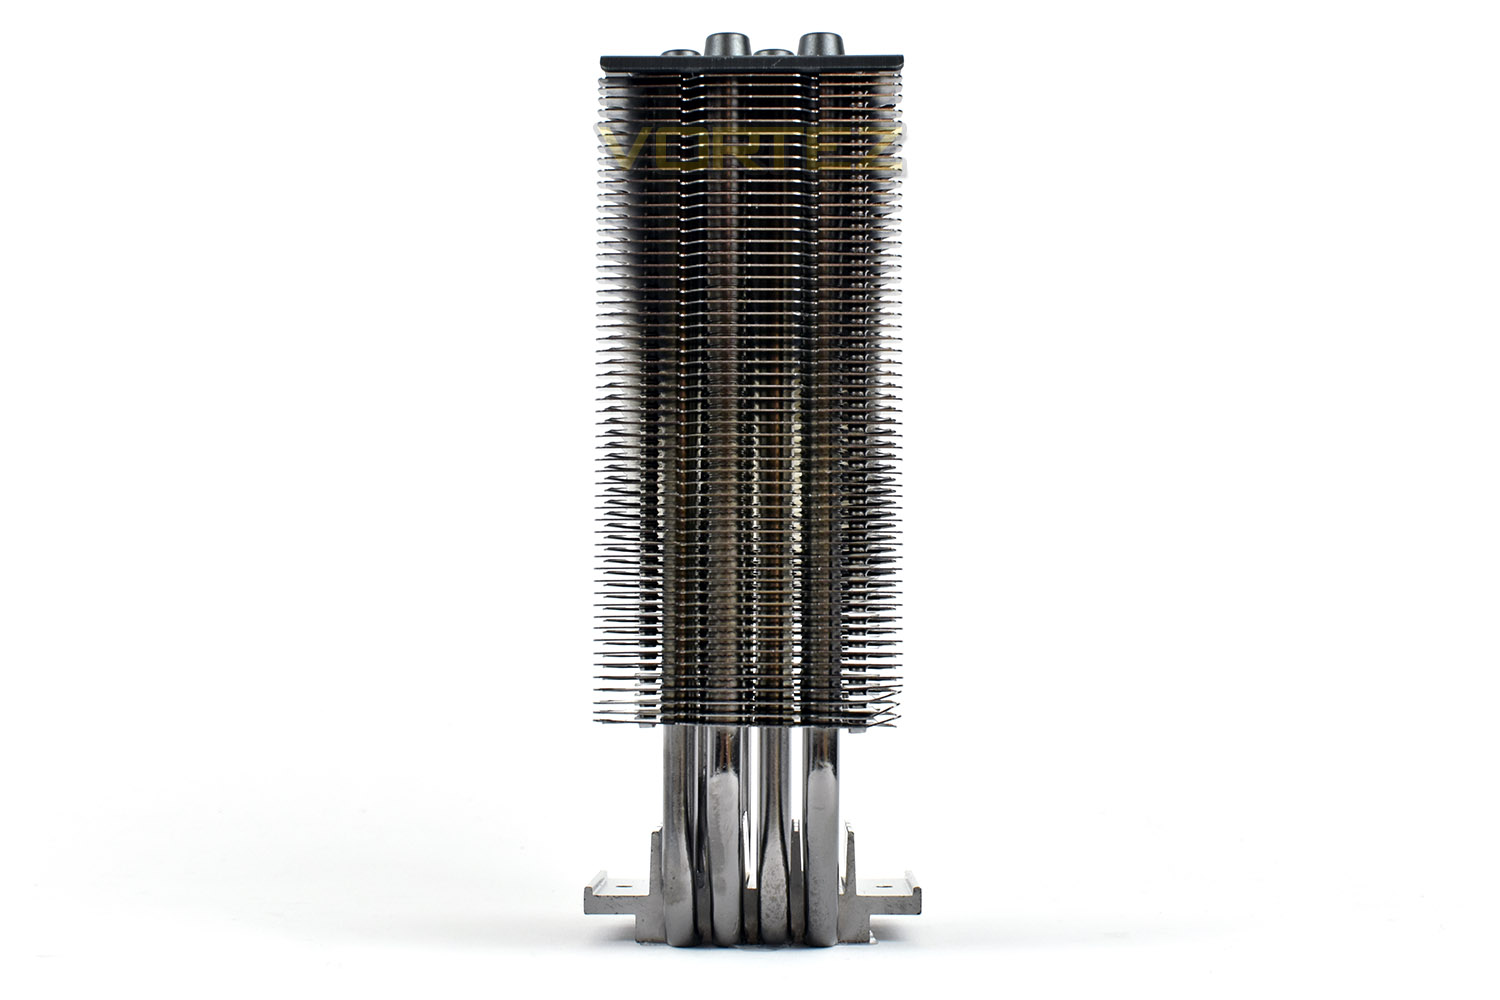
The thin profile (50mm wide at the fins) also aids memory compatibility, along with the ability to mount the fan on either side.
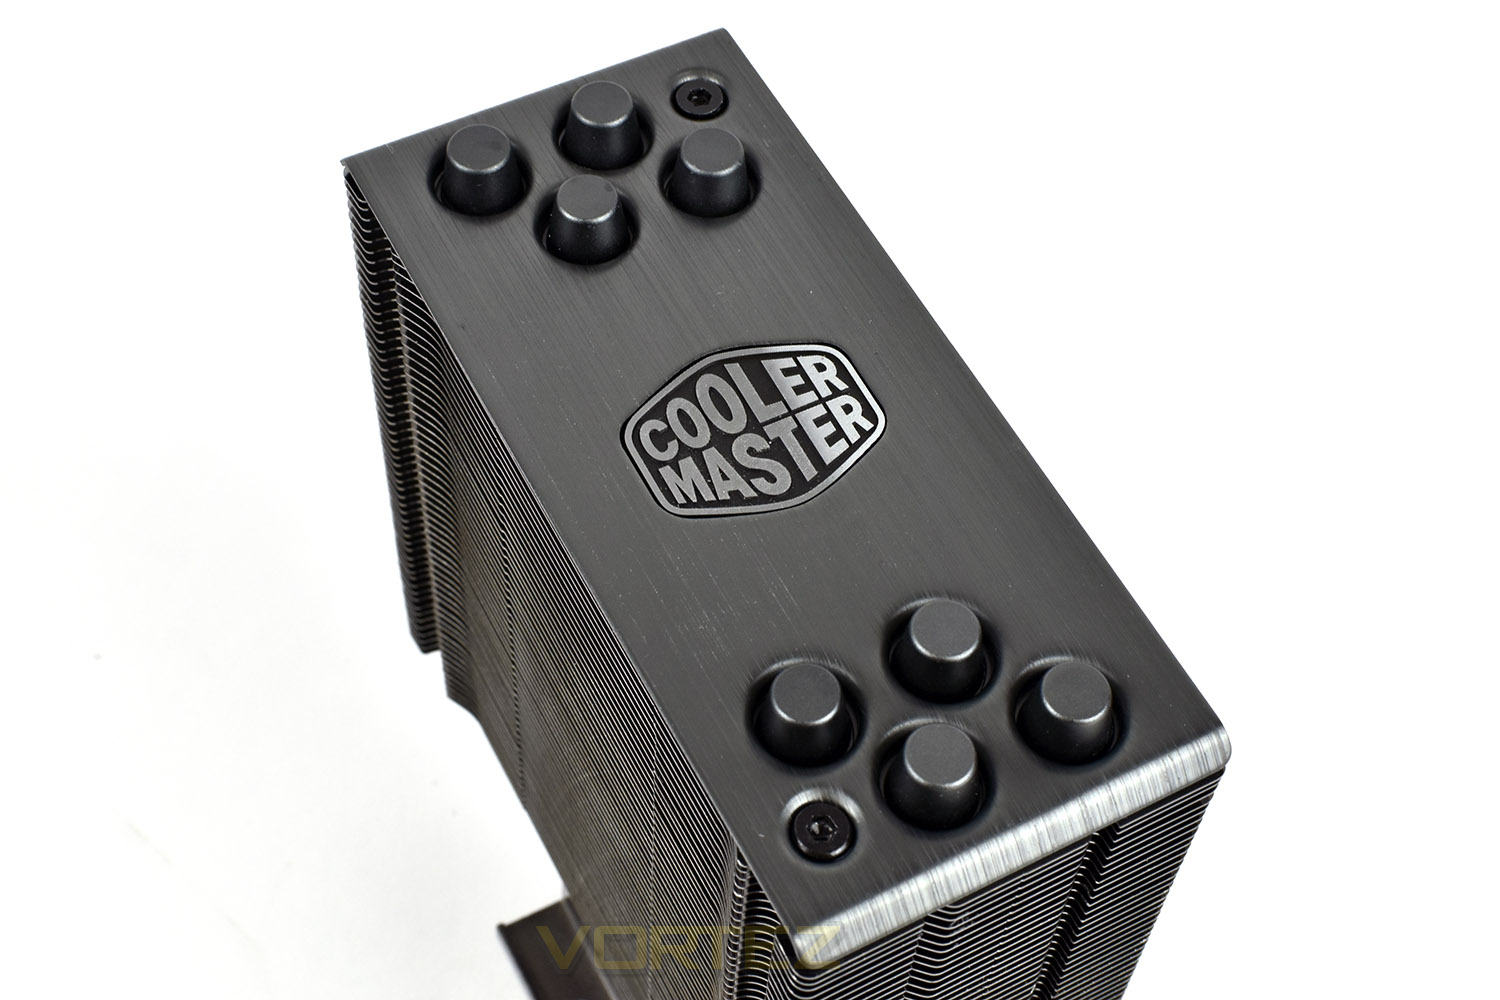
Unlike most Hyper 212s to date, the top is capped with a thick piece of anodised and brushed aluminium with the Cooler Master logo stamped into the top. It’s the finishing touches that make the difference.
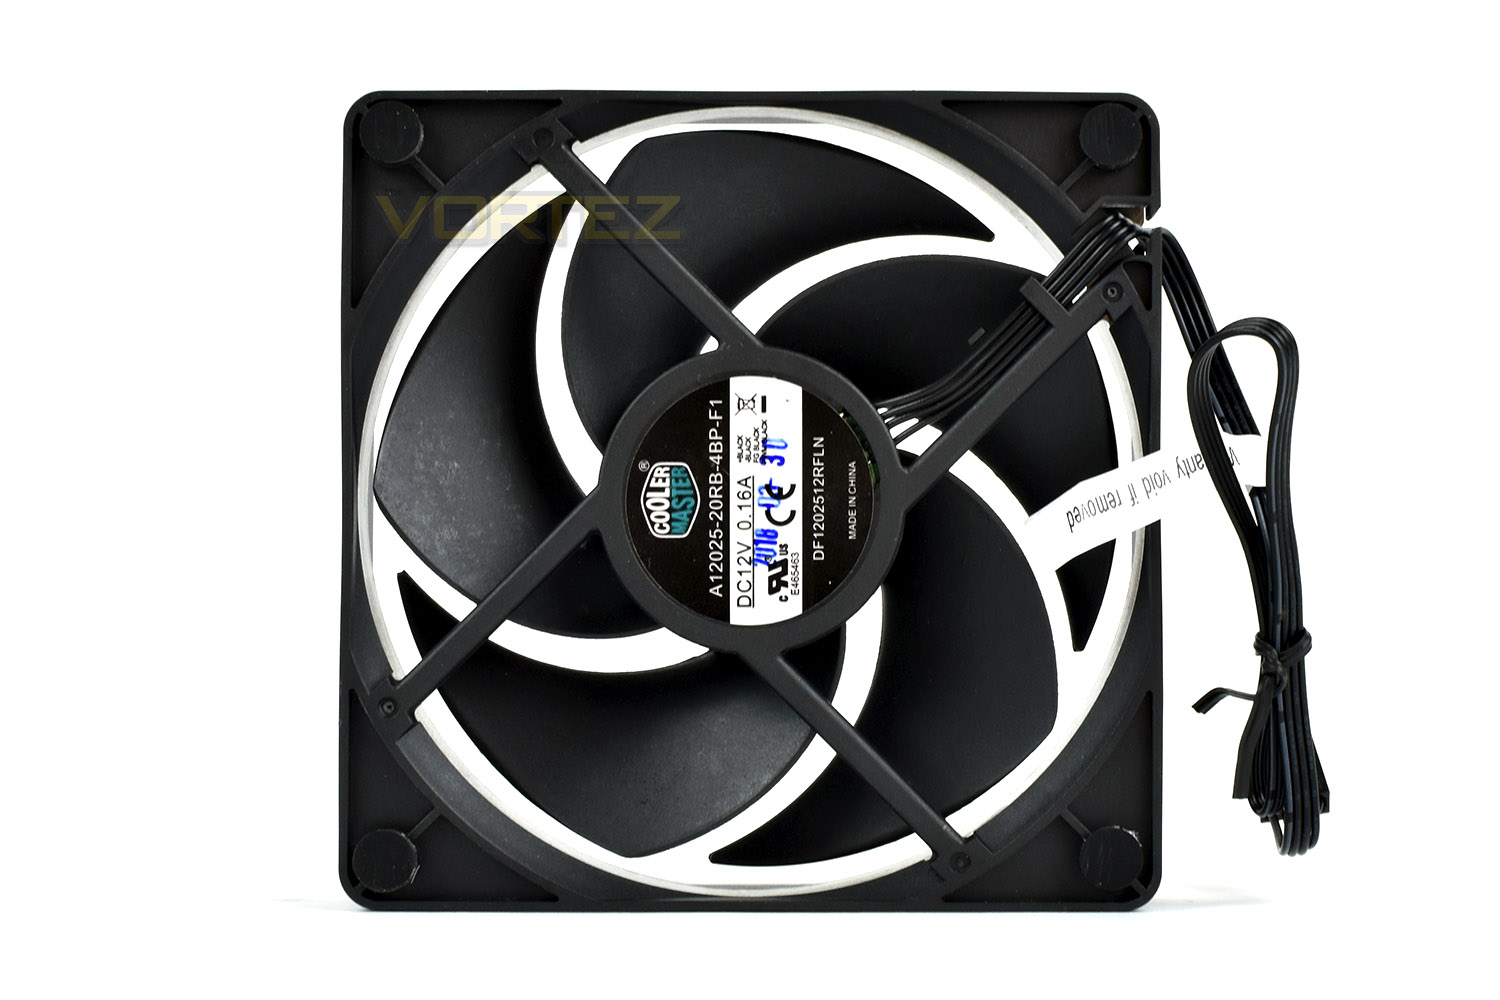
Airflow is propelled by the Cooler Master Silencio FP120 PWM fan, utilising Silent Driver IC technology to reduce noise and power usage. 5 large blades help to create 2.9mmH2O of static pressure which is important in pushing large volumes of air through tightly packed heatsinks.
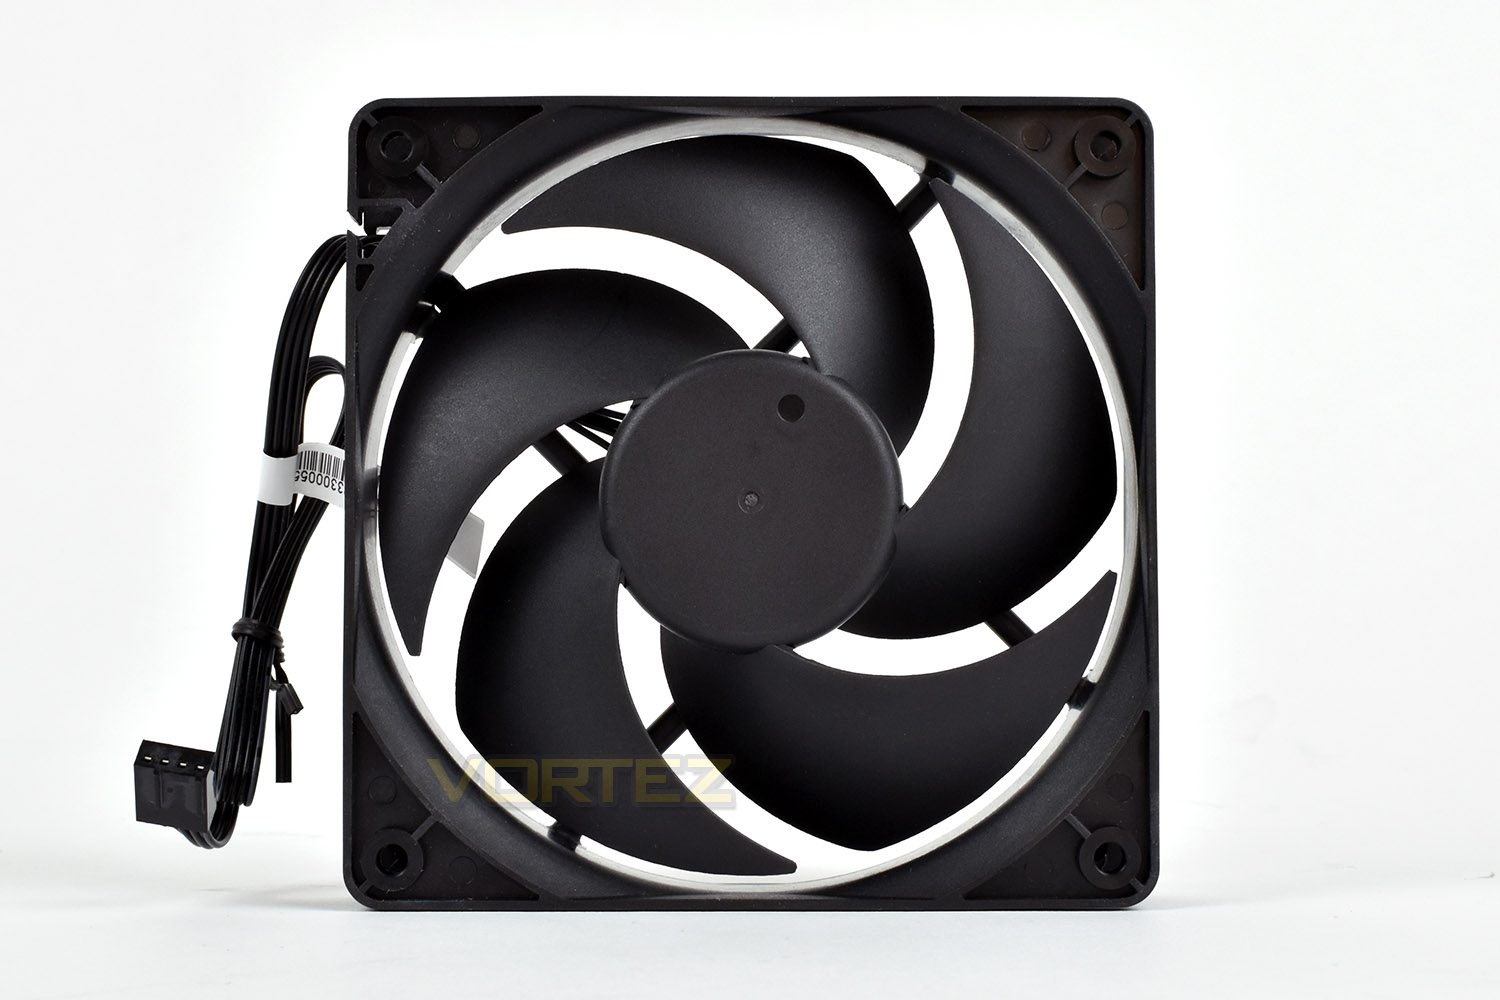
The rear of the fan has 4 small, rubber caps on each corner, helping to isolate vibrations from the metal structure of the heatsink, therefore reducing noise.
Closer Look (Continued)
On top of the base is a small heatsink, and while it’s only small, it may help to remove a fraction of heat away directly from the CPU without any transfer to the heatpipes.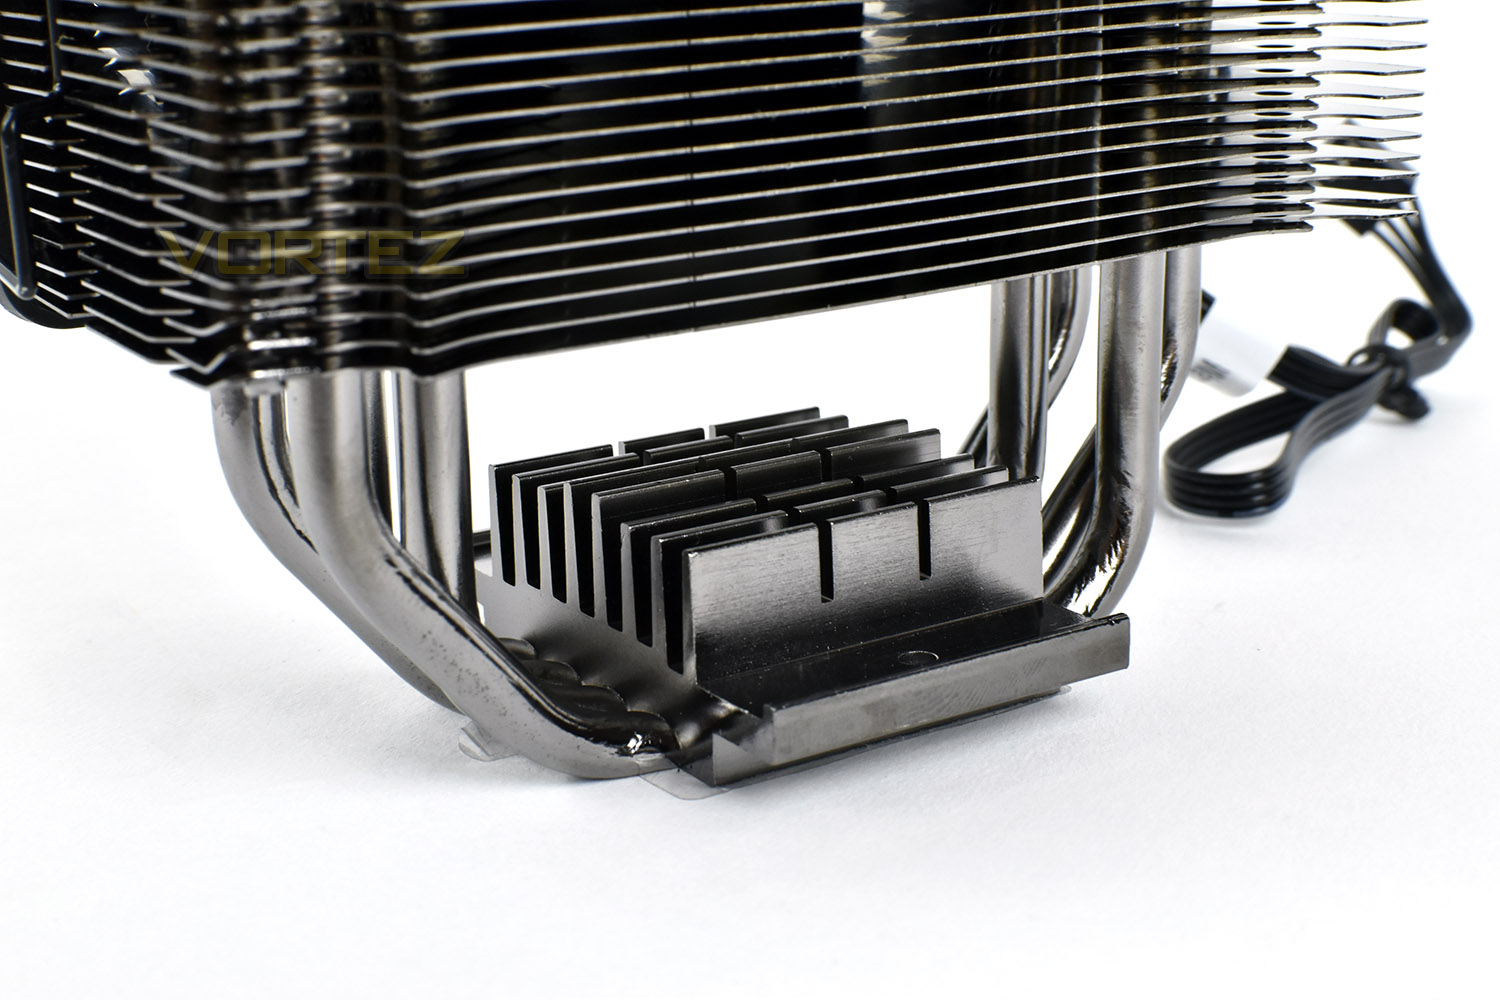
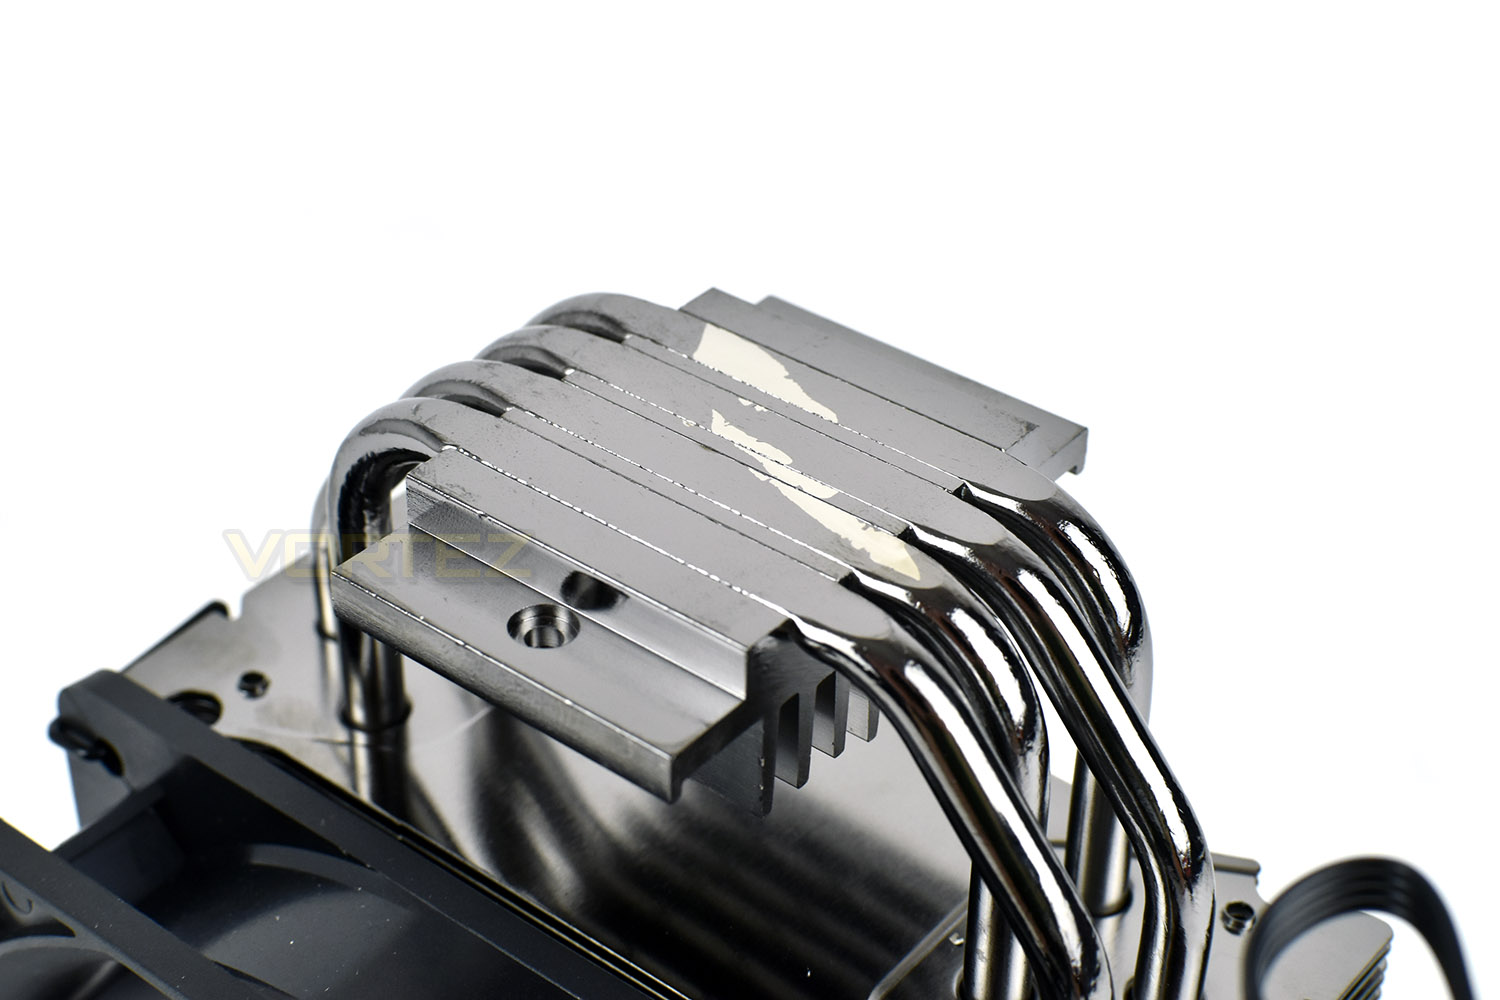
The 4 copper heatpipes, with the Nickel coating, make direct contact with the CPU for optimal thermal conductivity, however, when removing the protective sticker from the base, some of the Nickel coating was removed with it. We’re not too bothered about this, with it being invisible once installed and very unlikely to cause any issue in terms of temperature differences.
With the fan installed, the Nickel plating fins and the black Silencio fan complement each other well.
Installation
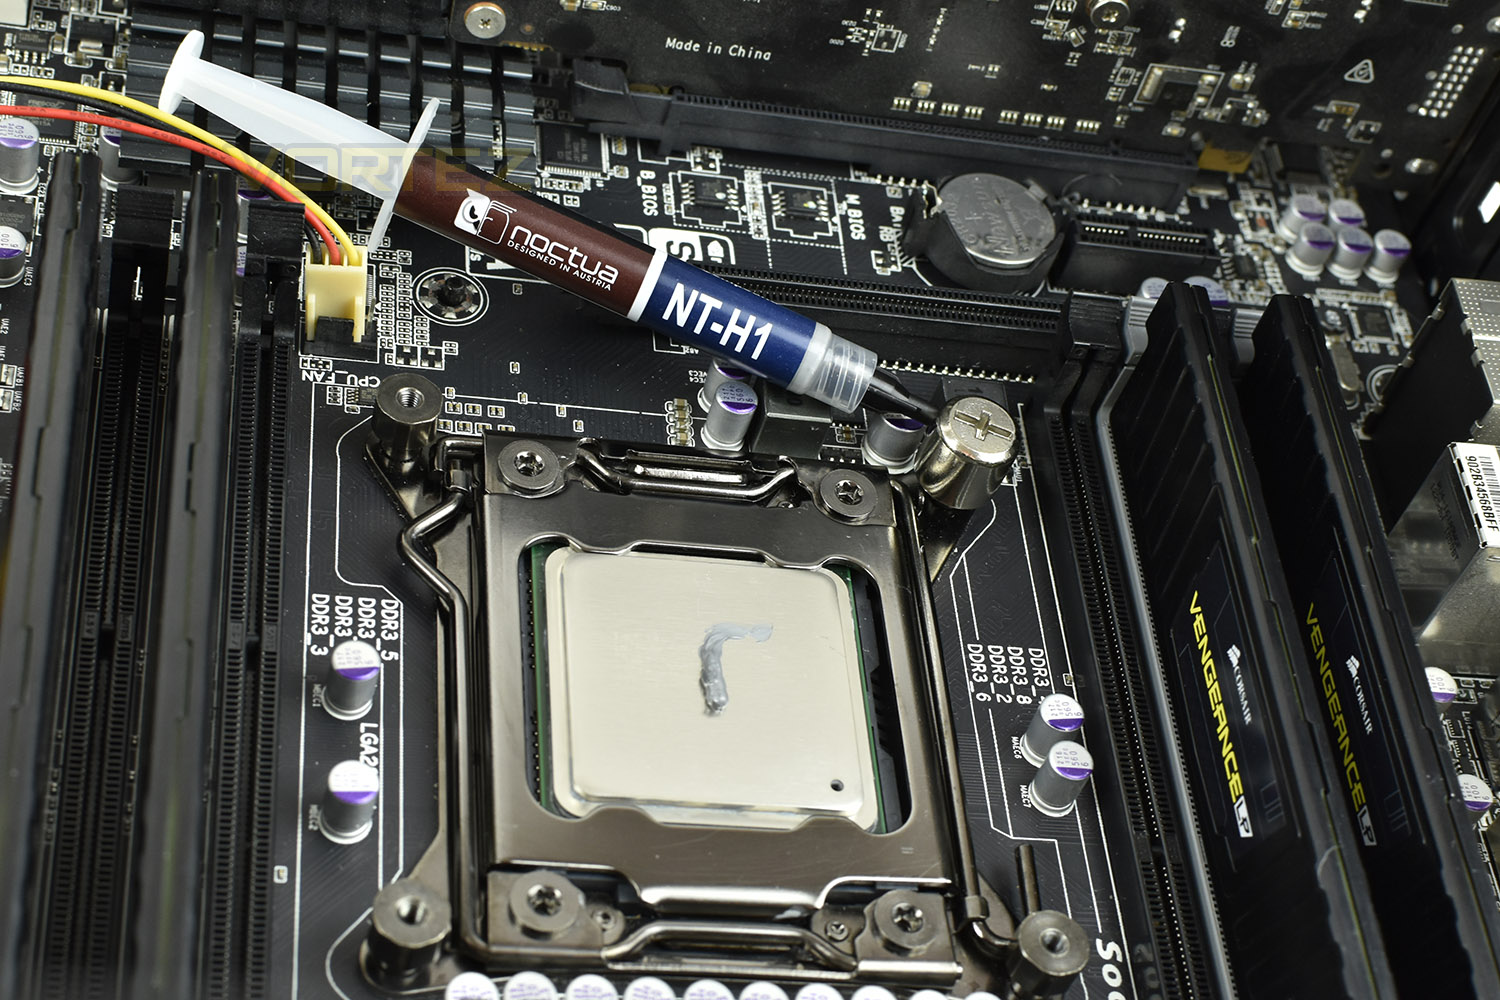
While most CPU coolers arrive with paste pre-applied or a small tube to use, we try and remove any variance from our testing and use Noctua’s NT-H1 thermal paste instead. A small grain of rice sized blob is enough to cover our Intel Core i7 3930K CPU.You can also see the mounting points in each corner, with the socket-tool attached to the top-right.
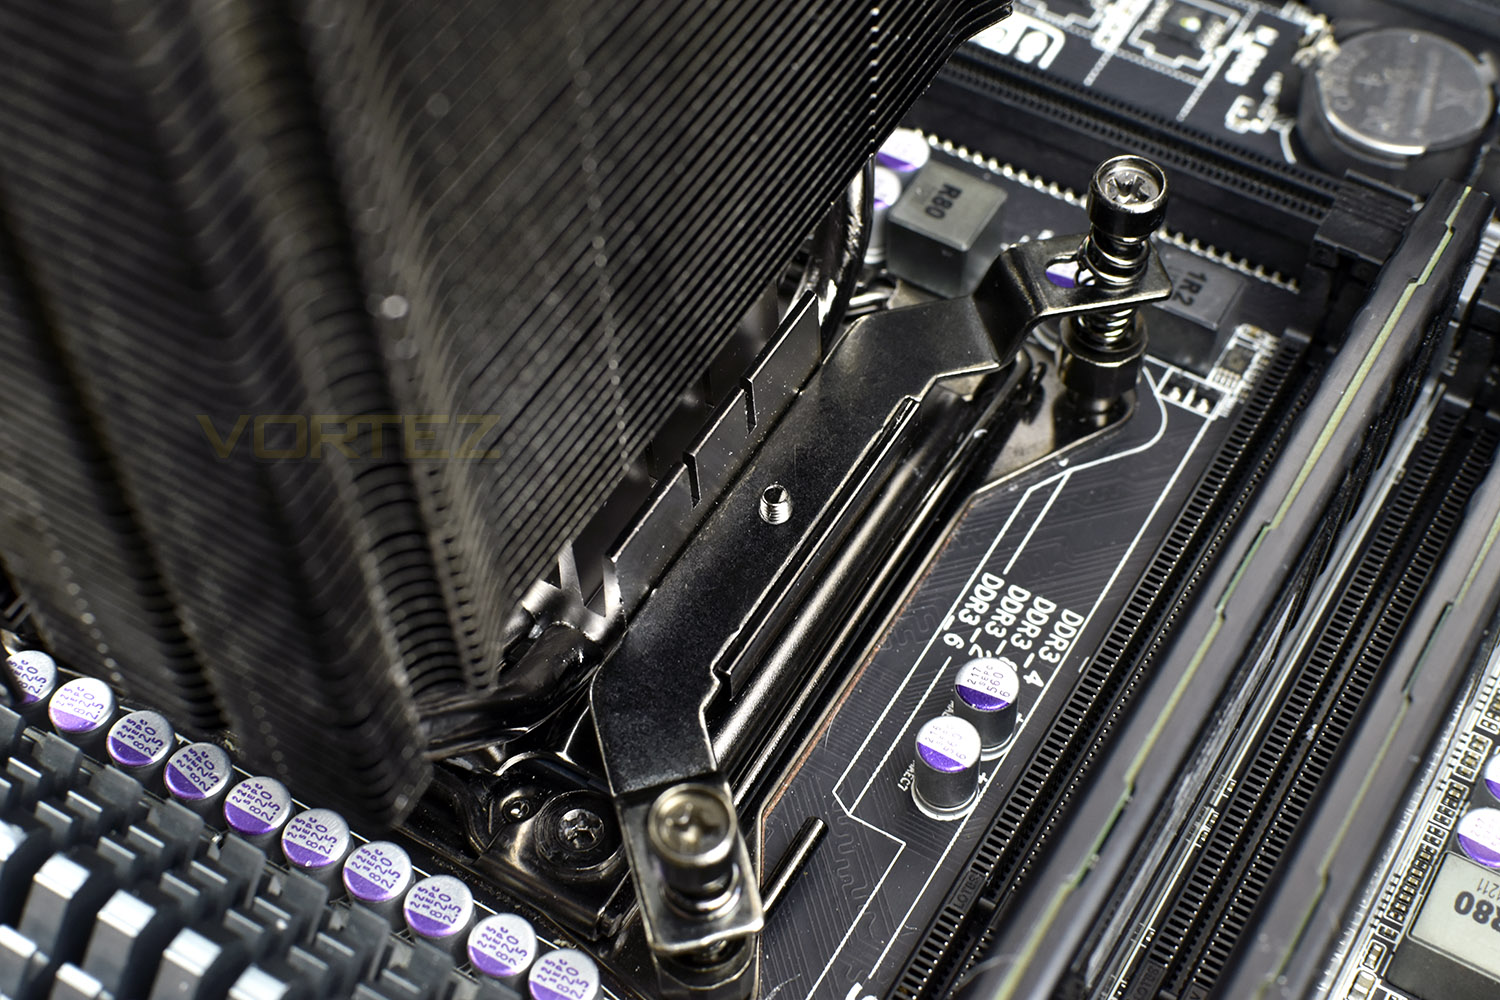
After attaching the Intel bracket to the flanks of the cooler, it’s as simple as tightening each corner, a few turns at a time, until the cooler is evenly attached to the CPU. Making sure to tighten each corner equally is important to ensure an even layer of thermal paste on the underside for optimal thermal transfer.
Lastly, it’s time to connect the fan, an incredibly simple task with Cooler Master’s thick and sturdy fan clips.
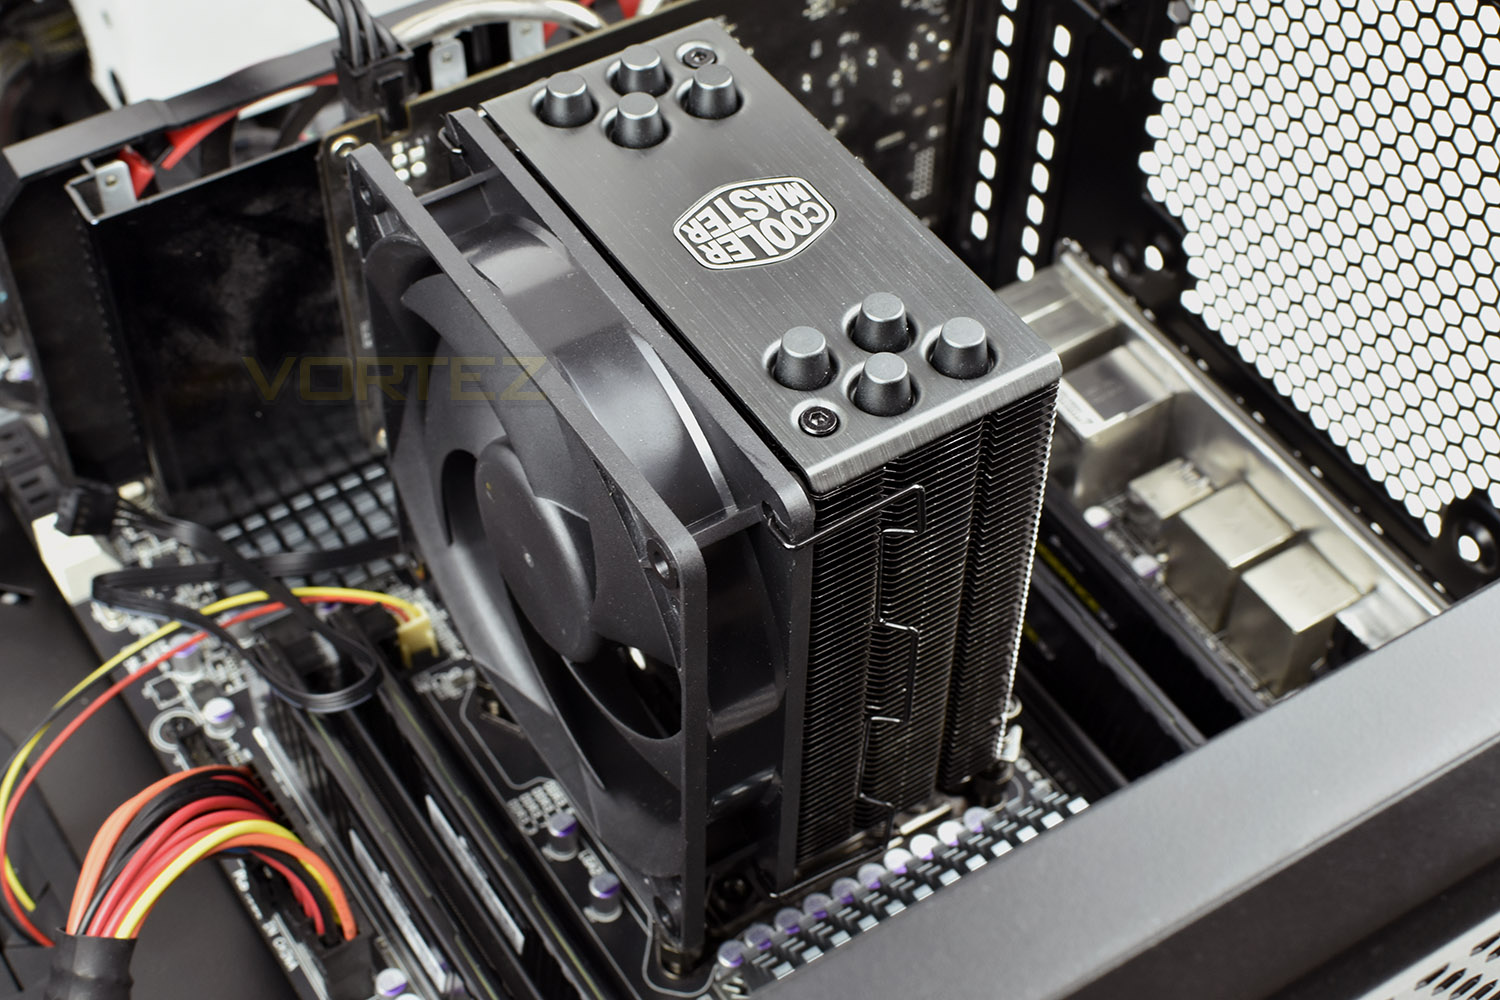
We’d rate the installation procedure of this cooler as: a breeze.
Test Setup & Methodology
We have recently made changes to our cooling department and the associated testing methodology, so please note that the number of results shown will increase over time as we add additional products. We hope that these results will appear clearer to the majority of our readership and look forward to building upon the baselines that we currently have.We perform two individual testing routines with each CPU cooler that we receive – temperatures and acoustics. The system used is as follows and all tests are performed at stock 3.8 GHz and overclocked 4.4 GHz frequencies.
Processor – Intel Core i7-3930K
Motherboard – Gigabyte X79-UP4
Memory – 8GB Corsair Vengeance LP 1600MHz CL9
Video Card – Sapphire Radeon HD 6850 1GB
Power Supply – NZXT Hale90 650W
Storage Drive – Kingston HyperX 240GB SATA III SSD
Case – Corsair Carbide 760T
Monitor ASUS ROG SWIFT PG278Q
Motherboard – Gigabyte X79-UP4
Memory – 8GB Corsair Vengeance LP 1600MHz CL9
Video Card – Sapphire Radeon HD 6850 1GB
Power Supply – NZXT Hale90 650W
Storage Drive – Kingston HyperX 240GB SATA III SSD
Case – Corsair Carbide 760T
Monitor ASUS ROG SWIFT PG278Q
To keep our tests consistent, we always review CPU coolers as they come out of the box – with their factory cooling fans, as the manufacturer intended and as the consumer expects. It should, however, be noted that we do not use supplied thermal paste but instead, Noctua NT-H1 paste to, again, ensure consistency. The paste is applied and the CPU allowed to run for a couple of hours, at idle, to give the thermal compound some time to “bed in.”
In the first test, we record idle and load temperatures as shown by the most current version of the Real Temp monitoring utility. The test system is booted to the Windows desktop and left to idle for 20 minutes to ensure temperatures have stabilised. The average core temperatures are then recorded over a 1 minute period and averaged across the six cores. We then perform a continuous 20 minute AIDA 64 stress test. The maximum absolute core temperatures are recorded immediately after the test has completed and averaged across the six cores. All results are displayed as delta temperatures – these are calculated by subtracting the ambient room temperature from the average core temperatures recorded. For temperature testing, the Corsair 760T chassis door is closed and has all three systems fans powered on to simulate real-world conditions.
Our second test follows a similar methodology to the first, with the key difference being that the Corsair 760T chassis door is now left open and all three systems fans are disabled. This allows for the CPU cooler fans acoustic profiles to be captured in isolation. From cold, the system is again booted to the Windows desktop and left to idle for 20 minutes to ensure temperatures have stabilised. The acoustic level is then recorded at a distance of 20cm from the CPU cooler and where the individual result is an average level over a 1 minute period. We then perform our continuous 20 minutes AIDA 64 stress test. Acoustic levels are again recorded at a distance of 20cm from the CPU cooler and where the individual result is an average level over a 1 minute period.
Benchmarks – Thermal Results
We have recently made changes to our cooling department and the associated testing methodology, so please note that the number of results shown below will increase over time as we add additional products. We hope that these results will appear clearer to the majority of our readership and look forward to building upon the baselines that you see below.We start off by letting the CPU cooler “bed in” for a couple of hours, to ensure the paste has time to move around and form an even layer, after which an idle result is taken.
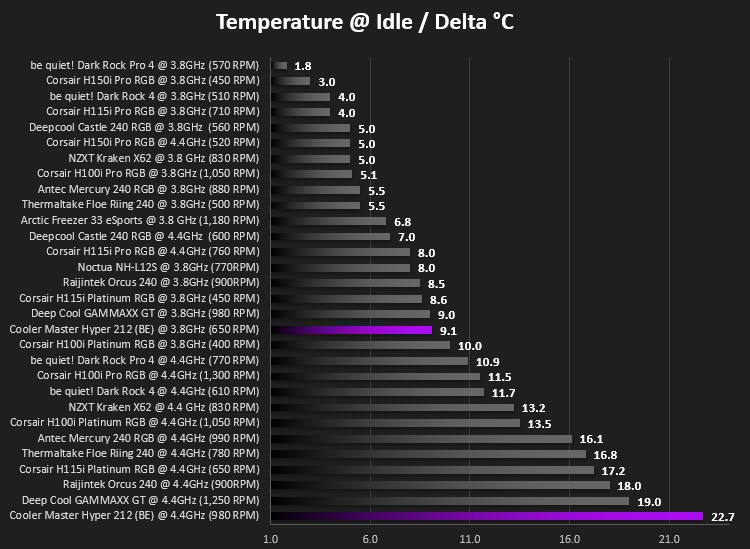
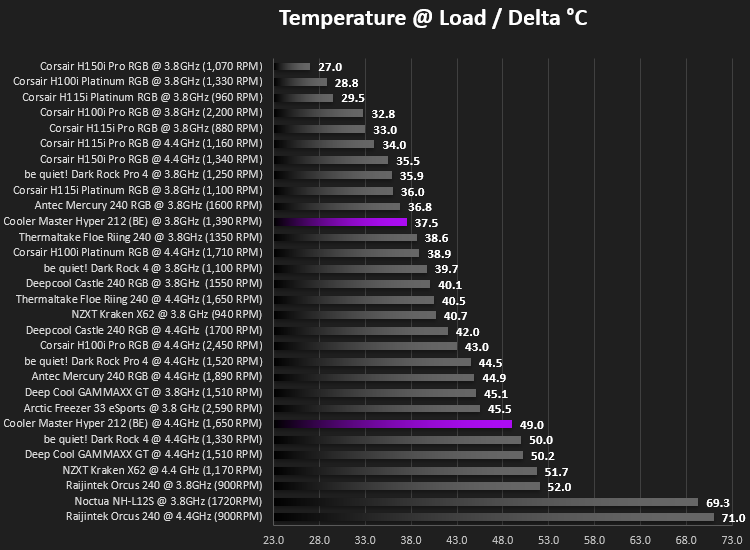
We then launch AIDA64 and set off the stability test. After 20 minutes, we record the average core temperature.
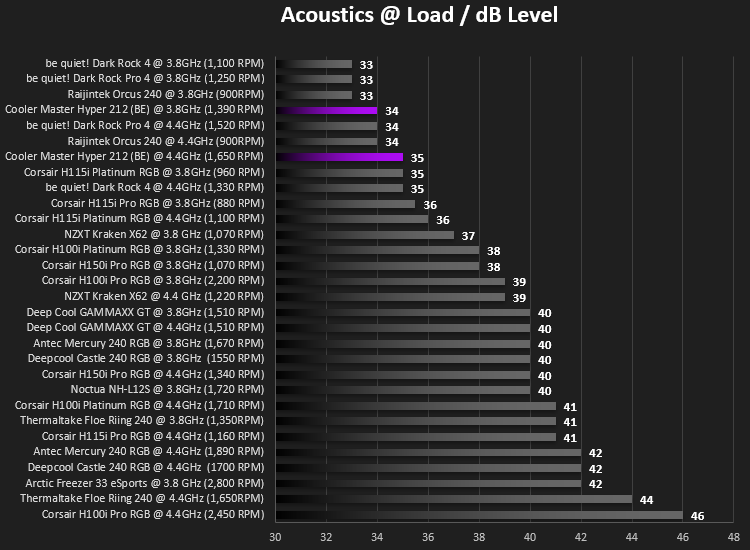
Benchmarks – Acoustic Results
We have recently made changes to our cooling department and the associated testing methodology, so please note that the number of results shown below will increase over time as we add additional products. We hope that these results will appear clearer to the majority of our readership and look forward to building upon the baselines that you see below.We measure the idle acoustics after allowing the system to boot and come to rest, usually around two hours after booting when we begin testing the idle and load temperatures. This ensures any processes are done and complete, giving a true idle measurement.
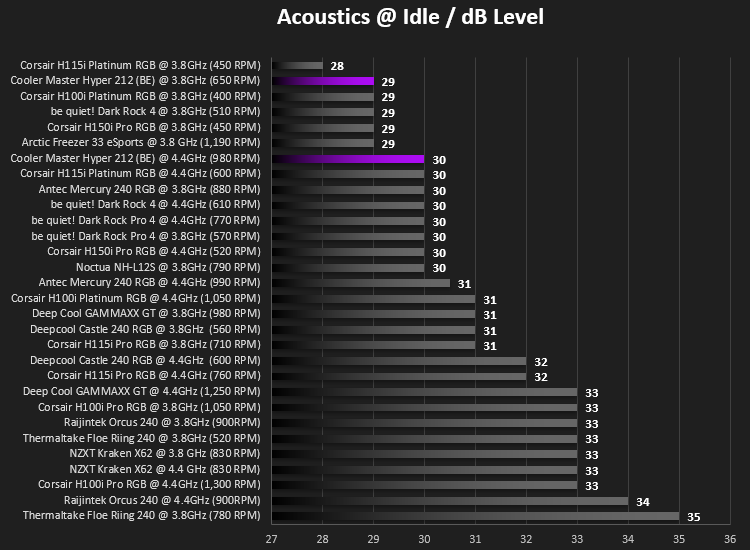
We then take the load acoustics measurement right at the end of the 20 minutes AIDA 64 stability test.
Conclusion
Searching for a CPU cooler around the £30 mark will find you hundreds of options, most of which will likely look similar to the Hyper 212 but may not perform any better than the stock cooler that came with the CPU. However, that’s firmly not the case with this; we’ve yet to find a cooler perform as well for as little money.At idle, the noise levels were impeccable, even with the CPU turned up to 4.4GHz. Temperatures did climb to 22°C above ambient, but that’s well within levels that we can accept if the noise levels don’t need to rise. Even at load, with the fans spinning at 1650 RPM, noise levels never went above 35dB(A). Temperatures approached around 70°C (49°C above ambient) with our overclock, but considering the ~170W our Intel CPU draws at that point, that’s perfectly reasonable for the noise output.
Installation, as promised by Cooler Master, was a breeze, with the included tools and accuracy of construction of the pieces involved.
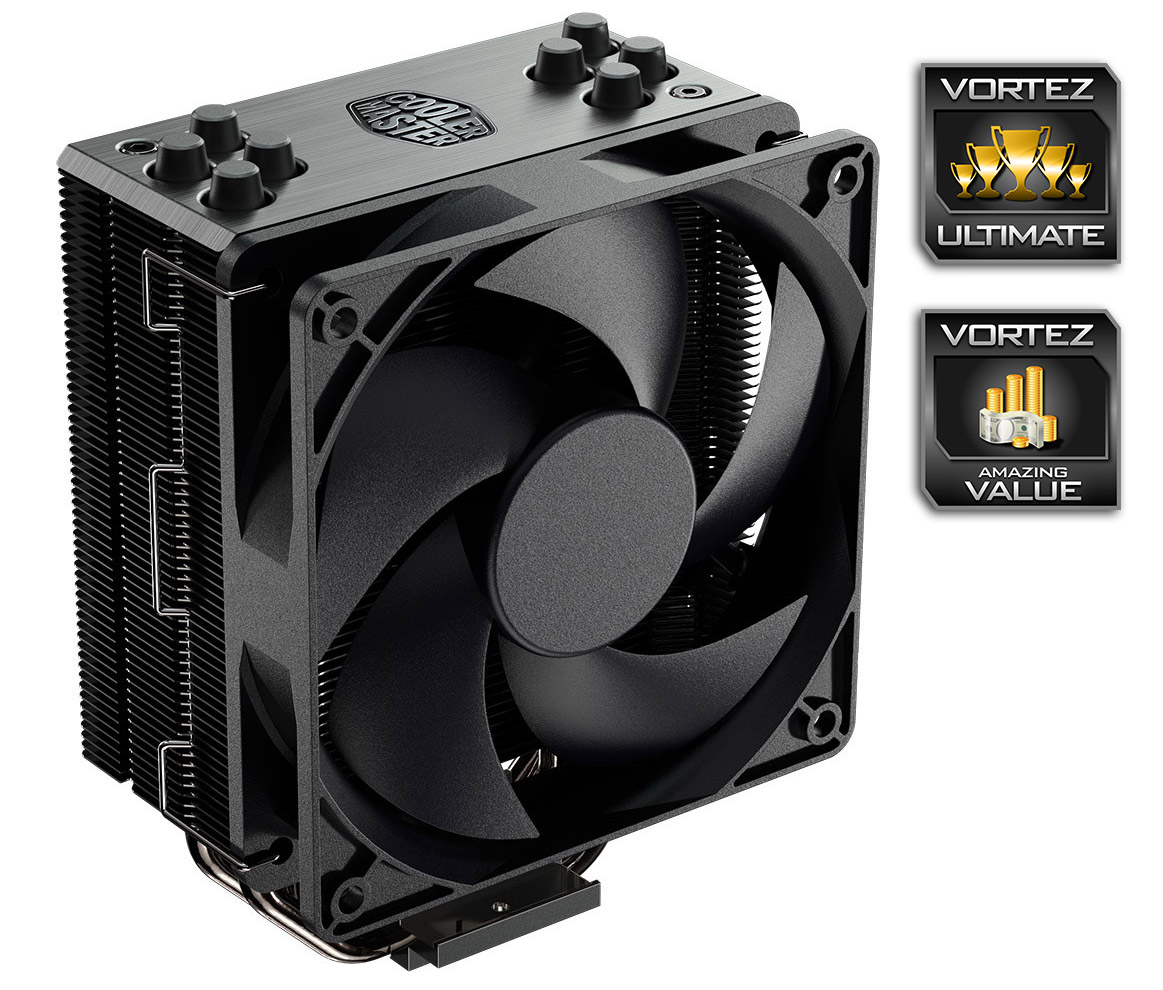
Appearance is also important, even if just to show off a couple of photos on Reddit before you put the case side on; thanks to the dark Nickel plating and brushed Aluminium cap, the 212 Black Edition looks fantastic, we’re confident it’ll match any build.
Considering the size and price difference to the be quiet! Dark Rock 4, the Hyper 212 Black Edition really does pull its weight. We’d recommend this without a doubt.
Pros
+ Quiet performance
+ Bargain price
+ Looks awesome installed
+ Easy to install
+ All the extras you need to add a second fan
Cons
– Nickel plating peeled off the base
+ Quiet performance
+ Bargain price
+ Looks awesome installed
+ Easy to install
+ All the extras you need to add a second fan
Cons
– Nickel plating peeled off the base
Click here for an explanation of our awards at Vortez.net.
Stay connected with the Vortez Social Media pages: