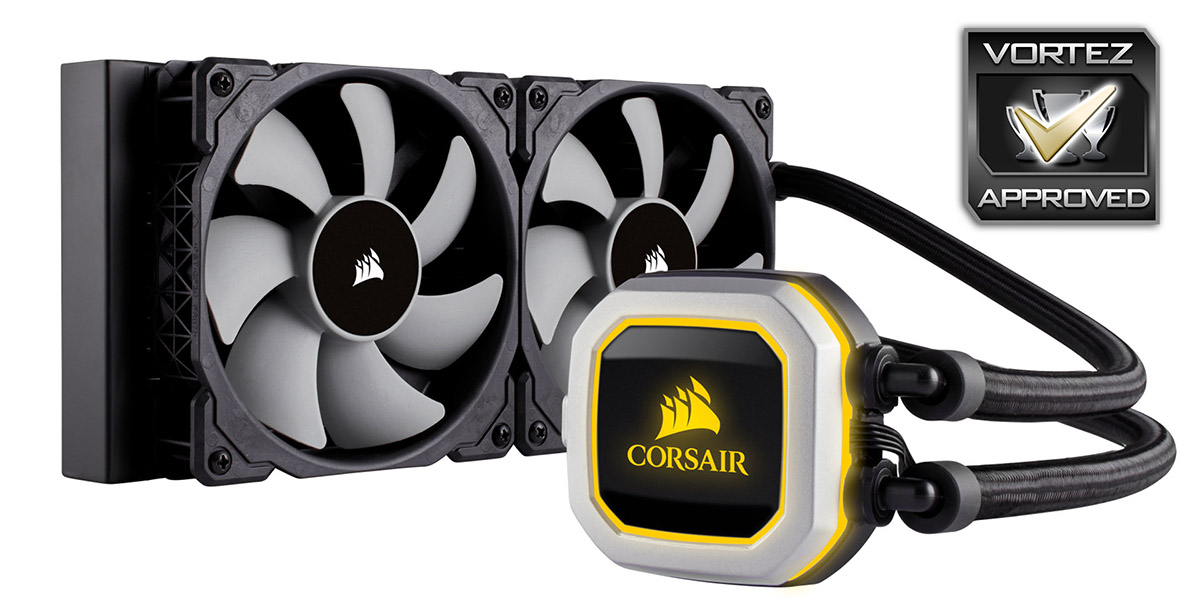
Well known for their Hydro range, Corsair are back with a 240mm option in their latest Pro RGB line up, featuring ML120 fans and RGB lighting.

Product on Review: Corsair H110i Pro RGB
Manufacturer: Corsair
Street Price: GBP £119.99 / USD $119.99 / AUS $169.00
Back at the start of the year, Corsair felt it necessary to add some RGB lighting to their all-in-one water-cooling line up. We saw the Corsair H150i Pro RGB and the Corsair H115i Pro RGB, featuring 360mm and 280mm radiators respectively. July saw the release of a 240mm version of that same CPU cooler, with a slight reduction in price to match. This should come as no surprise, with the 240mm format being one of the most popular sizes and most cases easily supporting the radiator.
The Corsair H100i Pro RGB is a self-contained water-cooling solution for those with a smaller case or less power-hungry CPU, with the intention of reduced temperatures and less noise.
Corsair’s ML-series of fans have proved popular since their introduction, being used for their high static pressure and low noise, perfect for radiators and cooling towers – Corsair include a pair of their standard grey ML120 fans with the H100i Pro RGB. Those fans are controlled and powered by the pump head, helping to keep clutter to a minimum.
Compatibility is improved on their previous generation Hydro Series CPU coolers, offering brackets for all of the latest AMD and Intel sockets, including the Threadripper CPUs.
We saw some brilliant results from the H150i and H115i back in January, so we’re keen to test the H100i Pro and see how a pair of 120mm fans can cope with our Core i7 3930K.
Corsair on the H100i Pro RGB:
The CORSAIR Hydro Series PRO are our quietest liquid CPU coolers ever. We’ve added a quieter pump, ML Series magnetic levitation fans, Zero RPM mode, and quiet startup to cut the noise to a minimum. A brand new compact RGB pump head with bold styling makes the Hydro Series PRO as easy on the eyes as it is on the ears.
Technical Specifications
Cooling Warranty: Five years
Cold Plate Material: Copper
Radiator Material: Aluminum
PWM: Yes
CORSAIR LINK compatibility: Yes
Radiator Dimensions: 276mm x 120mm x 27mm
Fan Dimensions: 120mm x 25mm
Fan Speed: 2400 RPM
Number of Fans: 2
Cooling Socket support: Intel 115x, Intel 2011/2066, AMD AM3/AM2, AMD AM4, AMD TR4
Lighting: RGB
Radiator Size: 240mm
Fan Model: ML Series
Fan airflow: 75 CFM
Noise level: 37 dBA
Fan static pressure: 4.2 mm-H2O
Cold Plate Material: Copper
Radiator Material: Aluminum
PWM: Yes
CORSAIR LINK compatibility: Yes
Radiator Dimensions: 276mm x 120mm x 27mm
Fan Dimensions: 120mm x 25mm
Fan Speed: 2400 RPM
Number of Fans: 2
Cooling Socket support: Intel 115x, Intel 2011/2066, AMD AM3/AM2, AMD AM4, AMD TR4
Lighting: RGB
Radiator Size: 240mm
Fan Model: ML Series
Fan airflow: 75 CFM
Noise level: 37 dBA
Fan static pressure: 4.2 mm-H2O
Packaging & Bundle
It’ll come as no surprise to learn that the box is coloured with the black and yellow theme. Why ruin a good thing, huh? The front shows off the H110i Pro RGB clearly, along with plenty of information about how the cooler operates.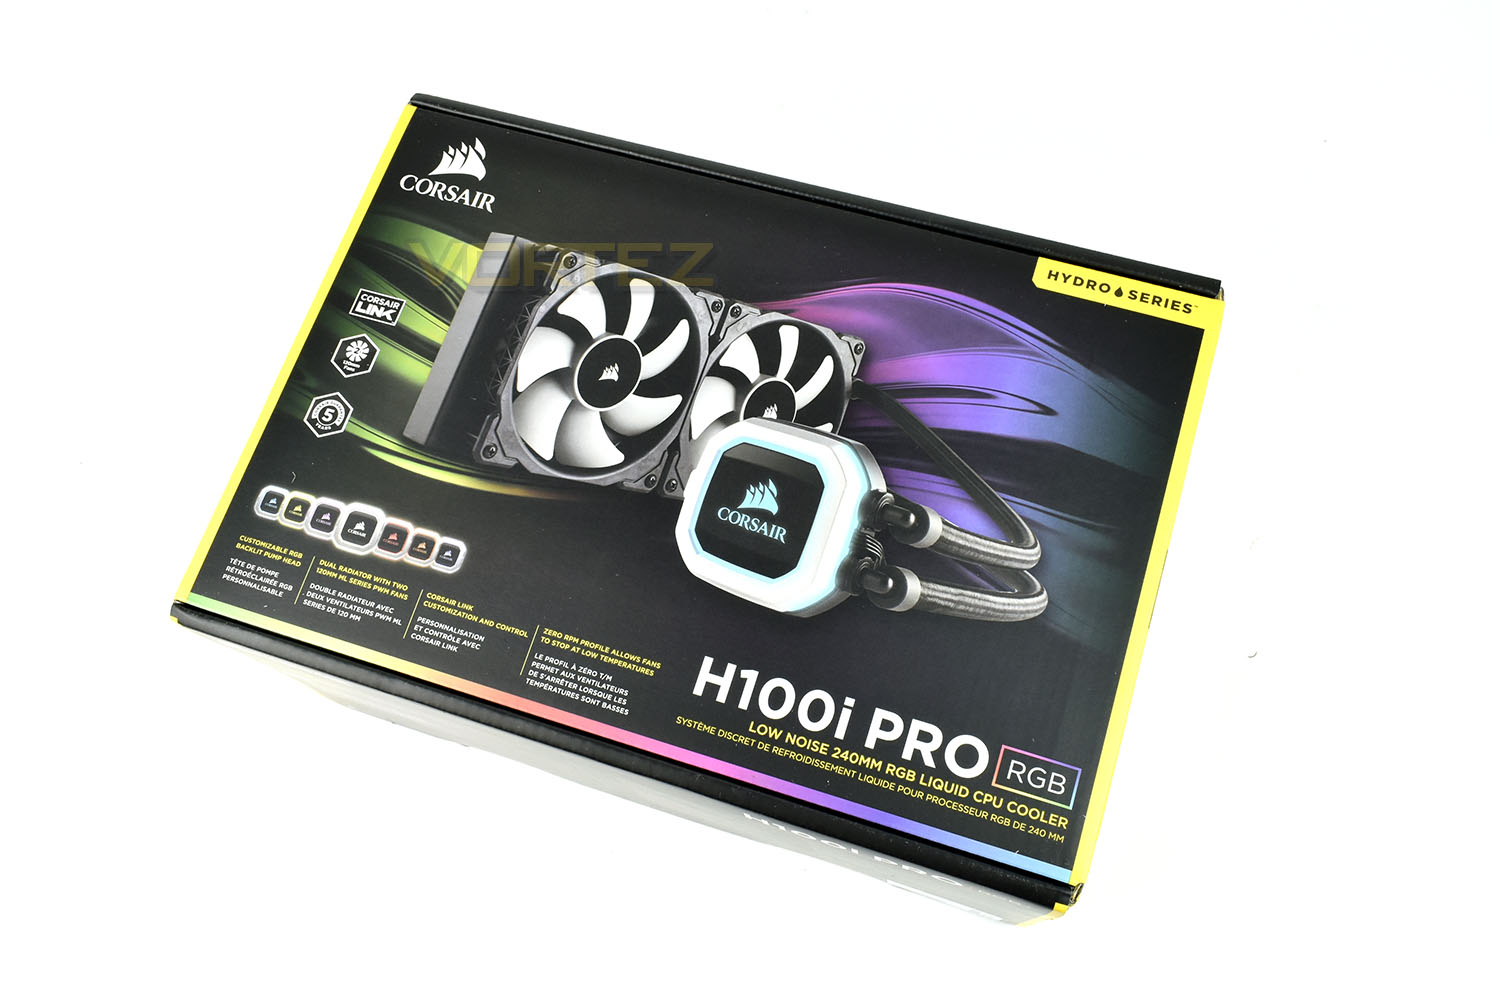
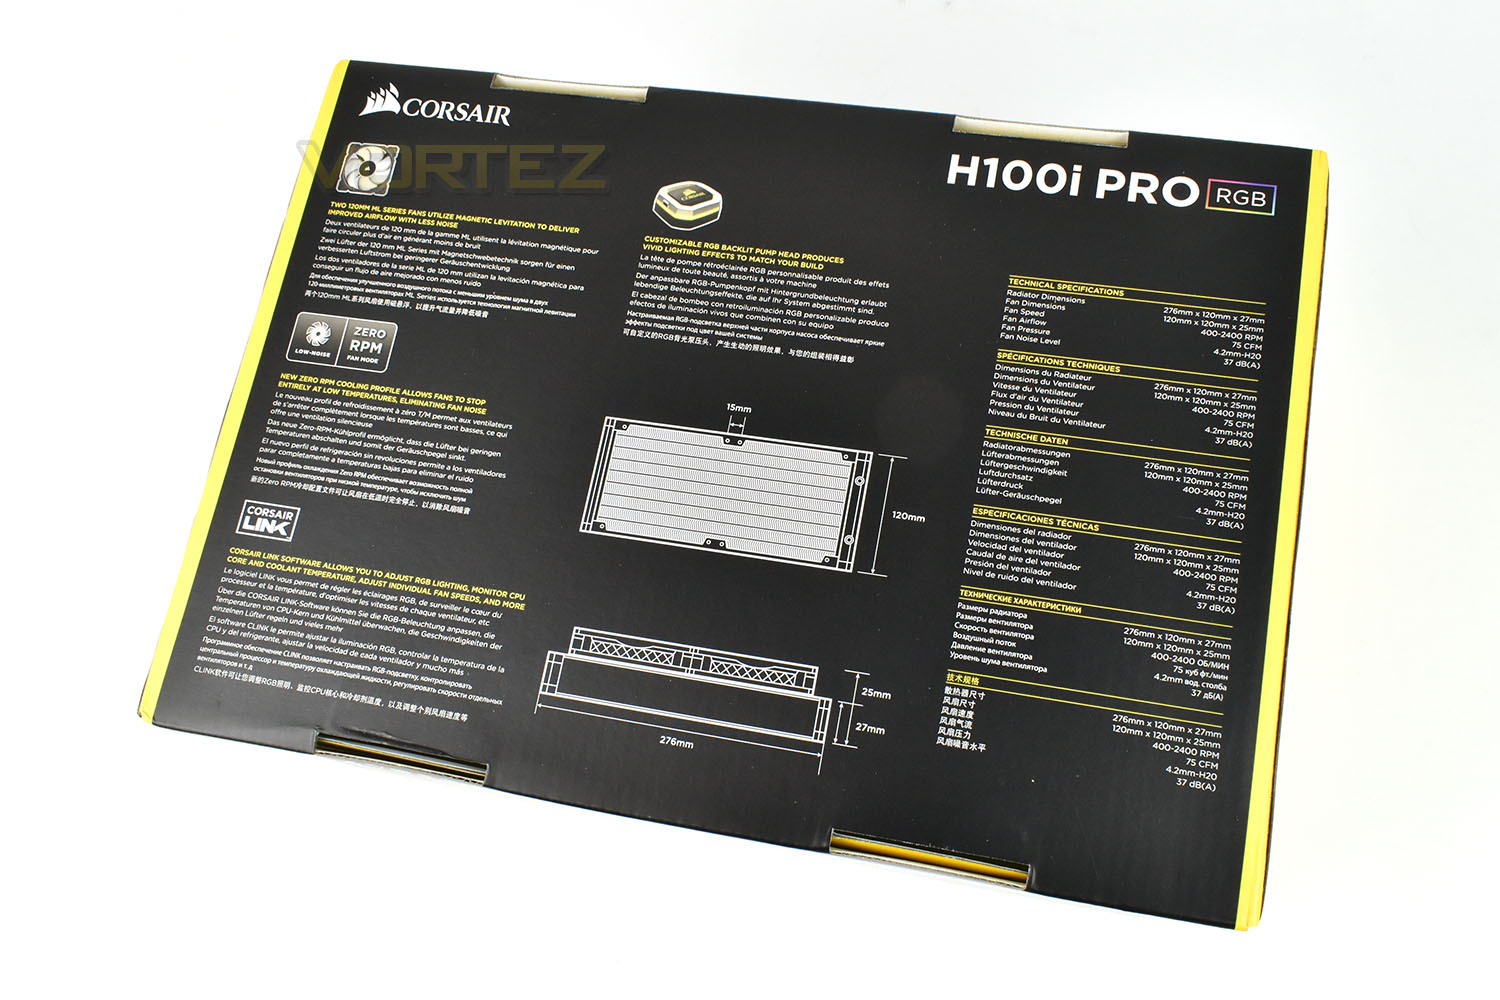
While the front is nicely stylised and given a fancy appearance, the rear is down to business with exact dimensions of the radiator, with and without fans, as well as details on the exact functions.
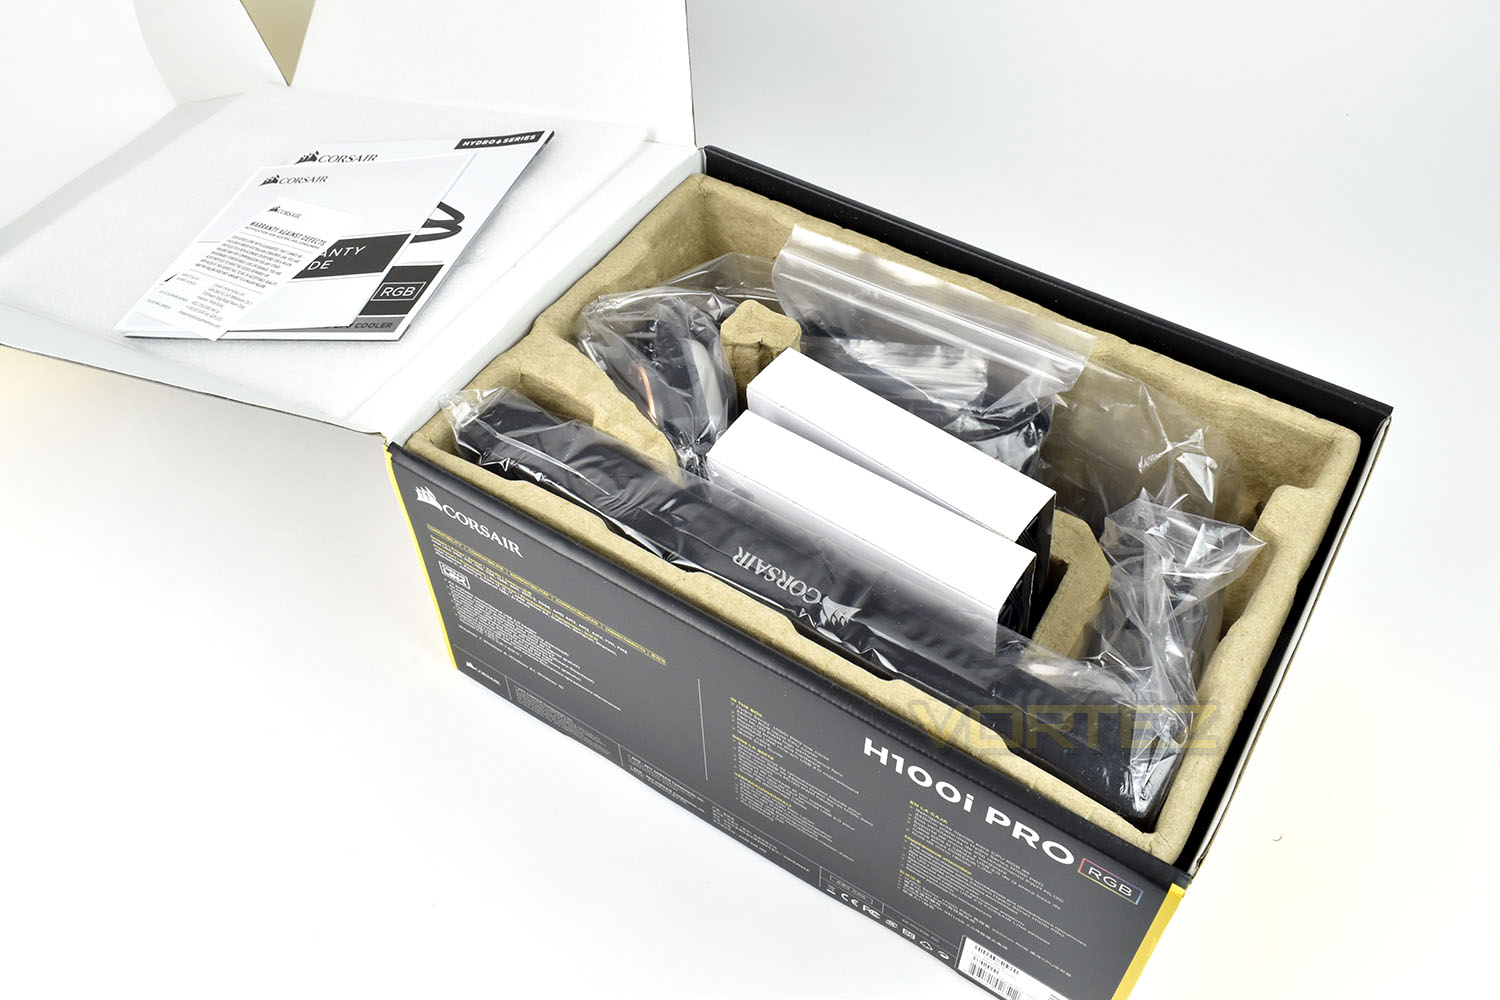
Helping to ensure that the packaging is recyclable, which is important to a growing number of people these days, there’s a cardboard insert holding everything in place. Perhaps Corsair can think of something to replace those plastic bags in the near future? The packaging serves a cracking job in ensuring the cooler arrives with no damage or leaks; essential, considering the damage a leaky cooler could do to your PC.
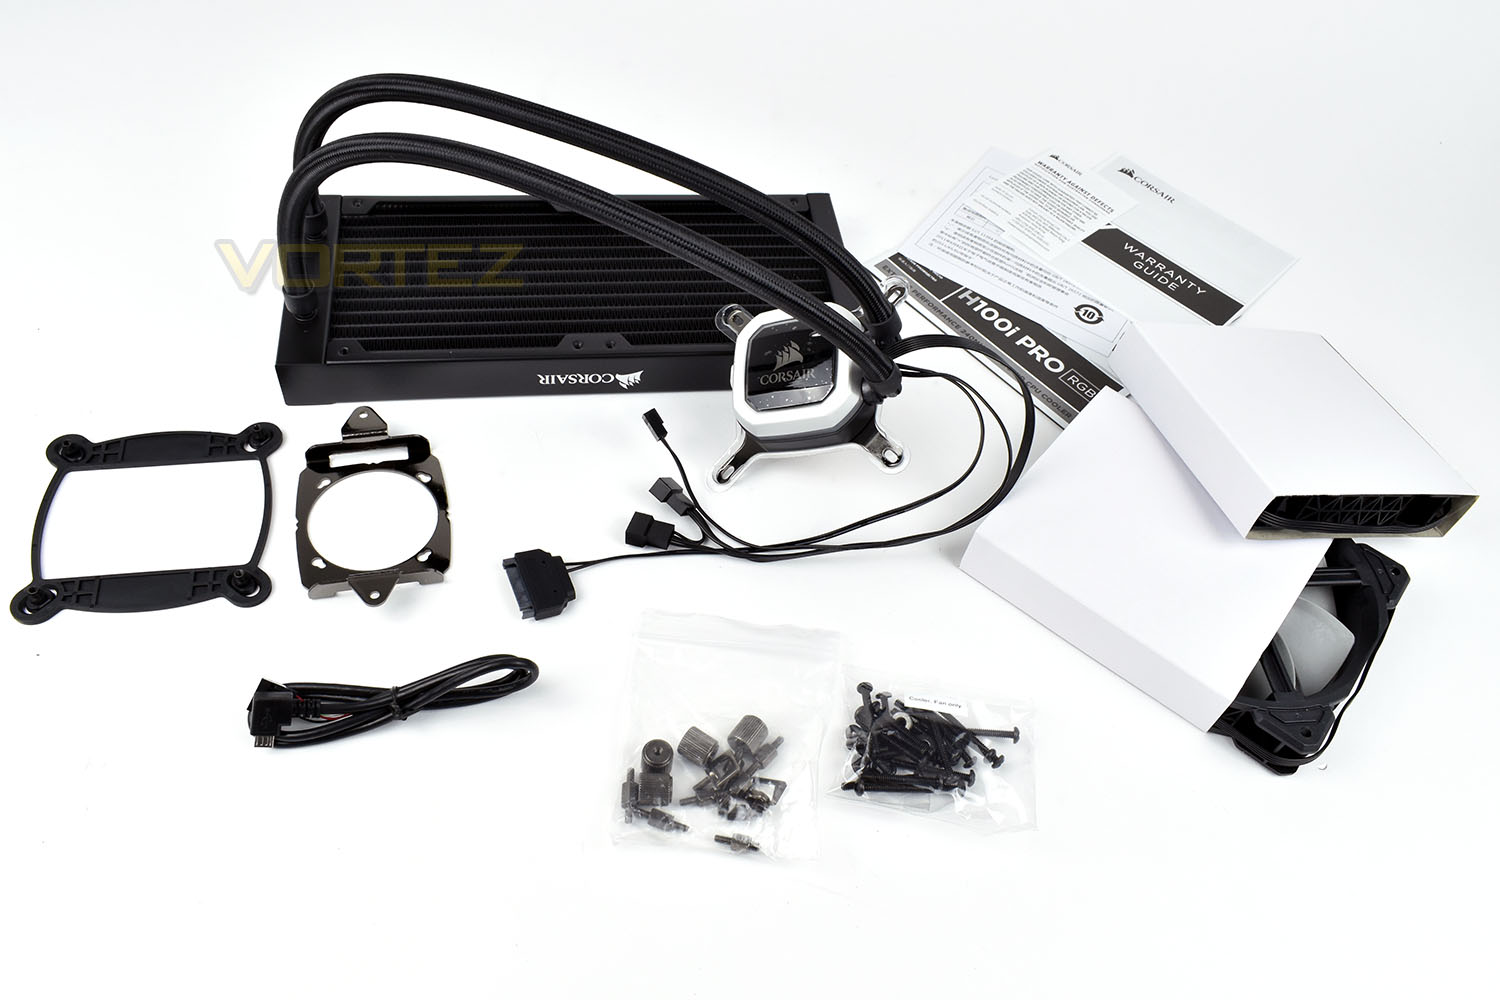
Bundled with the H110i Pro RGB is a pair of ML120 cooling fans, all the mounting hardware you could need for any Intel or AMD socket being used currently, documentation on how to install the device, a USB cable to allow the CPU pump to communicate with the PC for lighting effects and temperature control, and obviously, the H110i Pro RGB itself.
Closer Look
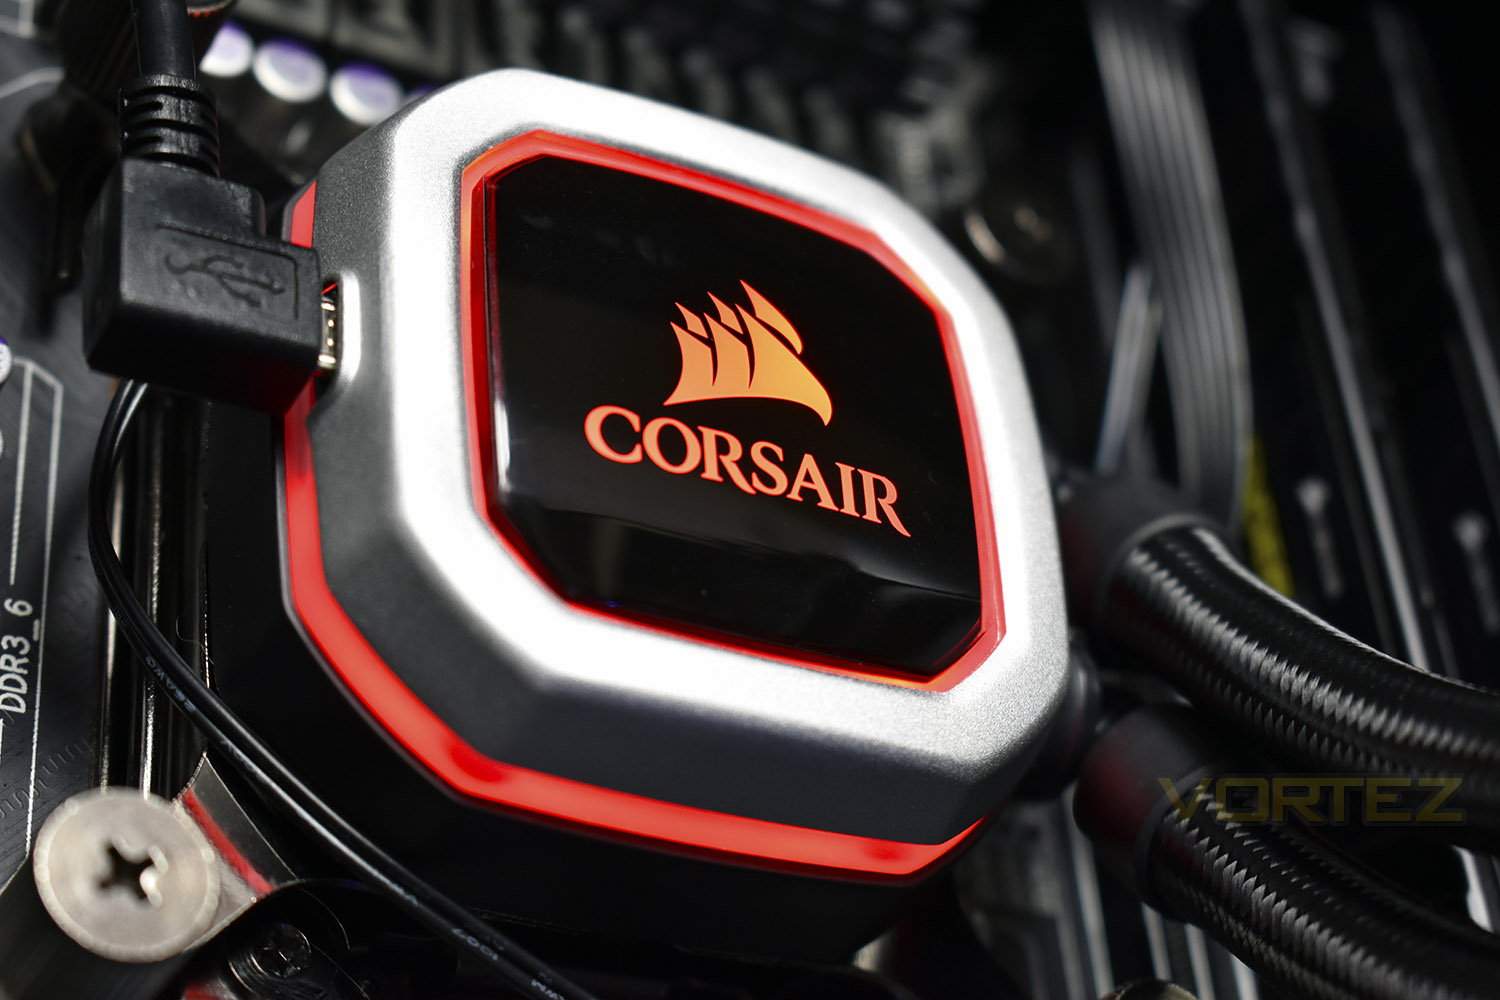
Starting with the pump, Corsair have done a good job of packaging this into a small block, only sitting above the CPU itself by about 35-40mm. However, a better job could be done for wiring the pump into the PC, with three separate connections on the right side and the Mini-USB on the left, it can create a bit of a mess once installed unless you’re talented with cable routing and are lucky enough to have things placed conveniently.The pump features a silver band around the top, surrounding the inner black inlay. The RGB lighting surrounds the silver edging, as well as illuminating the large Corsair logo.
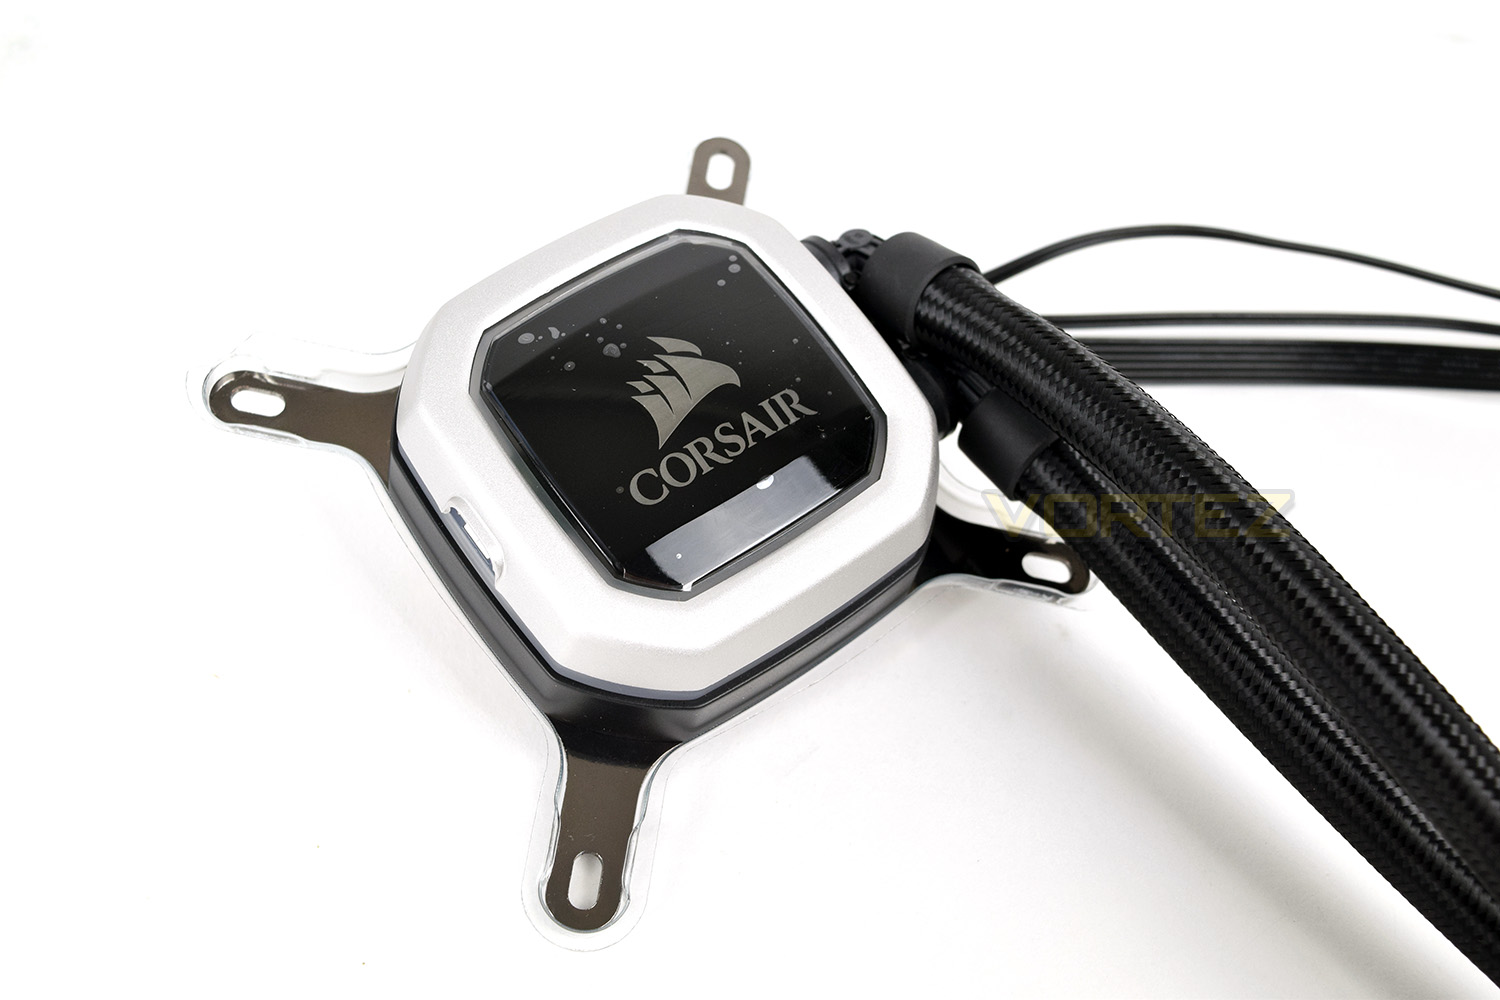
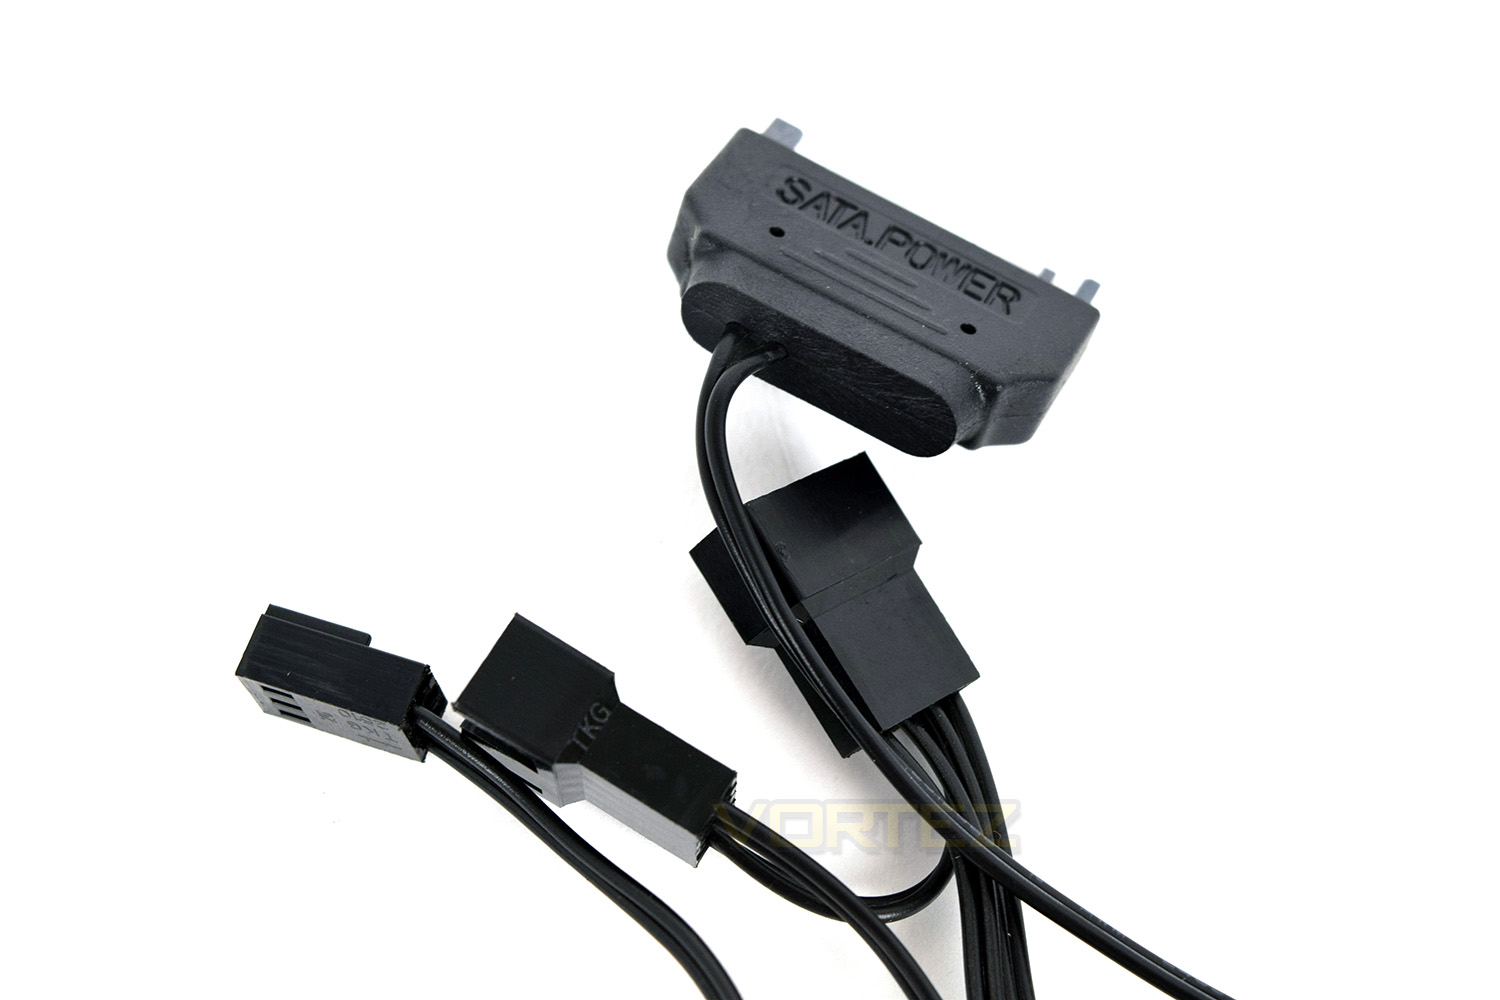
The three cables protruding from the right of the pump are: SATA power, to ensure the pump and the pair of fans receive enough power to go about their duty. A pair of 4-pin PWM fan connectors, enabling the fans to be controlled directly from software and monitored closely. There’s also a 3-pin fan connector for the pump, making sure your motherboard knows there’s something looking after your precious CPU.
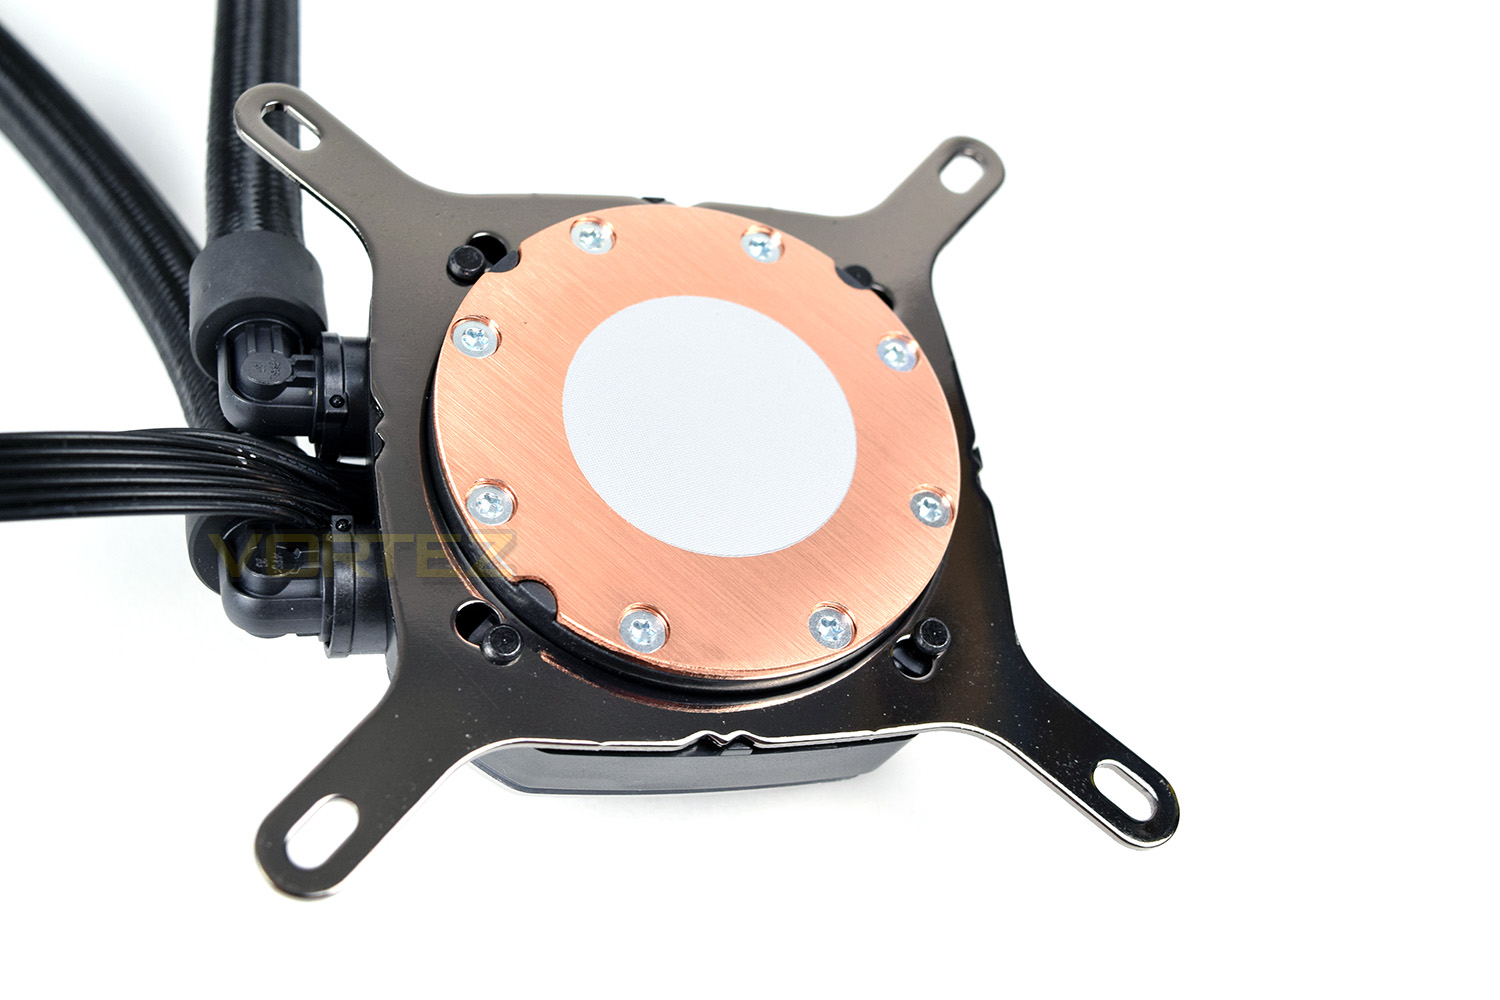
The underside of the pump, on the copper cooling plate, we find a pre-applied layer of thermal paste, allowing you to remove the plastic cap from this section and install it straight away, assuming your CPU is clean from any previous installations. You can also see the mechanism used to hold the mounting bracket in place, with a simple ‘twist and lock’ system.
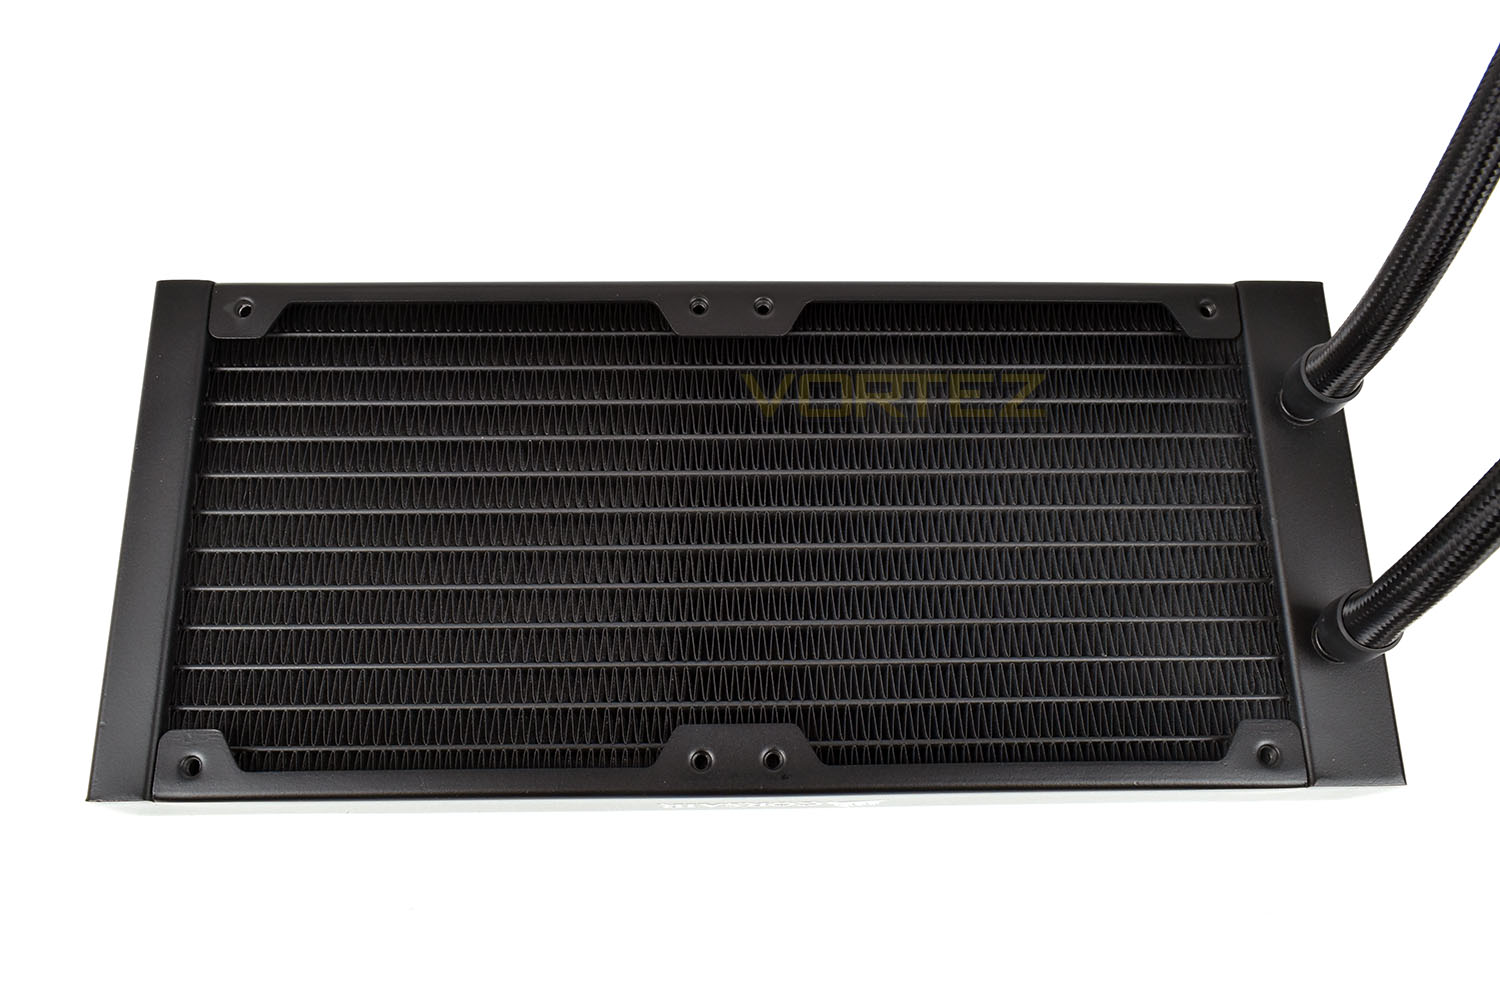
There’s nothing fancy about the radiator, it’s rectangular in shape and houses many, many fins; though Corsair do provide 16 fan screws, allowing you to install 120mm fans on either side for increased cooling, should it be required. The usual 8 stubby screws are also included for fixing it directly to the chassis.
Closer Look (Continued)
The Corsair ML120 fans included with the H100i Pro RGB feature magnetic levitation within the hub, enabling lower noise through lower levels of friction. These fans are costly to purchase separately and offer incredible static pressure, which is essential for pushing air through a densely packed radiator.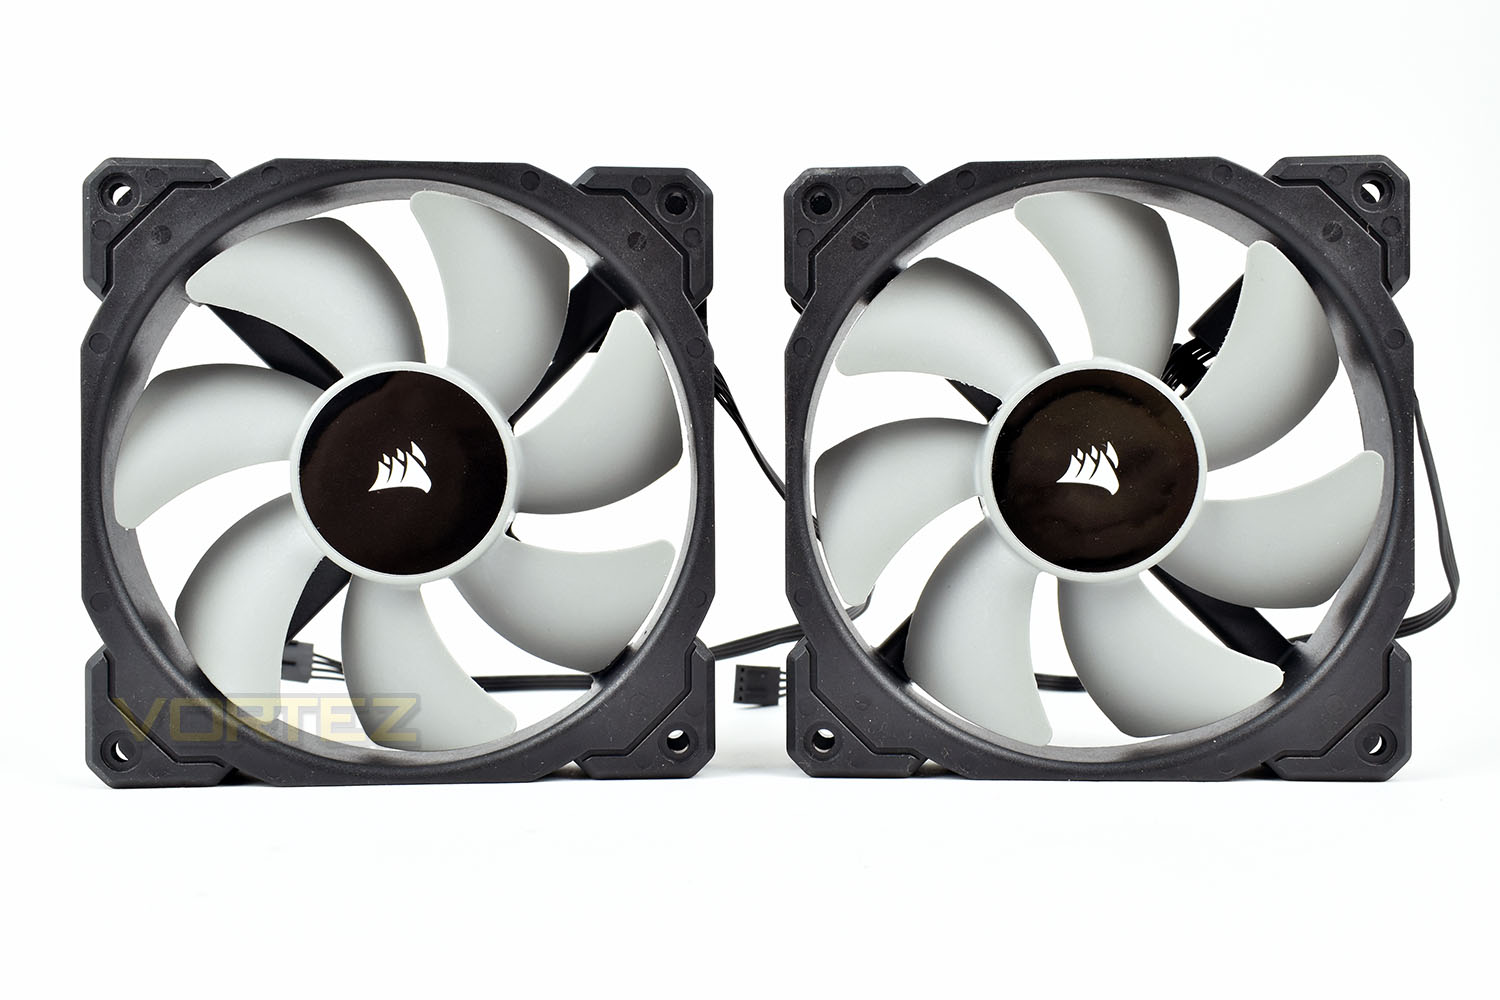
Sadly, these fans offer absolutely no kind of rubber sound isolation, which may work against them when compared to the ML 120 RGB Pro.
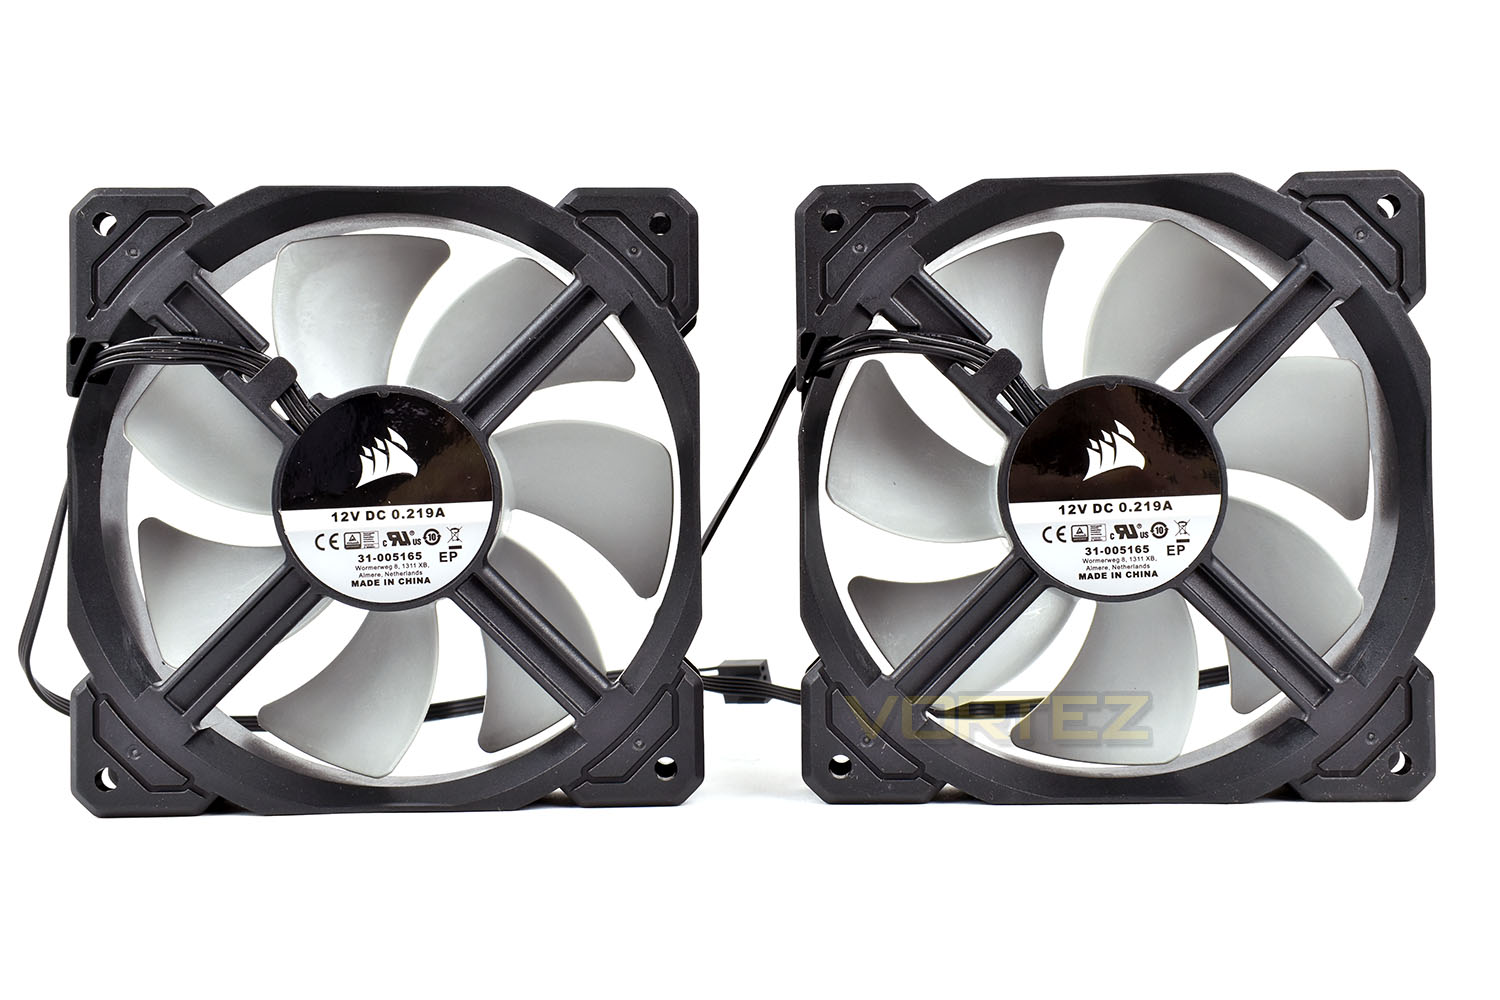
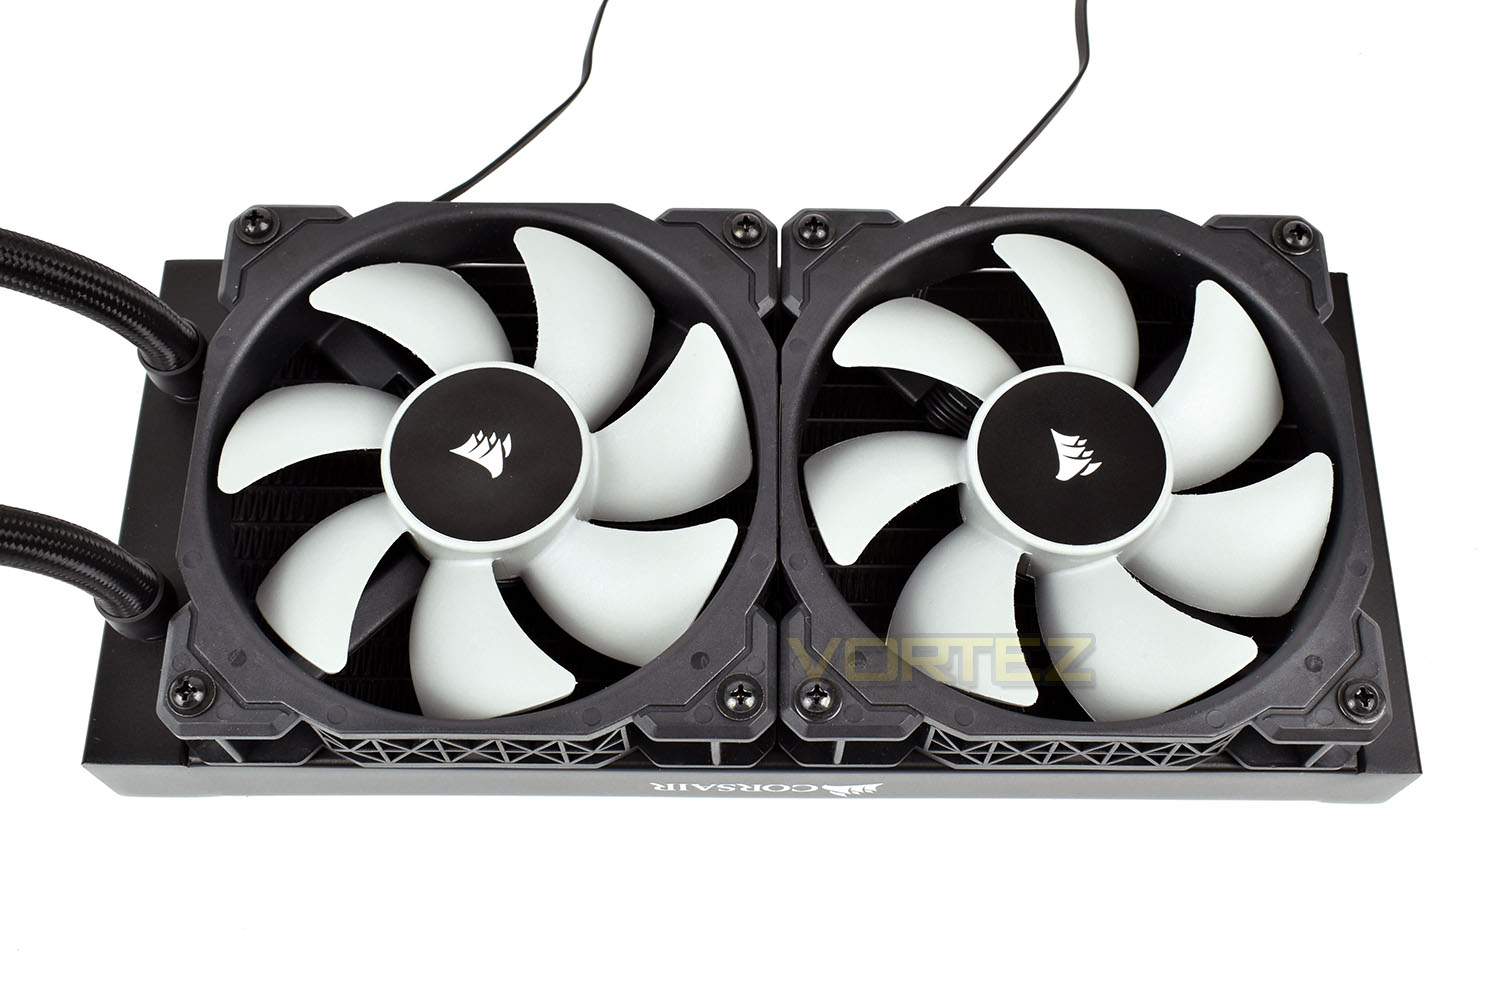
Installing the fans on the radiator is simple, with tolerances being well thought out; this helps when lining up screws and the like. When doing this, make sure you orientate the fans with the hub mount facing towards the direction of airflow and point your cables towards your preferred cable routing area, usually behind the motherboard tray.
Installation
With each CPU cooler that we test, a small pea-sized blob of Noctua NT-H1 thermal paste is applied to our CPU ahead of heatsink installation. We choose to use this high-quality paste in all of our CPU cooler reviews, essentially eliminating an unnecessary variable from the subsequent results and comparison graphs.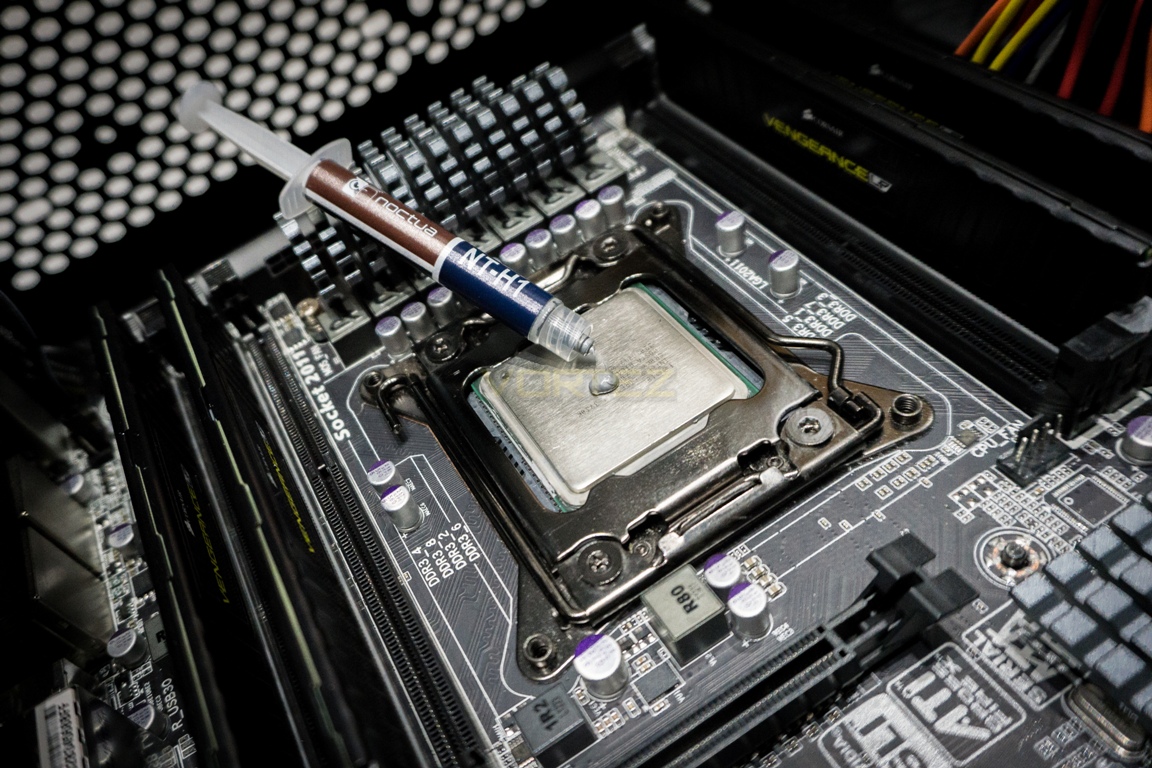
When installing an all-in-one water-cooling loop, we find it easiest to leave the pump until last, first installing the radiator into the top of the case. We placed the fans on the underside and fastened the 240mm radiator into place with the provided screws. Corsair may provide only two fans with the H100i Pro RGB, but they’ve kindly shipped the cooler with 16 lengthy screws, allowing you to install fans on both sides of the radiator when extra cooling is required (you’ll have to arrange a separate method of powering the extra fans, mind you.)

Thanks to Corsair’s research and development team doing their jobs properly, we never encounter any issues when installing their CPU coolers into our machines. The AMD/Intel bracket is easy to swap if required, with a simple twist and click locking mechanism. We installed the H100i Pro onto our Socket 2011 motherboard, finding the large thumb screws easy to use; they’ve very well machined and made from a solid quality metal. Ensuring each corner is turned in a cross-pattern, you’ll find that your thermal paste is evenly distributed under the cooler plate, optimising thermal transfer.
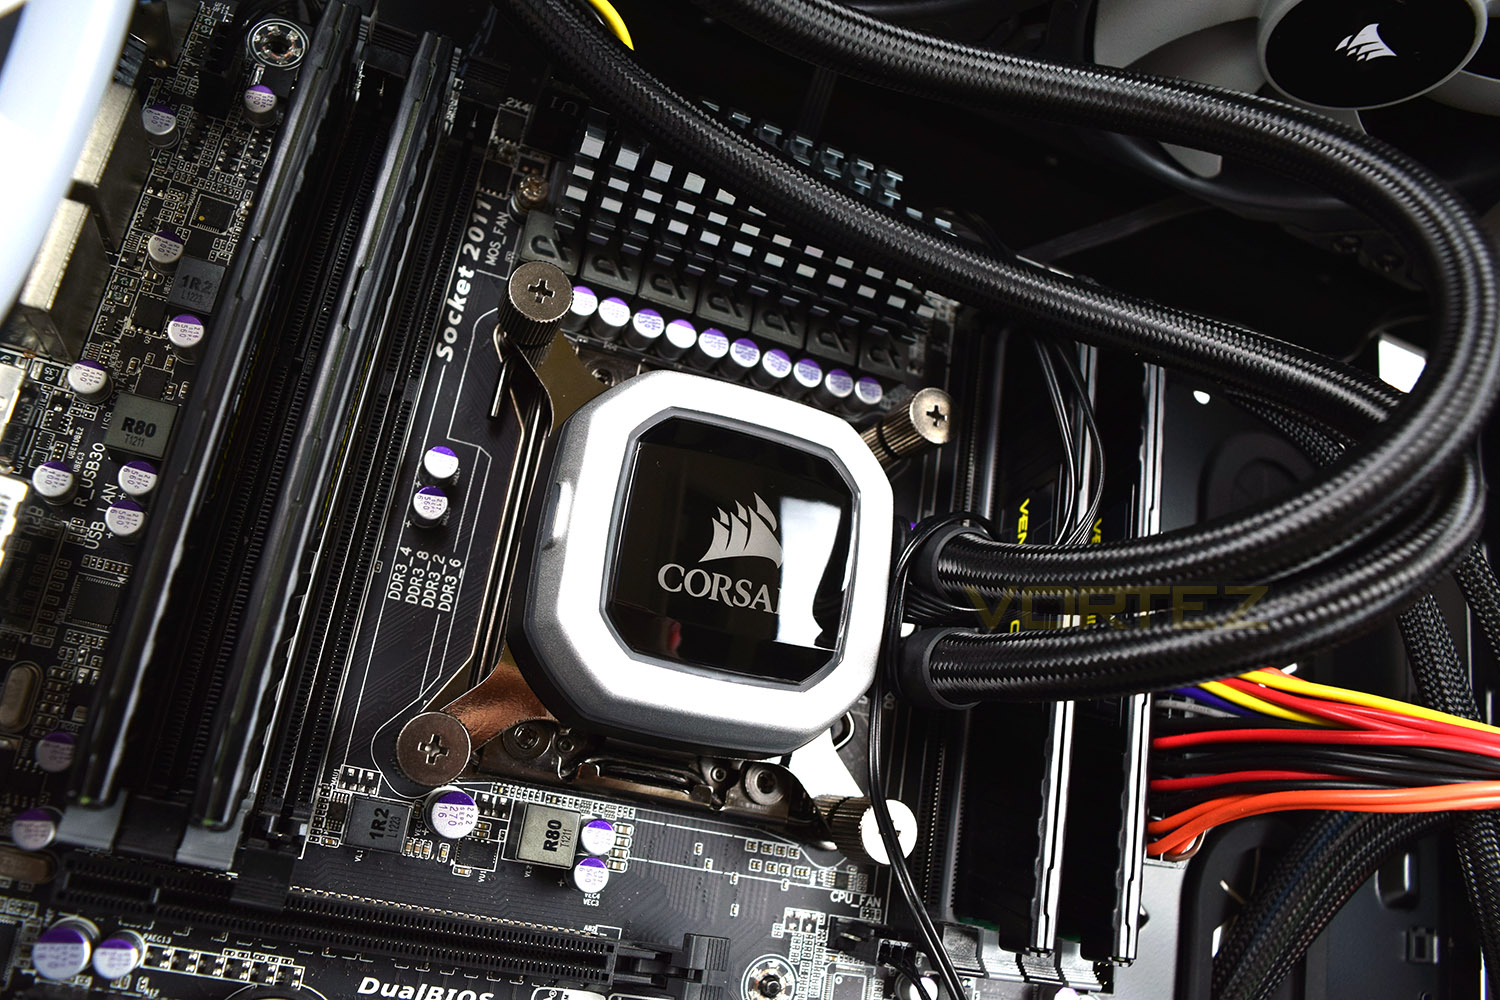
The final stage is connecting up the cables. Everything is simple and straight forward until this point, though it’s only difficult if you seek the cleanest of appearances. The fixed cables from the pump are also a little too short, making cable routing difficult. An extra 100mm adding to the SATA power and Fan Splitter cables would be excellent.
Test Setup & Methodology
We have recently made changes to our cooling department and the associated testing methodology, so please note that the number of results shown will increase over time as we add additional products. We hope that these results will appear clearer to the majority of our readership and look forward to building upon the baselines that we currently have.We perform two individual testing routines with each CPU cooler that we receive – temperatures and acoustics. The system used is as follows and all tests are performed at stock 3.8 GHz and overclocked 4.4 GHz frequencies.
Processor – Intel Core i7-3930K
Motherboard – Gigabyte X79-UP4
Memory – 8GB Corsair Vengeance LP 1600MHz CL9
Video Card – Sapphire Radeon HD 6850 1GB
Power Supply – NZXT Hale90 650W
Storage Drive – Kingston HyperX 240GB SATA III SSD
Case – Corsair Carbide 760T
Monitor ASUS ROG SWIFT PG278Q
Motherboard – Gigabyte X79-UP4
Memory – 8GB Corsair Vengeance LP 1600MHz CL9
Video Card – Sapphire Radeon HD 6850 1GB
Power Supply – NZXT Hale90 650W
Storage Drive – Kingston HyperX 240GB SATA III SSD
Case – Corsair Carbide 760T
Monitor ASUS ROG SWIFT PG278Q
To keep our tests consistent, we always review CPU coolers as they come out of the box – with their factory cooling fans, as the manufacturer intended and as the consumer expects. It should, however, be noted that we do not use supplied thermal paste but instead, Noctua NT-H1 paste to, again, ensure consistency. The paste is applied and the CPU allowed to run for a couple of hours, at idle, to give the thermal compound some time to “bed in.”
In the first test, we record idle and load temperatures as shown by the most current version of the Real Temp monitoring utility. The test system is booted to the Windows desktop and left to idle for 20 minutes to ensure temperatures have stabilised. The average core temperatures are then recorded over a 1 minute period and averaged across the six cores. We then perform a continuous 20 minute AIDA 64 stress test. The maximum absolute core temperatures are recorded immediately after the test has completed and averaged across the six cores. All results are displayed as delta temperatures – these are calculated by subtracting the ambient room temperature from the average core temperatures recorded. For temperature testing, the Corsair 760T chassis door is closed and has all three systems fans powered on to simulate real-world conditions.
Our second test follows a similar methodology to the first, with the key difference being that the Corsair 760T chassis door is now left open and all three systems fans are disabled. This allows for the CPU cooler fans acoustic profiles to be captured in isolation. From cold, the system is again booted to the Windows desktop and left to idle for 20 minutes to ensure temperatures have stabilised. The acoustic level is then recorded at a distance of 20cm from the CPU cooler and where the individual result is an average level over a 1 minute period. We then perform our continuous 20 minutes AIDA 64 stress test. Acoustic levels are again recorded at a distance of 20cm from the CPU cooler and where the individual result is an average level over a 1 minute period.
Benchmarks – Thermal Results
We have recently made changes to our cooling department and the associated testing methodology, so please note that the number of results shown below will increase over time as we add additional products. We hope that these results will appear clearer to the majority of our readership and look forward to building upon the baselines that you see below.We start off by letting the CPU cooler “bed in” for a couple of hours, to ensure the paste has time to move around and form an even layer, after which an idle result is taken.
Please note that the Balanced profile was used within the Corsair Link software to strike a balance between noise and performance; this rings true for all of our tests on the H100i Pro RGB, both with stock clocks and overclocked.
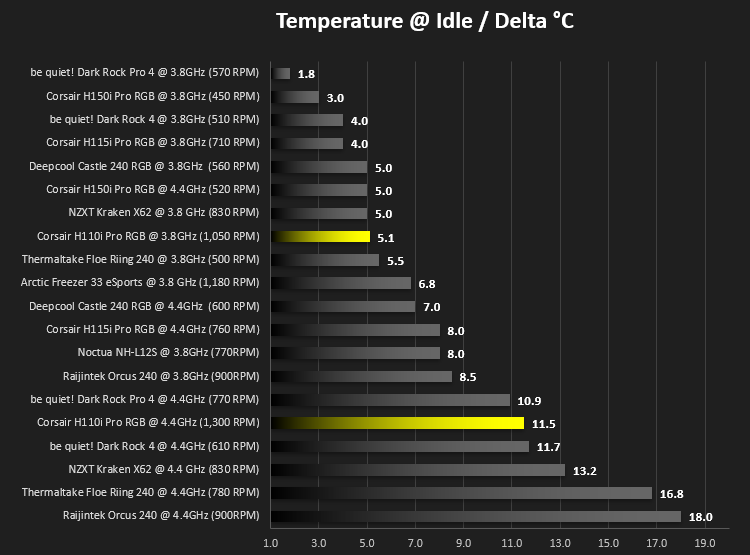
Compared to similarly sized CPU coolers, the temperatures aren’t high, but the fan speeds to maintain those temperatures are about twice what we would expect; requiring over 1,000 RPM to obtain 5.1°C above the ambient temperature. The consequence of this is evident on the following page, when acoustics are measured. The Corsair ML120 fans are capable of running between 400 RPM all the way up to 2,400 RPM.
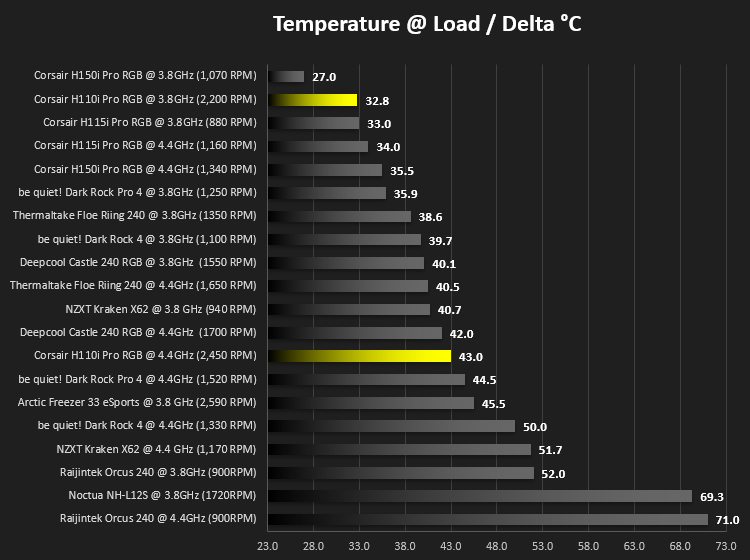
Load temperatures demonstrated this as a fairly decent CPU cooler, beating plenty of opposition, especially without the overclock where it was only bested by it’s bigger brother. However, fan speeds were again where we’d like to see them.
Benchmarks – Acoustic Results
As mentioned on the previous page, we’ve made some recent changes to our cooling department and the testing methodology. Therefore our results graphs are starting from fresh – we’re working tirelessly to populate these graphs, but we hope you can appreciate that these results must be done fairly, and more importantly, correctly.Perhaps even more important than thermal performance is the acoustic qualities of a CPU cooler; it’s all well and good having a cool CPU, but if you can’t hear yourself think while it’s running, it’ll soon wear thin.
We take a look at acoustics while idle, with the CPU at stock clocks and overclocked. The Corsair H100i Pro can turn its fans off entirely, but for fairness, we used the Balanced profile within the Corsair Link software. Once the fans have switched off entirely the noise dropped to 25dB, the only audible sound was coming from the pump.
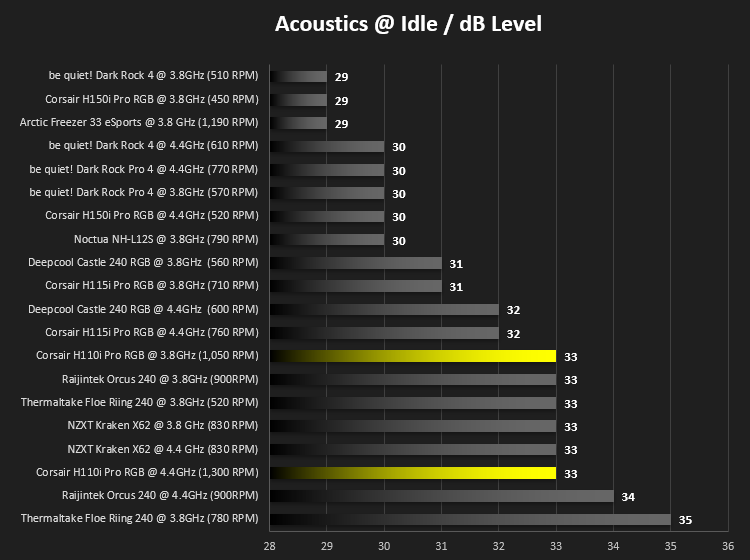
Unfortunately, the H100i Pro RGB doesn’t do well in the idle test. The fans are spinning far too fast to call itself “quiet”, even by any stretch of the word. We’re quite shocked by this result, with the H150i Pro RGB and H115i Pro RGB both featuring the same pump and similar fan configurations, with the 115i using a pair of 140mm fans instead of a pair of 120mm.
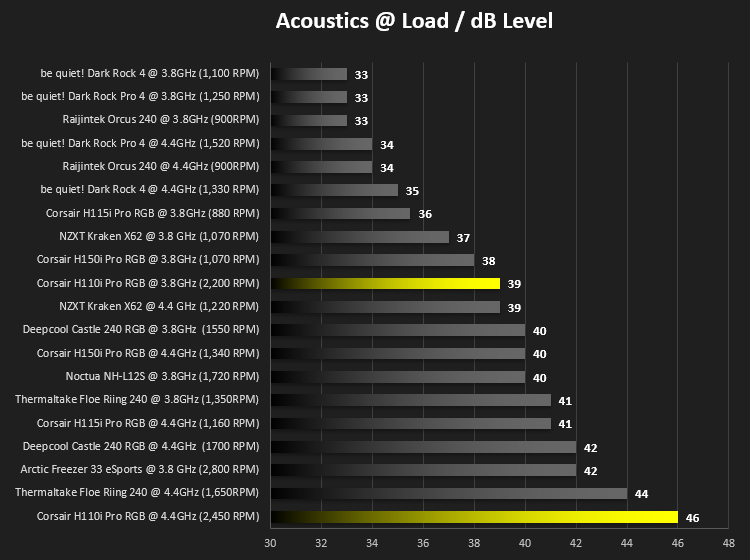
Bottom of the graph. Not somewhere we expected to see a Corsair Hydro CPU Cooler. 46dBA is far too loud, by anyone’s standards, and certainly nowhere near something we can recommend for daily usage.
Explanation?
At this point, we removed the pump from CPU, cleaned up all of the thermal paste, reapplied it and paid some serious attention to the installation method. We’re satisfied that the cooler is installed as straight and true as possible so we ran our tests again. The results were almost identical, save for a degree or two here and there.
Corsair Link provides a details insight into the operations of the CPU cooler, showing pump speeds, coolant temperature, fan speeds and LED lighting, all in real-time. We decided to take a look at the fan curves and discovered they were massively aggressive, even on the “Quiet” setting. We didn’t see fan speeds drop below 1,100 RPM throughout our entire testing session, despite being capable of as low as 400 RPM (roughly 16% of the maximum).
Corsair could provide a software update for this, we’re certain, but if you take the time to set up a custom fan curve, you can bring the idle and load acoustics right down without a huge effect on the temperatures. It took us about 15 minutes of tweaking numbers to find the sweet spot, improving the overall temperature and acoustics drastically.
Also, please remember that these fans are capable of turning themselves off. We found our CPU remained under 40°C at idle, for over 45 minutes, without the fans kicking in once, relying solely on airflow from the case fans.
Conclusion
Corsair’s H-series of CPU coolers have been reviewed by many websites over the years, earning themselves hundreds of awards and accolades for their cool and quiet performance, only getting better with each generation. Our findings were a little different with the H100i Pro RGB but we believe there’s a solution.
Certainly, the cooler itself looks great, providing a sleek and elegant RGB approach, which isn’t so “in your face” as some other options on the market. Installation is also easy and very well thought out – it’s clear that Corsair have spent the time on developing this system and its paid off.
That’s pretty much the end of the praise though, because performance was woeful in its “out of the box” form, especially compared to the H115i Pro RGB and H150i Pro RGB. We found the temperatures were excellent for a 240mm radiator, considering the 3930K @ 4.4GHz pulls around 170W; that’s an awful lot of heat to deal with, however, getting close to 50dBA in our tests was out of order.
We mentioned on the previous page that the software is incredibly aggressive with its fan speeds, choosing to keep the temperatures as low as possible instead of focussing on the noise levels. We spent a short amount of time messing with fan curves and ensuring the pump stayed at its Performance level of roughly 2900 RPM and got rather impressive results. We believe Corsair should take note and adjust things accordingly, perhaps testing the cooler on some more power hungry CPUs and issuing an update.
If you don’t mind tweaking fan curves and are confident with thermal envelopes and safe boundaries, you won’t be disappointed by the quiet performance of the H100i Pro RGB.
Pros
+ Looks great
+ Cost effective compared to competition
+ Easy installation
+ Good thermal performance
+ Lovely RGB lighting
+ Excellent Corsair Link software
+ Supports the new Corsair iCue software
Neutral
+- The H115i Pro RGB is worth the extra £15 if your case can accommodate it
Cons
– Incredibly noisy in it’s default state, on all three profiles (quiet, balanced and performance)
+ Looks great
+ Cost effective compared to competition
+ Easy installation
+ Good thermal performance
+ Lovely RGB lighting
+ Excellent Corsair Link software
+ Supports the new Corsair iCue software
Neutral
+- The H115i Pro RGB is worth the extra £15 if your case can accommodate it
Cons
– Incredibly noisy in it’s default state, on all three profiles (quiet, balanced and performance)
Click here for an explanation of our awards at Vortez.net.
Stay connected with the Vortez Social Media pages: