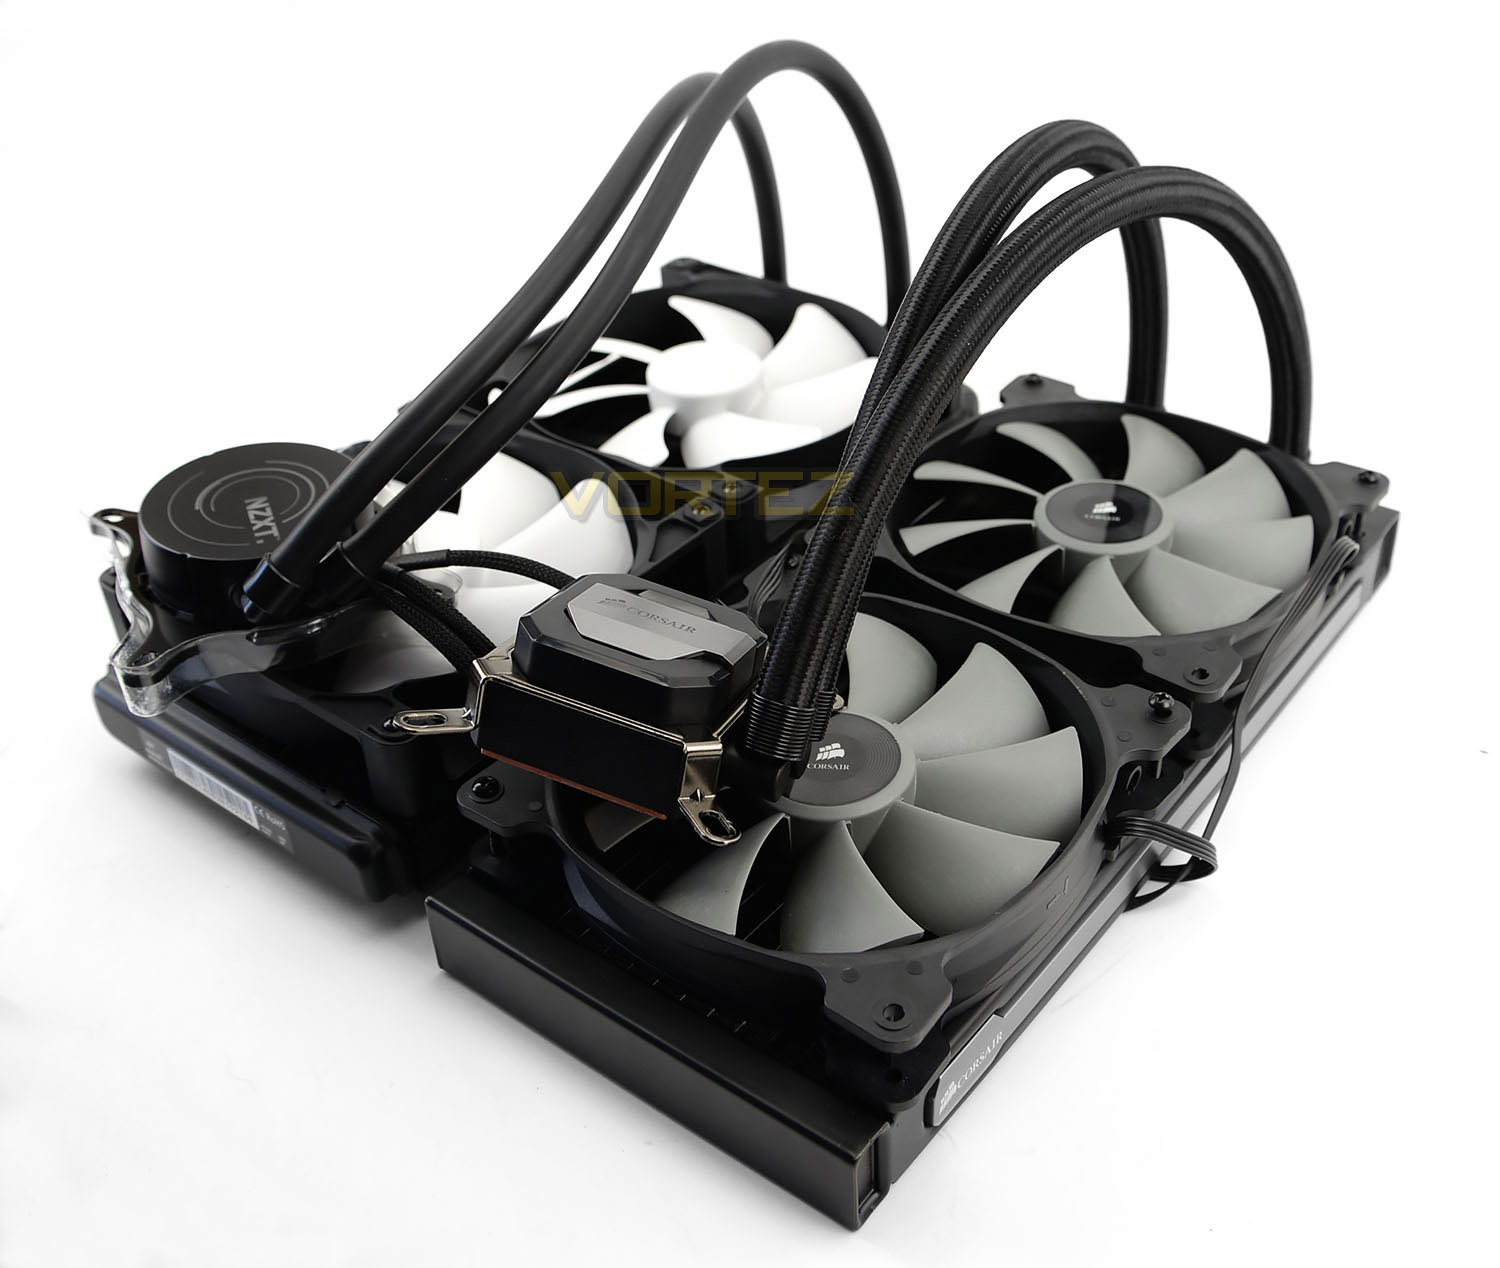
We put Corsair’s H110i GT and NZXT’s Kraken X61 in a head-to-head battle. Both closed loop coolers utilise 280mm radiators and dual 140mm cooling fans, but who will be crowned the winner?

Product on Review: Hydro Series H110i GT & Kraken X61
Manufacturers: Corsair & NZXT
Street Price:
H110i GT – £117 GBP / $139.99 USD
Kraken X61 – £115 GBP / $129.99 USD
ALCs (All-contained Liquid Coolers) are now regarded as a mainstay in the cooling market, bridging the gap between air cooling and custom water-cooling. There are two brands which have recently produced flagship products in this arena and today we are to carefully observe the two in a head-to-head battle.
Corsair’s Hydro Series has been the go-to product line for enthusiasts wanting to indulge and take full advantage of a closed loop cooling solution. Today we’ll be looking at their latest creation in the H110i GT. This cooler uses a 280mm radiator with dual 140mm cooling fans and as the “i” indicates, GT is digital and can be paired up with Corsair Link software for advanced control and customisation.
In the other corner is NZXT with their Kraken X61. Although this cooler has been on the market for a longer period of time, many cooling advocates have vouched for this solution and its backed by many an accolade. Similarly, Kraken X61 also has a large 280mm radiator which also has dual 140mm cooling fans and can be combined with NZXT’s CAM software for progressive modification.
So, who will pull through as the victor in this battle? Let’s find out!
Corsair on their H110i GT
The Hydro Series H110i GT is an extreme performance, all-in-one liquid CPU cooler for cases with 280mm radiator mounts. The 280mm radiator and dual SP140L PWM fans provide the excellent heat dissipation you need for highly overclocked CPUs. It’s Corsair Link compatible, so you can customize cooling performance, monitor system temperature, and change the color of the RGB LED lighting.
NZXT on their Kraken X61
The Kraken X61 is the first consumer closed loop cooler with an integrated variable speed pump. The state-of-the-art variable speed pump keeps noise to a minimum during use without sacrificing top end pump power.
Technical Specifications
Corsair Hydro Series H110i GT
Radiator dimensions: 140mm x 322mm x 27mm
Fan dimensions: 140mm x 25mm
Fan speed: 2100 +/- 10% RPM
Fan airflow: 113 CFM
Fan static pressure: 3.99mm-H2O
Noise level: 43dB(A)
Compatibility Intel™ LGA 1150, 1155, 1156, 1366, 2011 and 2011-3 AMD™ sockets FM1, FM2, AM2, and AM3
Material Copper, Aluminium, Rubber
Warranty Five years
Fan dimensions: 140mm x 25mm
Fan speed: 2100 +/- 10% RPM
Fan airflow: 113 CFM
Fan static pressure: 3.99mm-H2O
Noise level: 43dB(A)
Compatibility Intel™ LGA 1150, 1155, 1156, 1366, 2011 and 2011-3 AMD™ sockets FM1, FM2, AM2, and AM3
Material Copper, Aluminium, Rubber
Warranty Five years
NZXT Kraken X61
Model Number RL-KRX61-01
Fan Air Flow 42.4-106.1 CFM
Dimensions 140 (W) x 280 (H) x 27mm (D)
Fan Air Pressure 0.36-1.97mmH2O
Fan Bearing Nano Bearing
Motor Speed 2400-3600 ± 150 RPM
Fan Connector 4 Pin PWM
Motor Voltage 12V DC
Motor Connector 3 Pin
Compatibility Intel LGA 2011-3, 1366, 1156, 1155, 1150 CPUs
AMD FM2, FM1, AM3+, AM3, AM2+, AM2 CPUs
Fan Dimensions 140 x 140 x 25mm
Motor Current 325mA
Fan Current 12V DC
Fan Model NZXT FX V2 140mm Performance PWM Fan
Material Copper, Aluminum, Rubber, Plastic
Fan Noise Level 20-37 dBA
Tube Length 400mm
LED Color Hue Controlled Color Changing Lights
Fan Speed 800~2000 RPM ± 10%
Control Method Kraken+ Software Module
Warranty 6 Years
Fan Air Flow 42.4-106.1 CFM
Dimensions 140 (W) x 280 (H) x 27mm (D)
Fan Air Pressure 0.36-1.97mmH2O
Fan Bearing Nano Bearing
Motor Speed 2400-3600 ± 150 RPM
Fan Connector 4 Pin PWM
Motor Voltage 12V DC
Motor Connector 3 Pin
Compatibility Intel LGA 2011-3, 1366, 1156, 1155, 1150 CPUs
AMD FM2, FM1, AM3+, AM3, AM2+, AM2 CPUs
Fan Dimensions 140 x 140 x 25mm
Motor Current 325mA
Fan Current 12V DC
Fan Model NZXT FX V2 140mm Performance PWM Fan
Material Copper, Aluminum, Rubber, Plastic
Fan Noise Level 20-37 dBA
Tube Length 400mm
LED Color Hue Controlled Color Changing Lights
Fan Speed 800~2000 RPM ± 10%
Control Method Kraken+ Software Module
Warranty 6 Years
Packaging, Bundle & Fans (H110i GT)
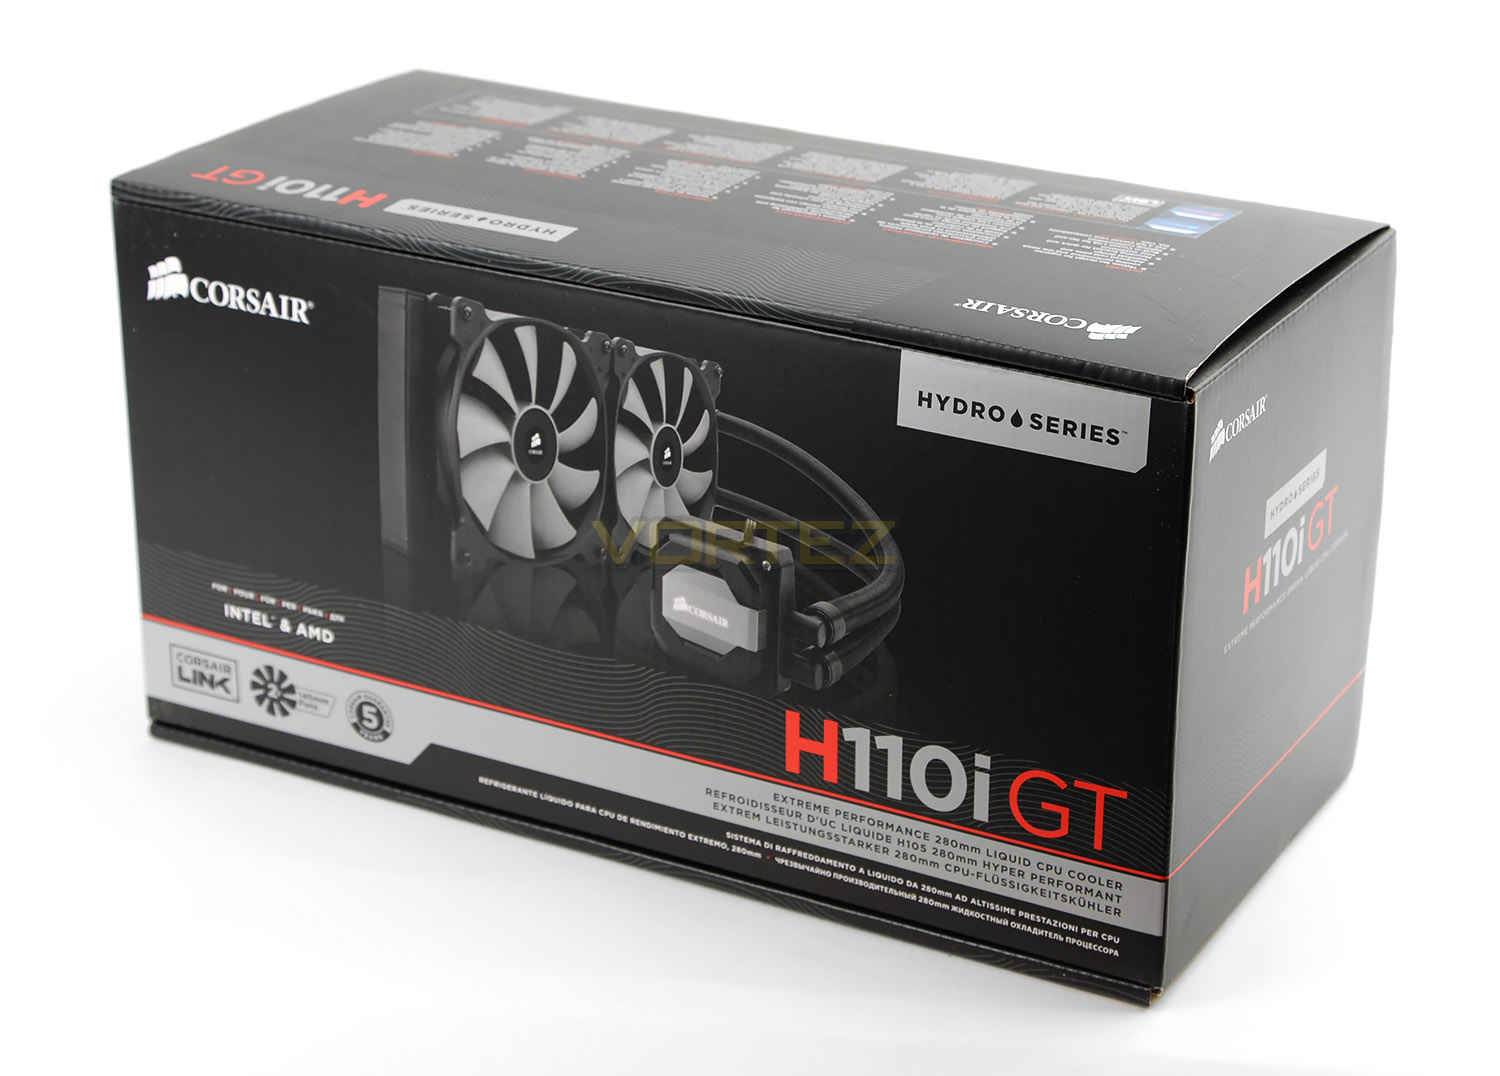
H110i GT arrives in a long box which conforms to Corsair’s usual theme. The front shows a depiction of the cooler and list some of the key features while the sides/reverse go into further detail with the technical specifications and highlights.
Inside, all of the components are carefully packaged – it’s nice to see such care taken with such intricate equipment.
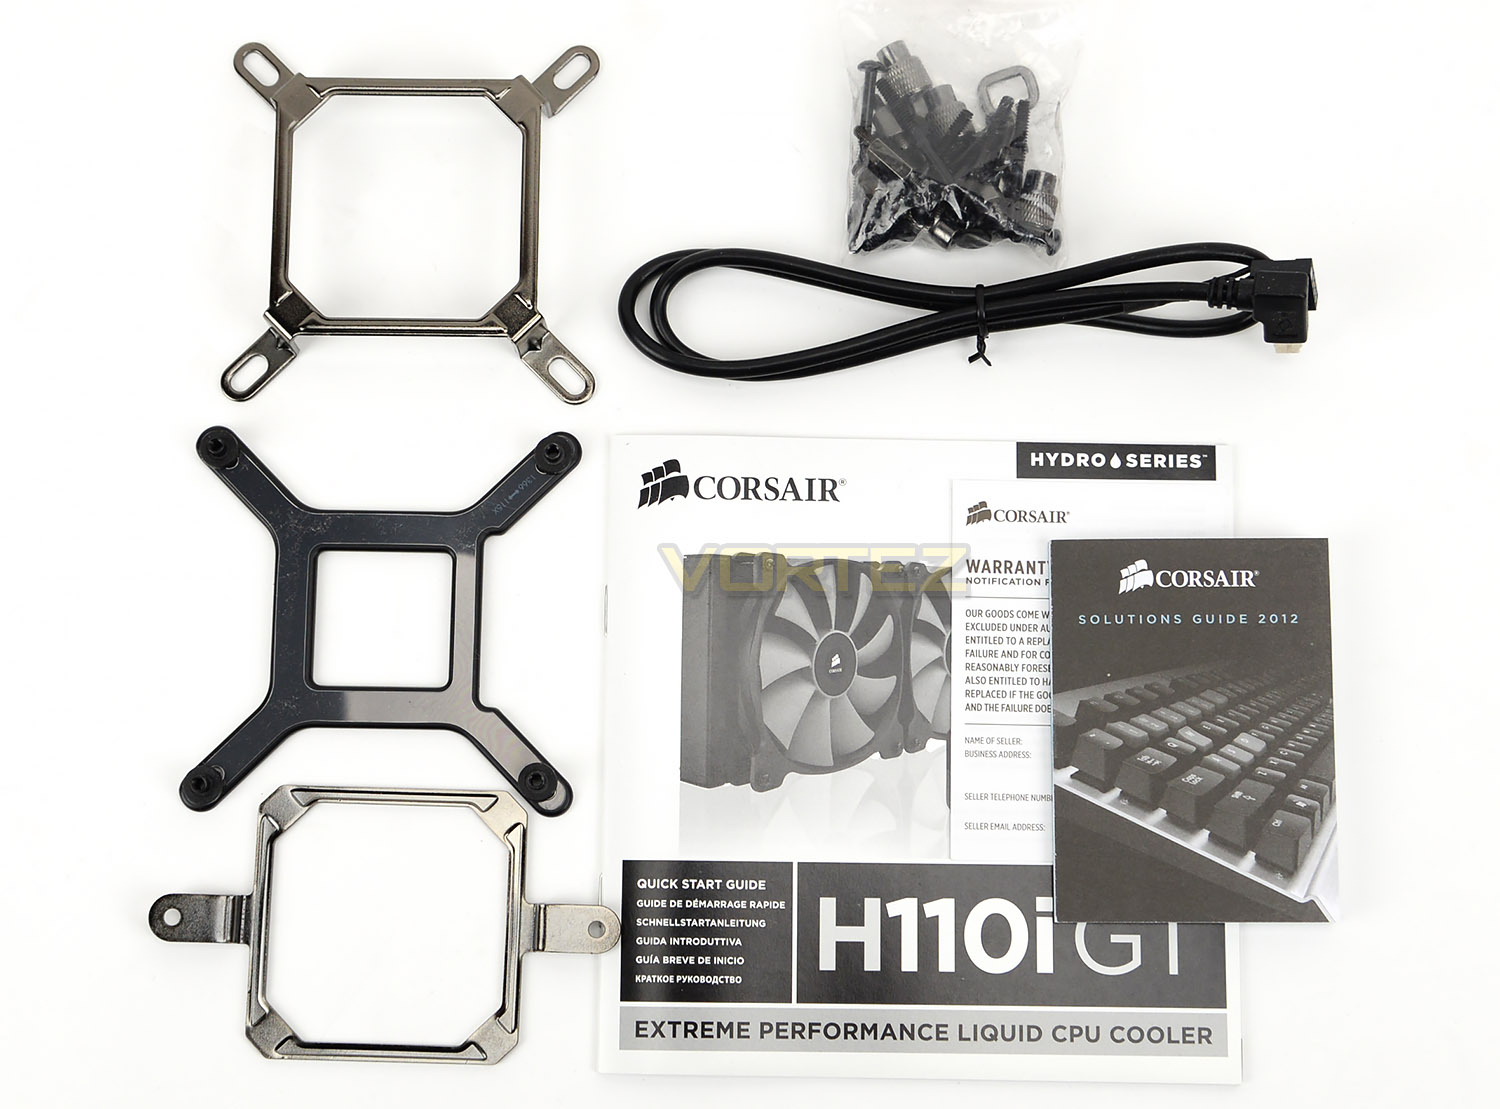
There are quite a number of different items within the accessories bundle, there is mounting kit for both AMD and Intel platforms, a helpful guide for installing, a warranty booklet and the Corsair Link cable to interface with the cooler.
H110i GT supports a wide-selection of sockets including:
Intel™ LGA 1150, 1155, 1156, 1366, 2011 and 2011-3
AMD™ sockets FM1, FM2, AM2, and AM3
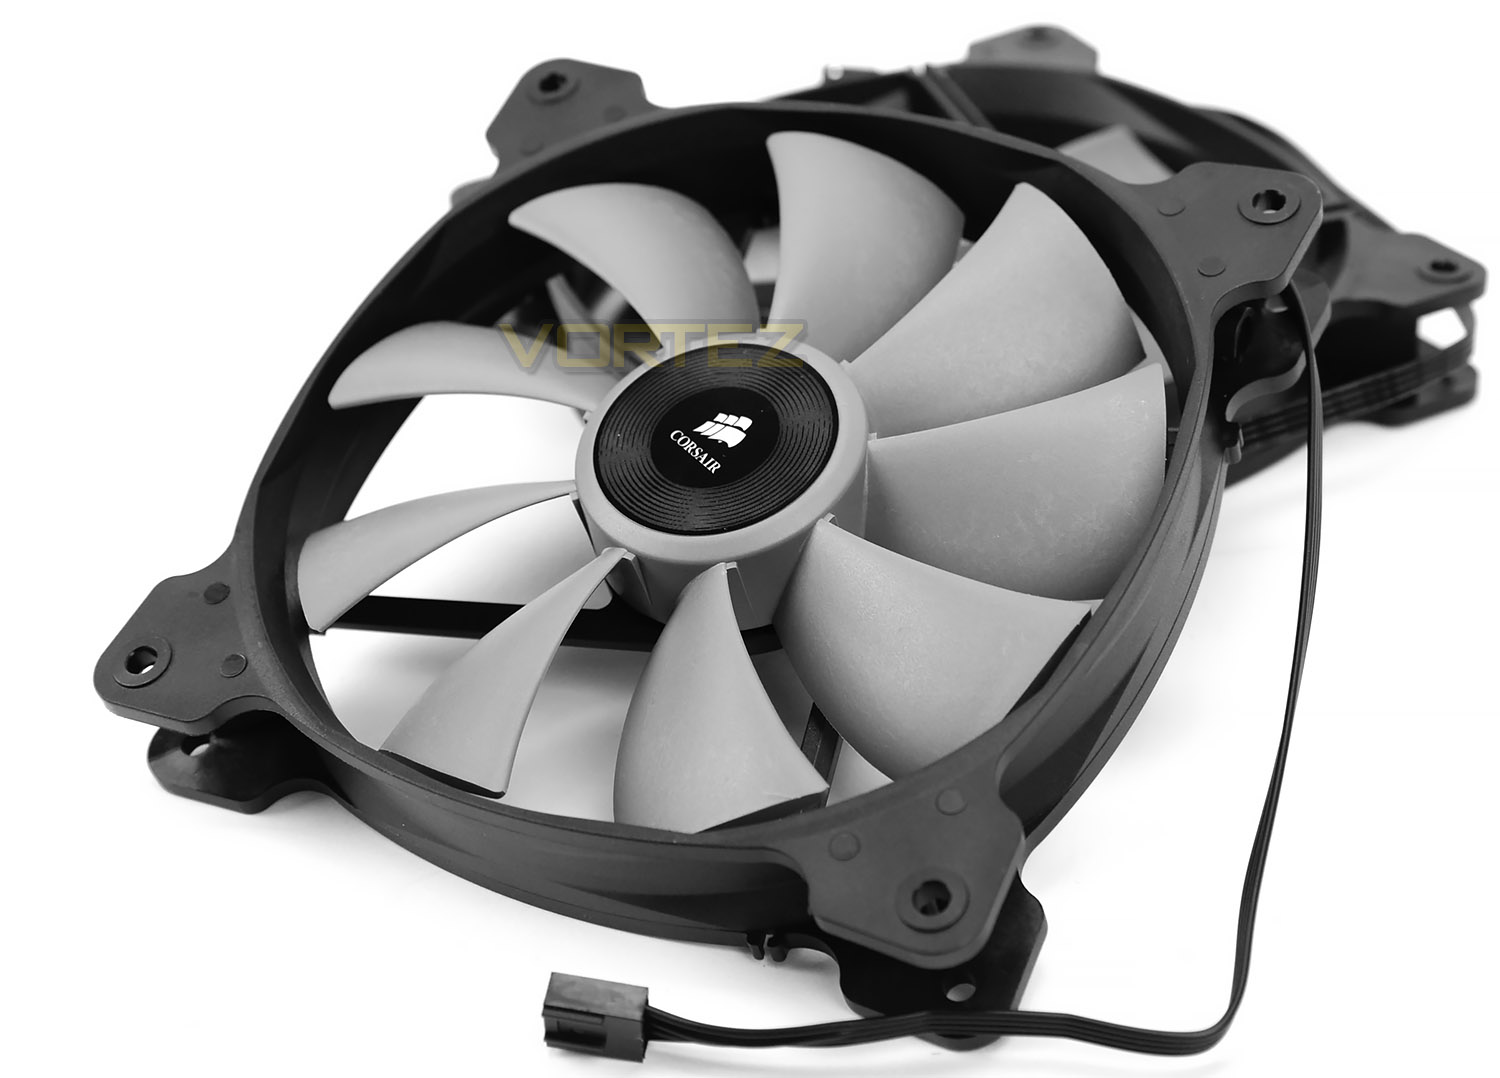
Along with the components for installing the cooler, there are also two cooling fans supplied which are to be paired up with the radiator. Both fans are Corsair’s own SP140L PWM variants and are a 9-blade, capable of up to 2200RPM. Although these fans are PWM we can also modify the speed of rotation via the Corsair Link software. Later in this review we’ll be testing the performance with 100% fan speed and PWM (Auto) settings.
Closer Look (H110i GT)
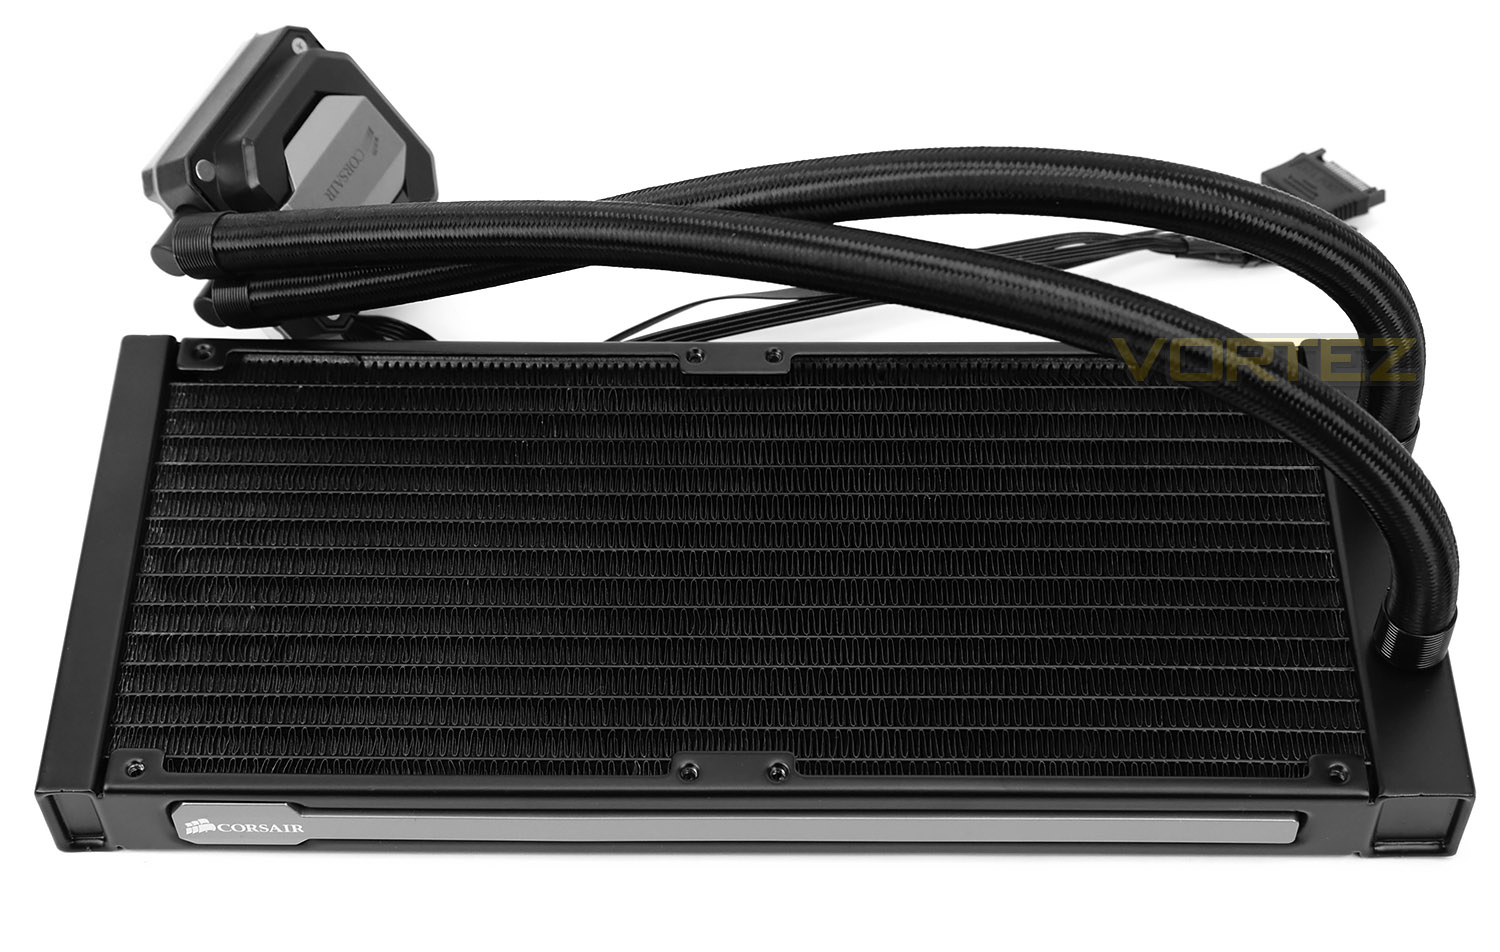
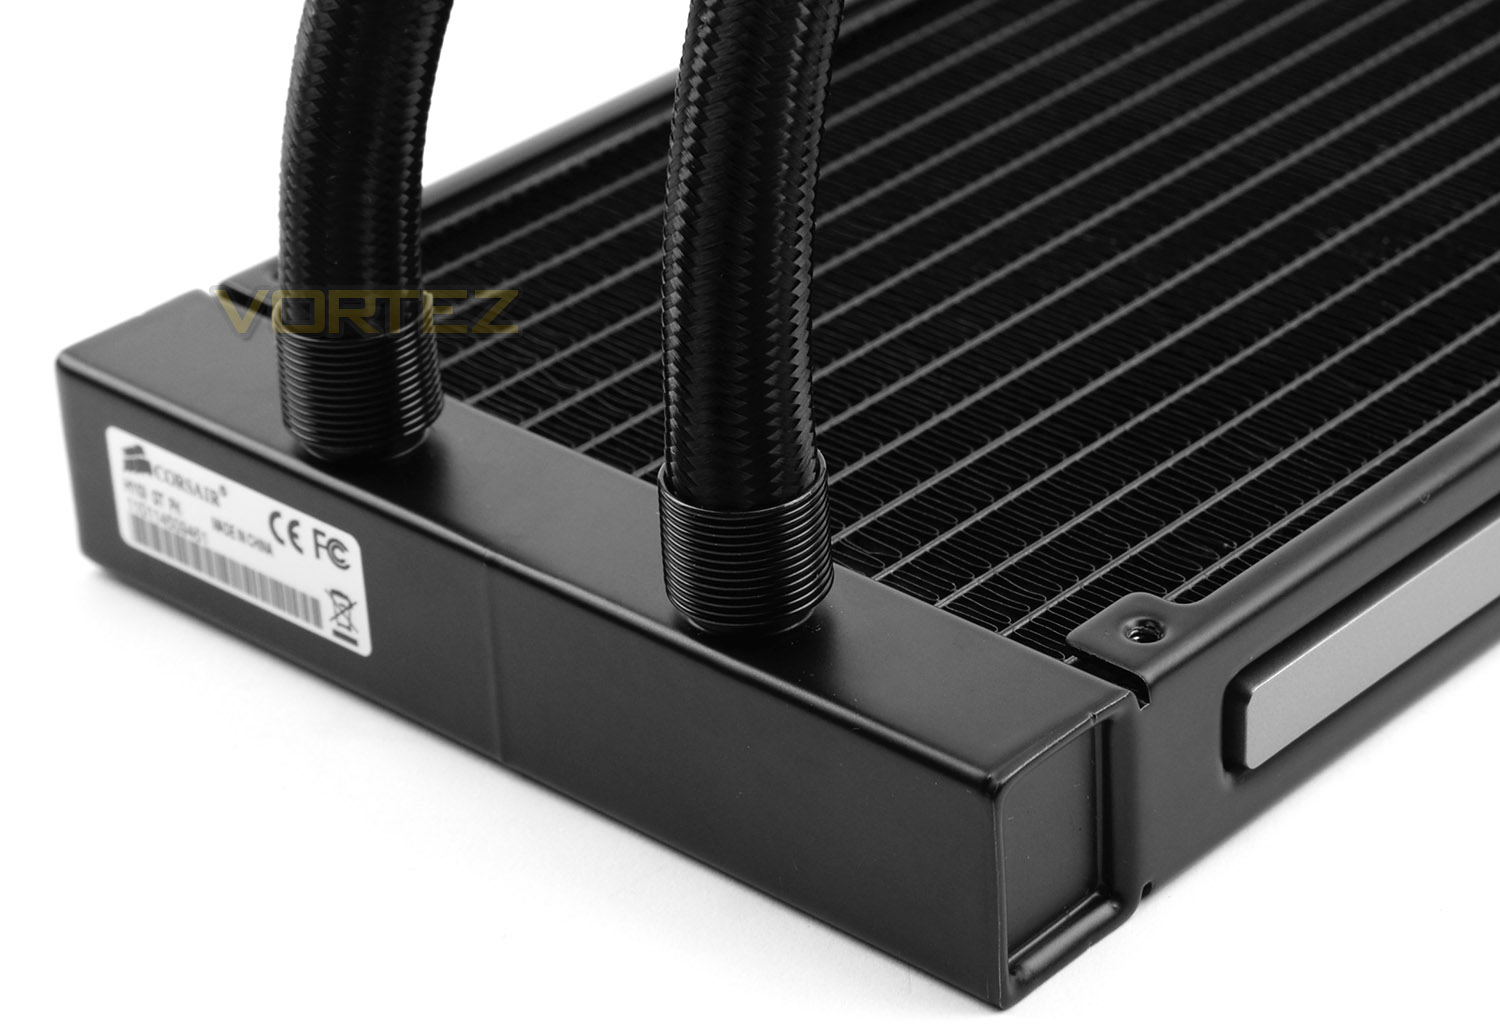
Unlike other Hydro Series coolers, H110i GT utilises a huge 280mm radiator, yielding greater surface area and in return better cooling performance. The actual dimensions of this radiator are 140mm x 322mm x 27mm.
Taking a closer look at area where the hoses connect directly into the radiator its clear the tubing here is vastly different to anything we’ve seen from a closed loop solution from Corsair, or any other brand. The material is thick, woven and flexible and it’s immediately apparent we have something which is high-quality.
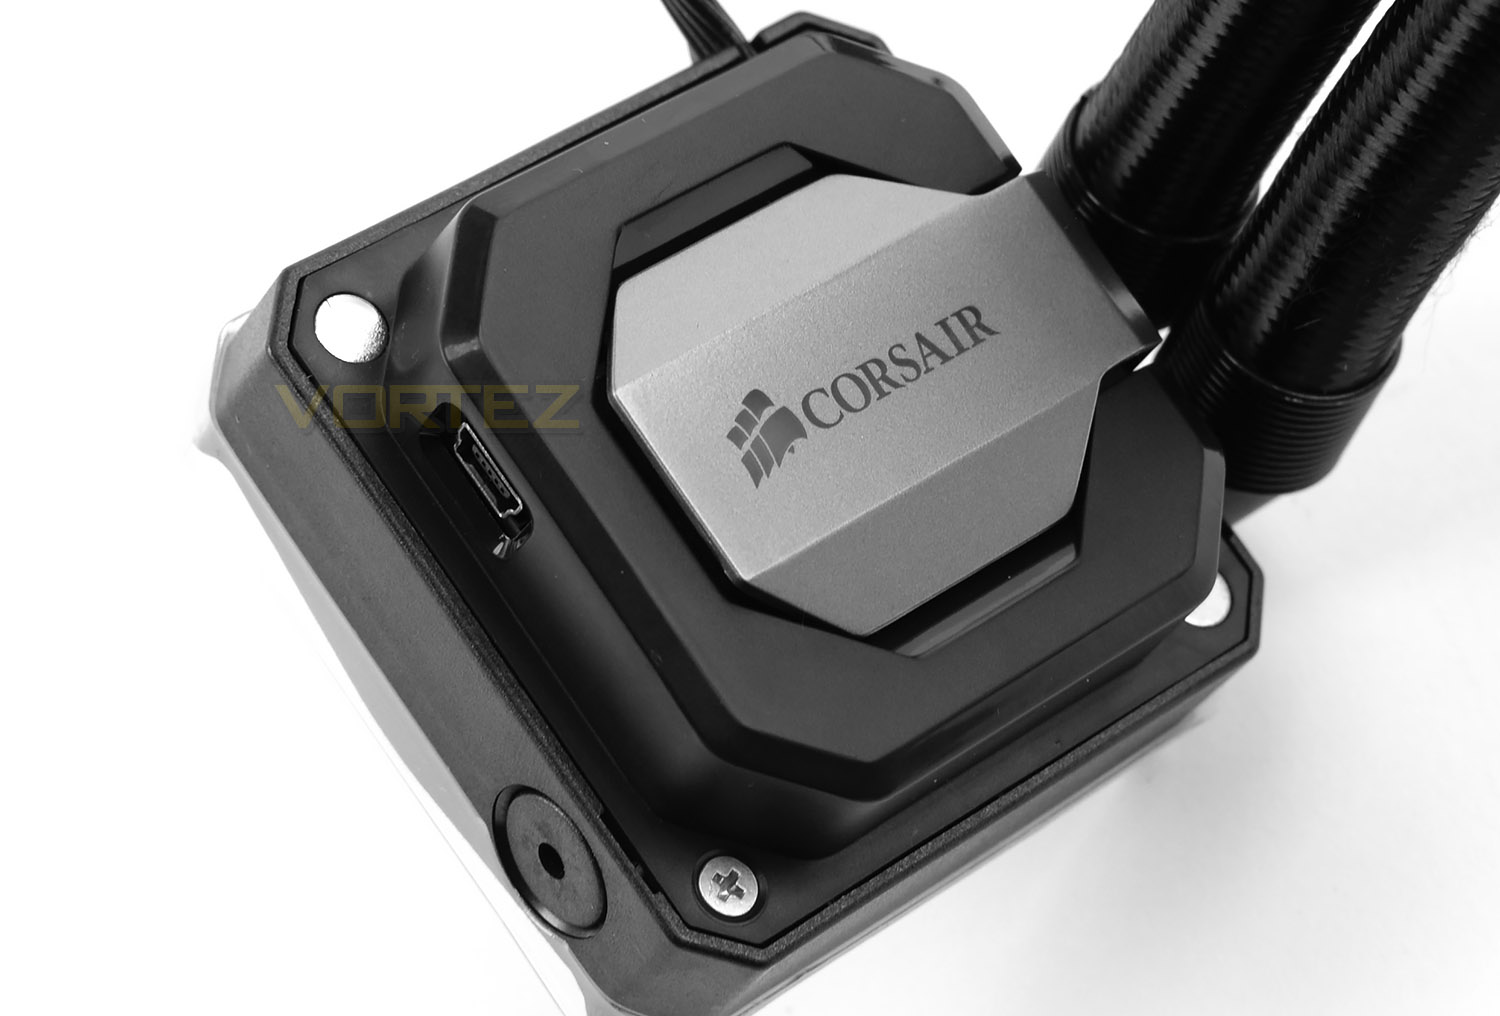
Examining the pump in closer detail, we have a really sleek piece of kit. True to form, Corsair has engineered this pump to be attractive and appealing to the eye. H110i GT is designed to be shown off and as such the Corsair logo which sits in the very centre uses an RGB LED which can be modified in the Corsair Link software. To gain access to this software the supplied cable must be connected to the micro-USB slot seen in the picture above – the other end plugs into a USB header on the motherboard.
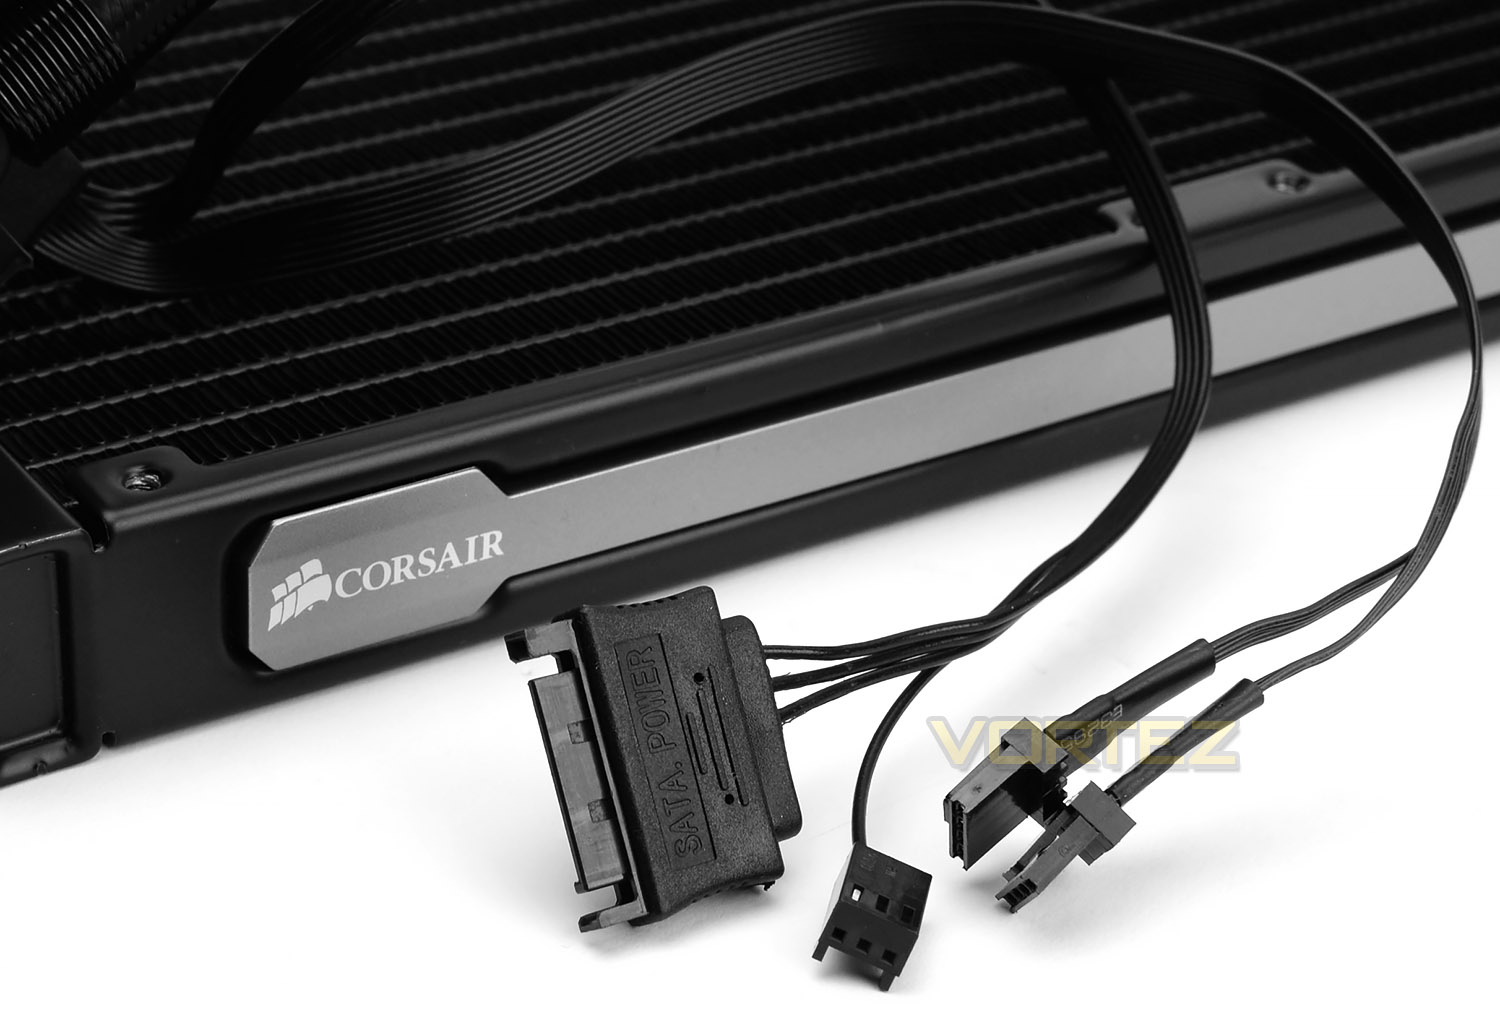
Stemming from the pump are a number of cabled connections. There is a SATA/3-pin connector which plugs to the PSU and CPU fan header on the motherboard. These particular cables will supply the pump with power to operate. The two other cables are to work in correspondence with the cooling fans – the cables coming from the fans connect to the headers and this allows the software to manage fan speeds.
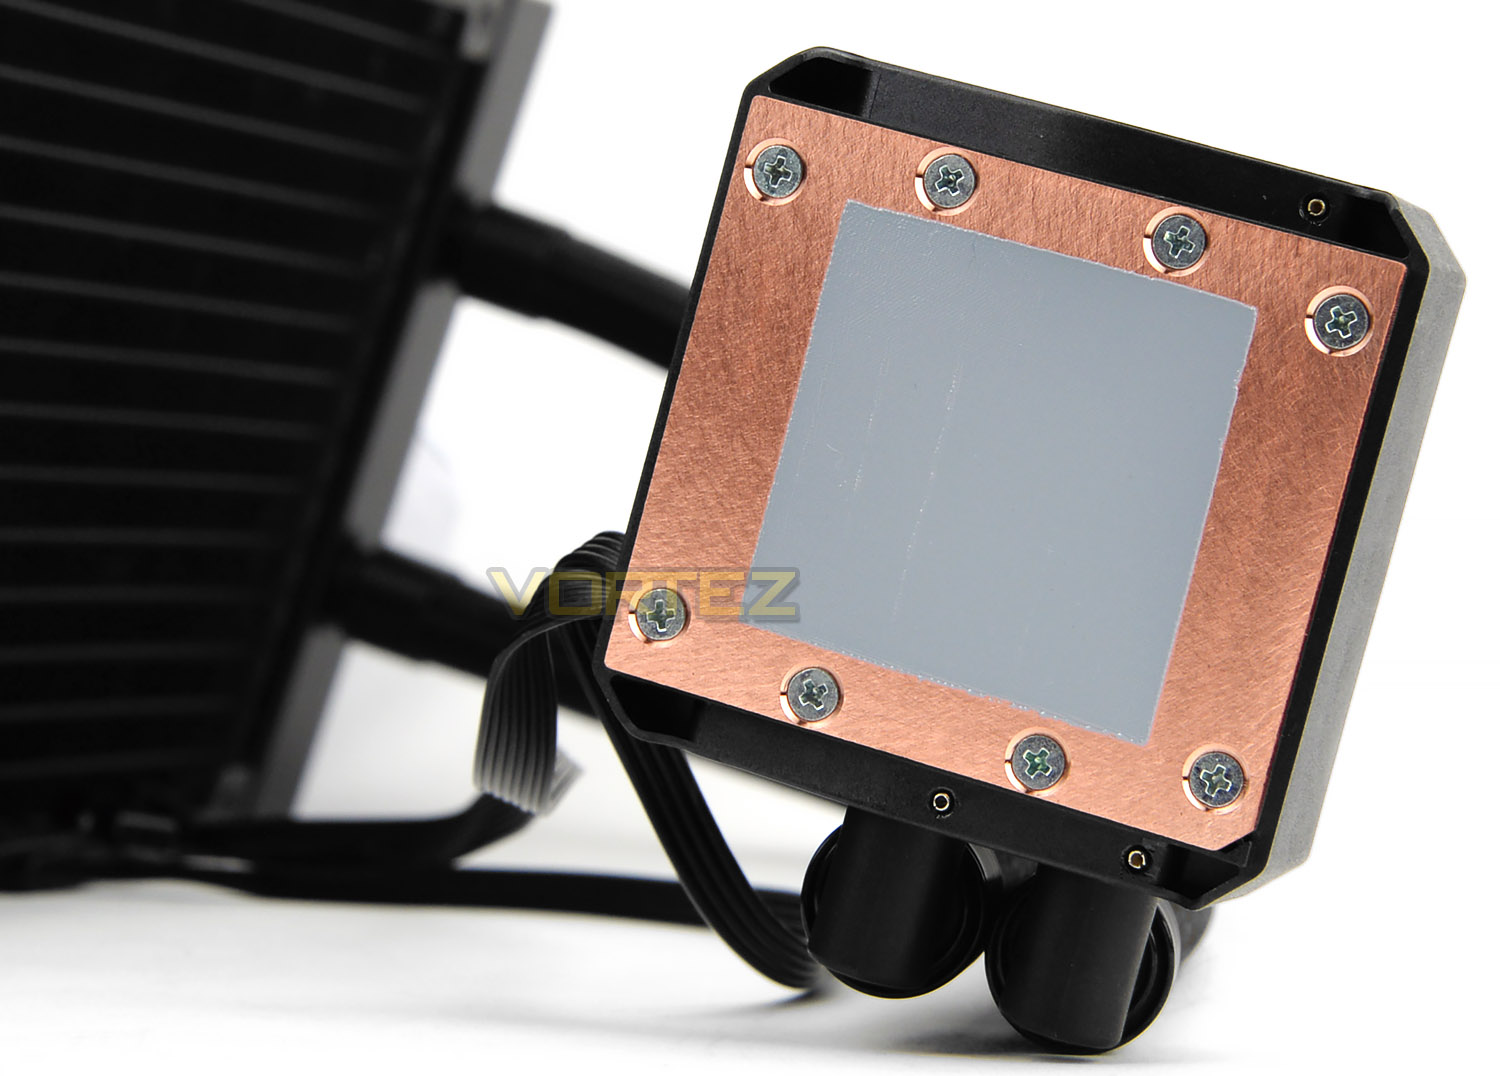
Flipping the pump over for a look at the underside we see the baseplate uses copper for direct contact with CPU. This copper base is large enough to cover the bigger chips from the likes of Intel’s enthusiast segment – LGA 2011. Out of the box, Corsair has provided an ample, thin layer of thermal compound paste so that you can get up and running in less time.
Installation Process (H110i GT)
For all our cooling reviews we test using the LGA 2011 socket and in this section we’ll be demonstrating how H110i GT is installed on this particular configuration.
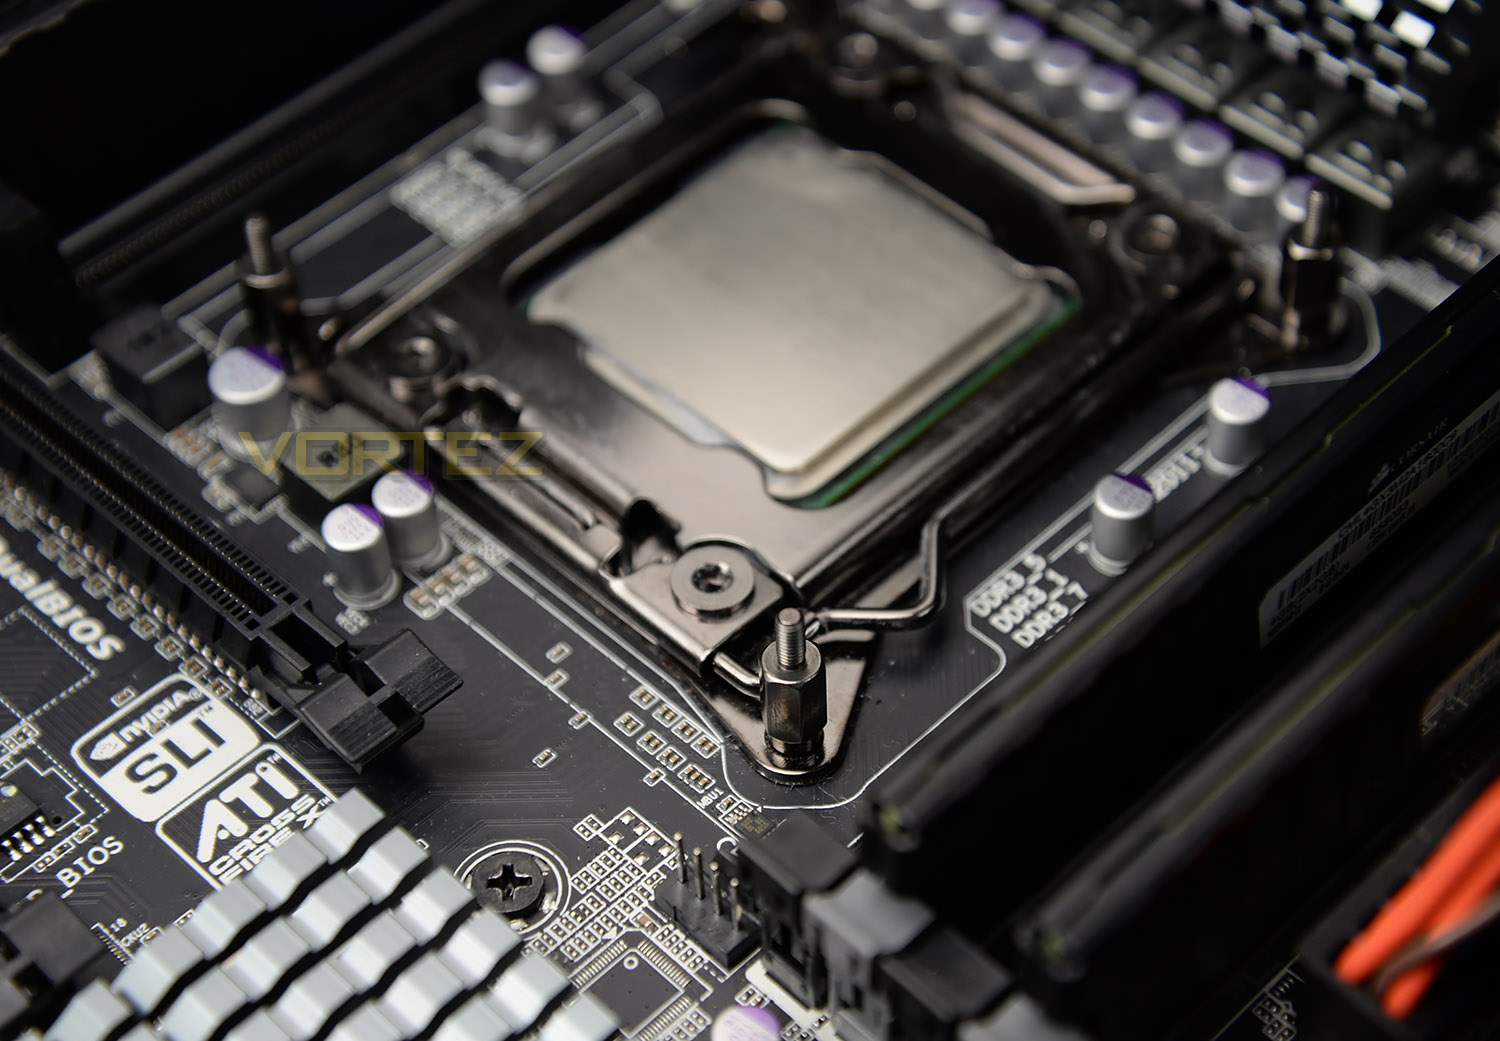
STEP 1
Firstly apply four standoff screws to the four corners of the socket plate – ensure they are nice and tight.
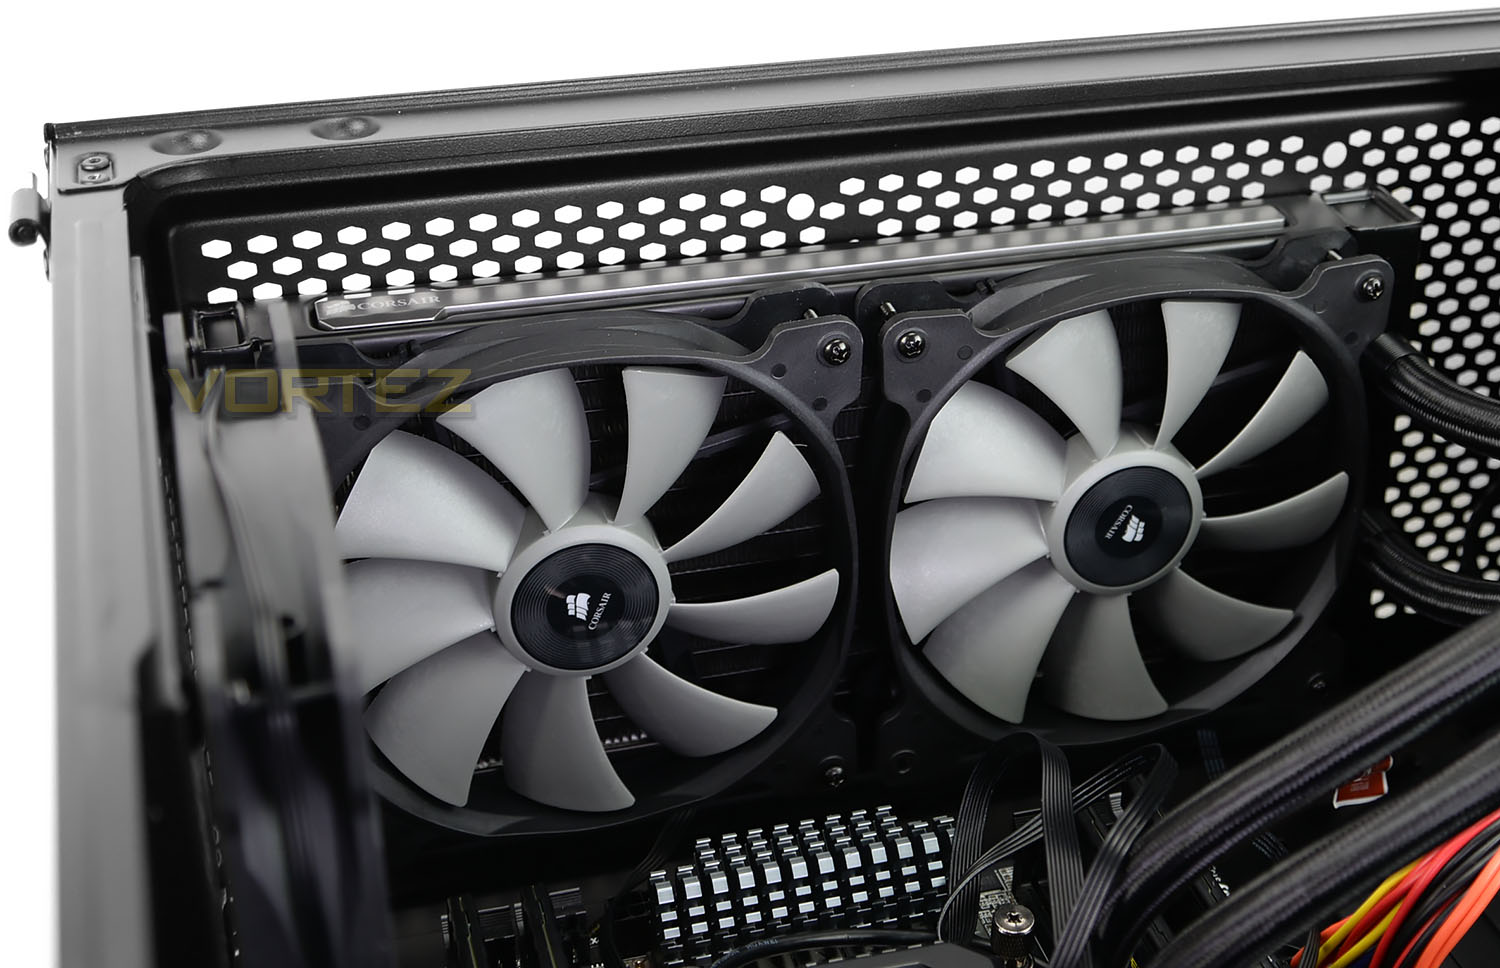
STEP 2
Although it isn’t essential, we recommend attaching the cooling fans to the radiator before attaching the radiator to the case as this will avoid difficulties with lining up the screwdriver with mounting holes. All of the screws are supplied – computer case compatibility is essential for this part of the installation, a case with dual 140 mounting holes is required.
STEP 3
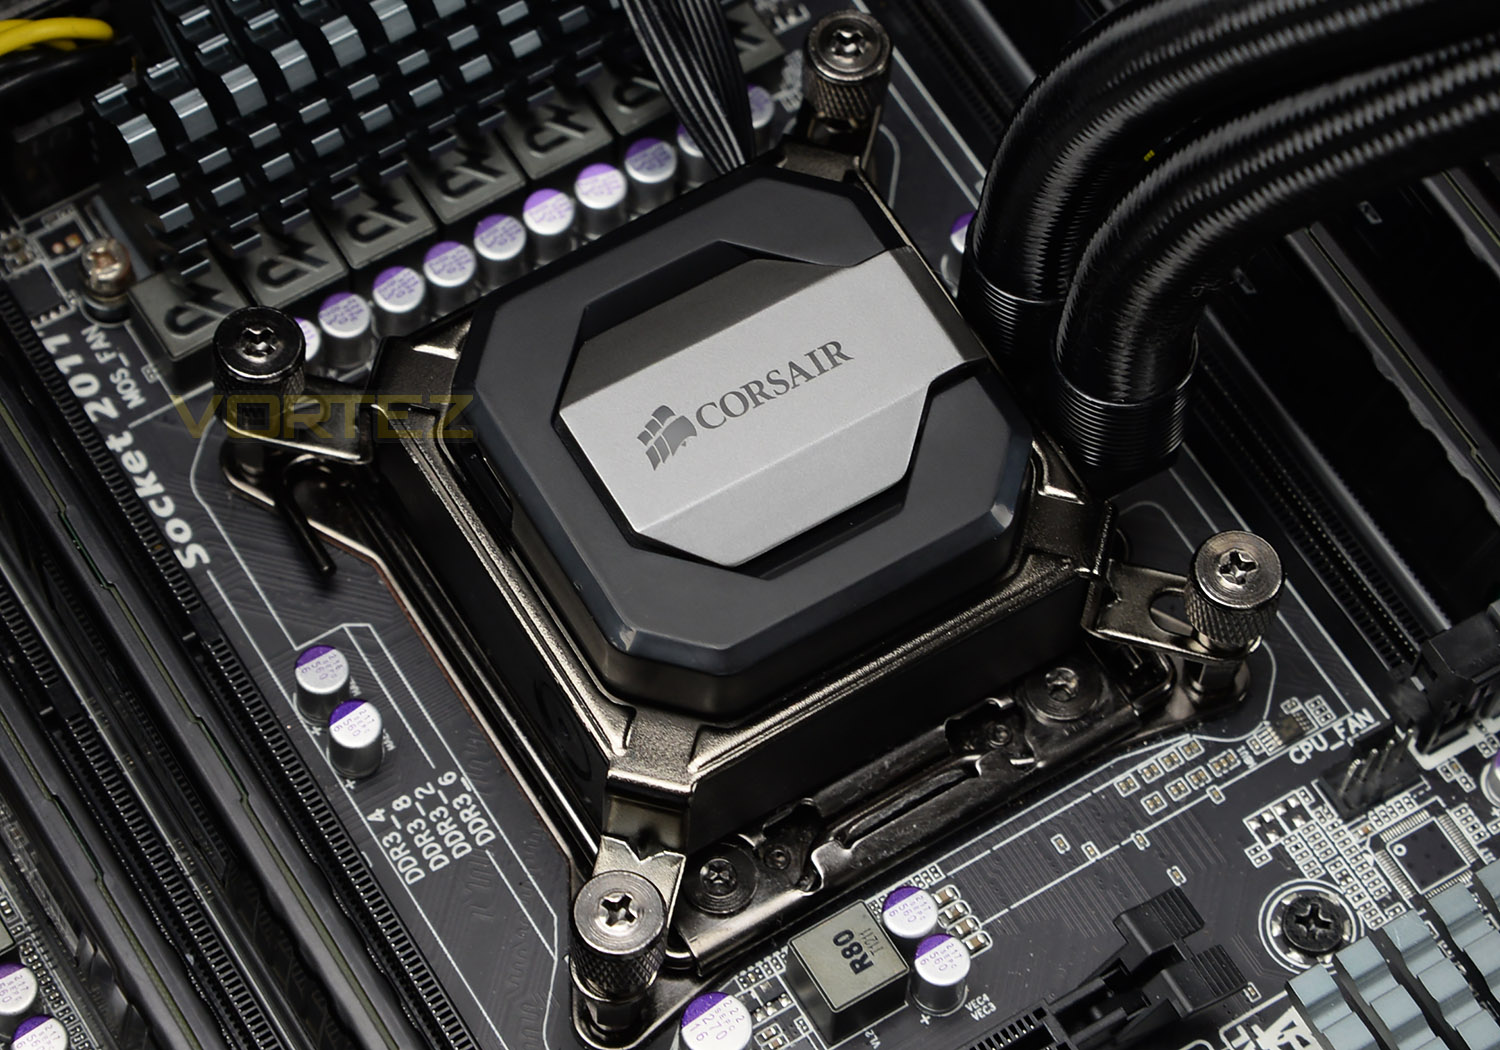
Next, we are ready to attach the pump block to the CPU. After carefully aligning the bracket over the standoffs four thumbscrews need to be fixed into place. We advise tightening this up in a diagonal sequence to apply even pressure. NOTE: thermal paste will need to be re-applied if pump/block has already been used.
STEP 4
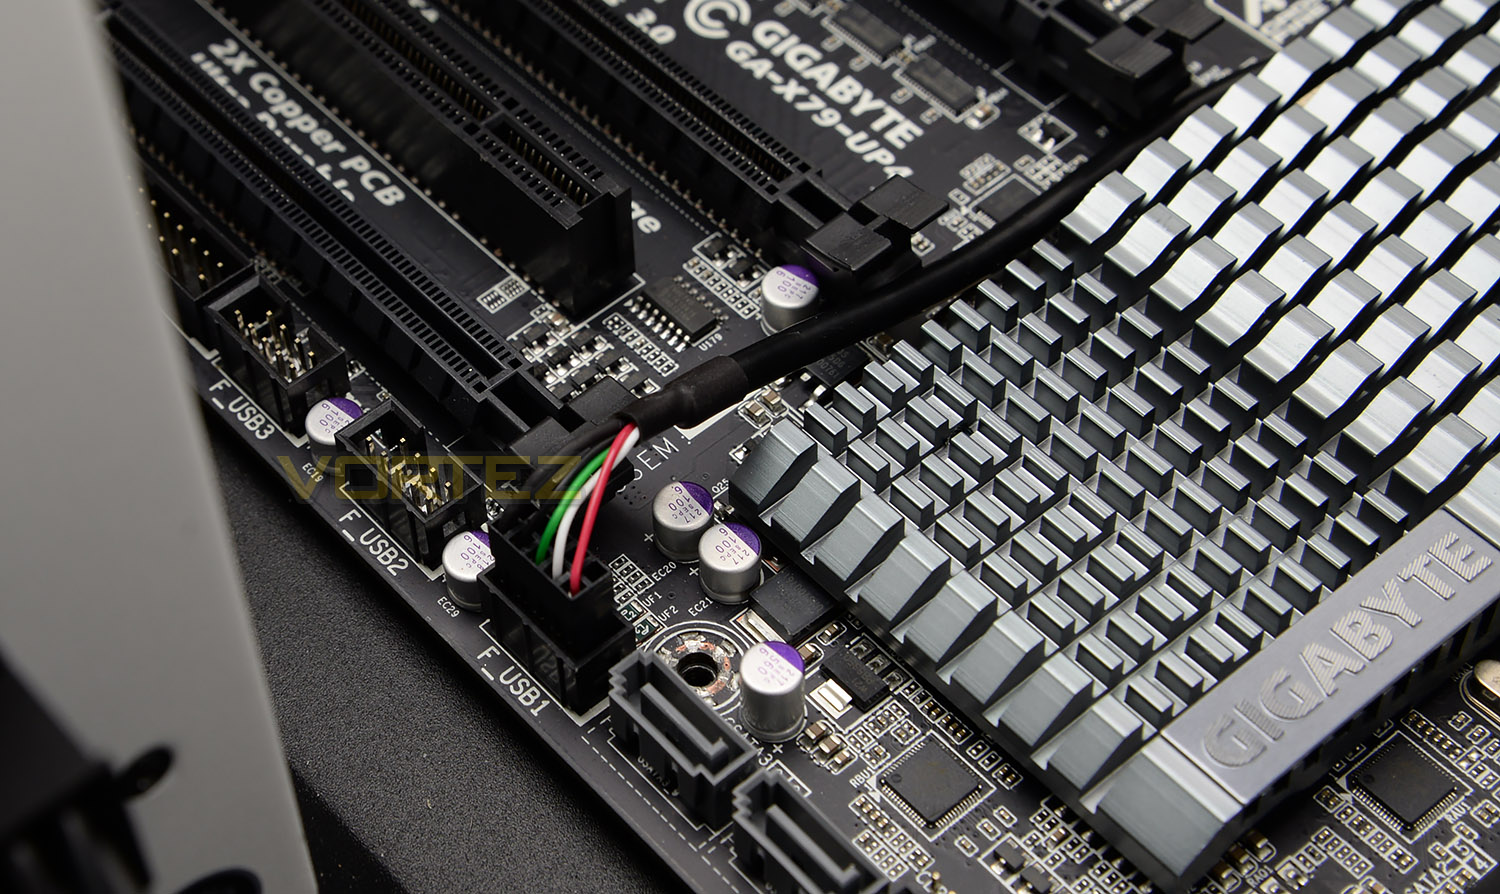
The final step in the process is to connect all the cables to the relevant places. SATA/3-pin power need to be plugged into the PSU and motherboard and then the fans need to be connected to the fan header cables which route from the pump. To make full use of H110i GT the supplied USB header cable needs to be plugged into the pump and motherboard as shown above.
Next, we’ll be taking a look at NZXT’s Kraken X61 to see how this cooler compares.
Packaging, Bundle & Fans (Kraken X61)
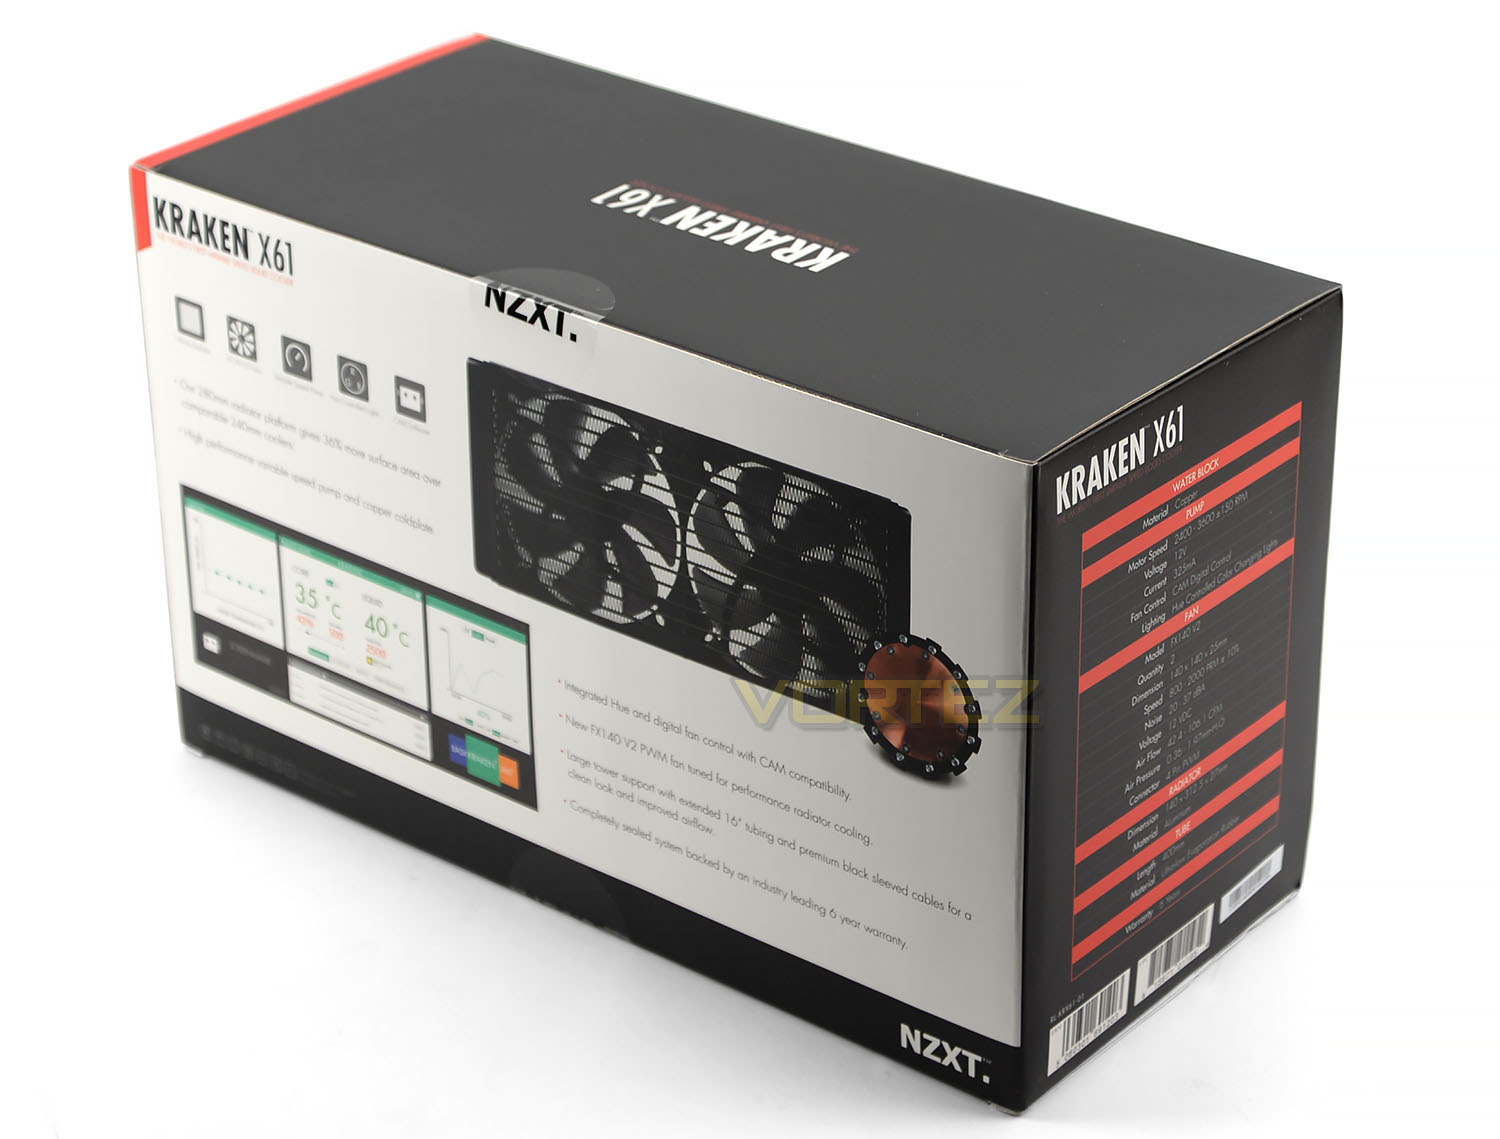
NZXT present Kraken X61 in a rectangular box. This packaging is well-designed and contains all the information you’d want to know about the cooler. Key features are listed on front and reverse and technical specifications can be found on the sides.
Within the box, NZXT has carefully packaged all components into an eggshell box and even the radiator has been shielded with its own cardboard surround.
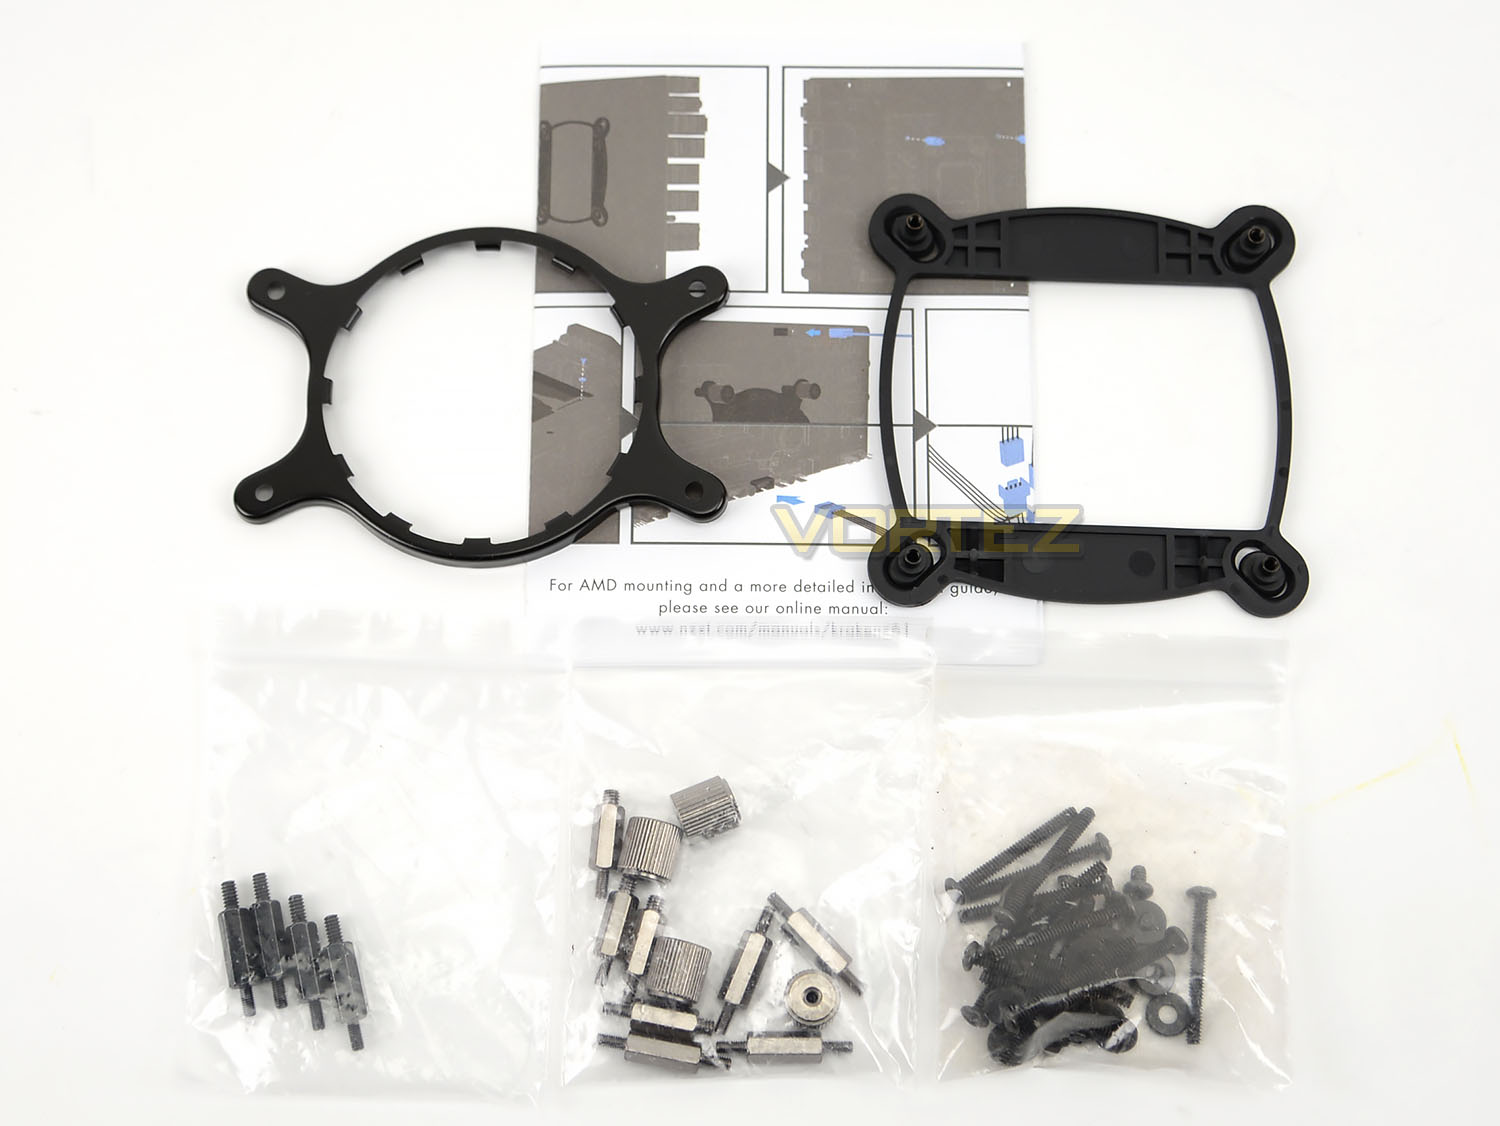
Kraken X61 can be installed on both Intel and AMD sockets and there are a wide selection which are supported. The following are compatible:
Intel LGA 2011-3, 1366, 1156, 1155, 1150
AMD FM2, FM1, AM3+, AM3, AM2+, AM2
Supplied with Kraken X61 are the fitting kits for these sockets and an instructions guide on how to install the cooler. Unlike the Corsair H110i GT, the USB header cable used in conjunction with the software, is hardwired to the pump itself.
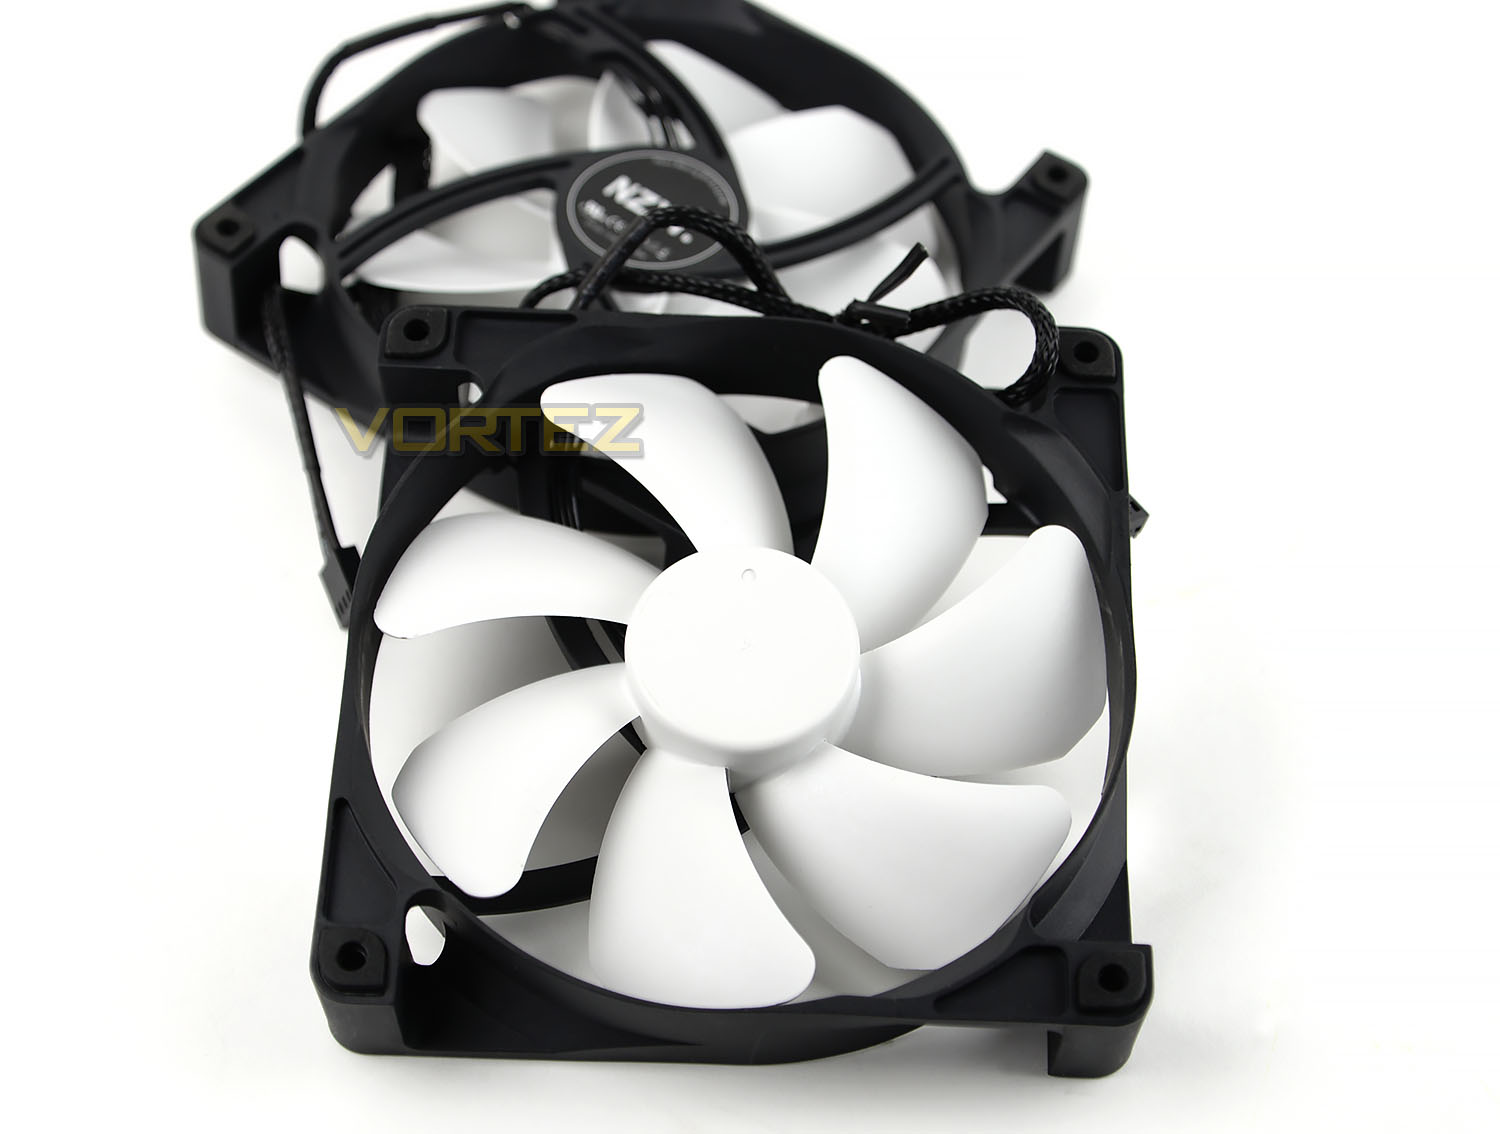
Accompanying the bundle are two cooling fans which are designed to be attached to the radiator. Both fans are 140mm and are NZXT’s FX V2s. These PWM cooling fans are a 7-blade design and are capable of up to 2000RPM. The cables stemming from the fan are braided and use a 3-pin header. The fan rotation speed can be monitored and modified within NZXT’s CAM software and later on we’ll be testing 100% fan speed and performance (PWM) modes.
Closer Look (Kraken X61)
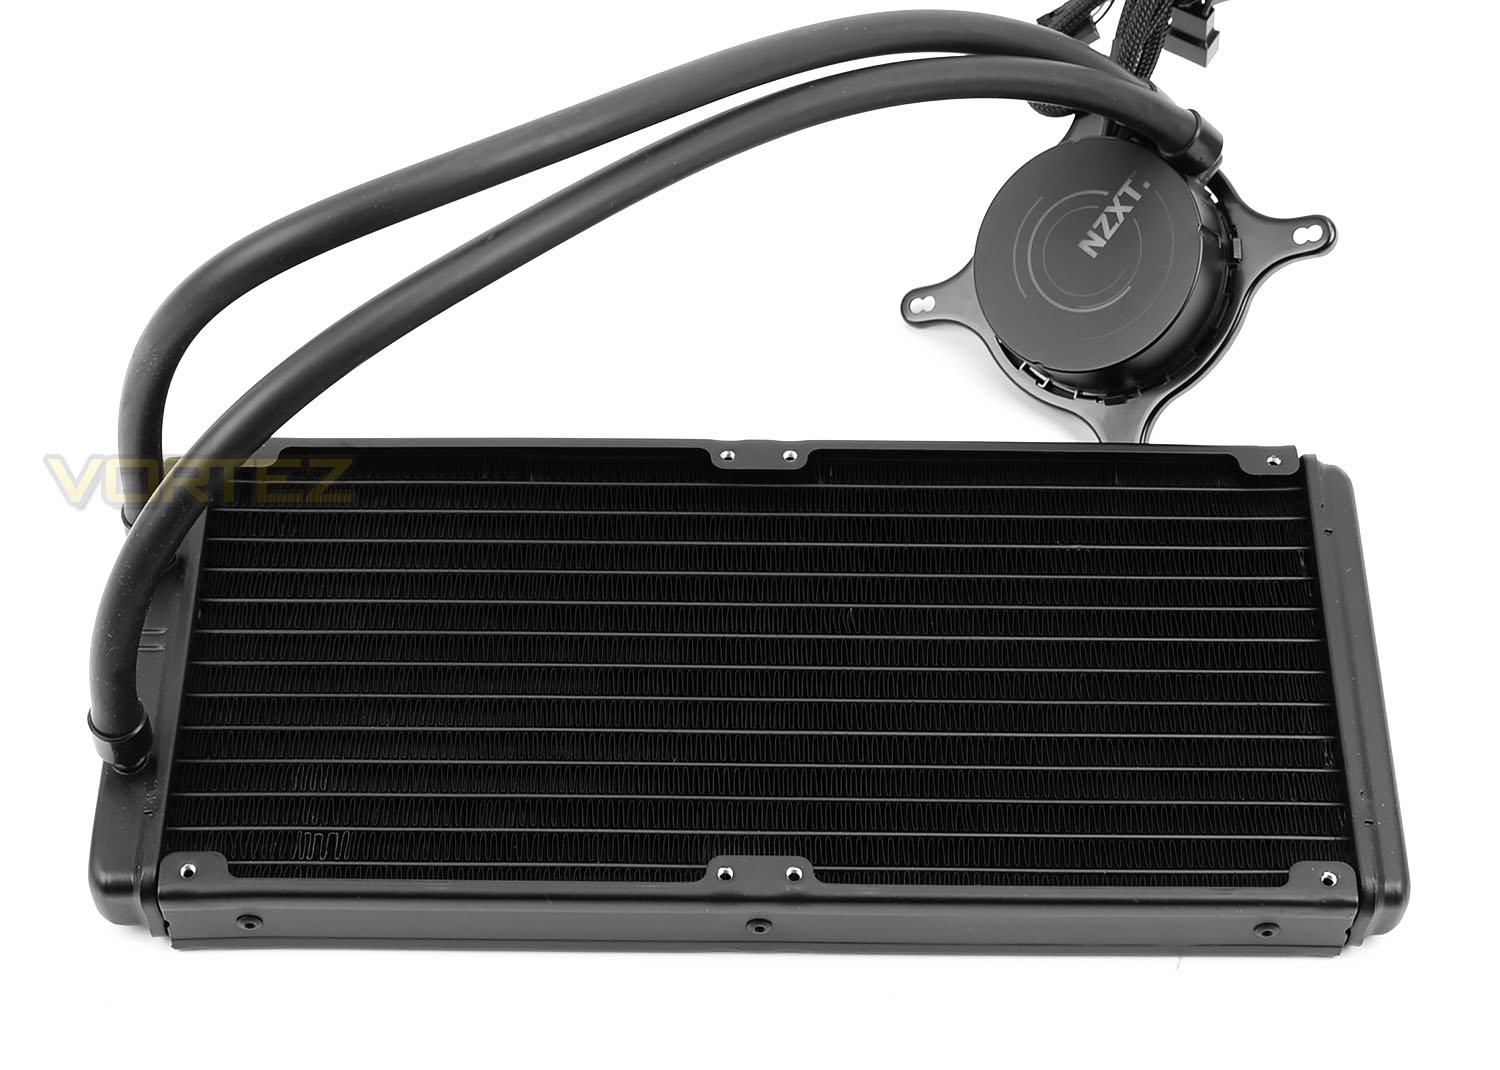
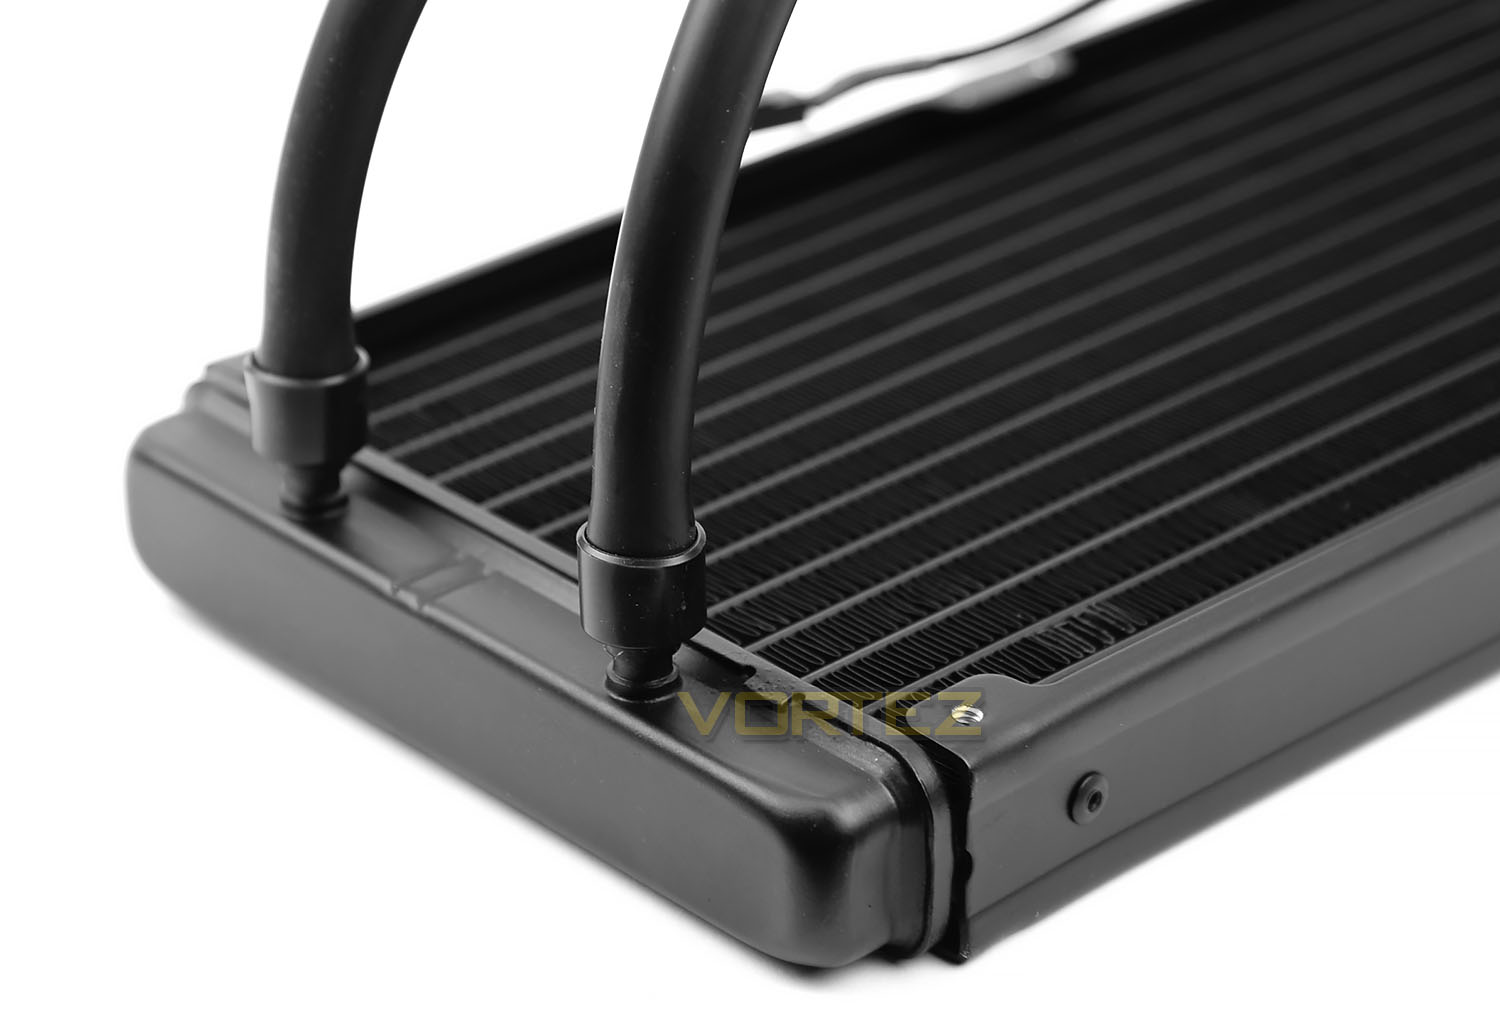
The Kraken X61 is NZXT’s largest closed loop solution, it uses a large 280mm aluminium radiator. The actual dimensions of this radiator are: 312.5 x 140 x 27 mm.
NZXT has chosen to use a thin rubberised material for the tubing. This material is flexible but is significantly thinner than Corsair’s solution.
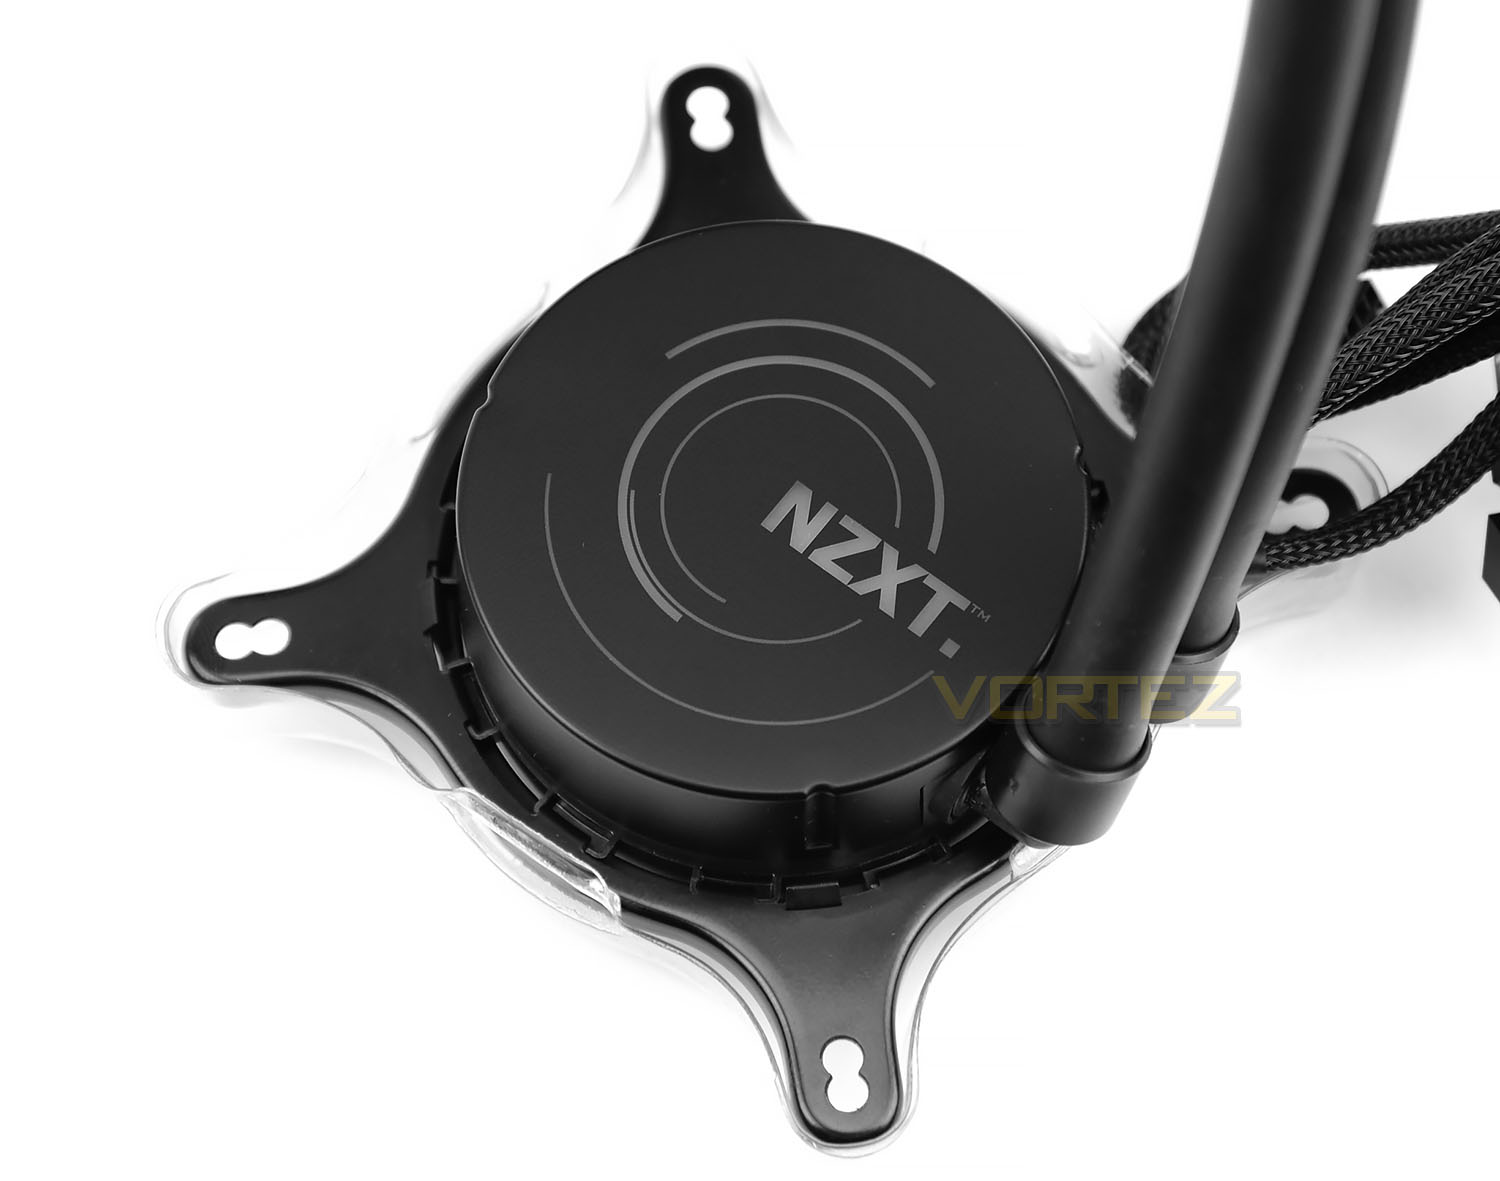
Kraken X61’s pump uses a circular design and features the NZXT logo on the topside. This logo uses an RGB LED and can have its colour fully customised in the CAM SOFTWARE.
The pump comes fitted with a bracket pre-installed with two mounting alignments under each edge.
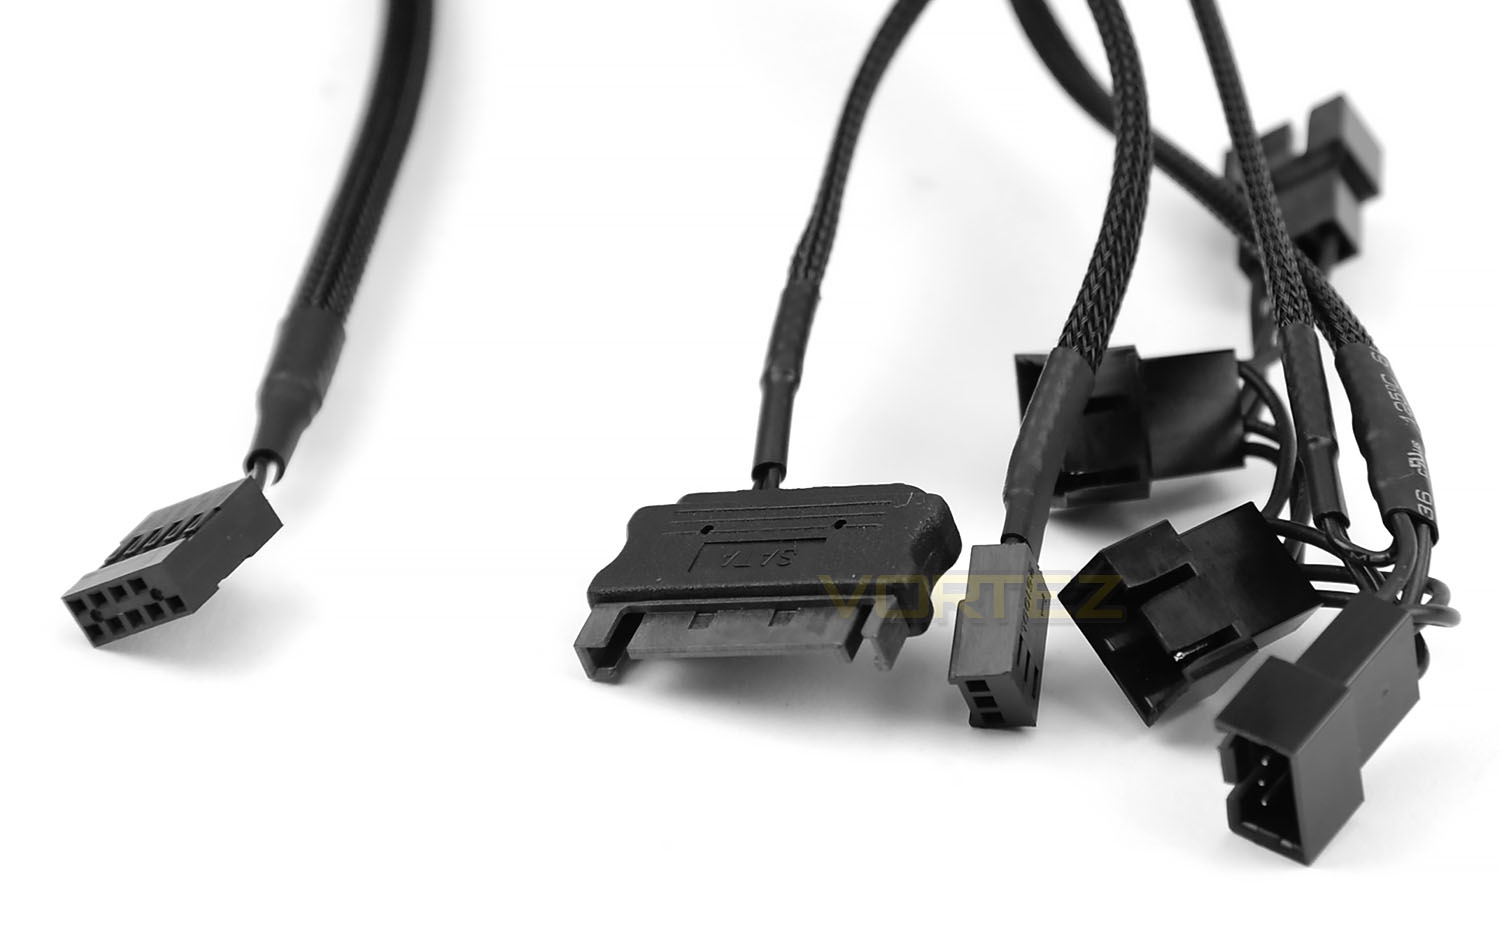
As mentioned previously, all of the cables are hardwired into the pump unit and as you can clearly see above, all of these cables are braided. In likeness to Corsair’s solution, the Kraken X61 also has a SATA/3-pin header to operate the pump. A USB header cable is used to supply an interface with the software and allow numerous options to be configured. There are four fan header connectors also, the two cooling fans need to be plugged into these connectors so that the software can adjust fan speeds as desired. It’s nice to see NZXT has included another two spare connectors in case we want to plug in more cooling fans.
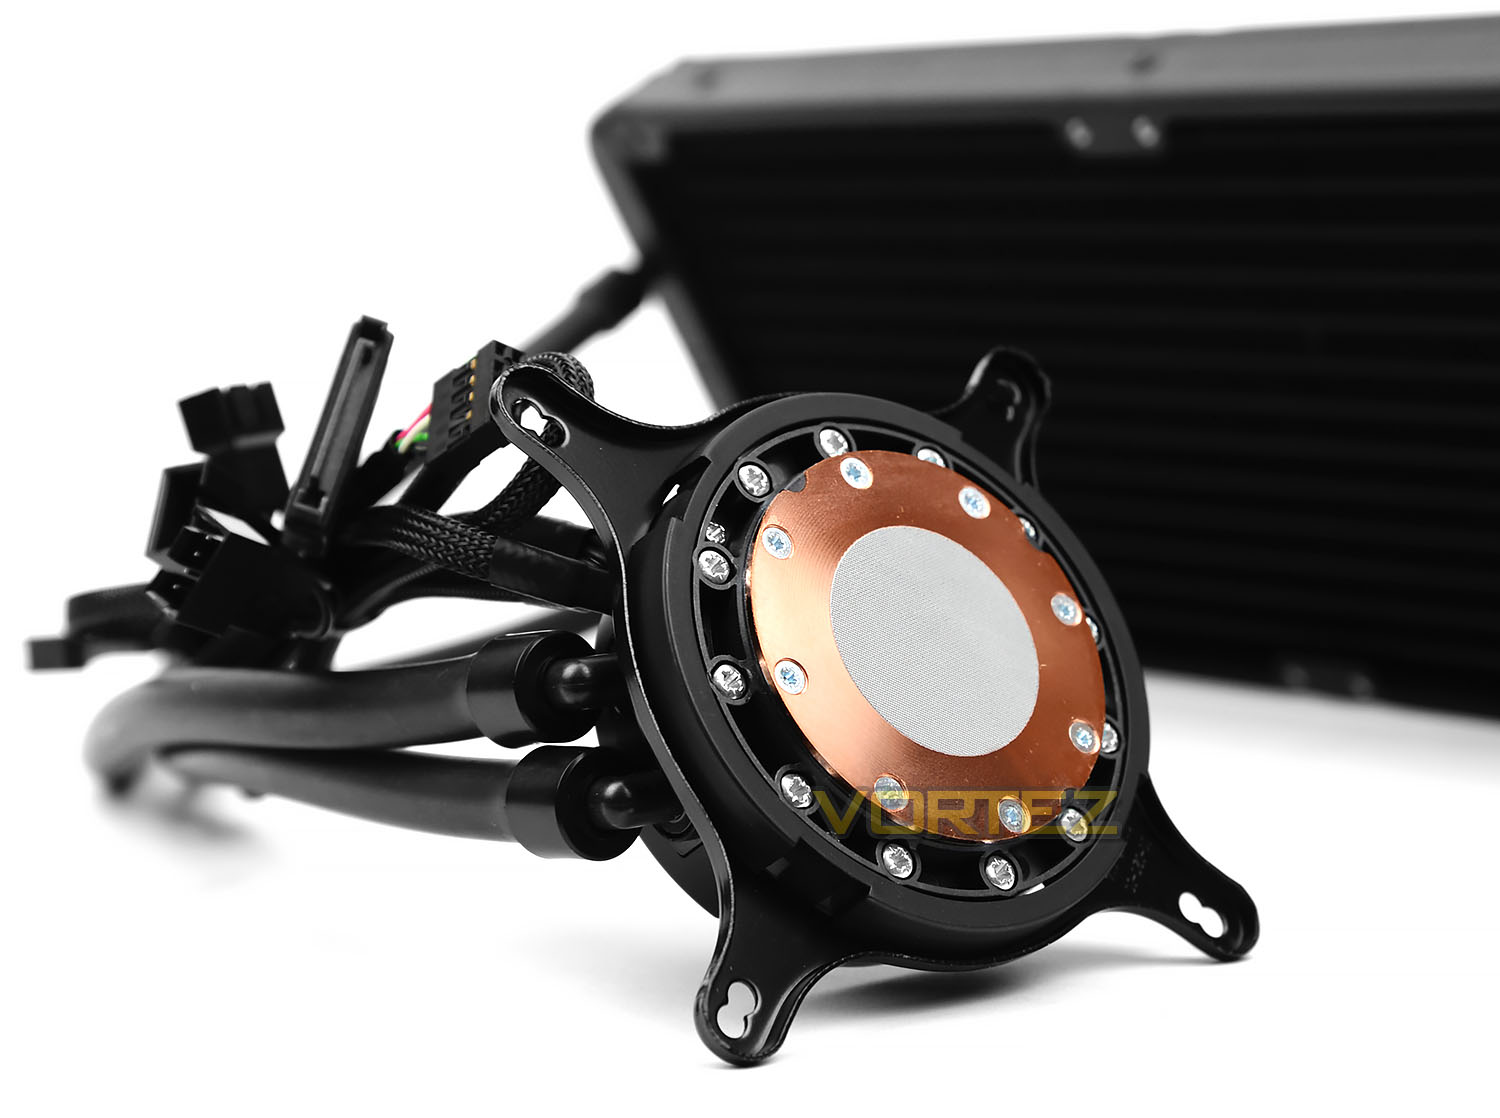
Focussing our attention on the reverse of the pump we see there is a copper baseplate which is circular in shape. NZXT has provided a thin layer of thermal compound paste onto this surface area for direct contact with the CPU.
Installation Process (Kraken X61)
Just like the Corsair H110i GT, we have installed the NZXT Kraken X61 onto our LGA 2011 cooling system in order to demonstrate the installation process from start to finish.
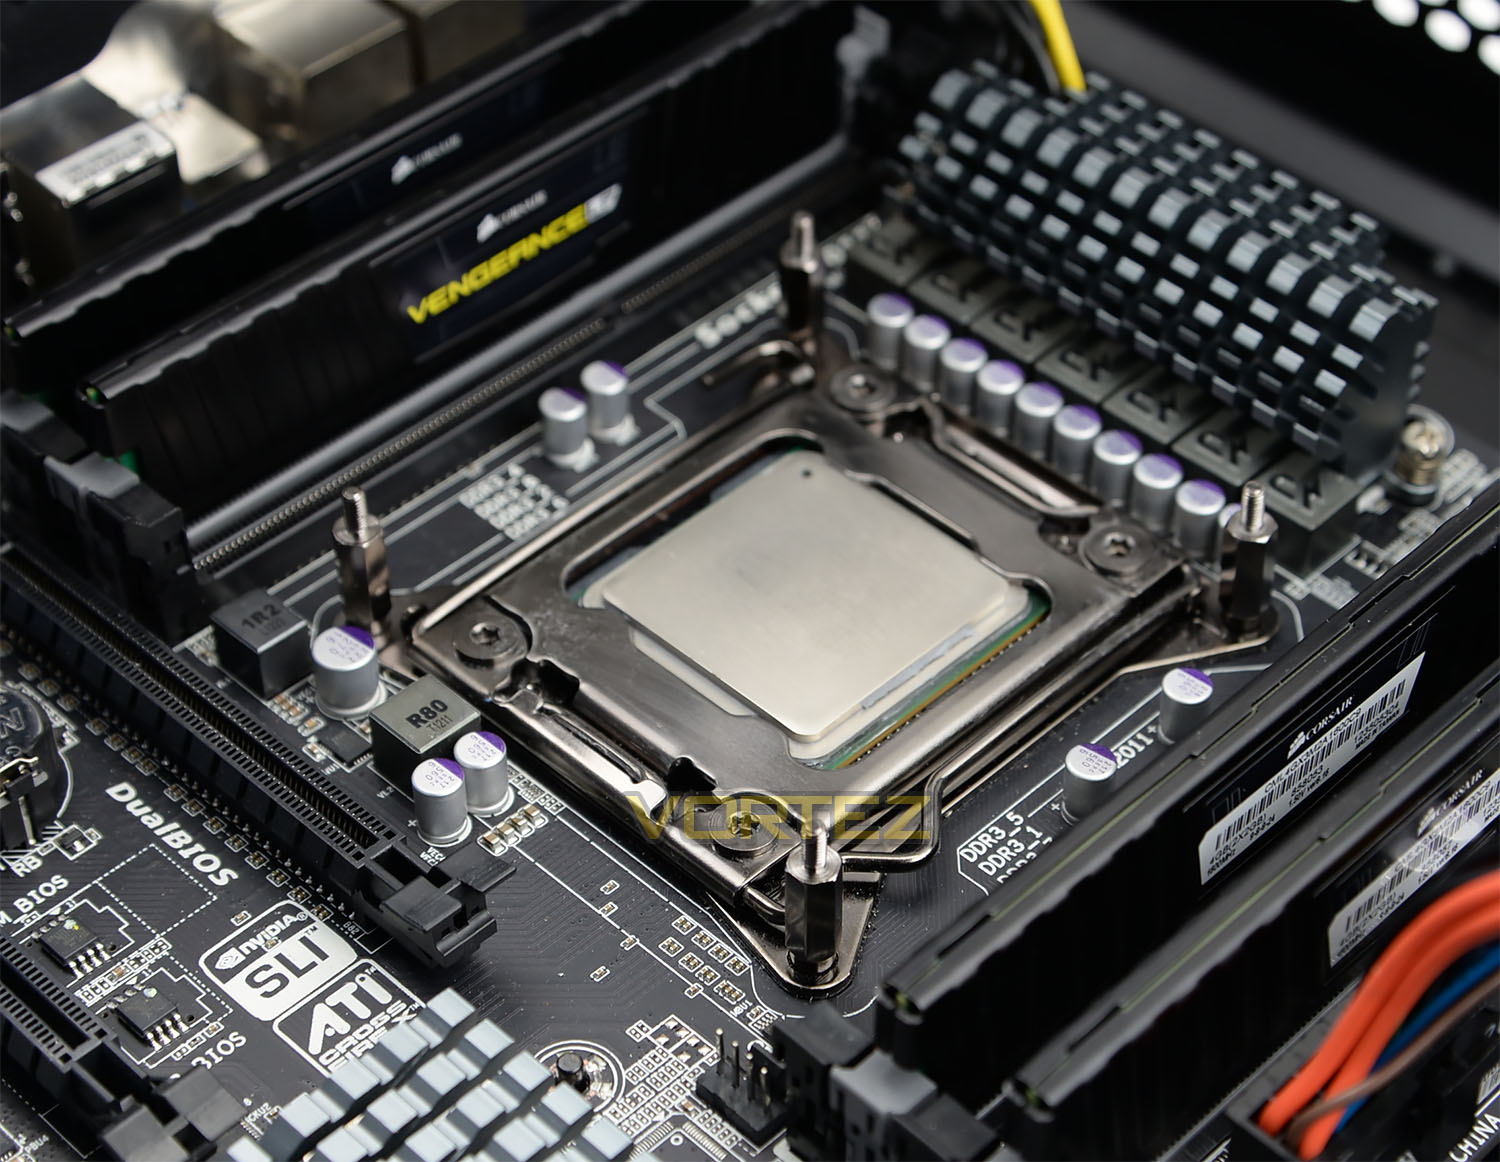
STEP 1
To start we must apply four standoff screws to the four corners of the socket plate. Once these are sufficiently tight we can then move on to the next step.
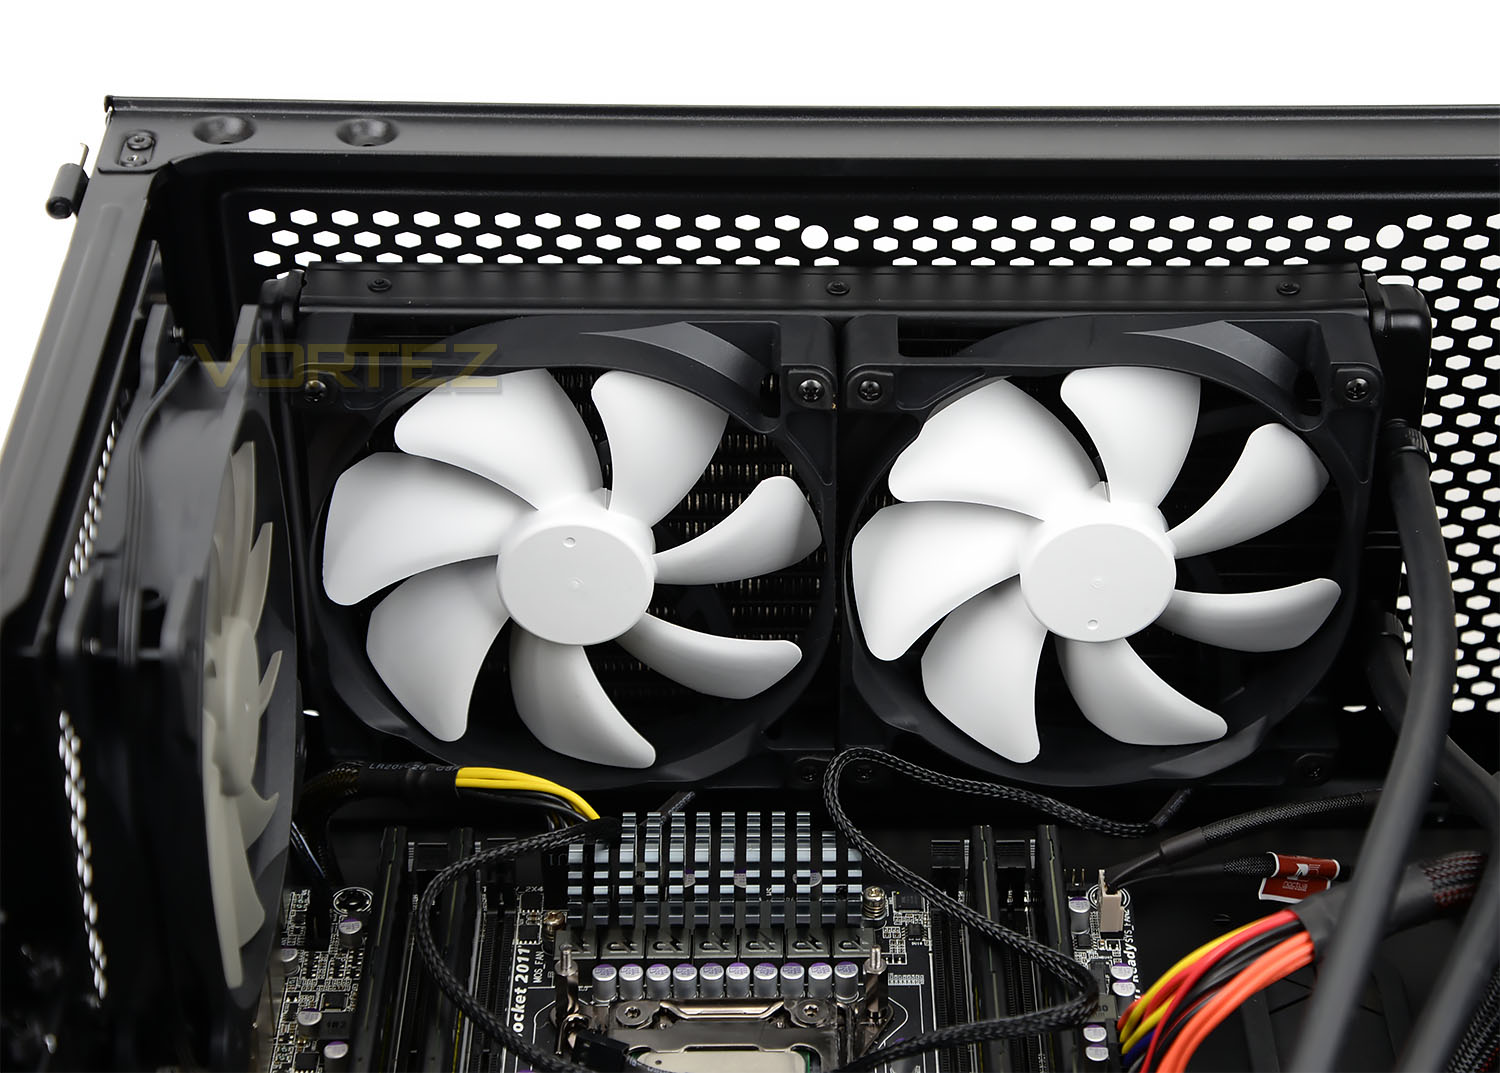
STEP 2
Next it’s time to fix the radiator to the top of the case. It’s advisable to attach the cooling fans to the radiator before the radiator is fixed into the case as we avoid any obstructions the motherboard may cause with aligning the screwdriver to the mounting holes.
STEP 3
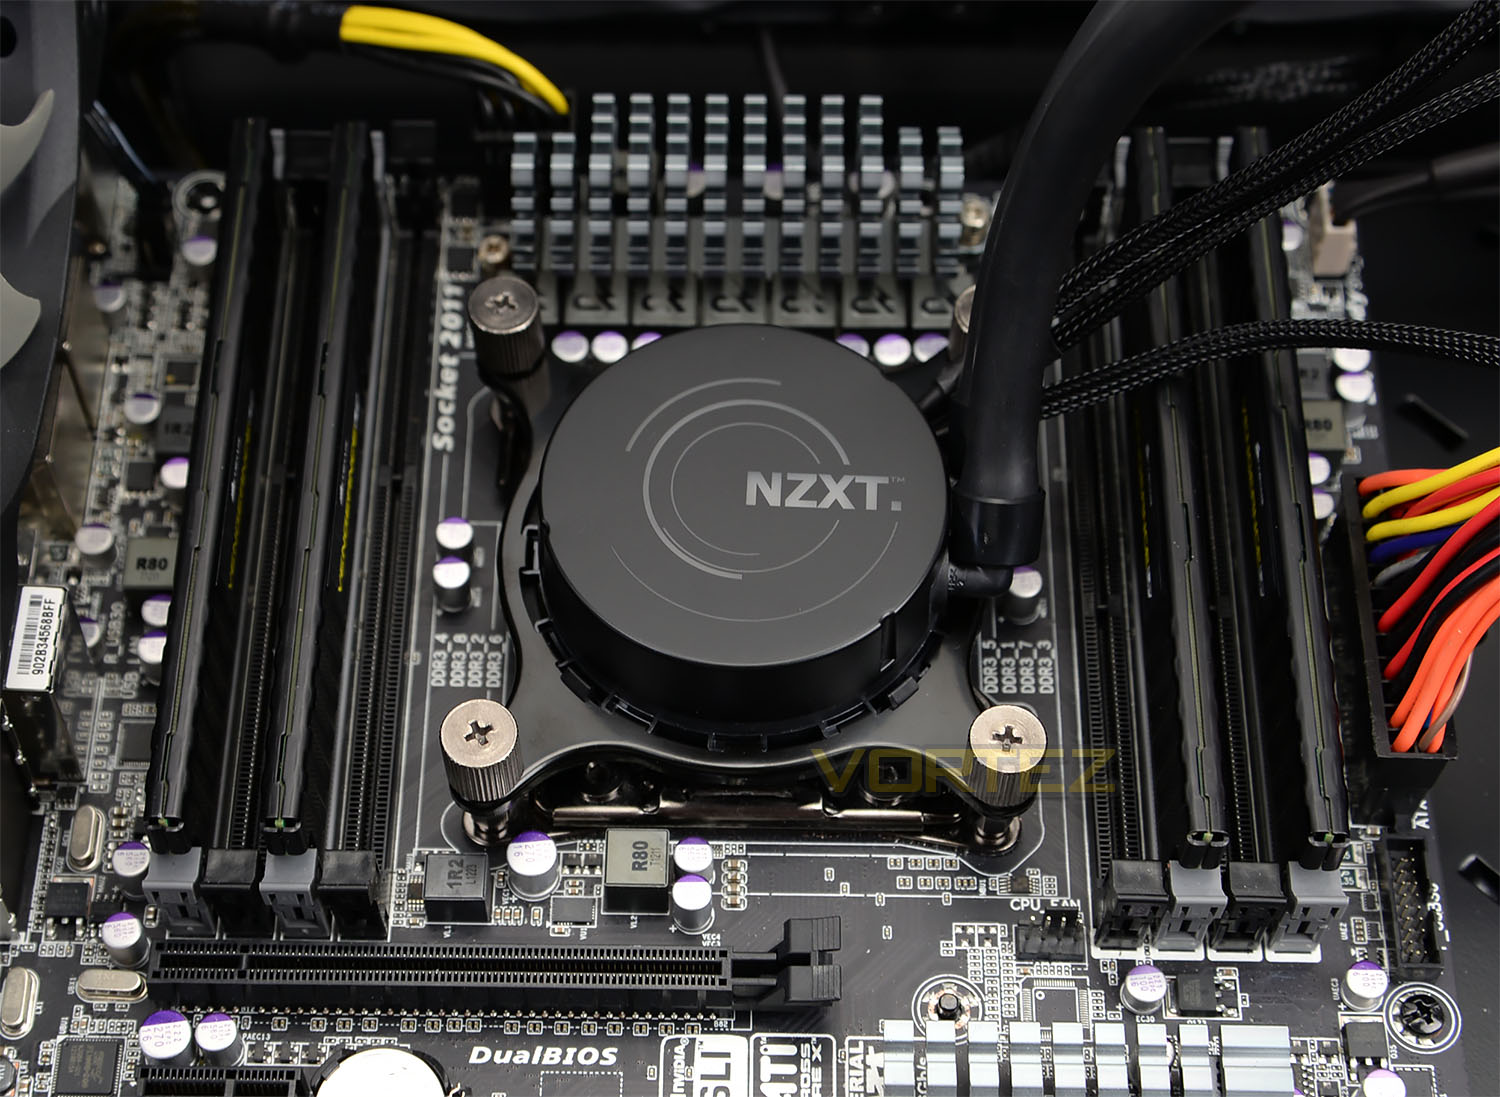
The pump/block is now ready to be installed onto the motherboard. Placing the unit over the CPU, line the standoffs with the arms of the pump and then apply each of the thumbscrews to fix into place. We recommend tightening each screw up in a diagonal sequence to apply event pressure. NOTE: if pump has already been used, thermal paste will need to be re-applied.
STEP 4
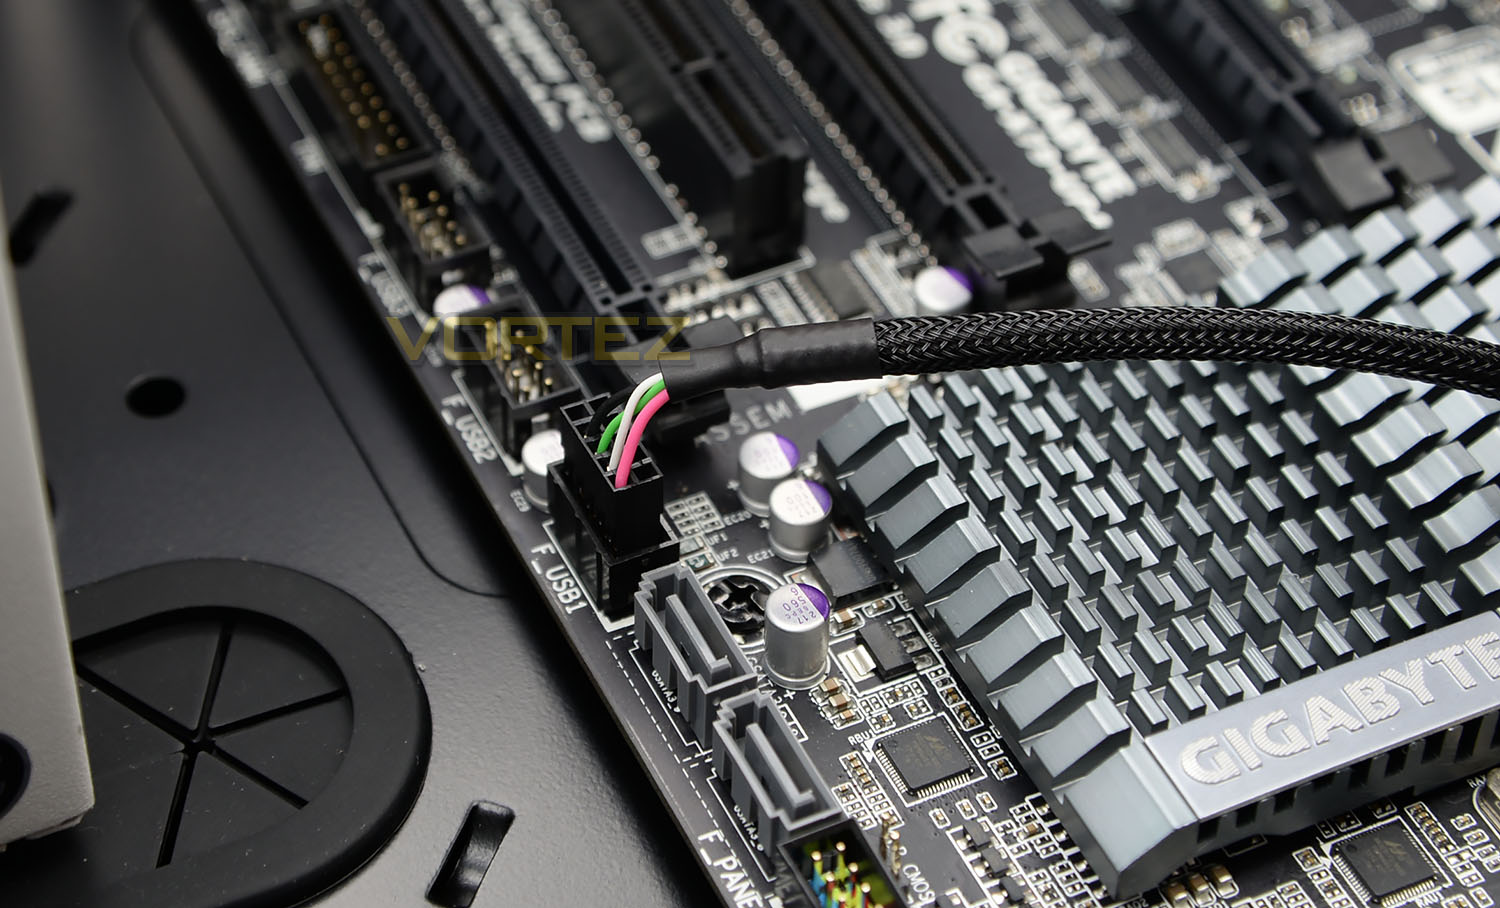
The final step in the process is to attach all of the cables to the associated parts. The SATA/3-pin connectors need to plug into the PSU and motherboard while the cooling fans need to be connected up to the fan headers. The last cable to be connected is the USB header (shown above) – this will allow access to the software and enable full customisation.
Software GUIs
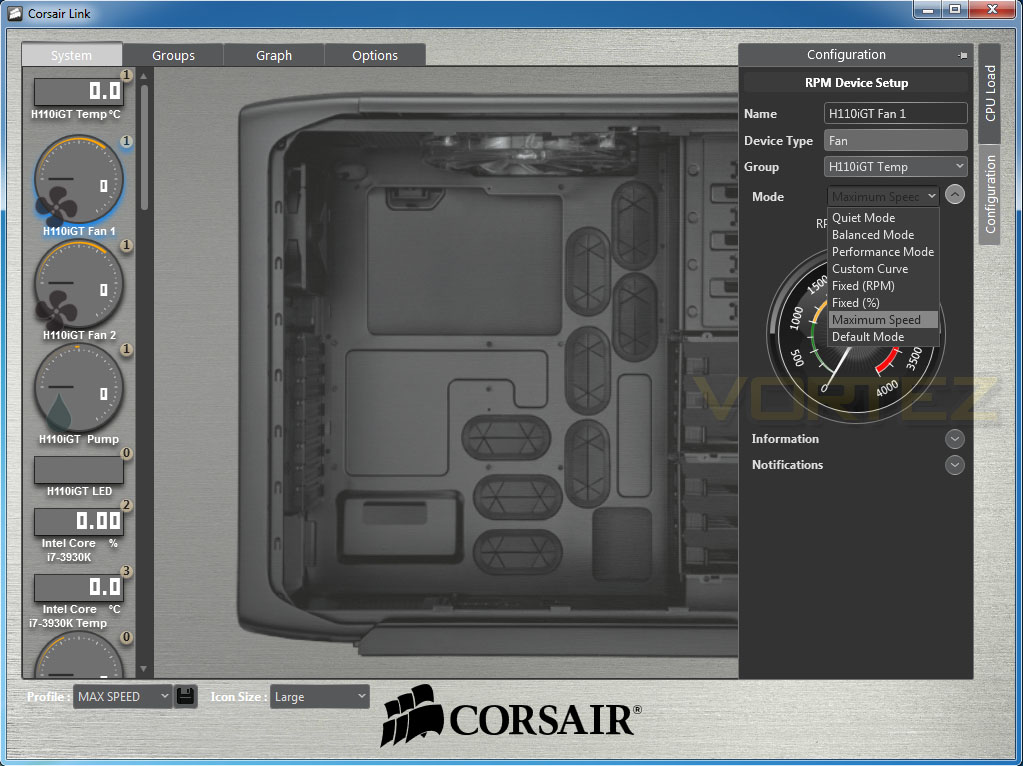
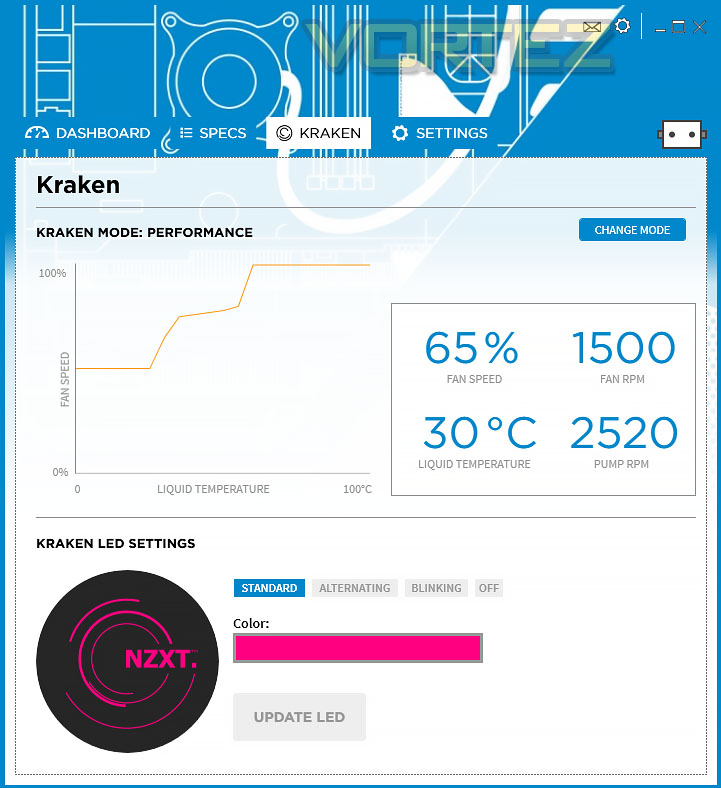
Both our coolers are digital and therefore allow us the option to modify settings such as fan speeds and RGB lighting. Profiles can be set in both software suites from Corsair and NZXT – enabling different configurations to be set at different times, such as 50% fan speed, 100% fan speed. Custom curves can be set to manage specific speeds – allowing a trade-off between noise/performance.
Test Setup & Methodology
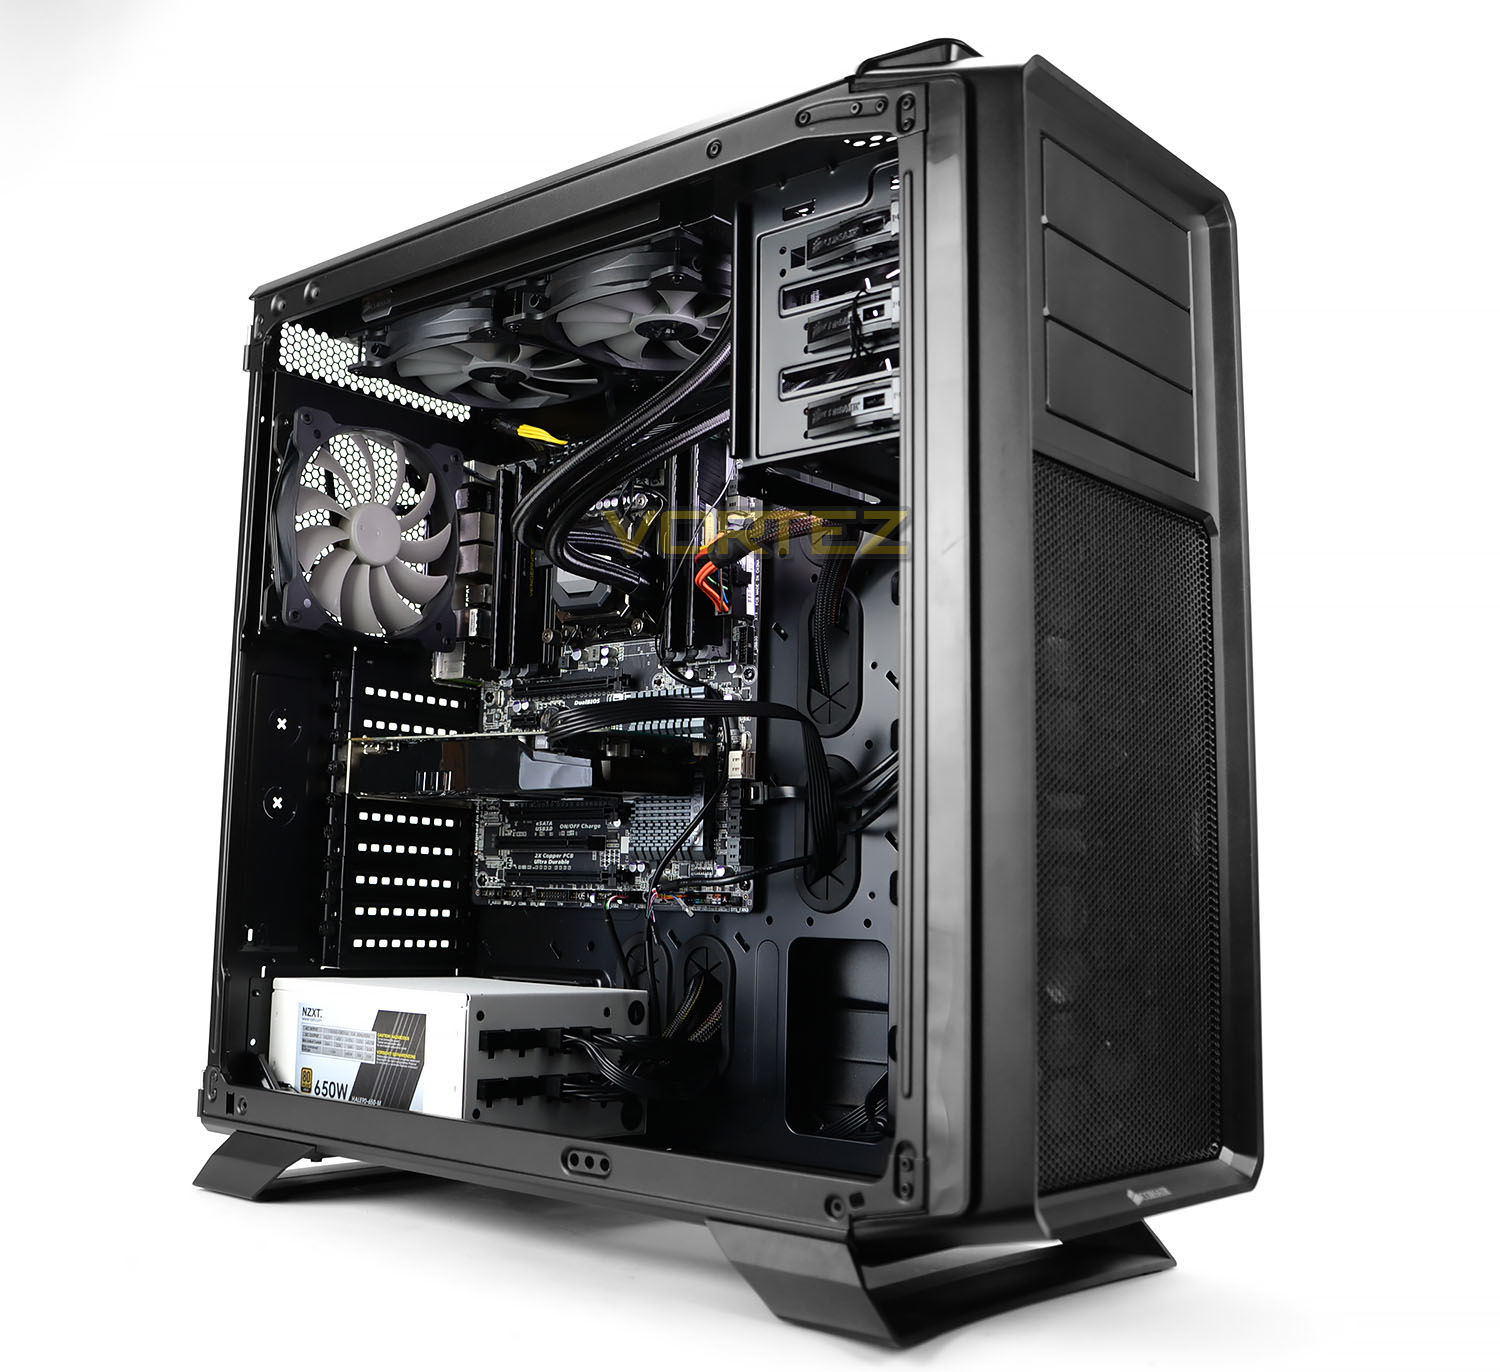
Test System
CPU – Intel Core i7-3930K (3.6GHz)
Motherboard – GIGABYTE X79-UP4
Memory – 8GB Corsair Vengeance LP 1600MHz CL9
Graphics – Sapphire Radeon HD 6850 1GB
PSU – NZXT Hale90 650W
Hard Drive – Kingston HyperX 240GB SATA III SSD
Case – Corsair Carbide 760T
Motherboard – GIGABYTE X79-UP4
Memory – 8GB Corsair Vengeance LP 1600MHz CL9
Graphics – Sapphire Radeon HD 6850 1GB
PSU – NZXT Hale90 650W
Hard Drive – Kingston HyperX 240GB SATA III SSD
Case – Corsair Carbide 760T
CPU Coolers
Alpenföhn K2 (120mm Wingboost: 500-1500RPM, 140mm Wingboost: 300-1100RPM)
Thermalright SilverArrow SB-E Extreme (Dual TY-143 fans – 600-2500RPM)
Corsair Hydro Series H100i (Dual 120mm fans – up to 2700RPM Push Config)
Noctua NH-U14S (Single 140mm cooling fan – 300-1500RPM)
Corsair H75 (Dual 120mm cooling fans – 600-2000RPM)
CRYORIG R1 Ultimate (Dual 140mm cooling fans – 700-1400RPM)
Corsair Hydro Series H105 – (Dual 120mm fans – up to 2700RPM Push Config)
Noctua NH-D15 (Dual 140mm cooling fans – 300-1500RPM)
LEPA LV12 (Single 120mm cooling fan – 300-2200RPM)
CRYORIG H5 Universal (Single 140mm cooling fan – 600-1400RPM)
Fractal Design Kelvin S24 (Dual 120mm cooling fans – 800-1700RPM)
Noctua NH-U9S (Single 92mm cooling fan – 800-2000RPM)
Corsair Hydro H110i GT (Dual 140mm cooling fans – 800-2200RPM)
NZXT Kraken X61 (Dual 140mm cooling fans – 800-2000RPM)
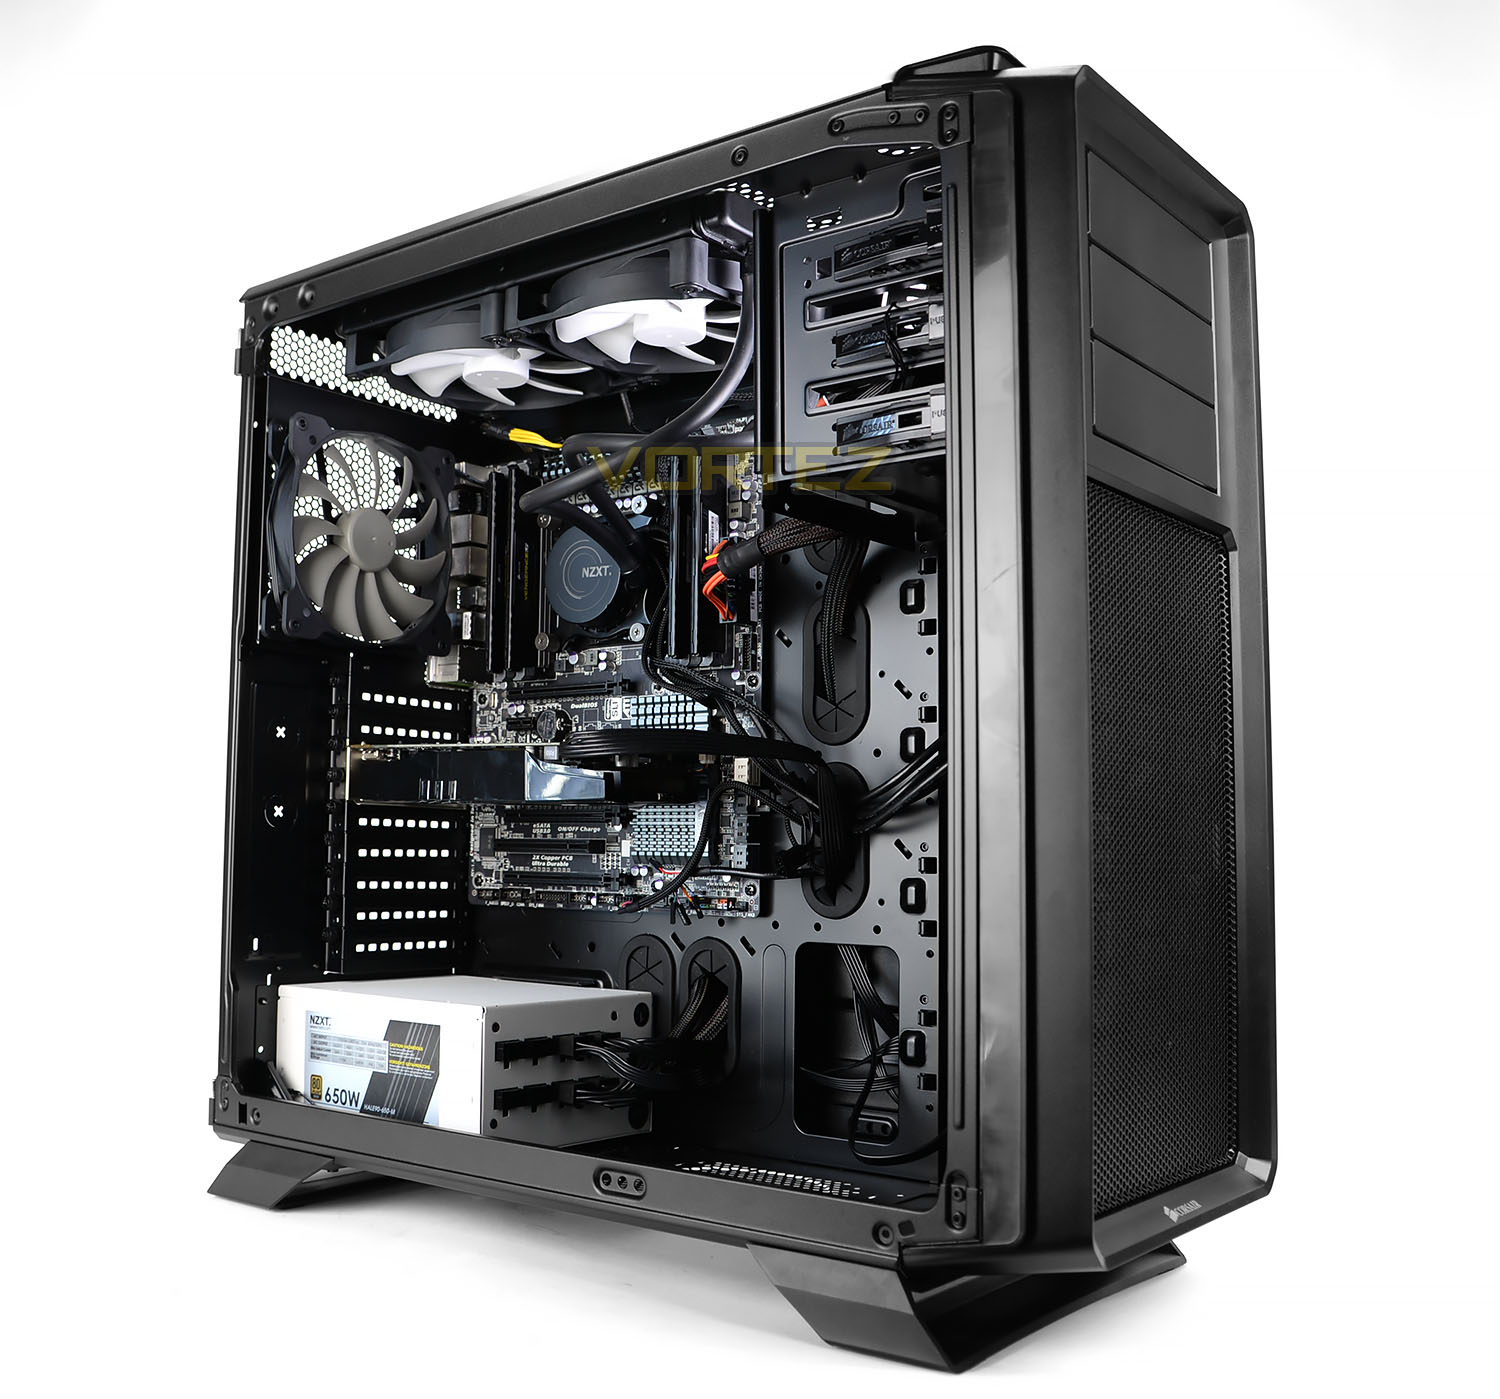
Program Suite
Real Temp – Maximum temperature analysis
LinX 0.6.4 – Applies thorough stress test to CPU
CPU-Z – Confirmation of CPU frequency/voltage
AIDA64 Extreme Edition – Confirmation of temperatures/fan speeds
Testing Methodology
For this special feature article and since we’re testing both coolers head-to-head, we’ll be setting both coolers up with two settings – 100% fan speed/RPM and then PWM mode (auto) to establish a fair test. This will demonstrate the true champion of cooling!
Testing will be based on temperatures recorded by Real Temp after 20 passes of LinX stress test. The maximum absolute temperatures will be recorded after the test and averaged over the 6 cores. The delta is then calculated by subtracting the temperature recorded near the intake fans from the average temperature calculated. Tests are conducted with the Intel i7 3930K at its default 3.6GHz stock speed and overclocked to 4.6GHz @ 1.42V. The tests are done inside the Corsair Graphite 760T chassis to simulate real world conditions. To keep the tests standardised we are using Noctua’s NT-H1 thermal paste on all coolers.
CPU coolers are reviewed as they come out of the box – with their factory cooling fans, as the manufacturer intended and as the consumer expects.
Additional tests include a passive test where the cooling fans are taken away from the heatsink and a comparison between the cooler used with stock thermal paste against our Noctua NT-H1 paste.
A kind thank you to Noctua for supplying us with NT-H1 thermal compound.
Benchmarks: Stock Performance
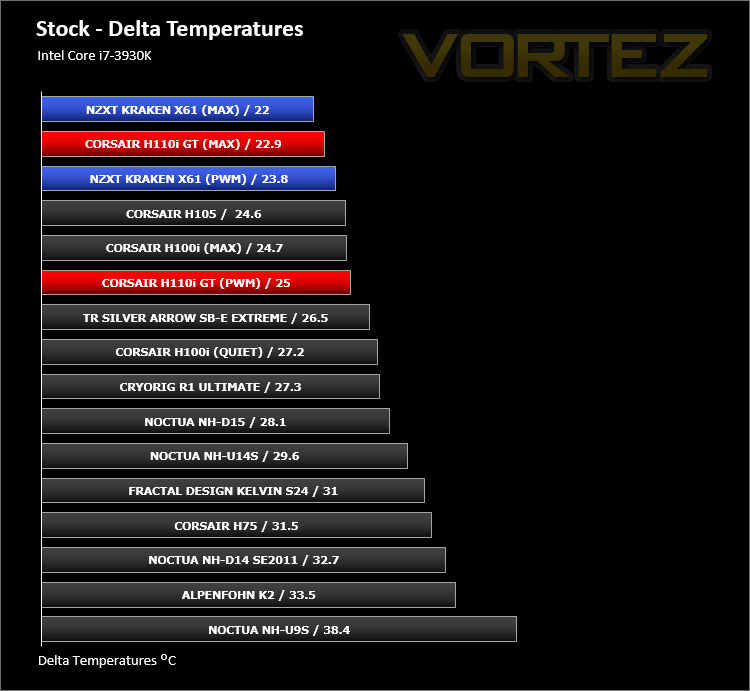
Configuring the CPU to be at its stock settings we see that NZXT’s Kraken X61 pulls through as the better cooling solution for outright temperature analysis. Observing the figures highlights 2-3C in difference between the coolers, the Kraken X61 operating at a slower RPM too!
One thing to note, Corsair’s H110i GT is distinctly quieter than the Kraken X61 at respective fan speeds. Kraken X61 emits a regular high-pitched whirring noise once it hits around 1800RPM.
Corsair H110i GT Fan Speed: MAX = 2200RPM / PWM = 1700RPM
NZXT Kraken X61 Fan Speed: MAX = 2000RPM / PWM (PERF) = 1650RPM
** UPDATE ** Corsair has since sent us a replacement H110i GT because they felt the results were not consistent with how the cooler should perform. After re-testing with this new replacement we can confirm the temperature results did improve — we have updated the chart below.
Benchmarks: Overclocked Performance
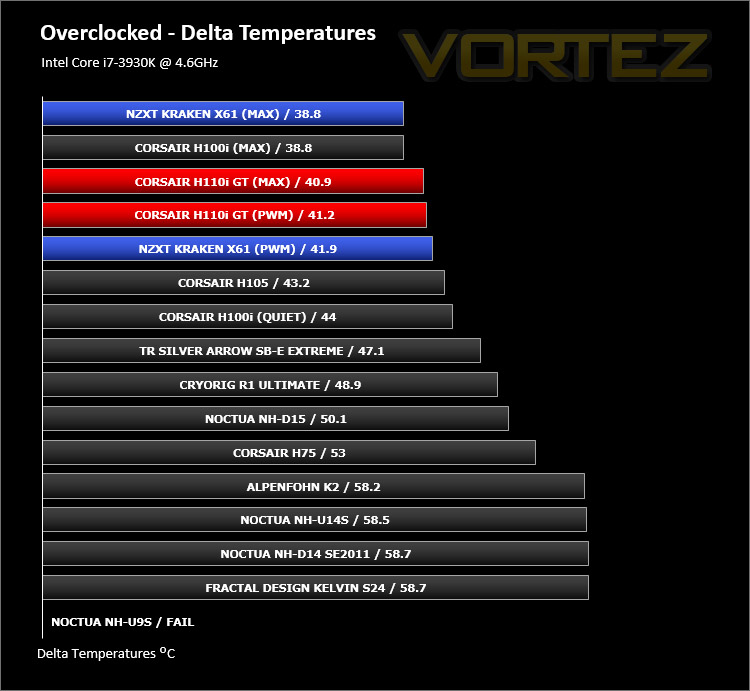
Applying a substantial overclock to the CPU generates some rather demanding circumstances and it has to be said, NZXT’s Kraken X61 takes the crown in this arena also.
Corsair H110i GT Fan Speed: MAX = 2200RPM / PWM = 2000RPM
NZXT Kraken X61 Fan Speed: MAX = 2000RPM / PWM (PERF) = 1500RPM
** UPDATE ** Corsair has since sent us a replacement H110i GT because they felt the results were not consistent with how the cooler should perform. After re-testing with this new replacement we can confirm the temperature results did improve quite significantly — we have updated the chart below.
Benchmarks: Passive Performance
As we found with other closed loop solutions, removing the cooling fans and using the products in a passive test results in failure due to the temperatures reaching dangerous levels.
Benchmarks: Thermal Paste Comparison
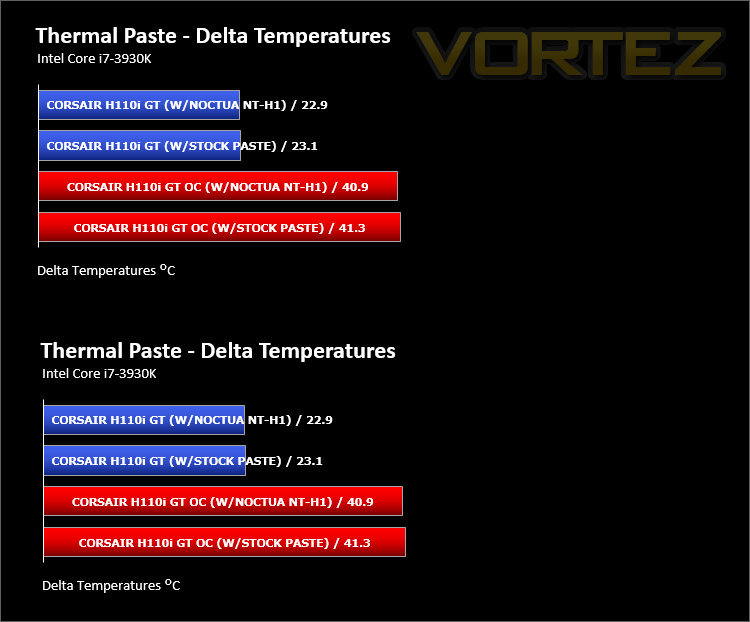
Most CPU coolers come accompanied with thermal paste provided by the manufacturer. For our CPU cooling tests we use Noctua’s NT-H1, so to offer up some interesting analysis we test the thermal paste pre-applied to both closed loop coolers against NT-H1 to see which gives the best results during stock and overclocked performance and the results really aren’t that much different at all. Both companies have done an excellent job in producing competitive thermal paste solutions.
Conclusion
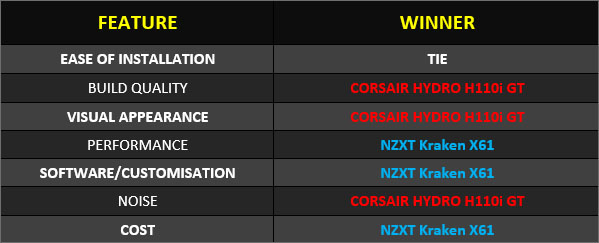
So in this clash of the titans, what is the verdict? Well, we undoubtedly have two rather impressive cooling solutions in both the Corsair Hydro H110i GT and NZXT Kraken X61 and the winner will very much depend on the user’s requirements.
Both products are presented in a very professional manner and support a wide spectrum of socket types. The installation process for both is easy thanks to the supplied guides and few steps needed to get up and running. We encountered no problems at all throughout the set up stages for each solution.
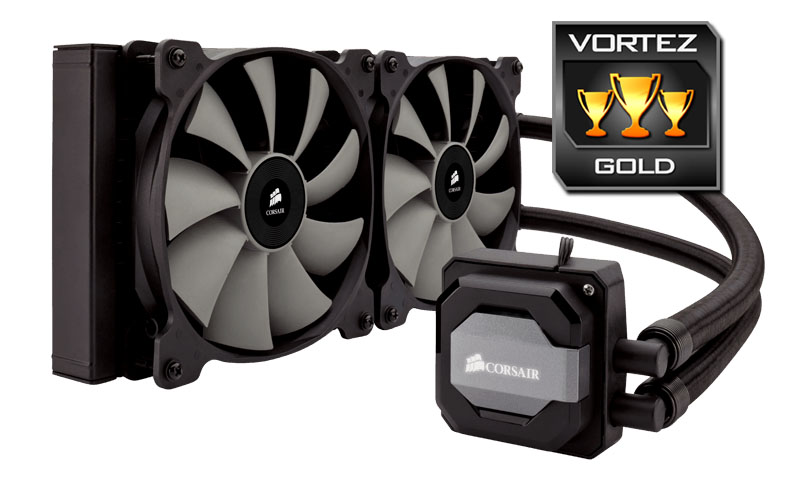
From both a visual appearance and styling point of view the Corsair Hydro H110i GT has somewhat of an advantage due to the attention to detail which Corsair has employed. Styling may not be a decision breaker for some but both coolers appear to be the type of product you’d clearly want to show off because they both have a customisable RGB LED. So from an aesthetics stand-point we feel that Corsair has done a better job with the external décor with an aggressive looking radiator and pump configuration. This particular aspect filters through into the build quality also, the H110i GT appears to have a slight edge over the Kraken X61 with more robust radiator and pump configuration and the undeniably intricately woven tubing.
The performance arena is where most enthusiasts and system builders will be interested and at first it would appear the NZXT Kraken X61 was the clear winner but having found Corsair’s original sample to be faulty we have since retested with a new unit and there is little to separate the two coolers. Both in the stock and overclocked performance tests the Kraken X61 appears to have a slight advantage but this is nothing to ‘write home about’.
Both coolers come with software to fully customise the lighting and monitor/tweak the operational characteristics of the cooler. Corsair’s Link and NZXT’s CAM software both offer a fulfilling experience but we feel that NZXT’s offering is more intuitive and adopts a much more attractive GUI. Both software suites work well, but NZXT appear to have raised the bar somewhat.
Using both coolers under PWM (auto) modes and having your CPU at stock settings will result in audible but not disruptive noise levels but increasing the RPM on the fans or applying an overclock while using PWM mode will understandably increase the noise and we found NZXT’s fans to be more disruptive when directly comparing to Corsair’s under the same circumstances.
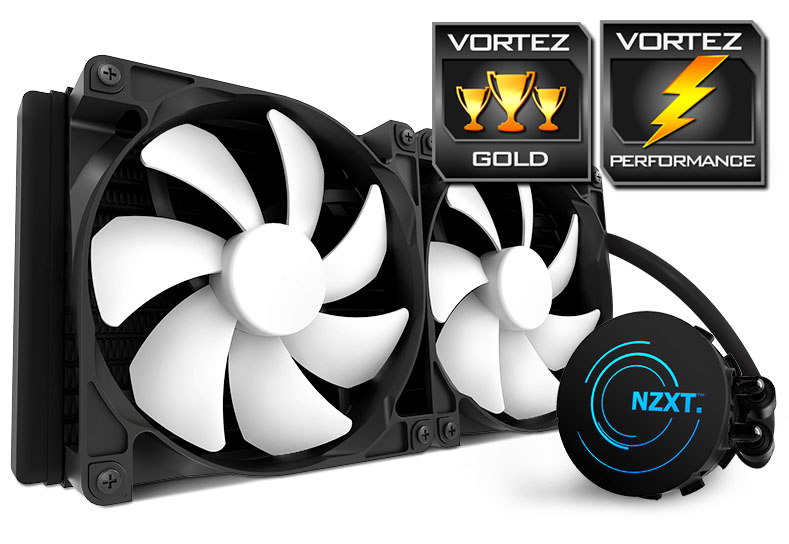
The cost is a factor which sways many people. At the time of writing this article NZXT offered better value, pricing the Kraken X61 at £115 GBP / $129.99 USD while the H110i GT was £117 GBP / $139.99 USD. After publishing this article Corsair were keen to highlight that they had applied a price-drop to H110i GT after this head-to-head; placing it at £101 (inc. VAT).
The winner in this closed loop showdown will depend on the outlook and needs of the user. For better build quality, stunning aesthetics and low-noise, Corsair’s Hydro H110i GT is a great choice but if you favour uncompromising performance, a better software interface and a more affordable cooling solution then NZXT’s Kraken X61 takes the win.

Click here for an explanation of our awards at Vortez.net.