Corsair is well known for its all in one cooling solutions, however they’ve never released a 360mm radiator, until now.

Product on Review: Corsair H150i Pro RGB
Manufacturer: Corsair
Street Price: £164.99 / $169.99
Despite advances in air cooling solutions, all-in-one water cooling loops are gaining a lot of traction in the cooling market. Corsair may be best known for its memory and possibly even its peripherals, but they’re forging a huge market share in the cooling sector with 120mm, 240mm, 280mm and for the first time, a 360mm radiator which we’ll look at today.
Corsair’s new 360mm all-in-one cooling solution features RGB lighting (of course!), a smart CPU block which controls fan speeds, RGB profiles and temperature monitoring via the USB connection, all of which can be observed and tweaked within the Corsair Link software.
Along with the 360mm radiator and pump you get 3x 120mm ML-Series fans which utilise magnetic levitation to decrease noise and increase airflow; the clever pump housing, along-side the Corsair Link software can shut these fans off entirely if the CPU and coolant temperature drop below a specified threshold.
All-in-all, the H150i Pro RGB promises to deliver excellent cooling to even the most power-hungry of CPUs, let’s slap it on top of our i7-3930K and see how it performs.
Corsair on the H150i Pro:
The CORSAIR Hydro Series H150i PRO is an all-in-one RGB liquid CPU cooler with a 360mm radiator built for low-noise cooling performance and bold styling with an RGB LED pump head. Three included 120mm ML Series magnetic levitation PWM fans provide great airflow while producing no more than 25 dBA of noise, pushing the performance of your build while staying whisper quiet. Take control with CORSAIR LINK software and customize lighting, monitor temperatures and precisely adjust fan speeds, or stop cooling fans entirely with the H150i’s Zero RPM fan mode. Easy to install and compatible with most major CPU sockets, the H150i makes it easy to cool your system in silence and style.
Technical Specifications
Coldplate Material: Copper
Tubing Material: Low permeation with black sleeving
Radiator Material: Aluminium
Radiator Size: 396mm x 120mm x 27mm
Fan(s) included: 3x ML Series 120mm PWM Fans
Fan Max Speed: 1600 RPM
Fan Airflow: 47.3 CFM
Fan Static Pressure: 1.78 mm-H2O
Fan Noise Level: 25 dB(A)
MSRP: $169.99
Tubing Material: Low permeation with black sleeving
Radiator Material: Aluminium
Radiator Size: 396mm x 120mm x 27mm
Fan(s) included: 3x ML Series 120mm PWM Fans
Fan Max Speed: 1600 RPM
Fan Airflow: 47.3 CFM
Fan Static Pressure: 1.78 mm-H2O
Fan Noise Level: 25 dB(A)
MSRP: $169.99
Packaging & Bundle
The H150i Pro arrives in an understandably huge box, due to the length and width of the radiator as well as allowing room for the pump housing as well as the fans. Everything is well protected within. The front of the packaging looks great, showing off the RGB pump and several of the features.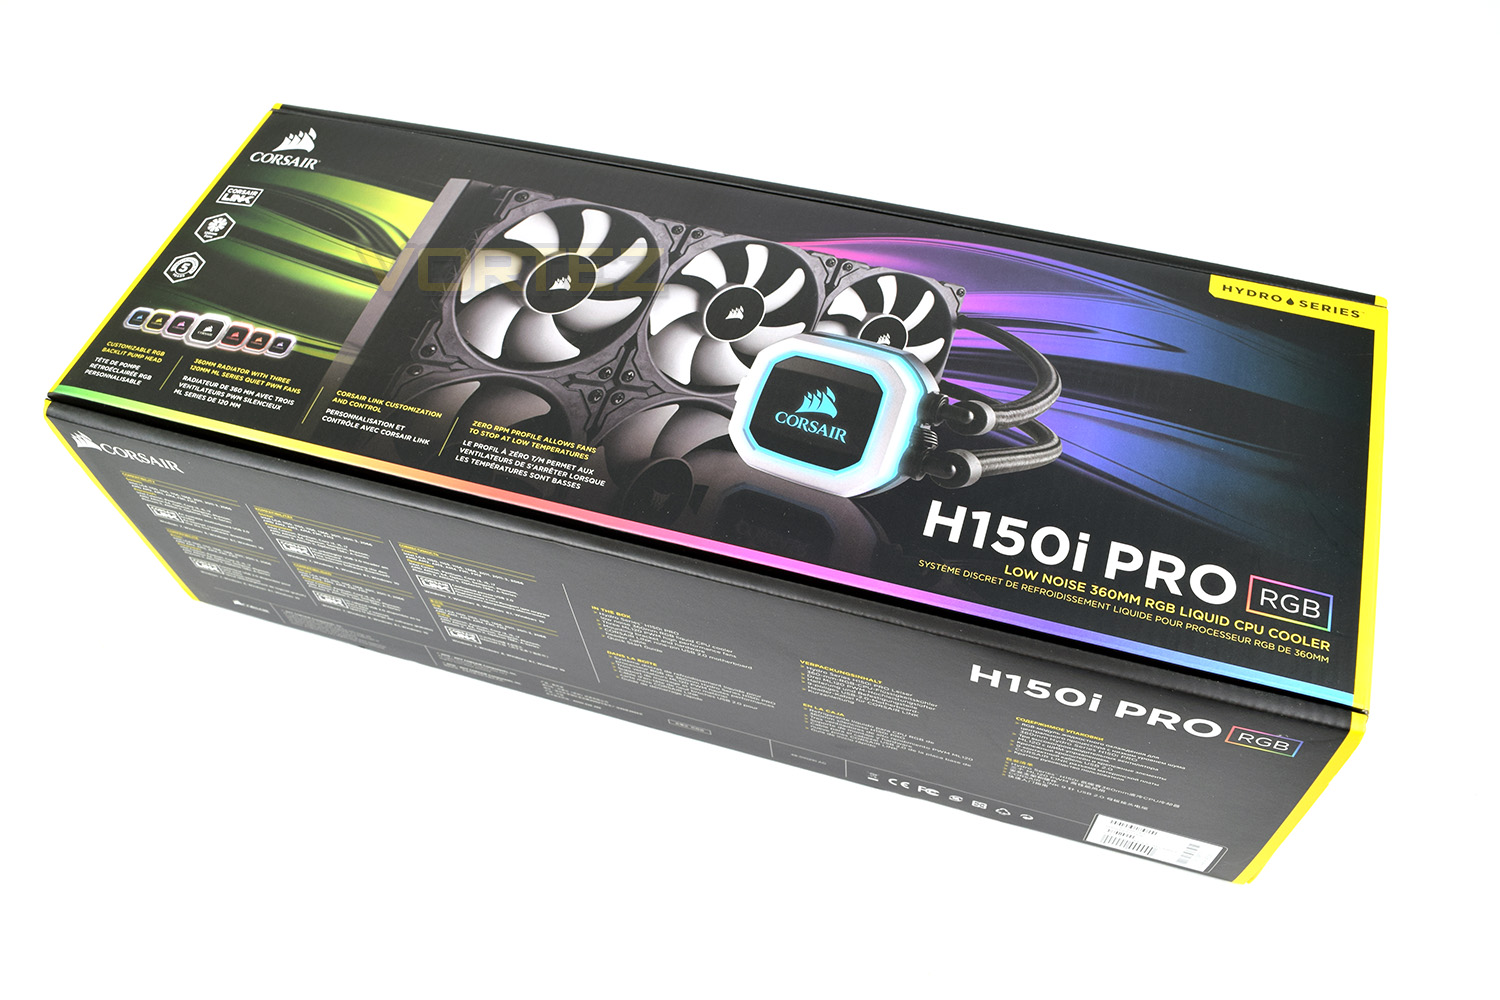
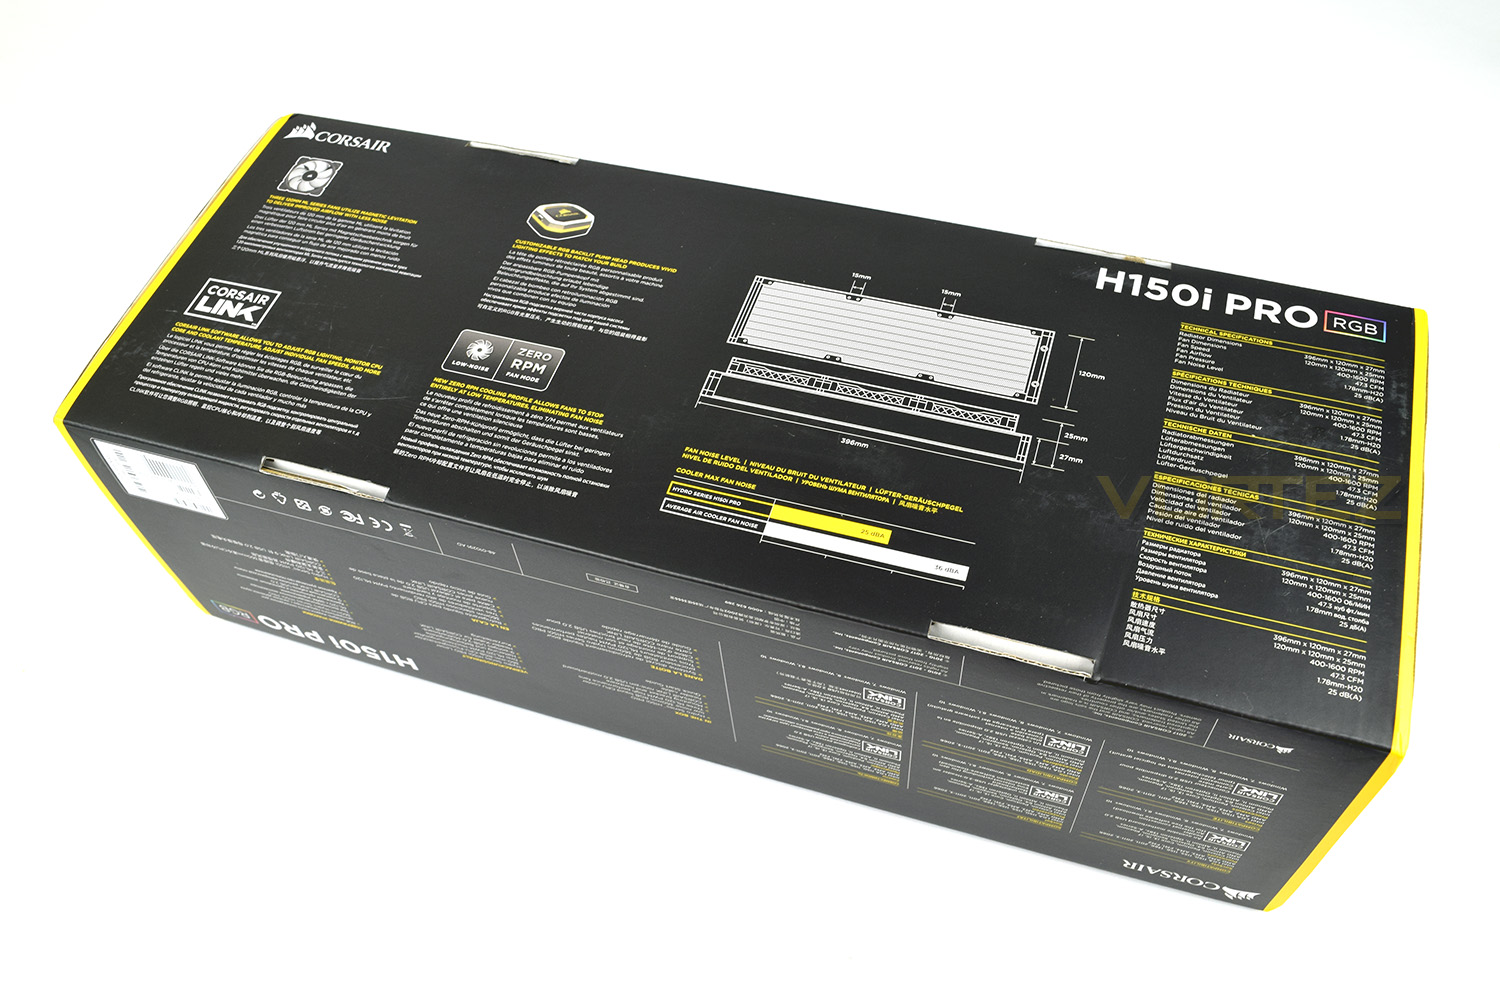
On the rear of the box, Corsair has provided a detailed look at dimensions to ensure the radiator will fit inside your case, alongside an in-depth look at the main features.
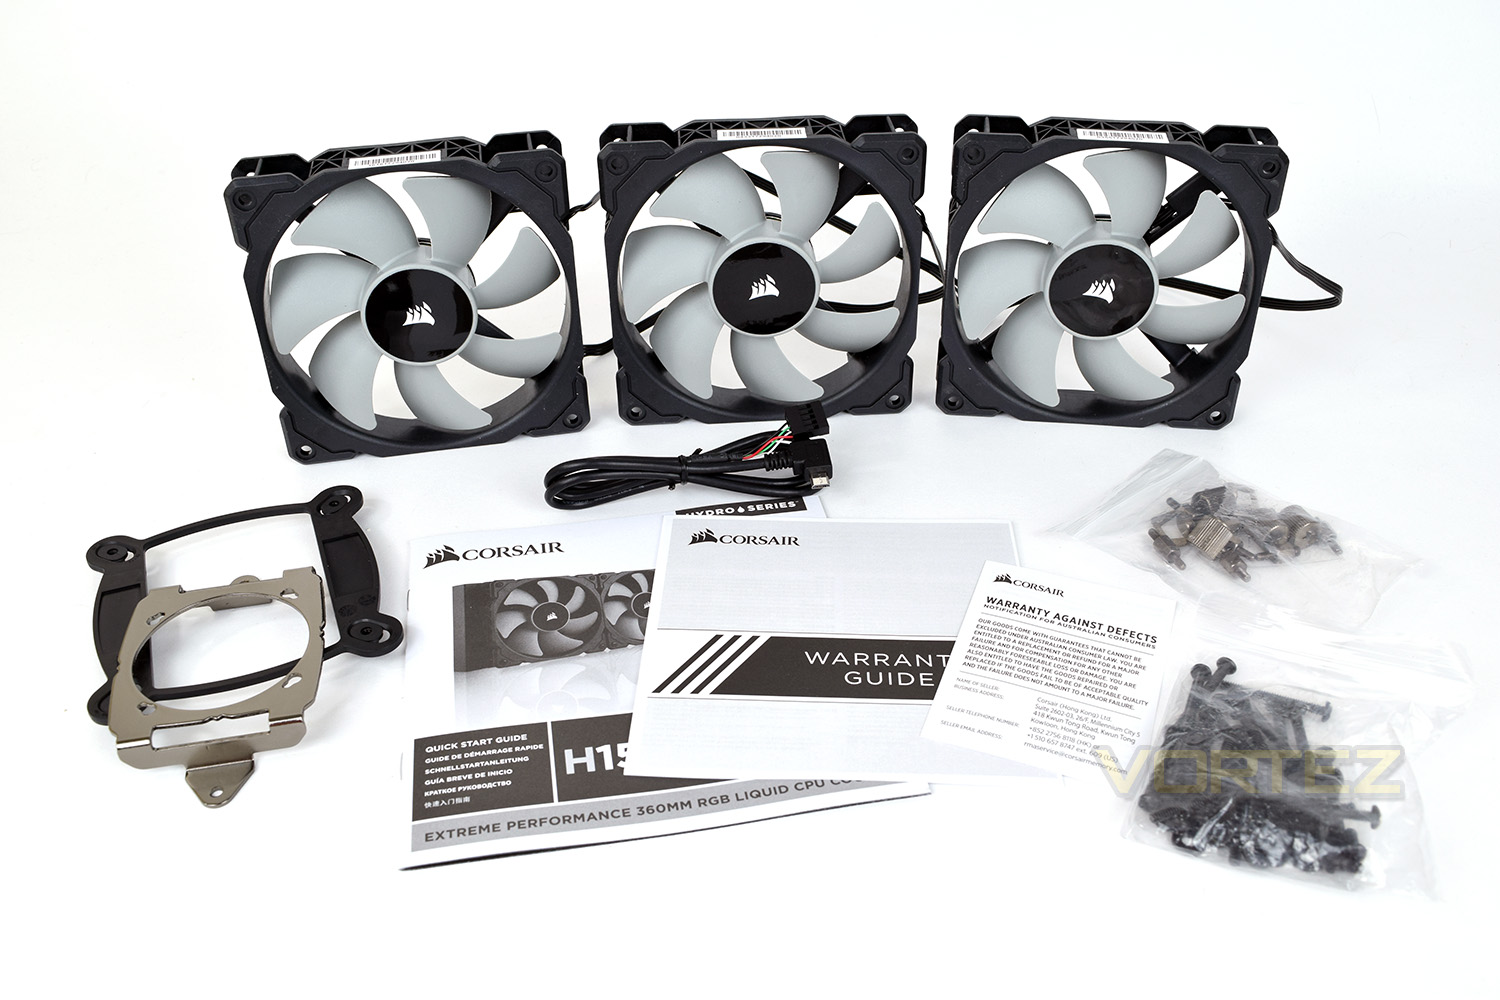
Inside the box, you will find a mounting bracket for Intel’s LGA 1150, 1155, 1156, 1366, 2011, 2011-3 and 2066. AMD is supported in the way of AMD AM2, AM3, AM4, FM1 and FM2; plenty of compatibility for a huge range of sockets. There are all of the associated screws to attach the fans, as well as the radiator to your case. Of course, there are the 3 Corsair ML120 fans to provide ample airflow while remaining as quiet as possible which can be connected to your motherboard via the included USB cable. In addition to all of those pieces, there’s the warranty guide and instructions.
Closer Look
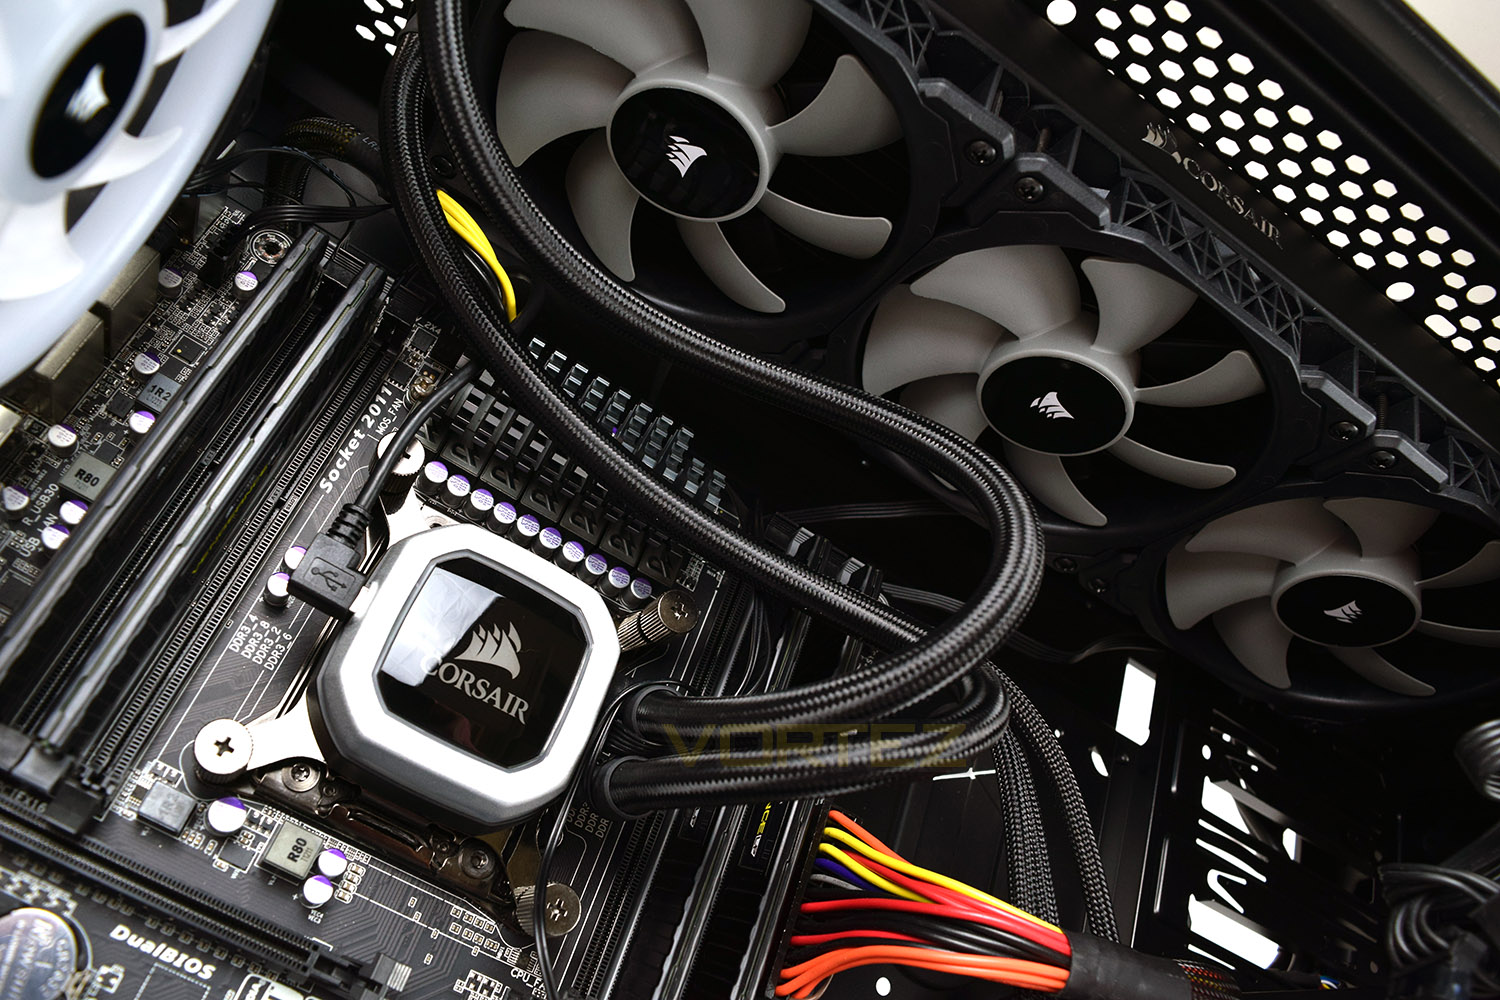
The pump housing features a large Corsair logo in the centre, through with RGB effects can be customised, there’s also a couple of rings around the pump which will glow, though only one colour can be specified for all areas.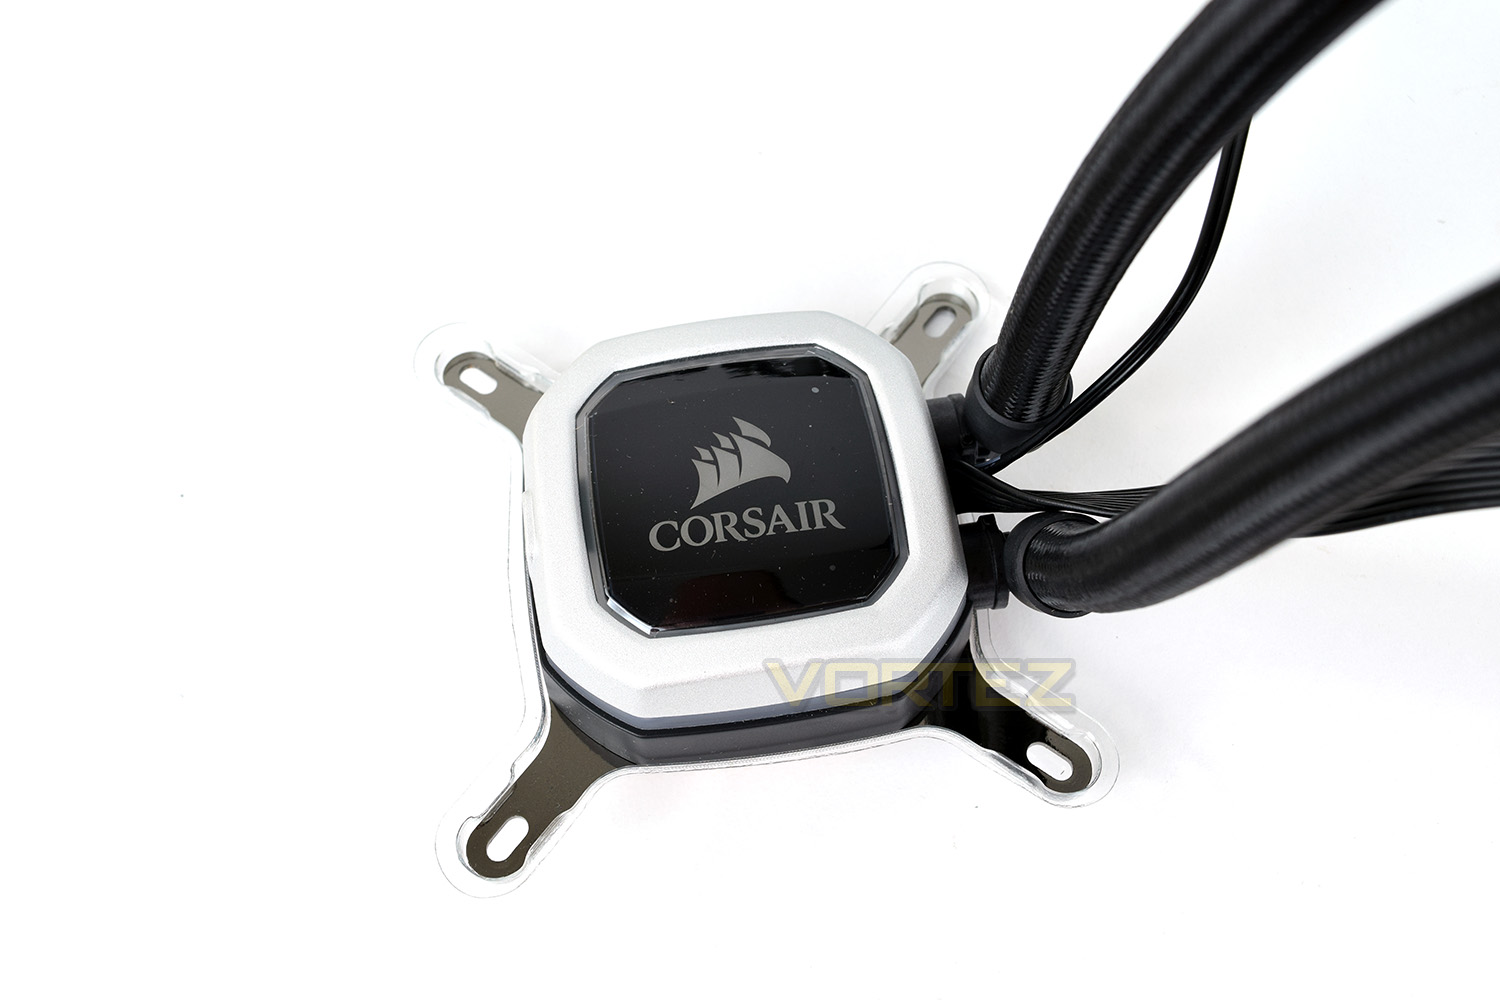
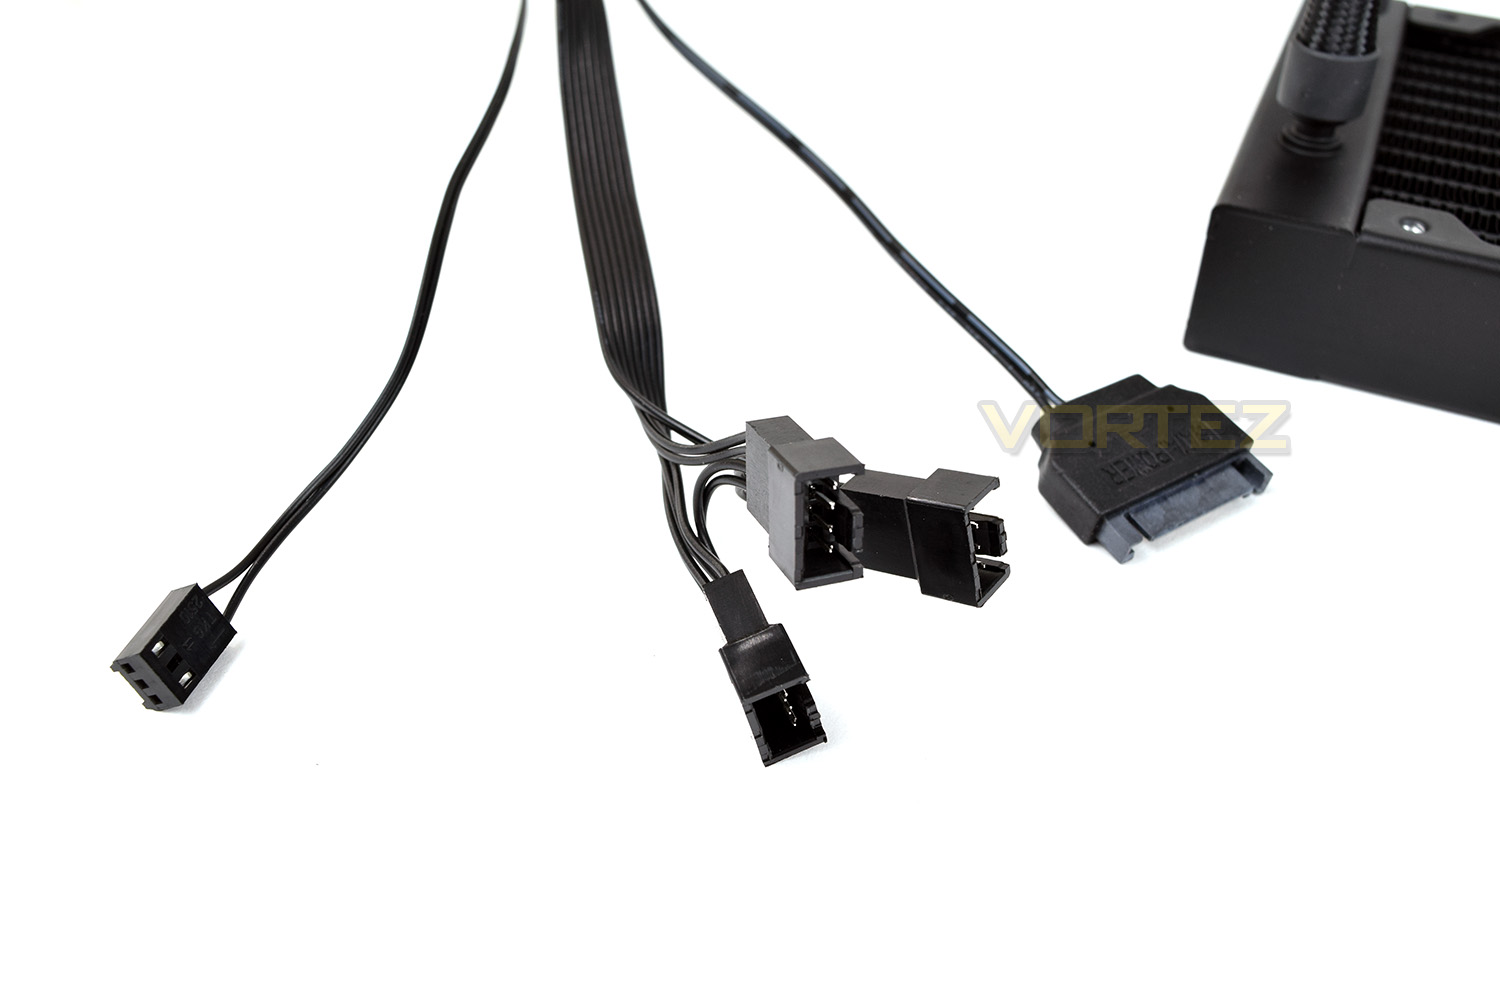
From the CPU pump itself comes the SATA power connector, to provide enough juice for those three fans, the RGB lighting and the water pump. There’s also a 3-way fan header to control the speed of the ML 120 fans as well as a motherboard header to allow the BIOS to monitor pump speed.
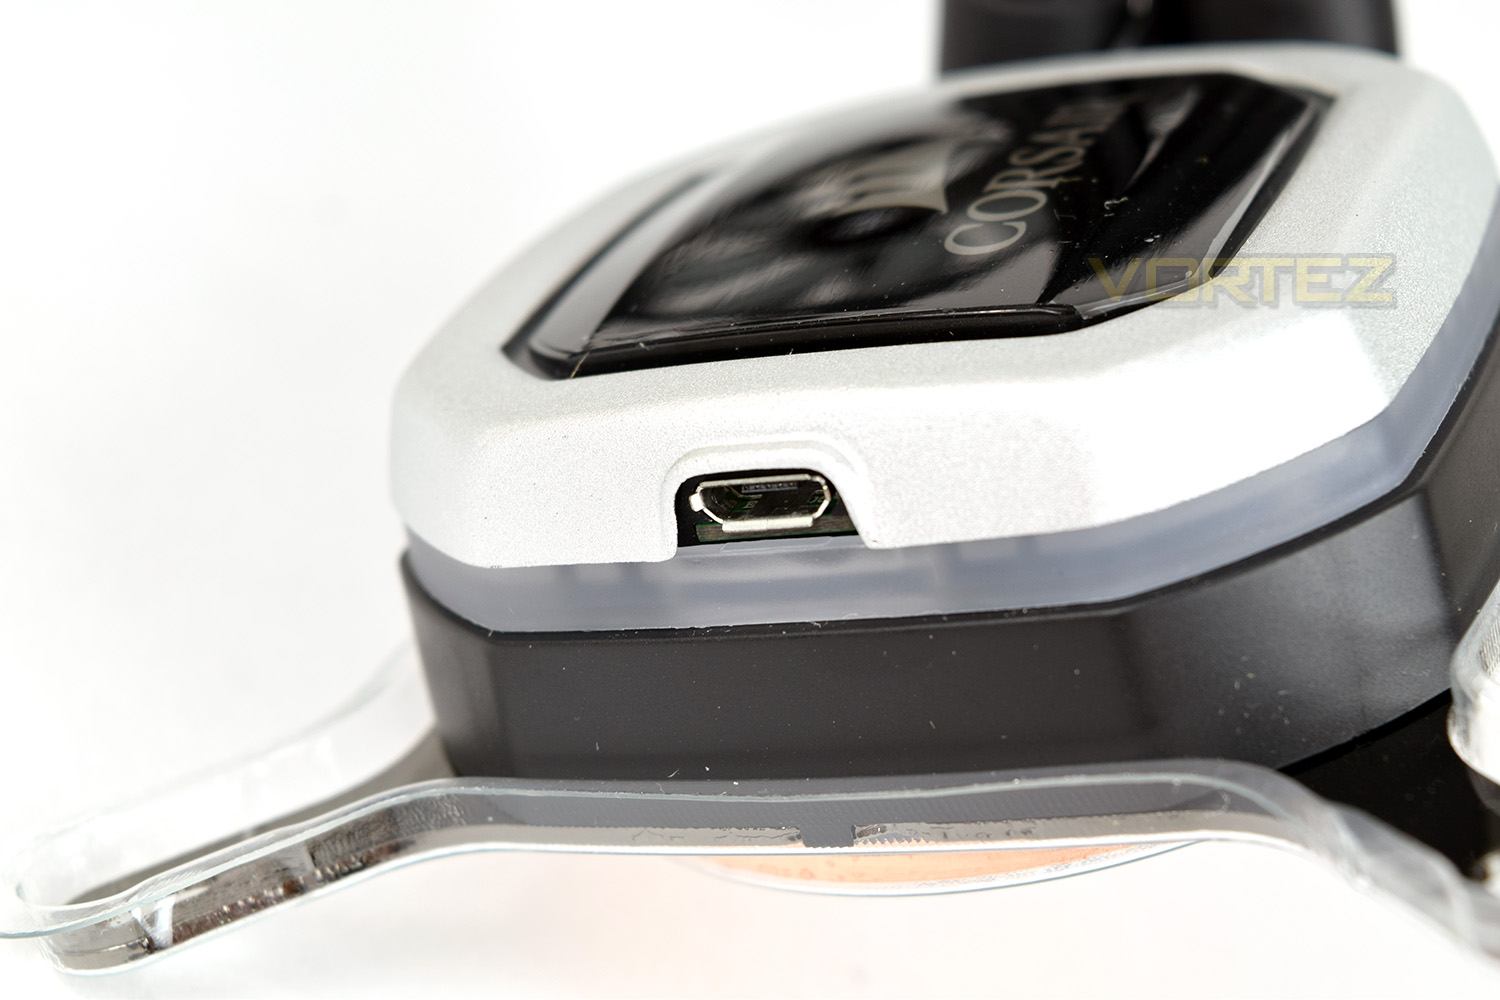
The left-hand side of the pump houses a micro-USB connection; this allows the Corsair Link software to communicate with the pump and fans for profiles and RGB customisation.
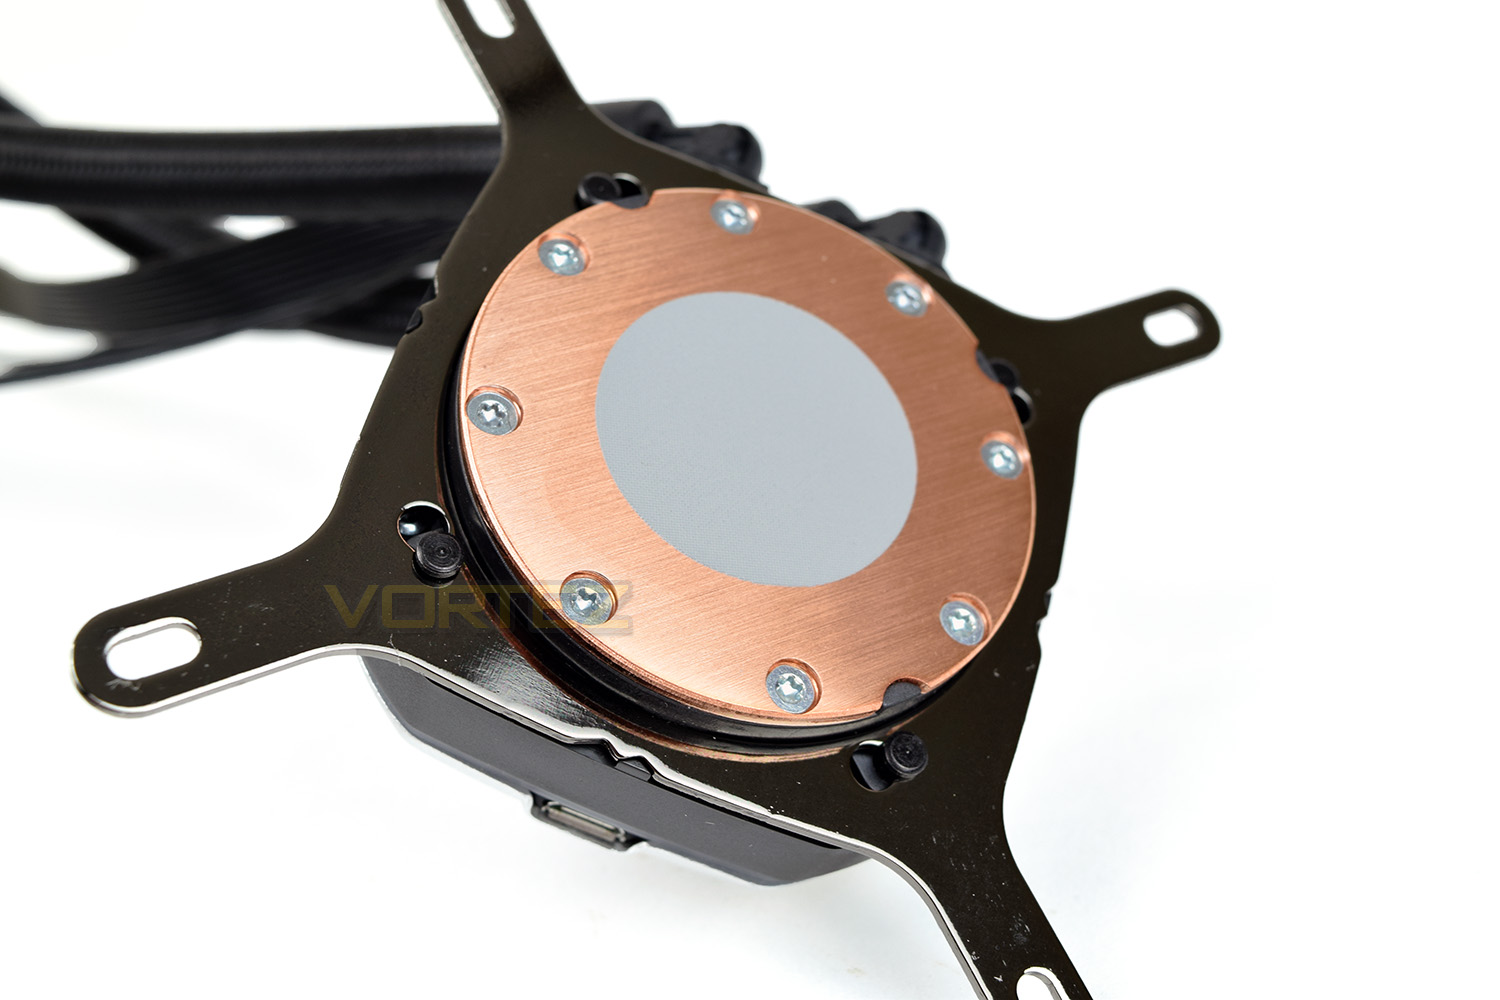
The base of the heatsink is a large piece of machined copper with thermal paste pre-applied; this is especially handy for taking out any guess work in regards to the amount of paste to apply, this thin layer will give optimum results.
The H150i Pro is a 360mm radiator with room for up to 6 fans, though only three are included. The radiator measures 396mm x 120mm x 27mm (52mm with fans installed). An all-aluminium construction keeps the overall weight down. In the way of styling, all we see is the Corsair logo printed on both long edges.
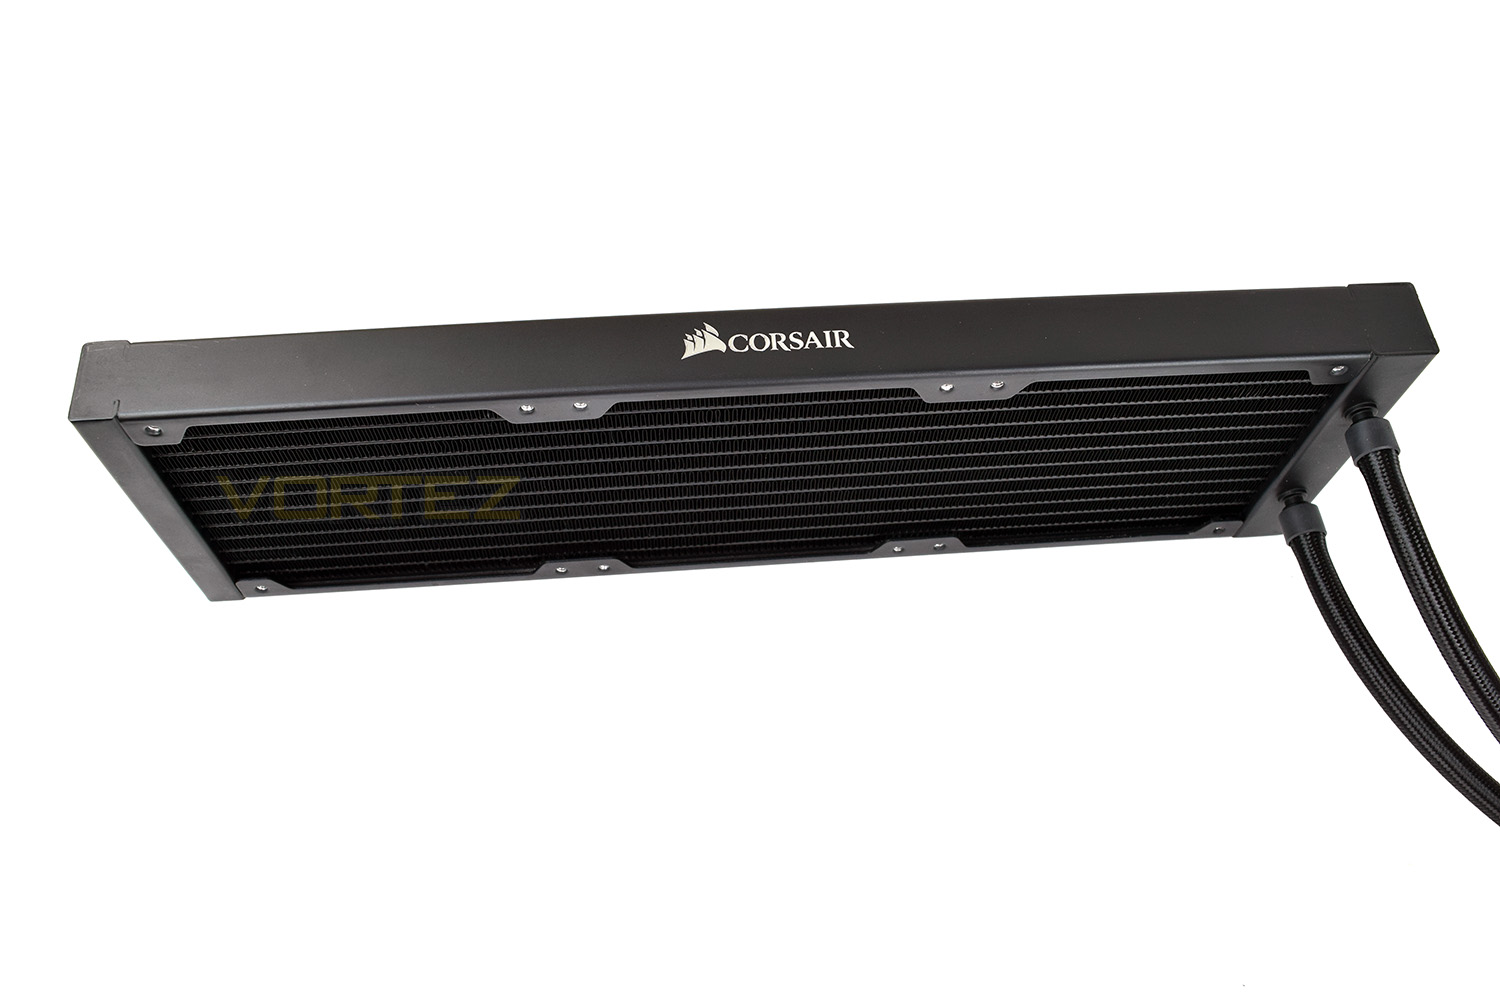
Once the fans are installed, the overall height is 52mm which may pose some trouble for slightly smaller cases. However the fans can be mounted one side of the case with the radiator the other.

Installation
With each CPU cooler that we test, a small pea-sized blob of Noctua NT-H1 thermal paste is applied to our CPU ahead of heatsink installation. We choose to use this high-quality paste in all of our CPU cooler reviews, essentially eliminating an unnecessary variable from the subsequent results and comparison graphs.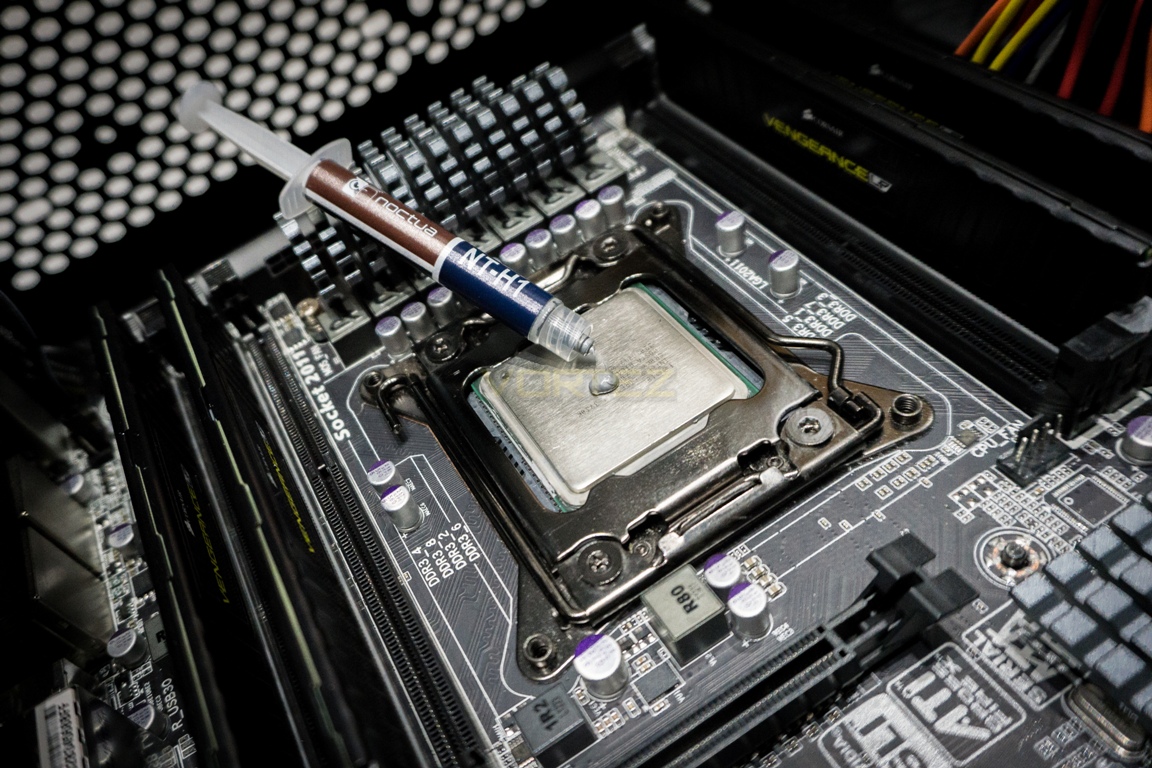
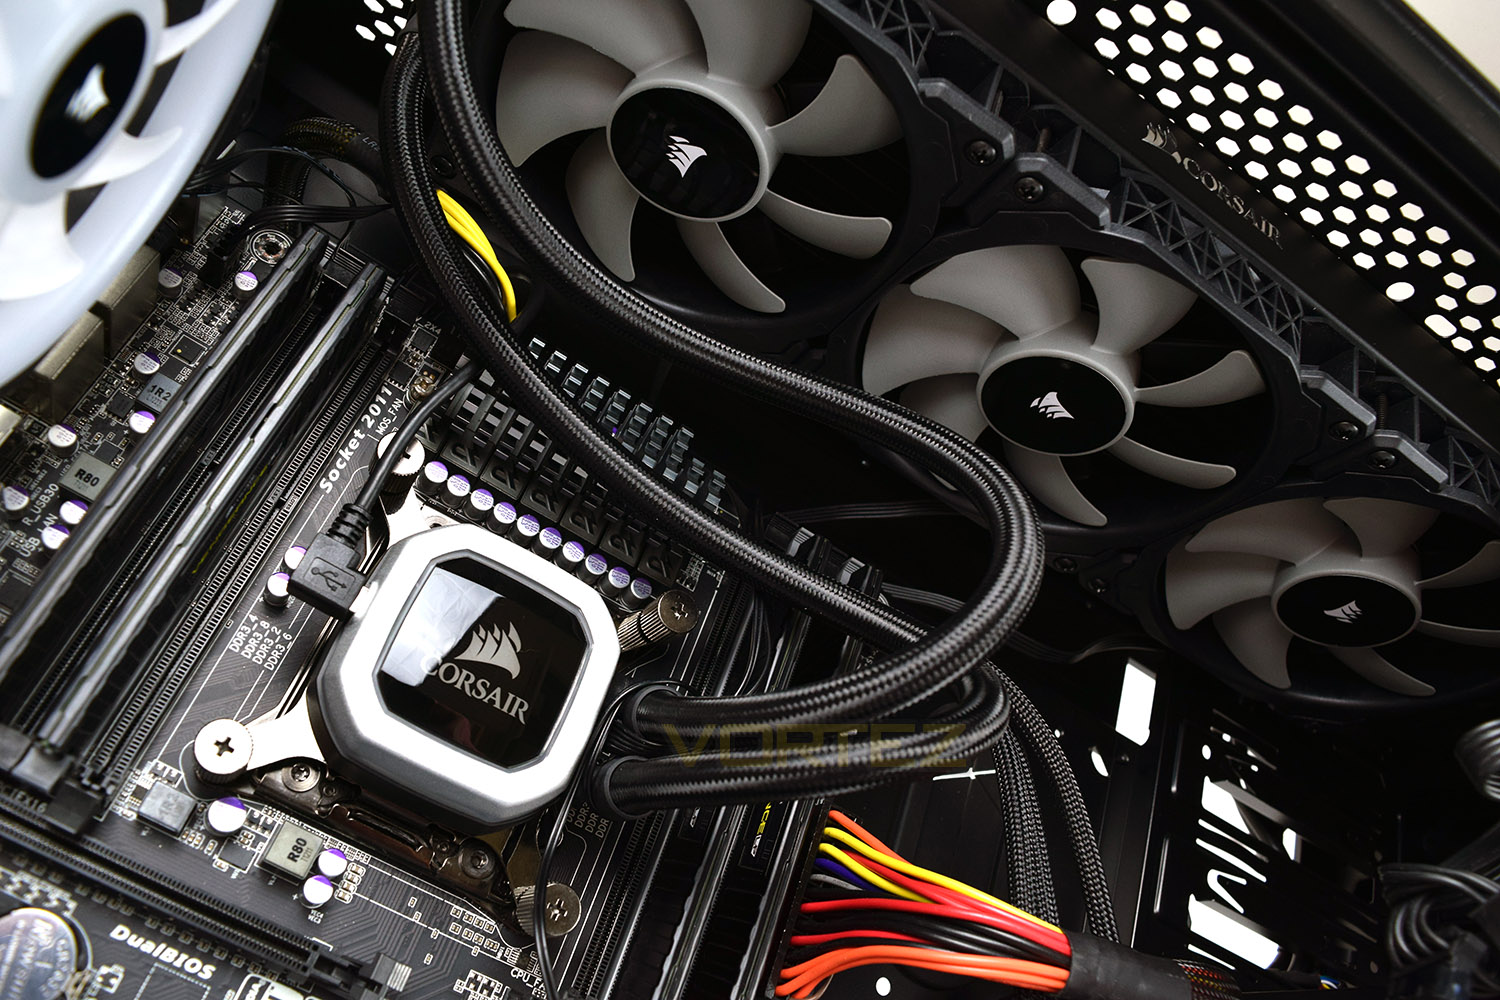
To install the Corsair H150i Pro, first, we mounted the radiator into the top of the case, ensuring all of the fan cables were pointing the correct way for better cable management while making sure the hose pipes were orientated correctly. As you can see, the Corsair 760T case we use provides ample space for a huge radiator like the H150i Pro. We mounted the fans in a blowing configuration. However, they can also be used to draw air through the radiator if required.
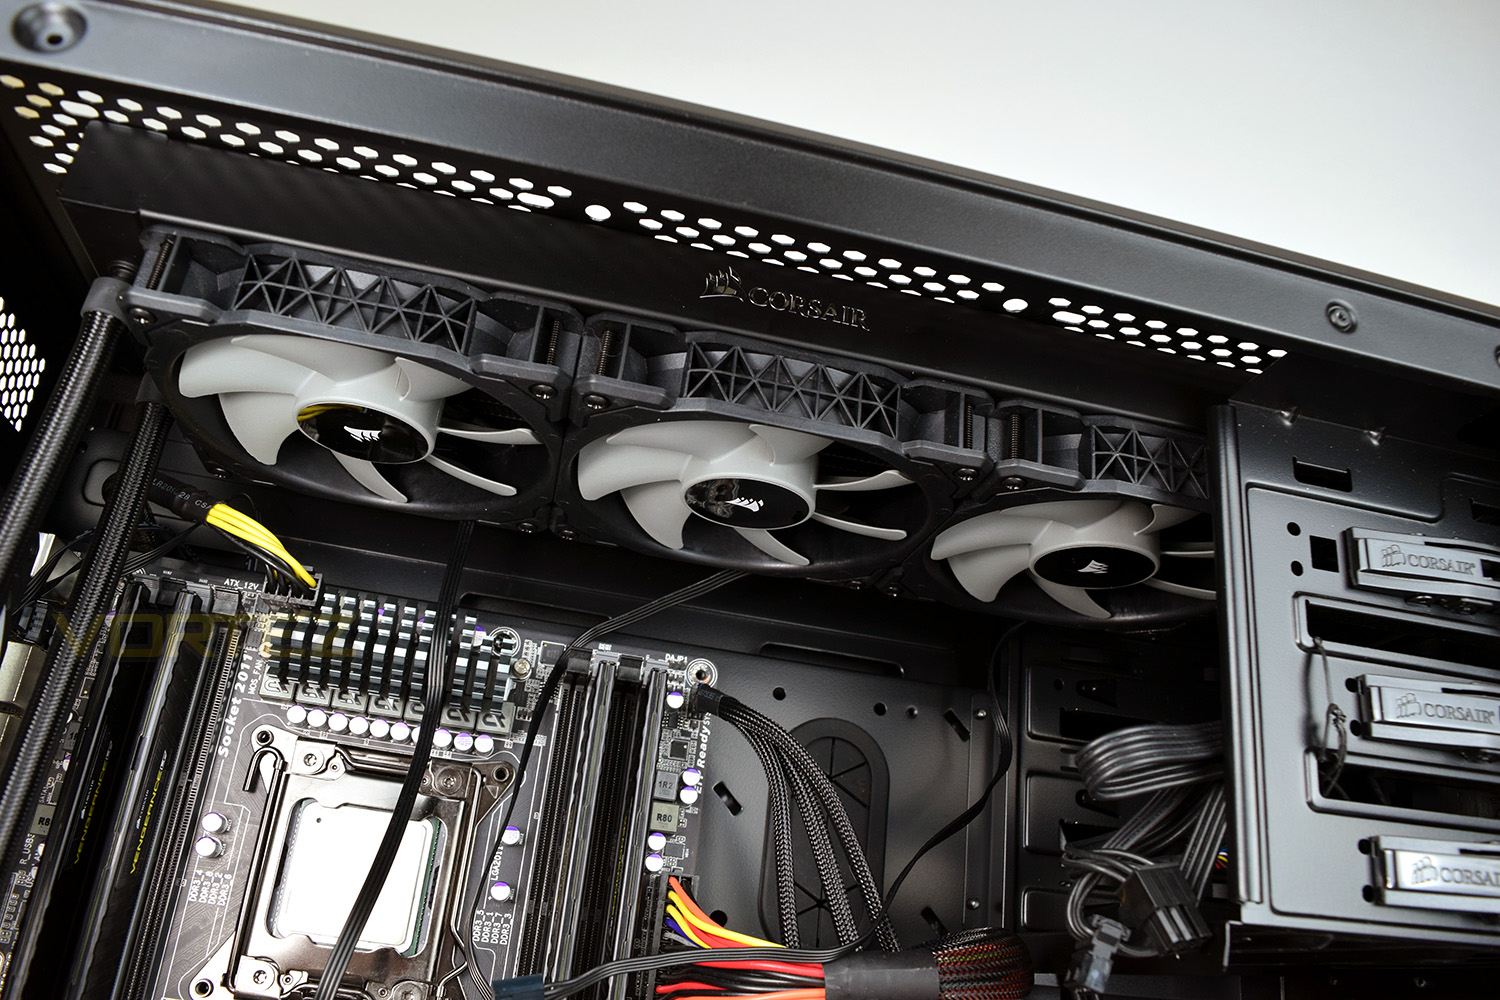
Corsair provides several different mounting methods for a vast range of Intel and AMD sockets, however, for our installation into an Intel LGA 2011 socket, we don’t need to use any backplate thanks to the integrated screw mounts within the socket itself. The thumb screws are large and easy to turn, though we would recommend to nip them up with a screwdriver to ensure they’re secure. When securing any CPU cooler, it’s advised to gently tighten the screws sequentially by proceeding in a diagonal manner to ensure even pressure is applied.
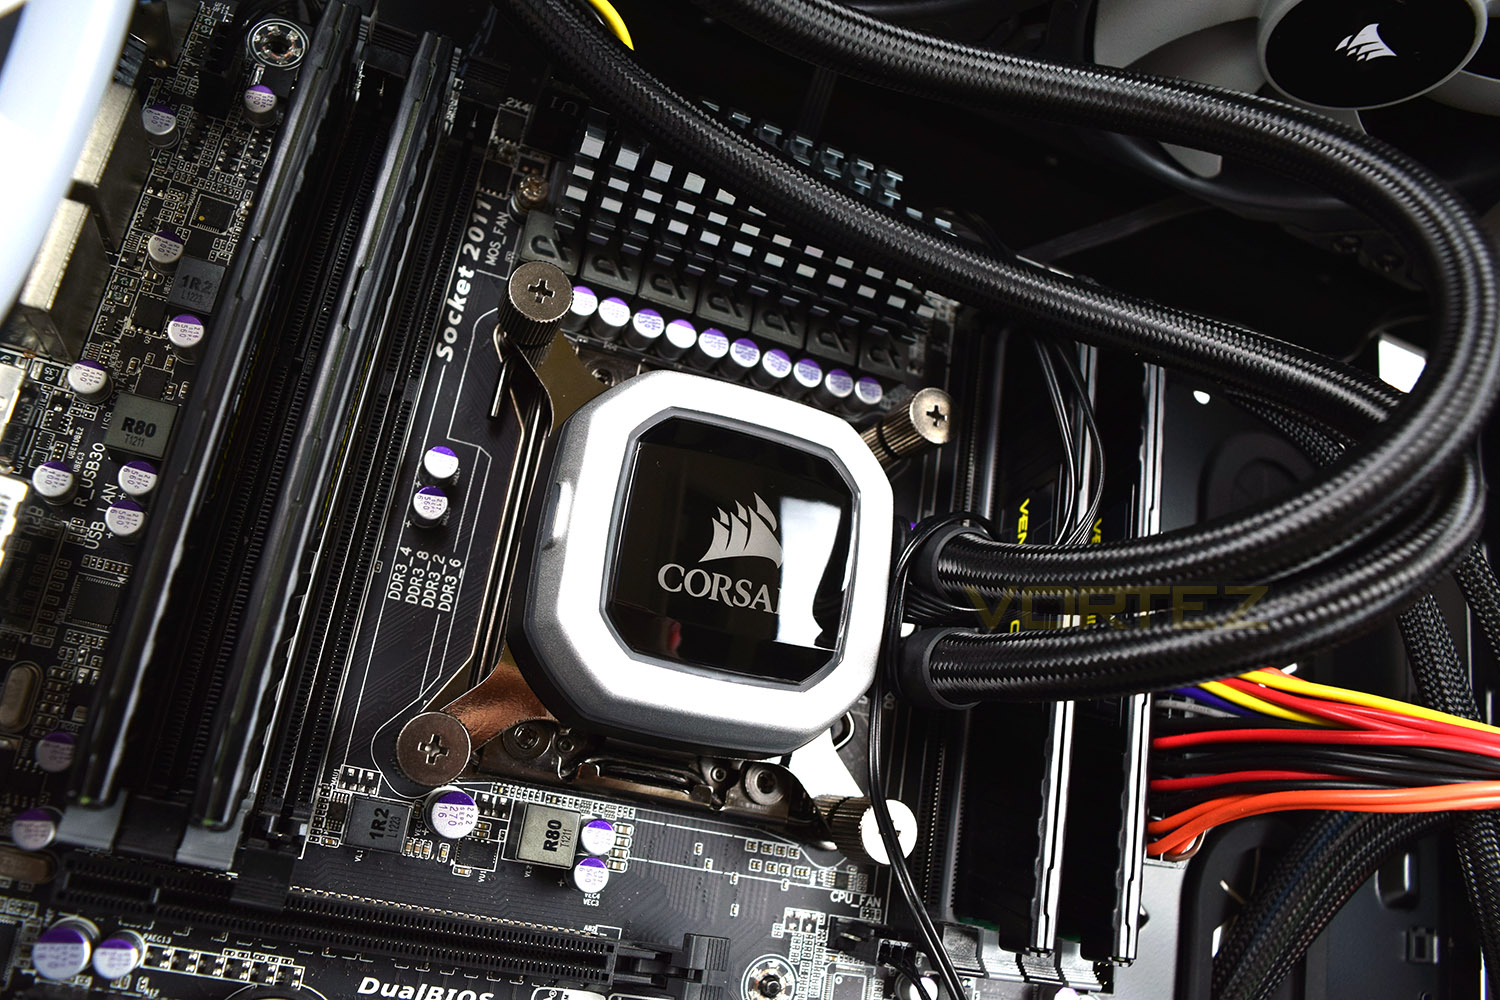
The only thing left to do is connect up the SATA power, USB header, fan cables and the motherboard’s fan connector for monitoring purposes. We connected these up behind the motherboard tray for tidiness. We found these cables to be a little bit too short which hindered our cable routing abilities somewhat; we appreciate that not all users will possess such a large case, but some extensions or a little extra length would’ve been welcomed.
Overall, the Corsair posed no real challenge in installing, despite the cable length issues. The radiator and pump looks excellent once installed; we can’t wait to see that RGB lighting in all of its glory!
Test Setup & Methodology
We have recently made changes to our cooling department and the associated testing methodology, so please note that the number of results shown will increase over time as we add additional products. We hope that these results will appear clearer to the majority of our readership and look forward to building upon the baselines that we currently have.We perform two individual testing routines with each CPU cooler that we receive – temperatures and acoustics. The system used is as follows and all tests are performed at stock 3.8 GHz and overclocked 4.4 GHz frequencies.
Processor – Intel Core i7-3930K
Motherboard – Gigabyte X79-UP4
Memory – 8GB Corsair Vengeance LP 1600MHz CL9
Video Card – Sapphire Radeon HD 6850 1GB
Power Supply – NZXT Hale90 650W
Storage Drive – Kingston HyperX 240GB SATA III SSD
Case – Corsair Carbide 760T
Monitor ASUS ROG SWIFT PG278Q
Motherboard – Gigabyte X79-UP4
Memory – 8GB Corsair Vengeance LP 1600MHz CL9
Video Card – Sapphire Radeon HD 6850 1GB
Power Supply – NZXT Hale90 650W
Storage Drive – Kingston HyperX 240GB SATA III SSD
Case – Corsair Carbide 760T
Monitor ASUS ROG SWIFT PG278Q
To keep our tests consistent, we always review CPU coolers as they come out of the box – with their factory cooling fans, as the manufacturer intended and as the consumer expects. It should, however, be noted that we do not use supplied thermal paste but instead, Noctua NT-H1 paste to, again, ensure consistency. The paste is applied and the CPU allowed to run for a couple of hours, at idle, to give the thermal compound some time to “bed in.”
In the first test, we record idle and load temperatures as shown by the most current version of the Real Temp monitoring utility. The test system is booted to the Windows desktop and left to idle for 20 minutes to ensure temperatures have stabilised. The average core temperatures are then recorded over a 1 minute period and averaged across the six cores. We then perform a continuous 20 minute AIDA 64 stress test. The maximum absolute core temperatures are recorded immediately after the test has completed and averaged across the six cores. All results are displayed as delta temperatures – these are calculated by subtracting the ambient room temperature from the average core temperatures recorded. For temperature testing, the Corsair 760T chassis door is closed and has all three systems fans powered on to simulate real-world conditions.
Our second test follows a similar methodology to the first, with the key difference being that the Corsair 760T chassis door is now left open and all three systems fans are disabled. This allows for the CPU cooler fans acoustic profiles to be captured in isolation. From cold, the system is again booted to the Windows desktop and left to idle for 20 minutes to ensure temperatures have stabilised. The acoustic level is then recorded at a distance of 20cm from the CPU cooler and where the individual result is an average level over a 1 minute period. We then perform our continuous 20 minutes AIDA 64 stress test. Acoustic levels are again recorded at a distance of 20cm from the CPU cooler and where the individual result is an average level over a 1 minute period.
Benchmarks – Thermal Results
We have recently made changes to our cooling department and the associated testing methodology, so please note that the number of results shown below will increase over time as we add additional products. We hope that these results will appear clearer to the majority of our readership and look forward to building upon the baselines that you see below.We start off by letting the CPU cooler “bed in” for a couple of hours, to ensure the paste has time to move around and form an even layer, after which an idle result is taken.
Please note that the Balanced profile was used within the Corsair Link software to strike a balance between noise and performance; this rings true for all of our tests on the H150i Pro, stock clocks and overclocked.
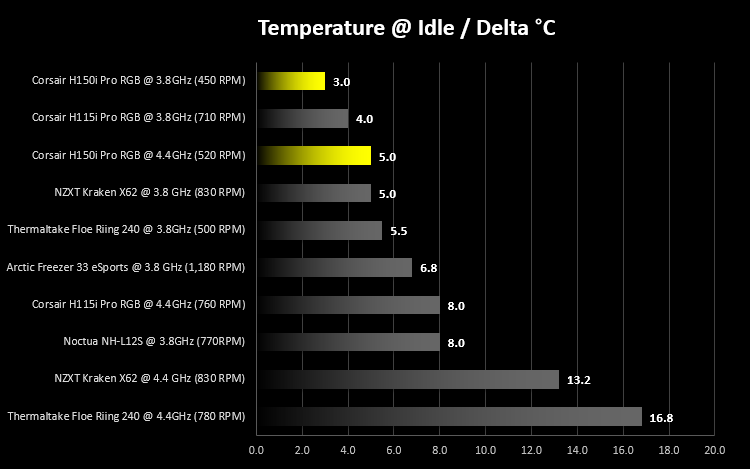
As you can see from the graph below, a delta temperature of 3°C shows the outright performance of this huge radiator, even with the fans barely ticking over at 450RPM. Those fans did spin up slightly more when overclocked to 4.4GHz, but it matched the Kraken X62’s stock clocks delta temperature.
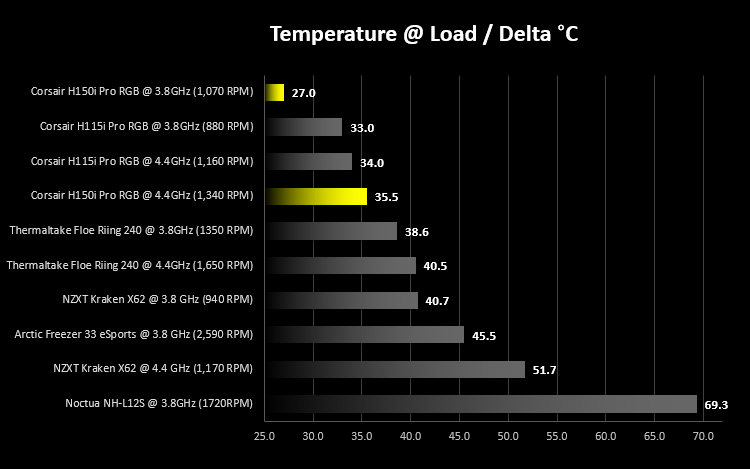
Moving onto the loaded results, which maxes all 12 threads to generate as much heat as possible from the i7-3930K. The results at 3.8GHz, considering the 130W TDP, is astounding. After 30 minutes the temperature, across all 6 cores, hadn’t broken above 50°C (27°C Delta to room temperate.)
This makes the Corsair H150i Pro our clear leader so far, with over 13°C of temperature difference to the NZXT X62 and still 6°C better off than the 280mm H115i Pro RGB.
Once again, we load up the overclocked profile and repeat the test, this time the CPU consumes around 160W of power; the Corsair barely breaks a sweat with all 6 cores reaching an average of 57.5°C. That drives a huge void between the H150i Pro and the Kraken X62 of over 16°C with like-for-like room temperatures. The H115i Pro RGB performed slightly better once overclocked, but acoustics may play a pivotal role here.
Over on the following page, we see how much noise was generated during these results.
Benchmarks – Acoustic Results
As mentioned on the previous page, we’ve made some recent changes to our cooling department and the testing methodology. Therefore our results graphs are starting from fresh – we’re working tirelessly to populate these graphs, but we hope you can appreciate that these results must be done fairly, and more importantly, correctly.Perhaps even more important than thermal performance is the acoustic qualities of a CPU cooler; it’s all well and good having a cool CPU, but if you can’t hear yourself think while it’s running, it’ll soon wear thin.
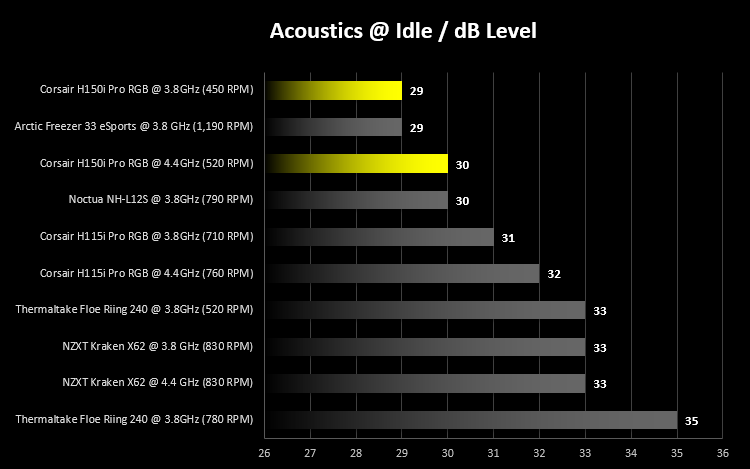
We take a look at acoustics while idle, with the CPU at stock clocks and overclocked. The Corsair H150i Pro can turn its fans off entirely, but for fairness, we used the Balanced profile within the Corsair Link software. Once the fans have switched off entirely the noise dropped to 25dB, the noise was coming from the pump only.
The Balanced profile spins the ML120 fans at 450 RPM at stock, with them bumping up slightly to 520 RPM when overclocked to 4.4GHz.
Our acoustics tests show this cooler to be tied as quietest with the Arctic Freezer, with the noise only increase by a solitary dB when overclocked. Again, excellent performance at idle.
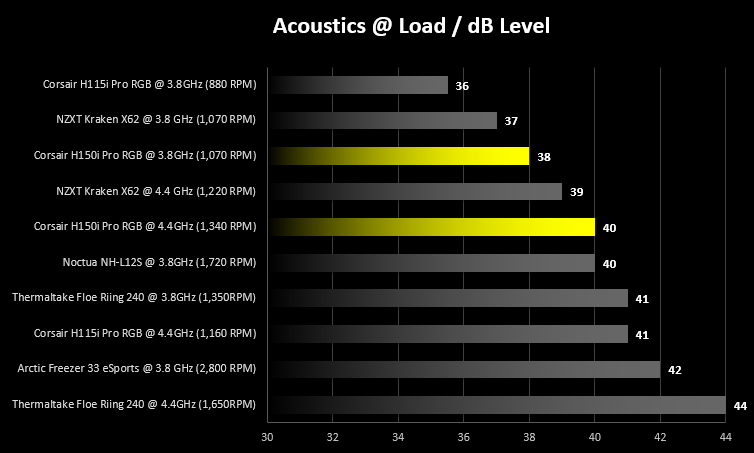
Moving onto our load tests, we read the noise levels after a 30 minute run of AIDA64’s Stress Test facility. The NZXT has a chance to flex its muscles here, with those larger 140mm fans, however the Corsair’s cooling performance does negate these small differences in noise levels. You can draw your own conclusions from this graph.
Conclusion
The acoustic results cement this cooler as a solid choice for anyone considering an all-in-one cooling solution, beating the Kraken X62 in the idle tests by a noticeable margin and only just losing out while under load, despite the vast temperature differences. Of course, this can be linked to the three fan arrangement of the Corsair as opposed to the two of the Kraken.With the current trend leaning heavily towards cases with a tempered glass panel, the RGB lighting adds a further canvas to which you can express your favourite colouring style within the system. Many users like to colour-coordinate based on their interests or favourite eSports team; which ever way you choose to set your RGB up, the options are near-limitless.
Priced at £165, the Corsair H150i Pro is aimed heavily at enthusiasts, almost encroaching on the custom-loop market. The performance we saw certainly attempts to warrant the hefty price tag; if you’re looking for big overclocks or just to keep the whole assembly cool, the H150i Pro will take some beating.
Corsair has included three of their ML120 fans, designed to provide high static pressure and high air flow, both of which are vital for pushing air through a tightly-packed radiator. These fans RRP for £19.99 each, so to include three of these further attempts to justify that £164.99 price tag.
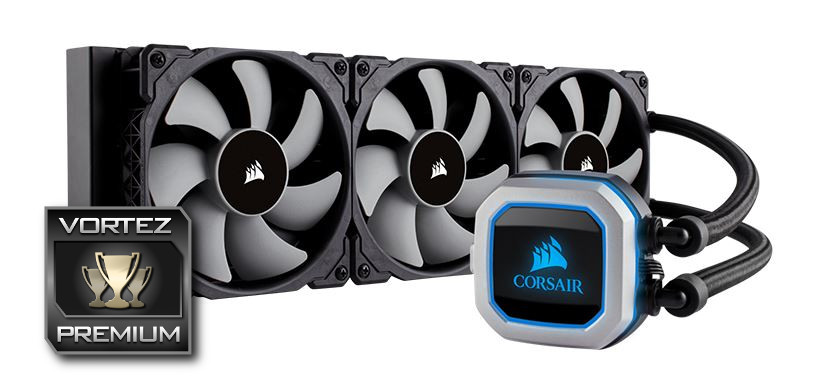
If you have the money, and the space for the 360mm radiator, the Corsair H150i Pro RGB offers incredible performance and looks fantastic.
Pros
+ RGB lighting looks great
+ ML 120 fans perform incredibly well
+ Low overall noise
+ Excellent performance all round
+ Five year warranty
+ Easy installation
Cons
– Wires are a little short
– Multi-zone RGB would be nice
– Pricey at £165
+ RGB lighting looks great
+ ML 120 fans perform incredibly well
+ Low overall noise
+ Excellent performance all round
+ Five year warranty
+ Easy installation
Cons
– Wires are a little short
– Multi-zone RGB would be nice
– Pricey at £165
Click here for an explanation of our awards at Vortez.net.
Stay connected with the Vortez Social Media pages: