New for 2015, we take a look at the Hydro Series H80i GT — a 120mm closed loop liquid cooler which makes use of Corsair LINK and two SP120L fans.

Product On Review: Hydro Series H80i GT
Manufacturer & Sponsor: Corsair
Street Price: £81 GBP / $105 USD
ALCs (All-contained Liquid Coolers) are now regarded as a mainstay in the cooling market, bridging the gap between air cooling and custom water-cooling. Corsair are a name that stand out in this arena, having presented us with a multitude of liquid coolers over the years and today we’re to look at the latest iteration of their 120mm variant which sits inside the Hydro Series.
The Hydro Series H80i GT is a closed loop cooler which adheres to the 120mm specification. This CPU cooler is supplied with two SP120L fans and is configured to offer digital functionality via Corsair LINK software – allowing the user to modify performance, noise and LED lighting.
Corsair on their H80i GT
The Hydro Series H80i GT is a high performance, all-in-one liquid CPU cooler that works with standard 120mm radiator mounts. The extra-thick 49mm x 120mm radiator and dual SP120L PWM fans provide the excellent heat dissipation you need for high performance CPUs. It’s Corsair Link compatible, so you can customize cooling performance, monitor system temperature, and change the color of the RGB LED lighting.
Technical Specifications
Materials: Copper, aluminium
Fan Specifications: 2x 120mm
Compatibility:
Intel™ LGA 1150, 1155, 1156, 1366, 2011, 2011-3
AMD™ sockets FM1, FM2, AM2, AM3
Radiator dimensions: 154mm x 123mm x 49mm
Fan dimensions: 120mm x 120mm x 25mm
Fan speed: 2435 +/- 10% RPM
Fan airflow: 70.69 CFM
Fan static pressure: 4.65 mmH2O
Fan noise level: 37.7 dB(A)
Warranty: Five years
Fan Specifications: 2x 120mm
Compatibility:
Intel™ LGA 1150, 1155, 1156, 1366, 2011, 2011-3
AMD™ sockets FM1, FM2, AM2, AM3
Radiator dimensions: 154mm x 123mm x 49mm
Fan dimensions: 120mm x 120mm x 25mm
Fan speed: 2435 +/- 10% RPM
Fan airflow: 70.69 CFM
Fan static pressure: 4.65 mmH2O
Fan noise level: 37.7 dB(A)
Warranty: Five years
Packaging, Bundle & Fans
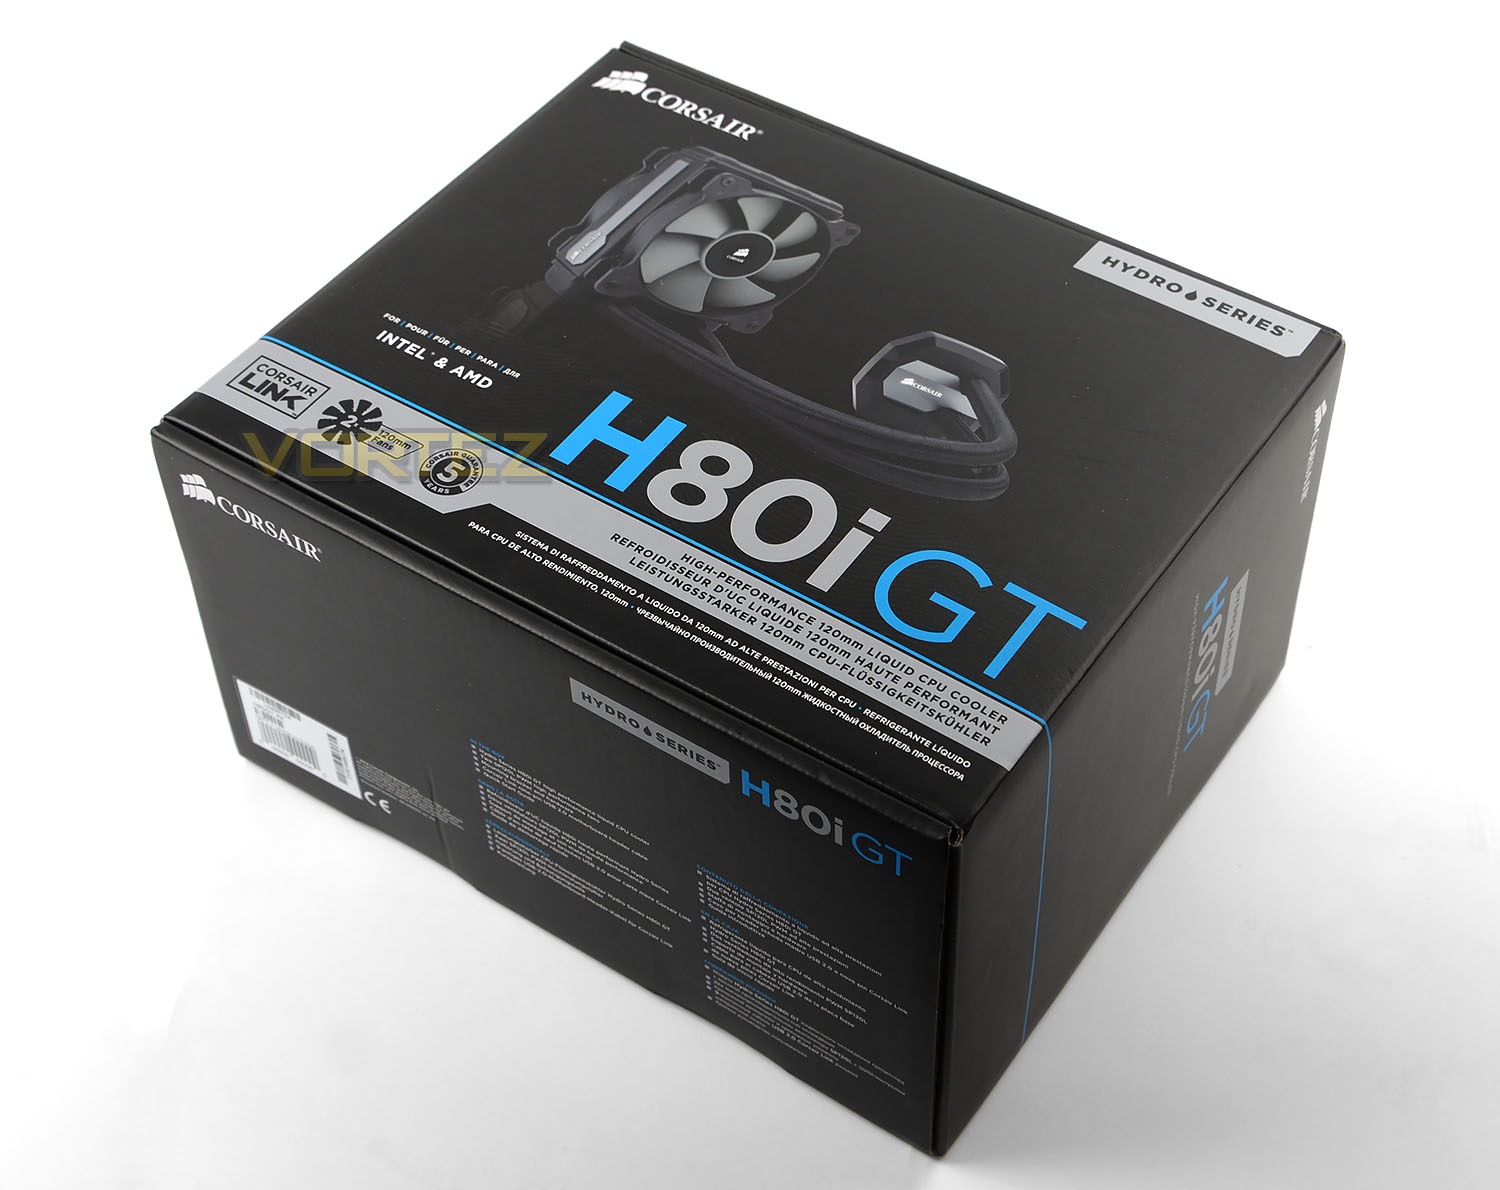
H80i GT arrives in the usual Corsair packaging; the box is very well-designed with a depiction of the product on the front and all of the fundamental features listed. Techncial details can be found on the sides and reverse for those wanting to discover more about the cooler.
Inside, all of the components are encased with a cardboard tray and covered in plastic to prevent any damage during transit.
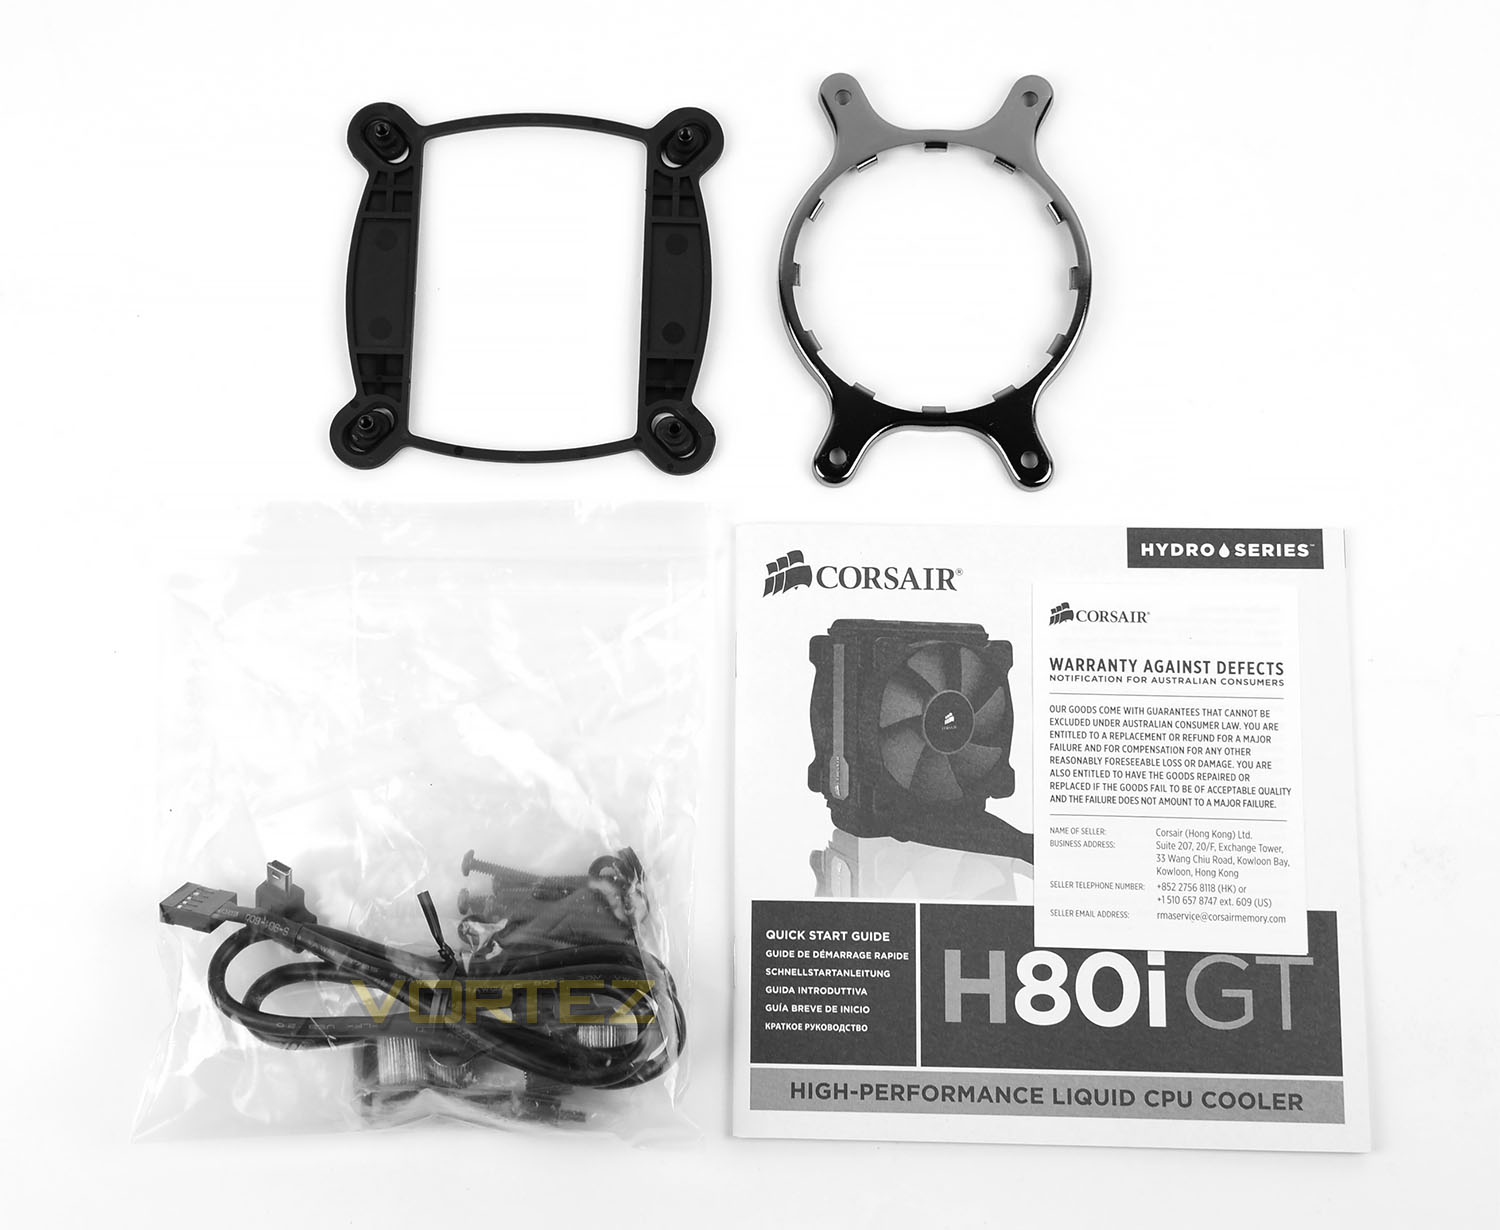
Corsair has given H80i GT support for a wide-selection of different socket types including:
Intel™ LGA 1150, 1155, 1156, 1366, 2011, 2011-3
AMD™ sockets FM1, FM2, AM2, AM3
As well as the mounting kit for the different sockets, there are also items such as thermal paste, Corsair LINK USB header cable, instructions guide with warranty details and screws for mounting the radiator and fans to the case.
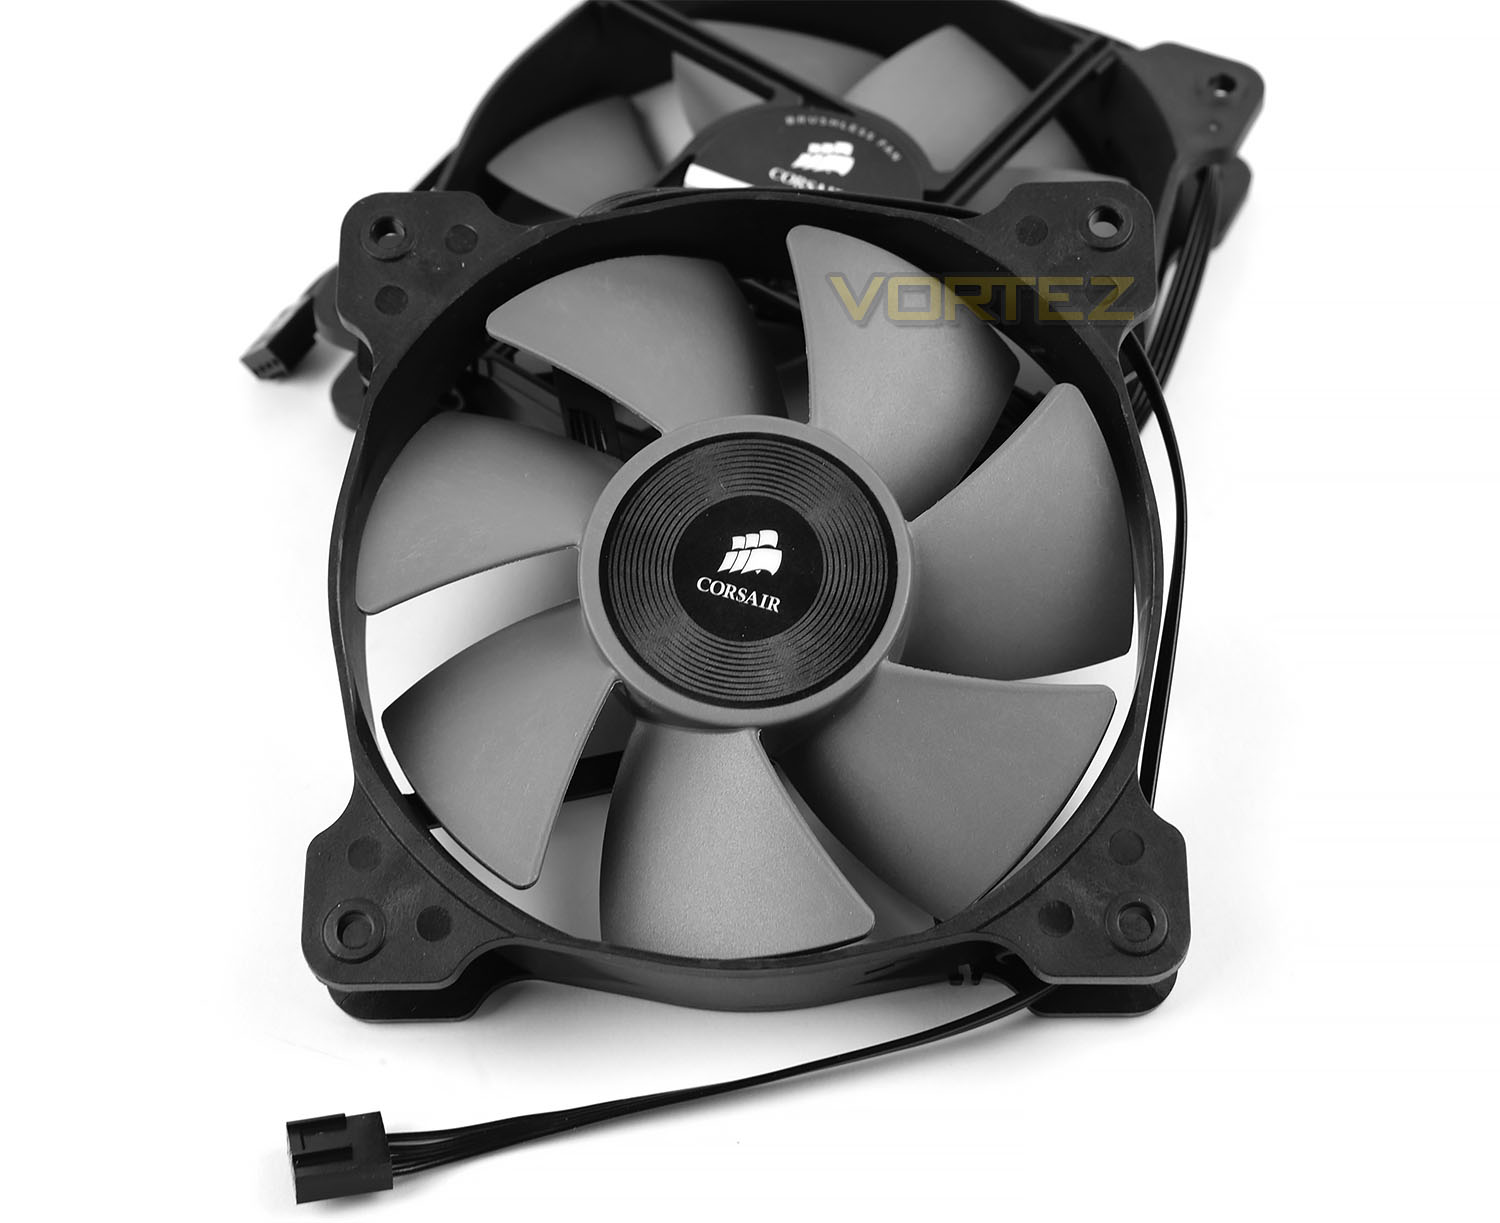
Due to the dimensions of the H80i GT radiator, Corsair has supplied two SP120L cooling fans which as their name implies are 120mm in size.
These fans are a seven-blade design and are PWM ready – allowing up to 2600RPM. The fan speeds can of course be modified using the Corsair LINK software. Each fan uses a 3-pin header cable which connect to the cables running from the H80i GT pump.
Closer Look
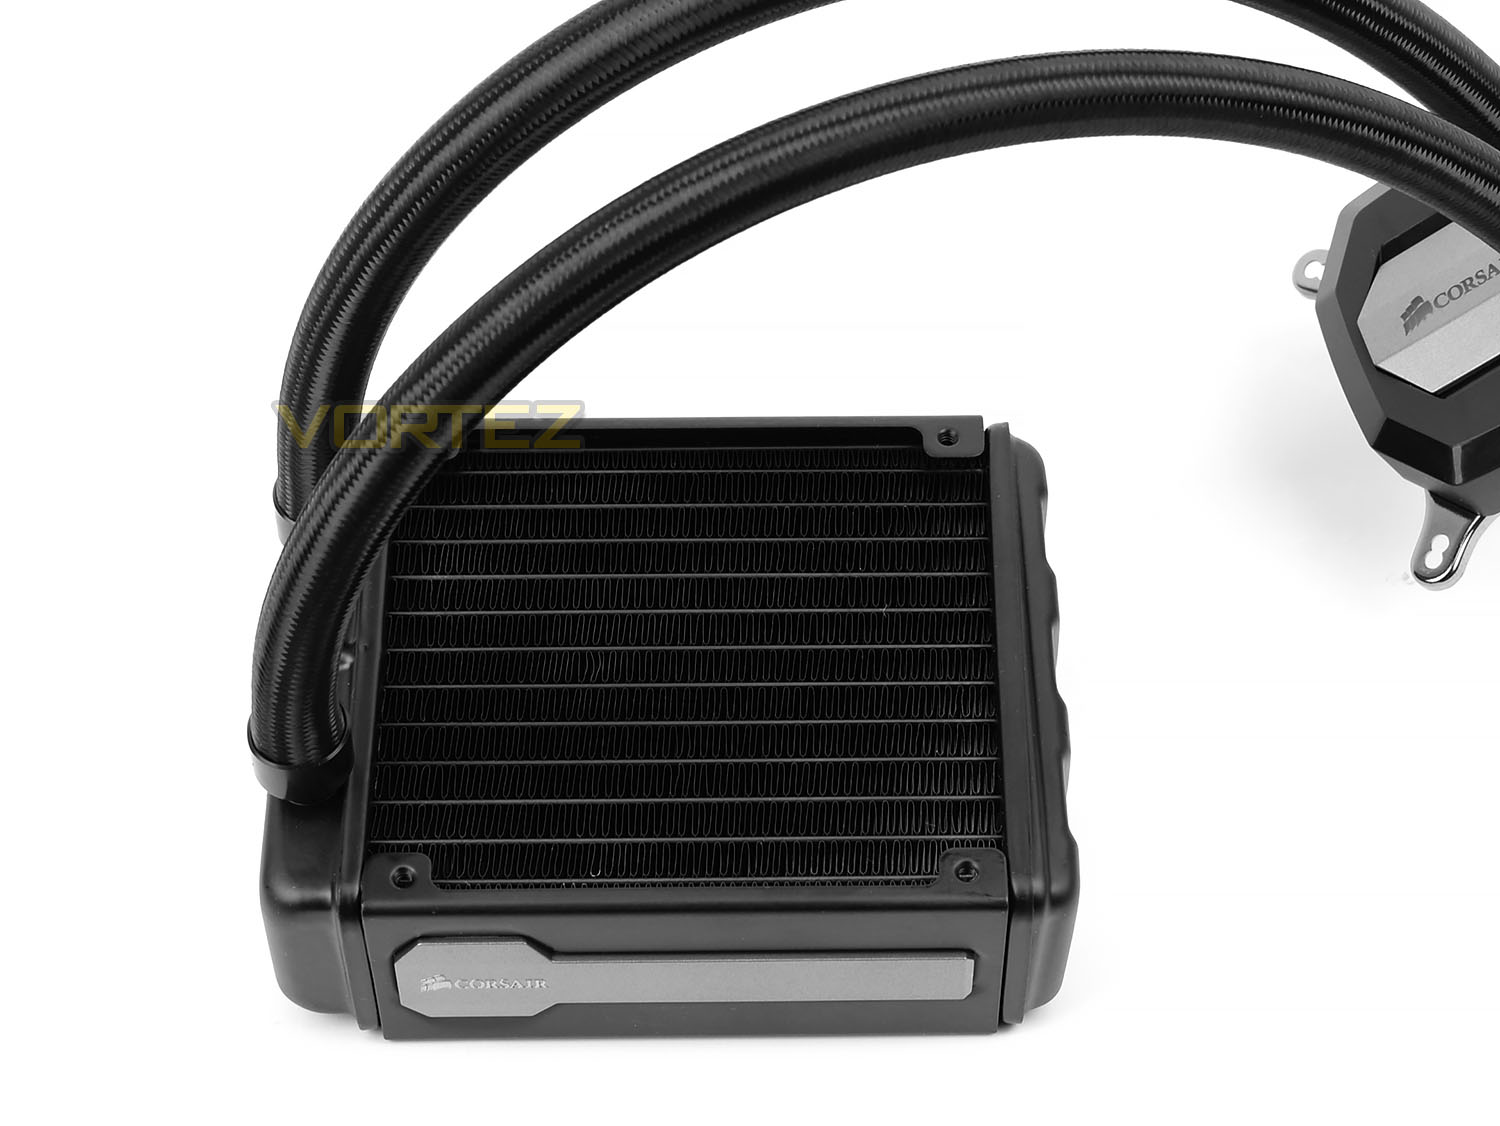
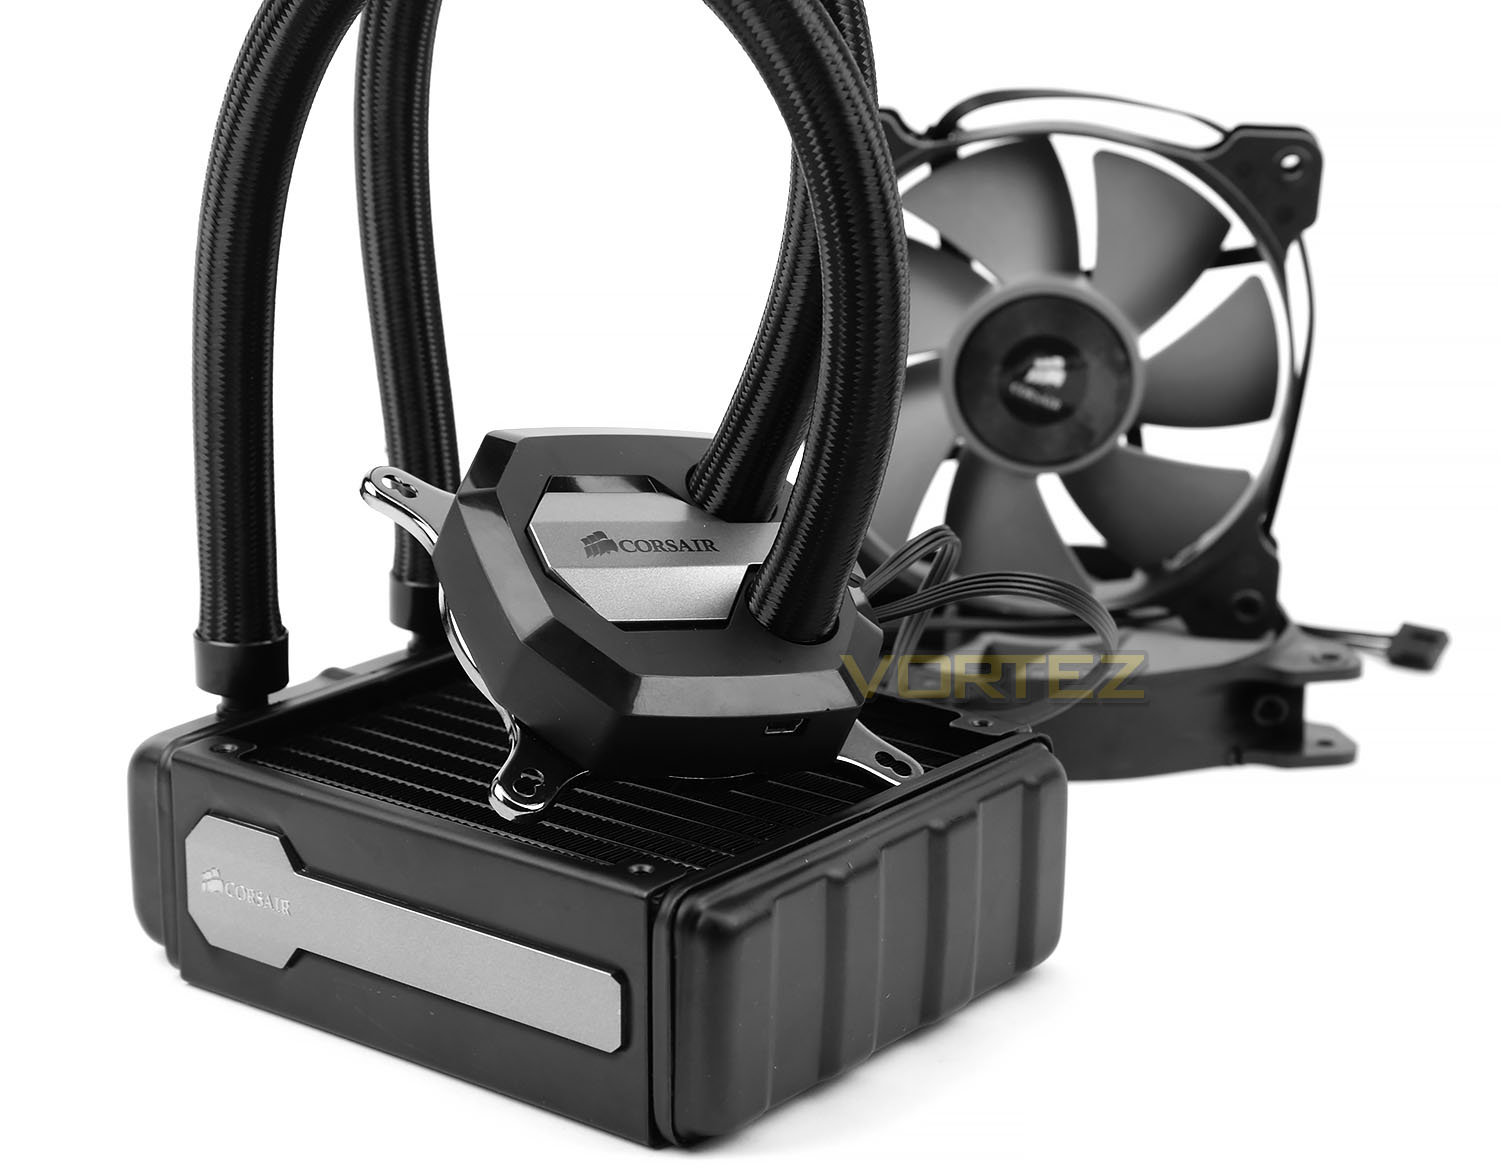
H10i GT utilises a 120mm radiator which actually has the dimensions of 154mm x 123mm x 49mm. This radiator is aluminium and features the new styling to which Corsair are using on all their 2015 radiators – a gun metal strip runs down each side to add depth.
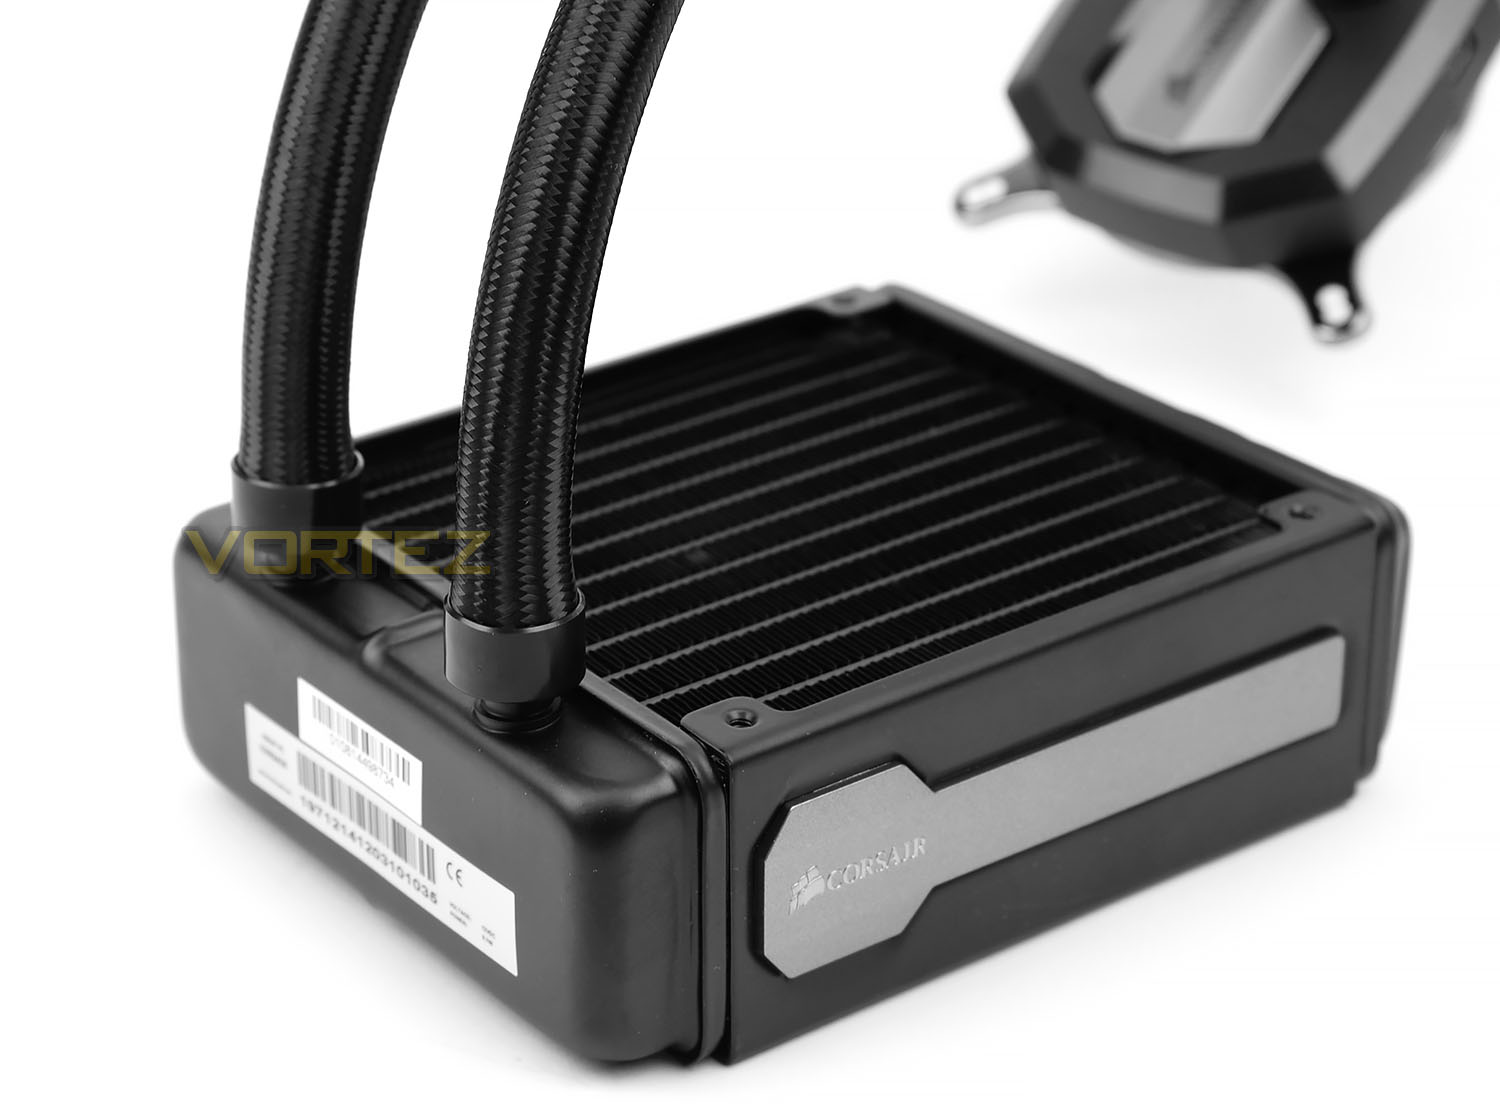
Observing the hose in close detail we can see that Corsair has used their premium nylon solution which gives the appearance of looking woven. This tubing is thick and yet still pliable – flexing in the direction to which the pump needs to be positioned.
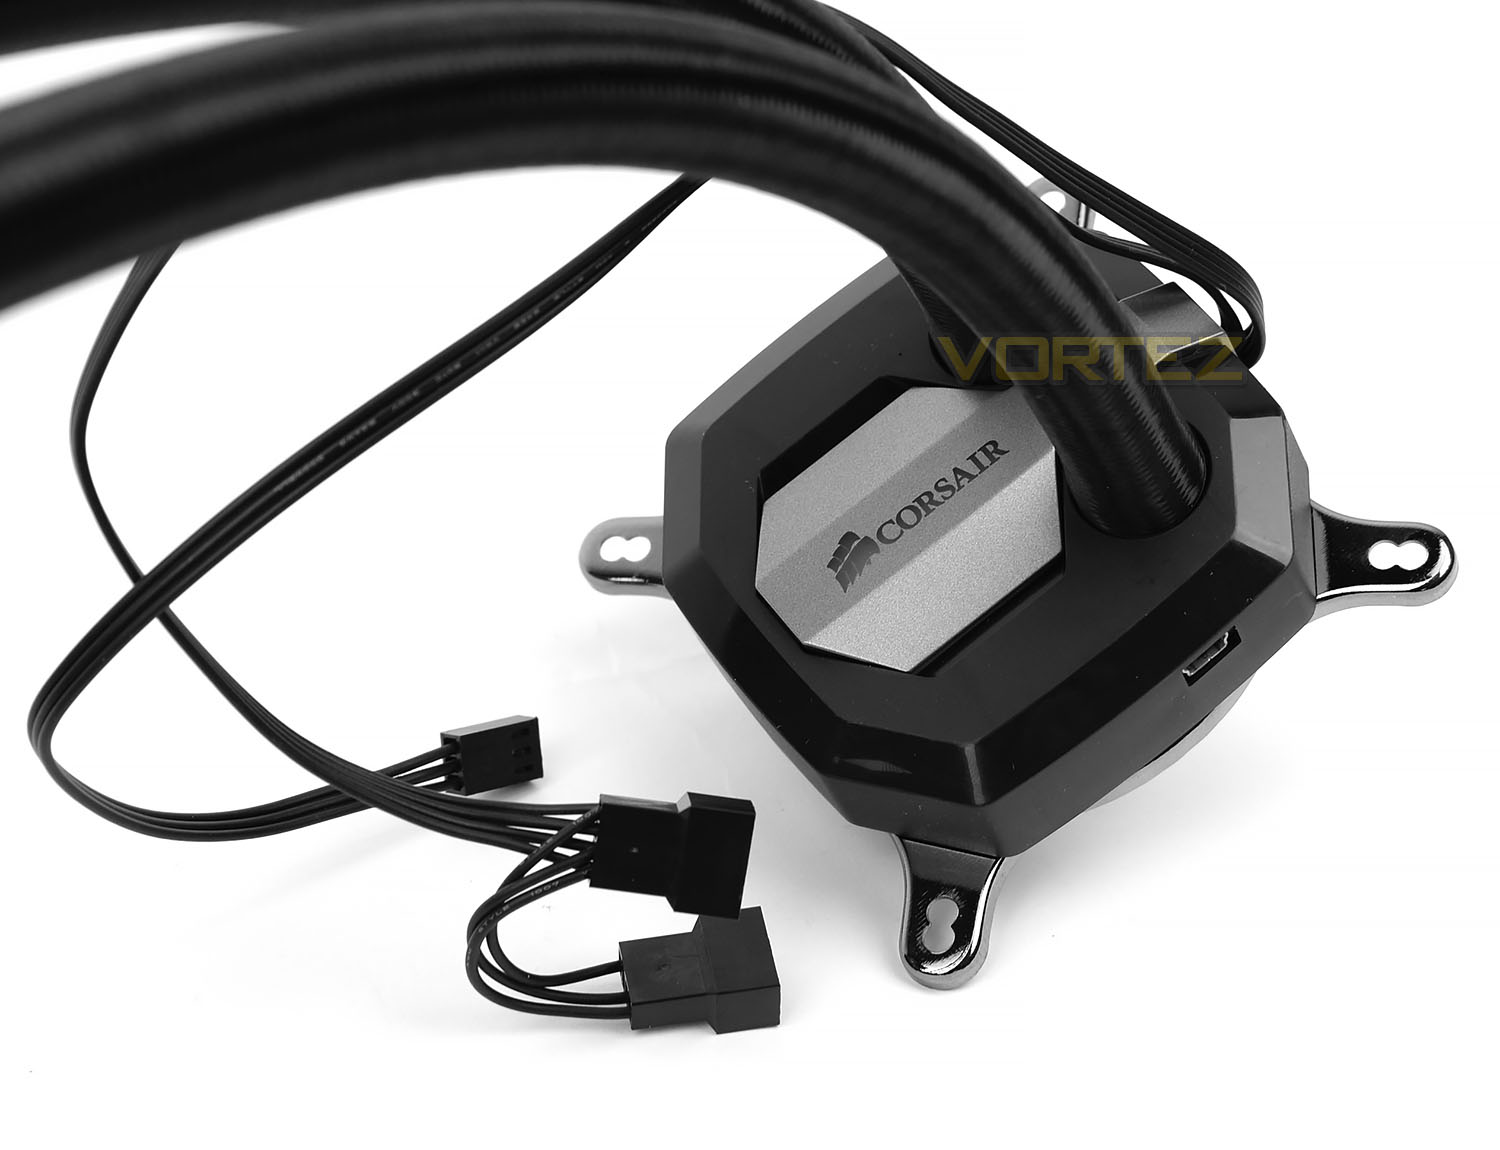
Along with new tubing, H80i GT also has a revamped pump which is significantly bigger than the original H80i. The hosing feeds directly into the top-side of the pump rather than to the edge with pivot points and makes use of another gunmetal plate with the Corsair insignia clearly in sight. This logo features an RGB LED which can be modified inside the Corsair LINK software.
Other things to note about the pump is the micro USB slot which works in conjunction with the supplied Corsair LINK USB header cable – this allows the cooler to interface with the operating system and establishes a digital connection. Feeding into the pump is a 3-pin header to give the pump its power and two fan controller cables – both SP120Ls will join to these connections to allow the software to adjust the fan speed.
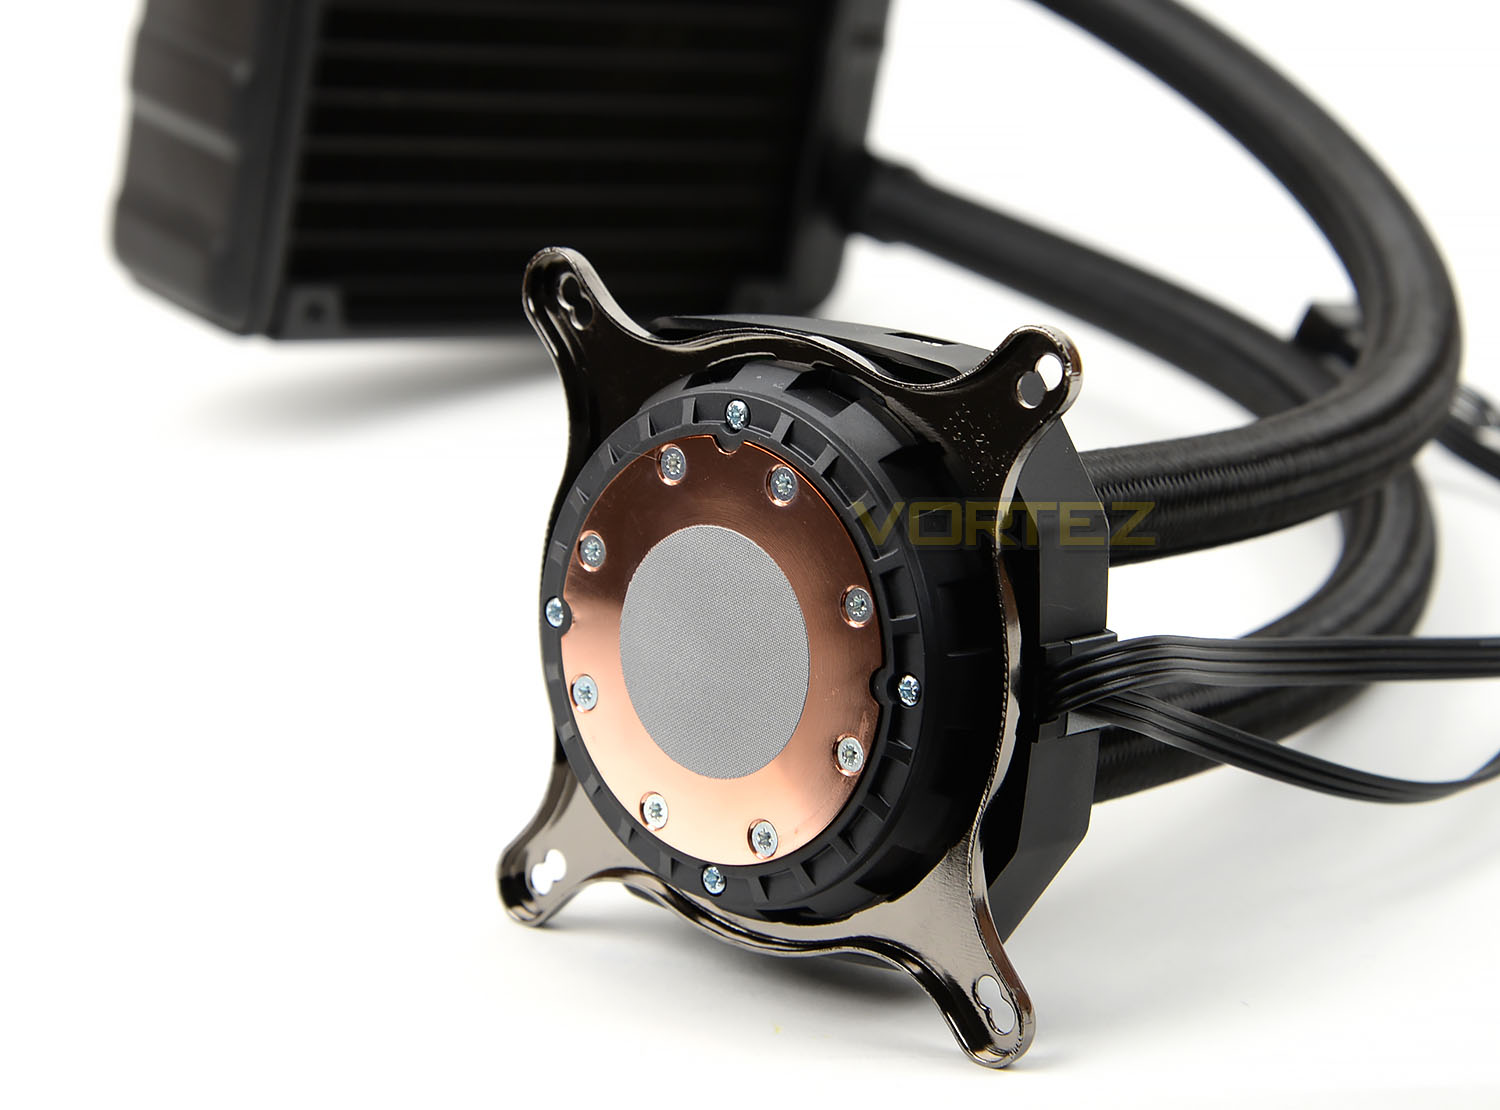
On the underside of the pump we have the baseplate/block. This is circular in shape and is constructed of copper. Corsair has supplied a thin layer of thermal compound paste so that users can get up and running without having to apply this to the CPU themselves. This also takes out of the equation the need to squeeze out the correct amount of paste, this layer is precise and will give optimum results.
Installation Process & Memory Clearance
For all our cooling reviews we test using the LGA 2011 socket and in this section we’ll be demonstrating how H80i GT is installed on this particular configuration.
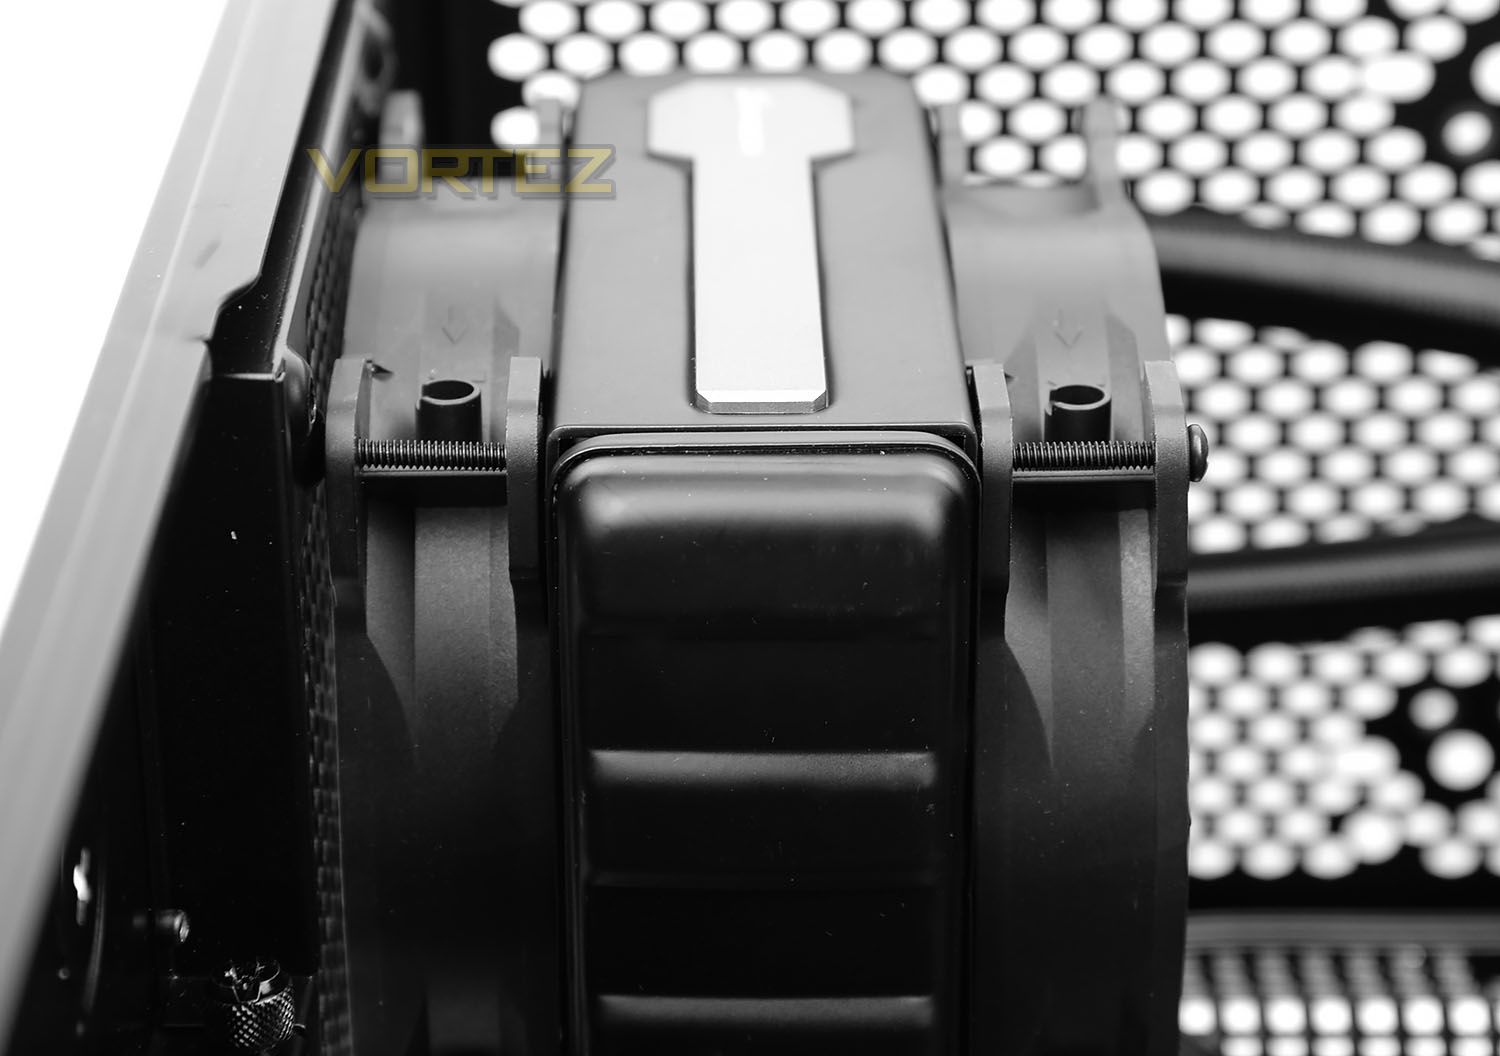
STEP 1
Depending on how much space you have, it might be advisable to swap step one and two around. To begin the installation, the rear exhaust cooling fan is removed from our case and we line up the radiator/fan with the mounting holes and attach screws from the reverse of the case through the fan and radiator. It’s important to mount the first fan so that the airflow is direction out of the case (blowing away from the radiator). Once the first fan and radiator are in place, you can then apply the second fan – making sure the airflow is directed towards the radiator. Again, four long screws are used to pass through the fan and radiator.
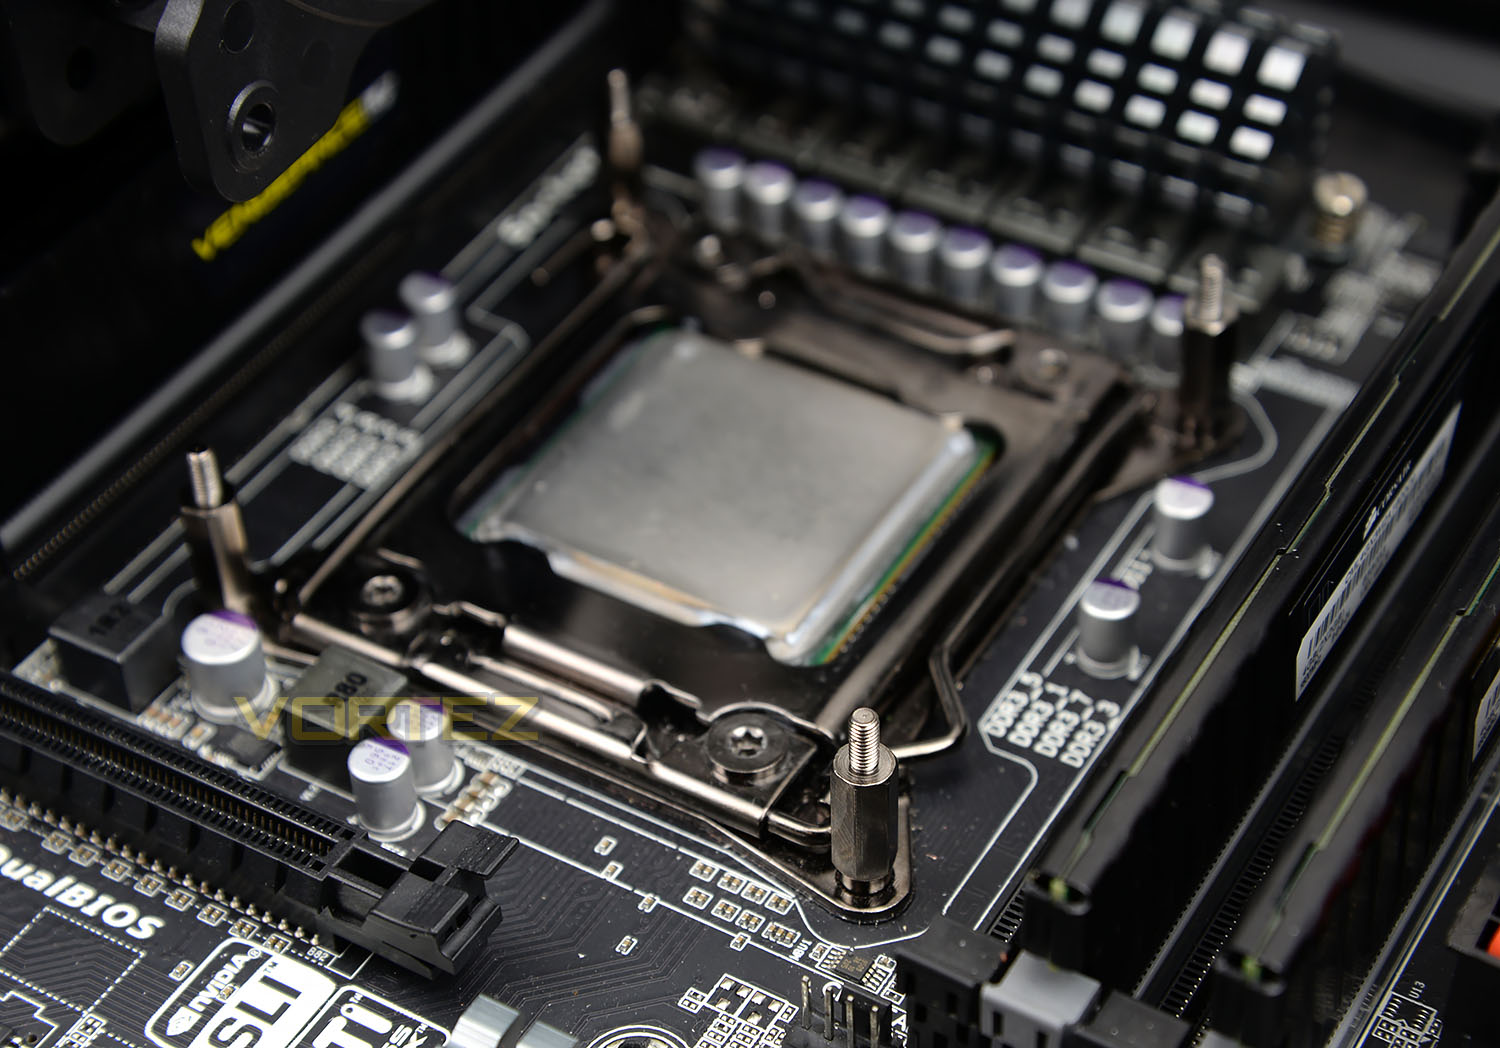
STEP 2
Next, we apply four standoff screws to the outer socket plate, ensuring they are nice and tight.
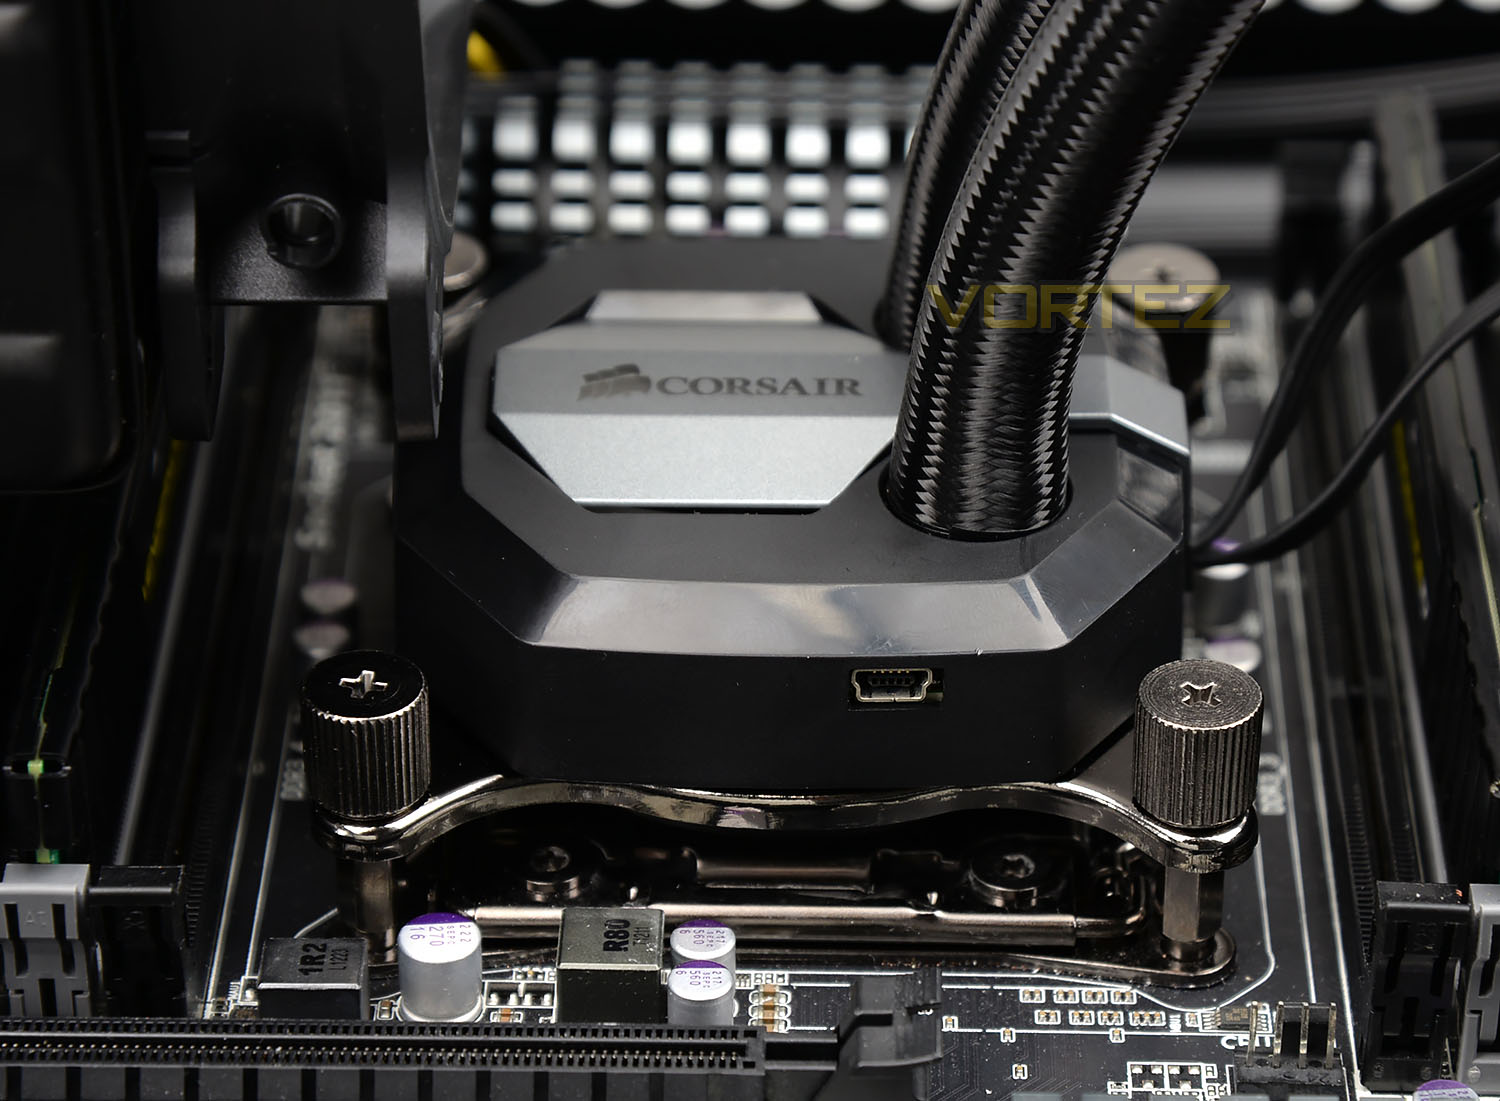
STEP 3
The pump block is now ready to be installed. If you’ve already used the cooler before, you will need to re-apply thermal paste but if this is the first occasion – there is already paste supplied by Corsair. The block just needs to be placed over the CPU, with the mounting holes correctly aligned with the standoff screws. Once this is done, the thumbscrews can be applied to the four threads. Care should be taken to tightened in a diagonal sequence so that even pressure is applied to the CPU.
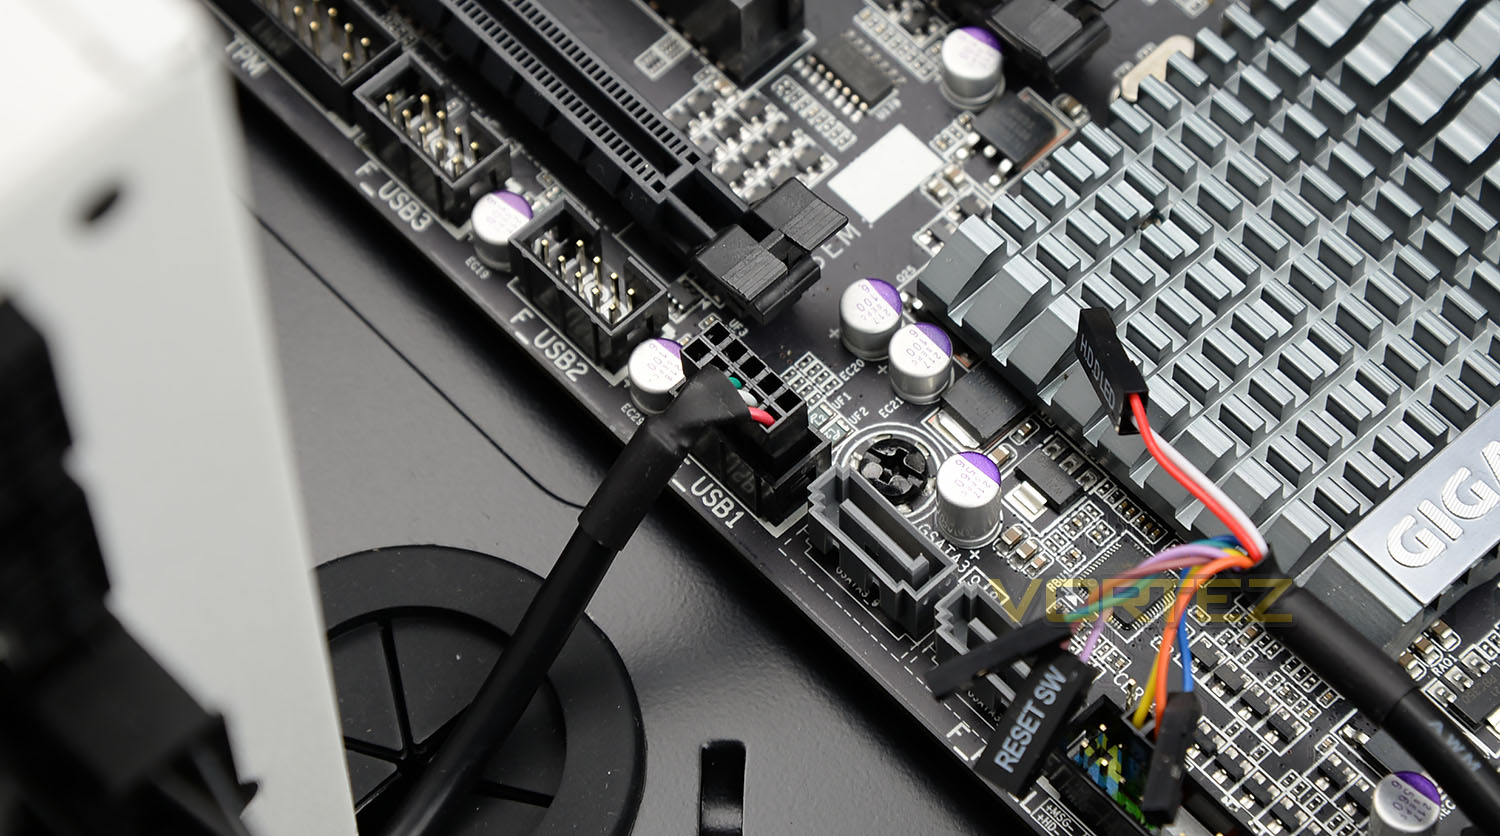
STEP 4
The last step is to connect the pump cable to the CPU fan header on the motherboard and connect the cooling fans to the connectors coming from the pump. To be able to use the Corsair LINK software its necessary to connect the micro USB to USB header cable.
Memory Clearance
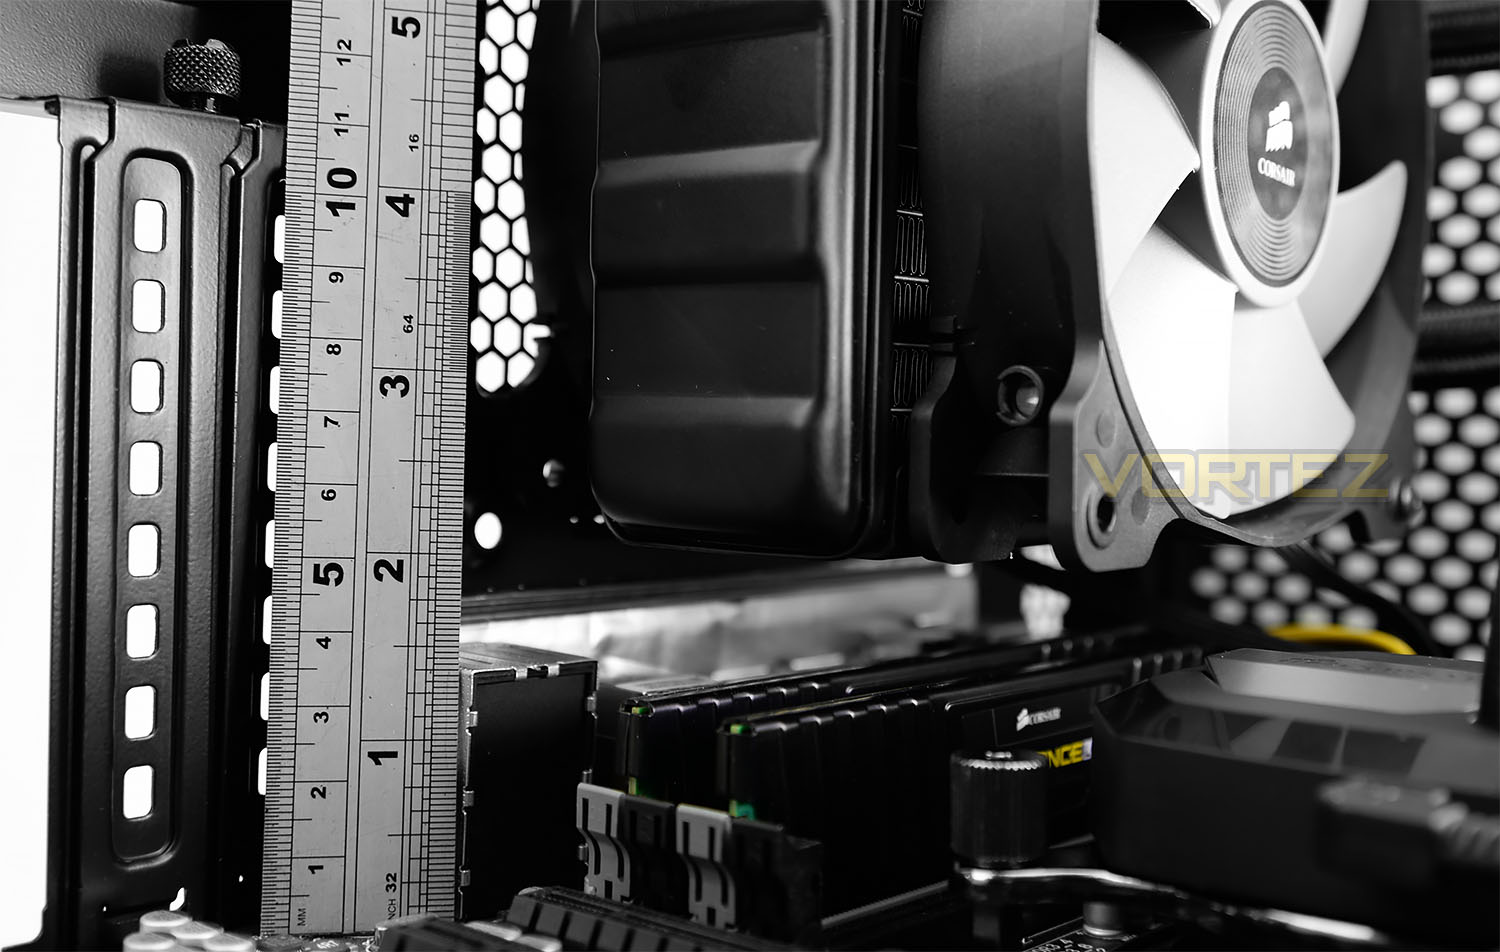
Since using an X99 motherboards have memory slots on the side nearest to where the cooler is installed, it’s important to observe the clearance limitations. There is approximately 5cm of space between the bottom of the board and the bottom of the radiator/fan configuration – some taller kits could have a problem fitting.
Test Setup & Methodology
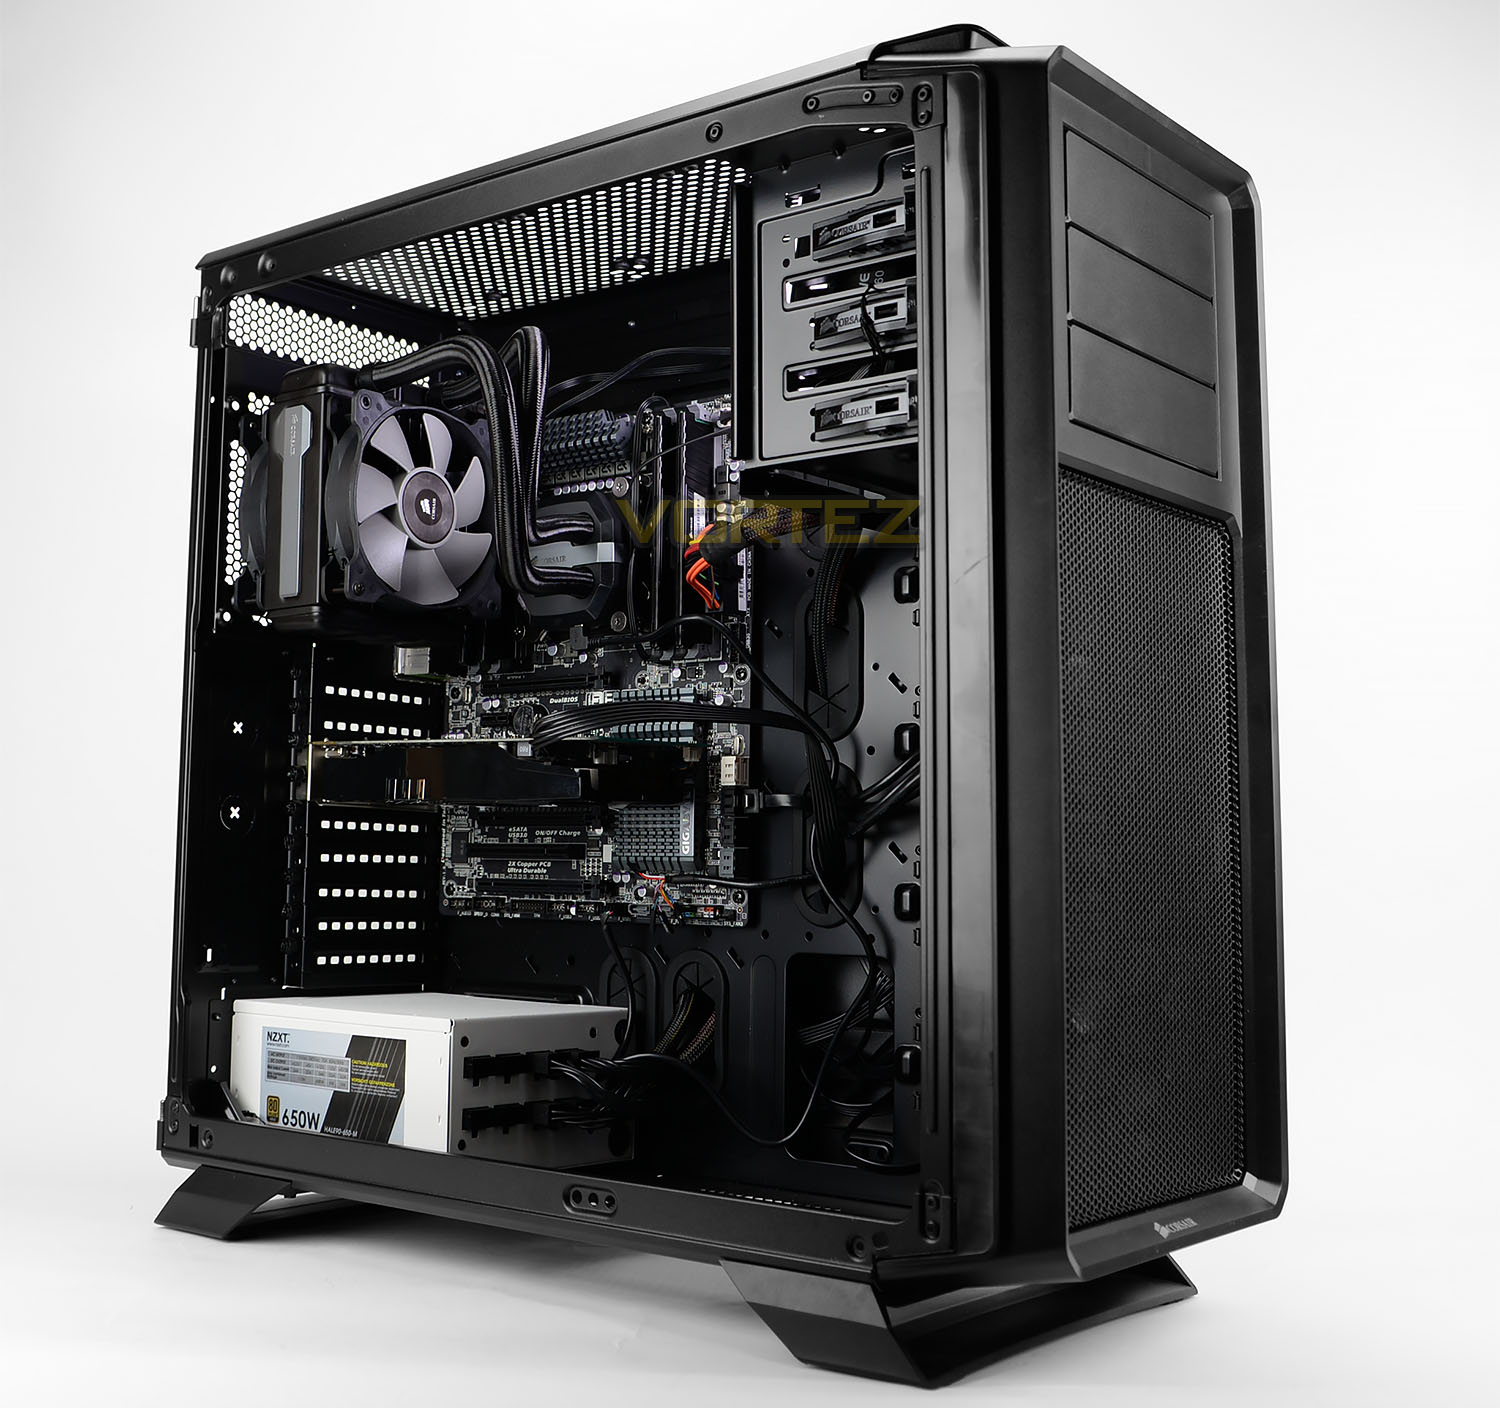
Test System
CPU – Intel Core i7-3930K (3.6GHz)
Motherboard – GIGABYTE X79-UP4
Memory – 8GB Corsair Vengeance LP 1600MHz CL9
Graphics – Sapphire Radeon HD 6850 1GB
PSU – NZXT Hale90 650W
Hard Drive – Kingston HyperX 240GB SATA III SSD
Case – Corsair Carbide 760T
Motherboard – GIGABYTE X79-UP4
Memory – 8GB Corsair Vengeance LP 1600MHz CL9
Graphics – Sapphire Radeon HD 6850 1GB
PSU – NZXT Hale90 650W
Hard Drive – Kingston HyperX 240GB SATA III SSD
Case – Corsair Carbide 760T
CPU Coolers
Alpenföhn K2 (120mm Wingboost: 500-1500RPM, 140mm Wingboost: 300-1100RPM)
Thermalright SilverArrow SB-E Extreme (Dual TY-143 fans – 600-2500RPM)
Corsair Hydro Series H100i (Dual 120mm fans – up to 2700RPM Push Config)
Noctua NH-U14S (Single 140mm cooling fan – 300-1500RPM)
Corsair H75 (Dual 120mm cooling fans – 600-2000RPM)
CRYORIG R1 Ultimate (Dual 140mm cooling fans – 700-1400RPM)
Corsair Hydro Series H105 – (Dual 120mm fans – up to 2700RPM Push Config)
Noctua NH-D15 (Dual 140mm cooling fans – 300-1500RPM)
LEPA LV12 (Single 120mm cooling fan – 300-2200RPM)
CRYORIG H5 Universal (Single 140mm cooling fan – 600-1400RPM)
Fractal Design Kelvin S24 (Dual 120mm cooling fans – 800-1700RPM)
Noctua NH-U9S (Single 92mm cooling fan – 800-2000RPM)
Corsair Hydro H110i GT (Dual 140mm cooling fans – 800-2200RPM)
NZXT Kraken X61 (Dual 140mm cooling fans – 800-2000RPM)
Corsair Hydro H80i GT (Dual 120mm cooling fans – 800-2600RPM)
Program Suite
Real Temp – Maximum temperature analysis
LinX 0.6.4 – Applies thorough stress test to CPU
CPU-Z – Confirmation of CPU frequency/voltage
AIDA64 Extreme Edition – Confirmation of temperatures/fan speeds
Testing Methodology
H80i GT will be set to PWM mode (Default) and Maximum (100% fan speed) to provide a good overview of performance.
Testing will be based on temperatures recorded by Real Temp after 20 passes of LinX stress test. The maximum absolute temperatures will be recorded after the test and averaged over the 6 cores. The delta is then calculated by subtracting the temperature recorded near the intake fans from the average temperature calculated. Tests are conducted with the Intel i7 3930K at its default 3.6GHz stock speed and overclocked to 4.6GHz @ 1.42V. The tests are done inside the Corsair Graphite 760T chassis to simulate real world conditions. To keep the tests standardised we are using Noctua’s NT-H1 thermal paste on all coolers.
CPU coolers are reviewed as they come out of the box – with their factory cooling fans, as the manufacturer intended and as the consumer expects.
Additional tests include a passive test where the cooling fans are taken away from the heatsink and a comparison between the cooler used with stock thermal paste against our Noctua NT-H1 paste.
A kind thank you to Noctua for supplying us with NT-H1 thermal compound.
Benchmarks: Stock Performance
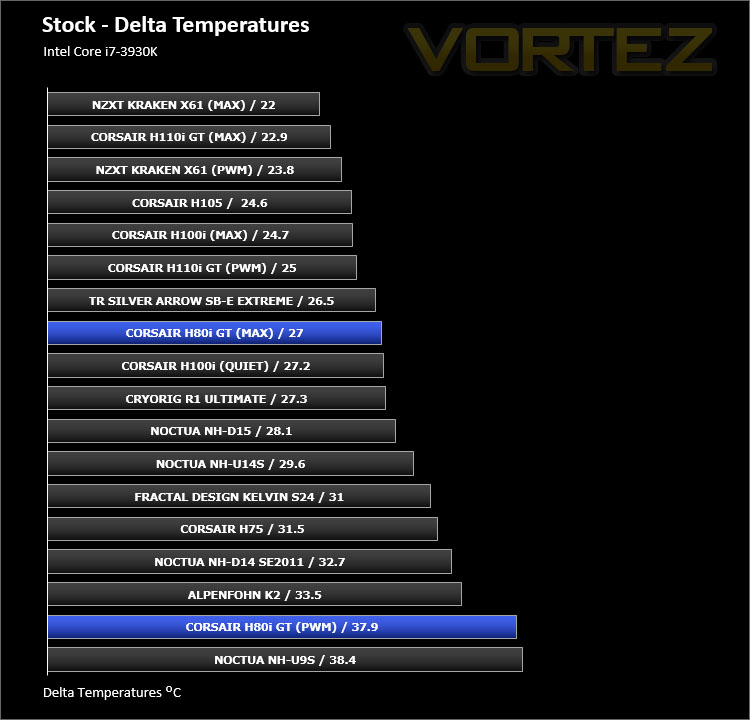
Using the H80i GT with the CPU at its stock settings presents us with an interesting set of results. By having the fans set at default (PWM) there is approximately 10-11C in difference when the fans are set to maximum speed. H80i GT competes with all of the flagship air CPU coolers when the fan speeds are 2000RPM+ but obviously noise is something that has to be compromised on. We suggest the sweet spot is around 1500-1800RPM for a good balance of performance and tolerable noise.
Corsair H80i GT Fan Speed: MAX = 2500RPM / PWM = 1200RPM
Benchmarks: Overclocked Performance
Applying a substantial overclock to the CPU creates a tough battle but H80i GT does an admirable job with the fan speeds set to maximum. The cooler appears to come into its own by stepping above the performance of the best air coolers on the market. Unfortunately, having the fans set to default with such a big overclock only results in high temperatures – which is understandable at just 1400RPM. For this kind of scenario we need at least 1800-2000RPM.
Corsair H80i GT Fan Speed: MAX = 2500RPM / PWM = 1400RPM
Benchmarks: Passive Performance
As we found with other closed loop solutions, removing the cooling fans and using H80i GT in a passive test results in failure due to the temperatures reaching dangerous levels.
Benchmarks: Thermal Paste Comparison
Most CPU coolers come accompanied with thermal paste provided by the manufacturer. For our CPU cooling tests we use Noctua’s NT-H1, so to offer up some interesting analysis we test the thermal paste pre-applied to this closed loop cooler against NT-H1 to see which gives the best results during stock and overclocked performance and the results really aren’t that much different at all – the results are marginal.
Conclusion
Corsair’s expertise in the closed loop arena is clearly evident from the latest batch of Hydro series coolers – through the generations of coolers many aspects have been refined and along with its counterparts, the H80i GT is an impressive product.
Observing the likeness to the older H80 and new H80i GT will identify how far Corsair has come. The styling and build quality on the GT is definitely notable. The radiator looks and feels like a quality piece of kit with its gun metal accent plates and the new nylon/woven tubing. The attention to detail on H80i GT is encouraging to see.
Being able to install this cooler in next to no time is another highlight. There are very few steps involved in attaching this closed loop to your system and inside your case and the obvious benefits are there for clearance around the socket – though when using an X99 motherboard, tall memory kits do have a slight limitation due to the extension of the radiator/fans.
On the performance front the H80i GT delivers good results. Using the cooler in default (PWM) mode will give lower noise and still attain decent results but if a significant overclock is required, it’s necessary to use a different profile – perhaps choosing performance or even a defined RPM preset. Adjusting the cooling fans to 100% offered up some impressive results and certainly shows H80i GT’s valuable position as an alternative to investing in a flagship air cooler.
Costing £81 GBP / $105 USD, H80i GT isn’t a cheap investment but nor does it scrimp on features either. Included are two 120mm cooling fans and of course the added bonus of being digital – allowing the user to fully control noise, performance and lighting.
The Hydro Series H80i GT is another compelling release from Corsair. Styling has almost certainly been refined and on offer is closed loop which packs in plenty of features and performs well.
Pros
+ Visual attractive
+ Great build quality
+ Easy to install
+ Two cooling fans supplied
+ Digital control
Cons
– Tall memory kits could be obstructed with X99 boards
+ Visual attractive
+ Great build quality
+ Easy to install
+ Two cooling fans supplied
+ Digital control
Cons
– Tall memory kits could be obstructed with X99 boards

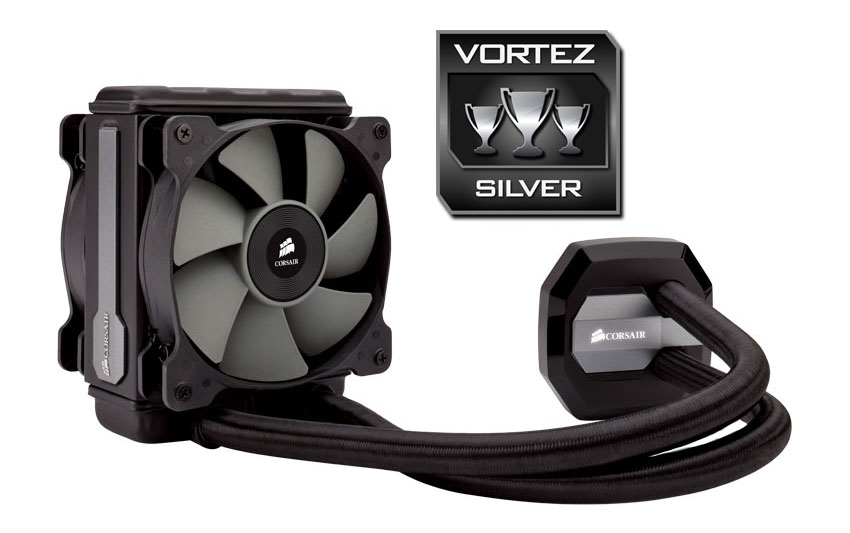
Click here for an explanation of our awards at Vortez.net.