







Newcomer CRYORIG push the boundaries with their first CPU cooler, R1 Ultimate. Can this new heatsink handle the might of Intel’s Core i7-3930K?

Product on Review: R1 Ultimate CPU Cooler
Manufacturer & Sponsor: CRYORIG
Price: £53 GBP / $89.95 USD
In the world of cooling there are numerous brands and products to choose from and for any newcomer, climbing to the top brings with it many challenges. Arriving on the scene last year and ready for the challenge, new kid on the block CRYORIG announced their debut CPU Cooler – R1 Ultimate.
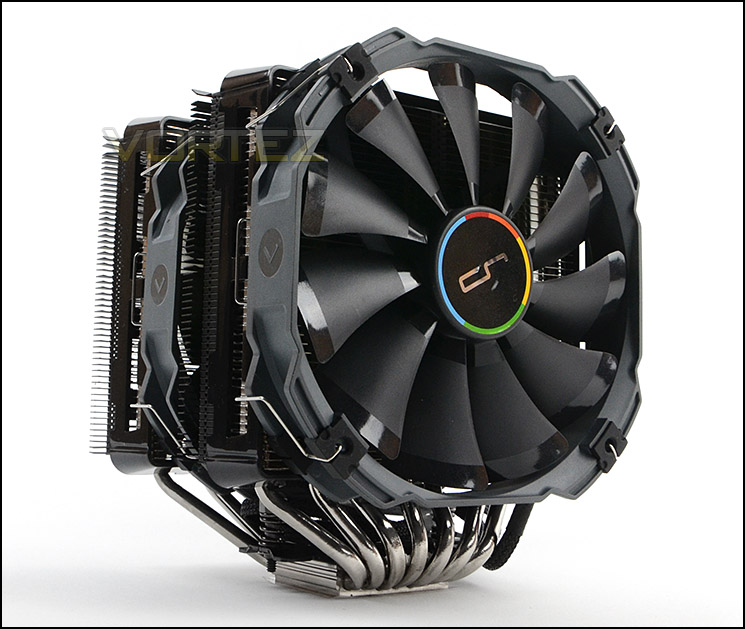
R1 Ultimate uses a dual-tower design which comes accompanied with two 140mm cooling fans – XF140. As previously mentioned this is CRYORIG’s debut CPU cooler which sports new soldering techniques and optimised fin design in a bid to achieve low temperatures across a plethora of socket types.
About CRYORIG
CRYORIG was officially founded in 2013, but took several years in the making. We began our journey right at the start of the first decade of the 2000’s. During what was the most prosperous age of PC DIY and Overclocking. Members of our team have either worked directly or indirectly with brands such as Thermalright, Prolimatech, Phanteks and many more. We ourselves are overclockers and PC modding enthusiasts, with a passion and drive to strive for improvement. With direct knowledge of manufacturing and design as well as holding multiple patents under our collective belt, we decided to make a name for ourselves, and that name is CRYORIG. So what is CRYORIG exactly? CRYORIG is about making the coolest rig possible.
Technical Specifications
HEATSINK SPECIFICATION
Dimension ( with fan )
L130 mm x W142.4 mm x H168.3 mm
Weight ( with fan )
1282 g
Weight ( without fan )
936 g
Heat pipes
6mm heatpipe x 7 units
Front Fin
T = 0.4 mm ; Gap = 2.4 mm
Front Fin Pcs
42 pcs
Rear Fin
T = 0.4 mm ; Gap = 1.8 mm
Rear Fin Pcs
53 pcs
Copper Base
C1100 Pure copper nickel plated
Motherboard to Fin
41.5 mm
L130 mm x W142.4 mm x H168.3 mm
Weight ( with fan )
1282 g
Weight ( without fan )
936 g
Heat pipes
6mm heatpipe x 7 units
Front Fin
T = 0.4 mm ; Gap = 2.4 mm
Front Fin Pcs
42 pcs
Rear Fin
T = 0.4 mm ; Gap = 1.8 mm
Rear Fin Pcs
53 pcs
Copper Base
C1100 Pure copper nickel plated
Motherboard to Fin
41.5 mm
XF140 SPECIFICATION
Dimension
L140 mm x W140 mm x H25.4 mm
Weight
156 g
Rated Speed
700 ~ 1300 RPM ±10 %
Noise Level
19 ~ 23 dBA
Air Flow
76 CFM
L140 mm x W140 mm x H25.4 mm
Weight
156 g
Rated Speed
700 ~ 1300 RPM ±10 %
Noise Level
19 ~ 23 dBA
Air Flow
76 CFM
Packaging, Bundle & Fans
The R1 Ultimate arrives in a nicely designed box which shows a subtle depiction of the cooler on the front. The sides contain information regarding the feature-set, whilst the rear of the box lists the technical specifications for those interested.
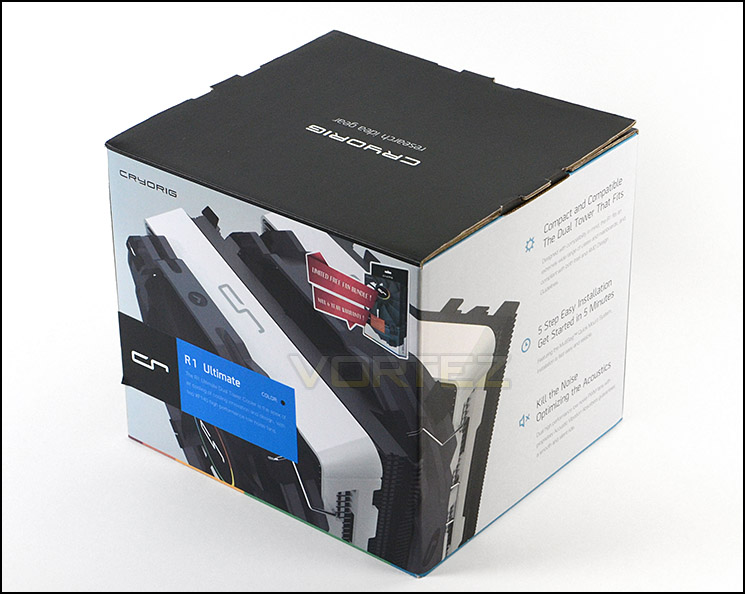
Packaging for R1 Ultimate
Inside the box CRYORIG have carefully separated each aspect of the cooler in specific compartments. With this being their first product release they have certainly moved in the right direction.
R1 Ultimate has support for multiple socket types and thus has respective components for compatibility. All of these parts are supplied in a cardboard tray and there are some additional items to assist with the installation such as a guide and magnetic screwdriver.
The supported sockets are as follows:
Intel: LGA 2011, LGA 1366, LGA 1150, LGA 1155/6, LGA 775
AMD: FM1, FM2, AM3/+
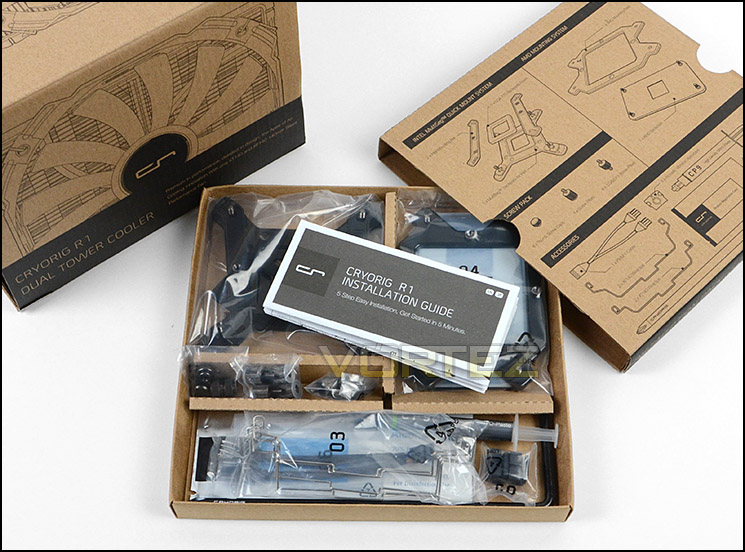
Support for Intel and AMD sockets
Supplied with the heatsink are two CRYORIG XF140 cooling fans. As their name alludes, these fans are 140mm and come with an 11-blade design and are capable of achieving 700-1400RPM. The XF140 features “High Precision Low Noise” sleeve bearings to accomplish good noise : performance ratio. We have to admit, their appearance is very appealing to the eye. The matt/gloss combo and styling is superb.
CRYORIG provide a y-cable so that both fans can run from a single fan header.
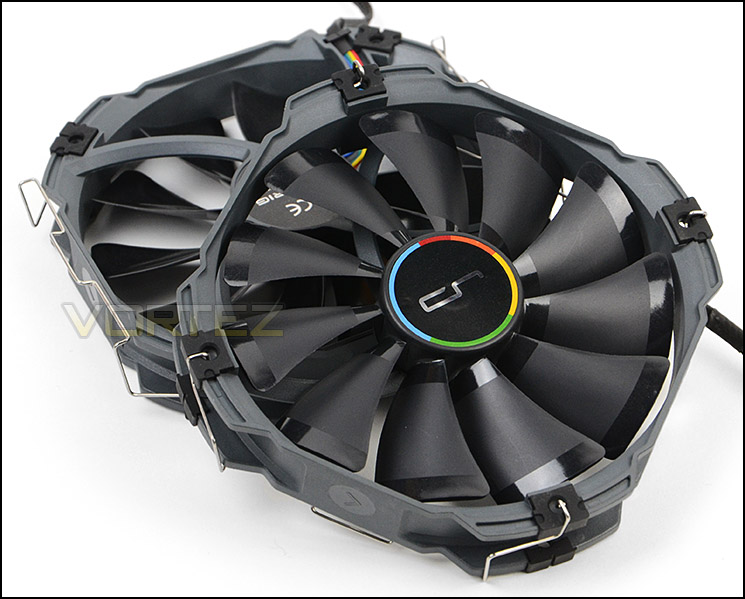
XF140 cooling fans are pleasant on the eye
Closer Look
R1 Ultimate is essentially a dual-tower heatsink but as you can quickly see, there are some significant differences from the conventional tower style of CPU cooler.
CRYORIG have engineered R1 Ultimate to have two fin stacks on either side. The black section features a 1.8mm gap between each fin whilst the silver section a larger 2.4mm. This implementation of what CRYORIG name “Jet Fin Acceleration System” promises to translate to better temperatures by squeezing airflow and increasing exhaust air speed.
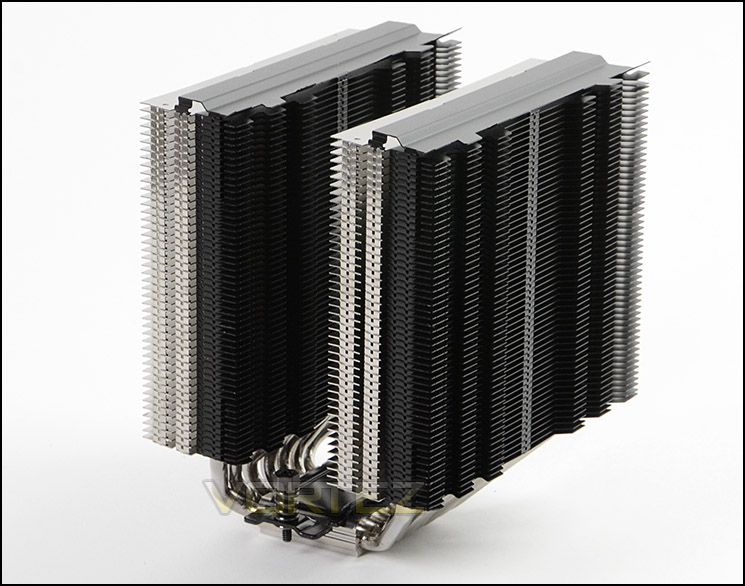
A dual-tower design
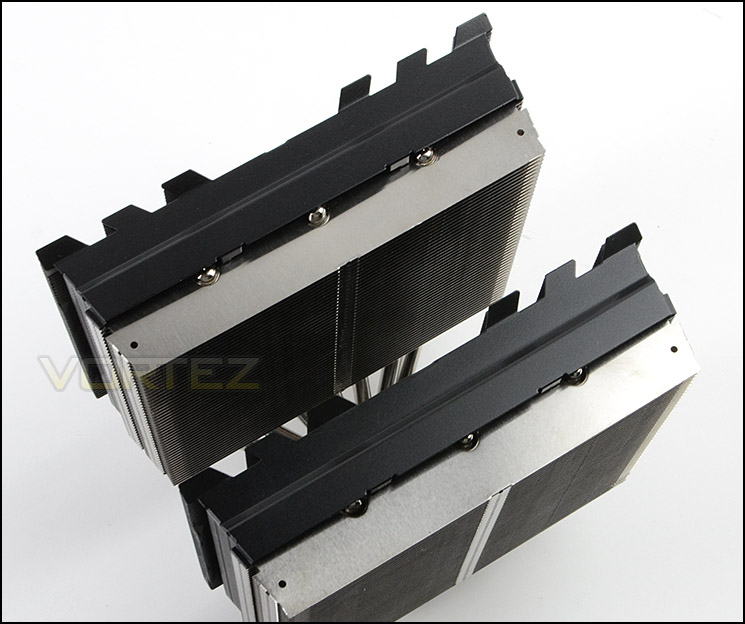
Two fin stacks soldered together
The profile of this fin stack is vastly different to anything we have seen and the black region lends itself to having a varying contour compared to the silver side. Heat spreads out in a radial fashion as opposed to linear (as with most heatsinks). Whether this translates to better and more evenly spread heat conduction remains a mystery at this point but later in the review we will be analysing R1 Ultimate’s performance closely.
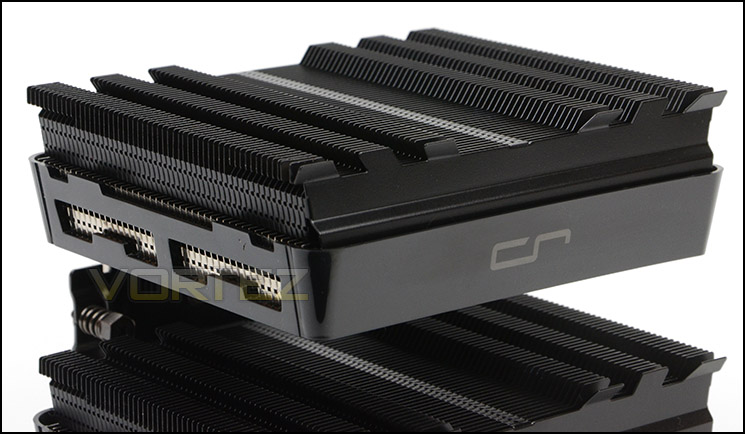
The profile and contour of R1 Ultimate
At the base of our CPU cooler there are 7x6mm copper heatpipes which pass through a copper baseplate furnished with nickel plating. This baseplate is convex and features a dull finish unlike other units which often are highly reflective.
It’s worth noting there are two pre-installed mounting screws attached to the top of the baseplate, these screws have tension springs in order to provide a tight and reliable fit.
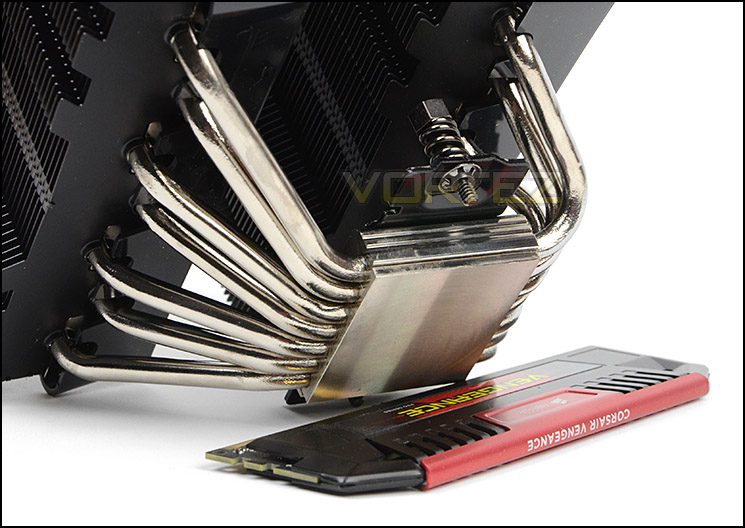
Seven copper heatpipes form the basis
Finally, the cooling fans clip onto the heatsink with some assistance from the plastic covers. Attaching a fan is very easy and we really like the fact that once attached the fan can be pushed up to help clear memory which has taller heatspreaderws. CRYORIG also priovide some additional fan clips for attaching a third cooling fan.
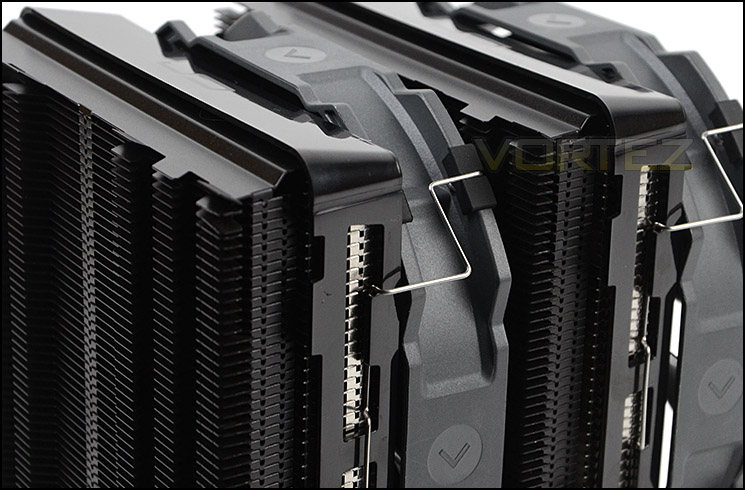
Attaching a cooling fan is easy
Installation Process
In order to demonstrate the installation process for R1 Ultimate we are installing the cooler on the Intel LGA2011 socket.
The first step in the process is to apply four standoff screws into the four corners of the socket boundary plate. Once these have been tightened two brackets must be placed over the screws, in order to achieve the traditional orientation of having the cooling fans face the rear exhaust inside a computer chassis it is necessary to configure them in a horizontal fashion as per our picture. The only other stage left is to apply thermal paste to the CPU, position the cooler over the CPU and tighten the screws. CRYORIG provide a handy magnetic screwdriver to reach each screw (without this you will really struggle) – the screwdriver tool fits down a cavity inside the heatsink.
And in only a few steps you can be up and running with R1 Ultimate, it really is that easy. We’re very pleased by the quality of the cooler itself and the tools/components used to install this CPU cooler, CRYORIG have done a great job.
Installed – Memory Clearance
Having installed R1 Ultimate we can now reveal how this colossal CPU cooler looks when fully installed. As you can see, it dwarfs the motherboard, taking up a substantial amount of space. Pairing it up with a motherboard that has black/grey heatsinks (just like our GIGABYTE board) is a great idea, both components work well in conjunction with each other.
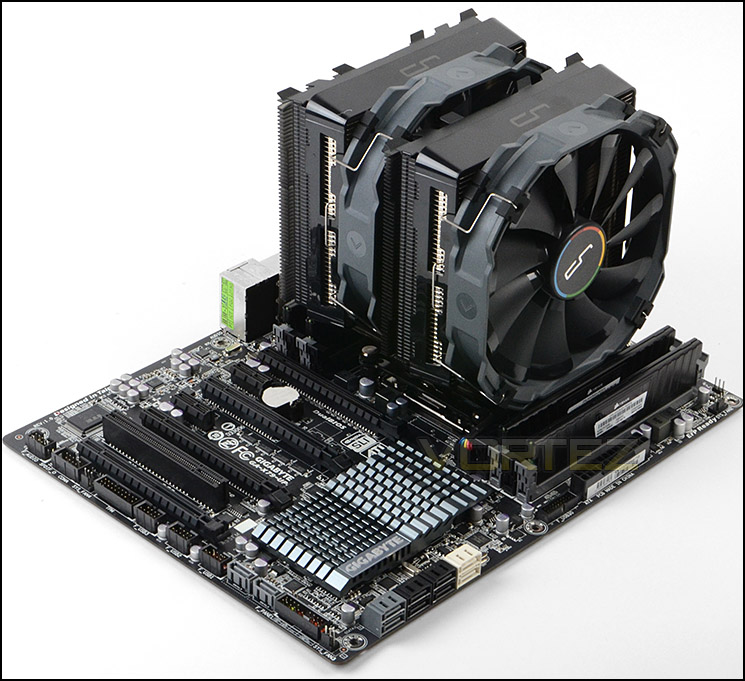
A gargantuan CPU cooler
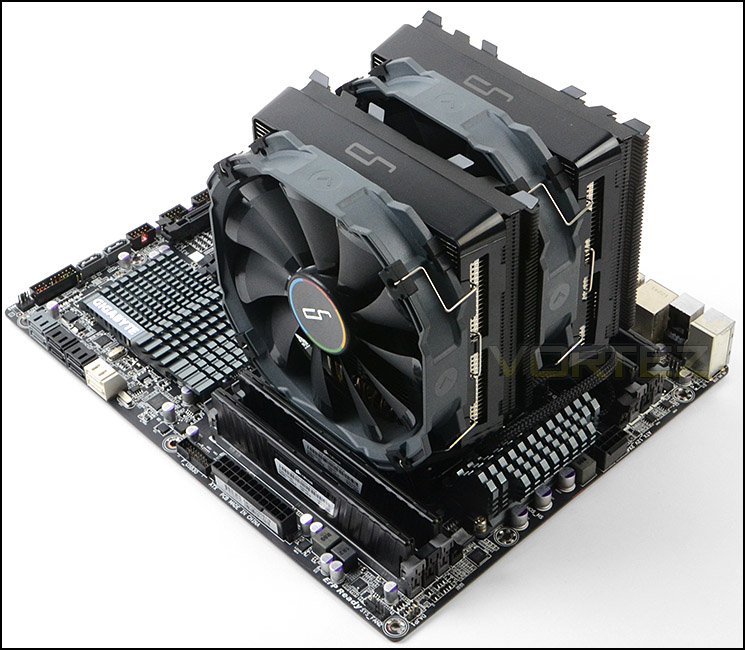
Pairing up well with black/grey motherboards
Memory clearance is important to quite a lot of system builders, especially for those who opt for modules which have oversized heatspreaders. Whilst R1 Ultimate does overhang the memory slots we’re pleased to report that fans can be moved up and down in a vertical motion if you need to allow for more space.
In the picture below we have measured the gap whilst having the cooling fan as high up as it can possible go. This leaves a total height of just under 4cm, so it’s probably a better idea to stick with low-profile solutions.
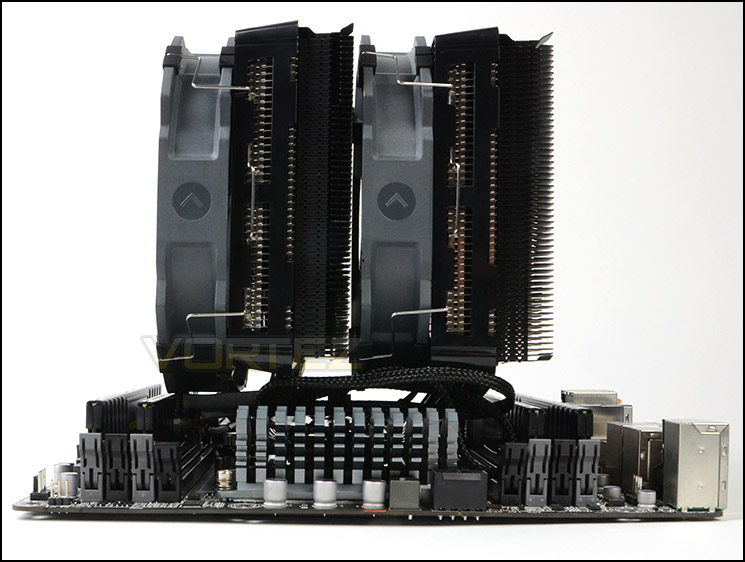
Heatsink overhangs both sides
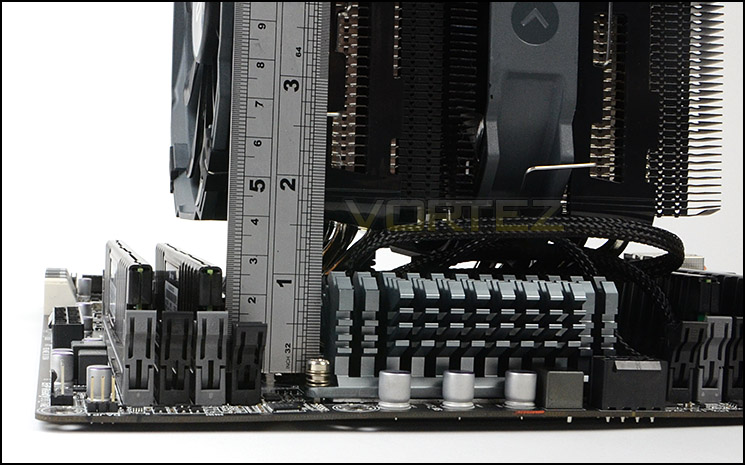
Approximately 4cm of total height
Test Setup & Methodology
Test System
CPU – Intel Core i7-3930K (3.6GHz)
Motherboard – GIGABYTE X79-UP4
Memory – 8GB Corsair Vengeance LP 1600MHz CL9
Graphics – Sapphire Radeon HD 6850 1GB
PSU – NZXT Hale90 650W
Hard Drive – Kingston HyperX 240GB SATA III SSD
Case – Corsair Carbide 500R White
Motherboard – GIGABYTE X79-UP4
Memory – 8GB Corsair Vengeance LP 1600MHz CL9
Graphics – Sapphire Radeon HD 6850 1GB
PSU – NZXT Hale90 650W
Hard Drive – Kingston HyperX 240GB SATA III SSD
Case – Corsair Carbide 500R White
CPU Coolers
Alpenföhn Matterhorn Pure(120mm Wingboost: 300-1200RPM)
Alpenföhn K2 (120mm Wingboost: 500-1500RPM, 140mm Wingboost: 300-1100RPM)
Alpenföhn Gotthard (140mm Wingboost: 300-1100RPM)
Noctua NH-D14 (120mm NF-P12 PWM + 140mm NF-P14 PWM: up to 1200RPM)
Thermalright SilverArrow SB-E Extreme (Dual TY-143 fans – 600-2500RPM)
Corsair Hydro H100 (Dual 120mm fans – low: 1300RPM, mid: 2000RPM, high: 2600RPM Push Config)
SilverStone HE01 (140mm PWM fan – 500RPM-1200RPM – 500RPM-2000RPM)
be quiet! Dark Rock Pro 2 (135mm + 120mm PWM Fans – up to 1500RPM and 1700RPM)
Thermaltake Water 2.0 Pro (Dual 120mm PWM fans – up to 2000RPM)
Corsair Hydro Series H100i (Dual 120mm fans – up to 2700RPM Push Config)
Be Quiet! Shadow Rock TopFlow(1x 135mm PWM fan – up to 1500RPM)
SilverStone HE02 (Passive – optional fan used: Noctua NF-F12 120mm PWM)
Corsair H55 (Single 120mm fan – 1700RPM Exhaust Push)
Cooler Master Seidon 120M (Single 120mm fan – Up to 2500RPM Exhaust Push)
Zalman CNPS11X Extreme (Single 120mm fan – Up to 1950RPM)
Phanteks PH-TC12DX (Dual 120mm fans – 600-1800RPM)
Noctua NH-U14S (Single 140mm cooling fan – 300-1500RPM)
SilverStone TD03 (Dual 120mm fans – 1500-2500RPM)
Thermaltake]Thermaltake NiC C5 (Dual 120mm fans – 1000RPM – 2000RPM)
Raijintek EreBoss (Single 140mm fan – 1100RPM – 1600RPM)
GamerStorm Lucifer (Single 140mm fan – 800-1500RPM)
Cooler Master V8 GTS (Dual 140mm fans – 600-1600RPM)
Antec KUHLER H2O 1250 (Dual 120mm cooling fans – 600-2400RPM)
Corsair H75 (Dual 120mm cooling fans – 600-2000RPM)
CRYORIG R1 Ultimate (Dual 140mm cooling fans – 700-1400RPM)
Program Suite
Real Temp – Maximum temperature analysis
LinX 0.6.4 – Applies thorough stress test to CPU
CPU-Z – Confirmation of CPU frequency/voltage
AIDA64 Extreme Edition – Confirmation of temperatures/fan speeds
Testing methodology
Testing will be based on temperatures recorded by Real Temp after 20 passes of LinX stress test. The maximum absolute temperatures will be recorded after the test and averaged over the 6 cores. The delta is then calculated by subtracting the ambient temperature recorded near the intake fans from the average temperature calculated. Tests are conducted with the Intel i7 3930K at its default 3.6GHz stock speed and overclocked to 4.6GHz @ 1.42V. The tests are done inside the Corsair Carbide 500R chassis to simulate real world conditions. To keep the tests standardised we are using Noctua’s NT-H1 thermal paste on all coolers.
CPU coolers are reviewed as they come out of the box – with their factory cooling fans, as the manufacturer intended and as the consumer expects.
Additional tests include a passive test where the cooling fans are taken away from the heatsink and a comparison between the cooler used with stock thermal paste against our Noctua NT-H1 paste.
A kind thank you to Noctua for supplying us with NT-H1 thermal compound.
Results – Stock Performance
Having the CPU at stock settings we can see that R1 Ultimate can effectively cool the Intel Core i7-3930K. Not only that but an impressive result is achieved and even with the cooling fans spinning at low-mid speed.
Fan Speed: 1100RPM during stock settings – noise isn’t noticeable.
Results – Overclocked Performance
Stepping things up a notch and applying a substantial overclock to the CPU revealed consistent results with R1 Ultimate. It still remains a contender in the air cooling arena, matching the performance of liquid coolers which have their fans operating at noisy levels. This cooler appears to be a much better option to take.
Fan Speed: 1400RPM during overclocked settings – noise is noticeable but not disruptive.
Results – Passive Performance
Again, as we have seen in the previous tests even with the cooling fans detached R1 Ultimate demonstrates admirable results.
Results – Thermal Paste Comparison
Most CPU coolers come accompanied with thermal paste provided by the manufacturer. For our CPU cooling tests we use Noctua’s NT-H1, so to offer up some interesting analysis we test the thermal paste given with R1 Ultimate against NT-H1 to see which gives the best results during stock and overclocked performance and the results really aren’t that much different, the Noctua paste is only ever so slightly better!
Conclusion
Most reading this will have never heard of CRYORIG before because they are newcomers to the cooling market but this, their debut is filled with great prospects.
Straight out the box, it’s clear to see CRYORIG are keen to make a lasting impression with R1 Ultimate. Packaging is attractive, well thought-out and the accessories bundle is laden with plenty of useful items – they’ve gone the extra mile.
CRYORIG’s R1 Ultimate has been engineered to an extremely high standard. Unlike many newer manufacturers it evokes the mature sensibilities of a veteran design, with none of the ‘rough around the edges’ feel which less well-appointed coolers exhibit.
Not only does R1 Ultimate ooze style on just about every level, but it actually works. Too often do we find companies introducing dressed up innovations as part of their feature-sets which fail to deliver but this is not so with CRYORIG’s new offering. During our stock, overclocked and passive tests this new cooler proved its worth and consistency, battling it out with some of the forerunners of the cooling league. Furthermore, the FX140 cooling fans needed only 1400RPM to achieve the results on the preceding pages whilst previously reviewed rival offerings required significantly more, thus bringing in unnecessary and unwanted noise.
Priced at £55 in the UK and $89 in the US, we think R1 Ultimate is reasonably priced for such a flagship product. It cleaned the floor with a range of coolers which are in the upper regions of between £70-90.
What isn’t there to like? CRYORIG’s first product ticks all the boxes from styling right through to performance. The R1 Ultimate arrives on the market with a lasting impression and a clear message from its designers: “Nothings gonna stand in our way”.
Pros
+ Looks attractive and impressive
+ Coordinates well with most hardware
+ Engineered with fine quality
+ Abundant accessories pack
+ Easy to install
+ Performs extremely well
+ Low-noise fans
Cons
– Not compatible with tall memory heatspreaders
+ Looks attractive and impressive
+ Coordinates well with most hardware
+ Engineered with fine quality
+ Abundant accessories pack
+ Easy to install
+ Performs extremely well
+ Low-noise fans
Cons
– Not compatible with tall memory heatspreaders

Click here for an explanation of our awards at Vortez.net.


