A midi-tower case from Enermax called the Hoplite (ECA3220) brings USB3.0, pre-installed Vegas and much more!
Product on Review: Enermax Hoplite (ECA3220)
Manufacturer and Sponsor: Enermax
RRP: £90 Inc. VAT

Enermax are world renowned for their presence within the PSU and cooling departments and are regarded as a household name, but would you be shocked to hear that Enermax also produce computer cases? Admittedly they have only a very small selection to choose from, but in the last 2 years Enermax have branched off into the computer case genre which will certainly surprised quite a few. These cases have been directed toward entry level users, so fundamentally the hardware enthusiast will be ignorant of their existence. But this year, things are about to change.
Just a matter of weeks ago Enermax announced the release of two new midi tower cases which both look very interesting. Today we will be taking a look at one of these cases named the Hoplite. (Incidentally, Enermax will also be populating their case category with some additional models at CeBIT 2011 in a few weeks time. Stay tuned, we will be bring you full coverage of CeBIT 2011 – lots of exclusive footage).

Enermax’s Take on the Hoplite:
Hoplite is the new flagship ATX Midi Tower from Enermax. Its high-performance cooling system can accommodate up to six fans, and the product designers put an emphasis on every single detail to create a perfect housing for the latest PC systems. The useful front doors allow for a quick and convenient access to the 12cm front fan and to the hot-swap bays at the bottom of the front. The internal arrangement is designed for best possible usability, with screwless, quick release fasteners for optical and hard drives, as well as the excellent cable management system that includes space behind the extruded right side panel for a flexible cable routing behind the mainboard tray.
Technical Specifications
Model
• ECA3220
Size
• ATX Midi Tower
Dimensions (mm)
• D 493 x W 200 x H 490
Material
• 0.6 – 0.8mm SECC
Drive Bays
• 5.25″ 4x
• 3.5″ 4x + 2x hot-swap bay
• 2.5″ 2x
• Hot-swap Dock on top side for HDD/SSD 2.5″/3.5″ SATA
M/B
• ATX & Micro ATX
I/O
• 2x USB 3.0, 1x eSATA, HD/AC’97 Audio
Air Cooling Front
• 1x 12cm Vegas fan (preinstalled)
Air Cooling Rear
• 1x 12cm fan (preinstalled)
0Air Cooling Top
• 2x 12/14cm fans (optional)
Air Cooling Side
• 2x 12cm fans (optional)
Expansion Slots
• 7x
Liquid Cooling Holes
• 2x
Packaging & First Look
The Enermax Hoplite arrives in a rather plain looking box. Enermax have chosen to go down the eco-friendly route which I would openly encourage. Let’s face it, this box will be going into storage once the case is out anyway so in regards to case artistry it isn’t something I am overly fussed about. Inside we have the Hoplite, covered in a clear plastic bag and held in place with polystyrene pillars to ensure full protection during transit.
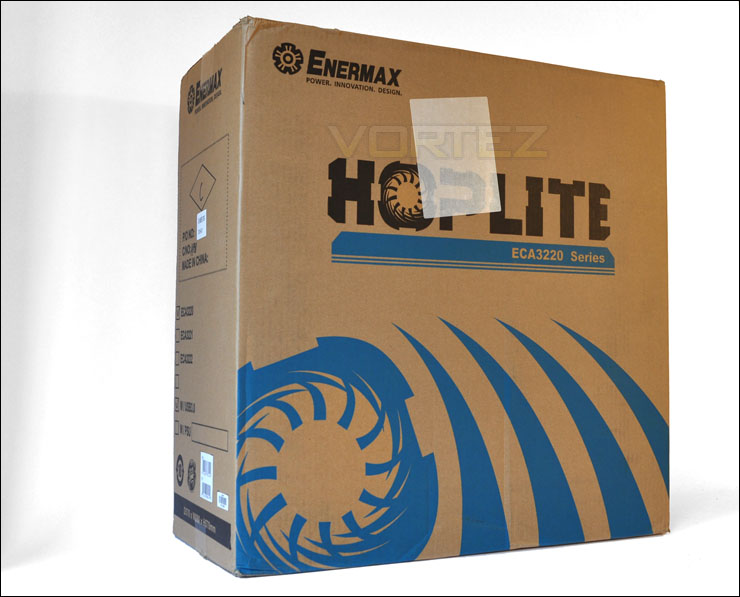
Enermax Hoplite packaging
So with the Hoplite removed from all its packaging we can finally take a look at this new release. For those with enthusiasm for gamer style cases the Hoplite certainly has some physical attraction. It has very bold looks and some excellent contours. The significant side – left, has a protruding panel which has perforated panelling allowing you to attach 2 x 120mm fans.
The alternate side also has a protruding panel but this doesn’t have any openings in it but does have the added benefit of providing additional clearance behind the motherboard for cable management.
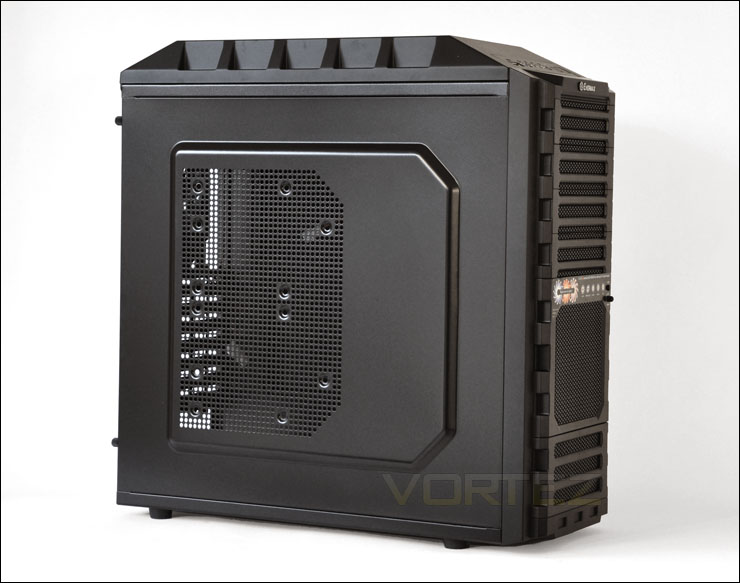
The prominent side panel with ability to attach 2 x 120mm fans
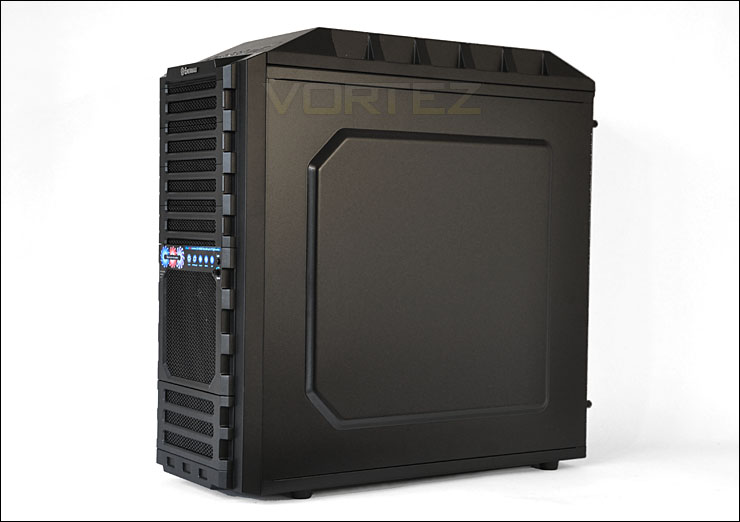
Similar appearance around the alternate side
Exterior
The Hoplite has a very distinct visual appearance. For a midi tower is has a great deal of features and with the aggressive looks to suit. The front features 4 x 5.25″ drive bays that include each to remove bay covers. All panels on the front are perforated mesh. Directly in the middle we have a fan controller that has a sticky label illustrating that the Enermax Vegas fan that is positioned behind the large mesh front panel can be switched between various LED modes (for more information on this please select the specifications tab on the Hoplite product page. The fan here can also have its speed controlled via a scrolling knob.
Beneath the large mesh panelling for the 120mm fan is a smaller section which allows you to install 2 x 3.5″ drives. Both this compartment and the fan region have doors that open out allowing you to gain access. See image further down this page.
Turning our attention to the rear, we have an opening at the bottom for a bottom mounted PSU and above this 7 expansion slots covers with a large perforated mesh panel beside it. Above this, 2 circular rubber grommets for water-cooling or cable management. Above this we have a section of mesh panelling and a pre-installed 120mm fan fixed in place. Finally, at the top another rubber grommet – this one is rectangular. Notice how the side panels and the top panel are all secured via rubberized thumbscrews for easy removal.
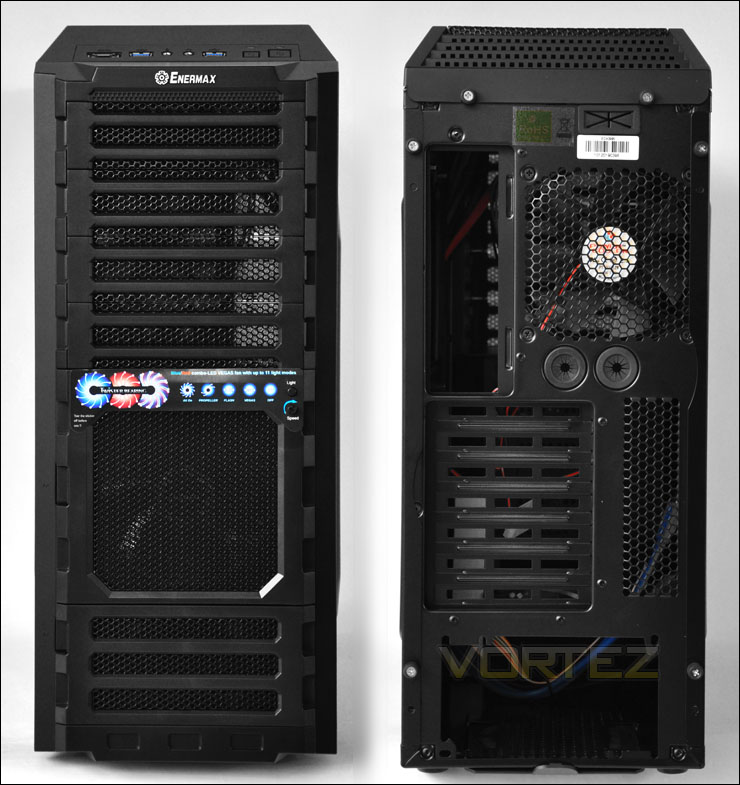
The front and back of the Enermax Hoplite
As mentioned previously, there are front panels on the Hoplite. The larger door hosts a 120mm fan – an Enermax Vegas. The lower door gives us access to 2 x 3.5″ bays. Within these bays are 3.5″ frame attachments which the drives will sit in.
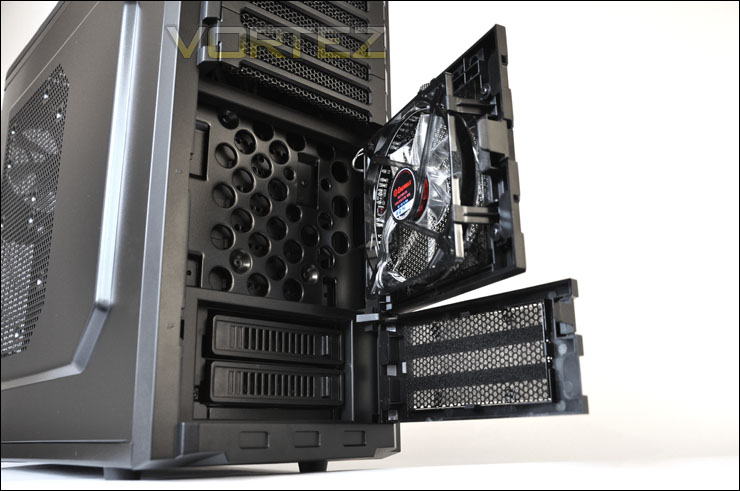
The front with easy access to fan and 3.5″ media
The front panel on the Hoplite has the typical functionality you would expect. From left to right we have eSATA, USB3.0, microphone socket, headphone socket, USB3.0, reset and power buttons with corresponding LEDs above. It’s interesting to see that Enermax have chosen to move away from USB2.0 altogether. In essence, to get the functionality for these ports you will need a USB3.0 ready motherboard because these ports have 2 x USB3.0 cables that run to the rear of the case.
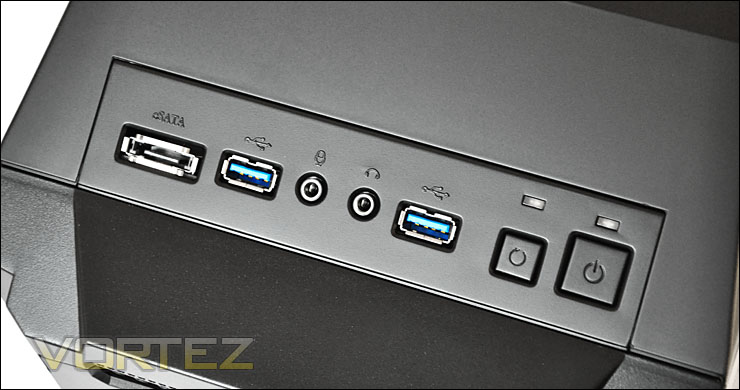
Front panel functionality with USB3.0 as standard
Exterior (Continued)
Further along from the front panel is a 2.5/3.5″ hot swap dock. This is a nice addition to the case, it doesn’t encroach on anything but it makes use of un-used space. Personally I would find a hot swap dock very useful. The PCB/unit beneath is powered via molex connector.
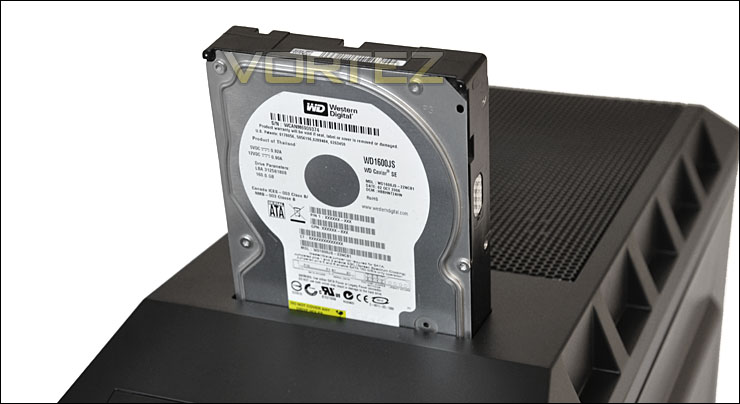
Hot swap docking station for 2.5″/3.5″ drives
The top of the Hoplite features a nicely crafted panel with mesh perforation. This top panel can actually be removed by extracting 2 thumbscrews and sliding the section backwards. With this top section removed we can see mounting holes for 2 x 120/140mm fans. We can also see the PCB with SATA ports for the 2.5/3.5″ drives. I really like the fact that Enermax have made getting to this part of the case very easy. You can get access to this area in under a minute!
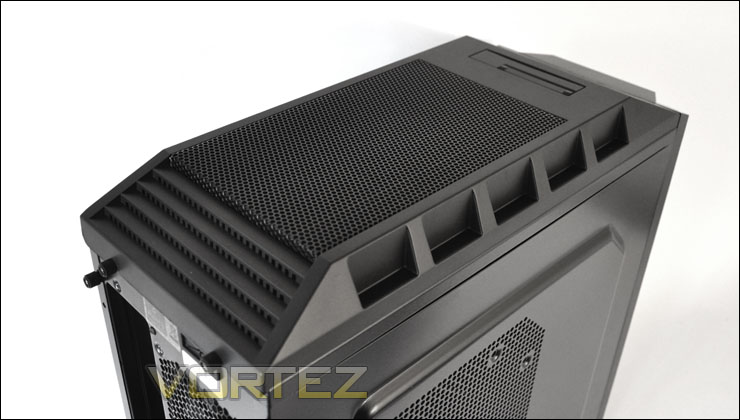
The top of the Hoplite
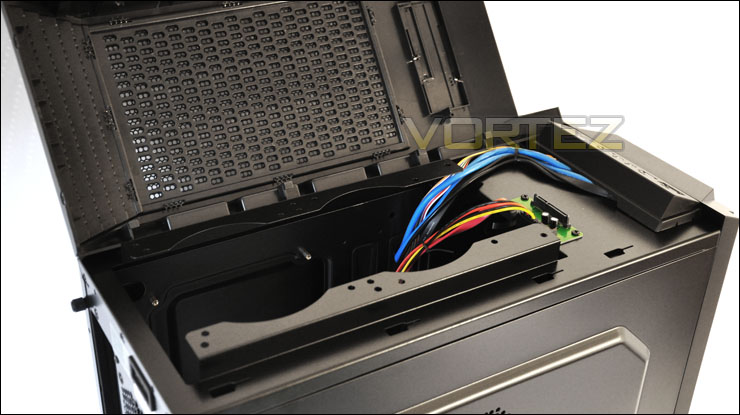
The top is removable
Interior
Removing the side panels we get our first glimpse of the interior. The motherboard tray has the rubber grommets running up the far side to ensure clean, cable management and we also have large cut-outs on the motherboard. There are elements of tool-less design within the Hoplite which is pleasing to see and the paint finish and build quality is certainly of a high quality.
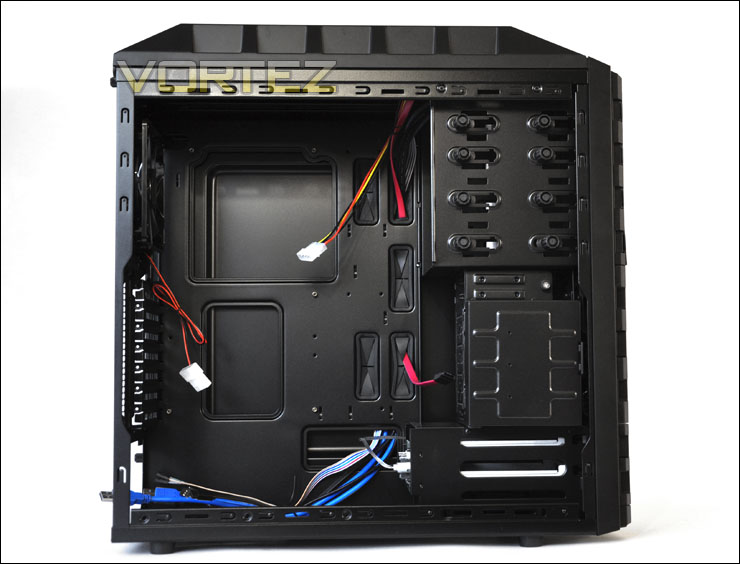
Our first look at the internals
Moving inside for a closer look, the PSU area surprisingly has no rubber mounting to prevent vibration or scratching paint surfaces. Unfortunately metal on metal only results in scratching. I had hoped Enermax would include rubber mounting here. We do have a fan filter underneath though that is removable from the exterior.
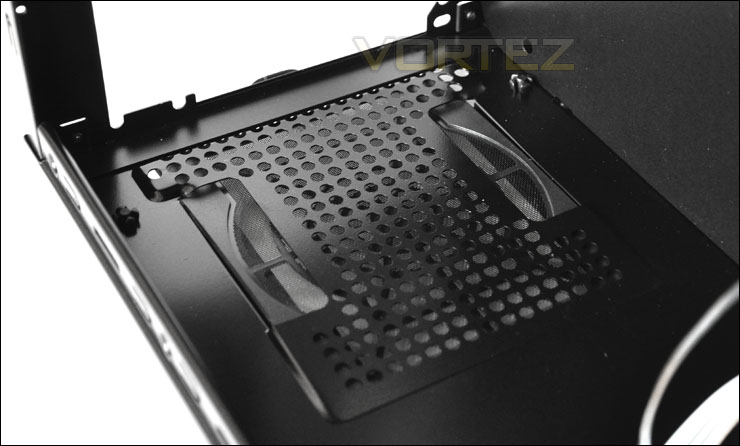
The PSU area within the Hoplite
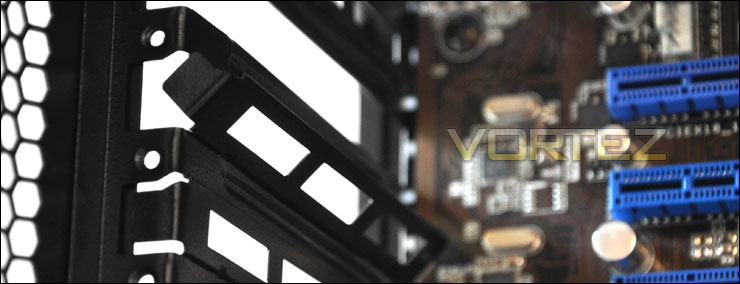
7 expansion slots cover the back section of the Hoplite but again disappointment. Enermax have gone down the route of using expansion brackets that have to be bent back and forth to remove. Once removed, these panels cannot be fixed back into place. So if you do remove a panel by mistake or happen to move a graphics card into another slot for example, you are going to be left with a gap.
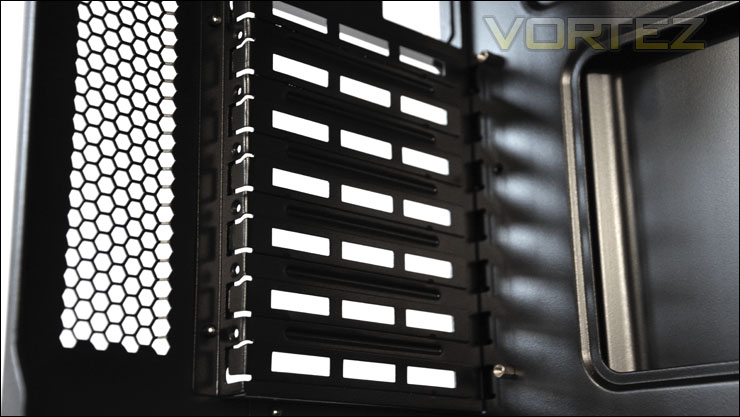
Moulded expansion slots
Moving up, we can see that Enermax have provided a pre-installed 120mm rear exhaust fan this has a molex connector so it won’t run off your motherboard, only the PSU. At the very top, above – we can install 2 x 120/140mm fans for additional cooling around the CPU area.
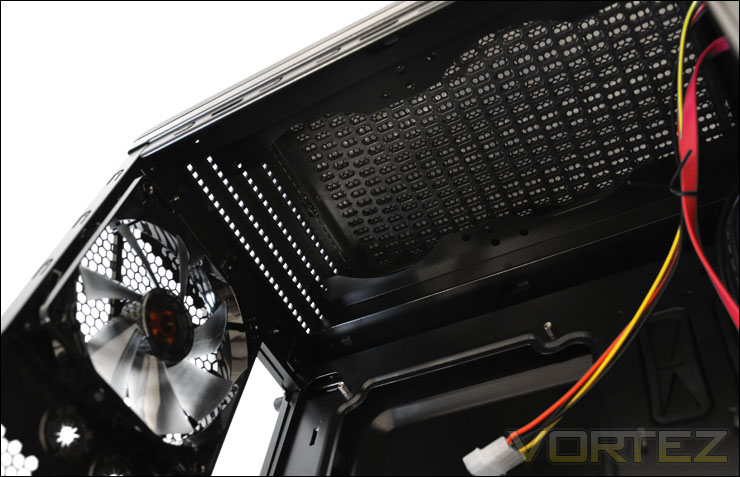
The cooling options within the Hoplite
Interior (Continued)
Over on the other side we have some tool-less mechanisms to fasten in the 5.25″ optical drives. These knobs simply act as screwdrivers – on the other side are the screws. A nice idea to get your optical media fixed in place without the need of a manual screwdriver.
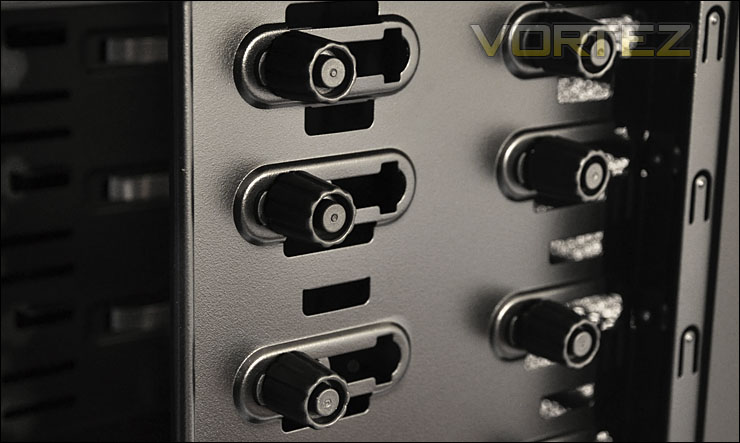
Tool-less installation for optical drives
Just beneath the optical bay we have a cage for installing HDDs. This cage has a hinged door that swings out after pressing a latch in. So within the Hoplite there are 2 areas you can install 3.5″ media. In the lower region and behind the 120mm – within the cage pictured.
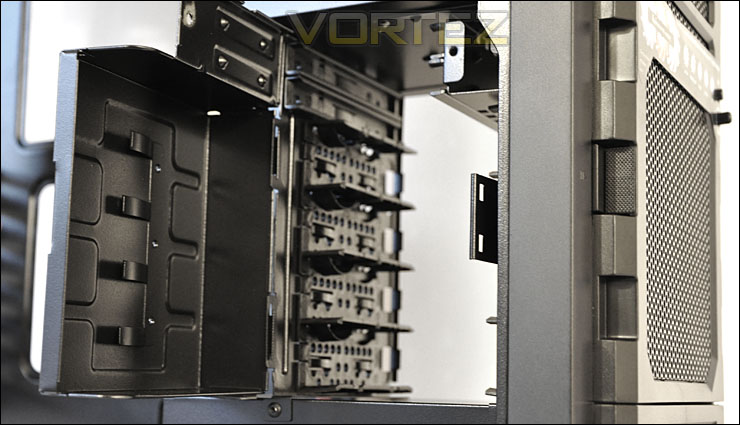
HDD cage with door
As I showed earlier the Hoplite features 2 slots at the very bottom that are accessible from the outside. These 2 bays here have a docking board. When you push a drive into one of the slots it will connect with SATA ports. On the opposite side to this we have a PCB with those SATA ports for hooking up to the motherboard. Basically this is a much cleaner approach. It keeps the cables nice and tidy and makes installing drives very simple and hassle free. On this PCB we also have 2 x 3-pin fan headers. One of these is already taken up by the front 120mm fan but it means you can extend the amount of case fans within the Hoplite which I think its a fantastic idea. This entire panel of functionality is powered by a standard PSU molex connector.
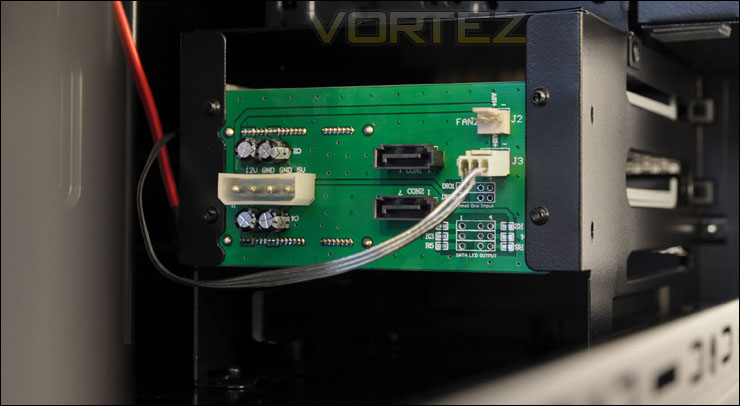
A PCB with SATA and case fan functions
Installation
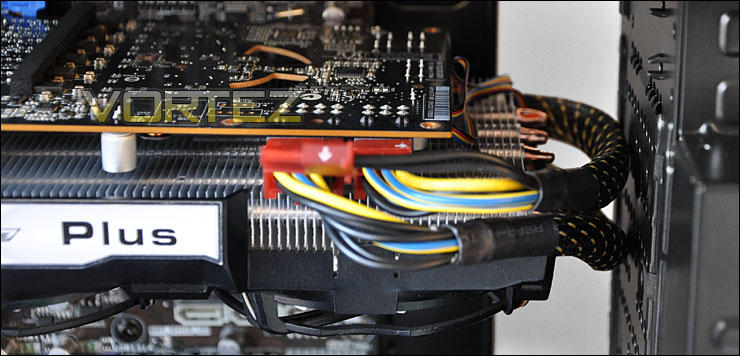
Installing your kit into the Hoplite is done in a breeze thanks to the cable management design options and tool-less mechanisms within. There is plenty of space around the motherboard and Hoplite even had room to accommodate the gigantic 12″ ARCTIC Accelero Xtreme Plus cooler that is mounted on the NVIDIA GTX 480.
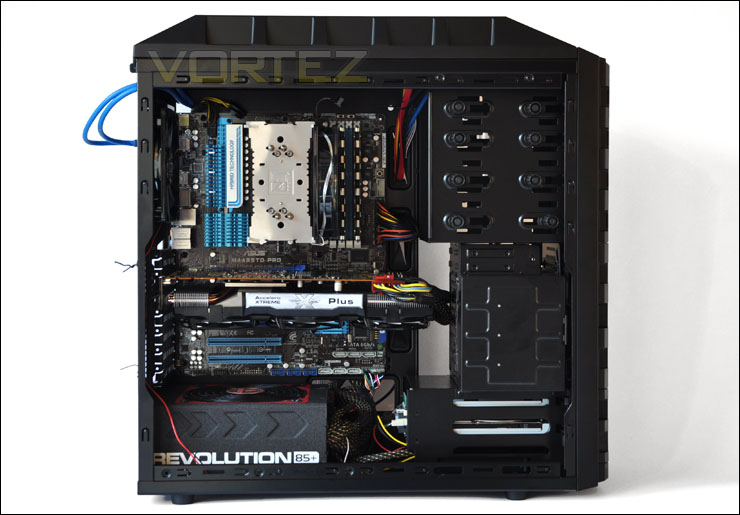
Installation went as planned
With the Hoplite you get a small bundle of accessories. Included we have various screw types that have been carefully labelled to ensure that installing all of your components into the case can be done efficiently. We have a handy instructions manual, speaker and some plastic cable ties as well as the larger fabric cable tidies too.
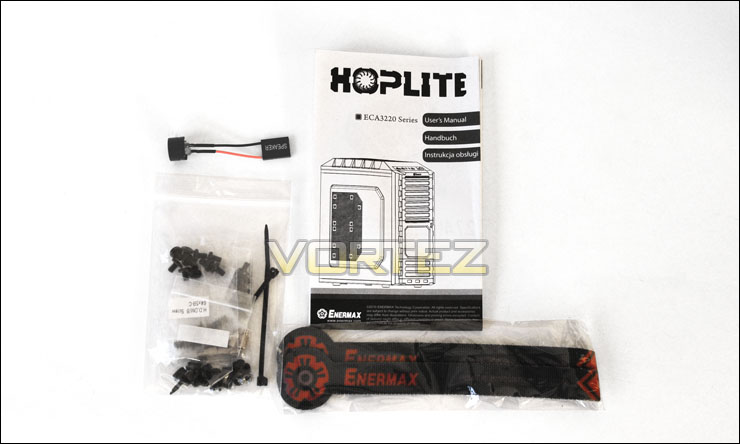
The accessory kit that you get with the Hoplite
There are different options available when installing 3.5″ (or 2.5″) media within the Hoplite. I opted for the lower drive bays which are situated beneath the 120mm fan at the front. All you have to do is drop the drive into the frame provided, place a couple of screws in and slide the frame/drive back into the bay making sure the SATA ports connect to the back of the PCB. It couldn’t be simpler.
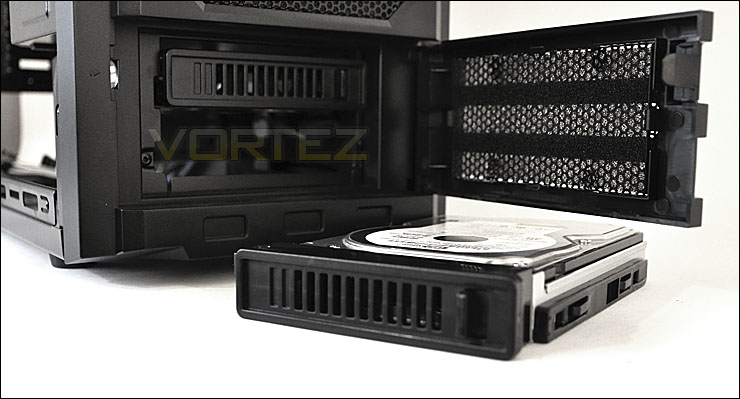
Installing 3.5″ HDD into the lower drive bay
As I pointed out earlier, the Hoplite has poor expansion slot brackets. To free up a slot, you have to ply the bracket off by twisting it. Once a bracket is removed, you can no longer fit this back into place should you need to. So if you happen to move things around you are going to have big gaps unfortunately. Why Enermax didn’t choose to go with interchangeable brackets here remains a mystery. It makes no sense.
Expansion brackets have to be twisted out
Installation (Continued)
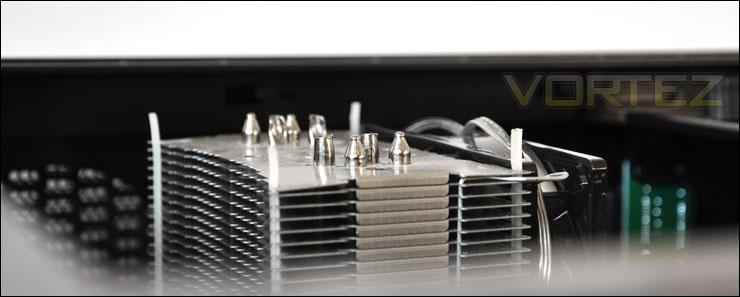
In terms of CPU clearance we have 2-3cm which isn’t a great deal of space but it does mean you will be able to install some of the best CPU coolers currently on the market. The cooler installed inside the Hoplite here is the Noctua NH-U12P which stands at 158mm in height. The following coolers, excluding the Archon should all fit within the Hoplite.
• Thermalright Archon: Height 170mm
• Thermalright Silver Arrow: Height 160mm
• Thermalright Venomous X: Height 160mm
• Noctua NH-D14: Height 160mm
CPU cooler clearance within the Hoplite
Over on the graphics card side of things, we have approximate clearance of 13″. So you will be able to install a HD5970 within this case. The card installed within the Hoplite is the NVIDIA GTX 480 with an ARCTIC Accelero Xtreme Plus which measures in at just over 12″ in total length. So you can fit pretty much anything currently on the market within this case.
GPU clearance within the Hoplite
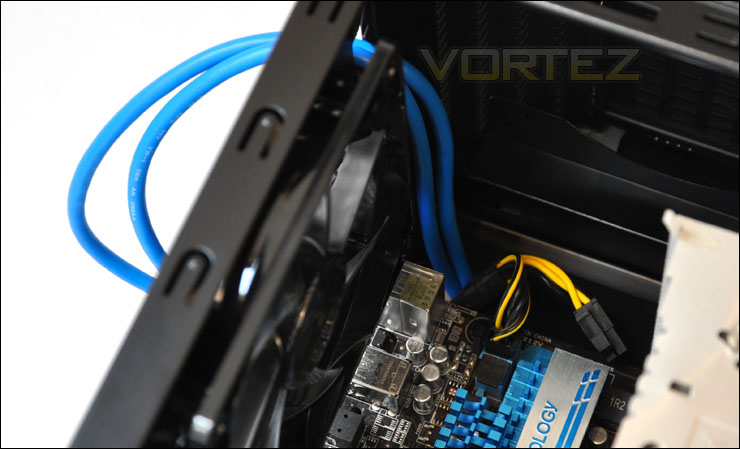
I review quite a lot of cases, and one aspect that bugs me within case manufacturing is that some companies will not accommodate spacing for the E-ATX/P4 PSU cable to be routed to the top of the case (as this is where it typically is across all motherboards). Enermax have pleased me here though, they have included a small opening in the top left hand corner, above the motherboard tray to not only allow the P4 cable to reach the motherboard behind the motherboard tray, but also the dual USB3.0 cables too. So I can easily route the USB3.0 cables around the back of the motherboard and out through the rubber grommet hole at the very top of the case. These are just the things that you want to be able to do when installing your kit into the case, you want to be able to keep things tucked away, neat and tidy and the Hoplite allows you to achieve this.
P4 routing is all there
Lastly, behind the motherboard tray we have plenty of space for cables to be hidden out of sight. Although there is only less than 1cm of clearance from the motherboard tray to the side panel when measuring – remember the side panel hollows out to allow even more spacing. So it can easily accommodate all of the cables, even the thick 24-pin PSU one.
The CPU cooler backplate clearance is pleasing, there is a great deal of space to get at that backplate should you need to change the CPU cooler. There is also a lower cut-out. Whilst this isn’t useful for a full ATX motherboard it will be useful for a mATX setup.
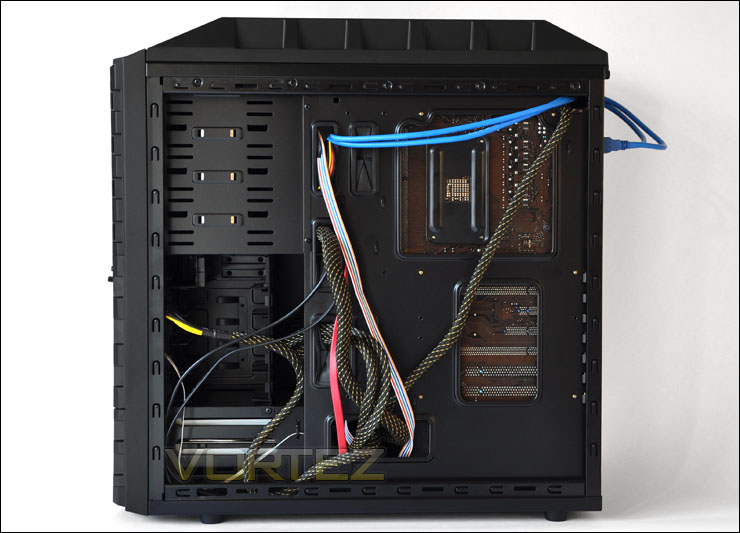
Lots of routes and spacing behind the motherboard tray
Powered Up (Lighting)
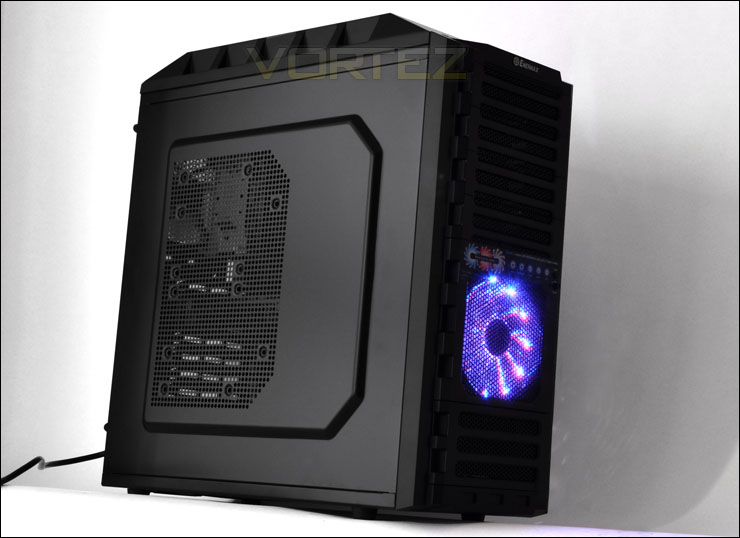
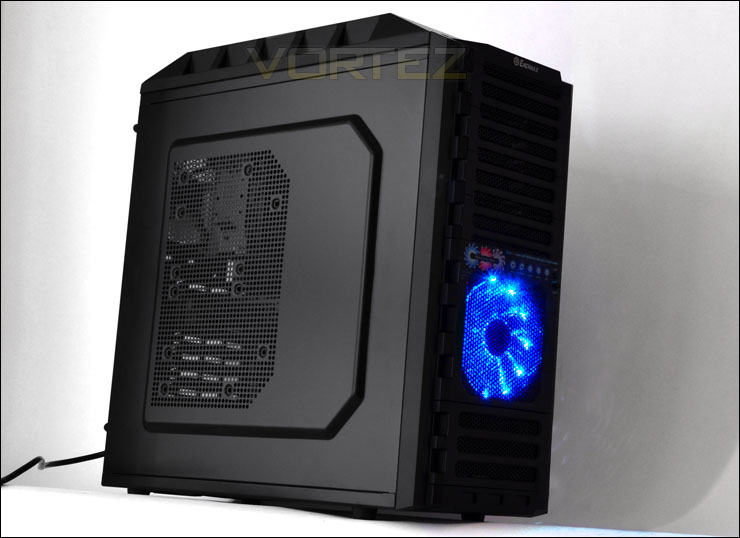
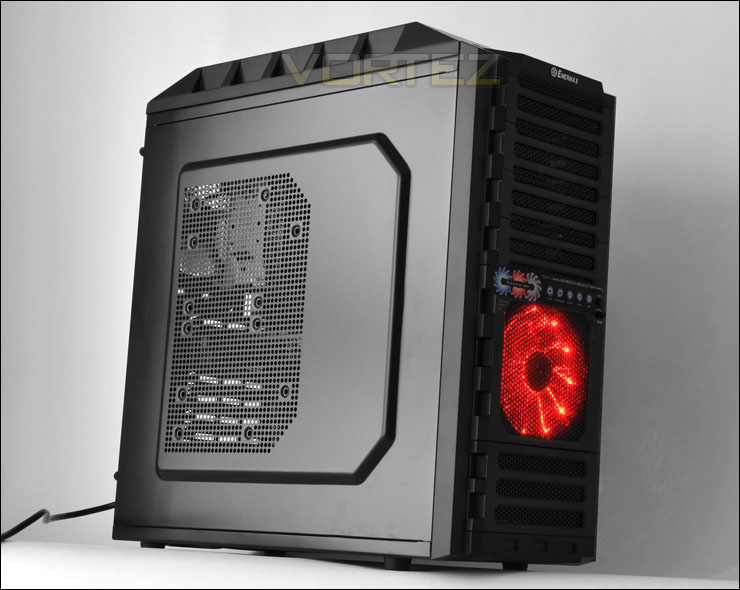
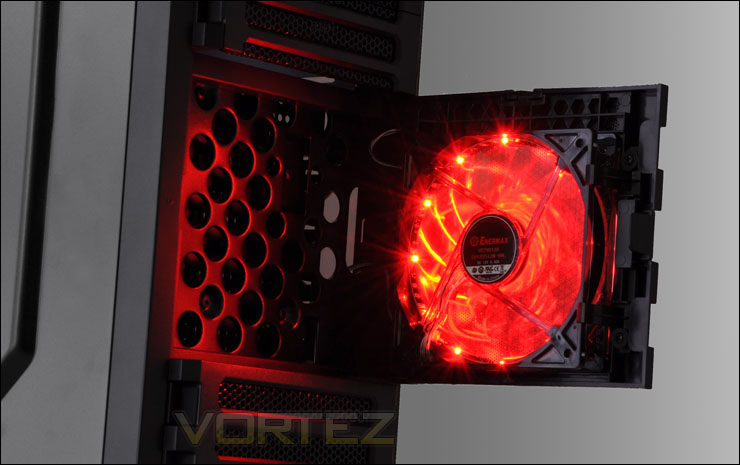
Now for the moment you’ve all been waiting for. The Enermax Hoplite powered up and displaying its colourful lighting configuration.
Thanks to the touch of a button, we can swap between 3 different colour modes – blue & red, blue and red. Within these colours we can then select between different lighting modes. For an idea of what I mean go to the specifications tab on the Hoplite product page.
Thermal Performance
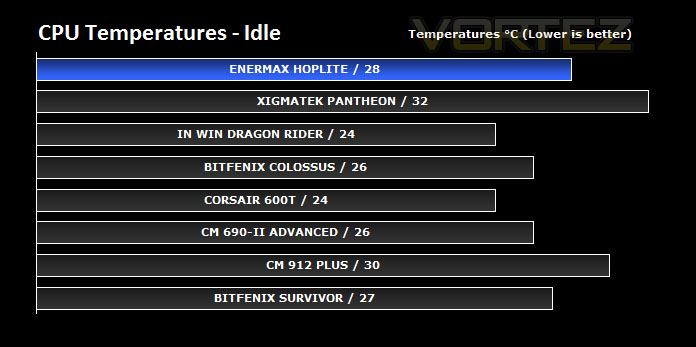
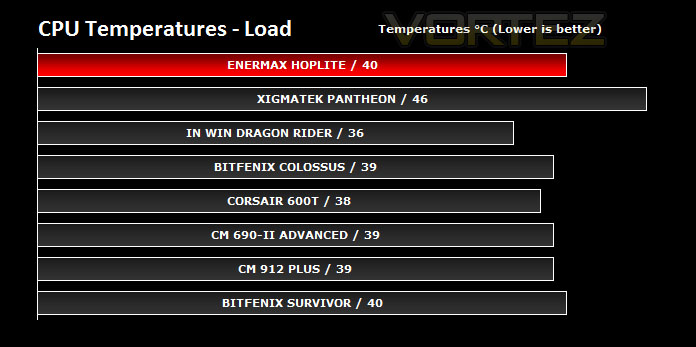
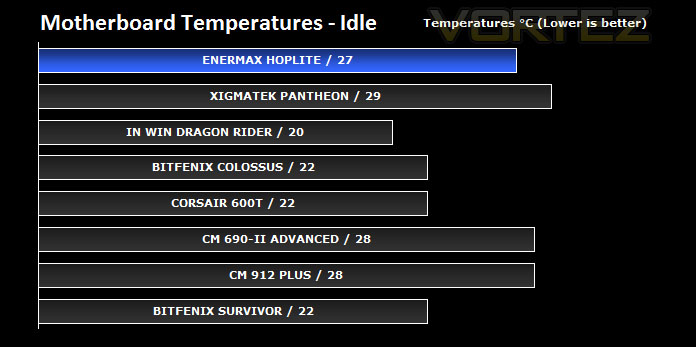
The Enermax Hoplite has the legendary Enermax Vegas fan pre-installed at the front, and features another 120mm fan for a rear exhaust. These fan placements are as traditional as case cooling can get so I expect good results from the Hoplite.
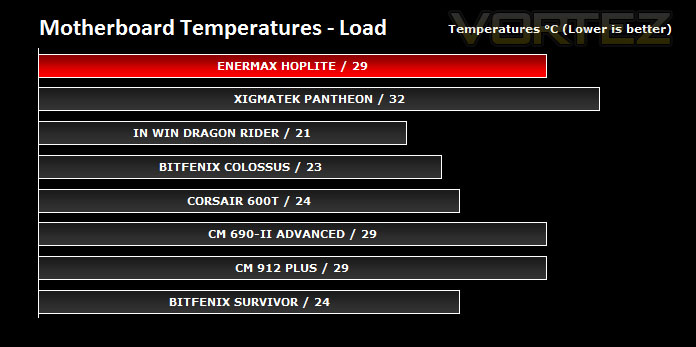
To discover the thermal performance of the Hoplite I will record idle temperatures after 20 minutes from a cold boot. I will then stress the system and temperatures will again be monitored after 30 minutes have elapsed. The front fan will be kept on the lowest RPM setting.
System Components
CPU AMD Phenom II X6 1055T 2.8GHz
Motherboard ASUS M4A89TD PRO
Graphics ZOTAC NVIDIA GTX 480 Amp!
Memory 4GB Mushkin EM3-10666 DDR3
HDD Samsung Spinpoint 500GB SATA-II
PSU Enermax Revolution 85+ 850W
The Hoplite performs well throughout the tests. It may not be the best case for air cooling but its one of the contenders. Remember it does only have 2 pre-installed fans and no top mounted fan. With plenty of spaces to mount fans on the side panel and the top the thermal performance can be improved upon.
Conclusion
So today was the first time we have reviewed a case from Enermax, and this could well be the first time that you have seen an Enermax case altogether. The Hoplite has left a very good impression.
With some very distinct looks, the Hoplite delivers feature after feature that you won’t find in many cases of its stature. What makes the Hoplite significant is its media options. There is a hot swap docking port on the outer shell, at the top of the case that allows you to gain access to a drive without the hassle of having to take side panels off and connect cables. Inside the case we have more hot-swap docking for 2 additional drives. But it doesn’t stop there, on this docking PCB we also have an additional 2 fan headers that we can take advantage and expand on the case fan cooling within the Hoplite. Couple this with the rubber grommets and routing for cables and the Hoplite delivers a very fluid installation.
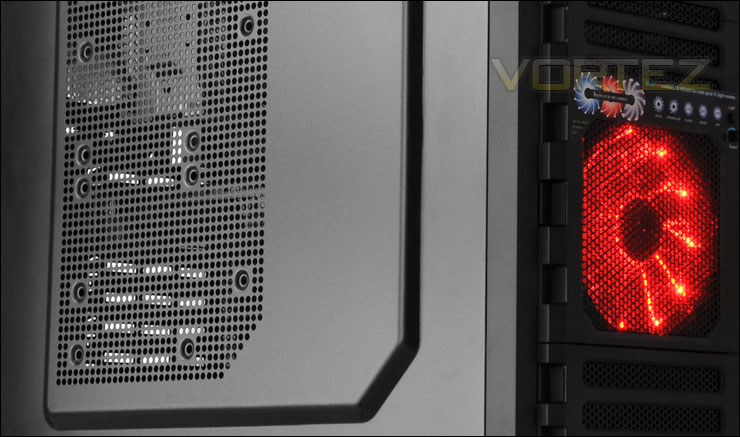
Enermax case fans will be pleased to know that the Hoplite comes with a pre-installed Vegas fan which can not only switch between 3 different colour configurations but also numerous lighting sequences too. This is all governed by the touch of a button on the front of the case which incidentally also brings manual control over the RPM of this fan.
I haven’t even mentioned the USB3.0 that comes as standard and ability to make use of up to 6 fans. For a midi-tower the Hoplite has lots to talk about, it has lots of elements to get excited about and is in general a superb high-performance gaming case.
Sadly though there are a few slight niggles which I should mention. First of all the PSU mounting space features no anti-vibration mounts. Installing a PSU within the Hoplite will mean metal on metal, and we all know what that results in – scratching! The other item to mention is the expansion slot brackets, they are not interchangeable but instead require you to twist and pull to free up a slot. Once a bracket is removed, it can no longer be installed back onto the Hoplite. So if you move things around in your case you are going to have gaps where previous expansion brackets have been removed. On Enermax’s part, this isn’t good practise. Brackets once removed are useless and have to be disposed of.
At £90 inc VAT the Hoplite is one of the more costly midi-tower’s out there. But there are plenty of features on this case that you wouldn’t perhaps find on other cases within its league. It looks great and is crafted to high specification, so if you are looking to upgrade your enclosure anytime soon then Enermax’s Hoplite is a good choice to go for.
Pros
+ Unique appearance
+ USB3.0 standard
+ Hot-swap HDDs
+ Customisable lighting colours + sequence
Cons
– Expansion slot brackets not reusable
– No rubber mounting for PSU
+ Unique appearance
+ USB3.0 standard
+ Hot-swap HDDs
+ Customisable lighting colours + sequence
Cons
– Expansion slot brackets not reusable
– No rubber mounting for PSU