Today we take a look at the brand new Enermax LIQFUSION all-in-one watercooling loop, boasting quiet operation, RGB water pump and fans and a 360mm radiator.

Product on Review: Enermax LIQFUSION RGB
Manufacturer: Enermax
Street Price: GBP £149.95 / USD $149.95
Enermax are a well-known brand for producing PSUs and are highly regarded within the computer enthusiast sphere for such, however, they have their lesser known sectors in the form of CPU coolers, cases and even some peripherals. Today, after a seven year gap since our last Enermax review, we’re looking at Enermax’s latest watercooling loop, the Enermax LIQFUSION RGB.
Enermax have already released the 240mm version of the LIQFUSION RGB but today we delve into the ins and outs of the 360mm, featuring a patented RGB water block with flow indicator, three 120mm RGB PWM fans and a tube-mounted pump for quiet operation.
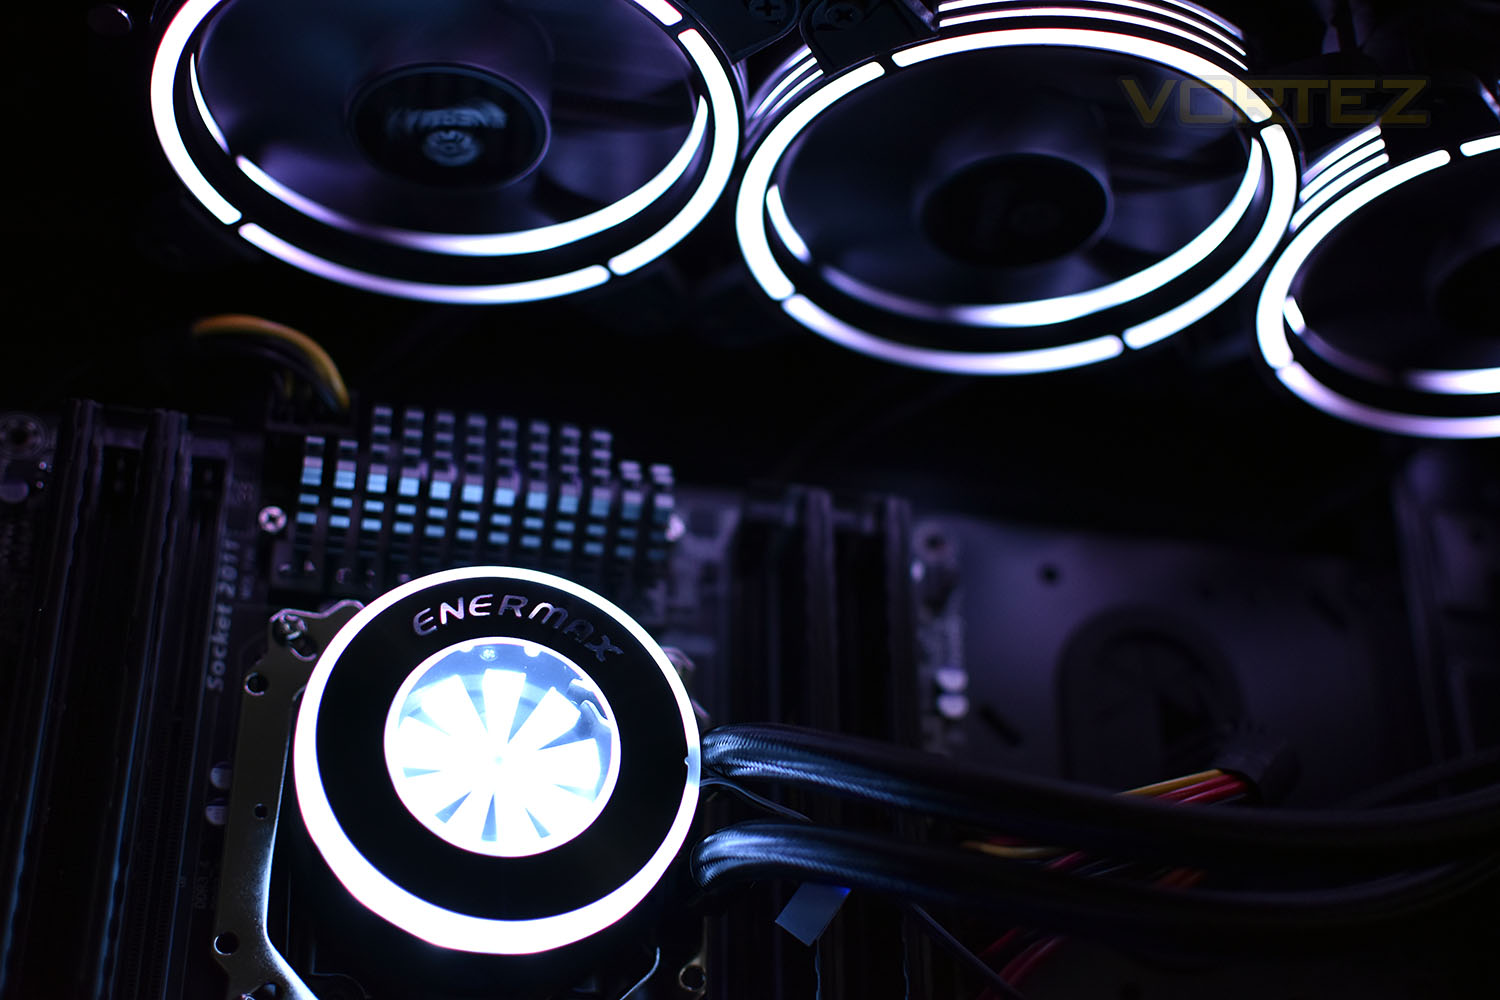
RGB lighting, which is very important to many users, can be operated automatically via your motherboard headers with support for ASUS Aura Sync, Gigabyte RGB Fusion, AS Rock Polychrome Sync and MSI Mystic Light; or if your motherboard doesn’t support RGB, Enermax include a SATA-powered controller.
Enermax have told us the cooler will RRP at £149.95/$149.95 in the UK/US, putting it right in the pricing range of the Corsair H150i Pro RGB.
With the unorthodox positioning of the water pump and fancy RGB lighting, the LIQFUSION certainly presents itself well, let’s see how it performs in our test rig.
Enermax on the LIQFUSION RGB:
LIQFUSION, an individually addressable RGB liquid cooler for Intel and AMD CPU platforms, is built with an exclusive RGB-sync water-block featuring patented flow indicator, which enables the user to easily monitor the status of coolant flow. Together with visually appealing ENERMAX addressable RGB fans, LIQFUSION can create unique, vivid RGB lighting effects. The addressable RGB water cooler is designed to sync the RGB lighting with selected GIGABYTE, MSI and ASROCK motherboards with addressable RGB headers. Meanwhile, LIQFUSION also includes integrated RGB control box for non RGB-Sync motherboards.
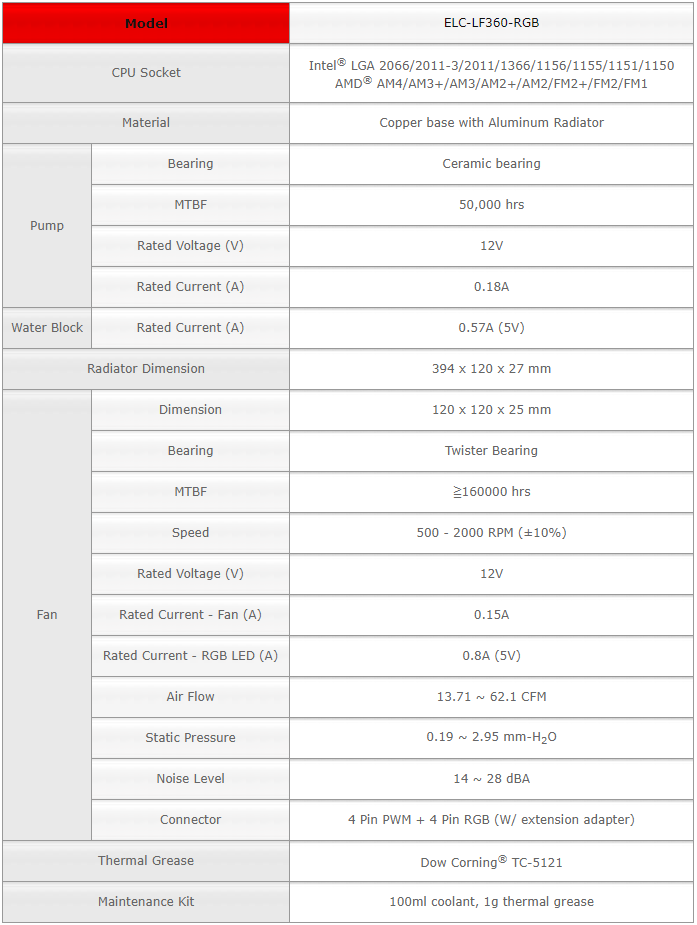
Technical Specifications
Packaging & Bundle
Due to the length of the 360mm radiator, the box is quite bulky, but that leaves plenty of room for pictures and information. The front is largely just pictures but gives a decent idea of what’s to be expected.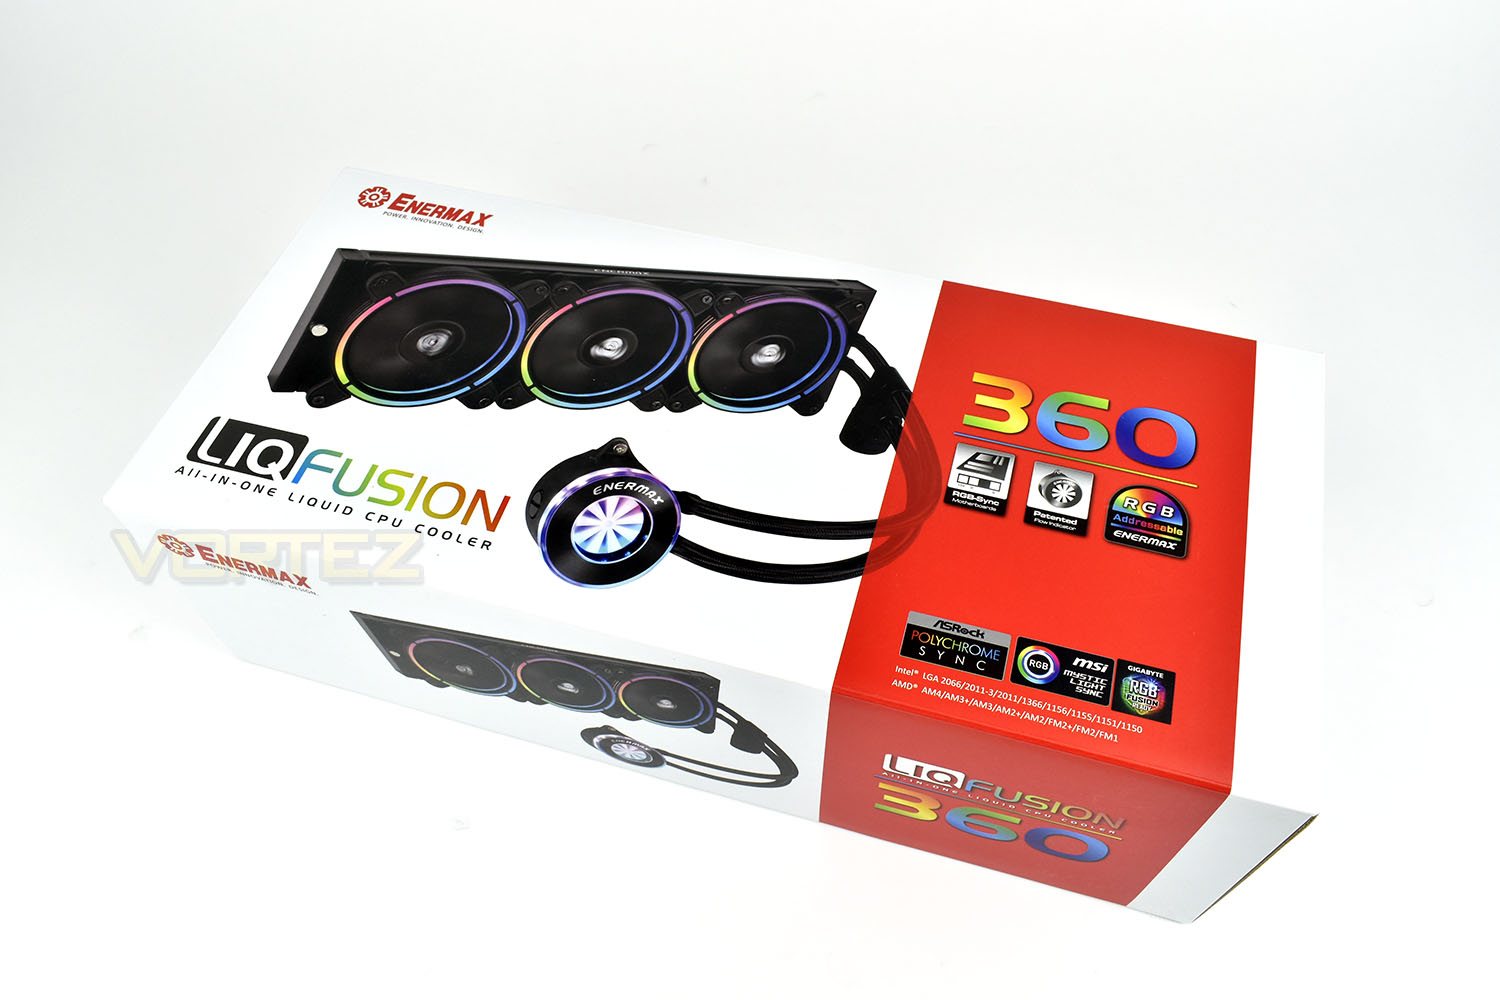
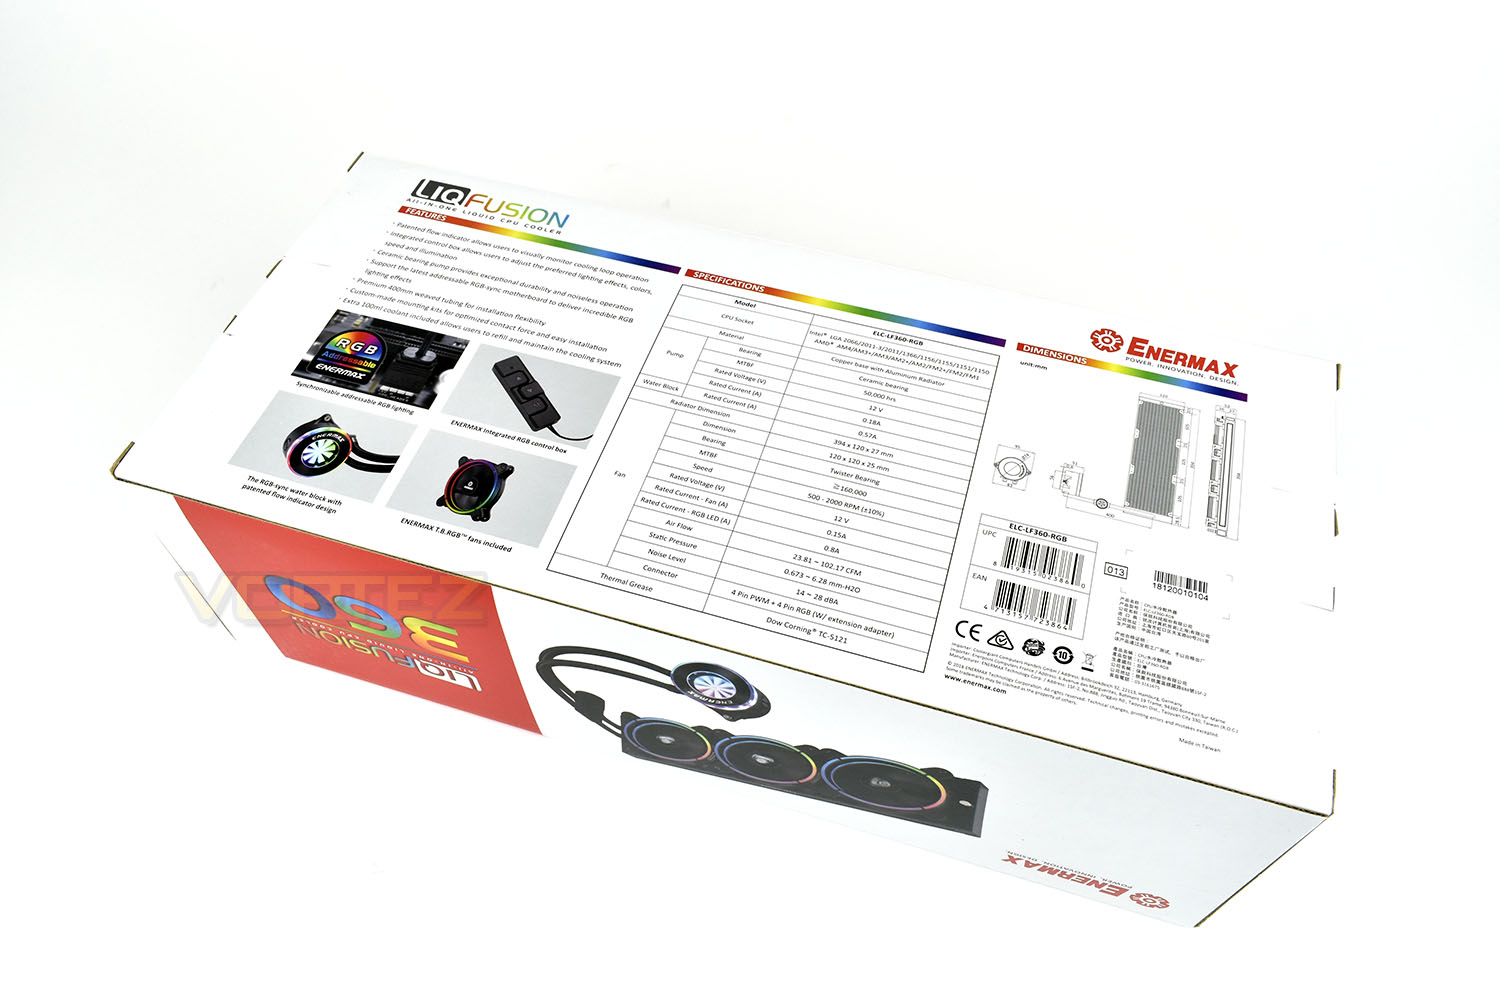
Again, thanks to the large size, Enermax have had loads of space to play with, providing up with close up images, an exhaustive specifications list and large blueprints.
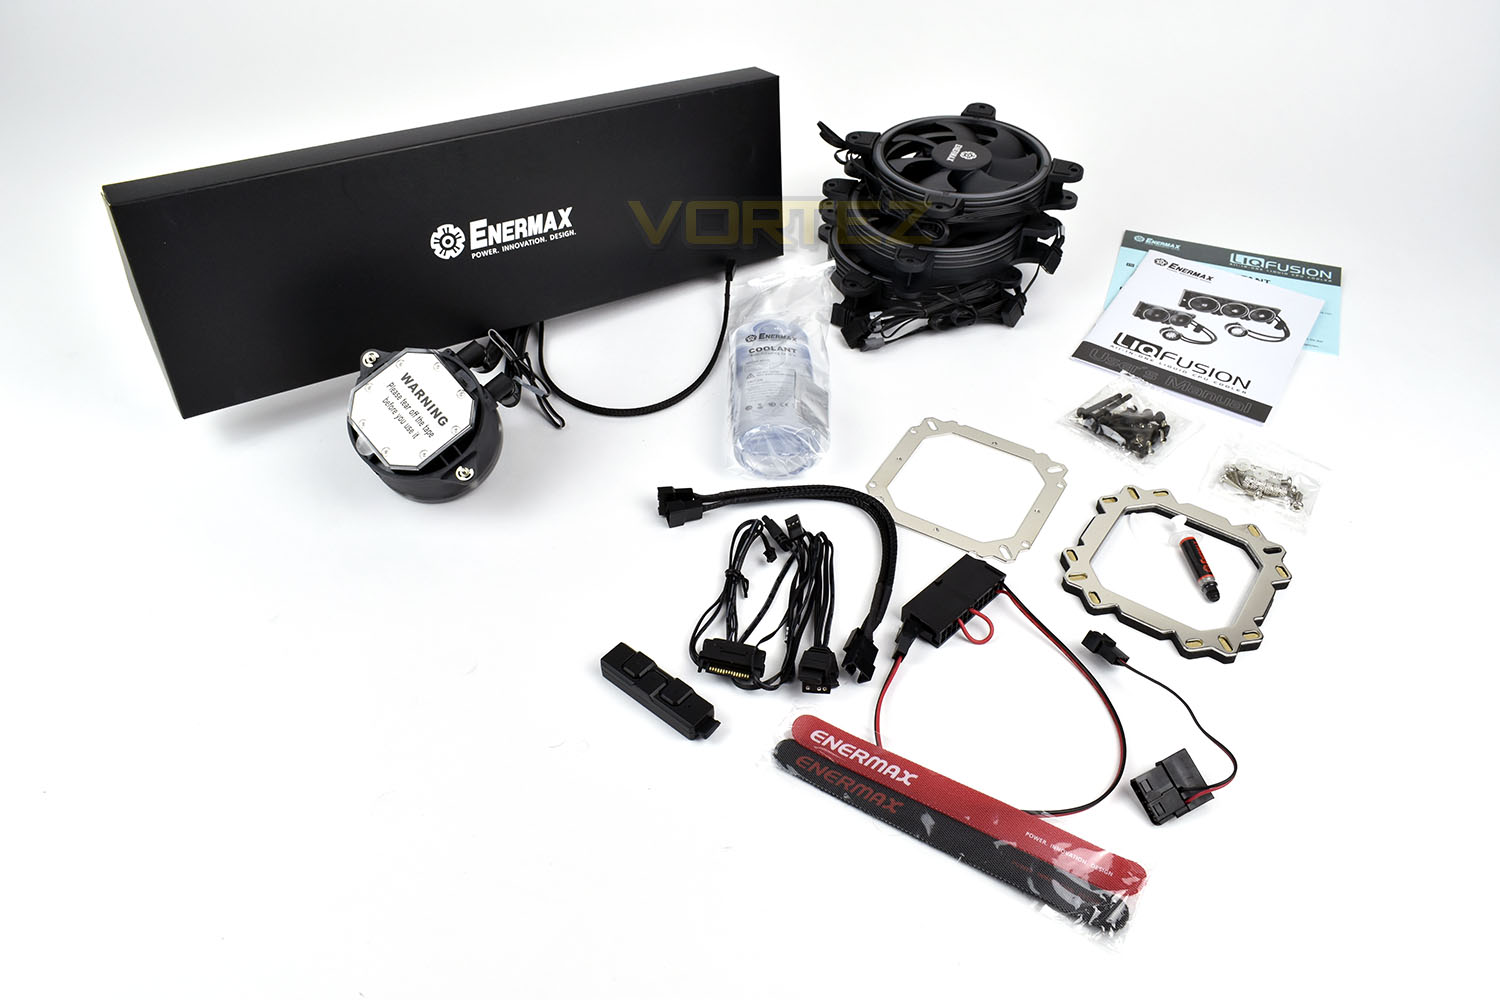
Included with the cooling loop is a large assortment of pieces which we’ll list below:
• Mounting hardware for all of Intel and AMDs mainstream socket types excluding only TR4.
• 3x 120mm Enermax Twisted Bearing RGB Fans
• 2x Enermax branded Velcro ties
• 1x SATA-powered RGB controller
• 1x 24-pin PSU connector (for testing the cooling loop outside of the case)
• 1x bottle of coolant for servicing and topping up the system over time
• 2x Instruction manuals
• 1x Dow Corning TC5121 thermal paste
Closer Look
Moving onto the cooling loop itself, we’ll look at the water block first. The top of the block is transparent, showing off the flow indicator inside, this will spin to indicate the speed of the water inside. On the left edge is a screw, with a piece of warning tape covering it; this is the fill port for topping up the system if required.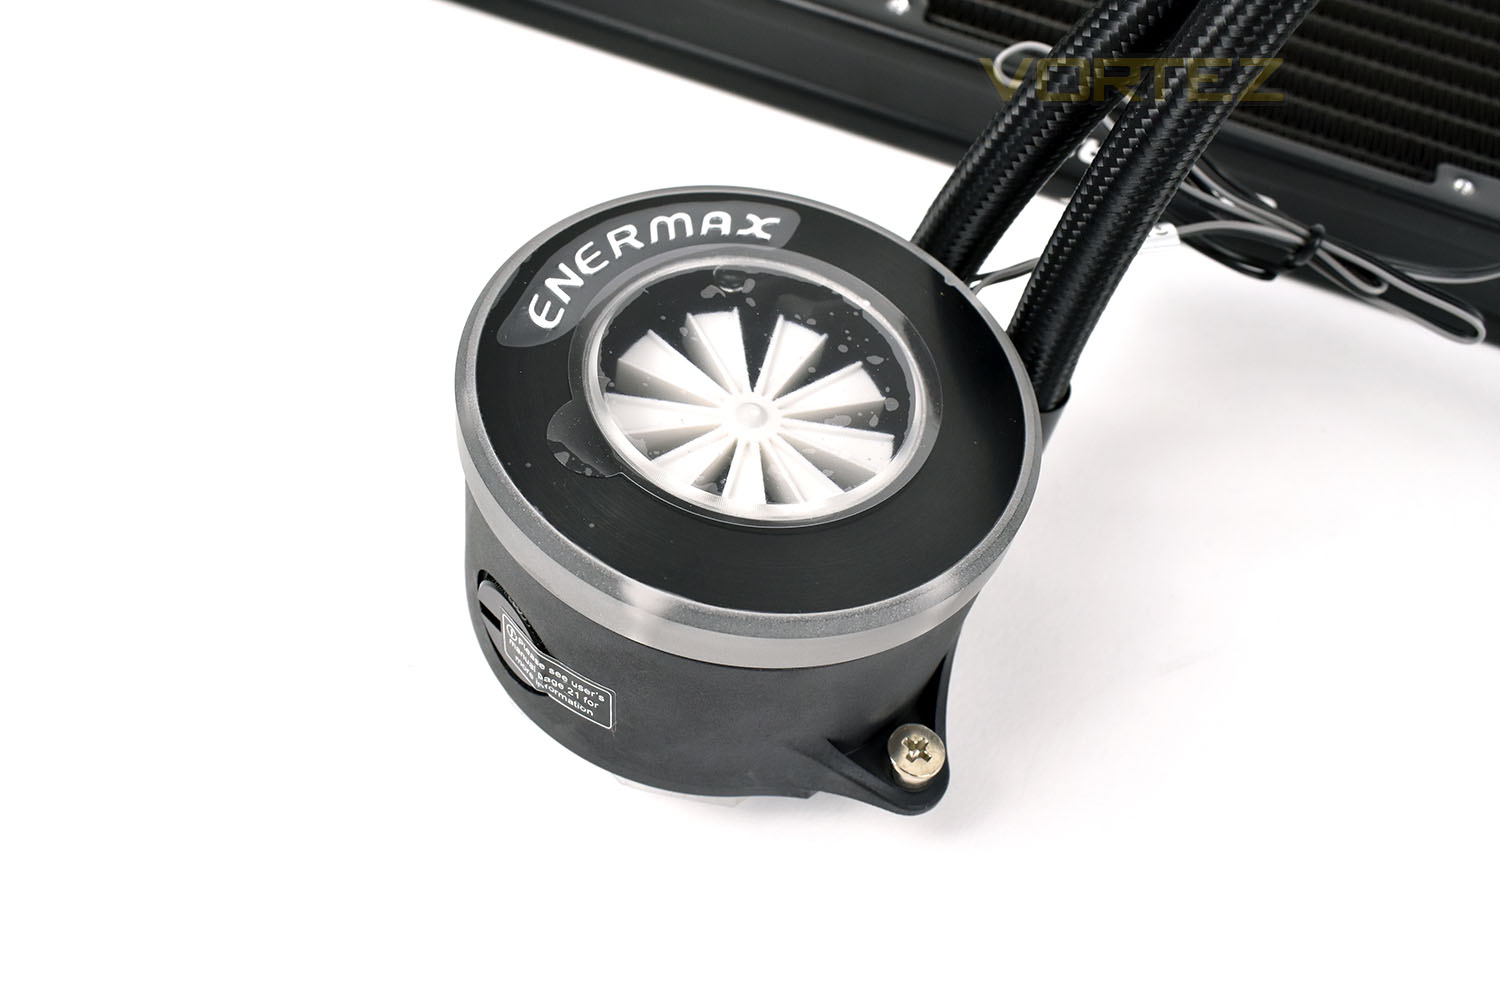
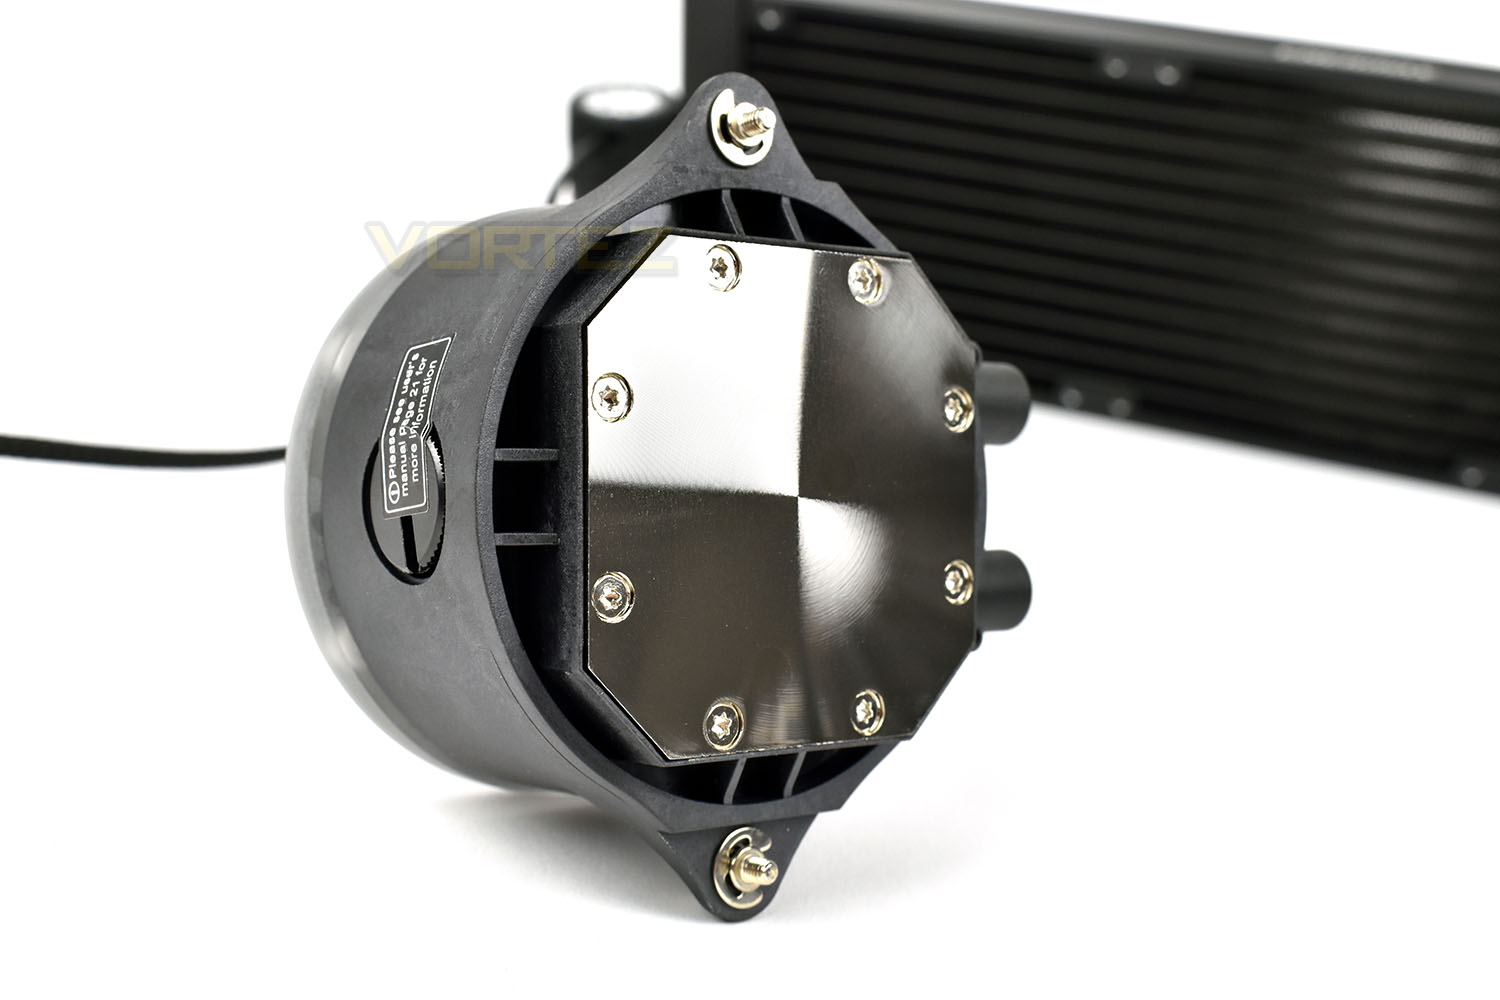
The base of the water block is copper, though it has obviously been coated in something to finish up this colour, however, neither the website or specifications specify what it’s coated with. It’s polished to a very smooth finish which helps optimise heat transfer.
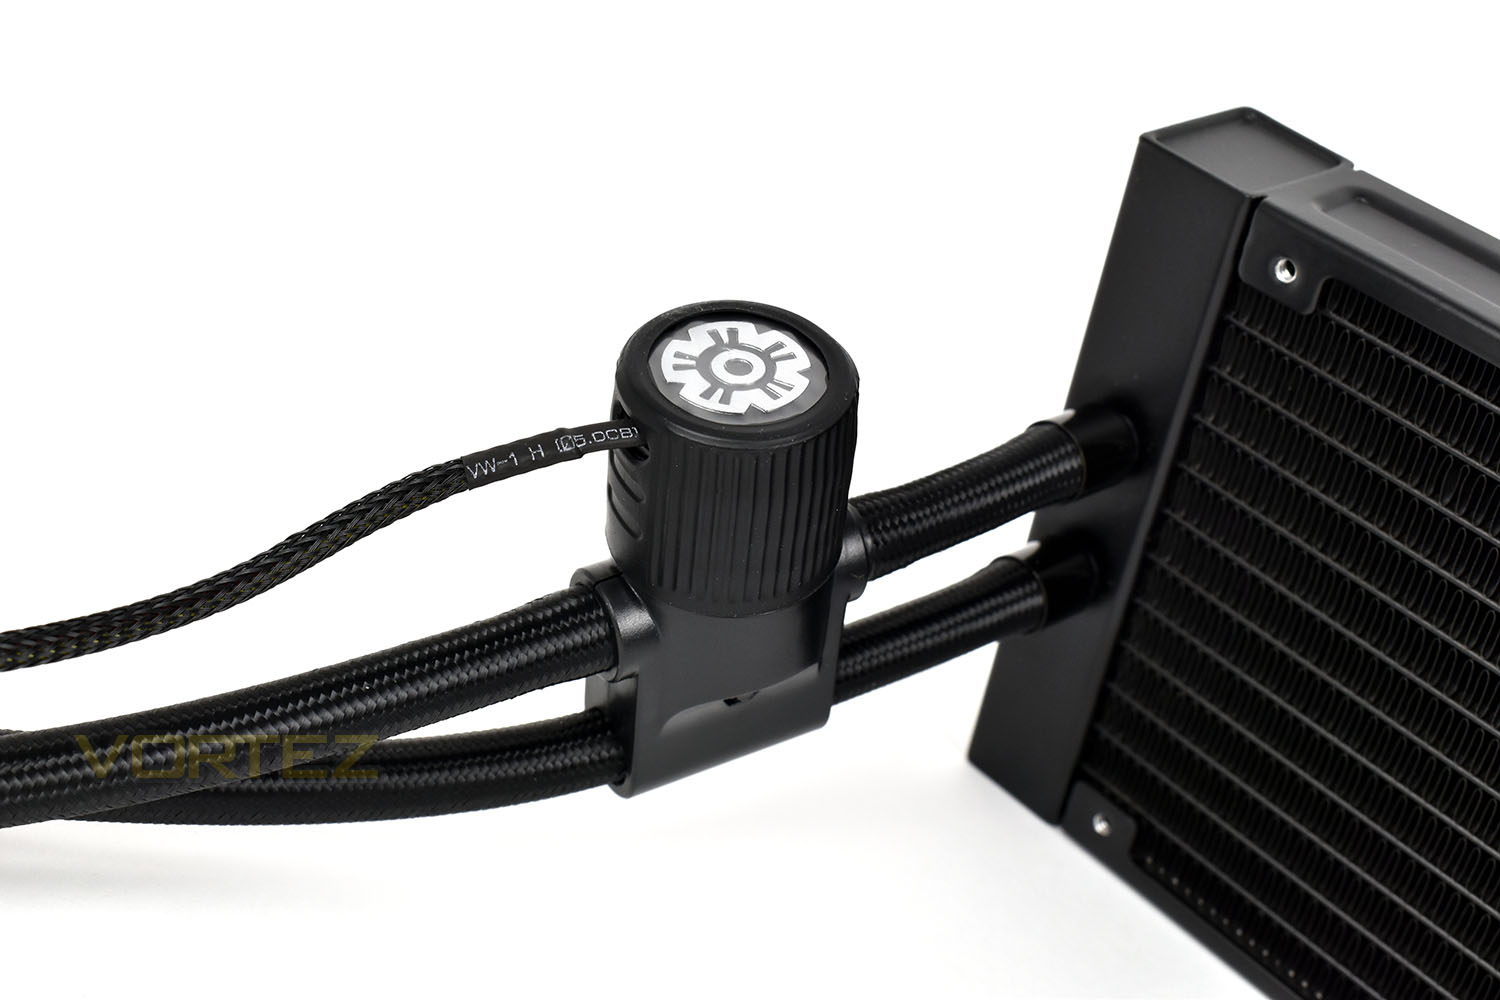
Strangely, the pump is located on the tubing instead of within the water block itself, while this increases the complexity of keeping the wires neat and tidy, it does provide a natural sound deadening through the 400mm braided tubes. The pump boasts ceramic bearings for quiet operating noise as well as being highly efficient.
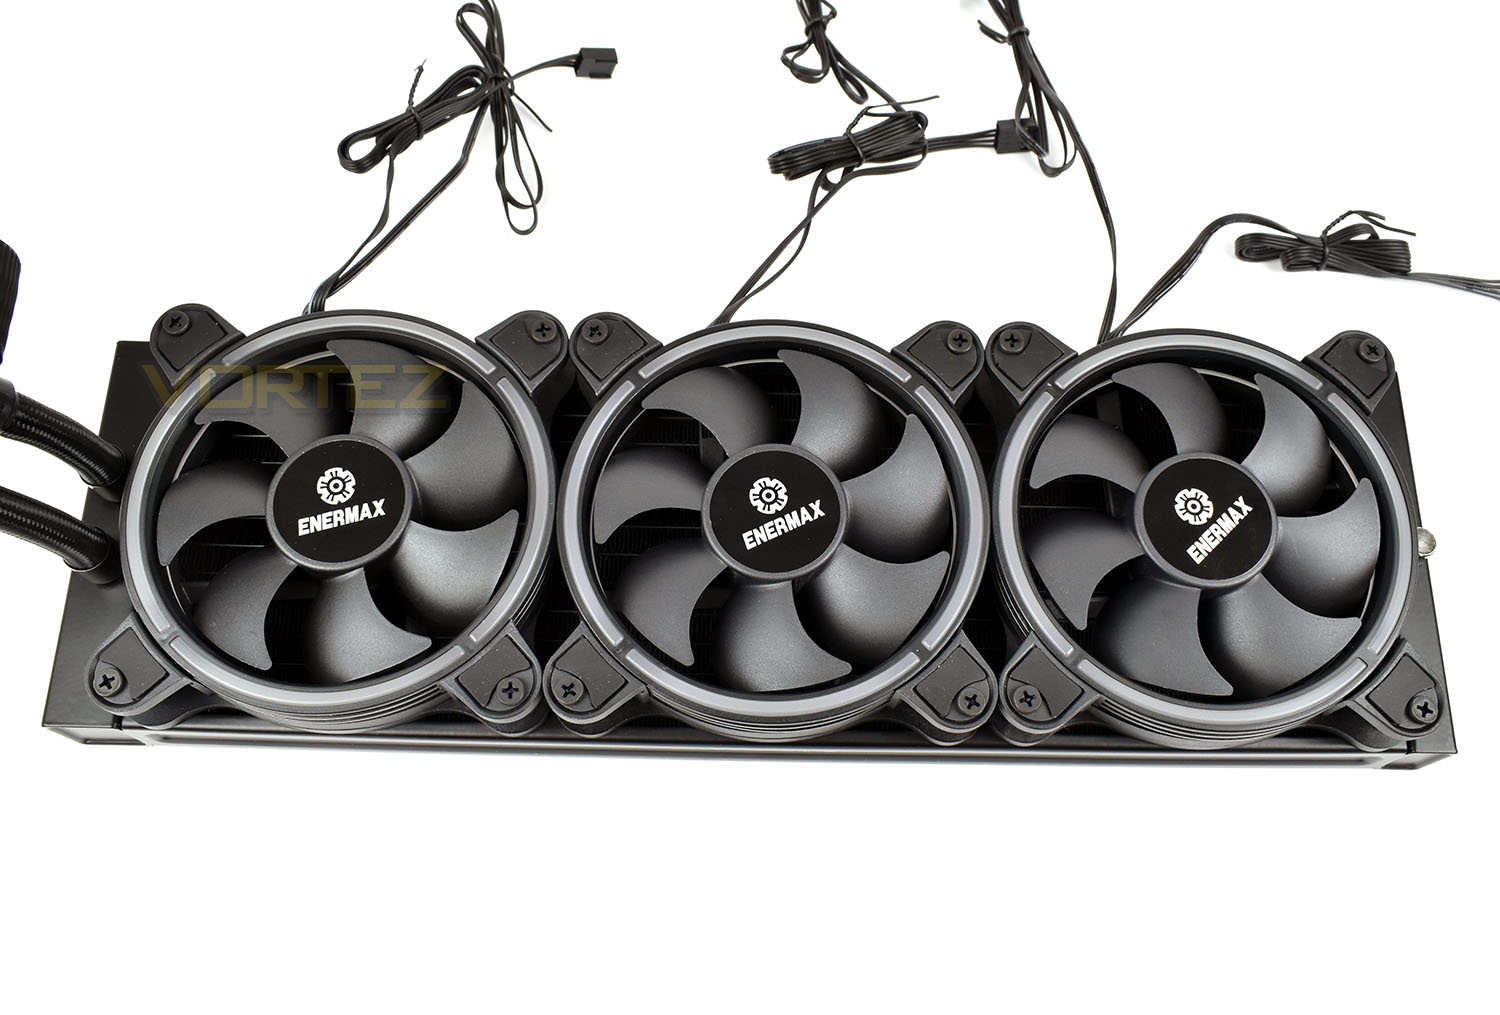
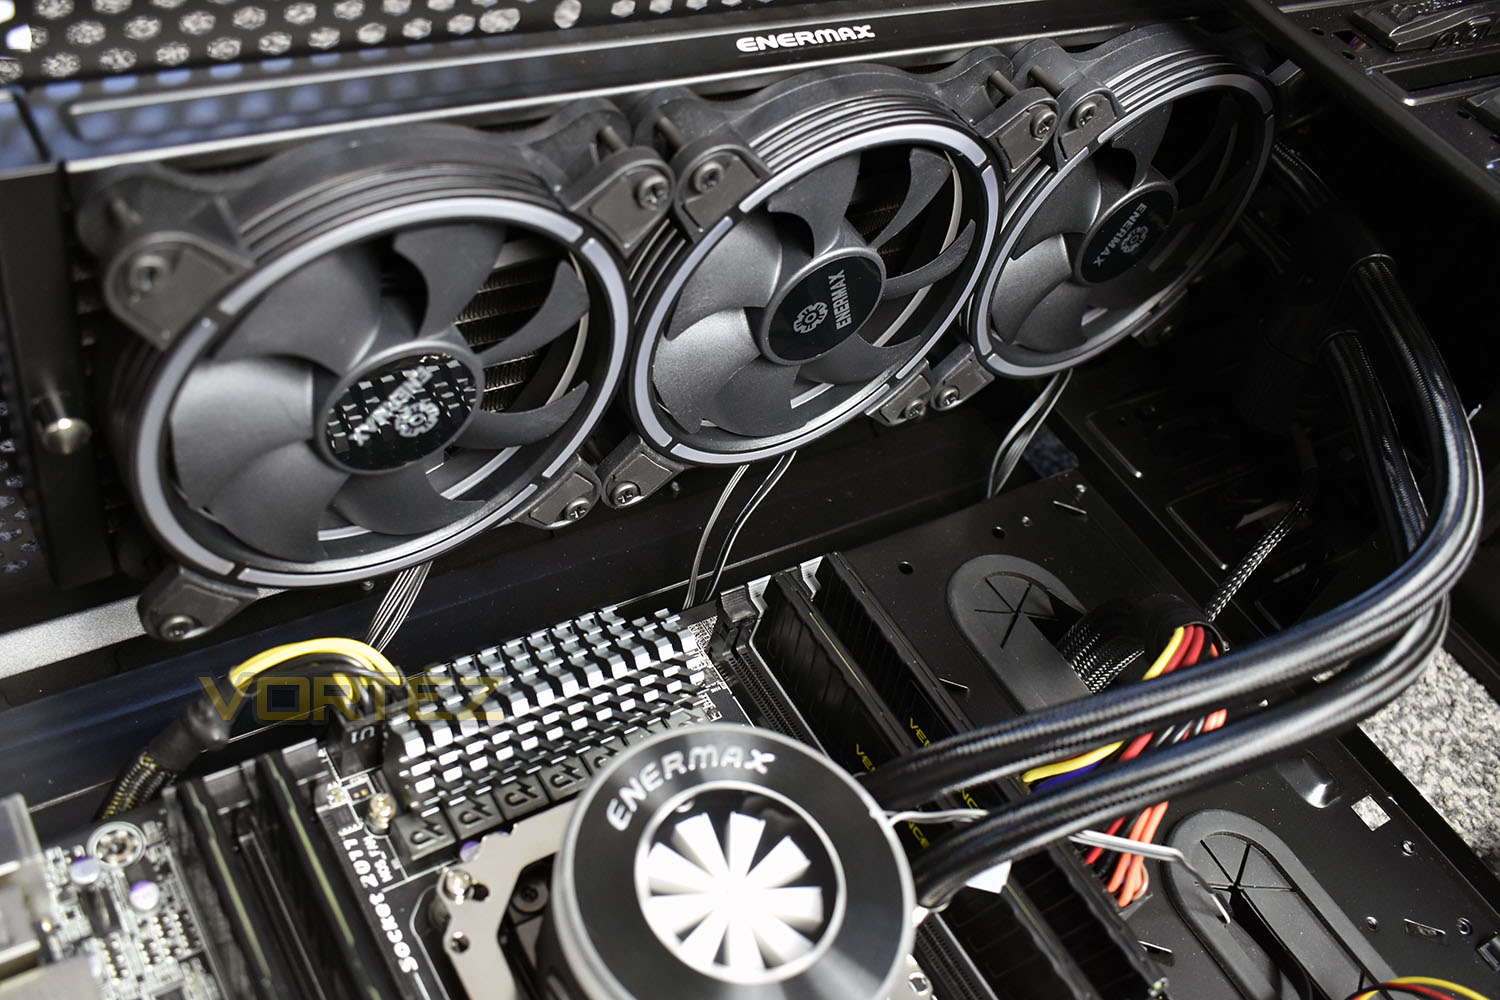
Enermax’s Twisted Bearing 120mm PWM fans feature RGB lighting on the front of the frame only, keeping the black styling throughout the rest of the fan. Each fan features 7 blades and operates within a range between 500RPM and 2000RPM allowing quiet operation or maximum cooling, depending on the situation.
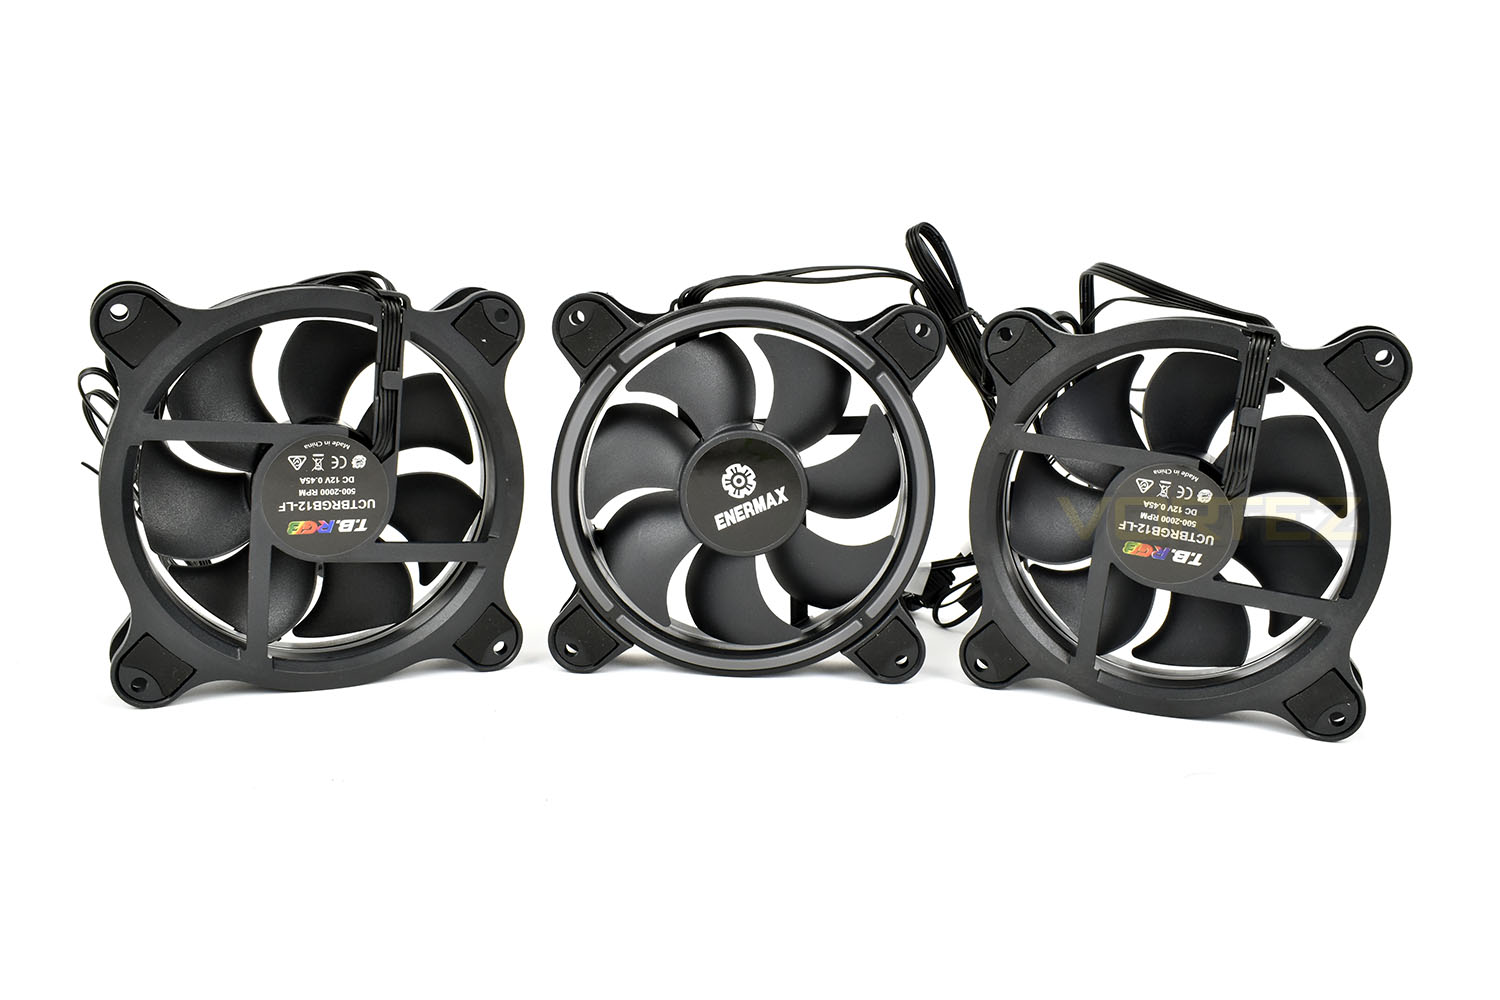
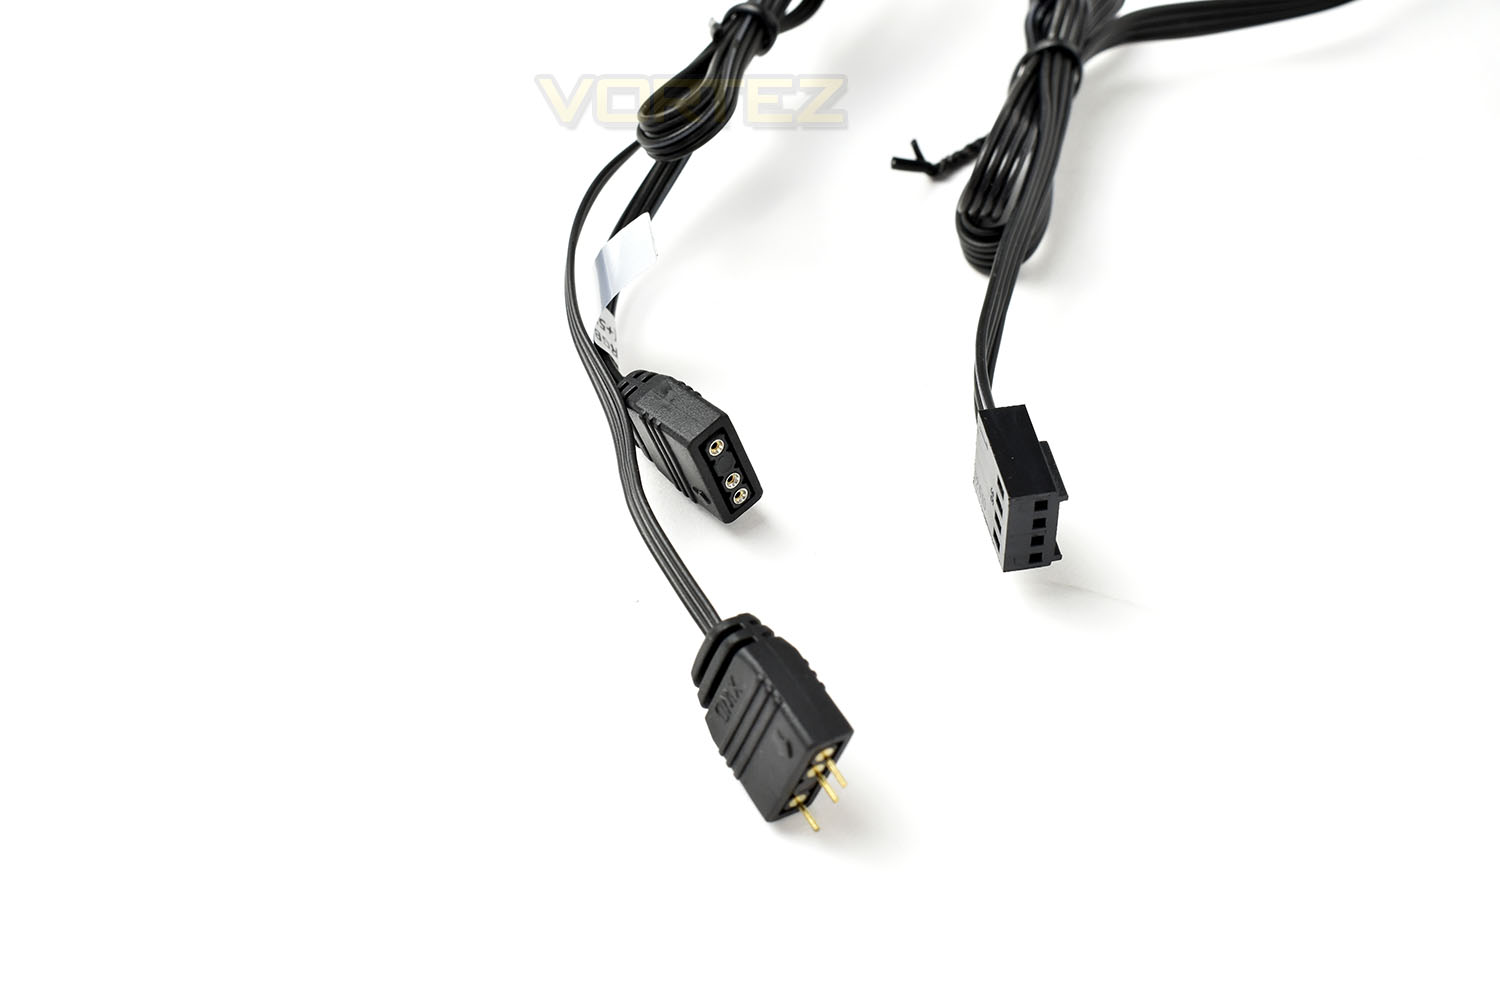
Each of the fans features a standard 4-pin PWM fan connection and an RGB connection with daisy chaining for connecting up all three fans as well as the water block for synchronised lighting.
Closer Look (Continued)
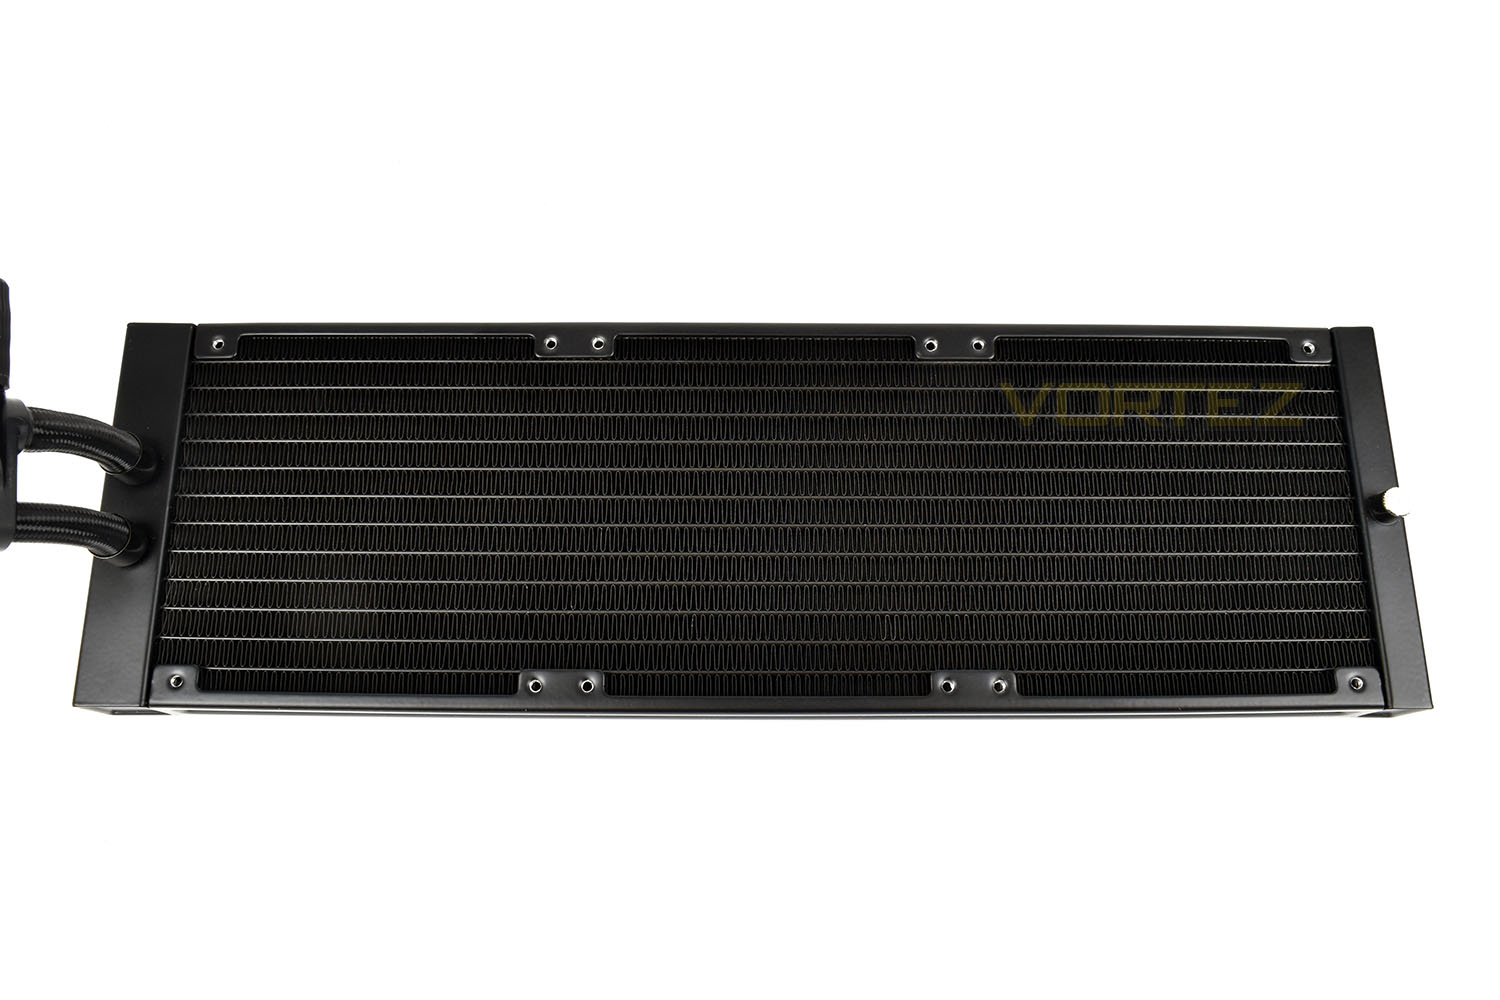
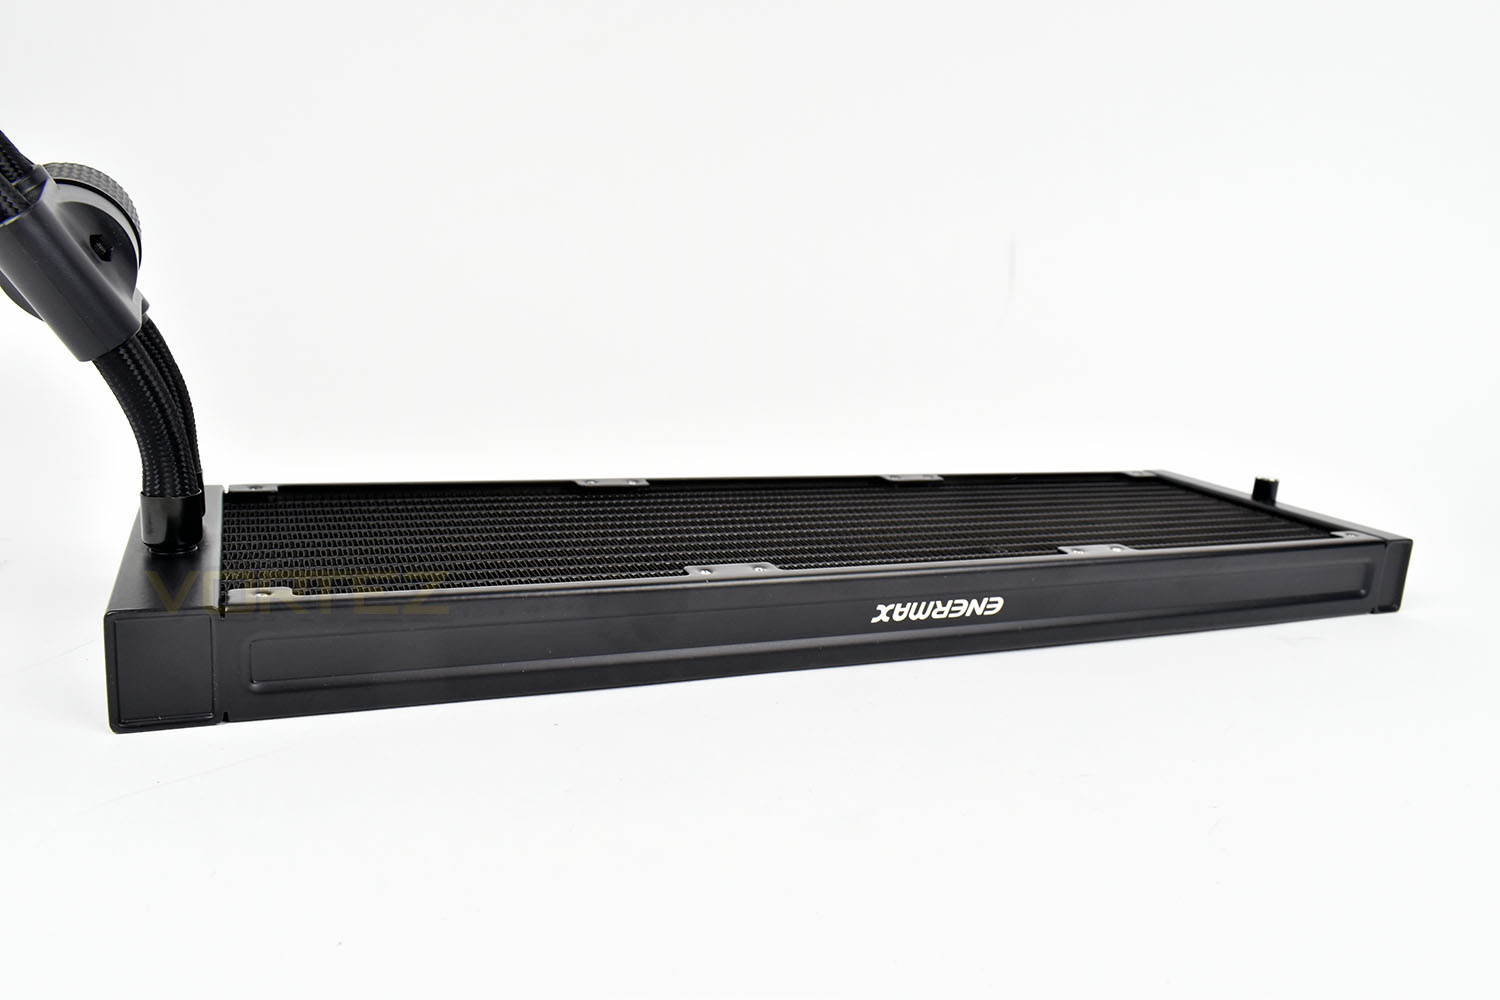
Moving onto the 360mm radiator, constructed from aluminium, it’s capable of housing up to six 120mm fans, with three on either side, but the marginal gains usually lead to most people using three fans on one side to push air through.The radiator measures 395mm x 120mm x 25mm.
On either side of the radiator is the Enermax logo; this will be the right way up once installed into the chassis.
Finally, attaching the fans to the radiator. The all-black construction looks great without any lighting, for a stealthy and sleep appearance. Also, thanks to the bulky, high quality screws and rubber pads on the Twisted Bearing fans, the installation was smooth and easy.
Installation
The keen-eyed amongst you might’ve spotted the similarities to the Raijintek Orcus 240, with a very similar water block and having its pump mounted on the radiator tubes. Well, the similarities continued into the installation process, which if you read our review of the Orcus 240, you’ll know just how much we hated it.Firstly, we had an identical battle with our 2011 socket, thanks to the spacing between the locking bar and the top-right stand-off. This causes us no end of issues with our Gigabyte X79 motherboard. However, we knew it was possible so we soldiered on.
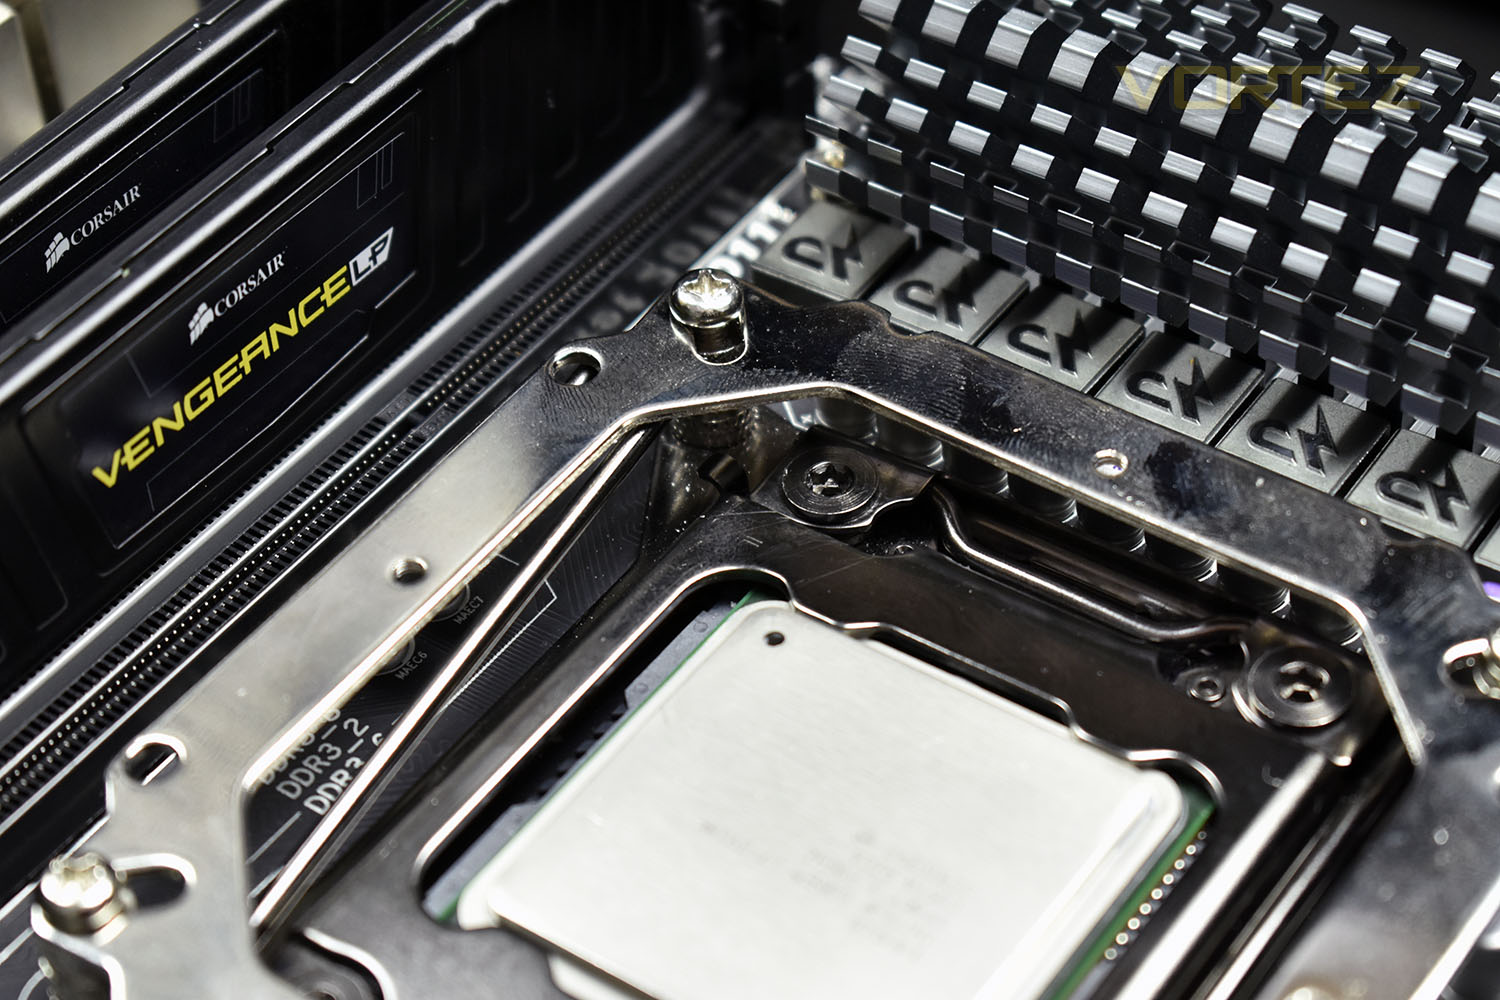
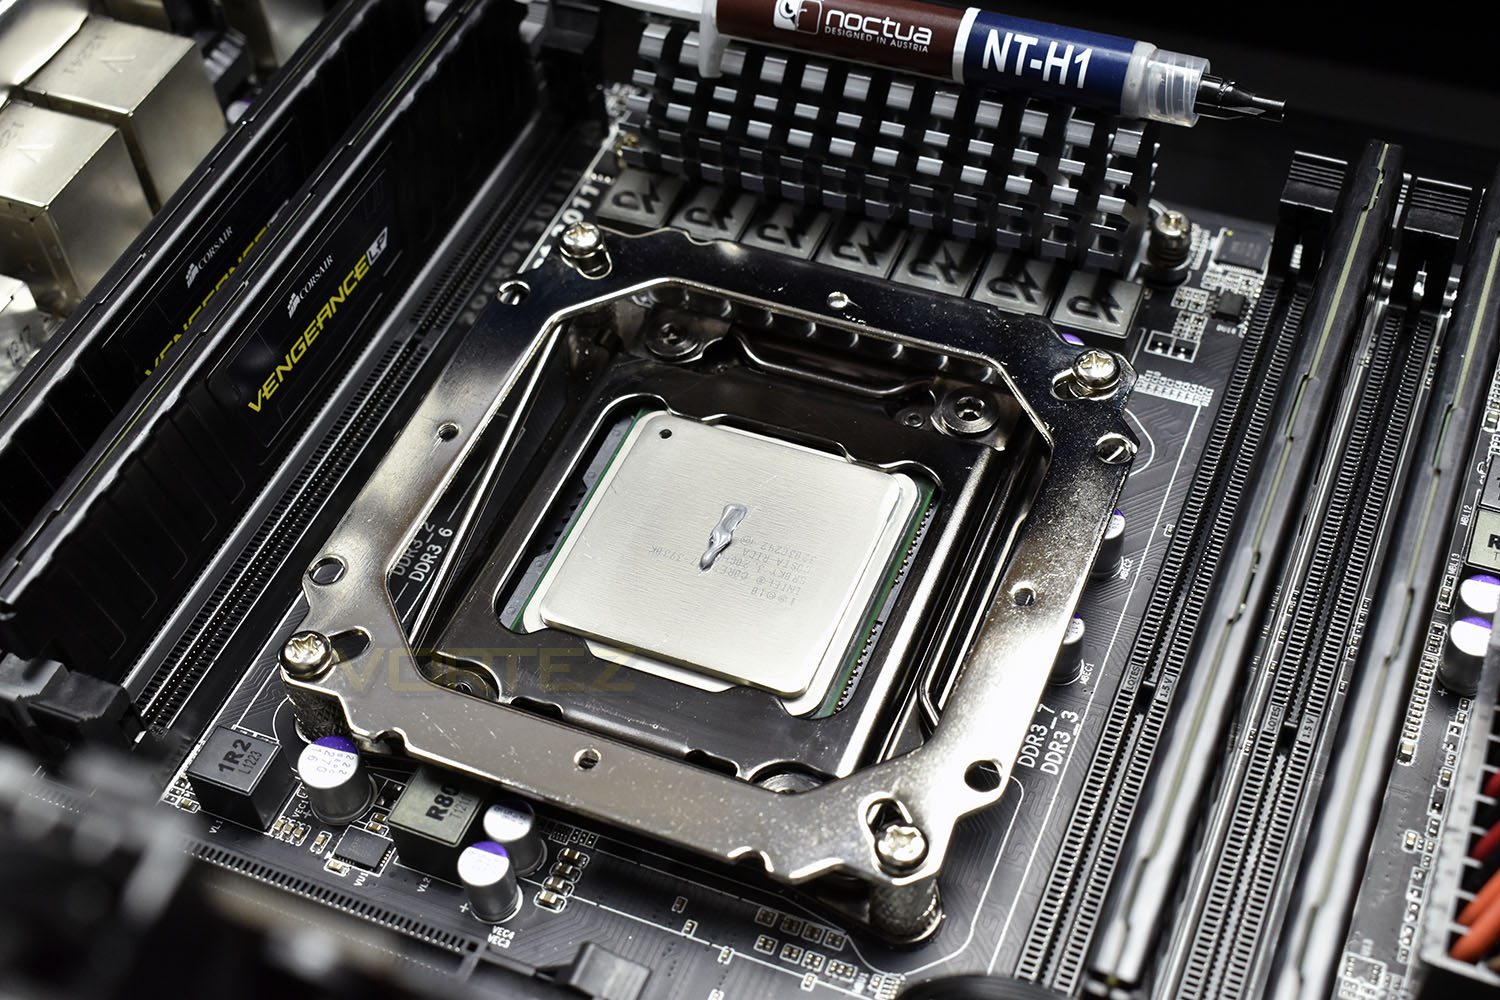
We managed to get everything secured down then applied our thermal paste; we use the Noctua NT-H1 to ensure our tests are as fair and equal as possible.
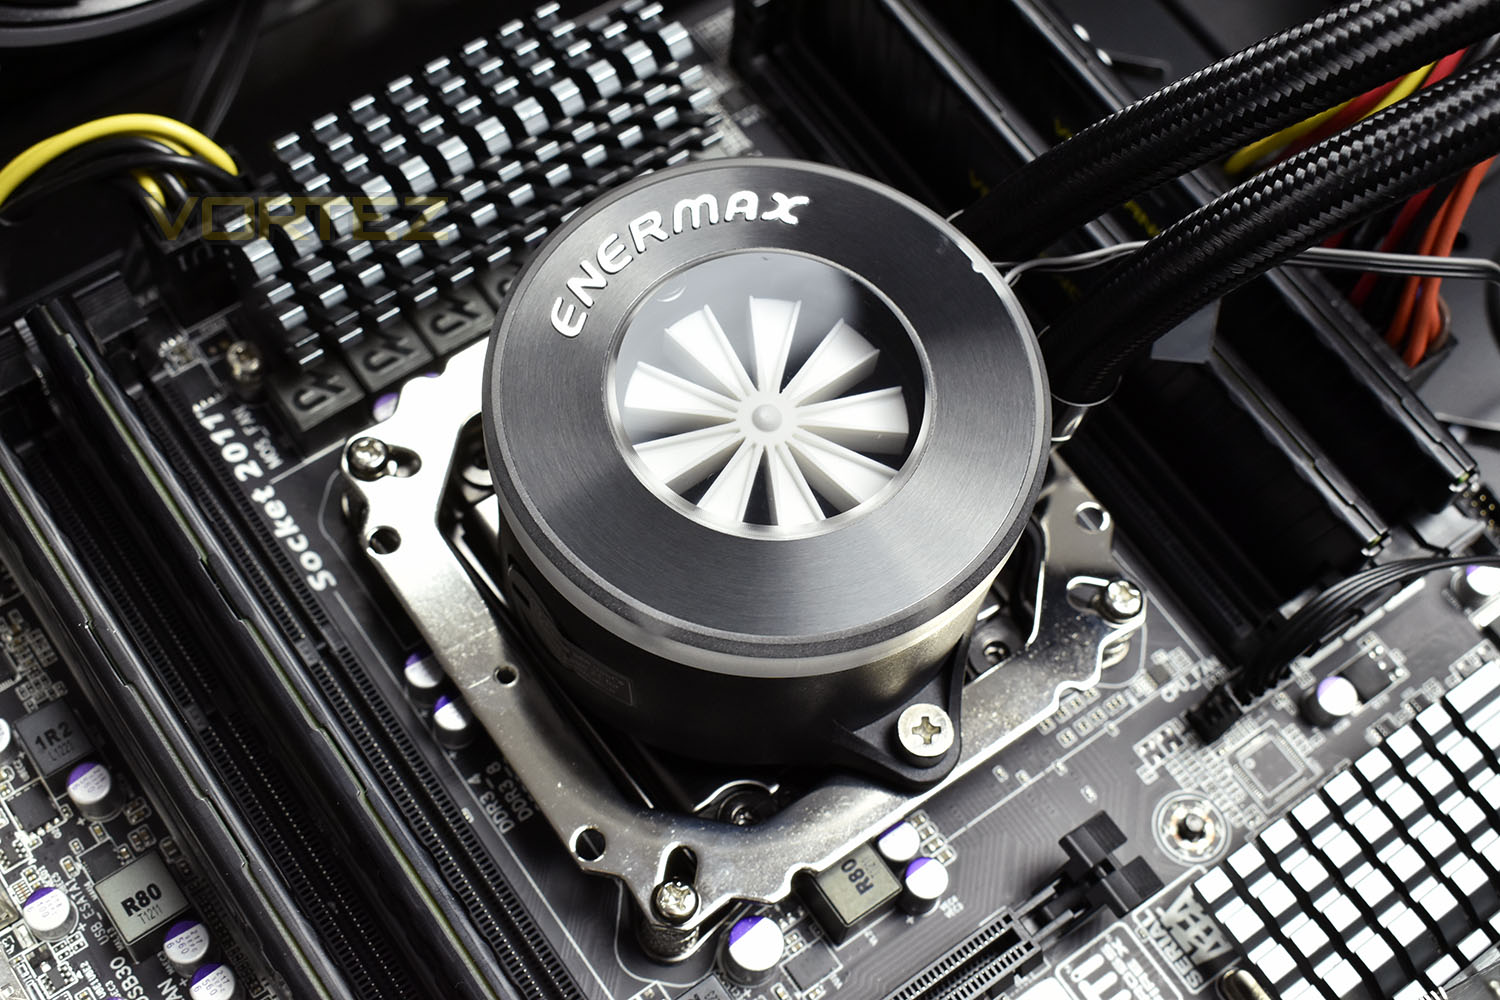
Installing the bracket was tough but installing the water block, with just two fixing screws, was plain sailing. Tightening them up as equally as possible to ensure the thermal paste is evenly distributed.
Last up, we install the 360mm radiator into the top of the case and feed the wires behind the motherboard to be organised and connected up to the RGB controller.
RGB Lighting
Below is a short clip showing the synchronised RGB lighting controlled via the SATA-powered RGB Controller.Test Setup & Methodology
We have recently made changes to our cooling department and the associated testing methodology, so please note that the number of results shown will increase over time as we add additional products. We hope that these results will appear clearer to the majority of our readership and look forward to building upon the baselines that we currently have.We perform two individual testing routines with each CPU cooler that we receive – temperatures and acoustics. The system used is as follows and all tests are performed at stock 3.8 GHz and overclocked 4.4 GHz frequencies.
Processor – Intel Core i7-3930K
Motherboard – Gigabyte X79-UP4
Memory – 8GB Corsair Vengeance LP 1600MHz CL9
Video Card – Sapphire Radeon HD 6850 1GB
Power Supply – NZXT Hale90 650W
Storage Drive – Kingston HyperX 240GB SATA III SSD
Case – Corsair Carbide 760T
Monitor ASUS ROG SWIFT PG278Q
Motherboard – Gigabyte X79-UP4
Memory – 8GB Corsair Vengeance LP 1600MHz CL9
Video Card – Sapphire Radeon HD 6850 1GB
Power Supply – NZXT Hale90 650W
Storage Drive – Kingston HyperX 240GB SATA III SSD
Case – Corsair Carbide 760T
Monitor ASUS ROG SWIFT PG278Q
To keep our tests consistent, we always review CPU coolers as they come out of the box – with their factory cooling fans, as the manufacturer intended and as the consumer expects. It should, however, be noted that we do not use supplied thermal paste but instead, Noctua NT-H1 paste to, again, ensure consistency. The paste is applied and the CPU allowed to run for a couple of hours, at idle, to give the thermal compound some time to “bed in.”
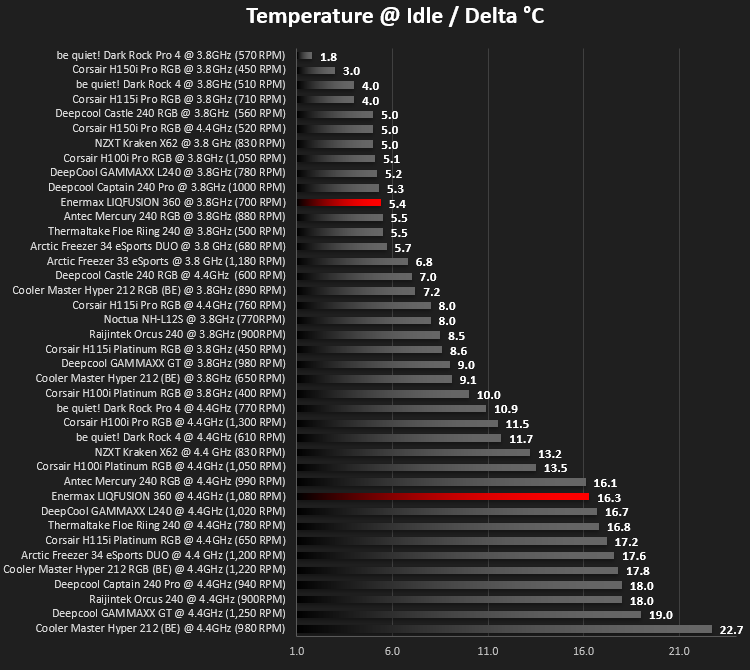
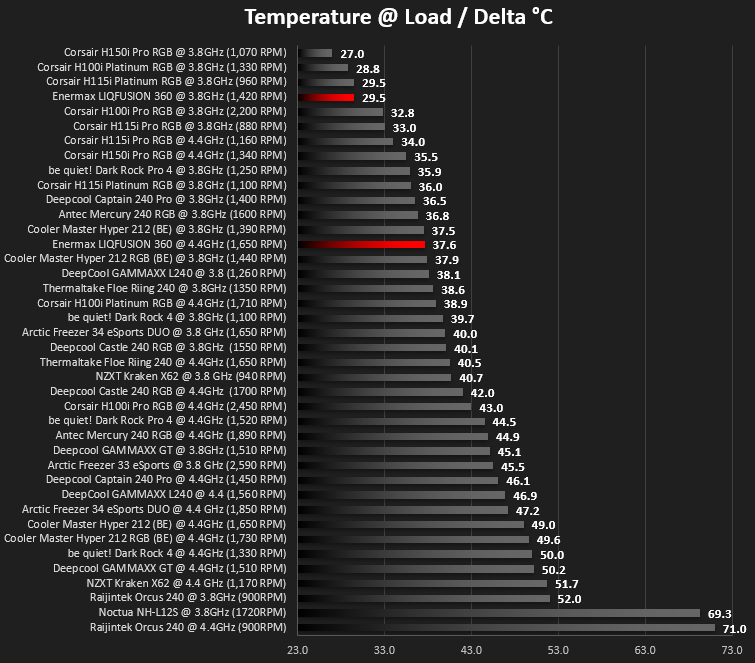
In the first test, we record idle and load temperatures as shown by the most current version of the Real Temp monitoring utility. The test system is booted to the Windows desktop and left to idle for 20 minutes to ensure temperatures have stabilised. The average core temperatures are then recorded over a 1 minute period and averaged across the six cores. We then perform a continuous 20 minute AIDA 64 stress test. The maximum absolute core temperatures are recorded immediately after the test has completed and averaged across the six cores. All results are displayed as delta temperatures – these are calculated by subtracting the ambient room temperature from the average core temperatures recorded. For temperature testing, the Corsair 760T chassis door is closed and has all three systems fans powered on to simulate real-world conditions.
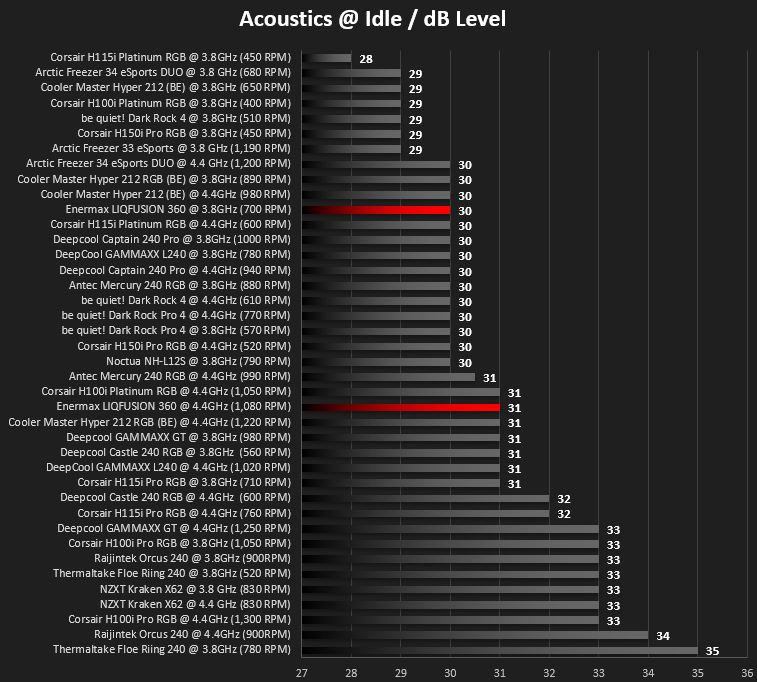
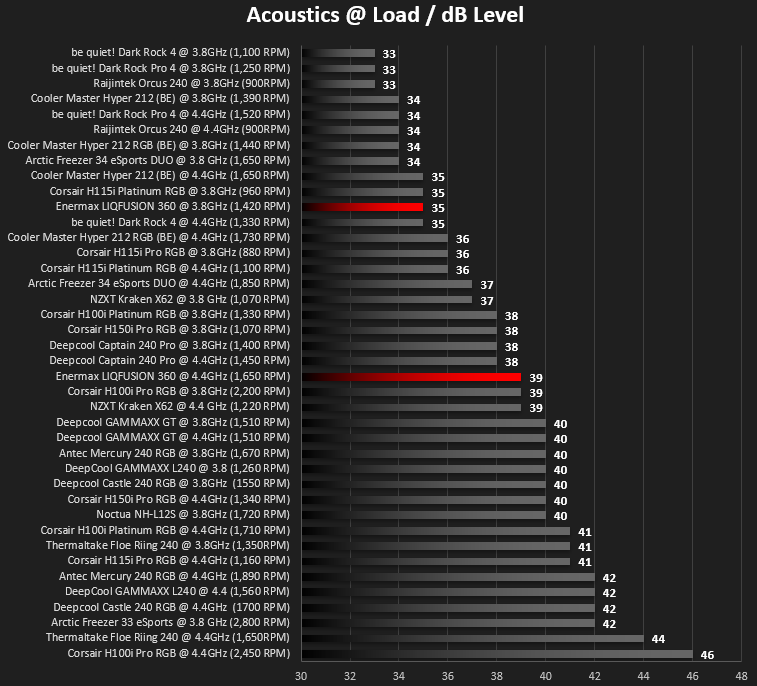
Our second test follows a similar methodology to the first, with the key difference being that the Corsair 760T chassis door is now left open and all three systems fans are disabled. This allows for the CPU cooler fans acoustic profiles to be captured in isolation. From cold, the system is again booted to the Windows desktop and left to idle for 20 minutes to ensure temperatures have stabilised. The acoustic level is then recorded at a distance of 20cm from the CPU cooler and where the individual result is an average level over a 1 minute period. We then perform our continuous 20 minutes AIDA 64 stress test. Acoustic levels are again recorded at a distance of 20cm from the CPU cooler and where the individual result is an average level over a 1 minute period.
Benchmarks – Thermal Results
As mentioned on the previous page, we give the system a couple of hours to bed in, as we do with all of our cooling system reviews, to ensure things are as even and fair as possible. It also helps to give the system some time to equalise so that temperatures are normal and the CPU isn’t working on anything in the background, such as searching for updates.We then take an idle reading, both at 3.8GHz and our overclocked 4.4GHz profiles.
It’s then given a blast of 20 minutes with AIDA 64 and measure the temperatures again, taking a reading over 60 seconds then averaging across the six cores.
Benchmarks – Acoustic Results
Moving onto acoustics, we take a measurement of the fan output at the same time as the temperature readings.We measure the noise output with the system at rest.
Then once the 20 minutes of AIDA 64 comes to an end, we measure the CPU temperature over 60 seconds and take the noise measurement below.
Conclusion
At the start of the review, we mentioned the challenge it put towards the Corsair H150i Pro RGB, and while it didn’t perfect quite as well, it was more than close enough that you’d be hard pressed to find any actual real-world difference outside of stress testing and temperature monitoring.Moving on from that, the Corsair H150i Pro only features RGB lighting on the pump housing, with standard ML120 fans on the radiator; the Enermax offers very similar performance but in a much more beautiful way. The RGB lighting was excellent using the included controller, ranging from slow, smooth effects right up to downright crazy speeds. Whatever you fancy, the controller can cater to you; of course, there’s also the option to allow your motherboard to control the lighting if that’s what you wish to use.
Installation, as you could probably tell, isn’t ideal on our Socket 2011 motherboard but, with this now being a niche socket with the vast majority moving over to AM4 or 115x, we can’t mark it down too much.
We also made mention to the similarity to the Orcus 240 from Raijintek, when we reviewed that we found it to be a terrible cooling loop with fans stuck at a single RPM, the Enermax seems to use the same platform and improves it immeasurably.
Build quality, finally, feels great. We liked the robust feeling of the 120mm twisted bearing fans, the screws to attach the fans were bulky and looks great in their matt black painted finish; we also love the inclusion of the testing equipment which allows you to power up the pump outside of the case using your PSU, handy if you need to top up the fluid a few years down the line.
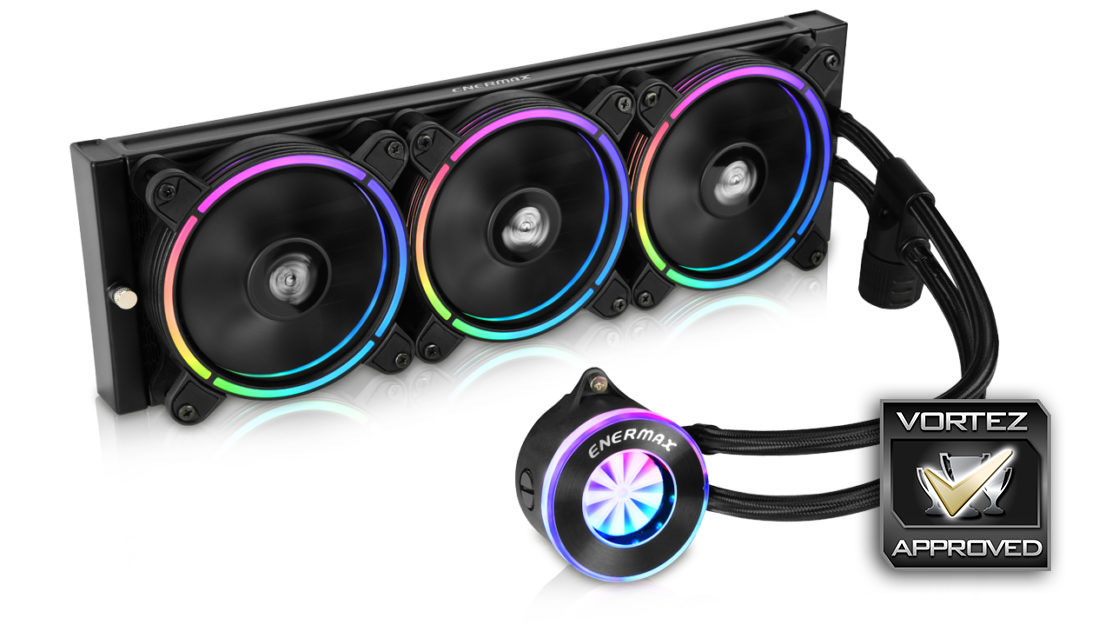
The Enermax LIQFUSION with its £150 pricetag certainly isn’t cheap but it presents better quality than the Corsair alternative. It arrives with three beautiful fans, offers great performance while remaining quiet and allows maintenance further down the line. Just a shame about the installation problems on our 2011 socket.
Pros
+ Looks fantastic once installed and running
+ Good cooling ability
+ Quiet operation
+ Great range of built-in RGB effects
Neutral
+- The Corsair H150i Pro RGB offers better performance but sacrifices RGB fans in the process
Cons
– Difficult to install on our Socket 2011 motherboard
+ Looks fantastic once installed and running
+ Good cooling ability
+ Quiet operation
+ Great range of built-in RGB effects
Neutral
+- The Corsair H150i Pro RGB offers better performance but sacrifices RGB fans in the process
Cons
– Difficult to install on our Socket 2011 motherboard
Click here for an explanation of our awards at Vortez.net.
Stay connected with the Vortez Social Media pages: