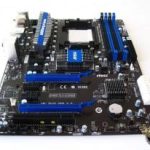
Foxconn have sent a new affordable performance motherboard in the form of the A9DA-S. See if its performance eclipses its price!
Product on Review: A9DA-S Socket AM3 motherboard
Manufacturer: Foxconn
Street Price: £65 at time of review
Manufacturer: Foxconn
Street Price: £65 at time of review
Foxconn primarily made their name as a large scale OEM producer for many of the brands we hold dear today. For example you’ve probably seen retention brackets, plugs and sockets with Foxconn branding nestled in hardware from other manufacturers like ASUS and Gigabyte. The original source of the company came from Hon Hai Precision Industry Company Ltd that was set up in 1974.
As you’d imagine after 37 years of evolution and growth Foxconn have become a well respected and highly experienced name in the industry. Besides motherboards they produce GPU’s, cases, heatsinks, barebones systems and peripherals including card readers under the Foxconn brand.
Here’s a few words from the company themselves:
Guided by a belief that the electronics products would be an integral part of everyday life in every office and in every home, Terry Gou founded Hon Hai Precision Industry Company Ltd, the anchor company of Foxconn Technology Group in 1974 with US$7,500, a devotion in integrating expertise for mechanical and electrical parts and an uncommon concept to provide the lowest “total cost” solution to increase the affordability of electronics products for all mankind.
Today, Foxconn Technology Group is the most dependable partner for joint-design, joint-development, manufacturing, assembly and after-sales services to global Computer, Communication and Consumer-electronics (“3C”) leaders. Aided by its legendary green manufacturing execution, uncompromising customer devotion and its award-winning proprietary business model, eCMMS, Foxconn has been the most trusted name in contract manufacturing services (including CEM, EMS, ODM and CMMS) in the world.
Guided by a belief that the electronics products would be an integral part of everyday life in every office and in every home, Terry Gou founded Hon Hai Precision Industry Company Ltd, the anchor company of Foxconn Technology Group in 1974 with US$7,500, a devotion in integrating expertise for mechanical and electrical parts and an uncommon concept to provide the lowest “total cost” solution to increase the affordability of electronics products for all mankind.
Today, Foxconn Technology Group is the most dependable partner for joint-design, joint-development, manufacturing, assembly and after-sales services to global Computer, Communication and Consumer-electronics (“3C”) leaders. Aided by its legendary green manufacturing execution, uncompromising customer devotion and its award-winning proprietary business model, eCMMS, Foxconn has been the most trusted name in contract manufacturing services (including CEM, EMS, ODM and CMMS) in the world.
There’s plenty more to add about this massively impressive company but as that would take up a few pages of this review I’ll just provide a link to the overview pages for the company HERE
Today we have one of their AMD AM3 compatible motherboards. It’s very reasonably priced at around £65 so let’s see if this has affected the feature count or performance capability.
Specifications
As you can see there don’t seem to be any cut corners perhaps besides the fairly obvious lack of USB 3.0.
Crossfire capability, SATA 6.0Gbps, the full fat 890GX northbridge and (as you’ll see) fanless heatsinks including one cooling the mosfets – it certainly seems to be specified above its very agreeable price point.
Packaging, extras and A9DA-S
The packaging for the A9DA-S is tidy and fairly understated with the front identifying board type and compatibility.
Box front.
The rear inherently contains more specific information relating to the board. But it is still uncluttered and to the point.
Box rear.
Unpacking we find the extras bundled with the board. These include the User manual, driver and utility disk, I/O backplate, two sets of SATA data cables and molex to sata power cables and a single eSATA backplate adapter.
Bundled extras.
Also within the box is a quick installation guide.
Quick install guide.
As you can see once unfolded it’s quite a comprehensive rundown of what’s what and what goes where. It also covers a selection of languages too which is useful.
A good deal of useful info.
The board itself cuts a very sleek look. The black and yellow look is very fetching and should go a long way to enticing prospective purchasers.
Board front.
The backplate for the heatsink retention assembly is the only real point of interest on the rear of the board. There are a few rear mounted resistors and other components spattered around the northbridge and southbridge regions too.
Board rear.
Closer look
Starting at the top of the board we can see the mosfet heatsink I mentioned earlier. An elegant arching design that in practice did a good job of remaining quite cool during even high clocking operation. Next to it you can also see the 8-pin ATX 12v connector which has been placed in a very accessible location – nice work Foxconn.
Mosfet and 8-pin 12v connector.
Moving across we can see the AM3 socket. This board is compatible with all current generations of Athlon II and Phenom II chips including AMD’s hex core designs.
AM3 socket.
The 890GX northbridge is situated below the AM3 socket. A passive heatsink design which in use is more than capable of comfortably cooling the chipset even under sustained load. Just make sure you at least have some airflow passing over it. This chipset contains ATI HD 4290 graphics and all the PCI-e 2.0 and USB 2.0 controlling. The chipset can deliver 1 PCI-e slot @ x16 speed or dual PCI-e slots @ x8 speed for crossfire application.
Northbridge passive heatsink.
Next we get to the DDR3 slots. The board can accept 4x4GB DIMMS resulting in a total system memory capacity of 16GB.
DDR3 DIMM slots.
Alongside this sits the 24-pin power socket and a selection of voltage monitoring points useful if you’re an avid overclocker and fancy a more hands on approach to your voltage monitoring regime!
24-pin power connector and voltage monitoring points.
Below that are the six SATA 6.0Gb/s sockets the use the now almost universally useful right angle connectors. With todays performance GPU’s hanging over the extremities of even full ATX boards like these there’s simply no real space available for a socket that plugs in from above.
SATA 6.0Gb/s.
Closer look continued
Behind the SATA sockets we can see the A9DA-S southbridge heatsink. It’s a compact unit designed to sit below a larger GPU installed in the first PCI-e slot. Fortunately it doesn’t need to ditch much heat as these chipsets are quite frugal. Controlling the six SATA connections and various RAID duties the SB850 will cope just fine under the sink.
Southbridge heatsink.
The bottom corner of the board contains the AMIBIOS chip, LED status indicator panel (this provides alpha numeric codes that allow the user to identify the status of the board and associated hardware issues) a com header, front panel header and a couple of what I can only assume are ASUS inspired power and reset buttons. Very useful if the board is being tested outside the case… no more shorting the front panel pins to power the board up!
BIOS chip, LED indicator and front panel connectors.
Running along the base of the board are no less than four USB 2.0 header sockets. As with any other board these sockets carry two discrete USB connections meaning a total of eight additional USB ports on top of those contained in the boards I/O plate. Yes they’re not USB 3.0 but the quantity available is none the less impressive!
4x USB headers = 8x USB connections.
Expansion wise the A9DA-S is well covered… it has two PCI-e 2.0 x16 slots (run at x8 when dual cards are installed), two PCI-e x1 slots and two standard PCI v2.3 slots. It’s a very flexible design that should allow many combinations of system installation depending on what the user is intending to use it for.
Expansion slots.
Finally we get to the last point of interest on the board – the I/O plate at the rear of the board. In line with much that we’ve seen regarding ‘feature set’ and the fact that the board uses the 890GX chipset the I/O plate is filled. There’s standard PS2 connector (I kind of wonder why these are still used though), six USB 2.0 sockets, a VGA, DVI and HDMI socket, optical digital output, gigabit ethernet socket and a raft of connectors that support the onboard 8 channel HD audio capability.
The I/O panel.
Software
As usual the Foxconn A9DA-S comes with a DVD containing all the required drivers for the board.
There’s also a selection of programs to monitor, overclock, power save and protect your PC.
The disc install process is an interesting affair as you’re whisked into space to choose to install either drivers, utilities or both.
Drivers include those for the AMD chipset and VGA, Realtek audio, Atheros lan and the ATi audio driver.
Drivers.
Utilities wise you get various Fox software for monitoring and overclocking, updating both software and drivers, adding a logo to the boot up process. You also get Adobe Acrobat for accessing the manuals included on the disk and Norton Internet Security.
Utilities.
All in all it’s a decent selection of useful items – certainly (with the exception of the Logo utility) there’s nothing superfluous here.
Let’s take a look the two standout programs…
Fox One is Foxconn’s tuning and monitoring software. Depending on the board used and the setup in BIOS it allows discrete control of many aspects of the system including clock speeds, multiplier levels, voltages and fan speeds.
The interface is easy to understand and comes in four different layouts allowing some degree of personalisation for users. The standard design is a fairly business like affair but the other versions offer more creative and off the wall designs as shown below.
Default style.
Crystal style.
Green style.
Rock style.
Software continued
Having decided on your chosen skin you can see the options available to the user. Any not useable due to feature set or BIOS status are greyed out. As you can see from the main page here the voltage tab is inactive since it was disabled in BIOS as this was prior to overclocking.
Primary screen.
As an example you can adjust frequencies for the CPU ram and PCIe lanes.
Clockspeed adjustment.
Automated fan speeds can also be manually altered if needed.
Fan control.
A configuration page also allows the user to make adjustments to the monitoring frequency and how temperature is displayed.
Config page.
The other particularly useful program is FOX LiveUpdate. Allowing the user to update and backup the BIOS. On top of that you can update from a file you’ve previously downloaded or select online update to get the very latest BIOS file for your motherboard direct from the Foxconn website!
FOX LiveUpdate.
It’s straightforward and quite foolproof! The process took around a minute while it backed up and replaced the file. It then requested a reboot and upon returning to the BIOS I found the update was in place.
Test Setup
CPU: Phenom II X6 1100T Black Edition @ 3.3ghz
RAM: 4gb OCZ DDR3 1333mhz
HDD: 160gb WD 7200rpm SATA HDD
Optical drive: HP DVDRW
CPU cooler: Coolermaster Hyper TX3
PSU: Nexus RX8500 850w
GPU: Gainward GTX260
Case: DimasTech Bench/Test Table Easy V2.5
RAM: 4gb OCZ DDR3 1333mhz
HDD: 160gb WD 7200rpm SATA HDD
Optical drive: HP DVDRW
CPU cooler: Coolermaster Hyper TX3
PSU: Nexus RX8500 850w
GPU: Gainward GTX260
Case: DimasTech Bench/Test Table Easy V2.5
Bios
The BIOS of the A9DA-S is a fairly familiar AMI layout. The main page includes access to all the security and set up options. The only difference compared to the majority I’ve worked with is the Fox Central Control Unit (FCCU).
BIOS main page.
From the FCCU you get a variety of BIOS protection options and tweaking controls.
FOX Central Control Unit.
The ‘Intelligent Stepping’ section allows changes to system clockspeeds and multipliers. The ability to limit some settings while changing others is a nice feature since you can lock out certain parts of the system to make sure they don’t push towards instability during an overclock session.
Intelligent Stepping section.
The ‘Voltage Options’ section quite obviously concerns system voltage control. Here you can over and undervolt the memory, CPU and chipset to varying degrees. I did have one issue with this section which is explained in the ‘Overclocking’ section of the review which comes next.
Voltage Options section.
All in all the familiarity of the BIOS made it easy to navigate and use and with the exception of the ‘Voltage Options’ section was a pleasure to work with.
Overclocking
Like the ASUS M4A89GTD PRO/USB3 I tested a good while ago the A9DA-S uses the same 890GX chipset which stands it in good stead for a decent overclocking performance.
Stock speed of the 1100T is a fairly heady 3.3GHz so I was aiming for 3.8GHz as a good clock.
Stock clockspeed.
One initial observation I made was that the inbuilt auto voltage adjusting system on the board seemed to function with both ‘cool and quiet’ and ‘C1E’ disabled. Initially this meant that a 150mv boost in BIOS which should have manifested itself as a 1.50v core voltage actually got to 1.55v on occasion. Not ideal if you’re not aware of the high voltages as the life of the chip may well be limited by such increases.
Obviously once identified I worked out how much of an additional boost each incremental increase returned. For example an additional 120mv in BIOS (which should give 1.47v) actually gave around 1.52v.
Obviously once identified I worked out how much of an additional boost each incremental increase returned. For example an additional 120mv in BIOS (which should give 1.47v) actually gave around 1.52v.
Now, onto testing! I tried pushing the FSB initially with 3.5GHz coming and going with no voltage increase. Pushing a little higher to 3.63GHz (220MHz FSB) the clock did require an extra 0.1v but ran stably and benched without issue. After this point I could not get FSB stable beyond 220MHz – there may well have been a FSB hole apparent but nothing changed up to 240MHz so I began working the unlocked multiplier.
Returning FSB to 200MHz and upping the multi to 18.5x I achieved a 3.7GHz overclock. 1.48v was used here for stability although with a bit of careful tweaking 1.45v/1.46v would probably have been perfectly useable.
I then added 10MHz to the FSB, pushed the multiplier up a further 0.5 to 19x and upped voltage to 1.52v to try and guarantee stability.
This proved to be suitably stress and bench stable and @ 3.99GHz had eclipsed my 3.8GHz goal I chose to run this clock for the remainder of the testing.
3.99GHz overclock.
Installation
Obviously I’m installing onto a bench table which is a doddle compared to virtually any other type of case. That said the layout of the board did suggest that Foxconn’s engineers had put a decent amount of thought into its design.
As mentioned before the 8-pin12v socket is well away from other components in the power section meaning it’s much less fiddly to plug and unplug.
The proximity of the DDR3 slots to the heatsink will mean careful thought will have to be given to the install of tall DIMMs and large heatsinks but it’s no different to the vast majority of designs so no great shakes.
The three fan headers are also nicely located with two nestled in a reasonably open space above the top most PCI-e slot next to the northbridge and the third sat at the extreme base of the board next to the USB headers. The USB headers and the power and reset switches are also very accessible being situated at the very edge of the board. Here they’re about as far away as they could get from any potentially interfering components.
As for PCIe and PCI expansion cards the selection of slots available means you could comfortably install a variety of setups without worrying too much.
The A9DA-S.
Sound
A combination of passive heatsinks and board monitored fan headers lends itself once again to quiet operation.
PWM control of the CPU fan was impressive. Under load it spooled up gradually and when idling would spin down to virtual silence. Of course a lot depends on the efficiency of the installed heatsink and the audible signature of the fan but overall I would rate it alongside any other quality motherboard.
Temps
With average case airflow I would say board components will be absolutely fine. I had one slow spinning 140mm noctua fan aimed roughly at the northbridge which never got more than just warm to the touch. The mosfet heatsink was just the same with virtually no airflow. The southbridge was warmer but certainly not hot – all the while over half of it was sat beneath the installed GTX260.
Results – PCMark05 and Superpi
I tested desktop performance initially using Futuremark’s PCMark05, SuperPi, Cinebench and the x264 HD benchmark. Besides the stock and overclocked results from the Foxconn A8DA-S I also included the results from the 1100T review when it was installed in ASUS’ flagship Crosshair IV Extreme motherboard.
Up first is PCMark05 a mixed test of general desktop duties to give a general overview of office style performance.
The result here clearly shows the additional performance made available by the overclock – due to similar clocks on both the A9DA-S and Crosshair the results match quite closely.
PCMark05.
SuperPi was next. This program offers a good impression of how raw clockspeed increases effect performance.
The times decrease as clockspeed increases and again they match across the two motherboards. That’s a pretty decent result again for the A9DA-S.
SuperPi.
Results – Cinebench and x264HD
The Cinebench testing suite followed. Rendering a 3D image is quite a difficult task so this is a good test of raw performance. It’s multithreaded too so will fully utilise all the cores available to render the 300,000 polygons across around 2,000 objects in the scene.
Rather interestingly the A9DA-S trumped the Crosshair across the board here… a great result.
Cinebench.
The final desktop test was the x264 HD benchmark. This ‘real time’ video encoding test makes four passes over two different files to convert a DVD quality MPEG-2 video into an x264 video file. I took the average of each of the four results from the two groups to generate the final result.
Once again this is a multi threaded program so benefits from more cores. When overclocked the A9DA-S trades blows with the Crosshair losing out in the 1st pass but winning in the 2nd. At stock clocks however the A9DA-S loses out slightly in both passes.
1st pass.
2nd pass.
Results – 3DMark06 and Vantage
Up first is Futuremark’s 3DMark06 benchmark program.
Once again at stock the A9DA-S can’t compete with the Crosshair but astonishingly the A9DA-S clocked @ 3.63GHz matches the Crosshair @ 4GHz and at almost 4GHz the A9DA-S pulls way ahead with an additional 1500 points. I ran the test a few times thinking it was a mistake but this result represents the average from four runs.
3DMark06.
One assumption is that newer chipset drivers might have unlocked some additional performance. All in all though that impressed me greatly.
I then tried Futuremark’s newer 3DMark Vantage benchmark program.
Not quite as large a difference as 06 but still a good one. The A9DA-S again trumps the Crosshair at both stock and the 4GHz mark.
Vantage.
Results – Blacksite
Moving onto actual games – our results here represent the average frame rate produced by the system.
Blacksite was our first test. A good gauge of the performance available from an overclock since it seems to scale quite nicely.
Yet again the A9DA-S matched the Crosshair virtually identically – just slightly down at stock speeds.
Blacksite @ 1280.
Still down at stock but overclocked returned slightly better numbers.
Blacksite @ 1680.
Better across the board @ 1920×1200.
Blacksite @ 1920.
Results – Dead Space
Dead Space came next – boosts from clocking really only exist at lower resolutions where the games is more CPU limited.
It virtually mirrors the previous results. Loses at stock speed then pulls back the deficit once clocked.
Dead Space @ 1280.
Matched @ 1680×1050.
Dead Space @ 1680.
And the same again @ 1920×1200. Very impressive considering the budget cost!
Dead Space @ 1920.
Results – Far Cry 2
Next was Far Cry 2 – using this game for testing is quite straight forward due to the inbuilt benchmarking program.
Not much performance offered from clocking with this game. Running @ 1280×1024 the A9DA-S is a touch down.
Far Cry 2 @ 1280.
At 1680×1050 it performs identically to the Crosshair.
Far Cry 2 @ 1680.
And again @ 1920×1200.
Far Cry 2 @ 1920.
Results – Unreal Tournament III
The last game on test is Unreal Tournament III. Once again this is a game that scales well as clockspeed increases.
Performance across the board is very similar.
UT3 @ 1280.
It’s the same story at 1680×1050.
UT3 @ 1680.
1920 is no different. A very impressive set of results once again!
UT3 @ 1920.
Conclusion
Well, what is there to say. Not only is this board absolutely affordable it’s also very nicely specified, well laid out, looks great and seems to perform incredibly!
The excellent Foxconn A9DA-S.
Of course there are issues – the most concerning of which is the additional voltage nudge applied to each voltage increase. Of course once I got my head around it then it was easy to manage but my initially reaction was one of sheer terror that I was going to fry the 1100T.
On top of that it would have been nice to see USB 3.0 but in all honesty it’s not a necessity in my eyes… at least not just yet anyway!
Now back to the good. What we have here is a motherboard that comes in at a very affordable price point but one that could be at the heart of a considerably potent and very capable high end machine! To trade blows (and quite often better) a high end board like the Crosshair IV Extreme is something else. Of course there are caveats in that updated chipset drivers could have a noteworthy effect on scores but in all honesty I couldn’t see the boosts being so great that the A9DA-S would get left behind.
As I’m sure you’ll agree I’ve found the Foxconn A9DA-S a mightily impressive motherboard with decent bundled utilities, a great spec for the money and performance to match.
Pros
+ Very impressive overclocking performance
+ Performance matches the very best at any price point
+ Cool running chipset with comprehensive passive cooling
+ Inbuilt HD 4290 graphics
+ Very affordable – verging on budget
+ Excellent board layout
+ Comprehensive specification including SATA 6.0G/Bs
+ Great looking
+ Useful utilities
Cons
– Voltage adjustment issueas
– Missing USB 3.0 connectivity
+ Very impressive overclocking performance
+ Performance matches the very best at any price point
+ Cool running chipset with comprehensive passive cooling
+ Inbuilt HD 4290 graphics
+ Very affordable – verging on budget
+ Excellent board layout
+ Comprehensive specification including SATA 6.0G/Bs
+ Great looking
+ Useful utilities
Cons
– Voltage adjustment issueas
– Missing USB 3.0 connectivity
As a result of this extremely positive experience I give the Foxconn A9DA-S both the Vortez Gold and Vortez Amazing Value award.