NZXT’s latest case innovation. Taking its name from Rolls Royce’s premium range of engineered automobile, will the Phantom live up to that name?

Product on Review: NZXT Phantom
Manufacturer and Sponsor: NZXT
RRP: £120
For a young company NZXT have certainly been maturing this past year into a formidable force within the market. Not only have they launched some interesting products this year but they have also revamped their website to engage better with their users. Up until now, their full tower cases haven’t had strong standing within the community but today’s product hopes to change all of this.
The Phantom was uncovered at the Computex 2010 event in Tapei earlier in the year and ever since its first appearance has caused much anticipation. The Phantom is a full tower case available in 3 different colours – black, white and red. Paramount to its features is the accommodating interior. According to the specifications this case will harbour any graphics card currently on the market, endorse water-cooling and even seat E-ATX motherboards. I’ve seen the pictures, and I can’t say I’m not excited about this review, so lets go ahead without further delay.

NZXT’s Take:
NZXT presents the cutting edge Phantom Full Tower Chassis. Designed with sleek, pristine contours, the Phantom radiates personality and quality. As with all NZXT products, we strive to set apart our customers from the rest with unique, original designs – we run the extra mile so you won’t have to settle with the typical rectangular box.
The Phantom delivers high performance cooling advantages with 7 fan cooling options, dual radiator support, quad watercooling cutouts, and five 20W per channel fan controls. An innovative 5.25” screwless system, vast space to encompass 7 hard drives, and five 5.25” bays enable smooth customization. Establish your power, your presence.
The Phantom delivers high performance cooling advantages with 7 fan cooling options, dual radiator support, quad watercooling cutouts, and five 20W per channel fan controls. An innovative 5.25” screwless system, vast space to encompass 7 hard drives, and five 5.25” bays enable smooth customization. Establish your power, your presence.
MODEL Phantom Series
CASE TYPE Full Tower Steel
FRONT PANEL MATERIAL Plastic/Steel
DIMENSIONS (W x H x D) 222 x 540 X 623 mm
VGA Clearance Maximum
– 350mm
COOLING SYSTEM
FRONT
– 1 X 140mm
REAR
– 1 X 120mm (included)
SIDE
– 2 x 120mm, 1 x 200/230 (2 x 120mm included)
TOP
– 2 X 200mm (1 x LED 200mm included)
DRIVE BAYS EXTERNAL
– 5
– 5.25″
DRIVE BAYS INTERNAL
– 7
– 3.5″/2.5″ Slots
Screwless Rail Design
MATERIAL(S)
– Steel with black finish
EXPANSION SLOTS
– 7
WEIGHT
– 11 kg
MOTHERBOARD SUPPORT
– E-ATX, ATX, MICRO-ATX, BABY AT
Exterior (1)
The Phantom is packaged inside a typical chassis sized and padded box. The typography and artwork is presented in a very engaging manner. On the front an image impression of the Phantom is found, on the sides the specifications that I listed on the previous page and on the back an in-depth look at the feature-set. The Phantom is available in 3 different colours. Black, white and red. Today I will be taking a look at the white version.
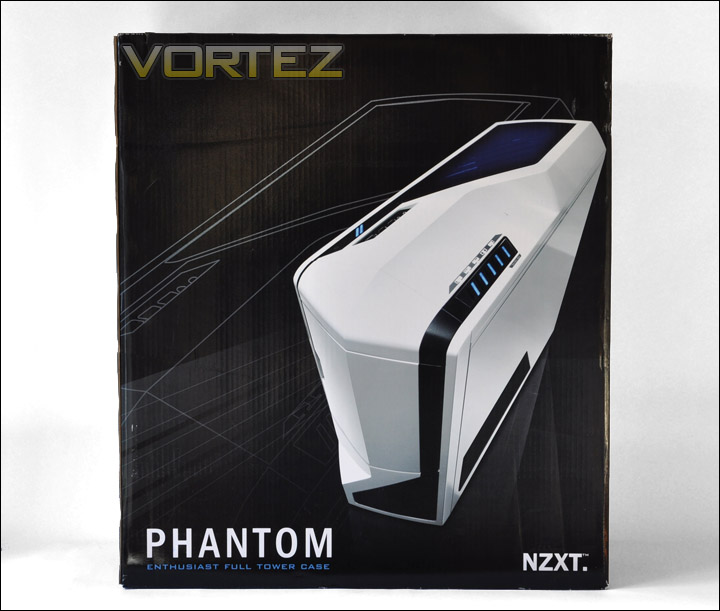
The Phantom box
In our first look at the Phantom its clear that this case wants to stand out from the crowd. It has some very unique characteristics. Start Wars fans will immediately see similarities between the storm-trooper and the Phantom. The white and black accents are very nice touch. Taking a look at the side panels – the prominent side features two perforated mesh panels. The lower of the two has behind it 2 x 120mm fans. This will provide intake, blowing air onto the HDD area. This seems quite an odd design and doesn’t really follow traditional cooling methods for case design. The larger of the black mesh panels has an opening to mount a 200 or 230mm fan. As NZXT have said in their description of the Phantom, this isn’t a conventional rectangular case. From a quick glimpse of the top and front you can see the different shapes.
The right side is essentially a steel side panel with just the one sheet of perforated black mesh this time. This panel doesn’t have any cooling fans behind it but does provide ventilation for components.
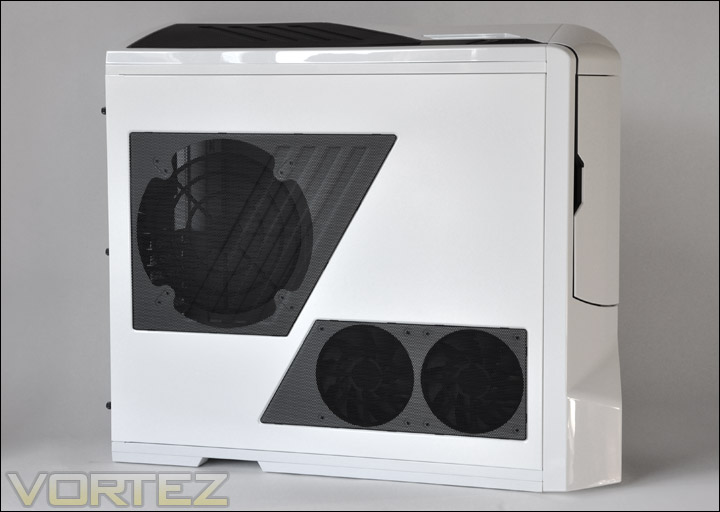
The left side of the Phantom
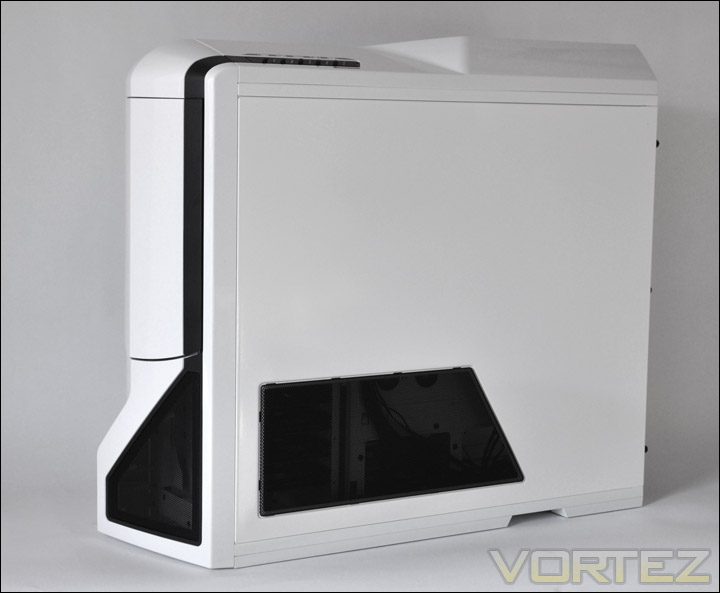
The right side of the Phantom
The front of the Phantom has plastic panelling that has a glossy finish. This front panel is split into two sections. The top section is effectively a door that swings open. Below this there is another perforated black mesh panel. Behind it, oddly there isn’t any cooling fans for intake as you would commonly find on a high-performance case but there is room to fit a 140mm fan. As with this and the top fascia, these panels can be unclipped to gain access with a moderate pull action.
Around the back of the Phantom the bottom has space isolated for the PSU to be seated, whilst moving up there are 4 x water-cooling grommets for feeding tubing through. To the side of these there are 7 x expansion slots that feature mesh ventilation to encourage airflow. Above these there is the I/O opening and another perforated steel opening for the installed 120mm exhaust fan. In the top left hand corner there is a circular button – this controls the LEDs on the top mounted 200mm fan.
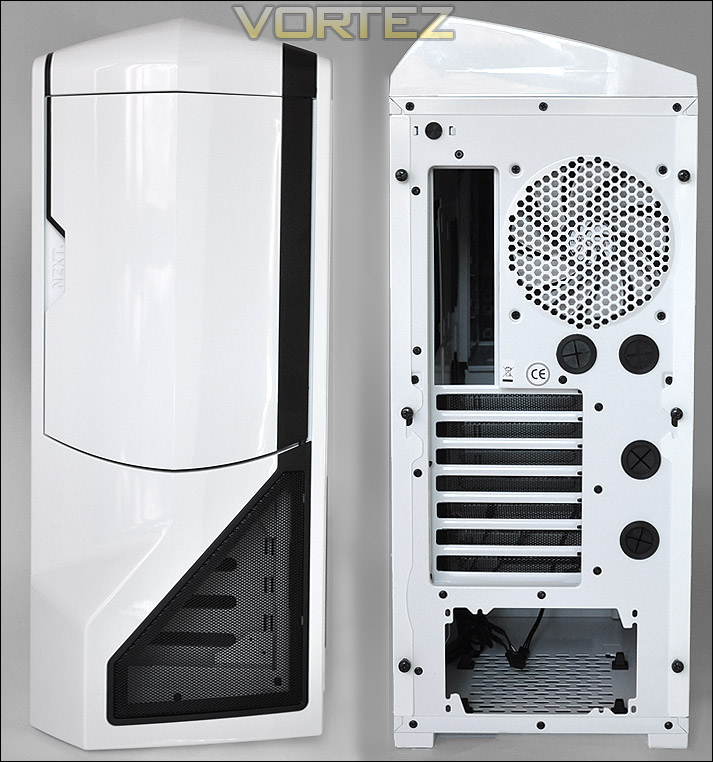
The front and back of the Phantom – unique and full of character
Exterior (2)
The front of the Phantom features a door, opening this is easy – upon opening you notice that NZXT have given this feature good quality materials. The hinge reacts well and when the door closes it fits flush to the case. Behind this door there are 5 x 5.25″ drive bay covers. Each one has a little slider button used to remove the cover. Again like with the front door, these panels fit perfectly into place – adding and removing is a breeze!
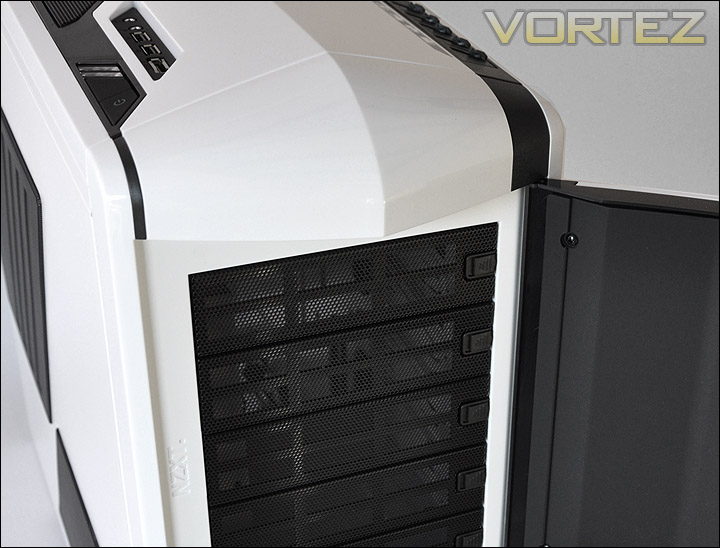
The door open to reveal drive bay covers
Along the top of the Phantom there are two sections of controls. On the left hand side we have controls for power/reset and corresponding LEDs. Nearby there are eSATA and audio ports for headphone and microphone. In the centre of these ports we have 2 x USB2.0 ports. Nice to see NZXT including this in their design considerations. We can easily fly over the front panel controls without looking at the careful contours and cut-outs – if you look at this panel it is embedded within the case, touches like this on the Phantom are very well thought out. NZXT haven’t just plonked this front panel on the front of the case, they have been creative with their decisions. I like this.
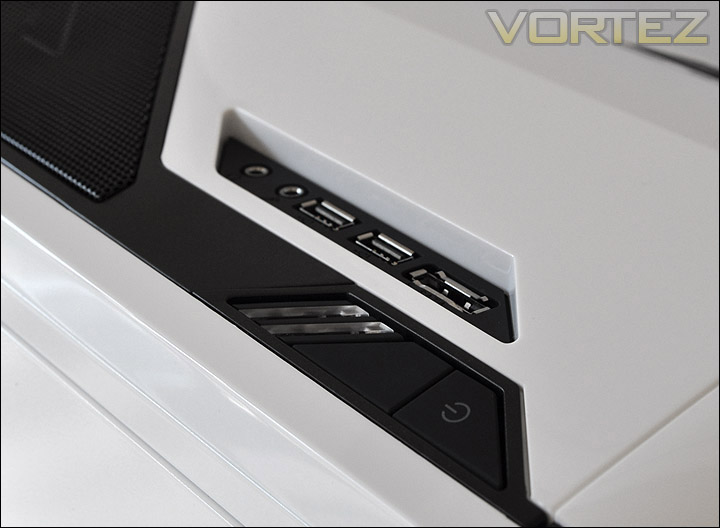
USB2.0 functionality amongst other controls
Over on the other side of the top of the Phantom are a set of slider buttons. Above these are diagrams. These diagrams are to be associated with specific areas within the Phantom that have fans attached. Moving the notch up for a designated fan will move the RPM up higher. Each of fan also has an LED next to the control notch. This is lit up if the fan is installed and operational. A nice idea, especially if you have forgotten to connect a fan up.
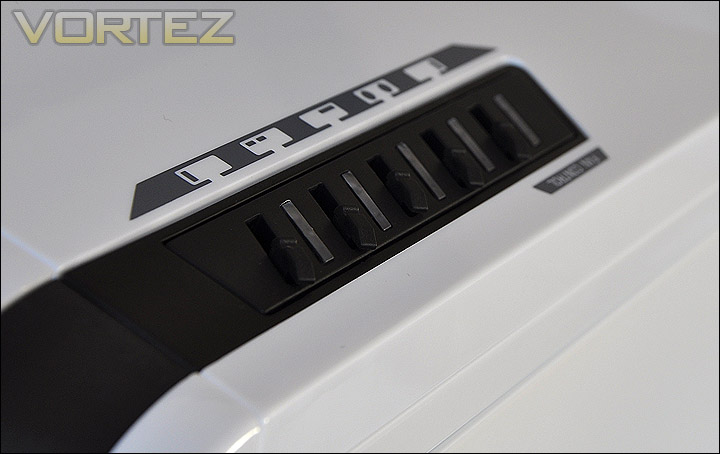
Fan control for all the installed fans – LED indicators for online fans
Along the top of the Phantom we have further distinctive looks, smooth edges shooting off at different angles. If you are looking for a case with lots of character that is unlike anything on the market surely this is a top pick. Towards the back of the case is yet more perforated mesh panelling – underneath this is a 200mm top mounted fan.
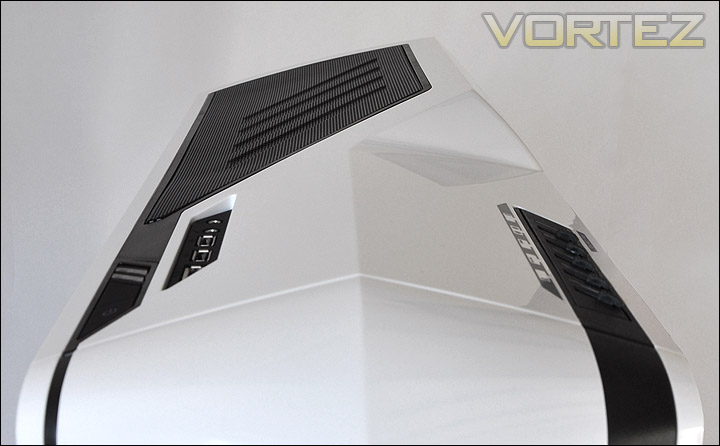
More curves than Kelly Brooke
As I mentioned on the previous page, the front and top of the Phantom features a glossy plastic fascia on each face. These can be extracted to reveal the underneath fans, controls and mounting positions. On the top there is another slot for an additional 200mm fan whilst the front contains mounting holes for a 140mm fan to be installed. Its good to see plenty of options here.
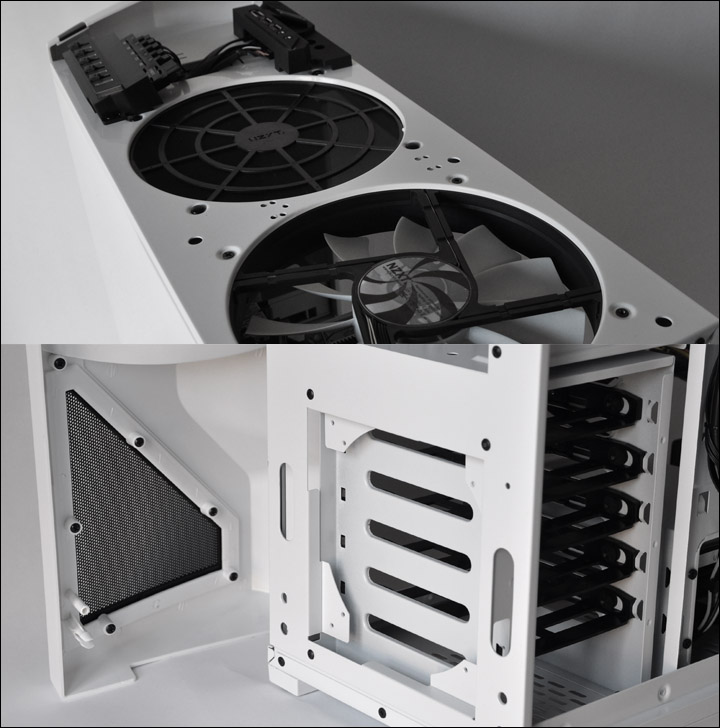
Plastic fascias removed to reveal hidden controls and mounting options
Interior (1)
Removing the prominent side panel reveals an enthusiasts playground. The depth inside is significantly more spacious than most of the cases I have reviewed at Vortez. NZXT state that graphics cards up to 350mm in length – so pretty much anything currently on the market. Checking the height of the expansion slots shows that the Phantom will also accommodate multiple graphics cards. SLI and Crossfire is no problem.
There is a large cut-out for the CPU backplate too, with plenty of cable management cut-outs with rubberised mounts to tuck cables behind the motherboard tray. On first glance it also seems that media drives will be tool-less in their installation.
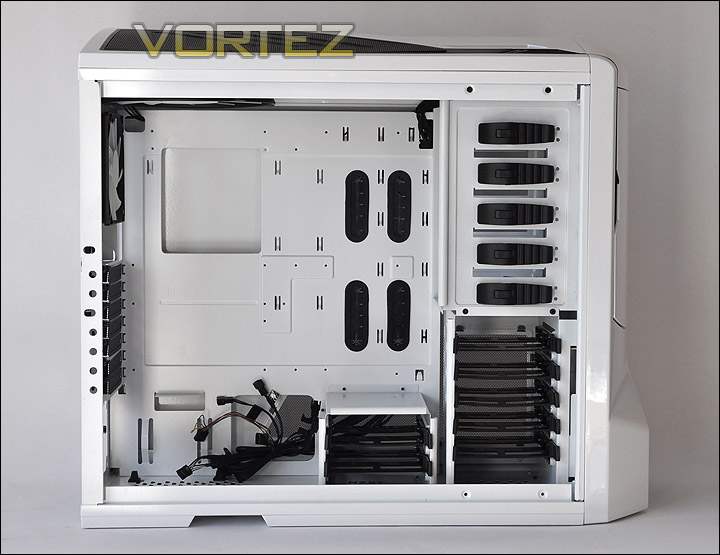
Side panel off to reveal plenty of space within the Phantom
The underside of the side panel has 2 x 120mm fans, these two fans have 3-pin connectors that will slot into the motherboard fan headers. The large rose type shape has a filter behind it that can be cleaned, there is space for 200/230mm fan to be installed but be warned you may need a low-profile CPU cooler to accommodate this. The side panel seems to be of good quality.
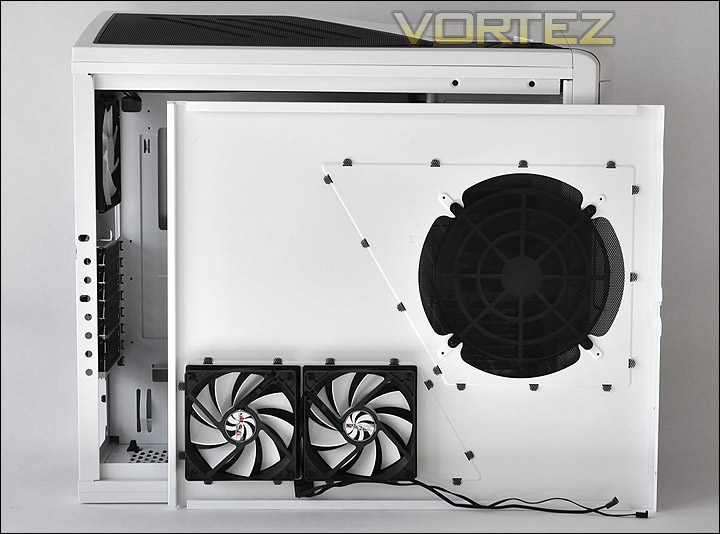
The underside of the side panel showing fans
Behind the motherboard tray there is again lots of space and some great areas for feeding cables through. NZXT have actually already tidied up the cables that route through from the fan controller and front headers.
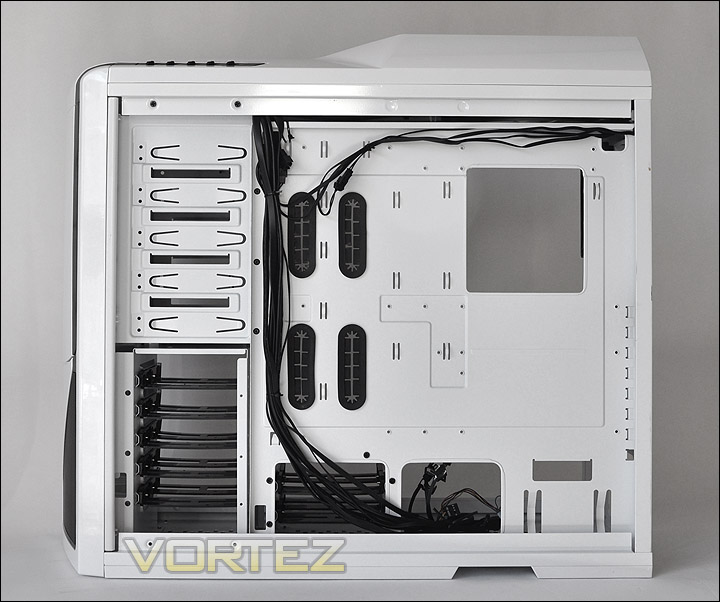
Behind the motherboard lots of space for cable management
At the very bottom of the case there is room provided to install the PSU. 4 soft rubber mounts have been positioned to give the PSU a nice comfortable fit but also reduce vibration. Underneath this section there is perforated holes that lead to a filter. This filter can be removed from the bottom of the case and cleaned.
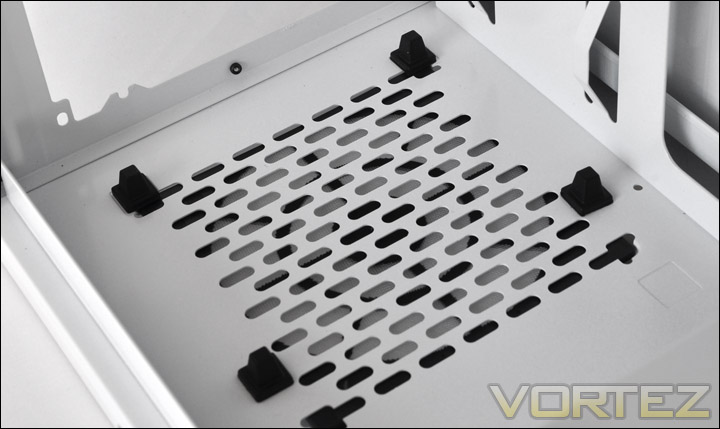
PSU seating area with rubber mounts for soft fitting and anti-vibration
Each of the 7 expansion slot covers have ventilation holes to encourage airflow within the Phantom – each of these panels also has a thumbscrew which makes removing the cover and installing a device very easy.
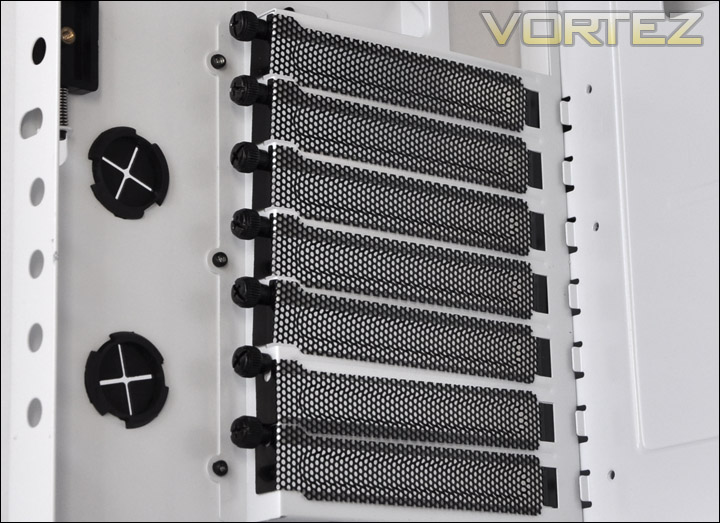
Ventilation and thumbscrews on the expansion slot covers
Interior (2)
As we saw in the exterior tour, the Phantom comes bundled with a 120mm rear exhaust fan and a top mounted 200mm LED ready fan. It’s really nice to see that NZXT have also thought about colour co-ordination. Most of us enthusiasts care about how the interior looks and take pride in our systems, so it makes sense to ensure everything is looking sharp from within.
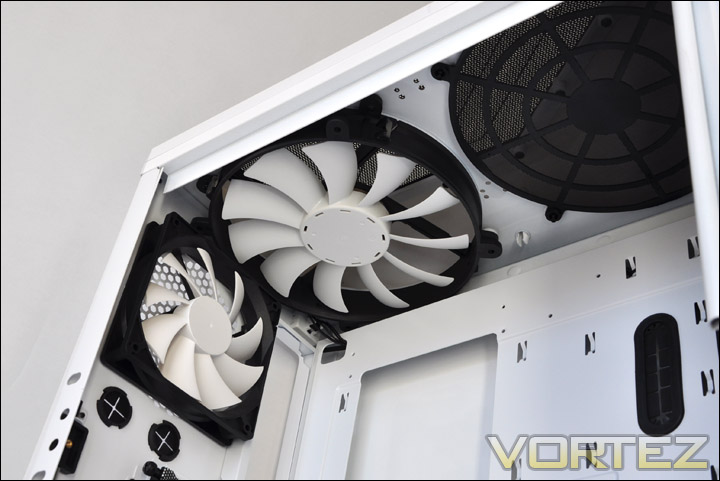
Rear exhaust fan is 120mm and a top mounted 200mm fan that is LED ready
With regards to the installation of 3.5″ devices the Phantom comes equipped with a lower cage that can accommodate two devices whilst the larger case next-door can host 7 drives. The installation method is something we have become accustomed to – each level has a frame that the HDD will sit into. Each side has 2 screws that push into the HDD to secure it into place. The frame is then slid into the cage. These frames can also house 2.5″ devices such as SSD.
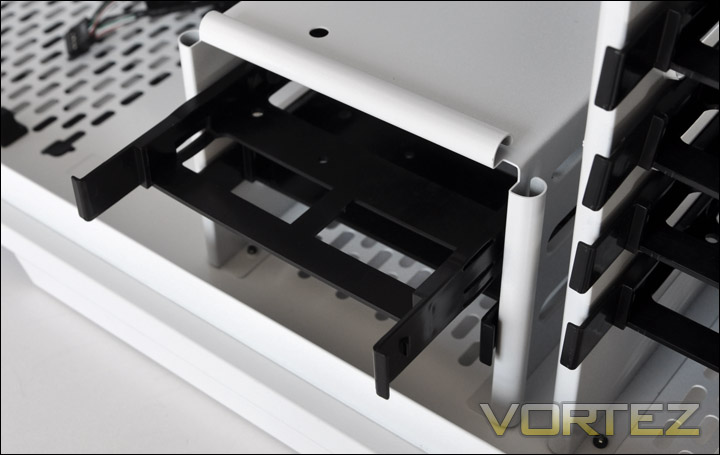
Lower cage with 2 slots for installing 3.5″/2.5″ devices
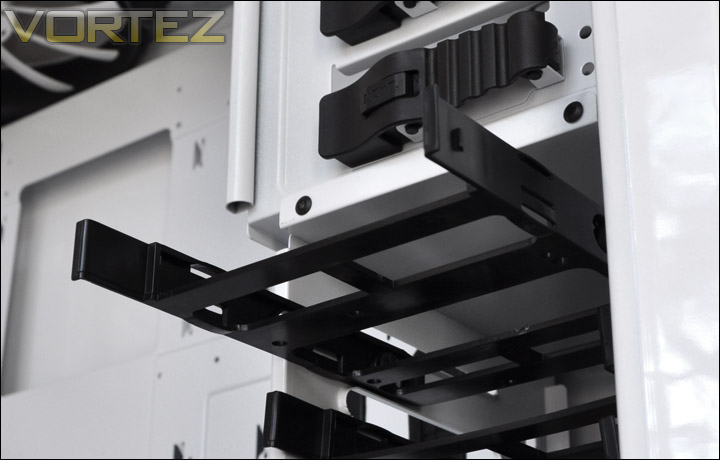
Main cage has 7 slots for installing 3.5″/2.5″ devices
Installing 5.25″ optical drives also involves a tool-less mechanism. Here there are rubber clips that have a notch on them. Moving this notch to the right opens the clip and were the rubber is ridged it can be pressed in to allow the drive to slide in and then pressing the left edge of the clip will move two pins into the optical drive to secure it.
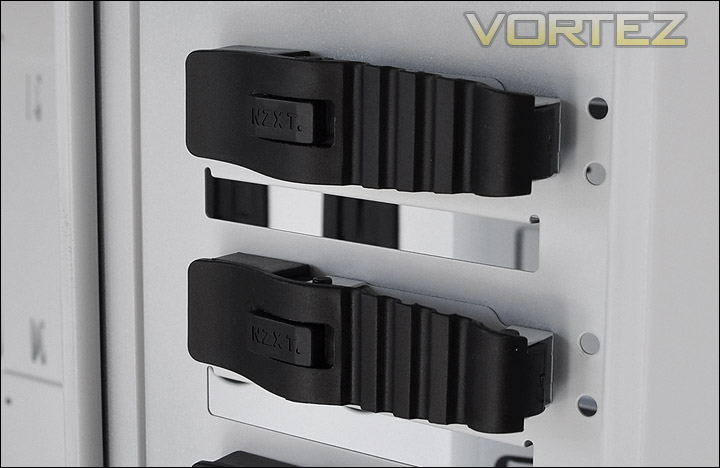
Tool-less mechanism clip for optical drives
Installation
When it comes to installing components within the NZXT Phantom, it will become instinctively clear that this is where this case excels. Masses of space and slots to tuck away the cables allows the entire process to progress without any issues. Within half an hour I had the system up and running (cables all neat and tidy too). It takes little effort to give the inside of the Phantom the minimalist look.
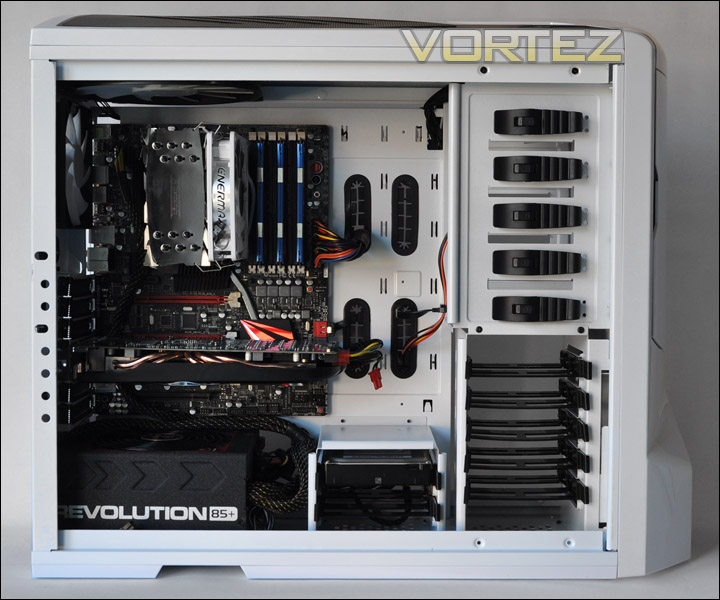
Installation complete – very spacious
Bundled with the Phantom are an assortment of screws, brackets for water-cooling and instructions sheet. The instructions sheet is very informative and what I like especially is the listing of each screw and its application. There are a wide seelction of screws inside the bag so its useful to know what screw goes where without having to rely upon ‘trial and error’
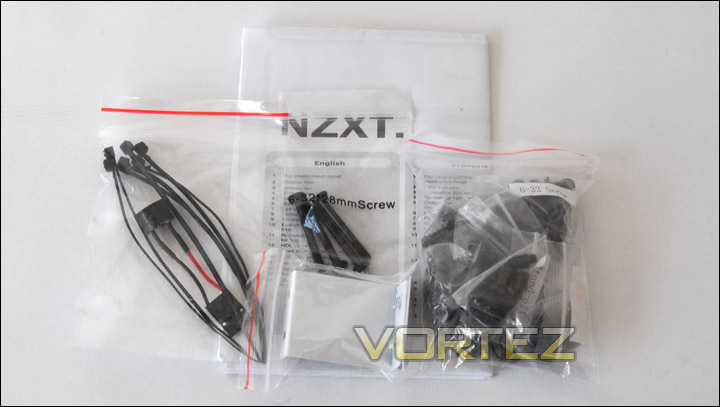
Accessories kit included with the Phantom
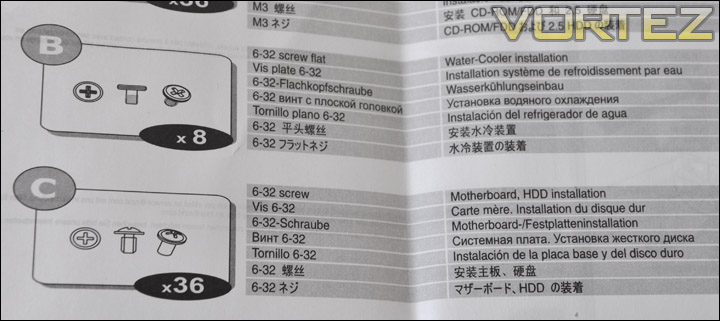
Instructions sheet is very helpful
As I mentioned everything slots into the Phantom with ease, everything fits tightly and is snug. Mounting devices like 3.5″ drives as below is very easy. Screws inside the frame slot directly into the drive and the frame can then be slid into the cage.
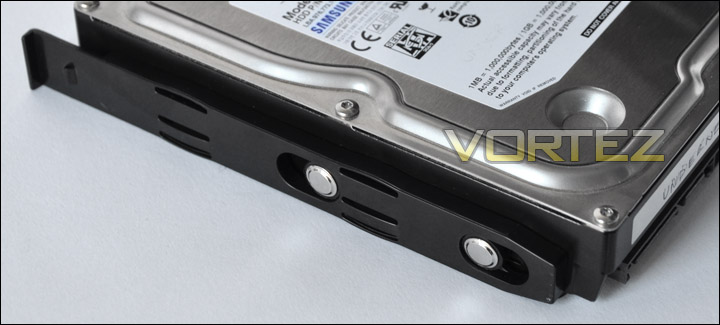
Mounting devices is very easy
Installed within the Phantom I used the Thermalright Venomous X Black for the CPU Cooler. This cooler stands tall at 160mm in height – one of the tallest coolers on the market. The Phantom is able to accommodates it though, with 2cm to spare. The Phantom will allow up to 180mm tall coolers.
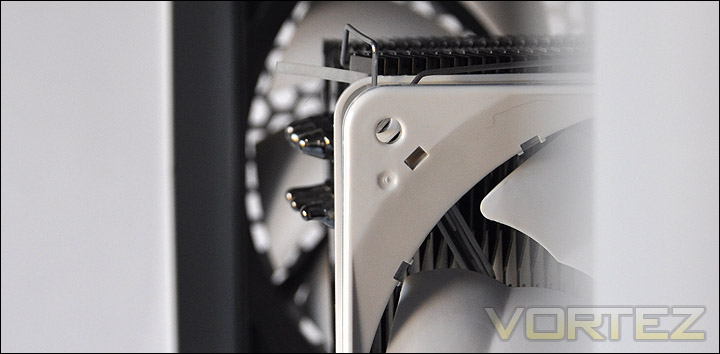
Mounting devices is very easy
Around the back is up to 1.7cm between the motherboard tray and the door. Plenty of space to route cables around the back including the clumpy 24-pin power cable for the motherboard.
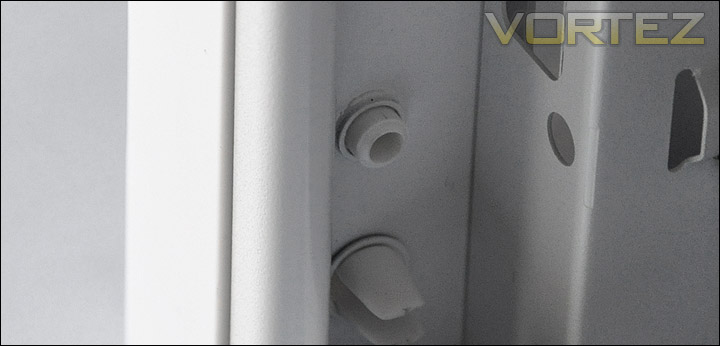
Mounting devices is very easy
Powered Up
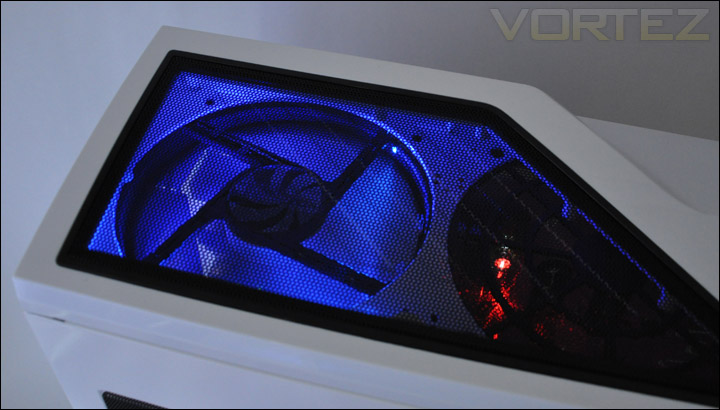
Usually on this page there is an image of the case standing tall with a view of front and side lighting but the Phantom only has lighting on the top section of the case. The top mounted 200mm fan has a exudes a pleasant blue glow, it isn’t too overpowering but if you do want to turn it off there is a button on the rear of the Phantom that allows you to control this.
Mounting devices is very easy
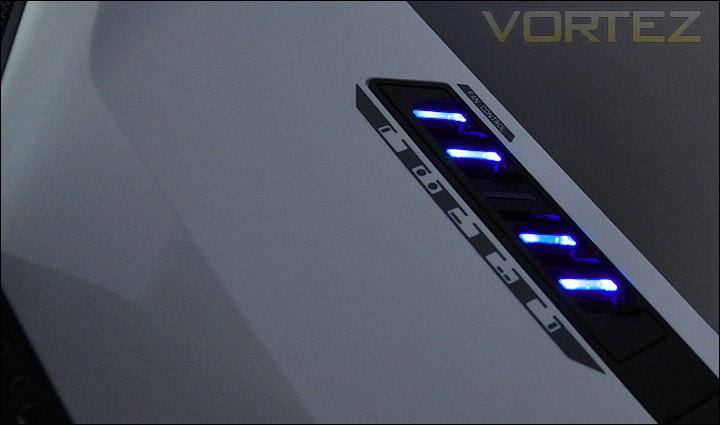
The fan control panel on the side of the Phantom is very useful not only its positioning (as its easy to get to) but it also highlights fans that are either not connected or not online. Here you can see in the image one of the fans is not plugged in. This is a very useful feature. This fan controller indecently can support 5 x 20W fans.
Very useful fan controller with LED indicator
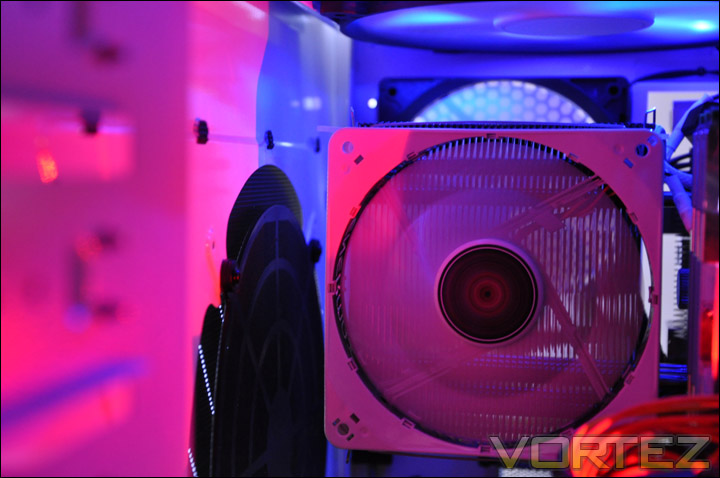
As an additional – I thought it would be interesting for readers to see the distance between the CPU cooler and the side door when its fastened in place. To take this shot I opened up the front door, took out the 5.25″ bay covers and took a photograph. Here you can see the top is quite close, to have a 200/230mm fan on teh inside of that side panel would require you to have a low-profile cooler installed. Anything over 150mm is going to obstruct.
Very useful fan controller with LED indicator
Noise: This is something that readers have often commented on when reading our reviews. Especially when a case has the option of managing fans between low and high speeds. I can report that noise on the lowest section is incredibly quiet. In fact, I took the side panel off to double check they were connected properly. With the fans all on high speed it is noticeable but comparing to the likes of the Antec Twelve Hundred (which stands out in my mine as noisy when all fans are on high) this case isn’t disruptive by any means. The fact you can manage the speed of each individual fan gives you greater control over noise anyway.
Thermal Performance
The Phantom has an interesting fan configuration. I haven’t seen a case with 2 x 120mm fans installed on the side panel pointing at the HDD section before. So I will be testing the stock performance against having a 140mm fan installed (Noctua P14) at the front of the Phantom to establish if we are going to benefit from having 1 – no front intake fan 2 – side fans pointing at the HDD religion.
So to discover the thermal performance of the Phantom I will record idle temperatures after 20 minutes from a cold boot. I will then stress the system using 3DMark Vantage and temperatures will again be monitored after a 30 minute have elapsed. All fans are set to high. This test will again be run with the fans in traditional layout as discussed above.
System Components
CPU Intel Core i7 920
Motherboard ASUS Rampage III Formula
Graphics Sapphire HD5870
Memory 12GB Kingston HyperX 1600MHz
HDD Samsung Spinpoint 500GB SATA-II
PSU Enermax Revolution 85+ 850W
The above results show quite distinctly that whilst the stock fan configuration does aid HDD cooling because the fans are directly blowing air onto the devices there, it doesn’t benefit the system temperatures as a whole.
The traditional fan configuration however reduces those temperatures significantly. Whilst I wouldn’t criticise NZXT for their decision in placing the two fans directly over the HDD area, its evident that that method isn’t as productive. What I like is that you are able to change things around. You aren’t stuck with a set way in which the case has been designed.
Conclusion
Readers, enthusiasts and consumers were right to get excited about NZXT’s new offering in the Phantom. I’ve seen style over substance quite a number of times but the Phantom doesn’t only look fantastic but it feels, operates and handles in this way also. Aesthetically this case is a masterpiece in its own right.
What probably stands out amongst other things with this case is the enormous depth inside. I’ve reviewed many cases recently that have had a couple of cm spare at the end of a HD5870 graphics card but never have I had inch upon inch spare. Truly this is a case that oozes expansion and will give enthusiasts the chance to future proof their systems for a long time to come.
With regards to cooling, the Phantom again excels itself in this department. The excellent rear exhaust and top mounted solutions provide well. The ability to control these fans in such an accessible spot is superb. I would however query the side fans on the Phantom – breaking out of the traditional design of airflow is a risky business. Whilst it doesn’t cause any issues, using the conventional placement of fans – (front intake blowing through and across the board – taking air out of the rear exhaust and top mounted fan). Does show better performance. NZXT haven’t forced enthusiasts to go with their method though, which is a good – experimenting with different options is a good thing.
Priced around £110, for a full tower case providing lots and lots of space, beautiful asthetics and brilliant features the Phantom is a no-brainer. It’s amongst the cheapest of the full-tower cases. Those in the market for a full-tower case should look no further, going with a Phantom will be one of the best decisions you will make!
Pros
+ Beautiful aesthetics
+ Excellent options for expansion
+ Very functional – fan controller – tool-less
+ Dual radiator support
+ Good cooling
+ Amazing value
Cons
– Lack of USB3.0 support
+ Beautiful aesthetics
+ Excellent options for expansion
+ Very functional – fan controller – tool-less
+ Dual radiator support
+ Good cooling
+ Amazing value
Cons
– Lack of USB3.0 support


I spent many moments deliberating which award to give the Phantom. I tried to justifiy giving it the Platinum award but I felt I couldn’t rationalise the lack of USB3.0 support. There is no doubting it, the Phantom is a fantastic product, and just it just slips being perfect and therefore receives the Gold and the Amazing Value award. Well done NZXT!