We look at a 4-bay All-in-1 NAS Server aimed at home & business users.
Product on Review: Synology Diskstation DS410Manufacturer and Sponsor: Synology
Street Price: £400

The NAS (Network Attached Storage) market is full of reputable brands, in amongst these brands are a company called Synology. At just 10 years old, Synology should be regarded as the elders of the NAS world, with QNAP, Thecus and others being only 5 or so years old. What this means is that Synology, by definition, should have a better understanding of NAS products with their expertise.
Synology have a rather impressive line-up of products currently on the market. You might be surprised to know that Synology focus on three main groups in their product range. These are Home to Small Office, Home to Business Workgroup and Small and Medium Business. Today we will be taking a look at a product which has recently joined the ‘Home to Business Workgroup’ the Diskstation DS410.
Here is Synology’s take on the Diskstation DS410:
Synology® DiskStation DS410 offers an affordable, high-performance and full-featured network attached storage solution that is specifically designed for home to business workgroup users who need to share and protect data cost-effectively, while increasing productivity with comprehensive business-oriented applications.
Features
The DiskStation DS410 is feature-rich and whilst it would be great to include all features, here is just a selection of the most prominent taken from the Synology website.Optimal Price/Performance Ratio
The Synology DS410 delivers an average 110 MB/sec reading speed under RAID 5 configuration in a Windows environment, and 54.9 MB/sec writing. The Synology DS410 provides a reliable solution for data sharing with an easy to use interface, and comprehensive businesses-oriented applications, including a complete backup solution making it one of the best values in 4-bay NAS devices available today.
Easy Setup and Management
For users who are limited on time and not familiar with configuring complicated routers, the Synology EZ-Internet Wizard simplifies the process of setting up access to the Synology DS410 from the Internet. The EZ-Internet Wizard steps through all of the settings including firewall settings, port-forwarding, PPPoE setup and DDNS registration.
Running on AJAX technology, the UI is intuitive and easy-to-use. Creating private shared folders for a large number of users is easy with the User Home feature because it minimizes the steps and time for the administrator to create private shared folders. The sub-folder privilege settings further extend the flexibility to allocate permissions for different workgroups.
Flexible RAID Management
The Synology Hybrid RAID (SHR) automatically builds an optimal RAID volume with data protection based on the hard drives installed, eliminating the need to have hard drives of identical size, while still offering a manual setup option for advanced users.
Complete Backup Solutions
The Synology DS410 offers a centralized backup target to consolidate fragmented and unstructured data across a network. PC Users can back up their data to the Synology DS410 using the free Synology Data Replicator software, while Mac OS X users enjoy native Apple® Time Machine integration. A web-based backup wizard is provided for backing up data in the Synology DS410 to another Synology DiskStation or any rsync server via an encrypted transmission, or to an external hard drive via USB or eSATA connection. In addition, backing up to the cloud using Amazon® S3 service is also supported.
Full-featured Business Applications
The Synology DS410 runs on the renowned system firmware, Synology DSM 2.3, offering comprehensive applications and features designed specifically for business workgroups. Comprehensive network protocol support assures seamless file sharing across Windows, Mac, and Linux platforms. Windows ADS integration allows the Synology DS410 to quickly and easily fit into an existing business network environment with no need to recreate user accounts on the Synology DS410.
Internet file access is simplified by the encrypted FTP server and the web-based file explorer, Synology File Station 3. HTTPS, firewall, and IP auto-block support ensure file sharing over the Internet is protected at a high security level.
Synology Web Station with support for PHP/MySQL web content allows hosting up to 30 websites on a Synology DS410. Synology Surveillance Station 4 offers a centralized interface to safeguard the office environments by deploying IP cameras. H.264 video format is supported to deliver high quality video. The Mail Station add-on turns a Synology DS410 into a mail server with only few steps of installation. The USB printer sharing capability minimizes businesses’ cost by sharing printing resources throughout the office.
DSM 2.3 users are encouraged to develop and install third-party applications on the Synology DS410. Meanwhile, a list of third-party applications that were tested by Synology is available for users to install on the Synology DS410.
Energy Efficient Design
Synology DiskStations are designed and developed with energy efficiency in mind. Compared with the average PC counterparts, the Synology DS410 consumes only 56 watts in operation. The support of wake on LAN/WAN, scheduled power on/off and hard drive hibernation can further reduce power consumption and operation cost.
All Synology products are produced with RoHS compliant parts and packed with recyclable packing materials. Synology acknowledges the responsibility as a global citizen to continually work to reduce the environmental impact of every product produced.
| The specificatons list for the Diskstation DS410 is somewhat extensive, so I will post a link rather than fill the page with the comprehensive listing: Synology DS410 Specifications |
DS410
The Synology DS410 comes in a neat little box with a handle. Inside this box there is the NAS box, AC power, warranty leaflet, screws, CAT5 cable, cable clip and CD with instructions. All fairly standard accessories.
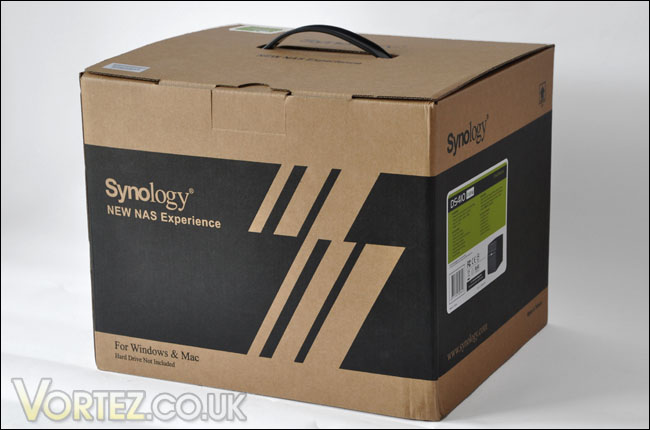
The DS410 box
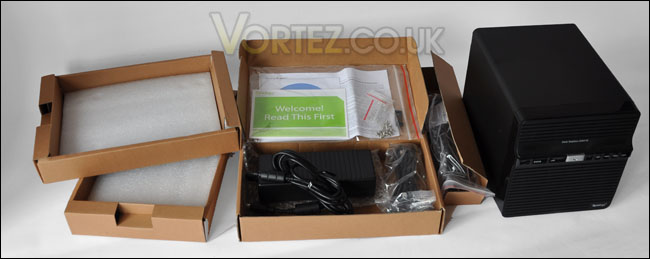
The accessories inside the box
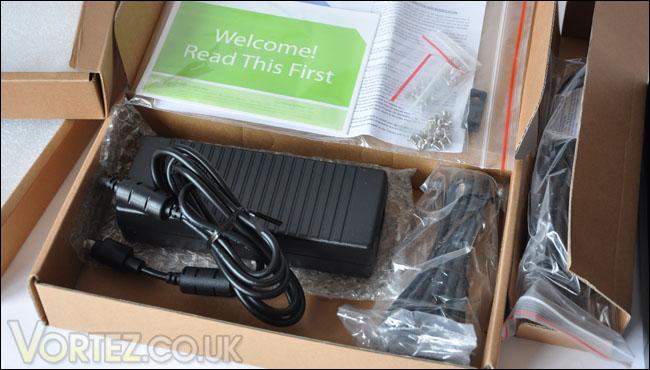
The power pack for the DS410
Taking a closer look at the DS410, the unit oozes quality. The outer shell is thick and well made, on the sides are the engraved Synology logos, adding a bit of style to a rather plain, large panel. The front panel takes advantage of corrugated front panelling. In the centre of this fascia is a strip with power, activity and HDD LED’s. In the very middle is a power button with a polished metal finish.
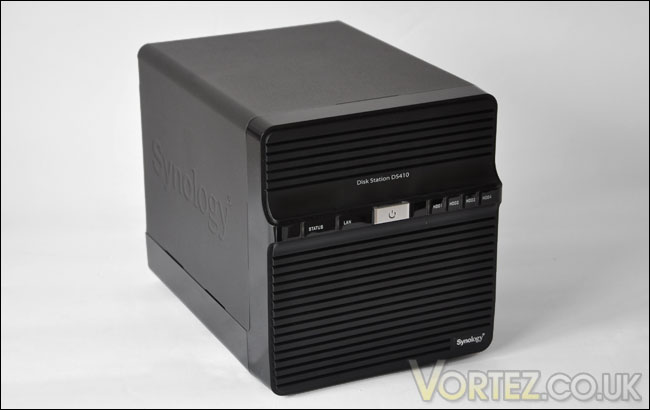
A very nice looking unit
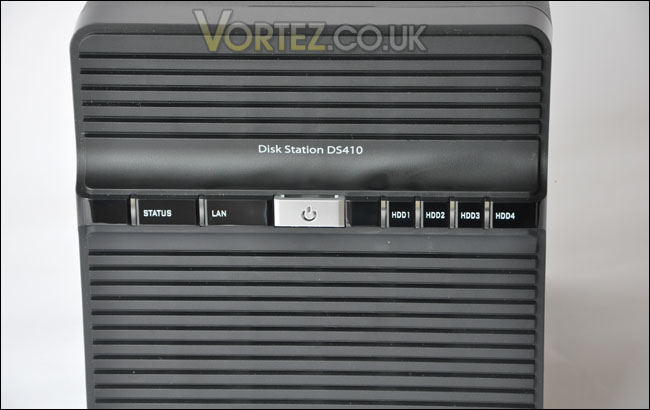
Power, Activity, HDD LED lights and power button
Moving to the rear of the DS410 we have the openings for the dual 80mm fans, below these two fans are the output ports.
– DC Output
– LAN
– Two USB ports
– RST (Restart)
– eSATA
The DS410 is quite a weighty unit. It weighs in at 2.23KG, so its probably a good idea to have this places on a shelf or desk. The above outputs give quite a bit of flexibility, the LAN connector gives gigabit transfer speeds.
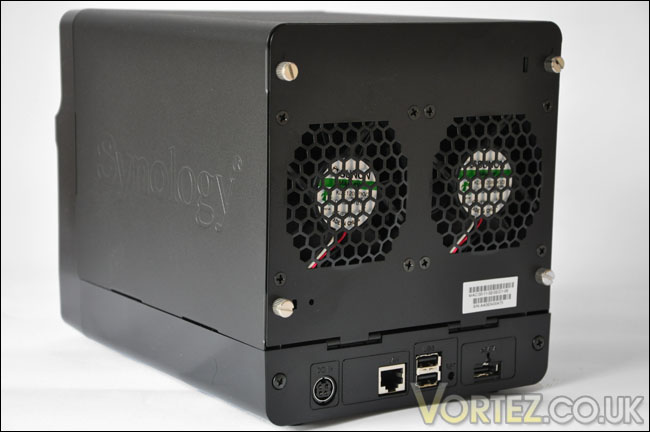
Twin 80mm fans
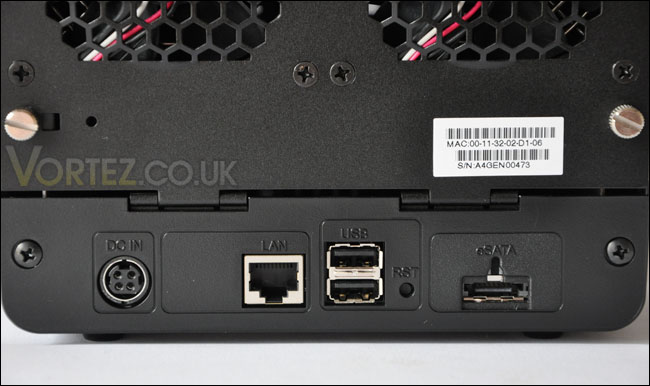
Fully flexible device outlet – USB, eSATA, Power, Reset
Below are the specifications for the DS410. It’s a shame there is no USB 3.0 with this unit, since this is a new product and a new technology it would have been nice to integrate such a feature. For the price, the below specification is decent. Nice to see Synology giving so much detail about what’s inside.
* CPU Frequency: 1.06GHz
* Floating Point
* Hardware Encryption Engine
* Memory Bus: 64bit@DDR533
* Memory: 512MB
* Internal HDD1: 3.5″ SATA(II) X4 or 2.5″ SATA/SSD X4
* Max Internal Capacity: 8TB (4x 2TB hard drives)
* Size (HxWxD): 168mm X 184mm X 230mm
* External HDD Interface: USB 2.0 port X2, eSATA port X1
* Weight: 2.23kg
* LAN: Gigabit X1
* Wireless Support
* Wake on LAN/WAN
* Noise Level (fan-only):2 23dB(A)
* Power Recovery
* AC Input Power Voltage: 100V to 240V
* Power Frequency: 50Hz to 60Hz, Single Phase
* Power Consumption: 3 56W(Access); 20W(HDD Hibernation)
* Operating Temperature: 5°C to 35°C (40°F to 95°F)
* Storage Temperature: -10°C to 70°C (15°F to 155°F)
* Relative Humidity: 5% to 95%RH
* Maximum Operating Altitude: 10,000 feet
* Certification: FCC Class B, CE Class B, BSMI Class B
Installing the Diskstation DS410 (Hardware)
Getting the HDDs into the DiskStation DS410 isn’t a very difficult task at all. All you have to do is remove the screws at the rear of the unit, which loosens the outer shell. You can then remove this shell, to expose the inner chamber, housing the PCB, components and HDD cage.
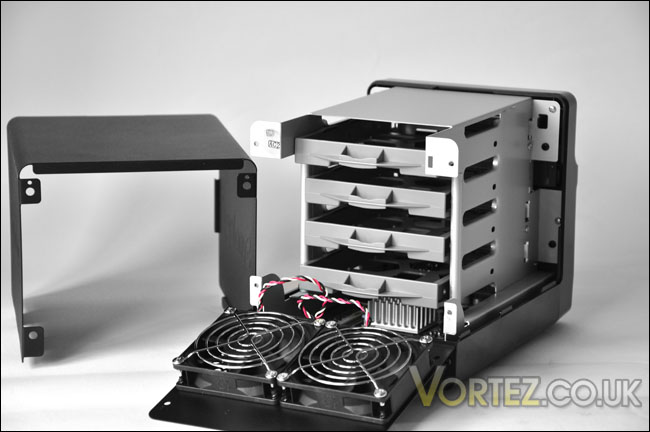
With the outer shell off
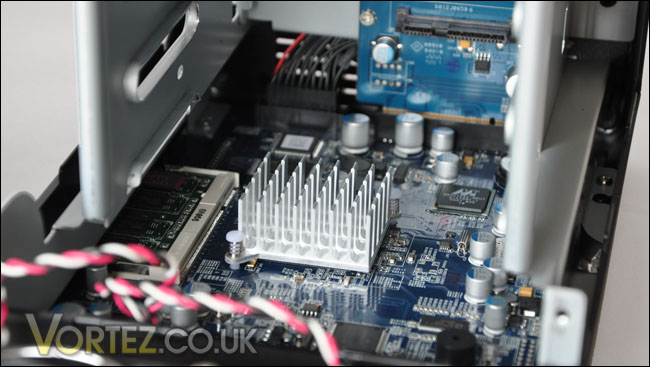
The PCB – CPU heatsink
For each level inside the DS410, there are mounting trays. To install the HDD you have to remove the mounting tray, place the HDD inside the tray and secure the HDD with screws.
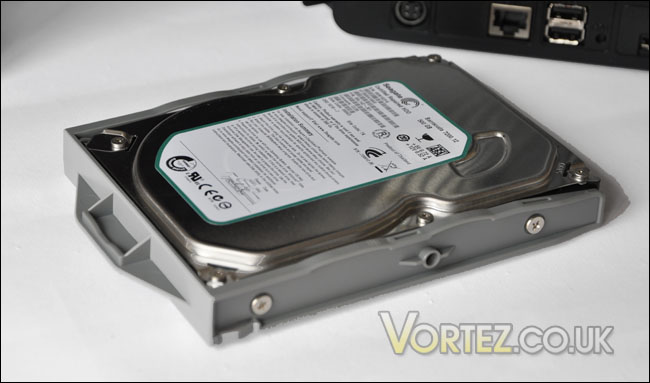
HDD goes into the tray and four screws secure the HDD
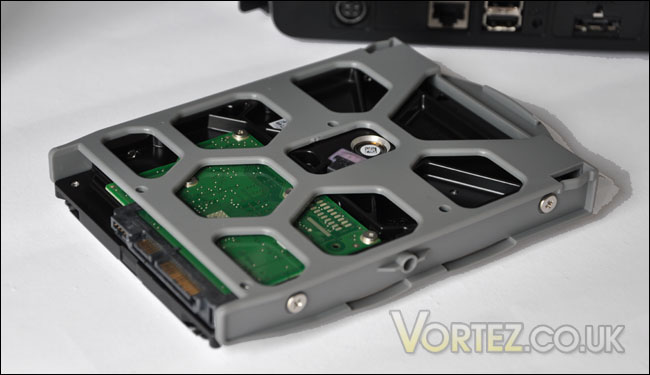
The underside of the tray. Gives suitable protection for the HDD
Depending on the configuration you want to use will determine where the HDDs go. In this review, I’m choosing to take advantage of RAID1 so I need two HDDs. There are a total of 4 slots to house the HDD media. Placing one in the top of our unit or even at the lowest shelf seems to limit the cooling capabilities of the DS410 because the two fans mounted on the back of the NAS unit do not cover these shelves. Fortunately though I only had two HDDs, so placing them in the two middle shelves works to my advantage because the fans cover these two positions. It’s important for us to have adequate cooling because like most NAS boxes, the unit is going to be powered up for long periods of time. So we want to keep the HDDs in particular as cool as possible.
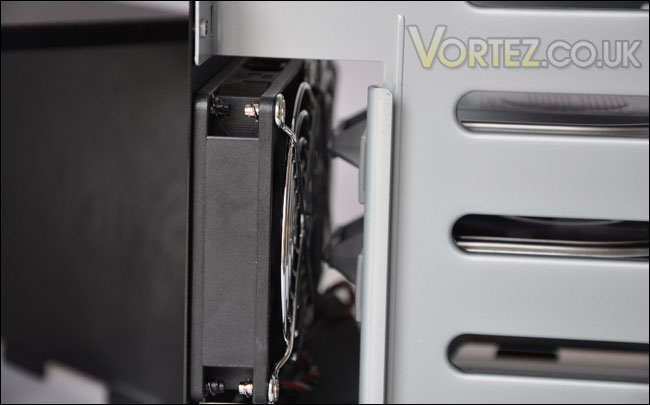
Twin 80mm fans only cover two middle slots
NOTE: These two 80mm fans can be replaced if required, just unscrew from the mounting and plug into the PCB.
When you are ready to install the HDDs, just slide them along the shelves and at the very end are the SATA data and power ports that fit perfectly into the HDDs.
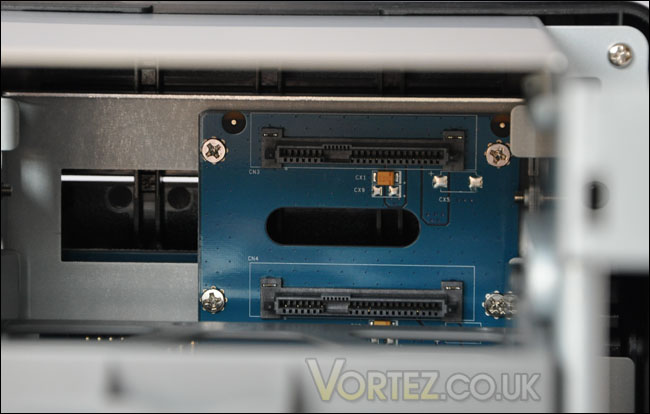
SATA ports at the front of the NAS – drive slides directly into these ports
When done, just place the shell and screws back on and we’re ready to go!
Installing the Diskstation DS410 (Software)
In the back of my mind, I imagined such a sophisticated unit would involve a lot of work and tweaking of settings but I was pleasantly surprised at how easy the entire set-up of the DiskStation DS410 was. The most time consuming of tasks is actually deciding where to position the DS410. If you are like me, things are messy and since implementing many other devices on the network here – I hadn’t made the sensible decision of keeping things in order for future usage. So the time had come to tidy things up and make a comfortable spot for the DS410.
Compared with other NAS units the DS410 is considerably smaller – yet finding a suitable position can be difficult if you have tight surroundings.
With the DS410 hooked up to the power and CAT5 cable connecting the NAS to the router, I pressed in the large power button on the front of the DS410. This illuminated the LED’s at the front. A few minutes later and everything is good to go.
The first thing required to interface with the DS410 is the set-up utility otherwise known as Synology Assistant. Synology have really gone out of their way to provide as much guidance with the set-up of the unit as possible. This was one of my initial concerns. So fear not, the set-up of the DS410 (and others I’m sure) is quite simple and easy with wizards directing you through the entire process.
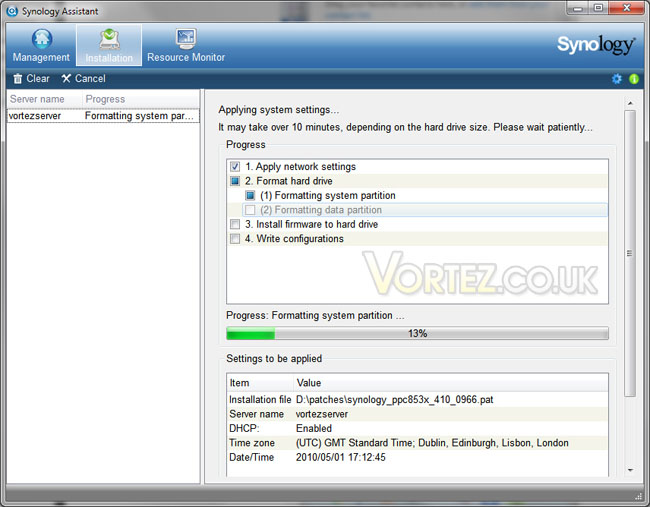
The assistant guides you through the installation
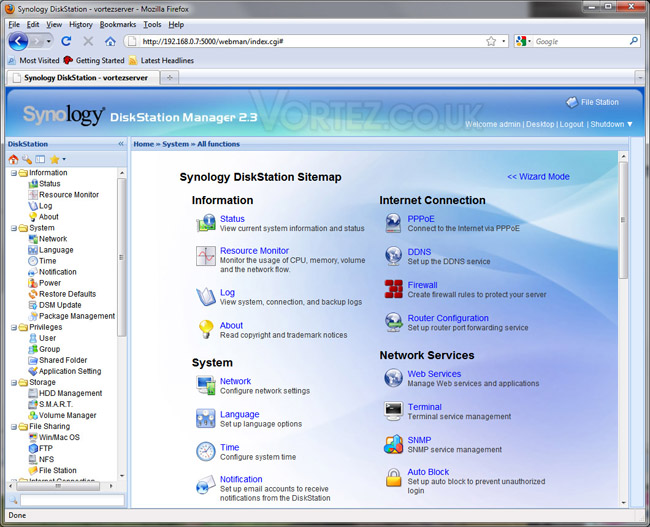
The index page for the DS410
Setting up RAID
One of the first things you’d ideally want to set-up is RAID because you wouldn’t want to lose the data you are going to be hosting on the NAS. With the test set-up featuring just two HDDs, RAID 1 is probably the best option – it incorporates a direct mirror of the data from the source drive onto the spare drive.Synology, with the helpful wizard feature have made the integration of RAID a piece of cake. Just click Storage > Volume > Create and you get a dialogue box asking you which RAID configuration you’d like to go with. I chose RAID 1. The wizard configures the drives to operate in RAID 1 mode and within no time at all, you are able to continue setting up.
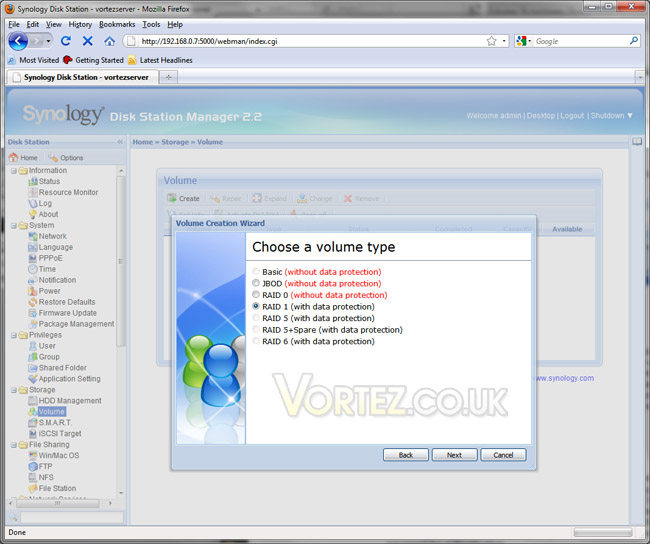
The choice between each RAID type
Setting up Admin UI & FileStation 4 over HTTP
Getting things set-up over HTTP couldn’t be easier. All you have to do is forward port 5000 on the router and find out the IP your ISP has assigned you by going to somewhere like What Is My IP as soon as you have your IP simply open a web browser and key in http://[YourIP]:5000 this will then allow you access to the Admin UI.
To allow users to access files over HTTP, File Station needs to be enabled in the Admin UI and then at your specific IP, using the above address in a browser now gives you the option of accessing Files Station. Of course, you can set-up specific users or groups to have access to certain areas should you wish.
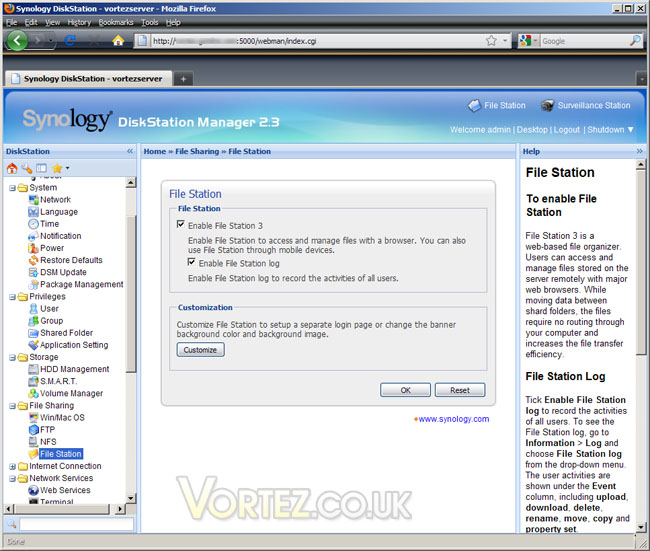
Enabling the File Station feature
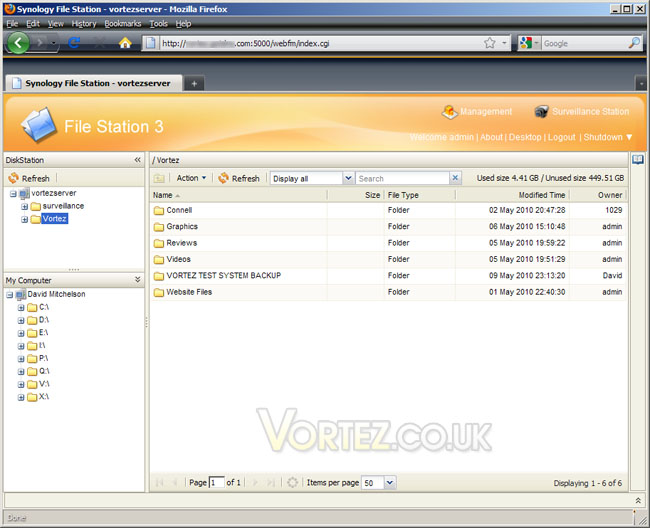
The File Station feature in use
Setting up FTP
Similar to the UI setup, for FTP access all that needs to be done is enable the option inside the Admin UI and then forward the FTP port on your router – 20/21 and inputting the network IP for the NAS and again using What Is My IP will give you the IP address. Enter the IP into an FTP client and you now have access over FTP. Just remember though that unless you have set-up users, the only active account will be the admin account.
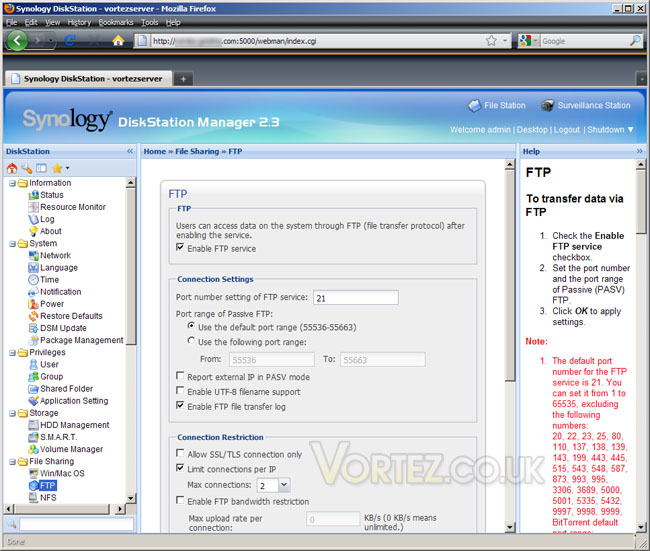
Enabling FTP is the first stage
Setting up Surveillance
One of the best features of the DS410 is the ability to configure up to 12 camera surveillance. All of which can be accessed over HTTP. This makes it ideal for a small company that requires backup, storage and building security. All you have to do is have an IP camera connected to the network using CAT5.
As with all of the features, the wizard guides you through setting up the IP camera. All you need to do is log into the Admin UI and select Applications > Surveillance. Inside here you will be asked if you want to enable this service. Select and click OK.
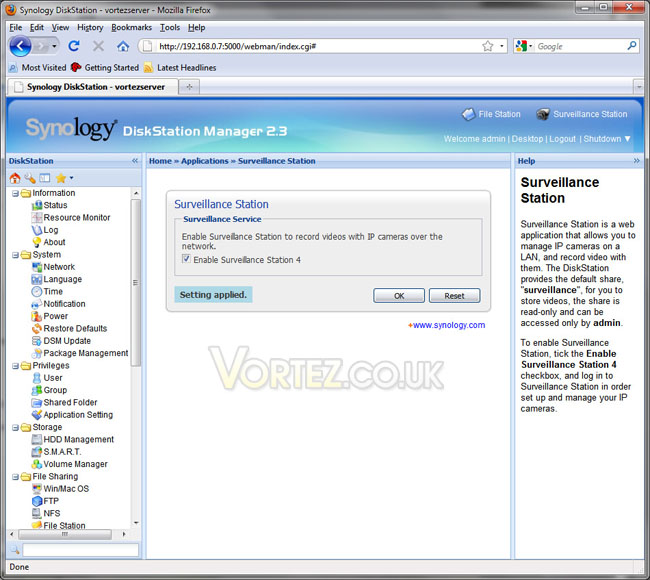
Again, as with other features you must enable the sevice first
This will now add a feature to the interface called Surveillance Station 4. Inside here you can install, configure and manage up to 12 cameras. There are many options within this specific area so I’ve only taken a couple of screenshots to illustrate.
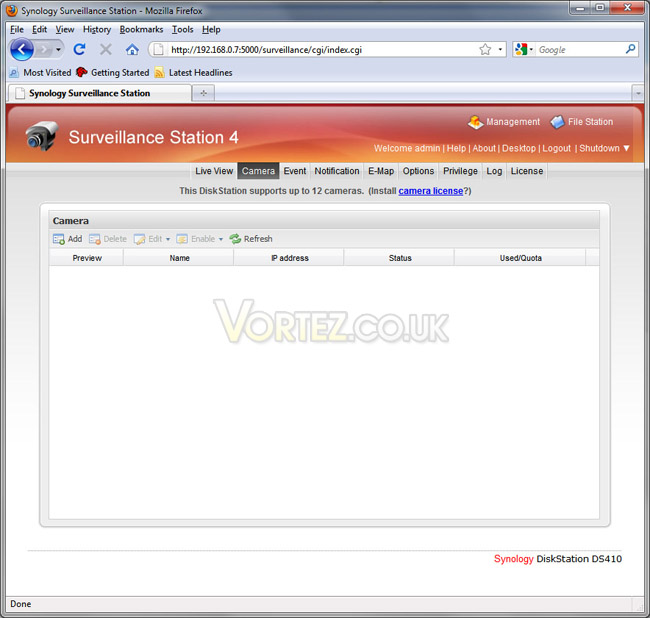
The camera index page
TIP: DynDNS DNS MASK
Using a service like DynDNS applies a DNS mask if you do not have a static IP address. Giving a memorable name to the NAS is probably a wise choice to make if you are a home user – as IP addresses usually change due to them being dynamic. The beauty with DynDNS is that if the IP does change, it automatically updates – keeping the location of your DS410 intact.
As you can tell from the interface there is a wealth of features within the Admin section. I’ve obviously not been able to cover every single feature, and hopefully I’ve covered enough to give people a taste as to what is available with the DS410. Aside from the features I have covered there is also the ability to set-up a download server, audio server, printer server and web server.
Conclusion
Having never really had any experience with NAS boxes, I was a bit dubious and excited at the same time. Dubious due to my preconceived stigma that such a device requires lengthy and complicated installation and excited at the prospect of setting up such a device and taking advantage of the features that a NAS has to offer.
What I can report is that those concerns I had were absurd and quickly forgotten. Synology, with their assistant, guides you through each of the numerous feature set-ups in a very informative manner. So, even for a novice (like myself) getting the unit up and running was easy.
The integrated software with the DS410 – DiskStation Manager – makes managing the NAS easy and very accessible. Whether you need FTP, HTTP or Surveillance access. It’s there and what makes these features so appealing is the fact they are also very easy to set-up.
Working out whether the DS410 is good value for money is a hard decision to make. For home users the price is on the steep side, and there are other units offering similar features for less. But for business users the DS410 is good value. It has a wide array of features including the ability to support up to 12 surveillance cameras.
Well there we have it, in a nutshell the DS410 is a fantastic NAS box, it comes with a wealth of features, is versatile and due to there being great support via the integrated software, configuring it is ever so easy. For these reasons, I award the Synology DS410 the Gold Award.
Pros
+ Extremely easy to set up
+ Packed with features
+ Visually attractive
+ Great for surveillance
Cons
– Big price for home users
– Top and bottom HDD not in direct airflow
We would like to thank Synology for sending over the DS410. Discuss this review on our forums.