







It’s all about the G with Thermaltake’s Element G. Gaming, Glittering, Gradational, Gigantic, Glaciated.
Product on Review: Thermaltake Element G
Manufacturer and Sponsor: Thermaltake
RRP: Approx £100 / $156 / €120

VL10001W2Z or Element G as its officially known has been available for over a year but we thought we would review it anyway as we progress through the case reviews. The Element series has many members, there is the V, T, S and of course the G today.
The Element G is quite specifically designed for the gamer (although the packaging intimates ‘Professional’), by featuring colour-shift fans and a very stylish appearance complimenting any gamers domain. It features high calibre cooling – 3 x 200mm and 1 x 140mm. Impressive for just a mid-tower case.

Thermaltake’s Take:
When designing the Element G, Thermaltake engineers opted for a classic, changeful chassis, with color change features to optimal gamer’s in-game experience. Element G sets new industry standards for gaming chassis by allowing users to change the color of the lgihts in different game simulations. The Element G is equipped with 3 Colorshift fans to create strong, dynamic and exciting atmosphere to make gamers perform better.
Features
So where does the Element G get its so called name ‘G’? It’s all about the G’s. See below (taken from Thermaltake website)
Gaming – Colorshift Fan with 6 color changing pattern for optimal gaming experience
Glittering –Three enlarged color shifting fans creates most eye catching appearance
Gradational – Adjustable fan speed control for performance mode or silent mode
Gigantic – Massive storage capability with 7 x 3.5”and 2 x 2.5 HDD or SSD bay
Glaciated – Excellent thermal performance with glacial airflow
Specifications
Case Type Mid Tower
Material SECC
Front Bezel Material Plastic
ColorBlack
Side Panel Solid w/23cm side fan
Motherboard SupportMini ATX/Full ATX
Motherboard Tray No
5.25″ Drive Bay 3
Ext. 3.5″ Drive Bay 0
Int. 3.5″ Drive Bay 7
With Additional 2 x 2.5″ HDD / SSD bay
Expansion Slots 7
Front I/O Ports USB 2.0 x 4,
HD Audio ports
Dimension (H*W*D)
480 (H) x 230(W) x 521(L) mm
18.9(H) x 9.1(W) x 20.5(L) in
Exterior
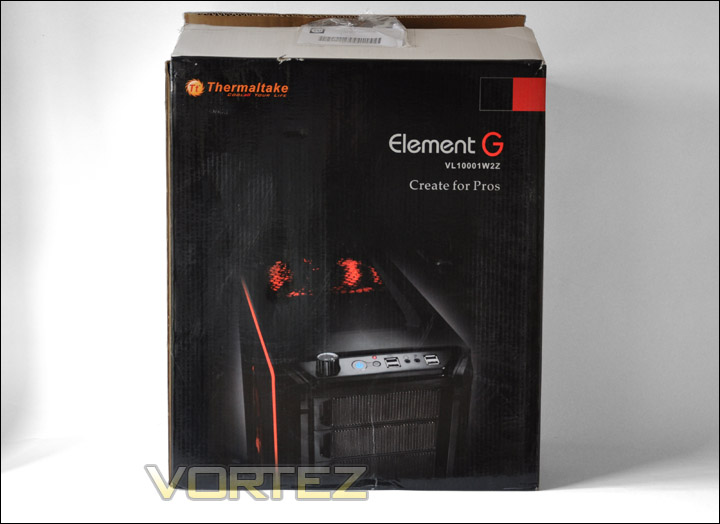
The Element G follows suit by being encased inside a case box that is styled in the Element theme. It has a sharp image preview of the Element G on the front. As always, on the reverse there is information regarding the features and specifications (listed on the previous page)
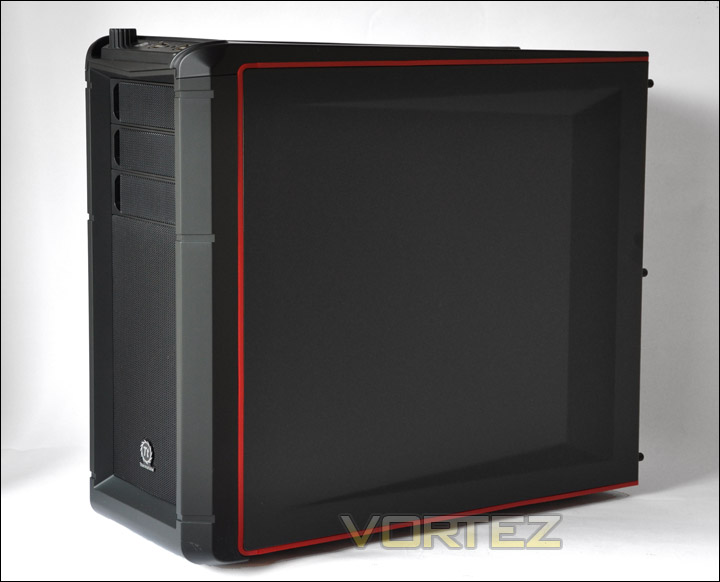
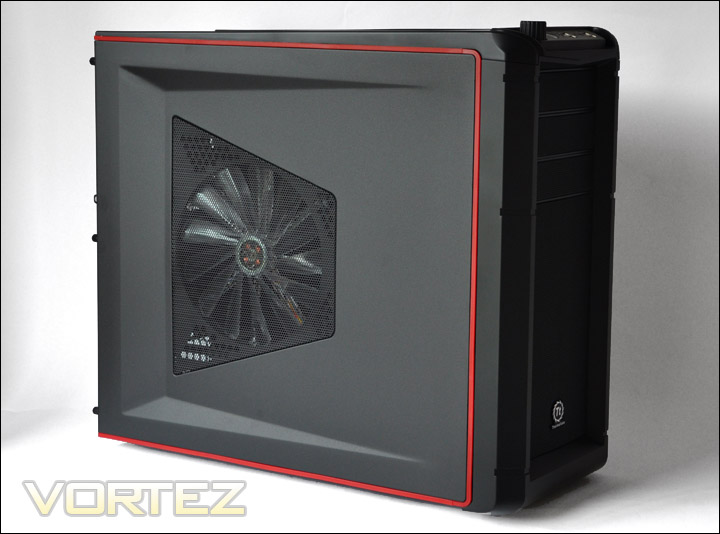
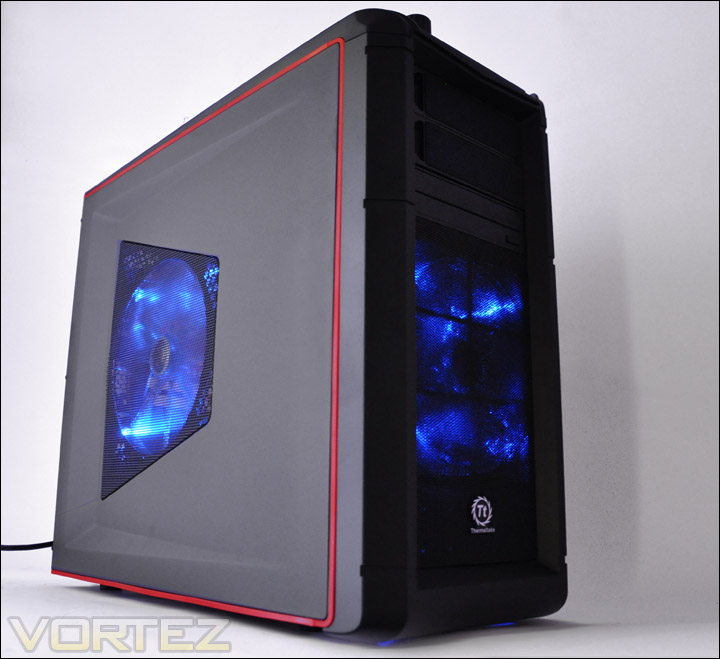
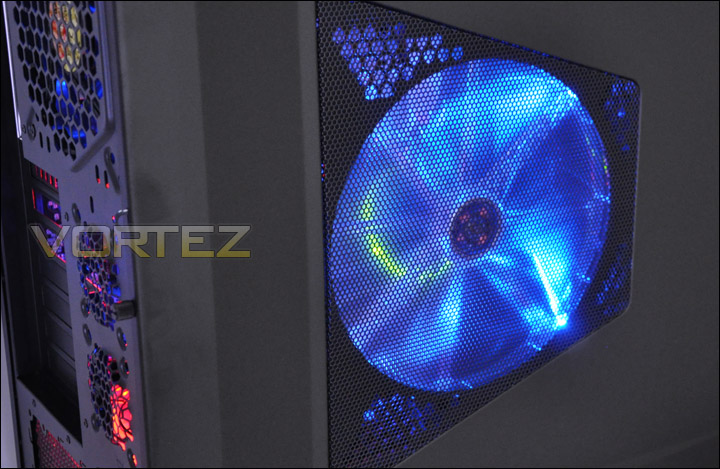
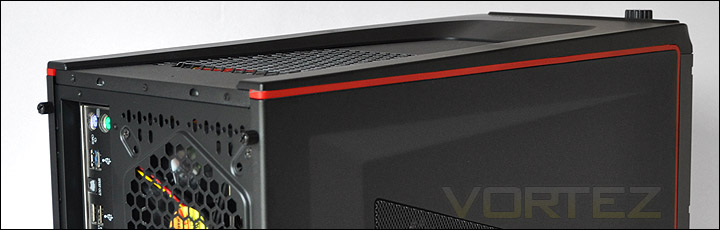
The Element G has a distinctive red line that runs around the edge of the side panels on either side. The left side of the Element G has a concaved design that looks very smart. On the prominent side panel there is a mesh grill with a 200mm LED fan behind it. There are 3 thumbscrews holding each side panel in place.
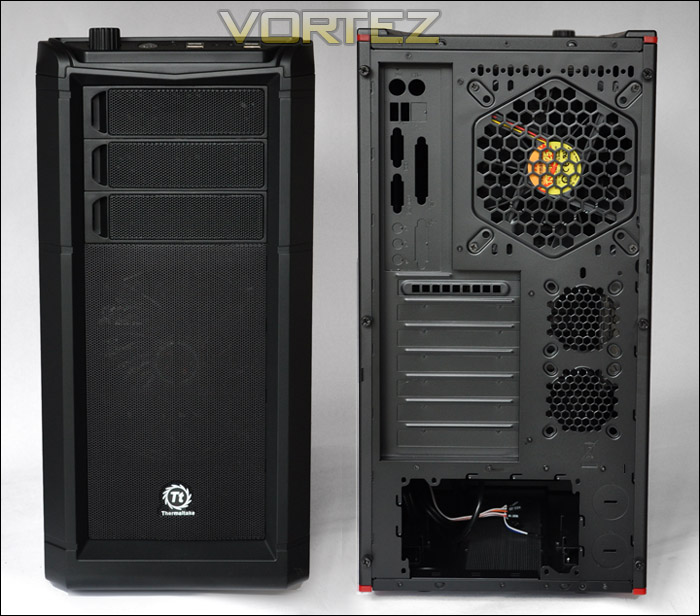
Moving to the front of the case there is a plastic bezel that surrounds a metal panel. Behind this panel there is a 230mm intake fan that is again LED ready. The front features 3 x 5.25″ drive bays. Each panel is removed via the thumb indentation. To the rear starting at the top there is a grill for the rear exhaust fan to push out excess heat this fan is 140mm in size. Beneath this are the expansion slots which are rather odd, they seem to be moulded into the case. When we take a closer look at this when we install the components later. Parallel to this are 2 circular mesh mounts for mounting 2 x 60mm fans. Strange to include mounting for such a size fan as usually fans of this size are found on chipset coolers, not as case fans. They aren’t that common to come by either.
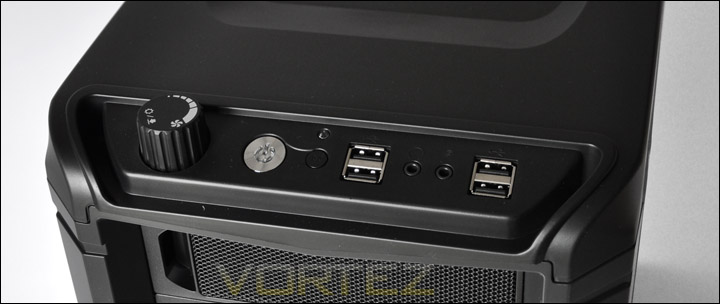
The front panel has a goodly amount of controls to engage in the first of these controls is the fan control knob. This not only controls the speed of the fans within the Element G but also acts as a button to change the colours of all 3 LED fans. You are able to choose from having red, blue, green, flashing, multiple colours and even turn them off altogether. So a lot of choice coming from that single control. Moving right, there is a power button that has a polished look to it, and a plastic reset button. Above this is a small activity light. Beside this there are 2 USB2 ports, headphone socket, microphone socket and a further 2 USB2 ports.
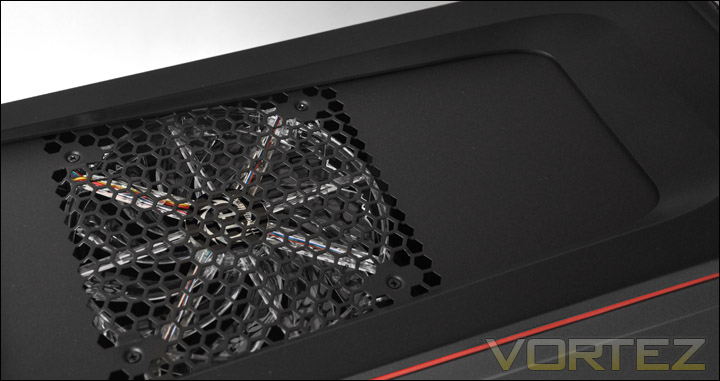
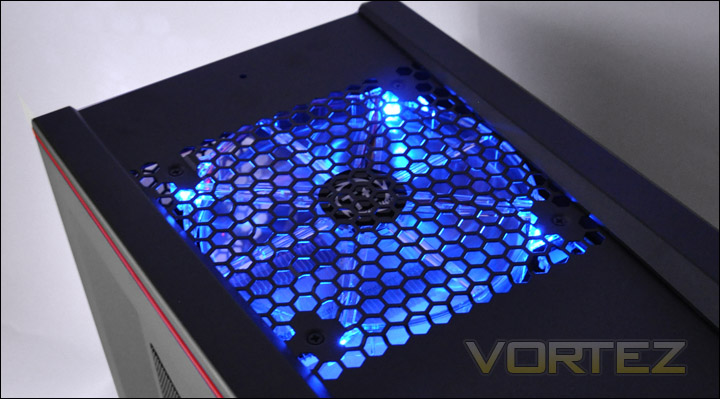
Lastly the top has a an opening for a further 200mm LED fan that acts as an exhaust fan, because of the hollow here you are able to store small accessories should you need to.
Interior
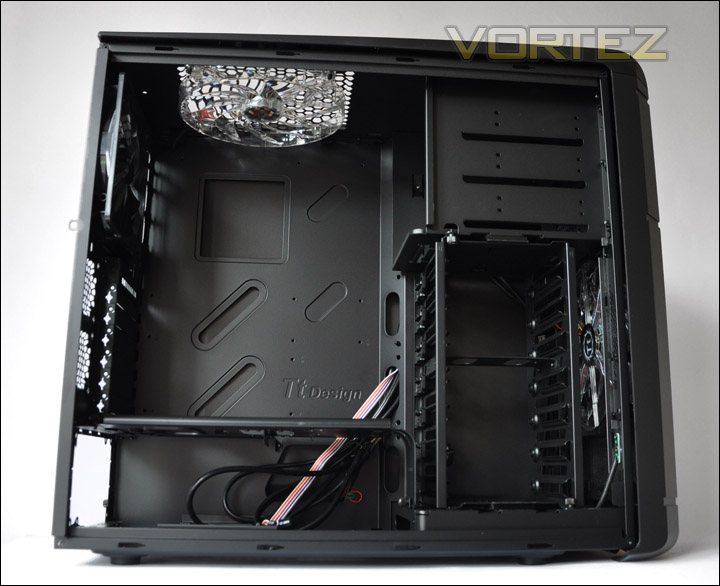
After removing the side panel we can take a good look inside, from the outset it looks to be a well designed layout with some nice incisions for cable management. There doesn’t appear to be any anti-vibration throughout the Element G, which is disappointing. But lets take a closer look at each section.
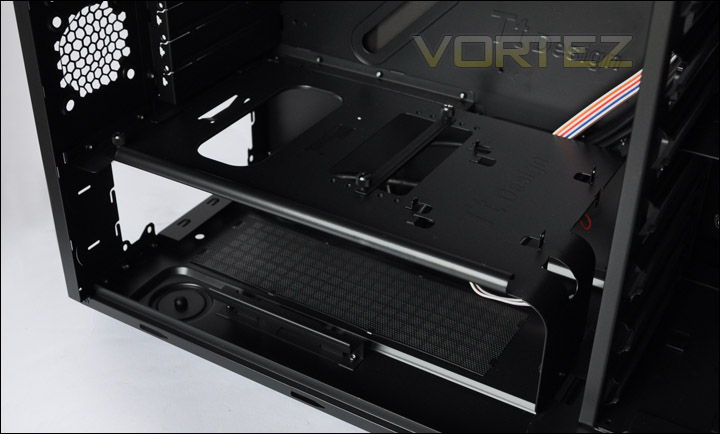
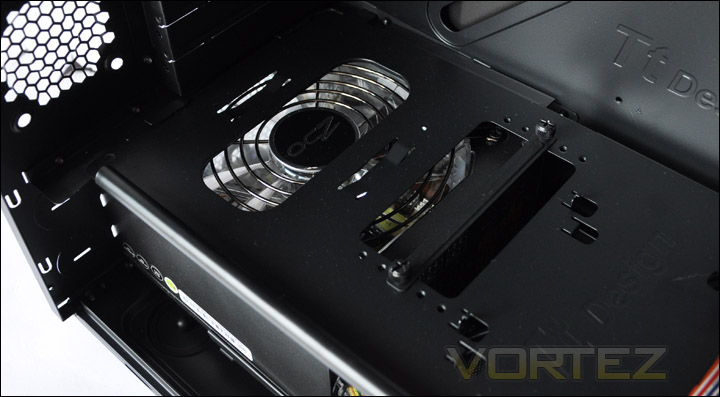
At the bottom of the Element G there is space to install the PSU. In this designated area there is a filter that is removable for cleaning purposes etc. Above this is a shelf that acts as a separator and also an installation platform for 2.5″ devices. This can be removed, and is required to be to get the PSU inside anyway.
As I’ve already pointed out the rear exhaust we have inside the Element G is a 140mm, a slight upgrade to the commonly used 120mm. It doesn’t have LED functionality like the other fans but has a braided cable which is a nice touch. Above this is a 200mm LED fan that acts as an exhaust too, removing unwanted heat up and out of the case. Near the two fans there is a cut-out for the motherboard backplate. From first impressions, the gap here is quite small and it is doubtful that it will be very helpful.
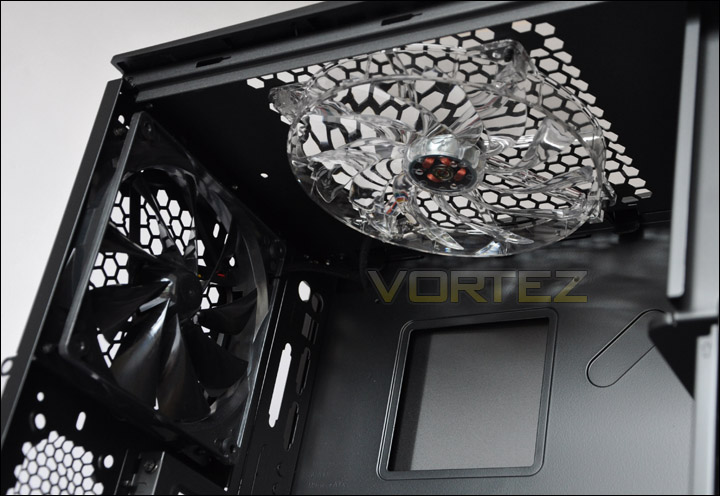
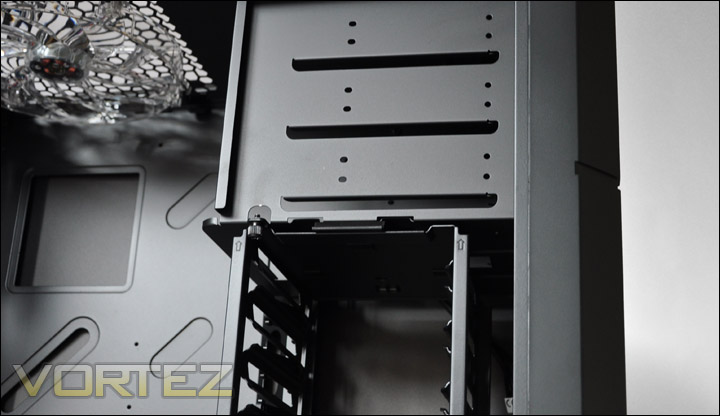
Optical drives are mounted in the 5.25″ area, this strangely doesn’t have any tool-less mechanisms to help secure the drive into place. It uses the traditional screw through a hole technique.
Beneath this is the 3.5″ HDD mounting cage. To install drives into this cage, special screws have to be attached which allows the HDD to be slid into place along the rails. This cage can be removed if desired – simply remove the thumbscrews holding it into place.
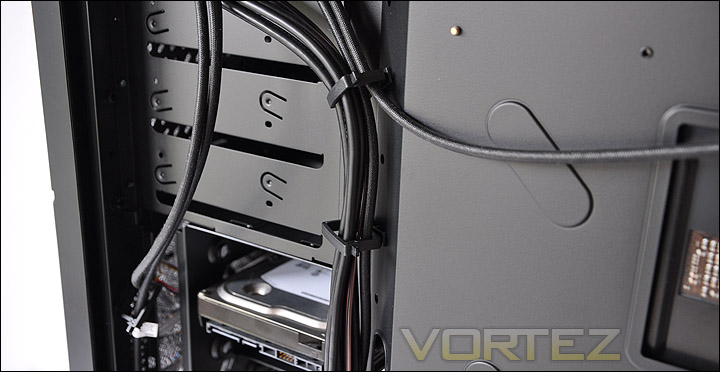
Behind the motherboard tray there are some nifty latches for keeping cables tidy. I really like this idea, and the space in this area helps because there is space to manage cables as well as the ability to tie things back. It’s nice to see Thermaltake taking the time to ensure cables are black, and those that aren’t typically black are encased in braiding like the LED power cable/fan cables.
Installation
The Element G is a decent case to work with when it comes to installing components. I found it easy to get things in and out and there are plenty of good features inside to take advantage of.
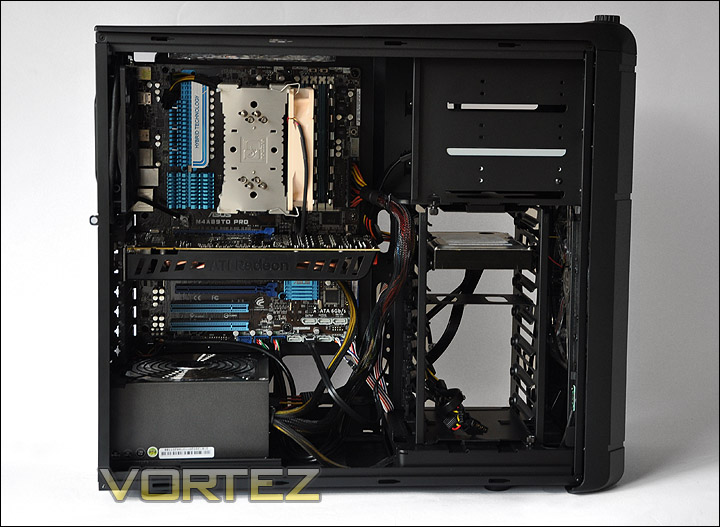
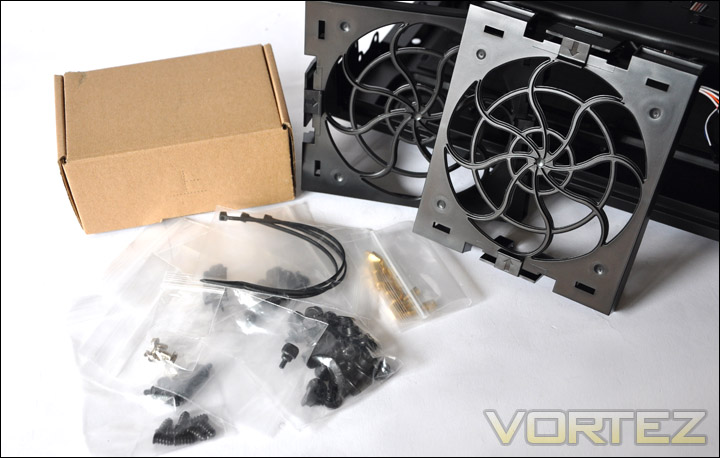
Turning firstly to the accessories pack. Inside the Element G is bundled a small brown box and 2 x 2.5″ bay adapters for SSDs. Inside the box we have an assortment of different sized and styled screws as well as cable ties for keeping things neat.
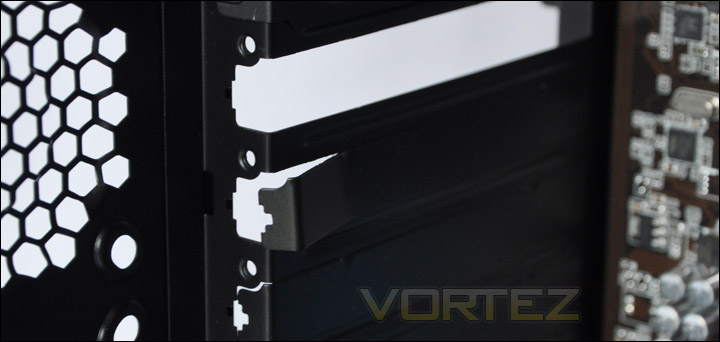
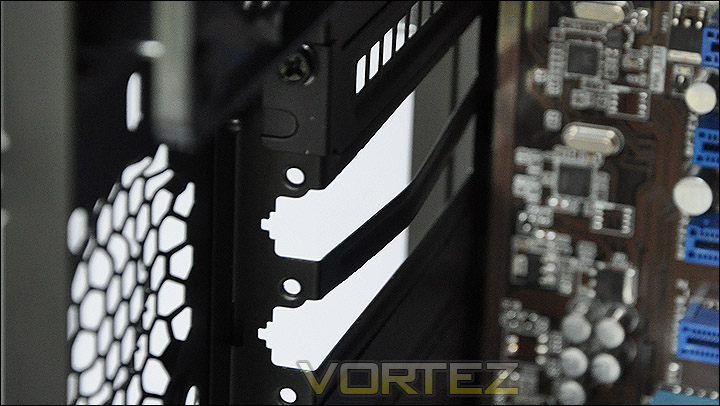
As I mentioned when commenting on the exterior of the Element G – the expansion slots do not feature any tool-less mechanism or even conventional expansion plates. Instead the areas marked out as slots required you to pull the metal plates away from the case. This is far from satisfactory as how are you going to cover in the slot should you want to cover it up again? When I removed a designated plate, because of the quality of the rear panel – the bar separating each slot just bent. (See pictures below) This shouldn’t be happening on a case that costs so much and its rather a let down if I’m honest.
Installing the PSU is fairly simple, you just have to remove the pre-installed shelf. I did try installing the shelf back in after fixing the PSU into place but I felt quite uneasy about having the fan on the PSU concealed so much by the shelf (see picture). I felt it would impede thermal performance within the PSU.
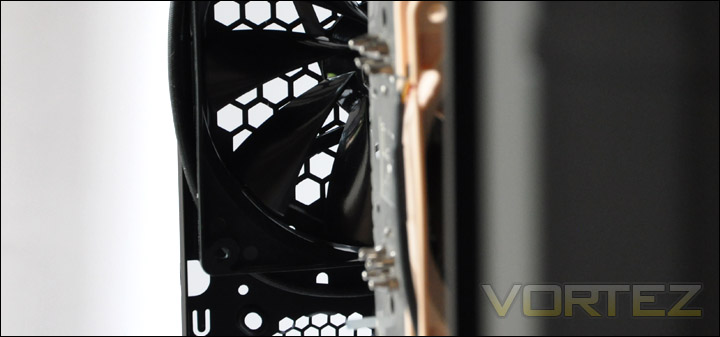
CPU heatsink clearance is great, there is plenty of space for the Noctua NH-U12P that I have installed within the Element G. This cooler stands 158mm in height.
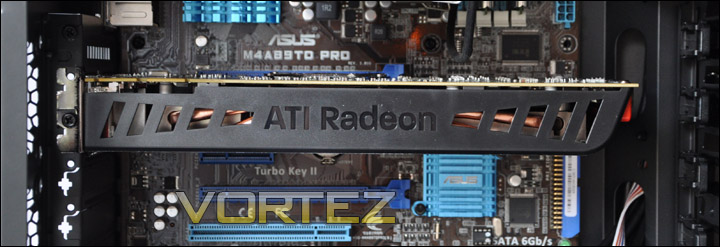
Similarly, the graphics card went in without any hassle and there is plenty of clearance between the end of the card and the HDD cage. There is another inch to spare on the HD5870 seen in the picture below.
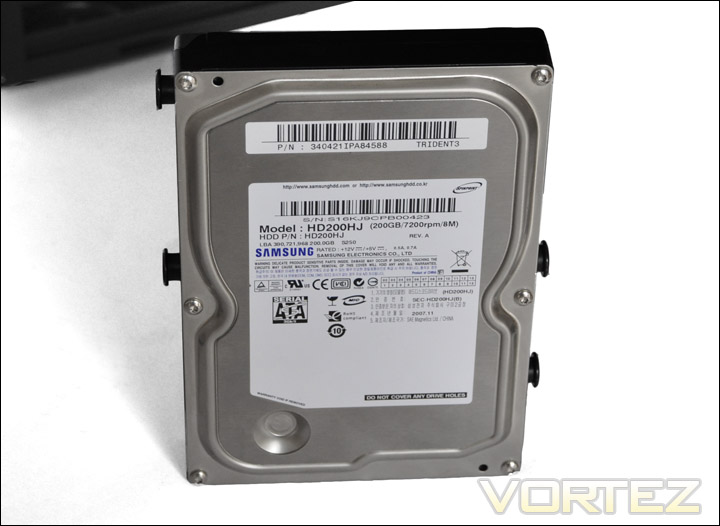
With regards to installing the 3.5″ HDD into the Element G its fairly simple, attach four screws aligned as picture below and slide along the rails within the cage and the HDD is securely in place. As I reported on the newly released Armor A60 just recently this case also has no anti-vibration materials within the case and these screws are obviously metal, as is the cage they are sliding into. Now to me, metal on metal doesn’t appear to be a good idea – its only ever going to scratch. It would make much more sense to equip rubber washed around the screw heads to not only provide some anti-vibration properties to the Element G but also prevent scratching.
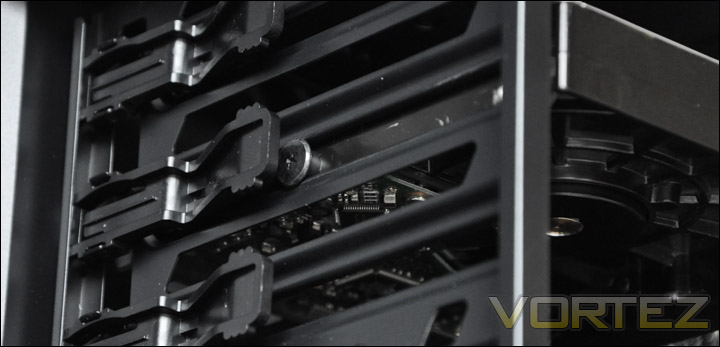
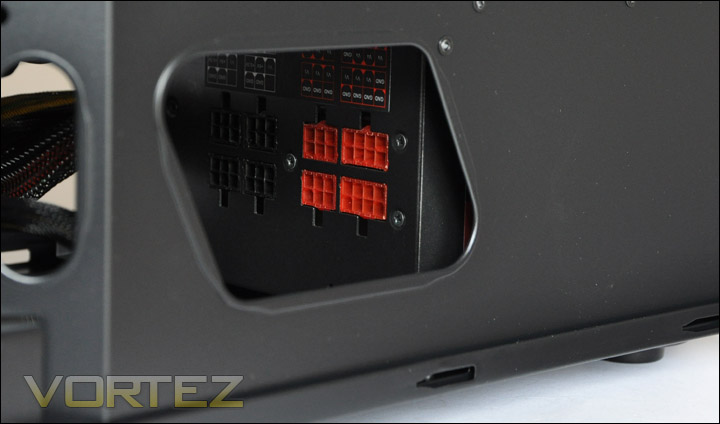
The cable management is a high-point of the Element G, the cut-outs are in just the right places, especially the PSU slot in the below picture. You can quite easily slot in additional cables if your PSU is modular and it makes the job of getting things up and running a lot quicker.
Powered Up
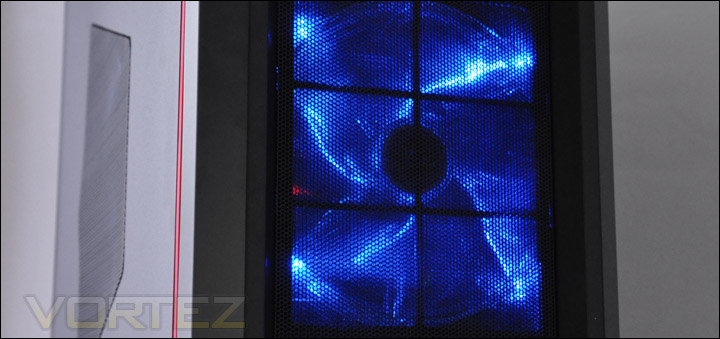
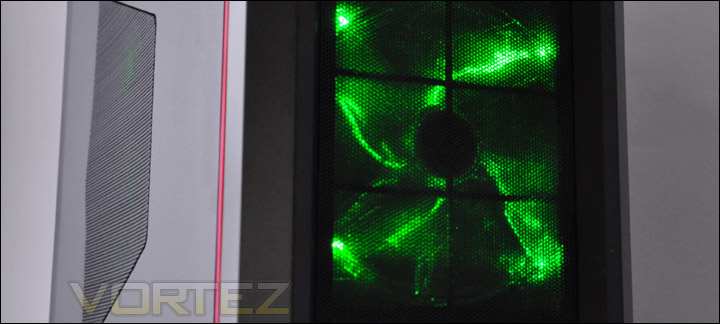
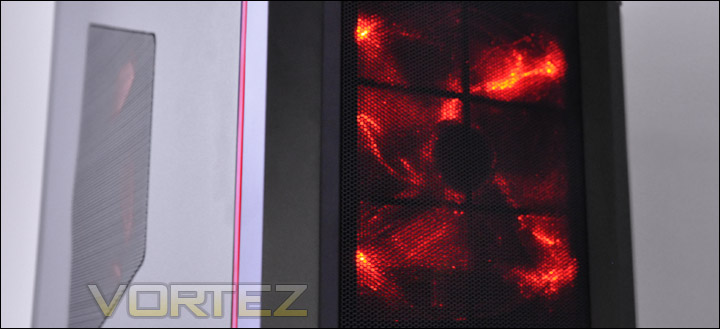
With everything installed and setup, I will now show the illuminating Element G in all its splendour. The knob on the front allows you to dynamically alter the LED colour of the fans within the Element G. So we have blue, green, red, flashing colours, alternating colours and LED’s off. Regarding the lighting inside the Element G, Thermaltake have done a good job at adding some atmosphere and I really like the ability to customise this case – you aren’t stuck with one colour and if you have other LED fans going inside the case you can co-ordinate them without any hassle.
Performance
For a mid-tower case the Element G comes with some pretty hefty cooling fans. 3 x 200mm and 1 x 140mm. I can’t recall a case of this size with such an aggressive cooling configuration.
So to discover the thermal performance of the Element G I will record idle temperatures after 20 minutes from an idle boot. I will then stress the system and temperatures will again be monitored after a 30 minute stressing has taken place. All fans are set to low during this test.
System Components
CPU AMD Phenom II X6 1055T 2.8GHz
Motherboard ASUS M4A89TD PRO (890FX)
Graphics MSI 8800GTX 798MB
Memory Mushkin EM3-10666 DDR3
HDD Samsung Spinpoint 500GB SATA-II
PSU OCZ Fatal1ty 750W
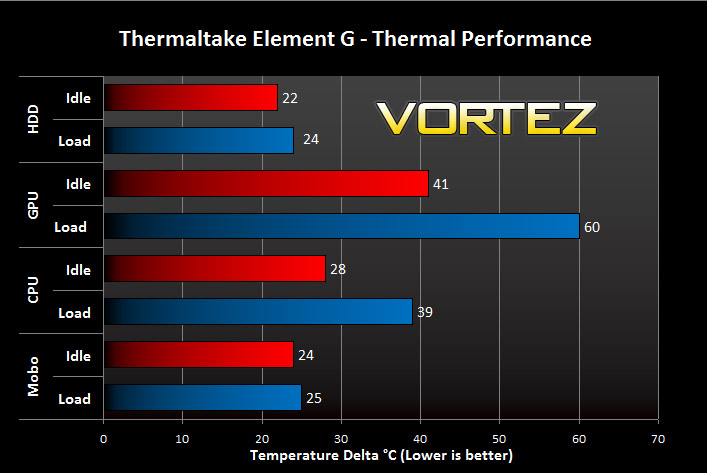
The above results speak volumes for the thermal performance within the Element G. Compared to the cases I have reviewed recently it keeps all components cool even at idle. The loaded temperatures are really what we are concerned with and the temperatures here are imrpessive, this is with the fans set at low too. So this means they are fairly quiet, but notching the fans up doesn’t really affect noise levels much and you are getting an extra 200RPM. All fans spin at around 600RPM on the low setting.
Conclusion
Upon taking the Thermaltake Element G out of the box I was anticipating good things, and I can report that there certainly are some good things, if not great things about the Element G. Foremost, it stands out as being a unique case with quite a lot of character – it has style. The ability to be able to change the colour of the fans within the case is a very nice touch, we even get the opportunity to alter the fan speed via the same control knob on the front of the case. These fans offer some exceptional thermal performance without hindering on the noise aspect.
The Element G has been carefully designed with cable management in mind, the cut-outs are in good places and its easy to create a cable tidy interior in little to no time at all.
Sadly though, there are some negatives that have to be considered. I experienced some disappointing build quality on the back panel of the Element G – metallic panels bending is not good news on a case that costs this much money. Mounting HDD’s into the Element G requires metal on metal, something that cannot be pushed under the carpet – why this has been engineered in such a way I do not know. It doesn’t help with regards to vibration and it certainly doesn’t compliment the paintwork inside the case, you’re just going to scratch things. The PSU shelf that is provided, to make things tidy and help with the visual appearance within only obstructs the fan on the PSU, I don’t think enough planning has gone into the development of this.
The Element G can be bought for around £100 which converts to $156 and €120 which for a mid-tower case is quite pricey there are full tower cases for around this mark.
Thermaltake have presented a good case to us in the Element G – it does have its faults but has some great potential.
Pros
+ Has character and style
+ Can change colour of fans
+ Fan controller
+ Great cooling
+ Excellent cable management
Cons
– Poor build quality on the back panel
– Metal on metal – HDD mount
– No anti-vibration inside
– PSU shelf obstructive
– Expensive for a mid-tower case
+ Has character and style
+ Can change colour of fans
+ Fan controller
+ Great cooling
+ Excellent cable management
Cons
– Poor build quality on the back panel
– Metal on metal – HDD mount
– No anti-vibration inside
– PSU shelf obstructive
– Expensive for a mid-tower case
We would like to thank Thermaltake for providing the Element G. Discuss this review on our forums.
