Thermaltake claims the World’s First accolade on a fully lit RGB all-in-one CPU cooler. Let’s find out if it performs as well as it looks.

Product on Review: Thermaltake Floe Riing RGB 240 TT Premium Edition
Manufacturer: Thermaltake
Street Price: £149.99 / $159.99
It seems like every product we now look at features some kind of multi coloured LEDs designed to light up your case like Blackpool sea front but, in true style, Thermaltake have embraced the RGB styling like no other, offering it on almost every product that they now produce.
The latest all-in-one CPU cooler that we’re looking at today is the Thermaltake Floe Riing RGB 240 TT Premium Edition. The name is quite a mouthful, granted, but it explains everything you need to know about the product in one fowl swoop. The RGB CPU cooler arrives in 3 different flavours, depending on the size of the radiator that you choose; 240mm (2x 120mm), 280mm (2x 140mm) or 360mm (3x 120mm).
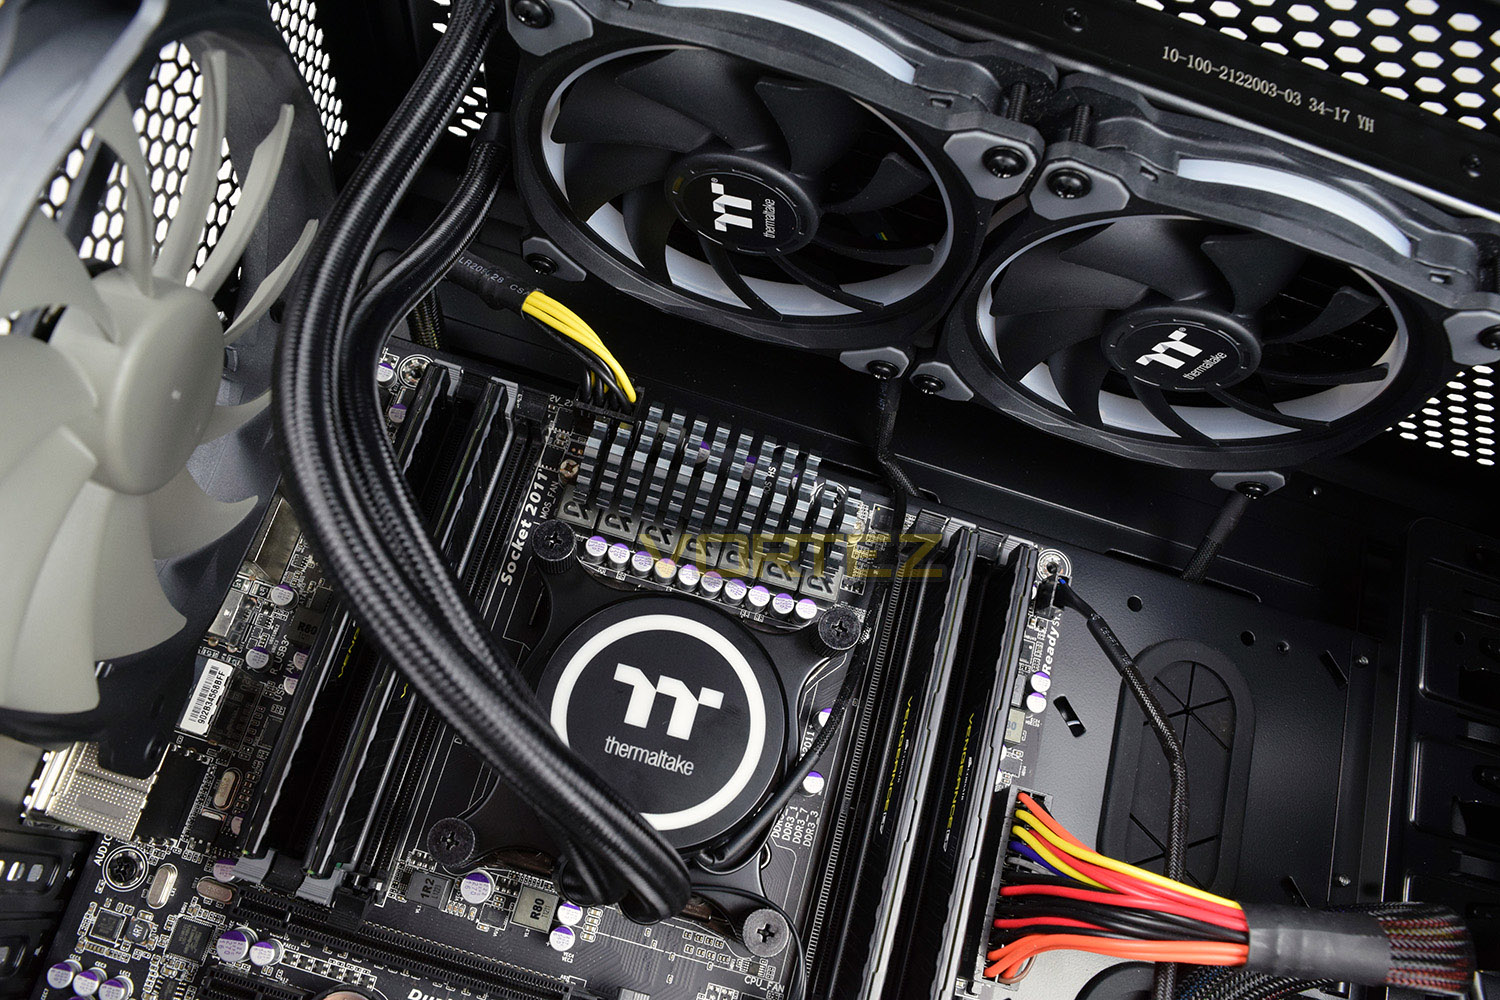
We’ve seen RGB pumps and we’ve seen RGB fans but Thermaltake are the first company to offer the entire package, complete with the hardware to control every single one of those 16.7 million colours. There’s also an application for iOS and Android devices which allows customisation of the CPU cooler.
It might look great, but it has to perform rather well to warrant the £150 price tag. We’ll strap it to our Core i7 processor, turn up the clocks and see how it fairs.
Thermaltake on the Floe Riing RGB 240 TT Premium Edition:
The Floe Riing RGB 240 TT Premium Edition is the world’s first 16.8 million colors liquid CPU cooler with two 120mm Riing Plus RGB fans and a LED waterblock. This cooler series features its extraordinary performance and superior quality. The large surface radiator plus high-performance waterblock and pump guarantees ultimate CPU cooling. Besides, the waterblock and the fans are manufactured with multiple addressable LEDs that can be controlled by Riing Plus RGB Software. Functions within the software also allow users to monitor fan performance and track CPU temperature. Enjoy better cooling performance and greater CPU protection with one simple upgrade!
Technical Specifications
Compatibility
Intel:
LGA 2066
2011-3
2011
1366
1156
1155
1151
1150
AMD:
AM4
FM2
FM1
AM3+
AM3
AM2+
AM2
Water Block
Material: Copper
Pump
Rated Voltage: 12 V/ 5V
Rated Current: 325 mA / 0.4A
Motor Speed: 3600 R.P.M
Fan
Dimension: 120 x 120 x 25 mm
Speed: 500~1400 RPM
Noise Level: 19.8~24.7 dB-A
Rated Voltage: 12 V
Max. Air Flow: 14.2~42.34 CFM
Max. Pressure: 0.17~1.54 mm-H2O
Connector: 5 pin
Radiator
Dimension:240 x 120 x 27 mm
Tube
Length: 326 mm
Material: Rubber
Weight: 1355g
Intel:
LGA 2066
2011-3
2011
1366
1156
1155
1151
1150
AMD:
AM4
FM2
FM1
AM3+
AM3
AM2+
AM2
Water Block
Material: Copper
Pump
Rated Voltage: 12 V/ 5V
Rated Current: 325 mA / 0.4A
Motor Speed: 3600 R.P.M
Fan
Dimension: 120 x 120 x 25 mm
Speed: 500~1400 RPM
Noise Level: 19.8~24.7 dB-A
Rated Voltage: 12 V
Max. Air Flow: 14.2~42.34 CFM
Max. Pressure: 0.17~1.54 mm-H2O
Connector: 5 pin
Radiator
Dimension:240 x 120 x 27 mm
Tube
Length: 326 mm
Material: Rubber
Weight: 1355g
Packaging & Bundle
The front of the packaging makes it perfectly clear that this product is aimed towards the RGB scene. There’s plenty of information to ensure you know exactly what you’re purchasing.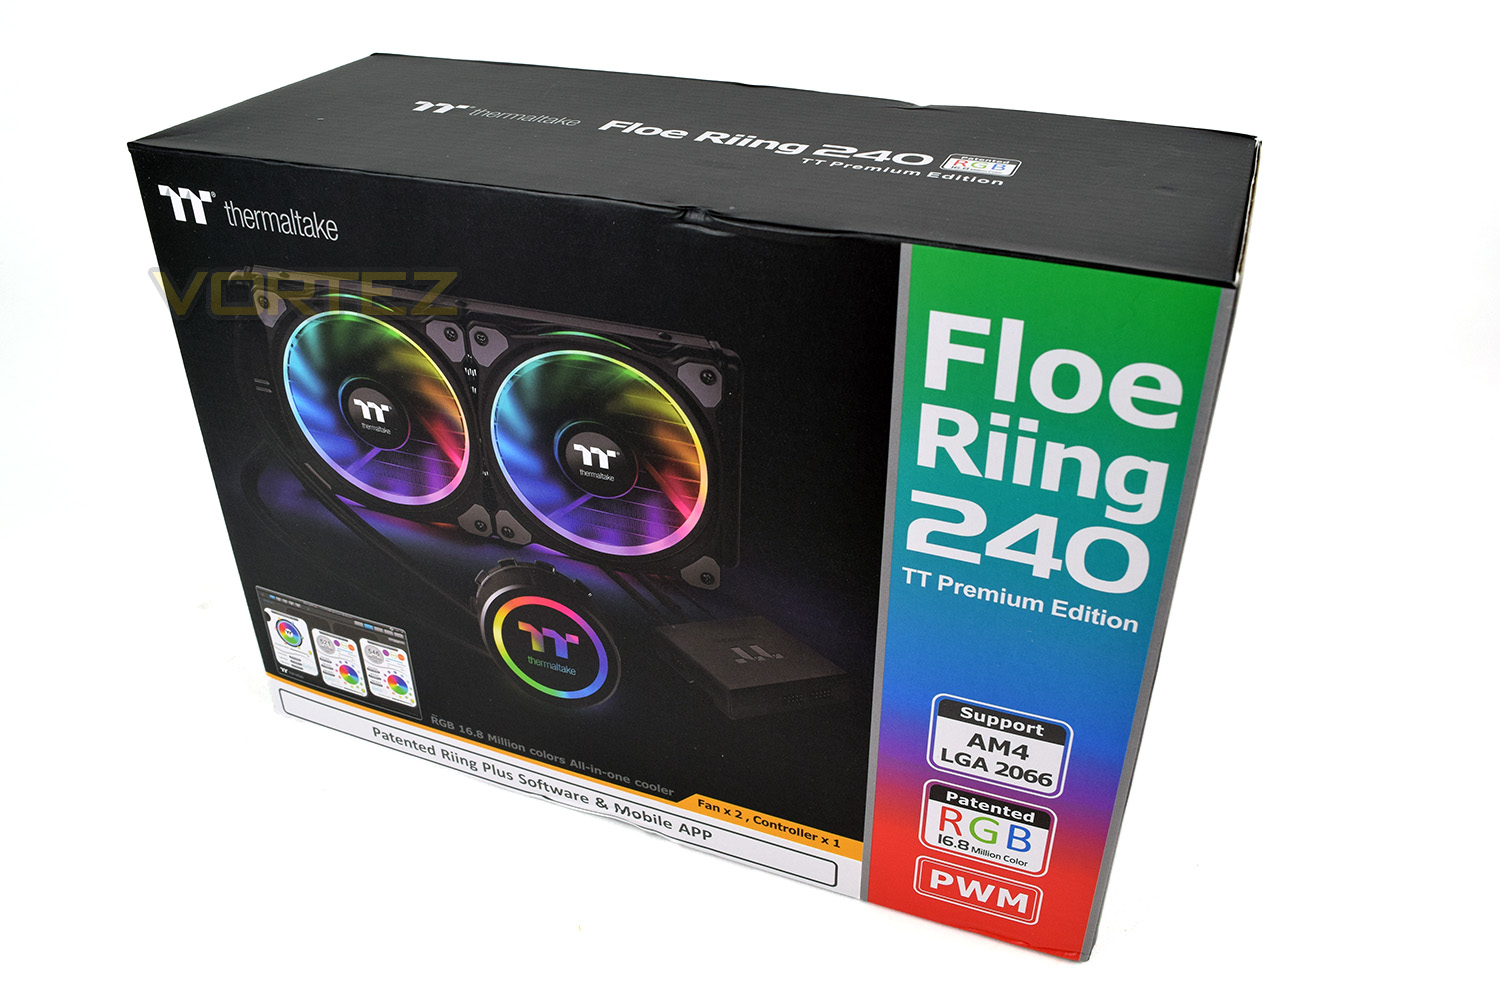
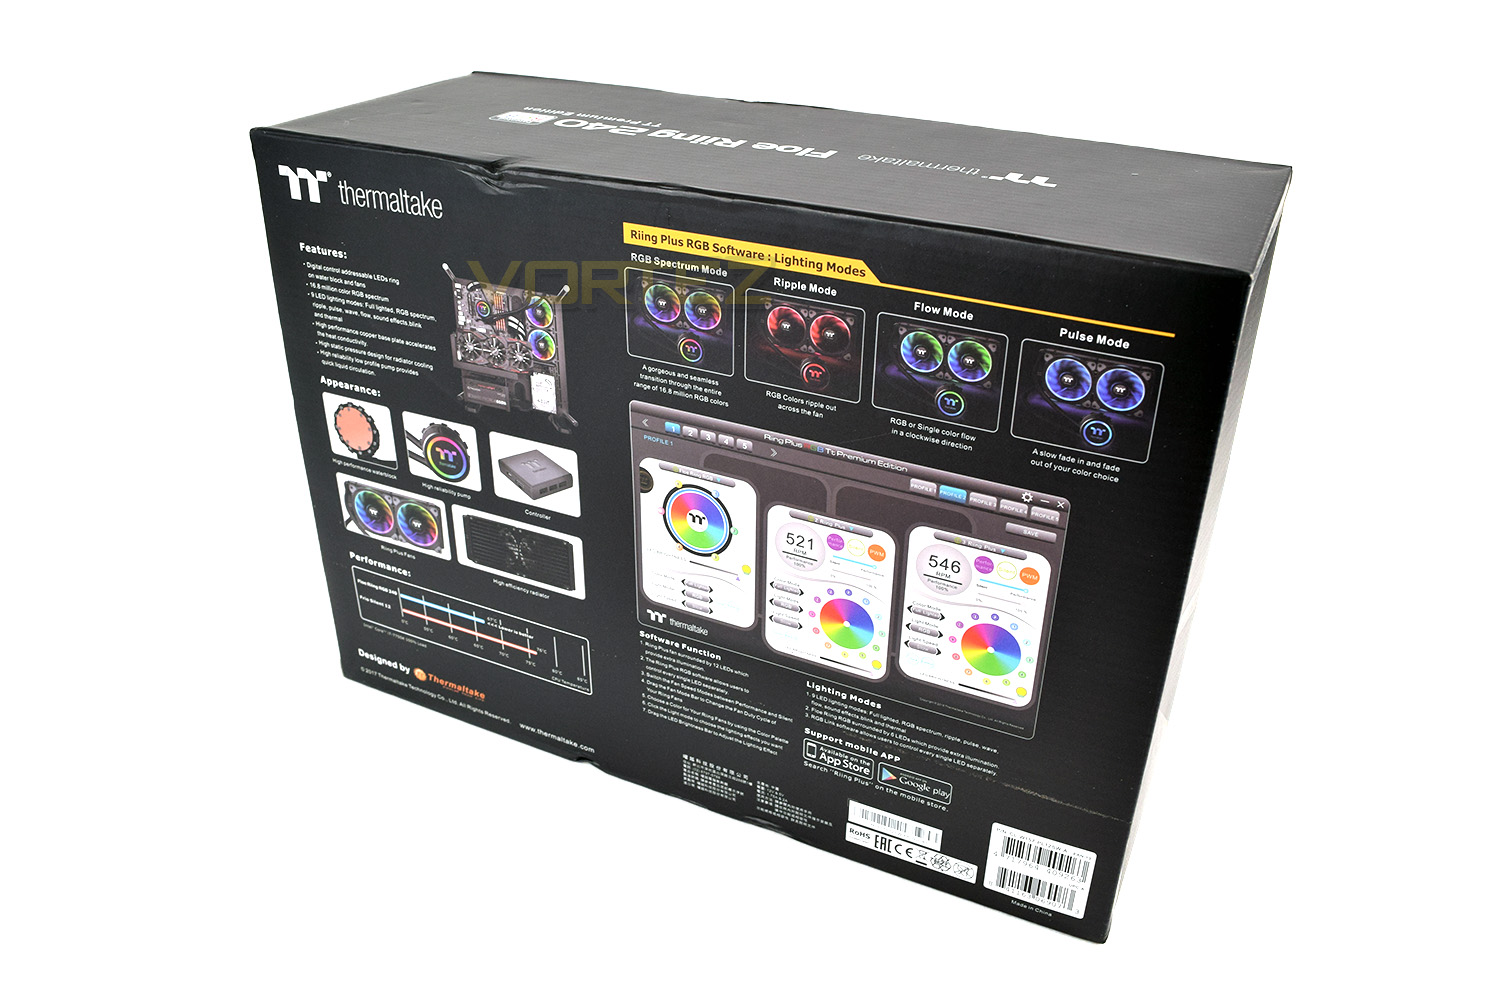
The rear of the box gives you an in-depth look at the many features of the Floe Riing 240, including the different lighting modes available as well as expected temperatures compared to a rival product.
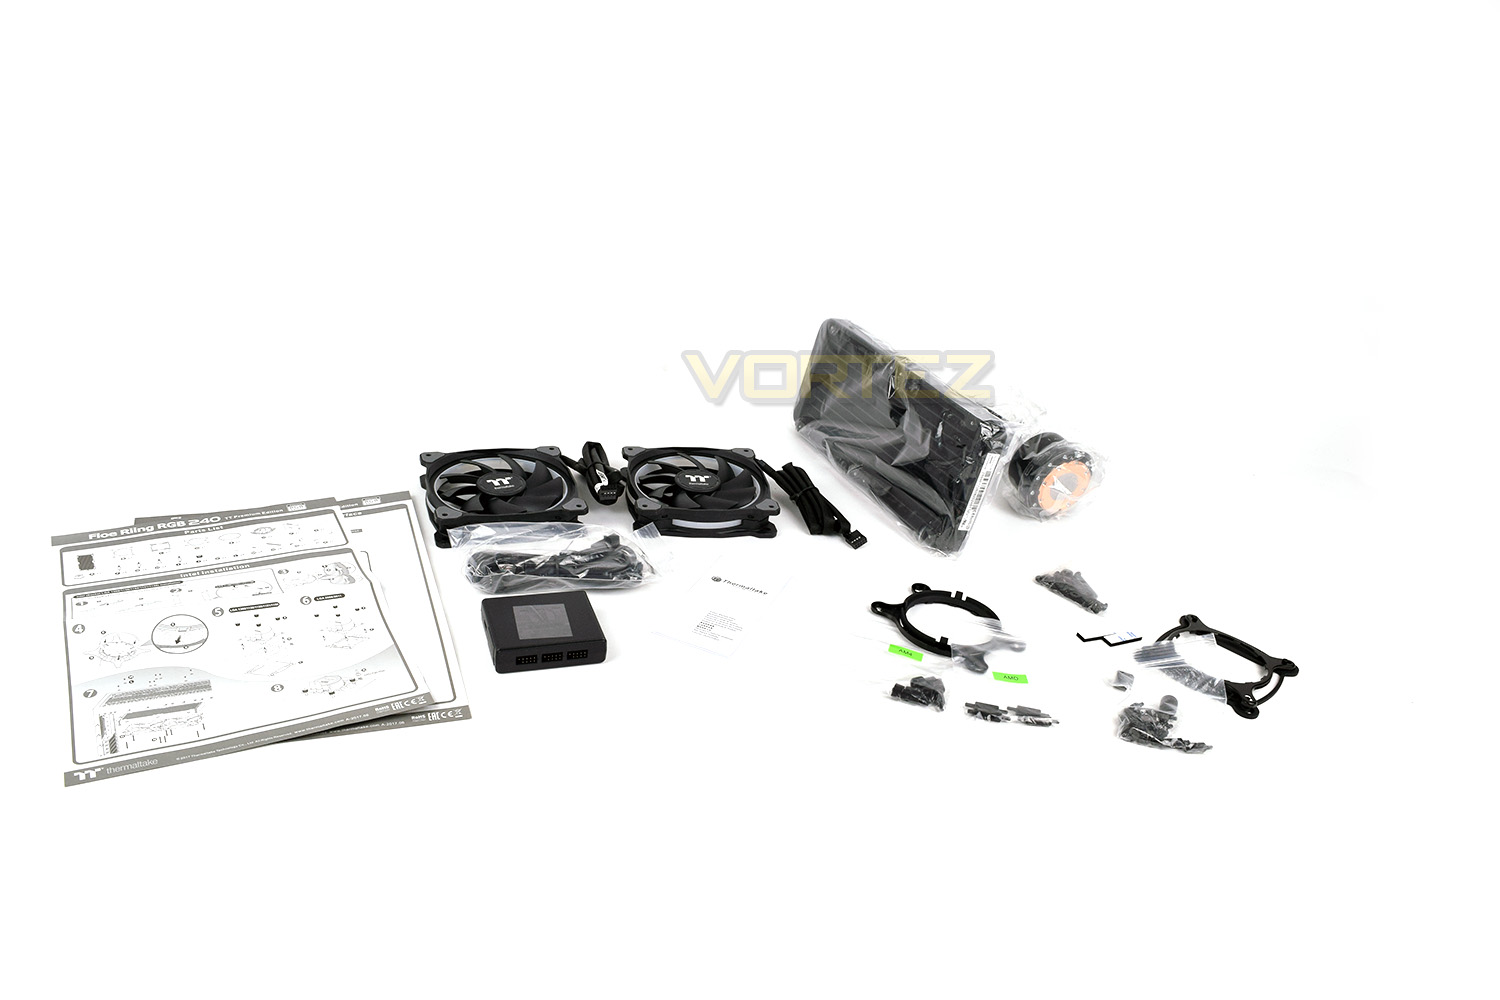
The bundle is quite substantial, to say the least. To allow fitment to most modern sockets, many different screws, standoffs and adaptors have to be included. There’s also the associated cables and control hub for monitoring and customising the lighting, fan speeds and the pump. The instructions are also incredibly in-depth.
Closer Look
The pump head looks good, even without the RGB lighting switched on. The black and white contrasts well and would suit almost any system build, if RGB isn’t your thing. The tubes are sleeved for aesthetics and protrude from the bottom of the pump head, along with the fan-header wire.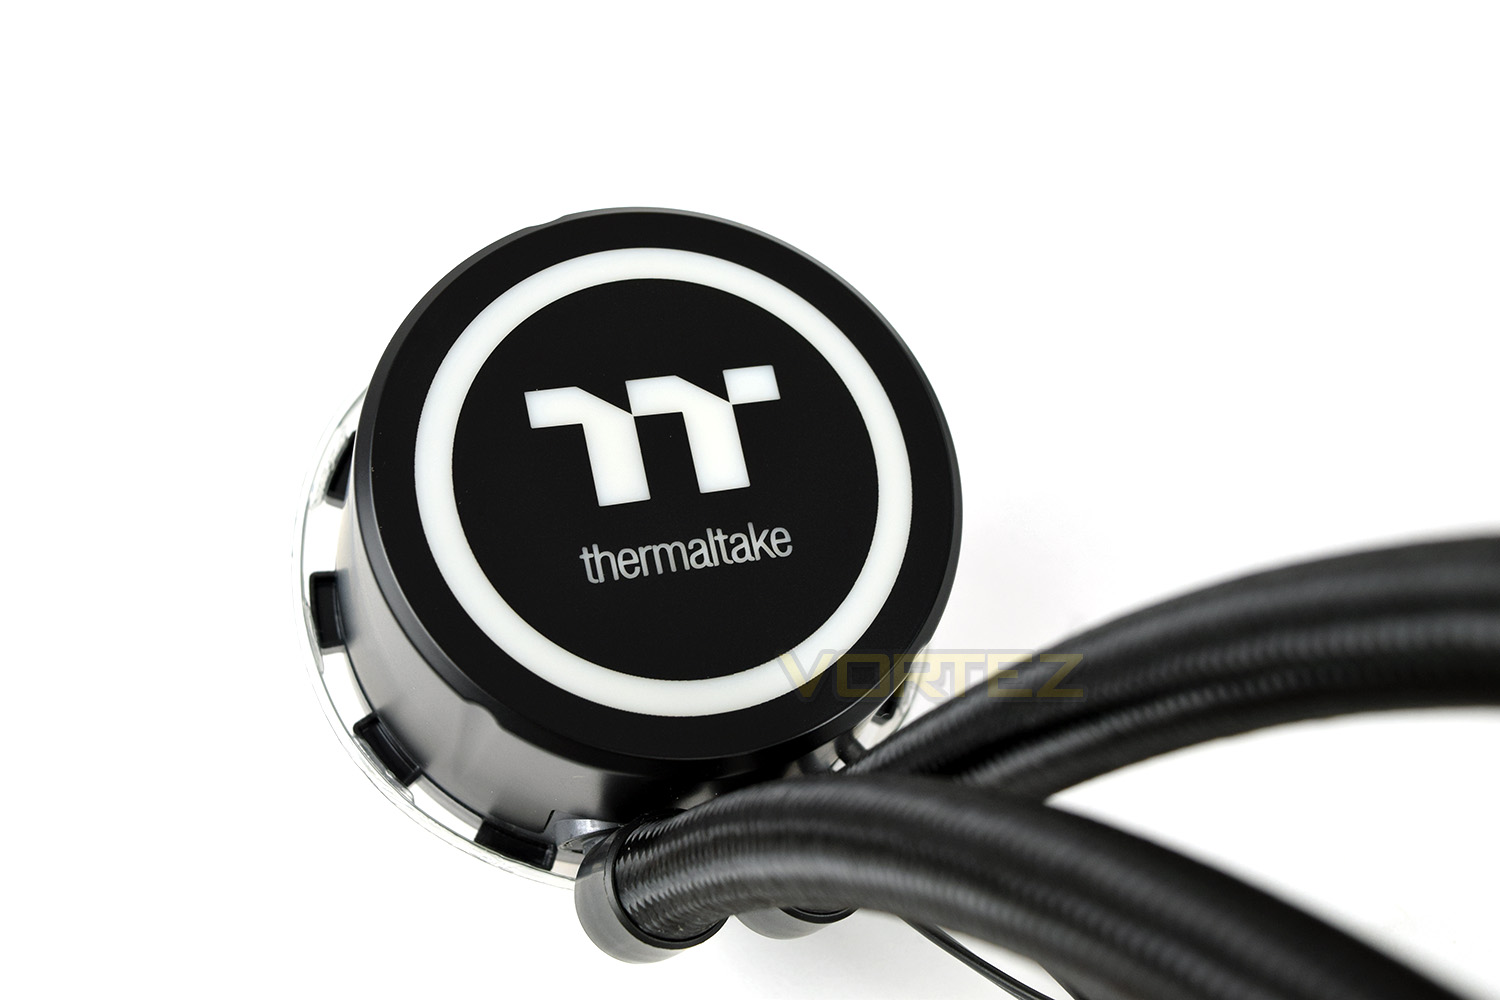
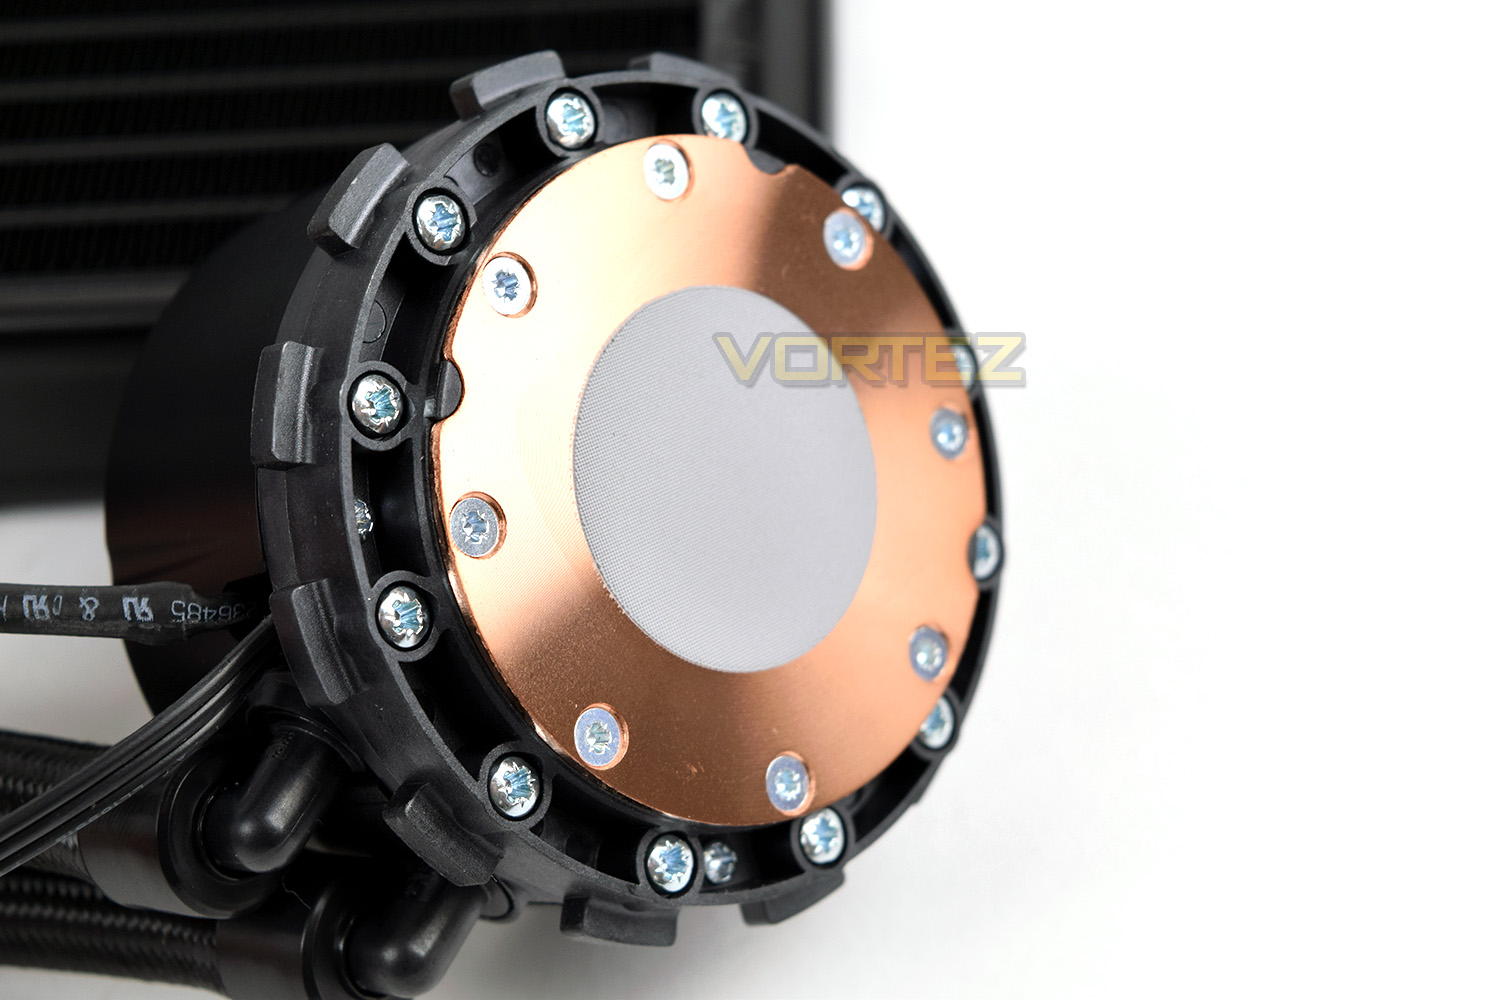
The base of the pump is formed from copper for better thermal transmission from the CPU heatspreader to the liquid behind. Thermaltake provide an accurately measured layer of thermal paste to get you off and running straight away. (We remove the thermal paste for our tests and instead use Noctua’s NT-H1 thermal paste)
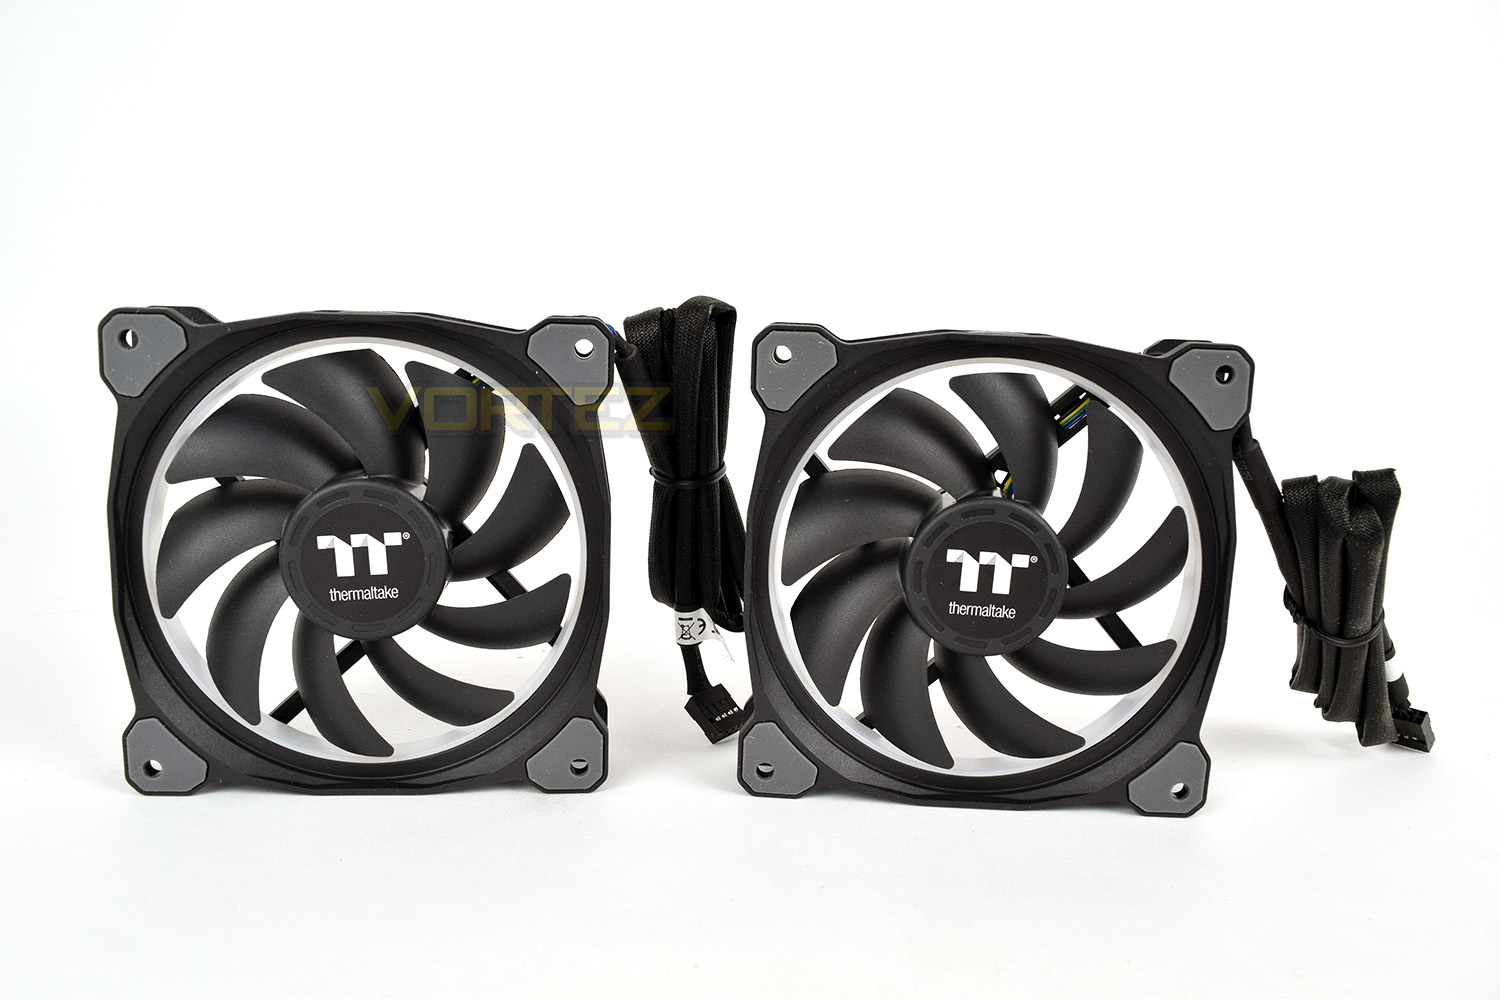
The included 120mm fans feature rubber mountings on each corner, to help prevent vibrations within the case, thus reducing noise. There are 9 blades in total to help create the high static pressure required to force air through a densely packed radiator. There’s a total of 12 LEDs in the white, translucent ring around the edge of the blades, each of which can be individually configured within the software. Another point worth noting is the use of a proprietary adaptor instead of a typical 4-pin fan connector, this enables Thermaltake to use a single wire for the RGB and fan speed control. The fan cables measure almost 900mm making routing a breeze.
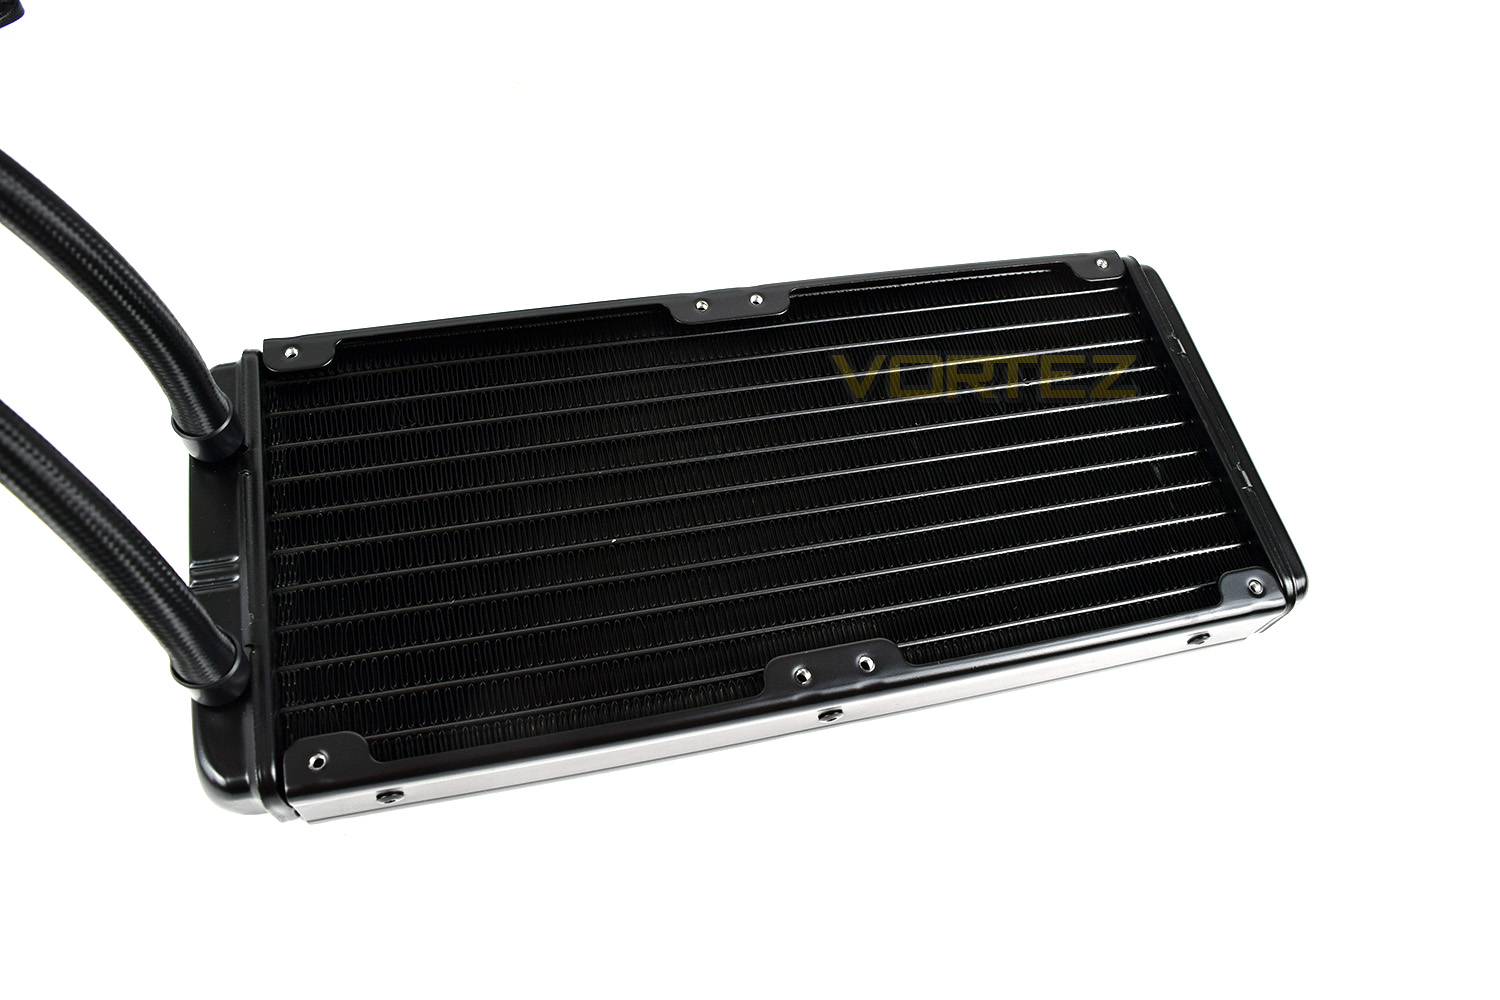
The 240mm radiator features densely packed fins to dissipate the heat as quickly as possible. The heated water is delivered via the sleeved tubes from the pump head. Thickness measures in at roughly 27mm so fitting this shouldn’t be an issue in most cases.
The installation of the fans is as easy as it can be really, the tapped holes provided no resistance and the washers provided ensured the screwhead was evenly distributed onto the rubber corners. There’s room around the fan enclosure to route some excess fan cable, if you don’t require 900mm of it. The overall height reaches around 53mm with the fans installed.

Installation
With each CPU cooler that we test, a small pea-sized blob of Noctua NT-H1 thermal paste is applied to our CPU ahead of heatsink installation. We choose to use this high-quality paste in all of our CPU cooler reviews, essentially eliminating an unnecessary variable from the subsequent results and comparison graphs.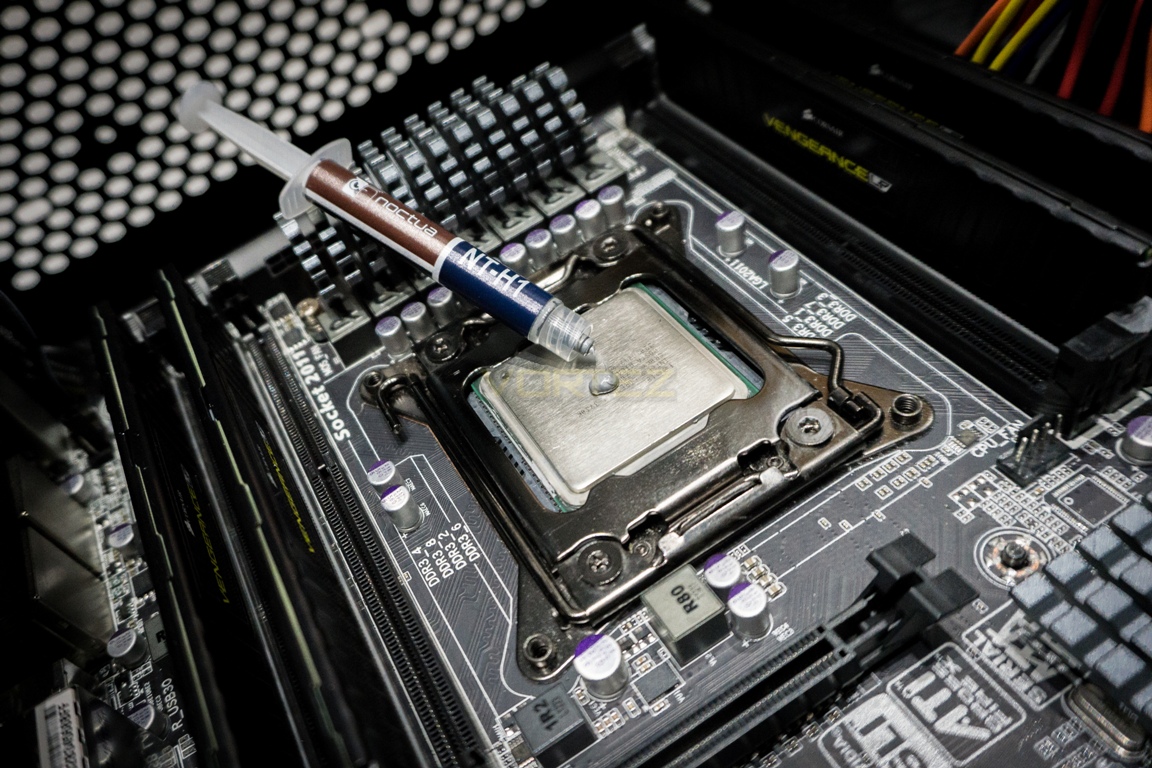
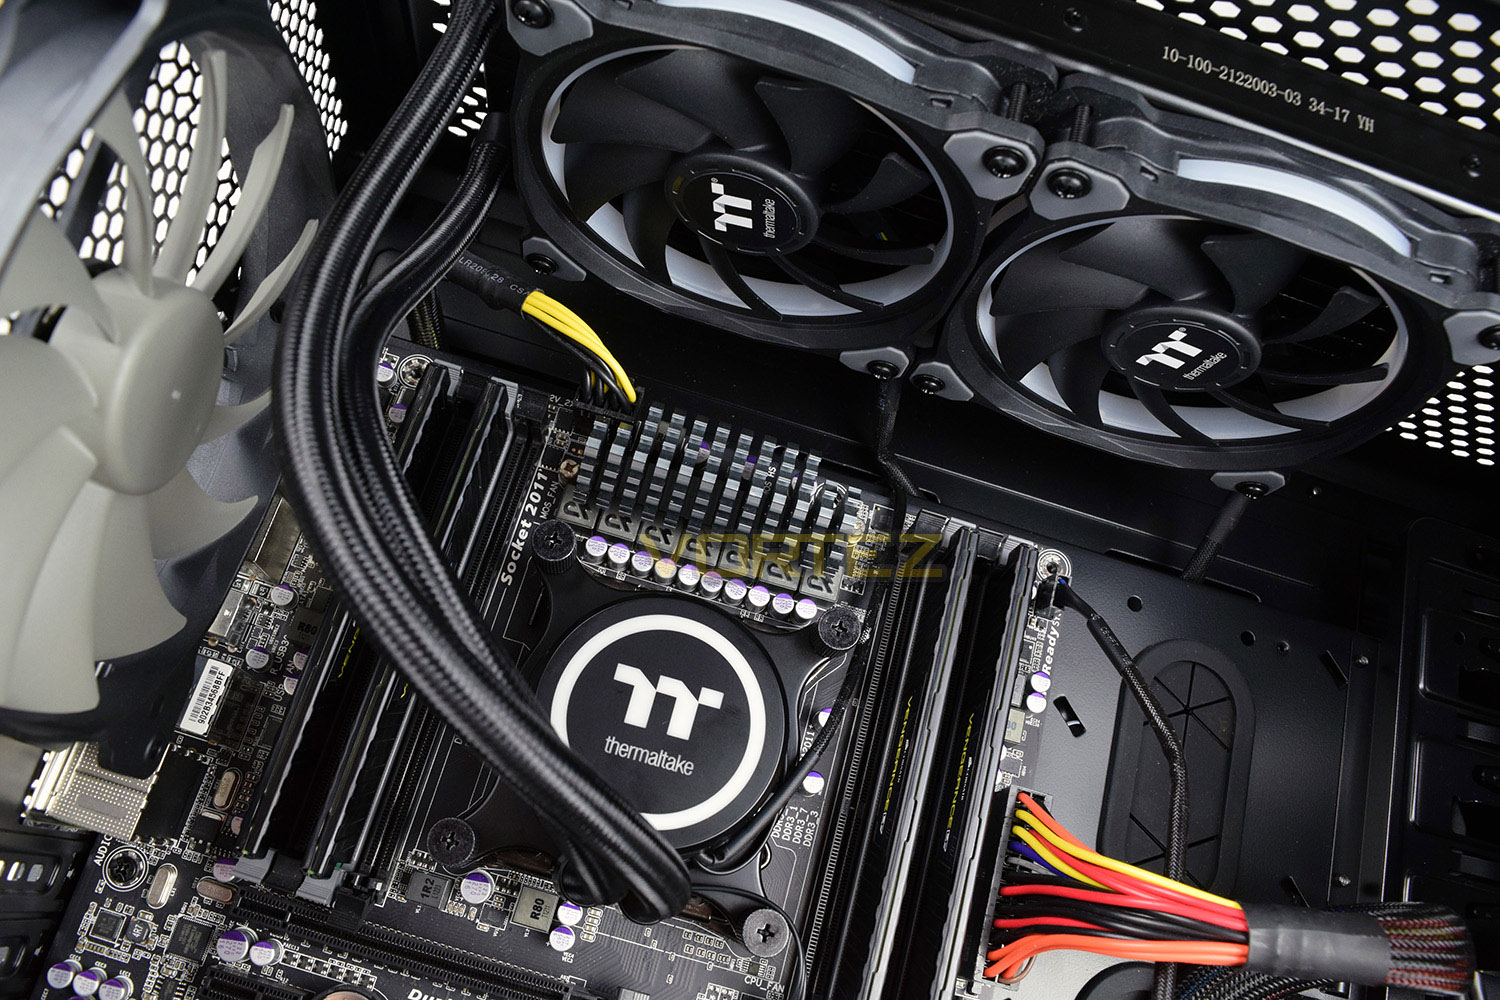
Installation to our LGA2011 socket was incredibly simple, with the built-in backplate. The Thermaltake arrives with all of the relevant stand offs and fixings to fit almost any socket currently in use.
We installed the radiator first. With the fans installed on one side, we attached the radiator to the top of our Corsair 760T case. The short pipes from the pump to the reservoir made things a little tricky to install so a friend may be useful to hold the pump head if you’re worried about it touching any delicate components.

Installing the pump head is as simple as lining up the 4 corners and tightening the thumb screws. When securing any CPU cooler, it’s advised to gently tighten the screws sequentially by proceeding in a diagonal manner to ensure even pressure is applied. The fan header cable measured 200mm in length, so this was wrapped around the perimeter of the pump and plugged into the socket.
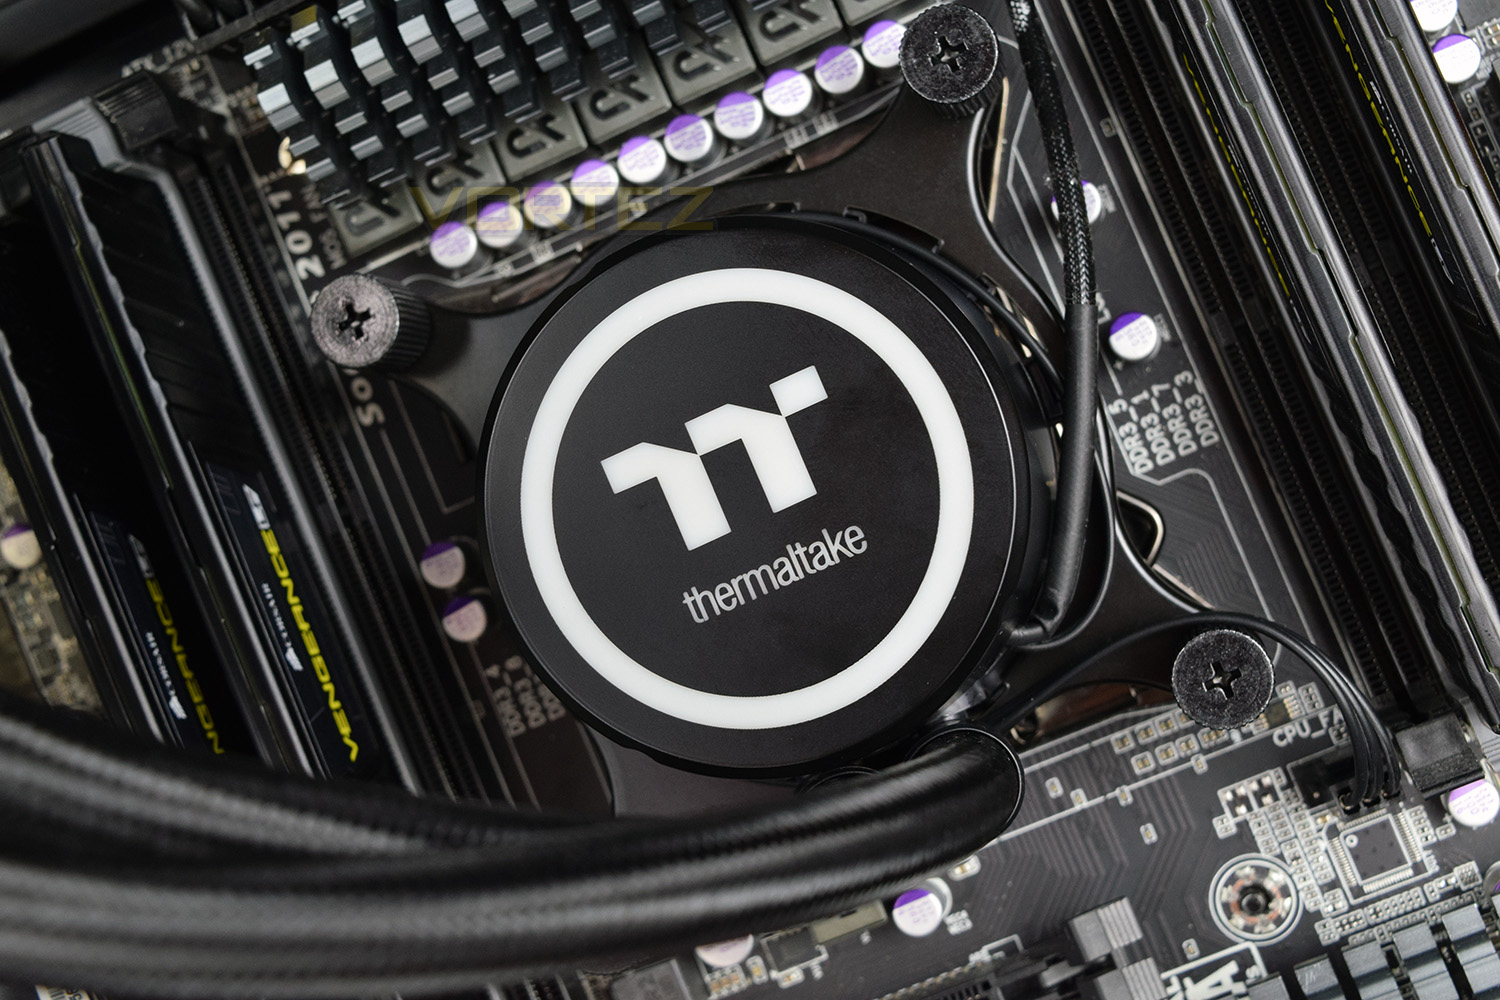
Once installed, the whole assembly looks fantastic. The black and white styling should go with any build/colour scheme, with the RGB taking over once powered up.
Software
The software for the Thermaltake Floe Riing 240 is available from here.The first hurdle we had to overcome was the painfully slow website and even worse download speed. The file is only 25mb but took close to 30 minutes to download on a Virgin Vivid 300 connection.
After that little debacle, we forged ahead and got things up and running, which went smoothly.
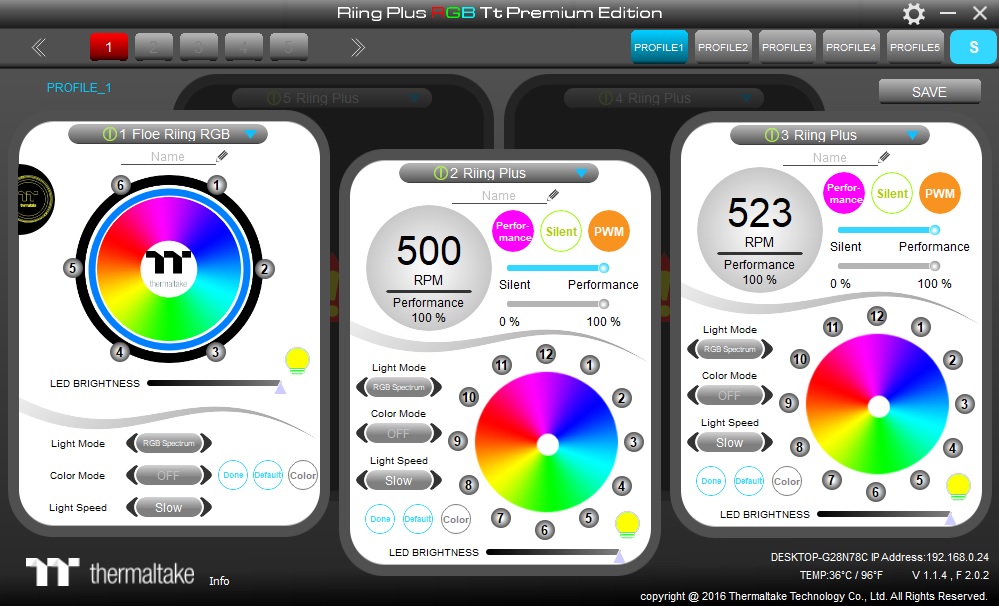
Initial impressions of the software weren’t positive, sadly. The first thing we needed to do was tell the software which hardware package had been installed; we assumed the software would know this information straight away.
Afterwards we looked at adjusting fan profiles to ensure our system was running at an optimum temperature, however that didn’t go quite as smoothly as planned. We adjusted fan speeds, hit the done button, hit the save button and even tried restarting the application, all of which did nothing. We then repeated the procedure and still saw no increase. Only a system restart will apply fan profile changes, which may not bother you too much, but if you tend to switch between the profiles to manually control system temperatures between different workloads, that’s going to get tiresome.
Setting up the lighting on the fans wasn’t the most straight forward procedure, especially with there being no obvious way of adjusting all of the lighting at the same time. However, the built in profiles are plentiful and look fantastic. All of the LEDs on this kit, of which there are 30, are independently controlled.
Moving swiftly on, hoping for a more fluid and perhaps successful experience, we looked at the mobile phone app, available for iOS and Android.
Connecting the application was seamless; the list was populated with our test bench within a couple of seconds and connected immediately. Promising so far.
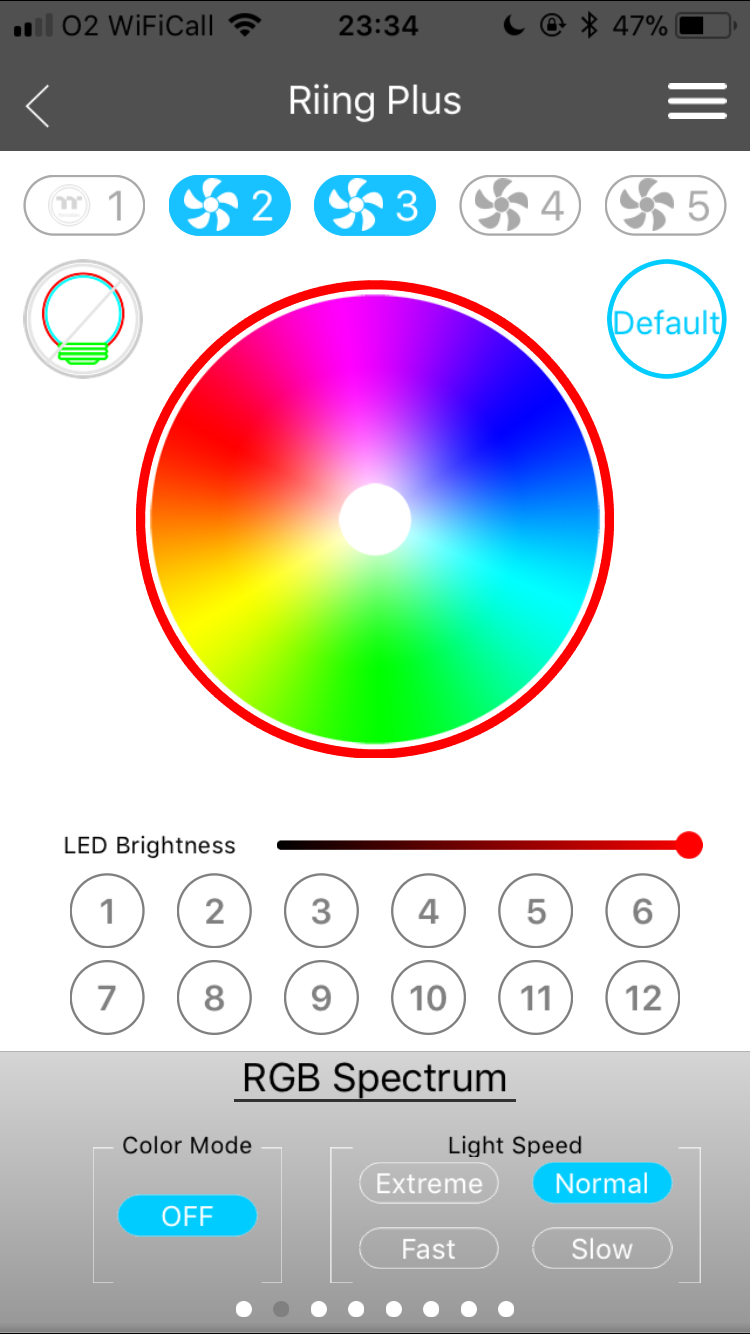
The phone software is used purely for the RGB lighting, leaving the fan speed to the desktop application. We set about trying to adjust the LEDs and testing the latency, if any is present. We immediately ran into yet another issue. We weren’t able to adjust the fans and the pump at the same time which made matching up lighting profiles impossible. There’s a different mode within the software for 12 LED and 6 LED (the fans are equipped with 12 LEDs per fan, whereas the pump has only 6.)
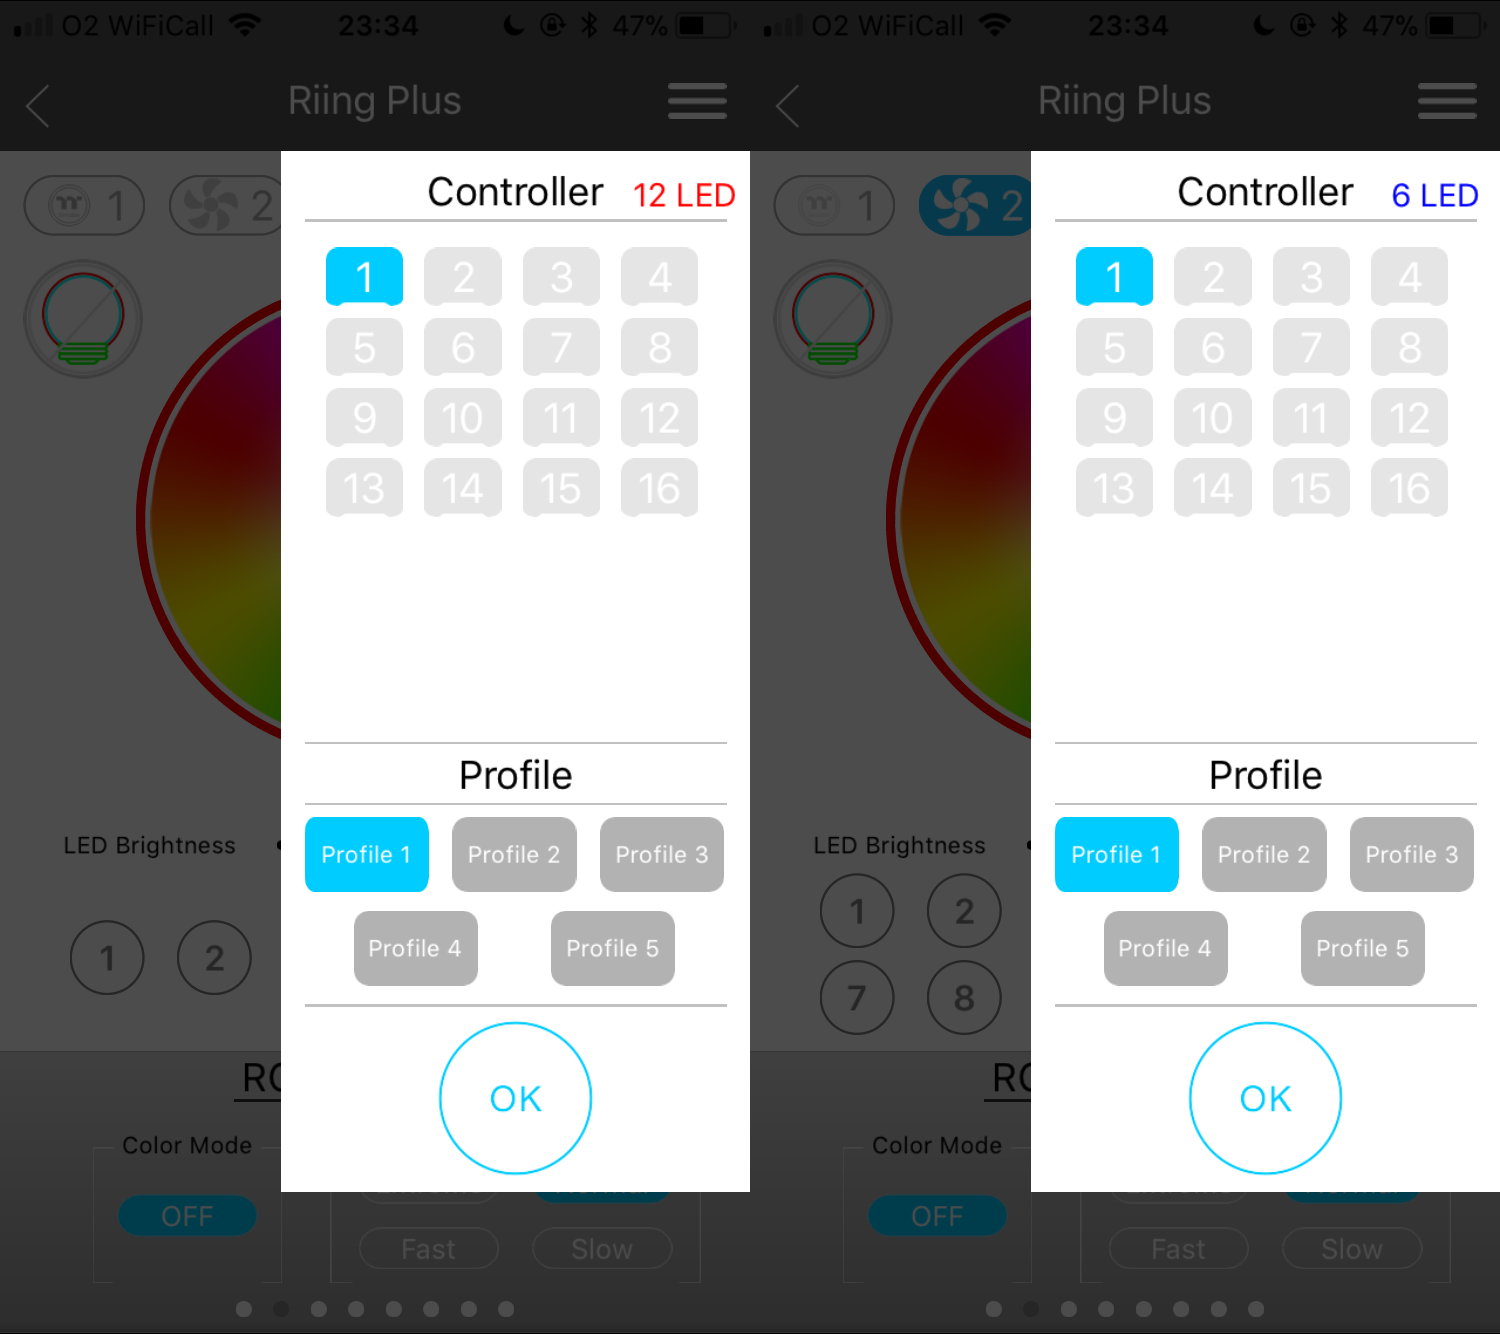
Overall, the software needs a lot of work from Thermaltake, it’s otherwise letting down a very beautiful set of fans and pump header.
RGB Lighting
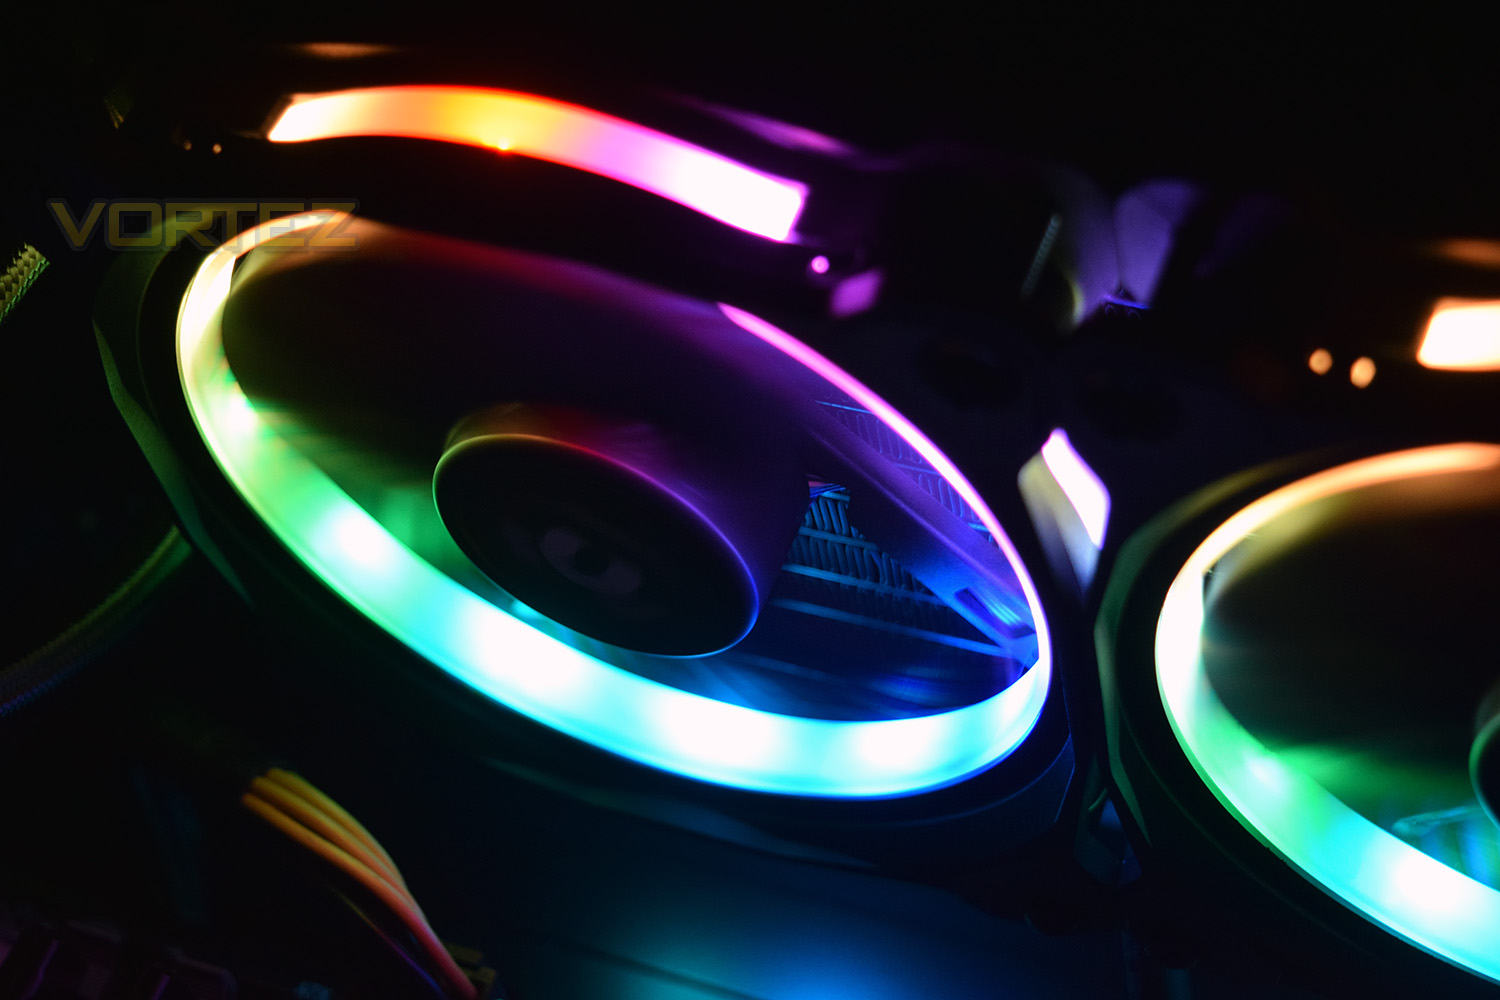
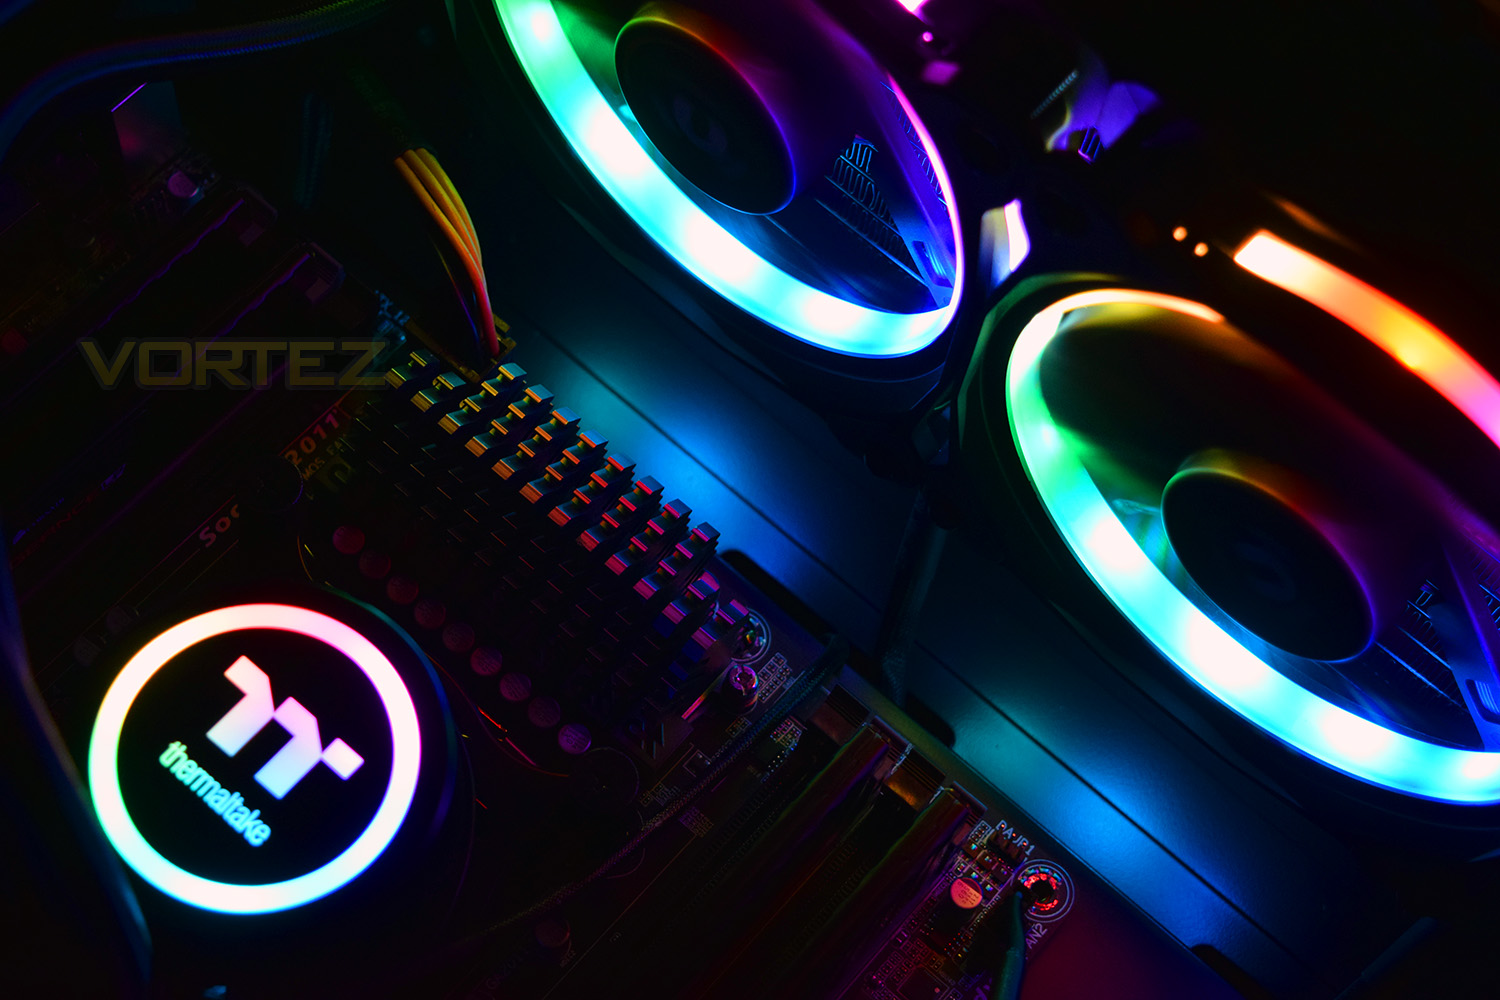
No text needed, just feast your eyes on what’s below.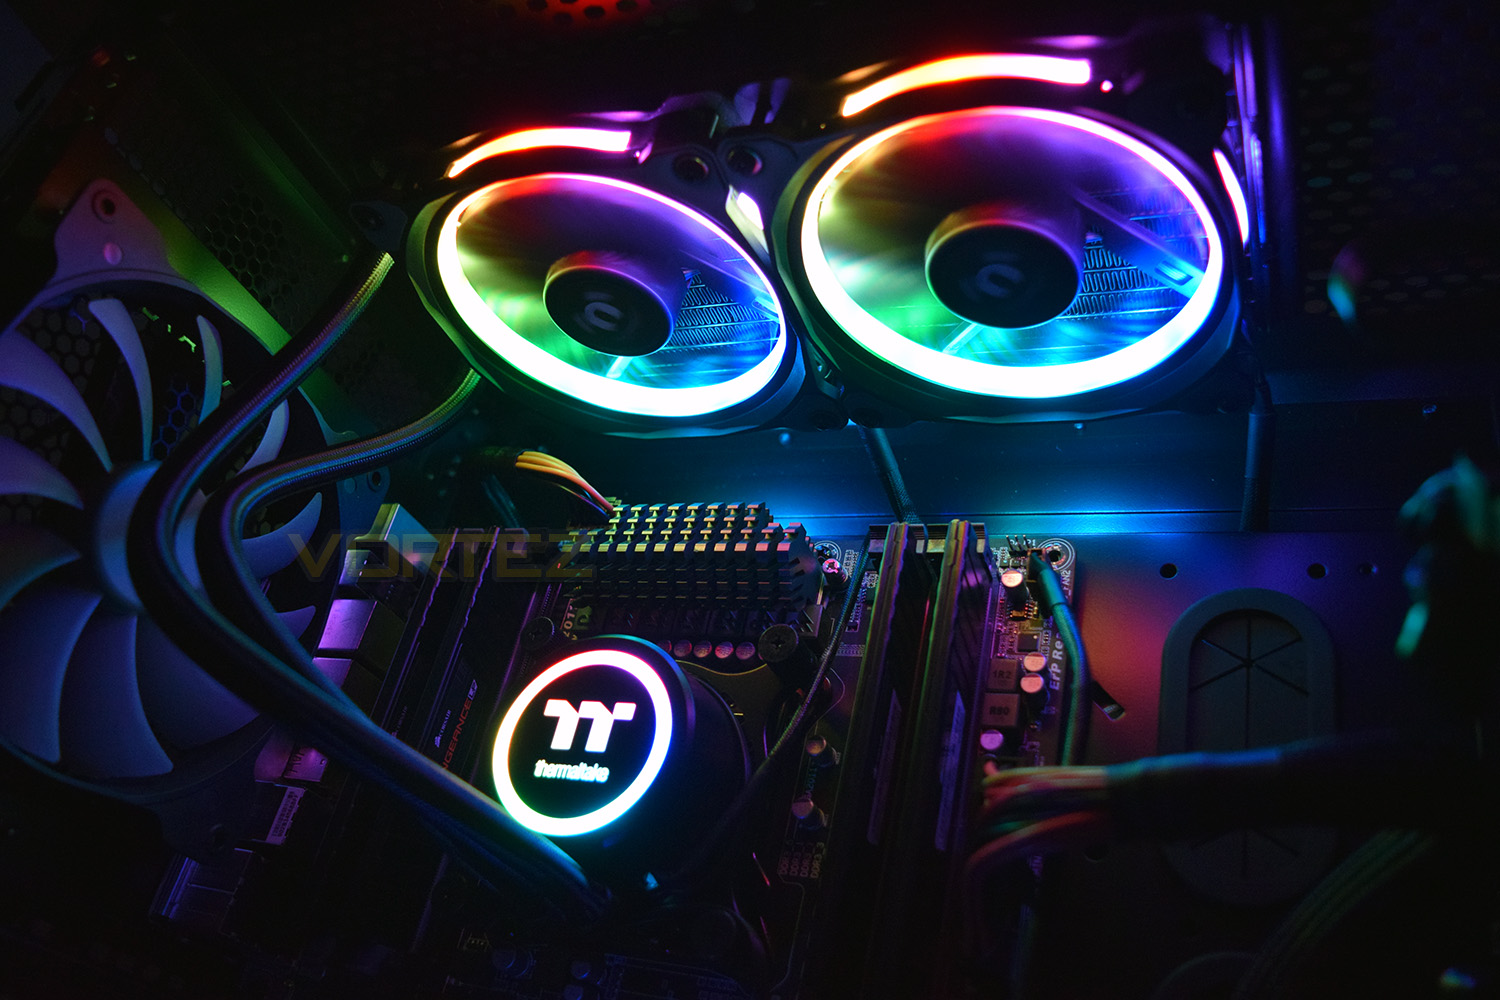
Test Setup & Methodology
We have recently made changes to our cooling department and the associated testing methodology, so please note that the number of results shown will increase over time as we add additional products. We hope that these results will appear clearer to the majority of our readership and look forward to building upon the baselines that we currently have.We perform two individual testing routines with each CPU cooler that we receive – temperatures and acoustics. The system used is as follows and all tests are performed at stock 3.8 GHz and overclocked 4.4 GHz frequencies.
Processor – Intel Core i7-3930K
Motherboard – Gigabyte X79-UP4
Memory – 8GB Corsair Vengeance LP 1600MHz CL9
Video Card – Sapphire Radeon HD 6850 1GB
Power Supply – NZXT Hale90 650W
Storage Drive – Kingston HyperX 240GB SATA III SSD
Case – Corsair Carbide 760T
Motherboard – Gigabyte X79-UP4
Memory – 8GB Corsair Vengeance LP 1600MHz CL9
Video Card – Sapphire Radeon HD 6850 1GB
Power Supply – NZXT Hale90 650W
Storage Drive – Kingston HyperX 240GB SATA III SSD
Case – Corsair Carbide 760T
To keep our tests consistent, we always review CPU coolers as they come out of the box – with their factory cooling fans, as the manufacturer intended and as the consumer expects. It should however be noted that we do not use supplied thermal paste but instead, Noctua NT-H1 paste to again ensure consistency.
In the first test, we record idle and load temperatures as shown by the most current version of the Real Temp monitoring utility. The test system is booted to the Windows desktop and left to idle for 20 minutes to ensure temperatures have stabilised. The average core temperatures are then recorded over a 1 minute period and averaged across the six cores. We then perform a continuous 20 minute AIDA 64 stress test. The maximum absolute core temperatures are recorded immediately after the test has completed and averaged across the six cores. All results are displayed as delta temperatures – these are calculated by subtracting the ambient room temperature from the average core temperatures recorded. For temperature testing, the Corsair 760T chassis door is closed and has all three systems fans powered on to simulate real-world conditions.
Our second test follows a similar methodology to the first, with the key difference being that the Corsair 760T chassis door is now left open and all three systems fans are disabled. This allows for the CPU cooler fans acoustic profiles to be captured in isolation. From cold, the system is again booted to the Windows desktop and left to idle for 20 minutes to ensure temperatures have stabilised. The acoustic level is then recorded at a distance of 20cm from the CPU cooler and where the individual result is an average level over a 1 minute period. We then perform our continuous 20 minutes AIDA 64 stress test. Acoustic levels are again recorded at a distance of 20cm from the CPU cooler and where the individual result is an average level over a 1 minute period.
Benchmarks – Thermal Results
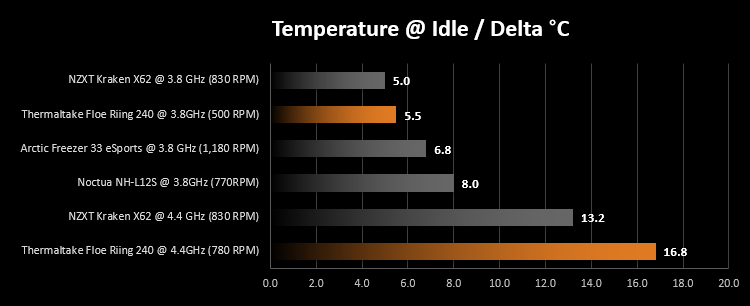
We have recently made changes to our cooling department and the associated testing methodology, so please note that the number of results shown below will increase over time as we add additional products. We hope that these results will appear clearer to the majority of our readership and look forward to building upon the baselines that you see below.We found that idle temperatures at the stock clock of 3.8GHz on the 3930K was almost rivalling the esteemed Kraken X62, a very well regarded all-in-one CPU cooler from NZXT. We thought the extra surface area from the 280mm radiator would help keep the Thermaltake at bay. It turns out there’s very little in it.
Overclocking the CPU raised the idle temperature somewhat, despite the software raising the fan speed. This is purely due to the additional voltage required by the CPU to maintain higher clock speeds. The NZXT is beginning to show its prowess at this point.
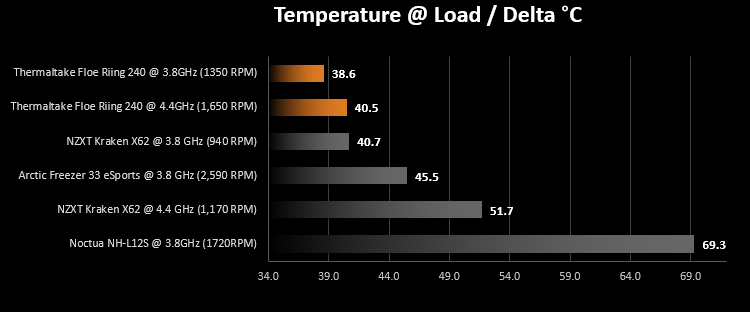
To test load temperatures, we fire up the AIDA 64 Stress Test, used to push a CPU as hard as possible, using all 12 threads, the cache and the vast majority of the “uncore” within the chip.
As you can see, the Thermaltake has topped our charts in this sector by ramping up fan speeds. We were surprised to see this beating the NZXT by such a margin, especially with the overclock, however the following page may explain this result by showing the acoustics of the relevant temperatures.
Benchmarks – Acoustic Results
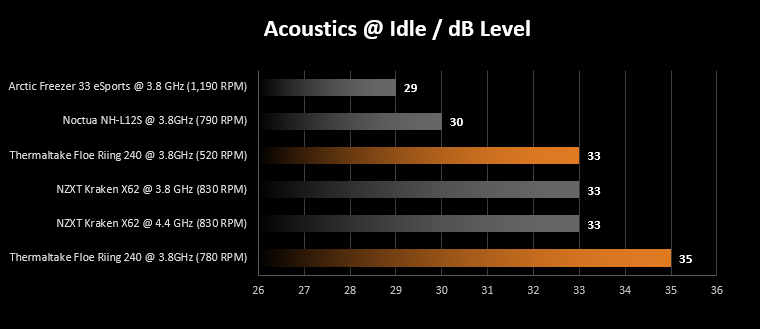
Temperatures at idle, and particularly load, are important, but many people regard the noise levels of their PC as an even higher priority. We hold a sound meter 20cm from the fans and pump to measure overall sound, while stopping all other system fans to isolate the noise from the subject.The software keeps the fans at around 500 RPM while idle, preventing any real sound from being generated, despite blowing a fairly noticeable amount of air through the tightly packed radiator. Most coolers, whether AIOs or air cooling, are roughly around the same ball park and won’t be noticed unless in an incredibly quiet environment. Check the results below.
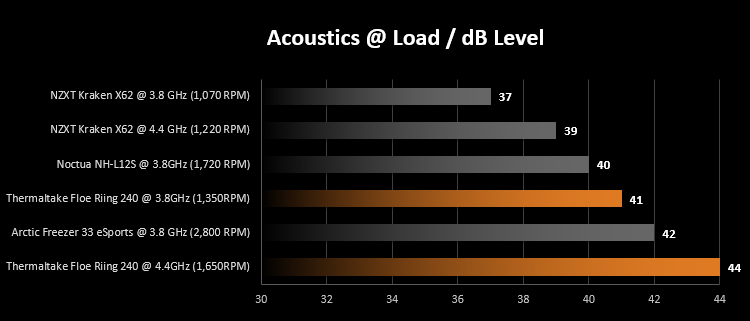
Loading up the 130W CPU generates a substantial amount of heat for any cooler to deal with; heat generally also generates noise. We find that the 3930K, once overclocked to 4.4GHz, consumes around 160W of power. We mentioned on the previous page that the cooler was performing well compared to the X62, however, the acoustics are also in line with that kind of performance.
Conclusion
The Thermaltake Floe Riing 240 TT Premium Edition arrives just within the £150 price mark, putting it up there with the best that Corsair, BeQuiet!, NZXT and Cooler Master have to offer; we would struggle to recommend the product at that price, unless you desperately want the RGB lighting that the product offers.Looking at cooling performance, the Thermaltake does a decent job of dissipating the 160W of heat generated by the 3930K @ 4.4GHz, however, in doing so, it also generates quite a lot of noise by spinning the fans at close to 1,700 RPM. If utilised on something a little more tame, such as an i5 8600K or possibly even an i7 8700K, both of which claim a TDP of 91W, noise should be kept within a reasonable window.
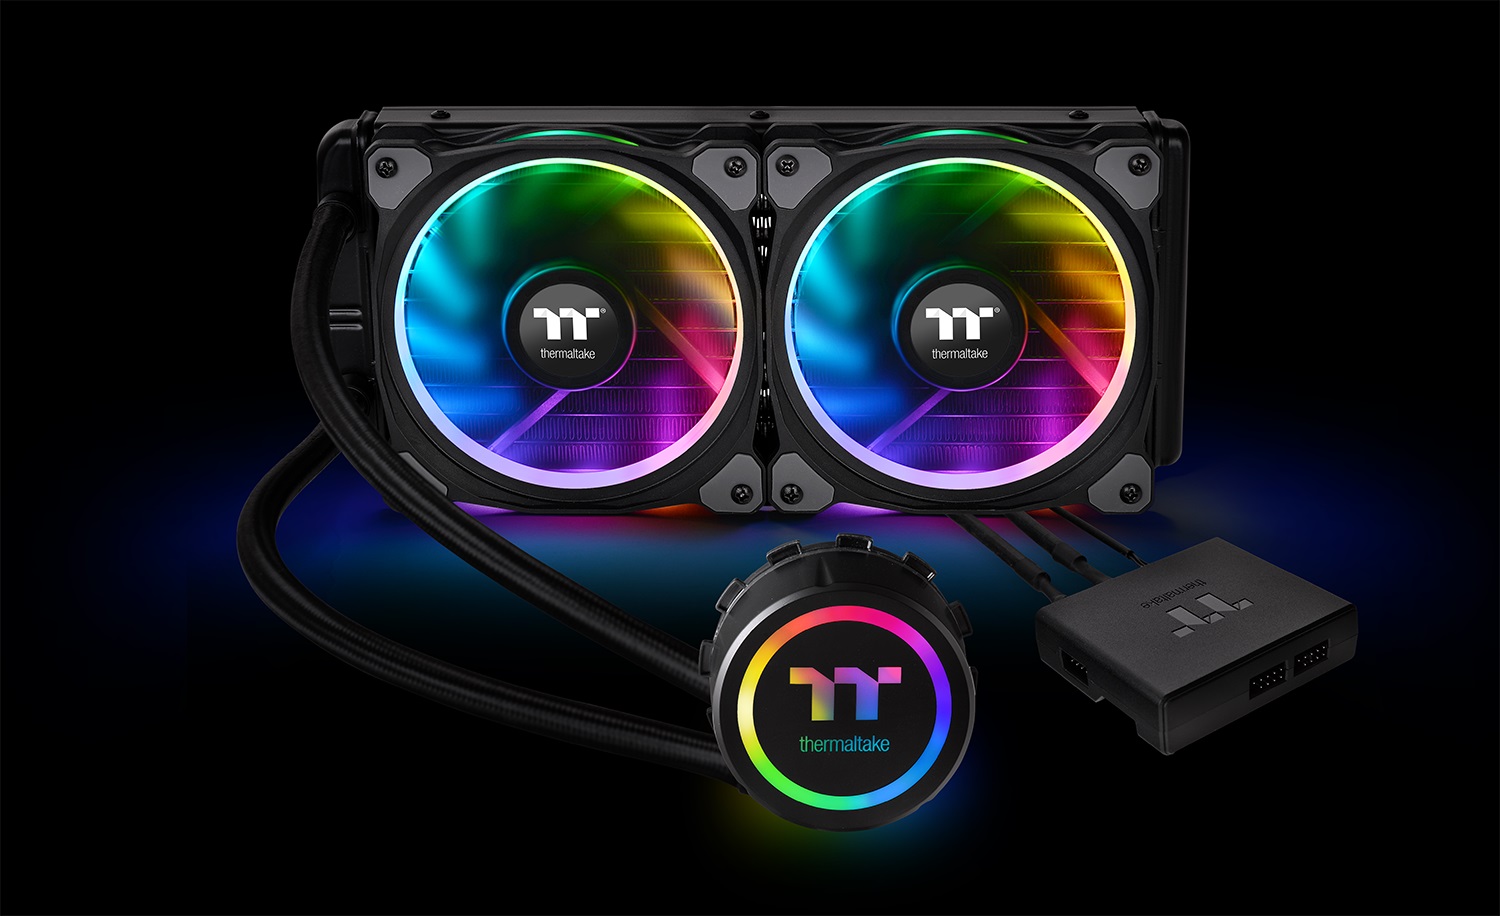
The RGB lighting on the fans, as well as the pump, looks fantastic although some work could be done on making the transitions a little smoother. We looked at the Corsair LL120 fans a few weeks back which offered roughly the same in terms of lighting but the transitions were buttery smooth.
The main stumbling block for us was the software. It felt like very little effort had been put into designing or testing the software, to the point where simple tasks became ridiculously difficult. If Thermaltake could take anything from this review, please do something about the software.
If you’re looking for a simple and easy to install all-in-one cooling solution, with RGB lighting out of the box, this kit will provide exactly what you’re looking for, but your money may be better spent elsewhere
Pros
+ RGB looks awesome
+ Good thermal performance
+ Lengthy cables for good cable management
+ Simple installation with diagrams provided
+ Braided tubes and cables improve aesthetics
+ Expensive
Cons
– Noisy under load
– Terrible software
+ RGB looks awesome
+ Good thermal performance
+ Lengthy cables for good cable management
+ Simple installation with diagrams provided
+ Braided tubes and cables improve aesthetics
+ Expensive
Cons
– Noisy under load
– Terrible software
Click here for an explanation of our awards at Vortez.net.
Stay connected with the Vortez Social Media pages: