







Watercooling is becoming increasingly popular so here is a roundup review to help you choose the best products!

For new comers to the world of water cooling, it can be a very scary place indeed – the most common reaction being ‘WHAT!, don’t you know water and electricity don’t mix!’. Normally with this sort of statement at the start of a review, I’d go on and prove it wrong. However, this time they’re not wrong at all – water and electricity really don’t mix, so how does it all work?
The simple answer is that the water never actually touches the electrical components, instead passing through water-tight water blocks which act as the middle man – taking the heat away from the IC and dumping it in the water.

However, that’s not all that’s involved in water cooling – you also need a pump to circulate the water, a radiator to expel the heat, fittings, hosing, reservoirs etc, etc… This is where companies like Antec and Larkooler come in; offering an easier route for beginners into watercooling . These manufacturers offer a simplified solution to watercooling, and as a result are often cheaper than their custom counterparts. But, how do they compare with the Custom alternative?
Well, today you’re in for a bit of a treat, as we’ve teamed up with Antec, Larkooler and Aquatuning to do just that. With 4 different watercooling setups, all with different levels of complexity, we aim to see just how much extra performance watercooling has to offer.
It’s also important to remember the differences in cost, as the different setups vary massively in price, and this is something I will focus on throughout the review. Working out exactly where to spend your budget is very important when specing a new build, and if spending £100 or so more on cooling yields no noticeable gains then it’s really not worth opting for. If however, it can cool your chip enough so that you can clock it another 500mhz or so, then it becomes a very tasty proposition indeed.
Antec Kuhler H20 620
Price: £44.03The Antec is the cheapest cooler on test, and it’s also the simplest, with the kit arriving pre-assembled and sealed. No setup work is required – just mount the kit inside your system and you’re away. As the kit is pre-sealed, adding additional blocks won’t be possible, but with only a small pump and single 120mm radiator I think it’s probably for the best.
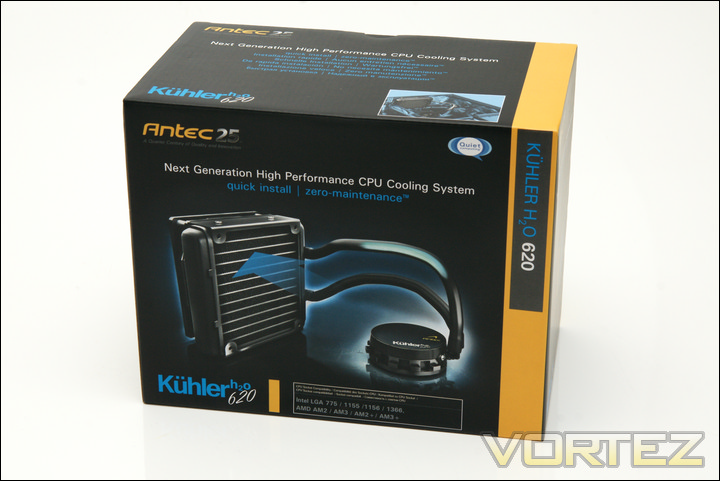
The packaging of the H20 620 was rather refreshing, with a light gloss finish to the box and a fairly simple layout. Antec have resisted the temptation to plaster information everywhere on the box, and it has worked well. Inside the box everything was held securely in place and arrived in pristine condition, so far so good!
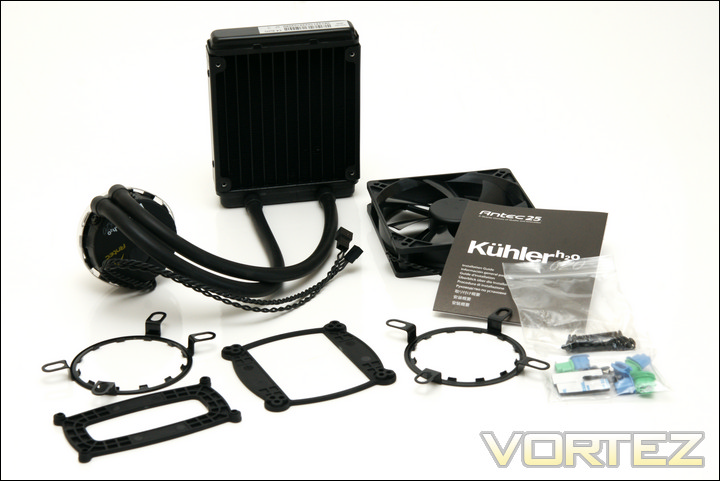
Inside the box we find: Antec Kuhler H20 620, AMD Mounting Bracket(AM2/AM3), Intel Mounting Bracket (775, 1155, 1156, 1366), Mounting screws, 120mm Fan and the users guide. Twisting out the side of the base are two fan cables – one for power and one for passing the power along to the 120mm fan. No RPM signal is passed on from the fan, so if you want to monitor/adjust its’ speed I’d suggest you connect it separately.
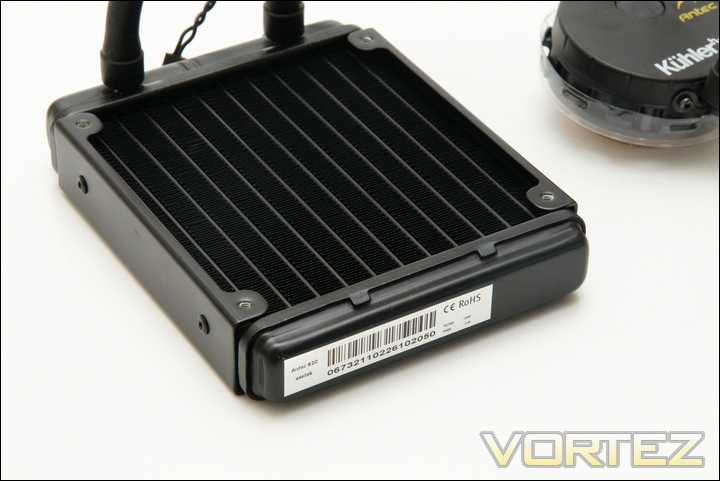
Looking closely at the radiator we can see how tightly packed the fins are, most likely in an effort to maximise the surface area, given how thin the radiator is. The tubing connections down the far end are fairly chunky, and despite hearing horror stories about these breaking on some of the early ‘all in one’ units (not Antec units, I might add), I’m confident these would survive all but the most violent of impacts.
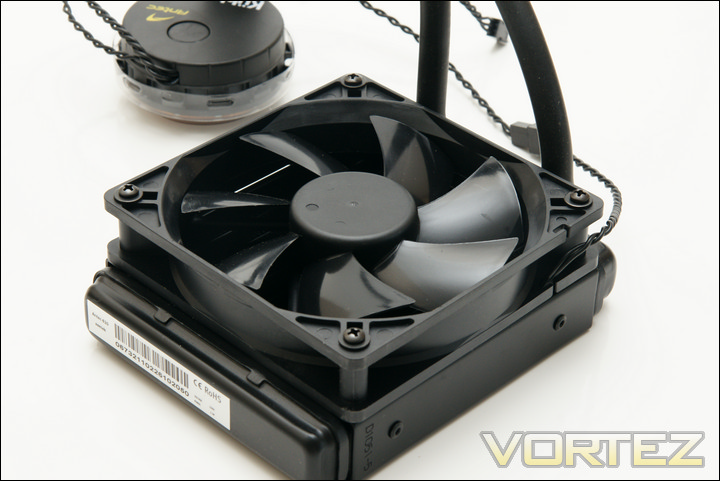
The fan that comes bundled with the unit isn’t particularly mind blowing, but feels solid enough. The quoted 81CFM is pretty good for a 120mm rad, although I was unable to find any DB ratings, so it’s probably not going to be great considering the 2000rpm rotation speed.
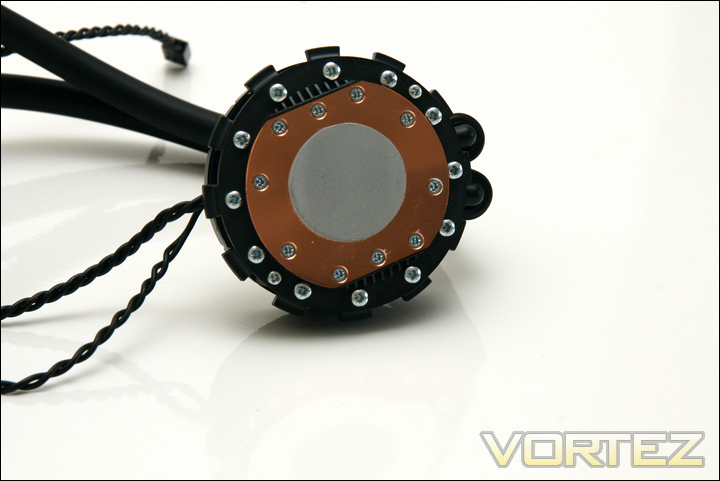
Looking at the bottom of pump/block combo piece we can see the copper coldplate, with TIM pre-applied.It would have been nice to have taken it all apart and looked at the inner construction of the waterblock, but getting all the fluid back in the unit again would be near enough impossible, so I gave it a miss.
Antec Kuhler H20 920
Price: £84.98As the bigger brother of the 620 it out-does it’s sibling in almost every way; bigger box, more fans, thicker radiator and a better bundle. Obviously this also leads to a larger price tag, but if it performs then it could be a tasty prospect.
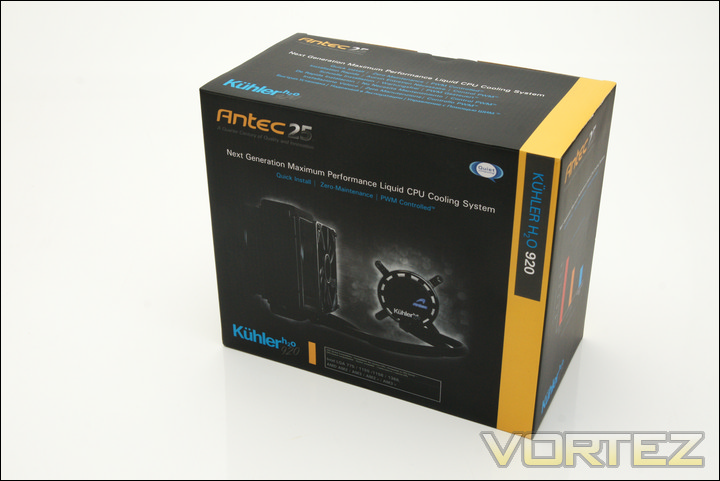
Apart from being larger, the box is actually very similar to the one that 620 comes packaged in, with the same layout and colour scheme used throughout. Opening up the box there is also the same pulped paper ‘carton’ holding everything safely in place.
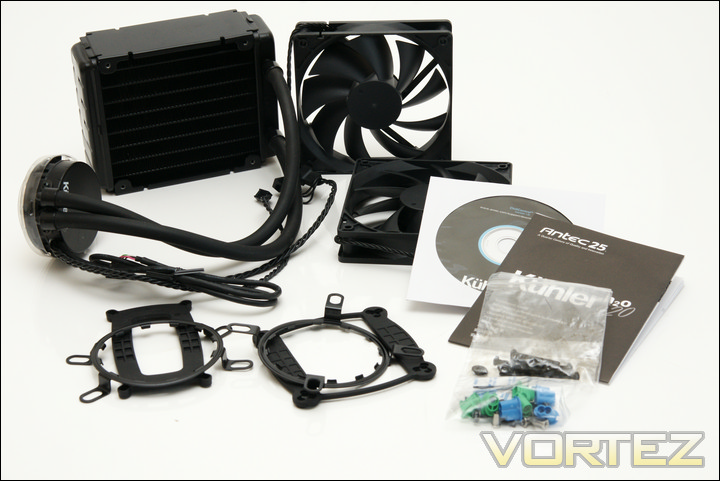
Removing the package’s contents we find that an identical set of mounting brackets have been included – but that’s where the similarities end. At first I thought the fans were the same, but upon closer inspection there is a number of key differences. These differences aren’t just in appearance, but also in the spec. The maximum rotational speed has been upped from 2000 to 2400rpm, which also bumps the CFM up to an impressive 110! With enough airflow to blow a small hamster away, the pair of fans should be enough to literally suck all the heat out your system. A CD is also included with the 920 – again something the 620 didn’t come with. I also found that the 920 sports a USB connection, which allows the software to communicate with the unit, which in turn allows you to change various parameters. This is a useful inclusion, as it should help quieten the fans when the system is sat idling.
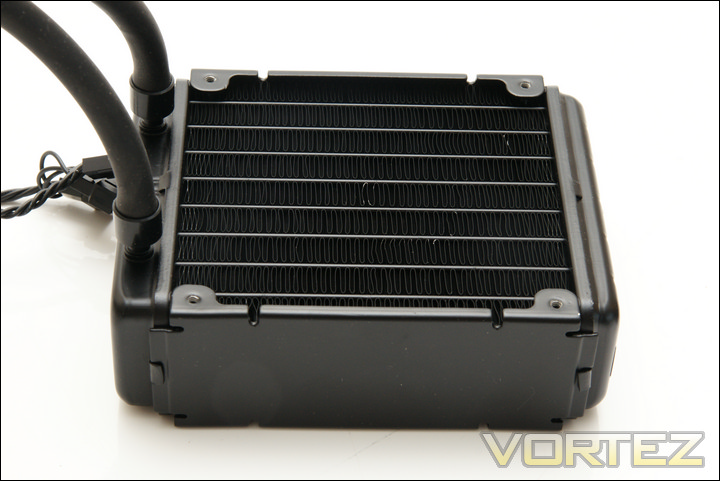
Turning our attention to the cooling unit itself, everything is similar in design to the 620. The radiator has slightly larger gaps between it’s fins, allowing the air to flow through a little easier. This is most likely because of the extra thickness of the radiator – keeping the fin density the same would probably cause a massive air flow restriction which would impede the cooling performance.
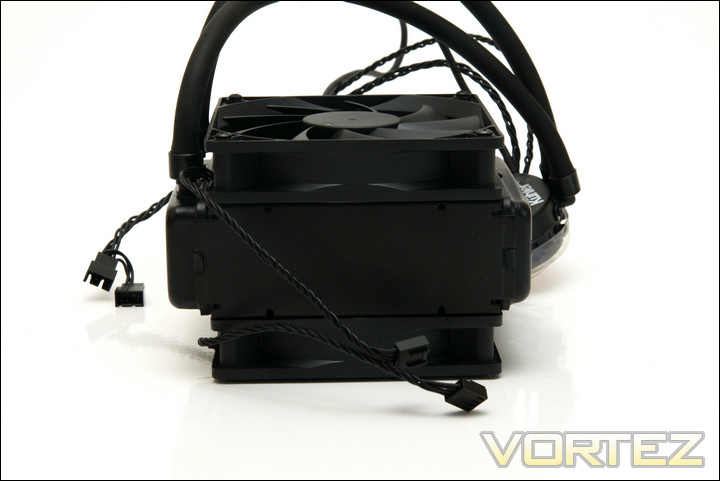
With the two fans attached the 920 is a pretty beefy device, and you’ll need to make sure you have space in your case to accommodate it (I can see it clashing with a lot of side panel fans).
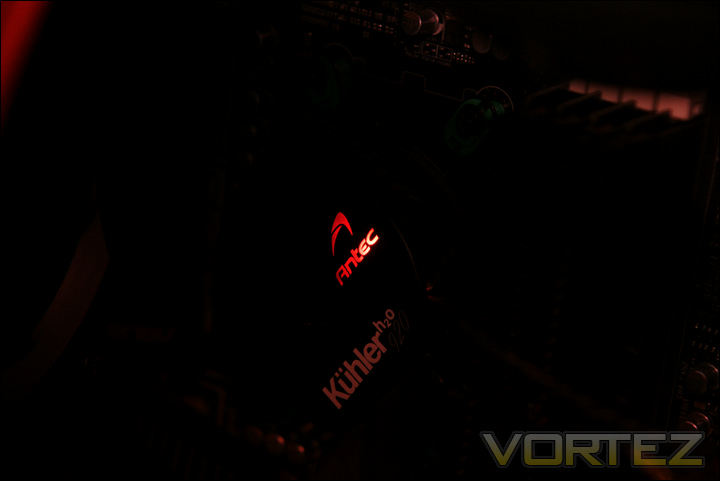
The Pump unit is the same unit found on the 620, with only a minor aesthetic change to distinguish between the two. Instead of the Antec logo being green like on the 620, it’s got a transparent cut-out, which allows light to shine through from the LED mounted behind. The colour of the LED can be changed via the bundled software to pretty much anything, with separate adjusters for red green and blue.
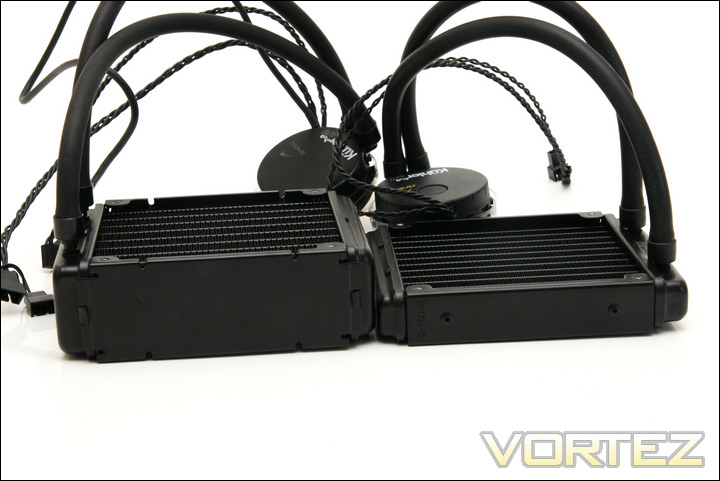
And finally a shot comparing the 620 and 920 – you can clearly see the extra depth of the radiator.
Larkooler KU3-241 Extreme Performance Liquid Cooling Kit
Price: £199.99Dubbed as an ‘extreme performance’ kit, this Larkooler KU3-241 represents the middle of the road here – both in terms of price and complexity. Larkooler have already bundled together all the individual components required, saving you the time of doing it yourself, but you still have to assemble it. For those of you wondering, it is possible to add additional waterblocks and radiators to this kit, with a reasonable range available from Larkooler themselves. Blocks from other manufacturers could also be used, but for maximum compatibility I would suggest sticking to Larkooler’s own range.
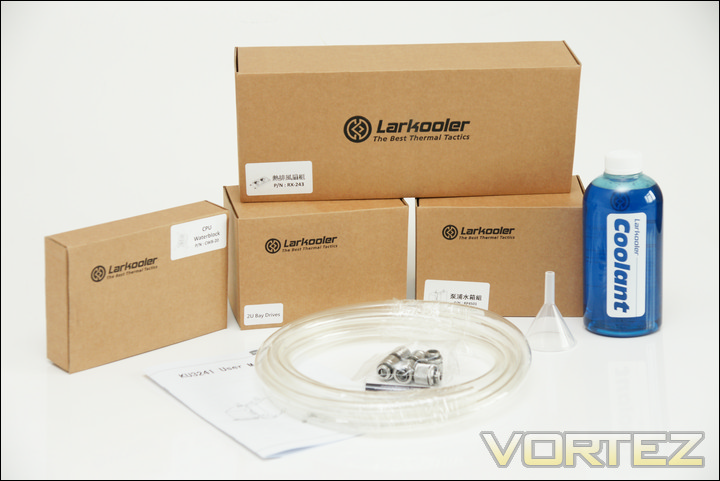
The kit arrived in a large box, with a number of smaller items left loose and the main components of the kit each separated into their own little boxes. Loose in the box we have: 500ml of pre-mixed coolant, a small funnel, 3/8″ tubing (approx 3m), installation guide, 6 compression fittings (3/8″) and a small tube of thermal grease.
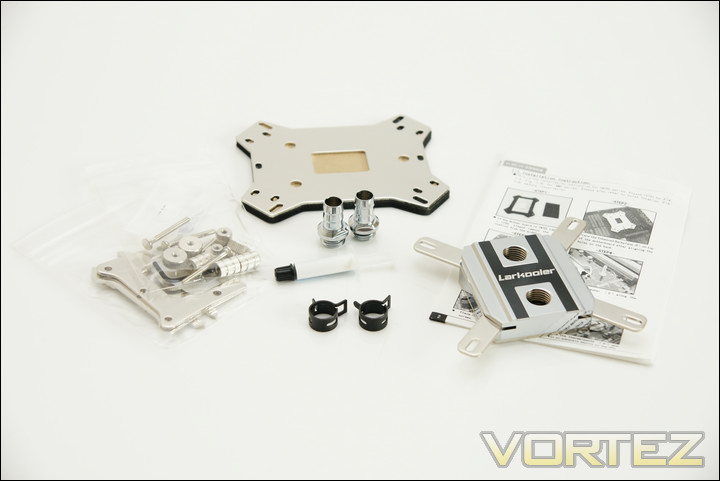
Taking a close look at the box labelled ‘CPU waterblock’ we find the block itself, another installation guide (specific to the waterblock), mounting brackets & fittings, more thermal grease and some additional barbs (also 3/8″). The block is constructed from copper, and has been nickel plated to reduce corrosion. This is a good combination, and
considering many pre-built kits use Aluminium, I was pleasantly surprised.
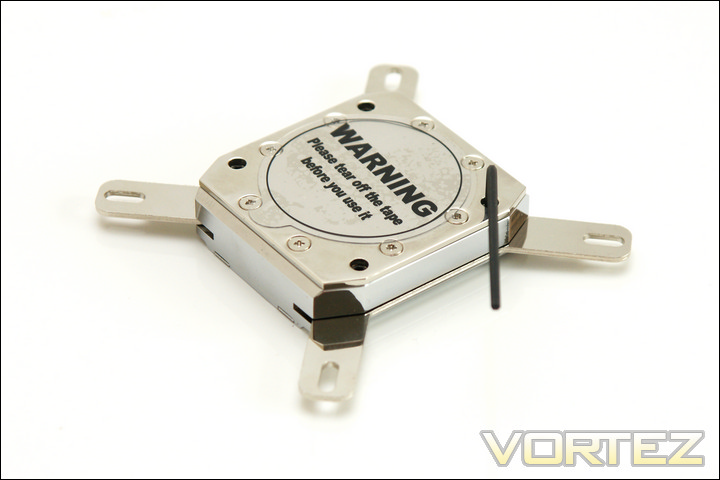
Turning the block over we find a large warning sticker. This is actually in place to protect the base of the block during transport, and as the sticker states, it’s important you remove it prior to use. The actual base of the block is very smooth, making it great for attracting finger prints and (hopefully) good at conducting heat also. Changing the mounting plate is very simple, and is well documented in the manual. Using the included Allen key you just undo a couple of small screws and the plates pop out. Then you just slide in the new ones, tighten the screws and you’re away.
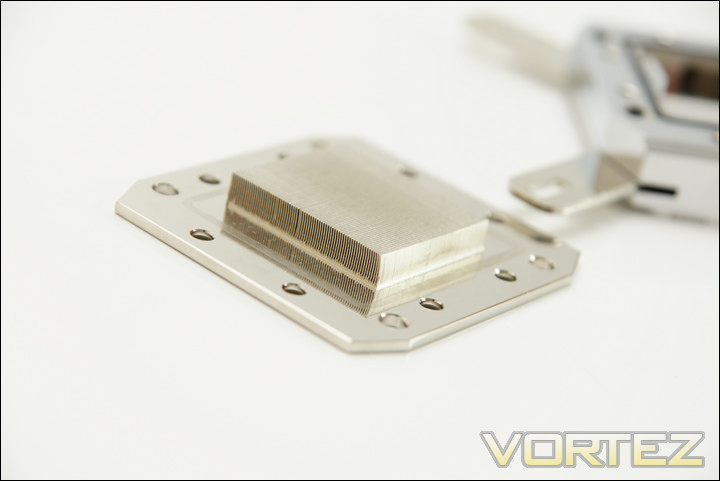
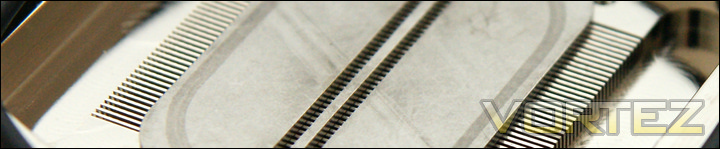
Opening up the bottom of the block we can examine the internals. Larkooler have created a number of micro-channels, maximising the surface area in which the water will come into contact with. There is also a silicone insert in the upper part of the block, which has been put there to force the liquid down into the micro channels. This doesn’t seem to be a particularly attractive method, but until the blocks been tested it’s hard to pass judgement. Looking closely at the micro-channels the finish towards the bottom doesn’t seem great, although this shouldn’t affect the performance.
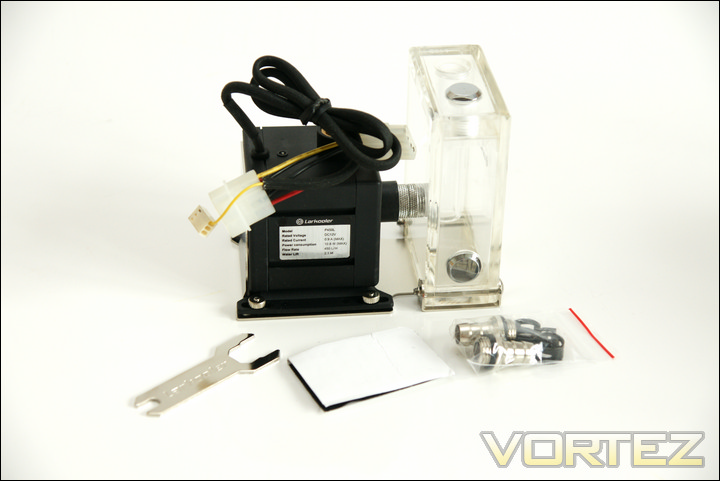
Onto the next box – which actually has some sort of foreign writing on it, but does in fact contain the pump/reservoir combo. Again, there are a couple of other items included; a large piece of velcro, a pair of barbs and a barb wrench. The inclusion of barbs in the initial box and within each individual boxes makes me believe that each of the components are manufactured to be sold separately, but then bundled together in a larger box to be sold as a kit. The specs on the pump are actually pretty good – capable of 450lp/h (litres per hour), and lifting water through 2.1m.
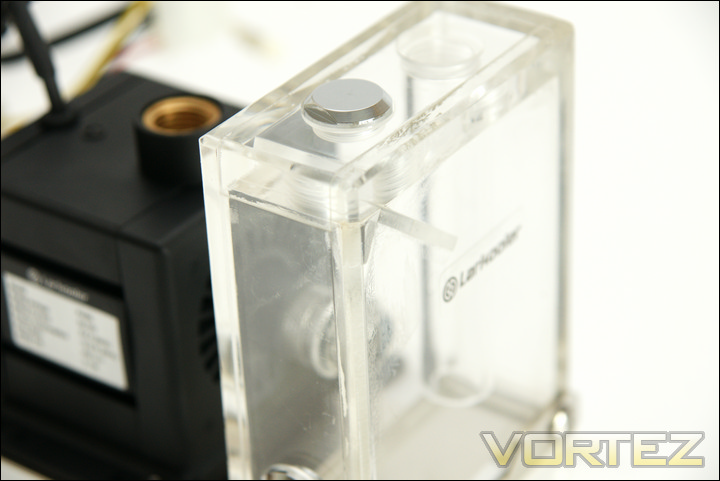
Attached directly to the pump is a small reservoir, which is made of clear acrylic making it easy to see things bubbling away and check how much liquid you have in there. I was a bit disappointed with the quality of the reservoir though – looking closely the acrylic looks slightly melted, almost as though they spilt glue on it during production.
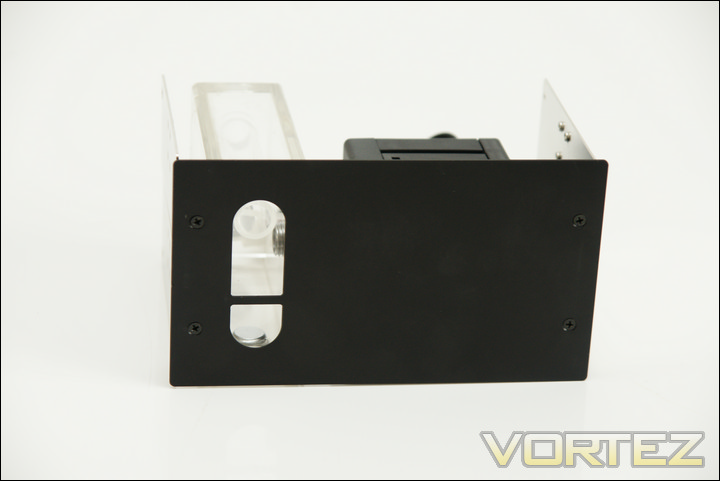
The pump and reservoir can also be mounted in a pair of 5.25″ bays using the included adapter. A small window in the adapter allows you to see how much coolant you have in the reservoir – handy!
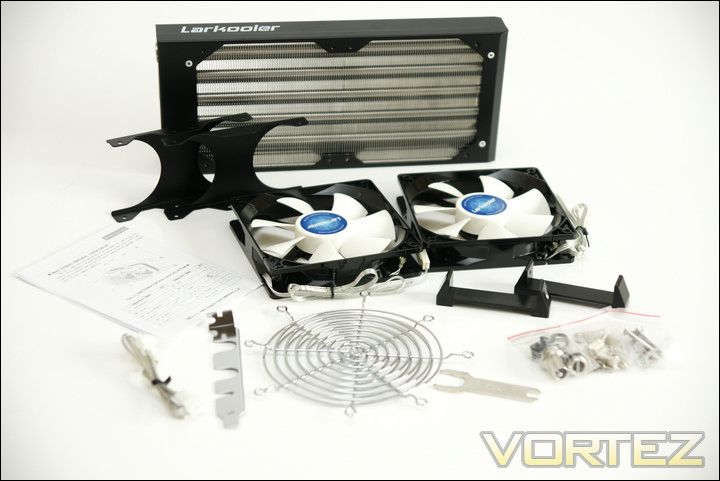
Finally we have the radiator and fans. The bundle in this particular box really impressed me, with a pair of fans, grills, radiator floor mounts, radiator case mounts, PCI tubing pass through plate, barbs, screws, Molex adapter and a small tool. The included fans are 1800RPM, white LED models, which should be enough to push a decent amount of air through the radiator.
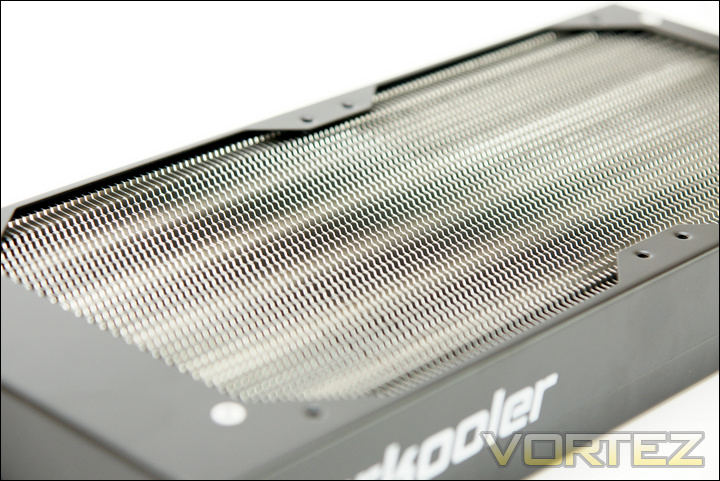
Speaking of the radiator, it’s worth commenting on its design. Unlike other radiators that I have used in the past, this one consists of aluminium plates (as opposed to wavy fins), more like a heatsink than a radiator. The radiator then uses copper tubes passing through the middle of these plates to transfer the heat, with the G1/4″ threads placed at the bottom of the radiator.
Custom Water Cooling Loop
Price: £213.06 (Not including fluid and fans) – from AquatuningWith a custom loop there’s an enormous range of parts to choose from, and knowing what to go for can be incredibly difficult. After a number of hours, searching the web for the best possible parts, I managed to source all the bits I required from Aquatuning.co.uk.. For anyone that hasn’t used them before, they offer a ludicrous range of parts, all at very competitive prices. Anyway, I selected my parts and despite coming from Germany, shipping only took two days, which was very impressive. I decided not to include fans and fluid in the spec, as these are down to personal choice (colour, fan speed, noise level etc). A few bits have changed since ordering – you can only get the radiator in black for example.
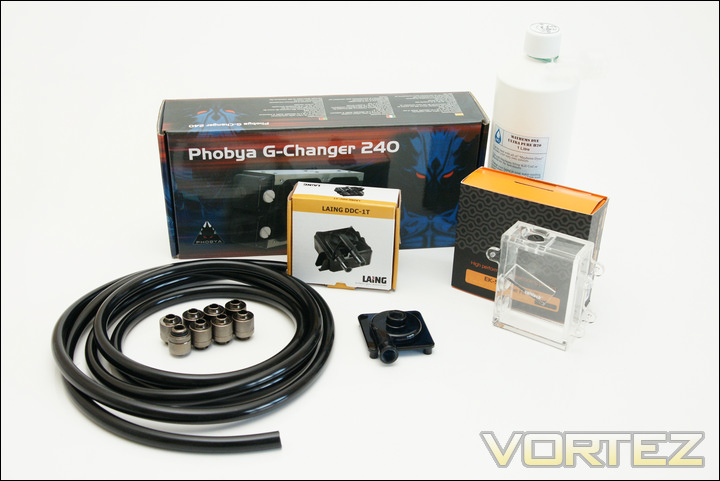
Above are the components I ordered in all their glory. Working left to right we have; Barbs and Tubing, Phobya G-Changer 240 Radiator, Laing DDC 10w Pump, Phobya Pump Top, EK Supreme HF CPU Waterblock, Swiftech Micro-Res and 1 litre of Distilled Water. The distilled water is what I will be using throughout testing. In with it I’ll be adding in some silver kill coils, which should kill any bacteria/algae that grow in the loop. For those of you looking for a more colourful approach, you can of course use any UV fluids etc with this kit (there’s a whole heap of them available from Aquatuning).
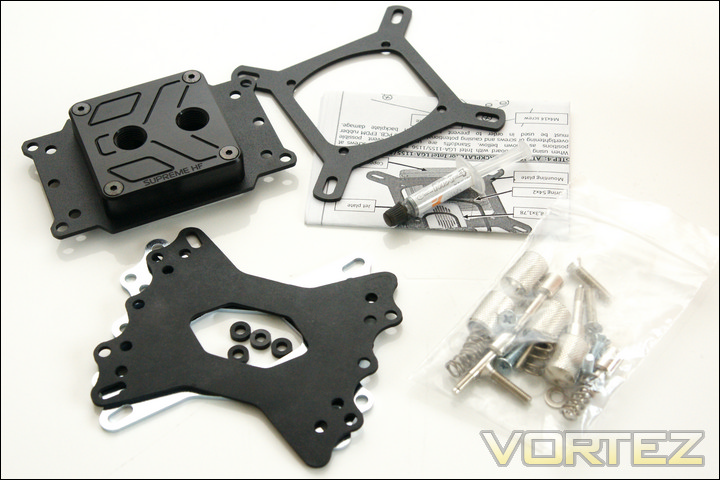
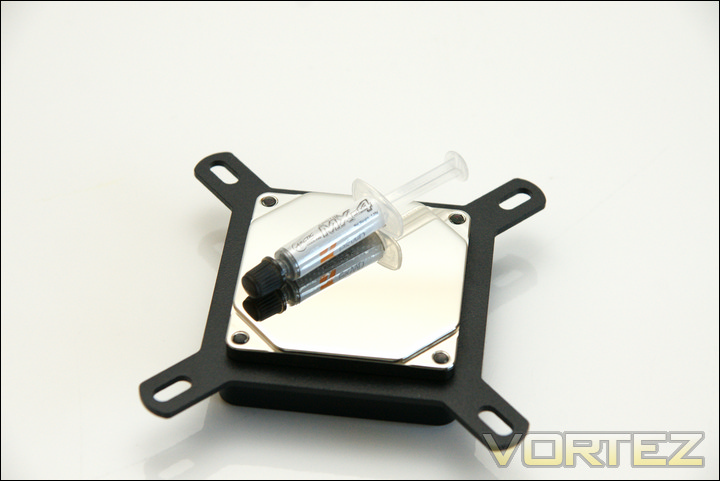
The packaging of the EK Waterblock was Supreme (see what I did there?!), with a number of security seals and even a quality control reference. I decided to go for the Acetal + Nickel version, which not only looks nice but the nickel plating stops the Copper in the base oxidising/corroding. All the mounting hardware required is included, along with a tube of Arctic Cooling MX4 thermal compound, which should perform much better than most cheap thermal pastes.
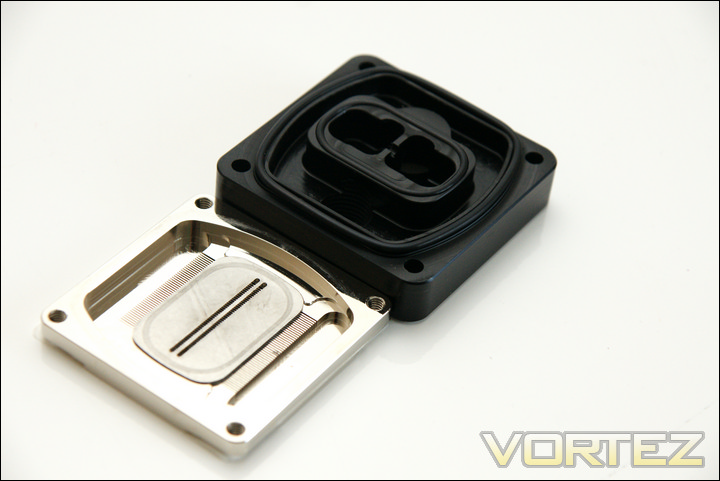
Changing the mounting plate requires the removal of 4 allen bolts, which also releases the nickel base from the top half of the block. This isn’t the best method I’ve seen, as getting the block back together was quite fiddly, but it shouldn’t be too much of a problem unless you constantly upgrade your system. Taking a closer look at the block itself it’s a very impressive piece of kit, with immaculately formed water channels that are just mind bogglingly thin.
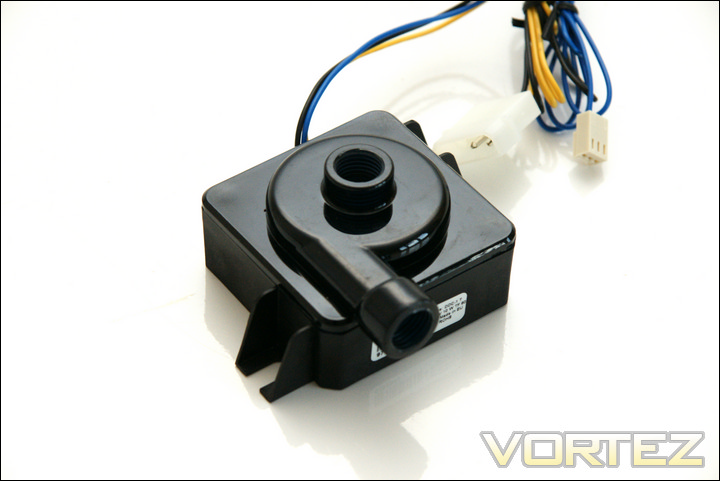
The pump choice for the loop was quite simple – the mighty Laing DDC. Anyone who knows their pumps will also know that replacing the top of the DDC can yield quite significant performance boosts, so a Phobya custom top was also ordered. Swapping the top over is ever so simple, providing you have the correct screwdriver. For some reason Laing have started using Torx screws, so finding the correct screwdriver attachment was a bit of an faff . It’s all part of the fun though, and within a few minutes the top had been successfully changed.
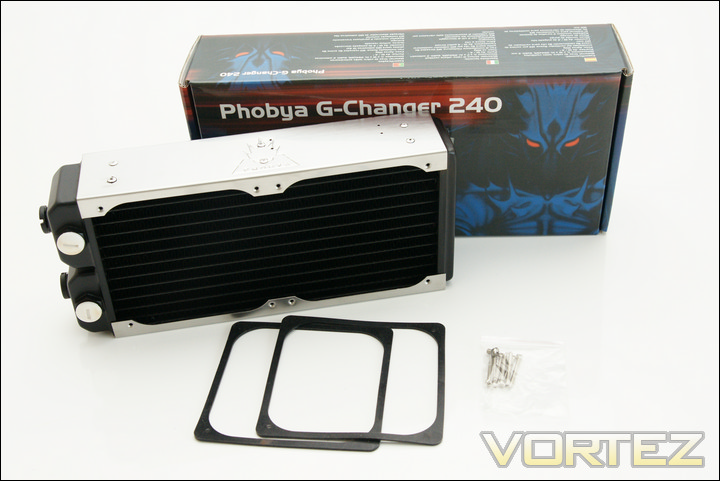
The radiator can have a massive impact on how well the system performs – it’s no good having a top of the line waterblock and pump if there’s nowhere for all the heat to escape. Offering a good combination of performance and cost, this Phobya radiator was top of my list. The kit includes all the necessary mounting screws along with a pair of rubber gaskets to help reduce vibrations.
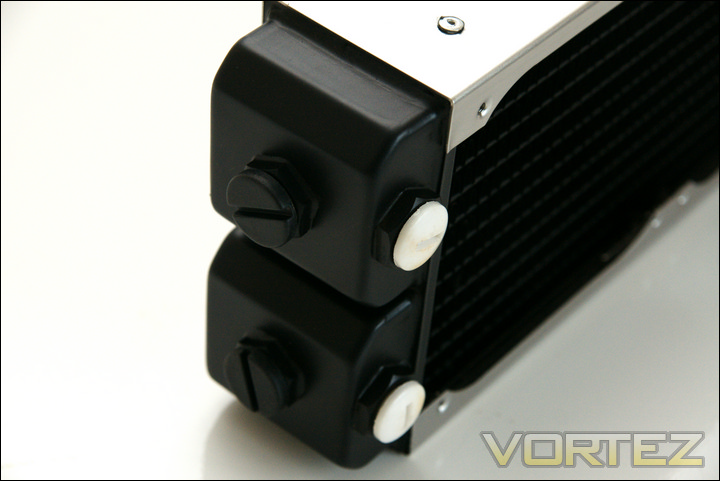
The Phobya radiator is also very flexible in terms of inputs and outputs, with four in total to choose from. The plastic plugs are easy to remove, although I would suggest you only use one input and output at a time.
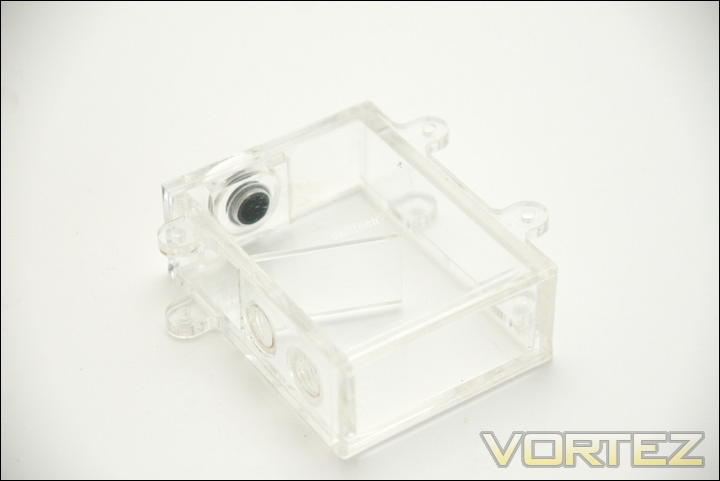
The reservoir I chose for the build is quite unremarkable, but serves its purpose just fine. A reservoir is only really needed when filling the loop: a T-line or similar would do a similar job (and would cut £22 from the build price) but would increase the time it takes to fill the loop.
If you’re planning on going down the custom route, but you’re not 100% certain on your component choice, it’s well worth emailing the helpful staff at Aquatuning, or popping onto our forum, where we’re more than happy to help.
Testing Methodology
With so many water cooling kits on test, it was vital that not only accurate results were taken, but ones that clearly showed the relative performance differences between each kit. For this reason, the stock thermal compound was removed/discarded from each kit, and Arctic Coolings excellent MX2 used across the board. Not only is it an excellent thermal paste, but it also has 0 cure time, meaning it doesn’t need to be left for a number of hours to get the best results. Each kit was re-mounted 3 times, with any anomalies in the results re-tested to ensure accuracy before an average was taken. In between mounts the CPU and Cooler base were both cleaned with an Alcohol cleaner and a fresh layer of paste applied.
As testing was conducted over a considerable length of time, ambient temperatures played a massive role in how well the kits performed. For this reason, the delta temperatures are the ones we will be looking at today (the difference between the ambient temperature and the reported temperature).
Testing was also completed a second time with the stock fans replaced with Enermax Magma fans, this way you can see how they all perform relatively. By using a standardised fan across the board it’s a lot easier to see which kits perform best given a certain noise level/CFM. I’d also like to stress that the stock cooling layout was retained, no extra fans were added, so the Antec H20 620 utilised one Magma fan, whereas the 920 used two.
Test Setup:
AMD Phenom X6 1090t @ 3.9ghz – 1.45v,
8GB Corsair Dominator @ 1600mhz 8-8-8-24 1.5v,
Asus Crosshair IV Formula,
Asus ATI Radeon 5870 V2,
Western Digital 80GB S-ATA HDD,
Enermax Modu87+ 500w PSU
Idle test: Left to idle for 20 minutes on windows desktop with no applications running or left open.
Load test: For the load testing all 6 cores were placed under full load using core damage and left to sweat for 20 minutes before temperatures were recorded.
Notes: For comparison, I also tested a Cooler Master Z600 CPU cooler. This is an absolute tank of a cooler and should give some indication as to the performance difference between a high end air cooler and the water cooling kits on test. It utilised a single 120mm Enermax Magma fan pushing air through the fins.
During testing of the watercooling kits I’d also like to point out that a 120mm fan was directed at the heatsinks on the motherboard, as the lack of airflow caused the Southbridge and VRM’s to get very toasty.
As the Custom kit wasn’t spec’d with any fans, I decided to give it a go with the high speed Antec Fans to try and put together the ‘ultimate setup’. This was merely an effort to see just how low I could get the CPU temperatures to go.
Test Results & Analysis
Results (Stock fans):
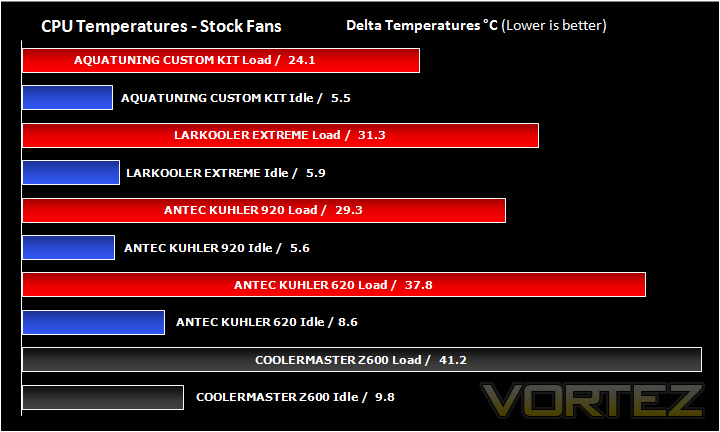
As expected, the Custom Kit with Antec Fans didn’t disappoint, topping the results. The surprise was in second place though, with the ultra quiet fans of the Larkooler allowing it to be beaten by the Antec. The difference isn’t huge, and considering the difference in noise I’d take the Larkooler any day. It will be interesting to see how they perform when they’re given the same amount of airflow though, as the Antec is probably shifting well over twice what the Larkooler is as standard. The Kuhler 620 brings up the rear of the pack, outperforming the Z600 air cooler by just over 3 degrees (not great, but better than nothing).
Results (Enermax Magma fans):
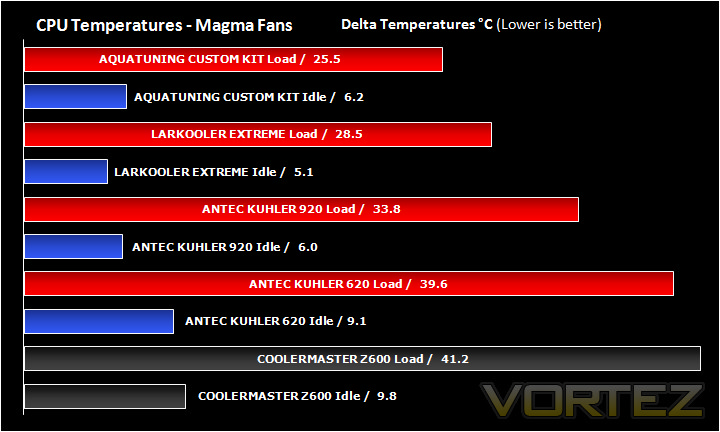
Swapping all the fans around changes the pecking order somewhat. The Larkooler manages to pull out quite a margin on the Antec kit, showing what it can do when it’s given a little more airflow to play with. The Antec kits both struggled here, with a fairly substantial rise in temperatures from their stock setups. This shows how much they rely on their noisy fans to keep the temperatures down, making the second test well worth the effort.
The Custom Kit was once again very impressive, with only a small 1.4 degree increase in load temperatures. Strangely the Larkooler actually managed better idle temperature than the custom kit, and was only 3 degrees hotter under full load, which is a pretty decent effort.
Conclusion
Writing this conclusion proved very tricky, as it was hard to work out which setup is the best all rounder. They each performed well for how much they cost, and none of them had any major design niggles. Both Antec kits have the obvious attraction of being pre-built, but then again you don’t get the same level of performance.However, looking at the results obtained with the Enermax Magma fans, the Kuhler 620 is the first cooler to stutter, with a result only 1.6 degrees better than the Z600 when using the same fan setup. The Kuhler 620 comes in around the £45 price bracket – for that I’d really be expecting it to perform a little stronger here, especially considering the sort of competition the price puts it up against.
In terms of out-right performance I don’t think you can argue with the power of a fully custom water cooling loop – the parts we had for review today proved that, beating all the other kits by quite a margin. There’s also the flexibility and ease in which you can customise the loop, with literally hundreds if not thousands of waterblocks available from Aqatuning to cool even the most minute of heat sources. So, if you’re going for all out performance a custom waterloop is still the best option, but what if you’re a noobie to the world of watercooling and you’re looking for something a little more simple?
Well, I’ll be honest – I was pleasantly surprised by the Larkooler kit. Having never heard of them before, I was a little sceptical when I heard they would be sending over a kit, but my scepticism was ill conceived. The kit’s easy to install and very quiet, but there are a few niggles. With a little bit of polish though, it could be a real contender, and for noobies to the world of watercooling (who can’t be dealing with the hassle of a Custom Loop) it’s certainly worth a look.
So where does that leave the Kuhler 920? I’m not really too sure myself. Build quality is solid, and the ability to shoe-horn it into 99% of cases has its appeals – as does the simple mounting mechanism. In stock trim it performed well, but that’s half expected considering the racket it made in doing so. Switching it to the Magma fans dropped the performance considerably, showing how much of an influence the extra airflow was having. For £85 though, it comprehensively outperformed the stock air-cooling, even with the magma fans fitted, and is a great middle of the road option if you don’t have the extra cash to splash out on a separates system.
Antec Kuhler 620
+ Easy to setup
+ Cheapest kit on test
+ Compact
+ Easy to mount
Cons:
– Performance not quite as good as it really needed to be
Antec Kuhler 920

+ Fantastic Performance
+ East to mount
+ Two fans included as standard
+ Can be controlled via USB
Cons:
– Stock fans incredibly noisy
Larkooler KU3-241
+ Simple mounting mechanism
+ Comprehensive bundle, with everything you could possibly need included
+ Nickel Plated water block
+ Good Performance
+ Quiet
Cons:
– A few small quality issues
– Can’t quite match a custom loop
Custom Watercooling

+ Performance – For 24/7 usage it really can’t be touched
+ Adaptability – can be tailor made to suit your needs
+ Extremely high quality components
+ Did I mention the Performance?
+ 1,000,000x better looking than a heatsink setup
Cons:
– Can be confusing for first timers
– Expensive


