







The XSPC RAZOR tried and tested, we use the latest NVIDIA GTX680 waterblock with Flow Bridge in SLI…

Product on Review: RAZOR GTX680 + SLI Flow Bridge
Manufacturer and Sponsor: XSPC
Street Price: £95.99 (at time of review)
We recently reviewed the XSPC RayStorm 750 RS360 which offers an entry point into a customised watercooling loop yet performs extremely well despite it’s budget cost. To take the kit one step further we will today be looking at adding a couple of SLI blocks into the mix to improve cooling on two NVIDIA GTX680’s.
While XSPC do a wide range of waterblocks, it is typically the CPU and then GPU that see the most benefits from watercooling. This has never been more important thanks to throttling of graphics cards depending on GPU temperatures, particularly with NVIDIA’s GPU Boost which has direct correlation between temperature and available ‘boost’ speed.
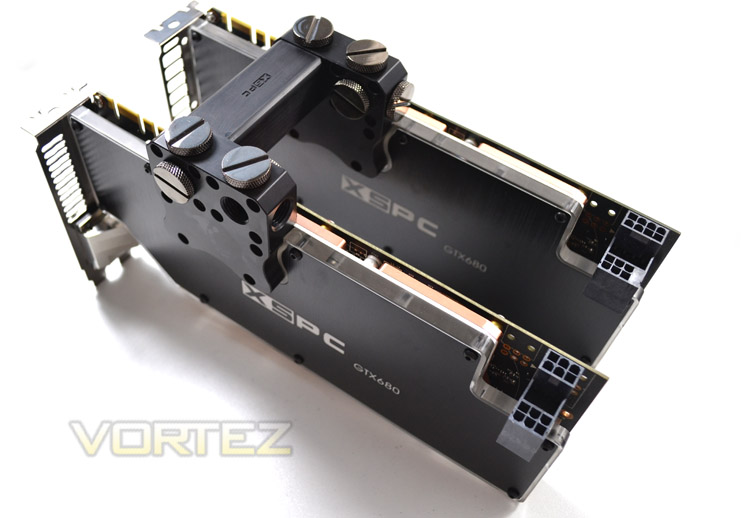
Adding a waterblock to the GPU in your system is likely have a dramatic effect to GPU temperatures, especially considering that the GPU is commonly the hottest component in a PC and receives the biggest amount of work in a gaming PC, more so than the CPU as the GPU will often be under 100% load for many hours during a gaming session. It is therefore critical that the GPU receives efficient cooling and while air cooling will do the job, water simply does the job much better and if the right components ar chosen, quieter.
So then, today we will be taking a look at not one, but two of XSPC’s new RAZOR GTX680 waterblocks in SLI and the accompanying Flow Bridges. Sleek, black, illuminated, with smatterings of copper, Acetel and perspex – it seems XSPC know exactly what the enthusiast wants.
XPSC’s take on their new product:
We are proud to introduce our new design for Razor GPU blocks. We have continued with the styling from our RayStorm series so you can now have a full set of matching XSPC blocks. We have also significantly improved cooling performance by reducing the fin width from 1mm to 0.5mm, this dramatically increases the surface area.
Although we have used an acrylic top for aesthetics we have a thin stainless steel plate between the copper base and the acrylic. This allows us to use LED lighting, while keeping the strength and reliability of an all metal waterblock.
The new multiport connector gives you many choices for neatly routing your tubing. We have two G1/4″ ports on the front and back of the block, two on the top, plus a side port, giving 7 ports in total. The multiport connector is compatible with our new SLI flow bridge.
Although we have used an acrylic top for aesthetics we have a thin stainless steel plate between the copper base and the acrylic. This allows us to use LED lighting, while keeping the strength and reliability of an all metal waterblock.
The new multiport connector gives you many choices for neatly routing your tubing. We have two G1/4″ ports on the front and back of the block, two on the top, plus a side port, giving 7 ports in total. The multiport connector is compatible with our new SLI flow bridge.
Let’s head straight to the packaging…
Packaging & Accessories
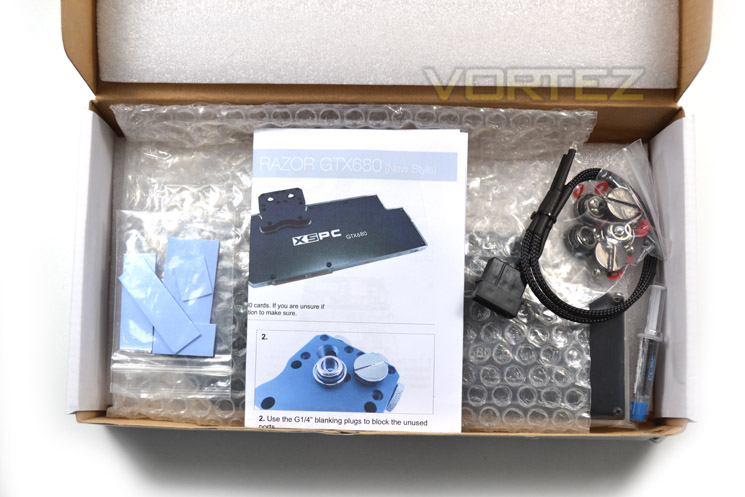
The blocks arrive in anonymous, plain white packaging. The ‘shake test’ tells us that the internals are well cushioned despite what appears to be basic exterior packing. Thankfully, upon opening the sealed boxes we are greeted with a wealth of good quality bubble wrap and foam which pads out the blocks and accessories perfectly.
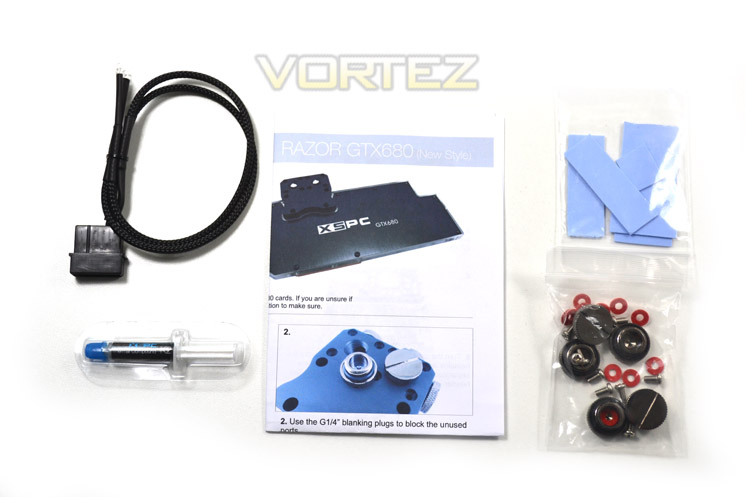
Inside each box you get a set of instructions, a host of screws and washers, a twin 3.5mm LED-MOLEX connector, thermal paste and pads and the fully assembled RAZOR block. It is worth noting that no barbs or compression fittings are included with the package so these will need to be purchased separately.
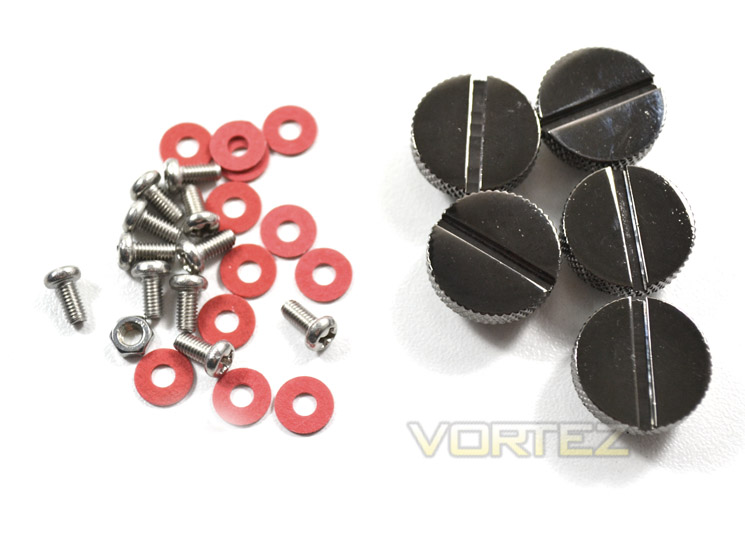
5x G1/4 Black Chrome plugs, 10 x M3 x 6mm screws and washers are stored in separate bags which makes everything easy to keep tidy and prevent you from losing anything during assembly. Our samples did have a couple of spare screws and washers witch was a nice touch although its always a little disconcerting after finishing assembly when you have screws leftover!
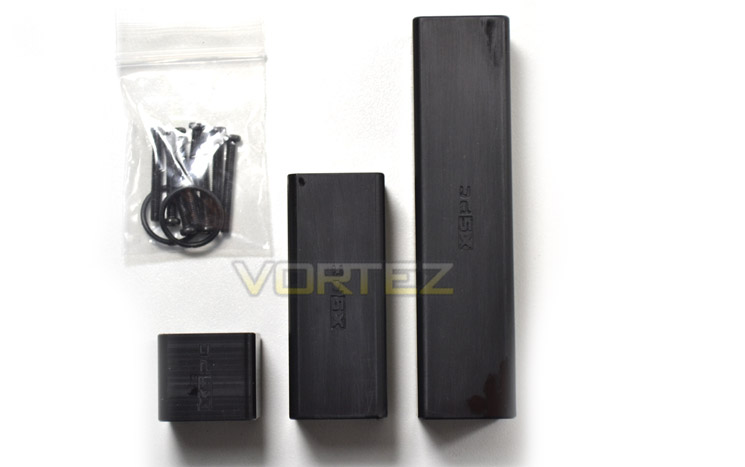
As we will be using two of the RAZOR Blocks in SLI, we will need a method of connecting them neatly. For this purpose XSPC have thankfully produced some neat Acetel blocks which perfectly match the RAZOR blocks. The aptly named ‘Flow Bridge’ is available in 3 different sizes, 2 slot, 4 slot or 6 slot spacing and are purchased separately. While simple in design, any good watercooler will tell you the Devil is in the detail when making a masterpiece watercooling build and it is little additions such as these which separate a good looking watercooling build from a great looking one.
Let’s take a look at the Razor waterblock…
First Look
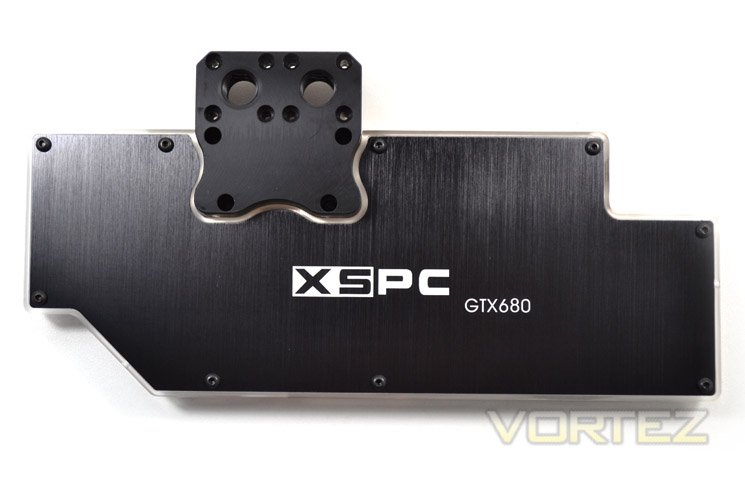
Here we get a first glimpse of the block itself. The block ad a shrink wrap type sticky polythene wrapped around it and it was also buried in a bubble wrap sleeve so should reach you in perfect condition, like ours with no scratches to the lovely brushed aluminium effect upper plate.
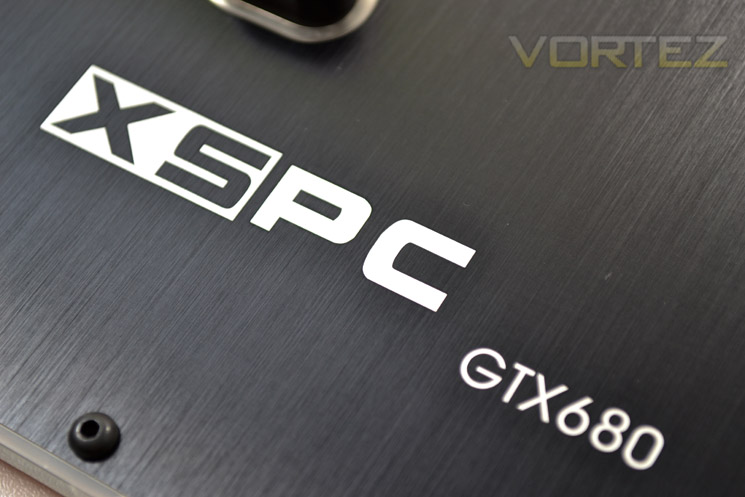
The finish on the top plate is exquisite. Anyone who has owned a Lian Li PC case will appreciate the brushed aluminium effect with contrasting silver logo. The rounded Allen key screw heads add that industrial feel but do not take anything away from the minimalist, sleek design.
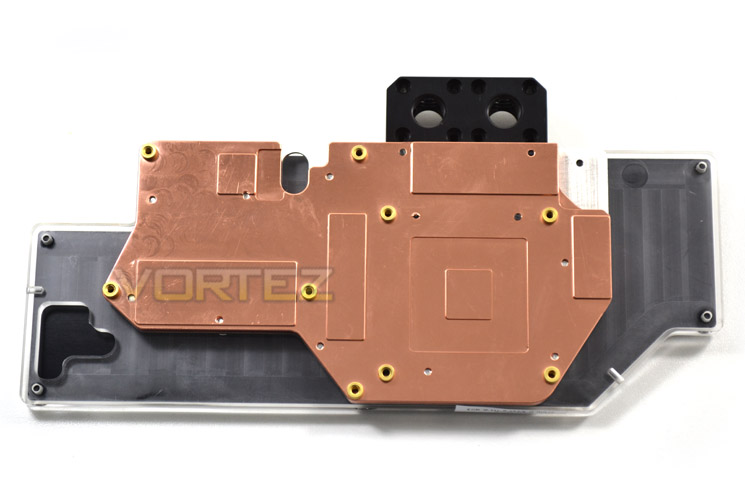
As you can see, the top plate is an exageration of what the block actually keeps cool with the copper base only taking around 60% of the upper plate real estate.
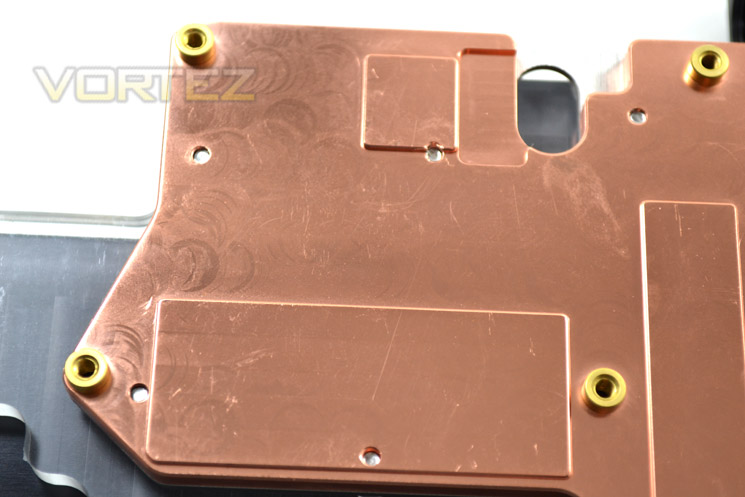
The finish on the copper is less than perfect I’m afraid with machining marks clearly visible. While this is extremely unlikely to effect performance, certainly not in any measurable way, we would have liked to have seen a perfect, polished mirror finish here.
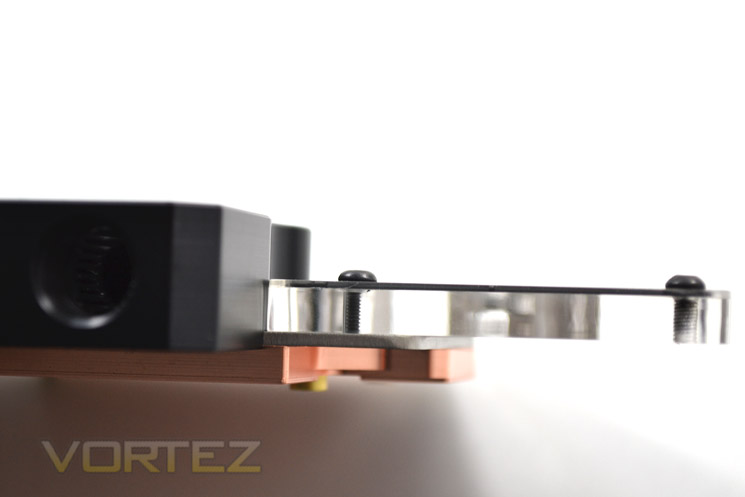
The thin metal top plate is held in place by Allen screws which are perfectly machined with no cracking present in the acrylic plate. In total, the block comprises of an aluminium upper plate, acrylic, stainless steel and copper sandwich and measures 252.5 x 123 x 25.7mm.
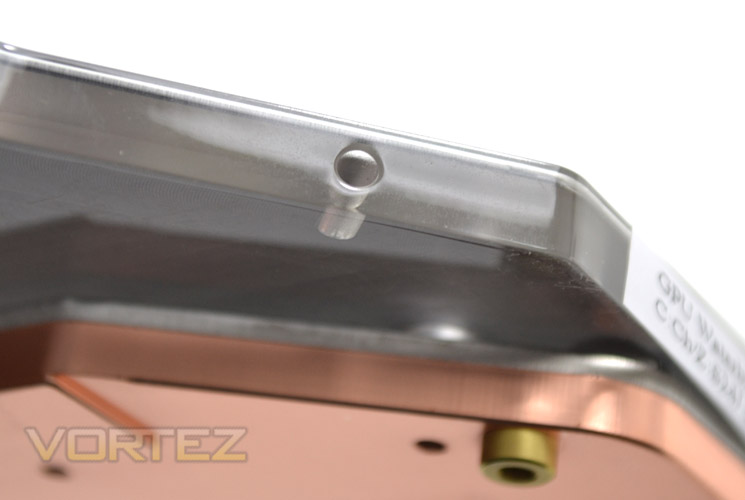
To illuminate the acrylic, XSPC have included two LED’s which (should) fit into the 2x 3mm holes that are dilled into the acrylic.
Let’s have a closer look at the block inner…
Closer Look
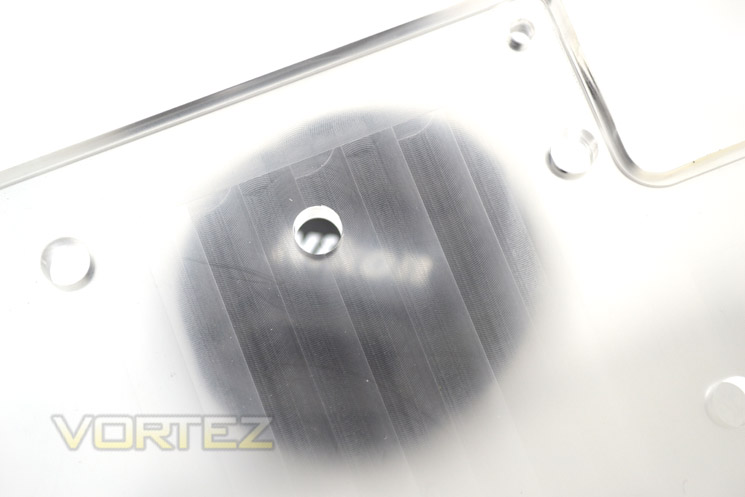
The acrylic is translucent rather than transparent. This has the effect of refracting the LED light out to the edges instead of uppermost. Should you wish there is no reason why you couldn’t have the full acrylic on show but you should be mindful it is not polished up like glass.
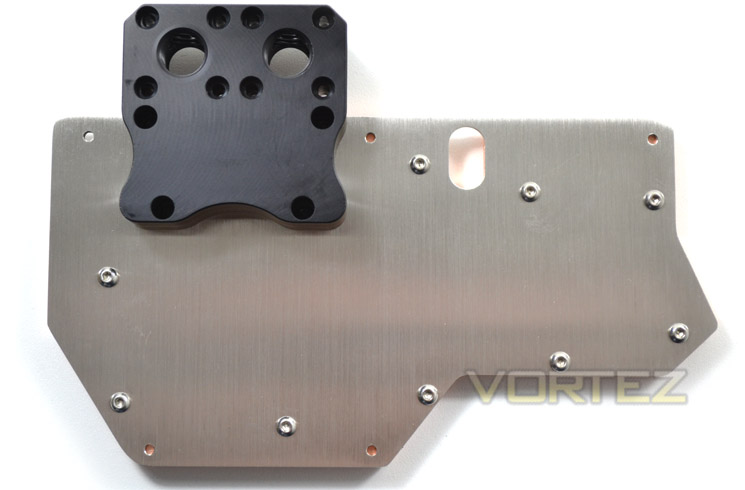
Removing the aluminium top plate and acrylic we are left what is in effect the older style GTX680 block from XSPC.
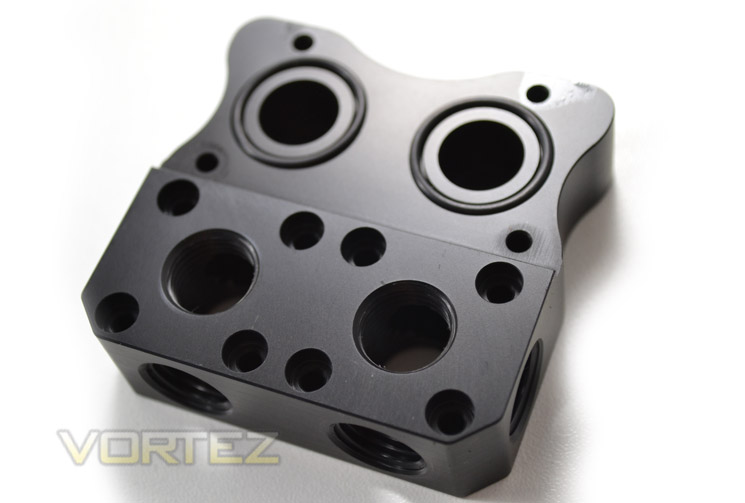
Instead of screwing your fittings directly into the copper as with many other waterblocks, XSPC make use of an cetel multi block. Polyoxymethylene, to give it its correct name used throughout many components thanks to it being stainless, very stiff, and durable. If you think that plastic is prone to destruction, consider that the M16 rifle stock is also made from acetel!
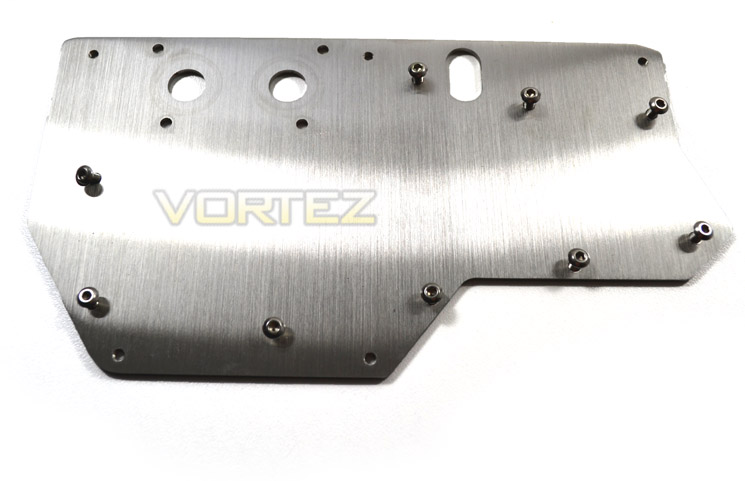
We had major concerns about the mid-plate as looking very much like aluminium, it could cause corrosion problems. Galvanic bimetallic corrosion is the process of mixing two dissimilar metals that are bridged by an electrolyte, in this case water, then there is risk galvanic corrosion could occur. XSPC have however assured us the mid-plate is stainless steel which is a relief.
Note: We recommend to always use a good corrosion inhibitor when building a watercooled setup, regardless of whether the metals are very close in the metallurgy table.
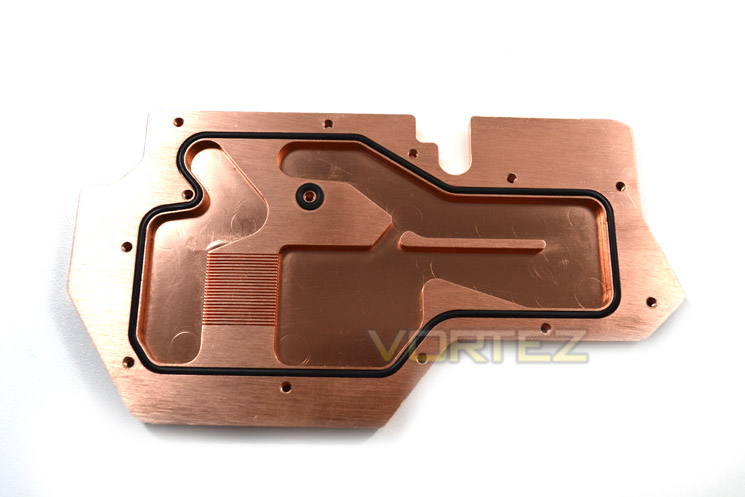
The main unit is full copper which is brushed on the areas where water does not pass and a dull mirror finish where it does.
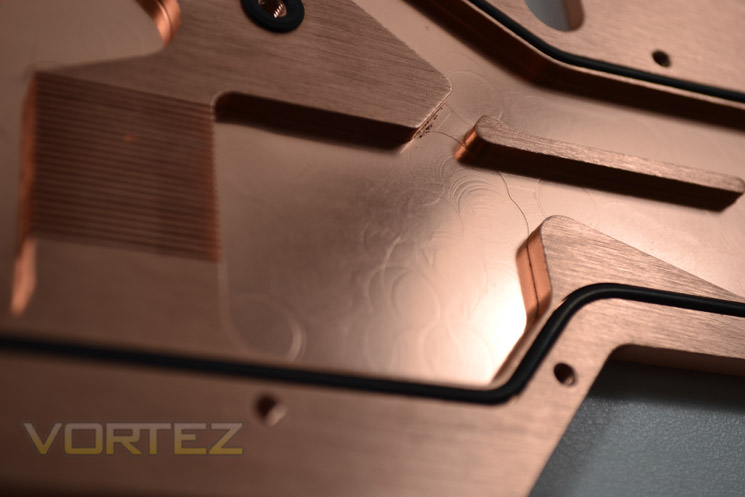
Once again, machining marks were clearly visible although undetectable to the touch so wouldn’t effect water flow.
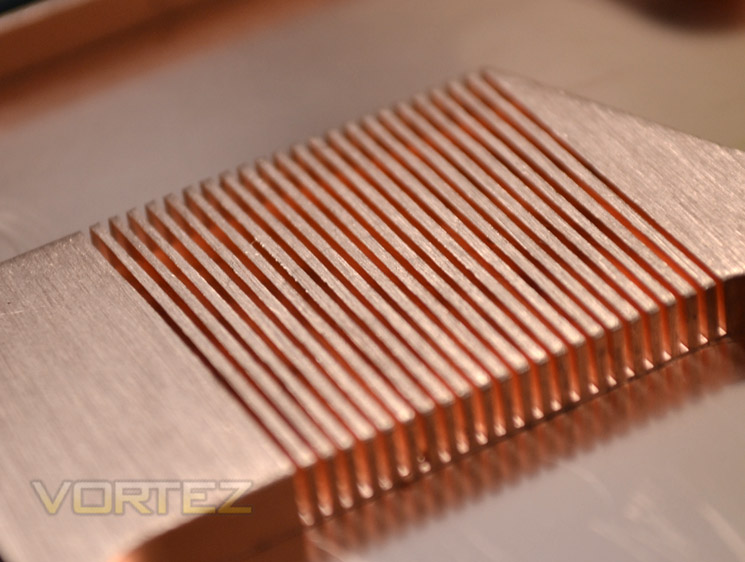
An area which will effect flow is the GPU cooling point. The fins are tightly spaced to increase the cooling area and will assist in dissipating the heat effectively.
Fitment
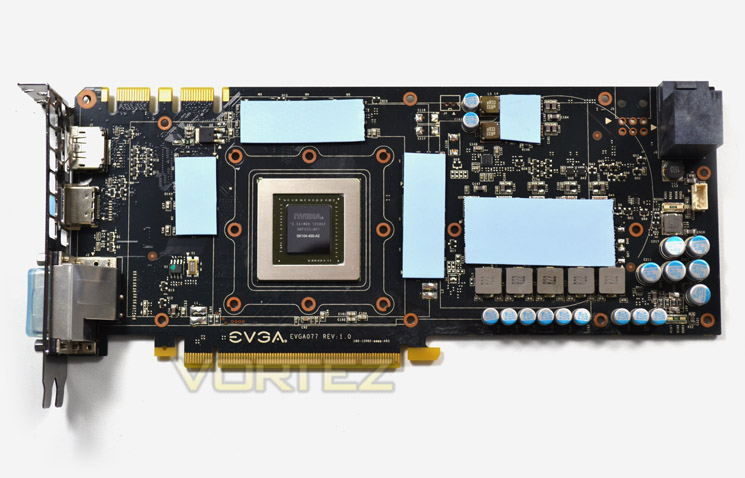
Removing the stock cooler will depend on which type of GTX680 you have. Both our GTX680’s were of reference design. Due to the design of the waterblock, we cannot say whether the block would fit a non-reference design but it is unlikely due to the cut-outs for capacitors in the acrylic.
With the coolers removed, we cleaned the residue from the memory chips, VRM and thermal paste from the core. We then added the thermal pads which were none sticky. The last job before attaching the block was to apply a fresh blob of included XSPC thermal paste to the core.
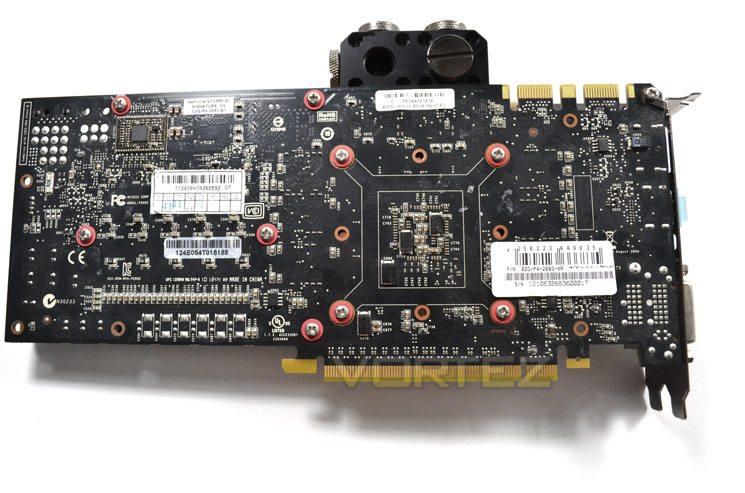
Fitting the block was a cinch thanks to the well diagrammed instruction pamphlet. Reference cards will require 10 screws, while custom cooled cards will require 9.
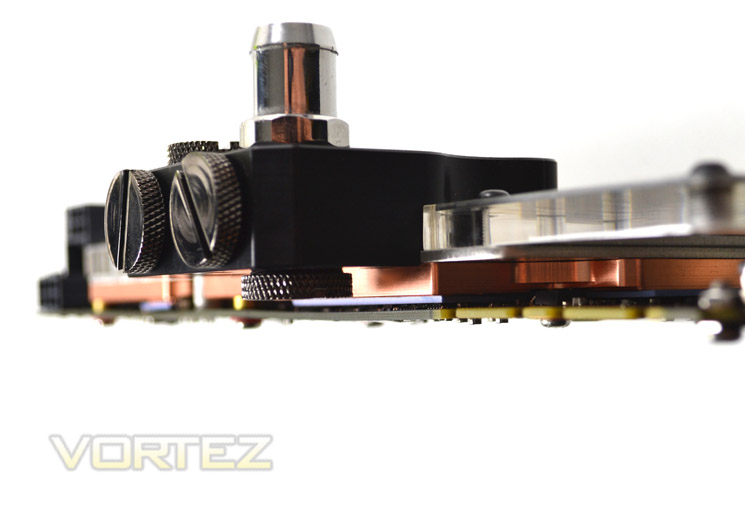
While it is important to get good contact of the block to the graphics card, it is important that the screws are turned carefully without too much pressure to prevent bowing the PCB. To check this lay the card on its side and check the profile. There will inevitably be some very slight bowing in places but as long as the card doesn’t resemble a banana it should be fine.
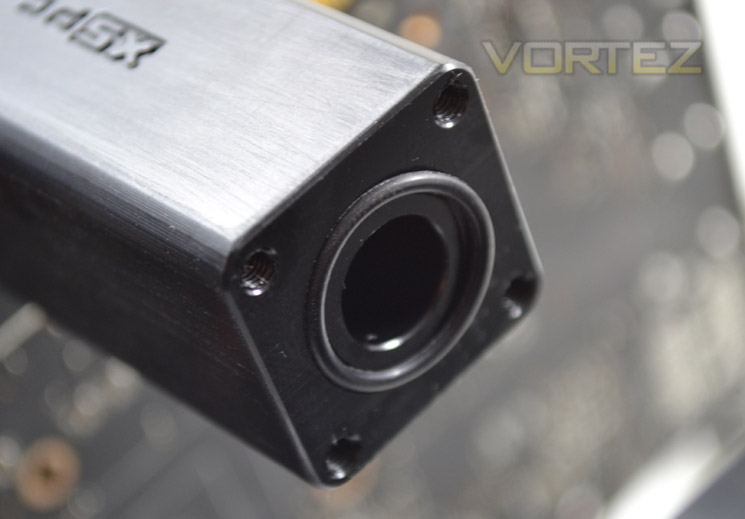
With the waterblocks fitted it was time to connect these together. We decide to use the 4 port Flow Bridge for our setup however you may wish to choose the 2 or 6 port depending on your requirements and motherboard PCIE layout.
The bridge is a hollowing out length of acetel with four screw holes at each end. A rubber o-ring at each end of the flow bridge will prevent water leakeage and should be checked and double checked it is in place, not kinked and fitted correctly before attaching the flow bridge to the multi adaptor on the main waterblock.
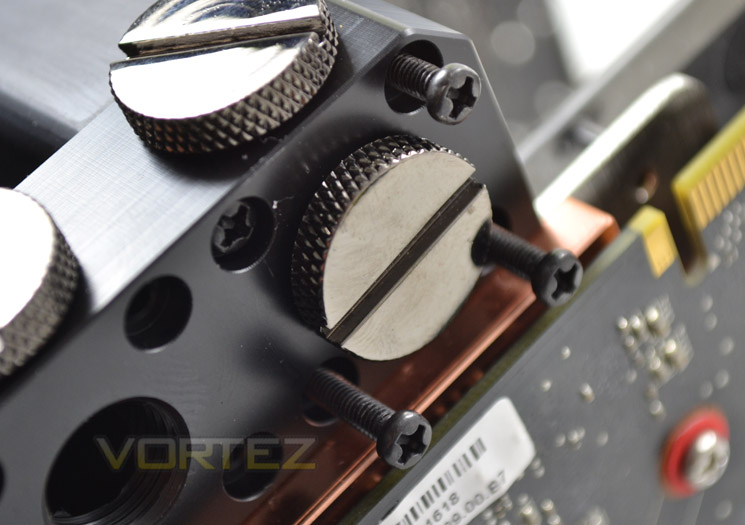
The flow bridges fitted perfectly to the blocks using the provided screws.
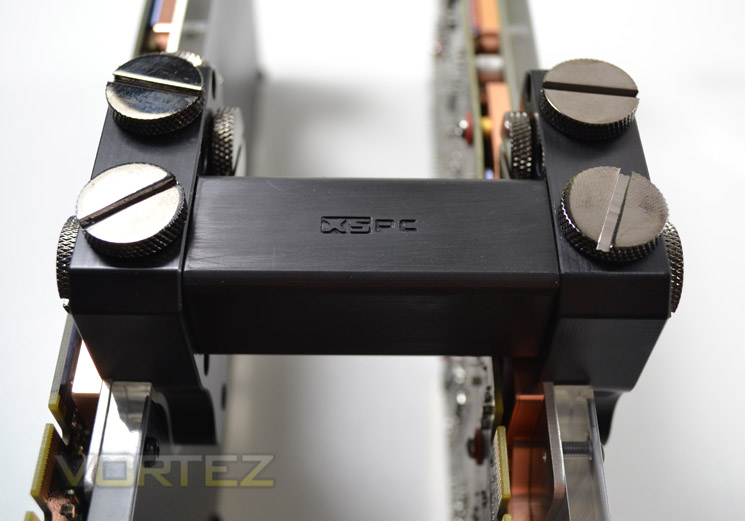
When fitted, the flow bridge will look something like the above depending on the size used. You should then start filling the spare holes with the black chrome plugs, leaving one on each card free to attach you water loop connections be it compressions or barbs.
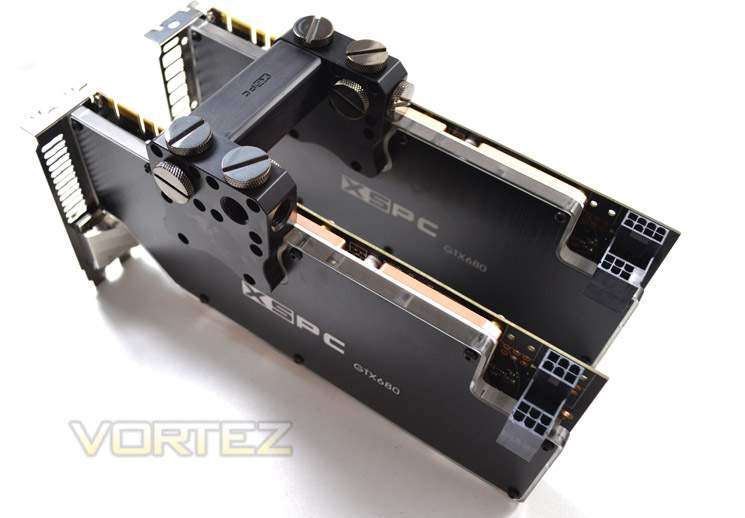
The finished article. Truly a thing of beauty for us watercooling enthusiasts!
Illumination & Installation
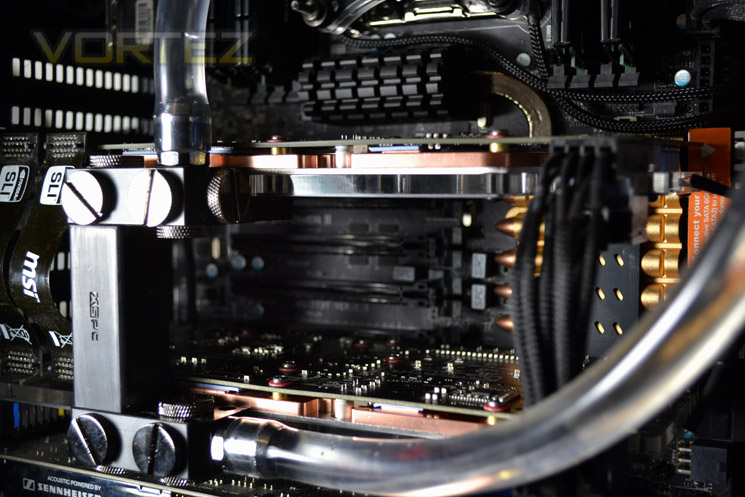
We were worried that the cards may need a little flexing to get them to sit correctly into the PCIe slots however the measurements of the SLI Flow bridge were perfect as the cards align to the slots without issue.
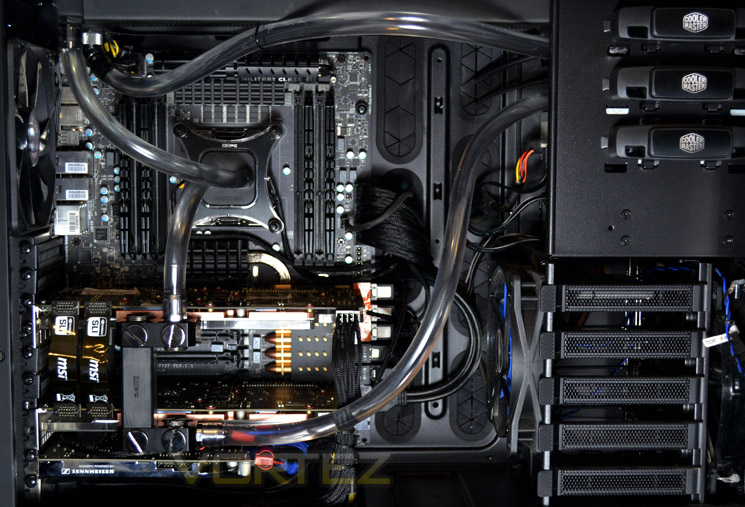
With the cards in place it was just a simple task of re-adjusting the old CPU loop to include the new graphics cards. Our loop went Res/Pump>radiator>CPU>GPU1>GPU2>Res/Pump. We don’t use clips to secure the tubing as the tubing is 7/16″ while the barbs are 1/2″ and we heated up the ends of the tubing to shrink back into place when fitted to the barb giving a very secure watertight fitment. If you are not so confident then bulky, unsightly clips or compression fitting may be to your preference.
The last job was to sort out the eye candy (illumination. With the block fitting, flow bridge attachment and general build going so well we didn’t expect any problems with this last stage however, we were wrong.
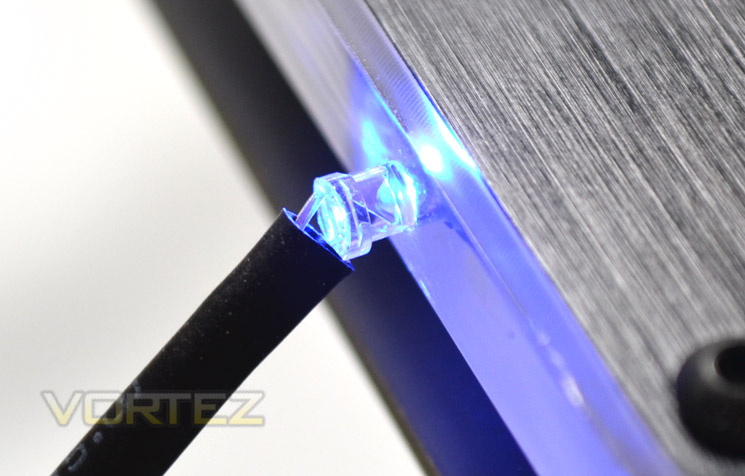
Despite our very best efforts we could not get any the 3mm LED to fit snugly into the pre-drilled holes. It appears that the holes are just too small.
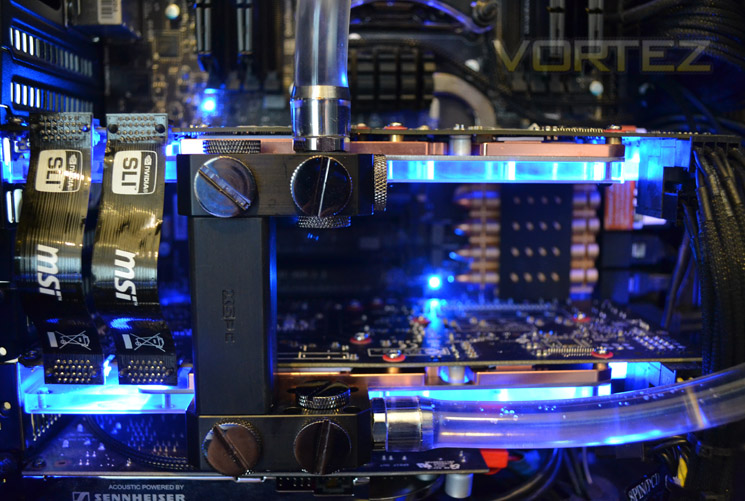
Sadly, this had the effect of much of the light escaping from the LED before it had time to illuminate the blocks correctly. Undeterred a little Super glue resolved the issue and gave us a better effect.
This is such a shame. While not a major issue as it certainly won’t effect cooling ability nor bother you if you have a case without a window, it is a smear on an otherwise near perfect product thus far.
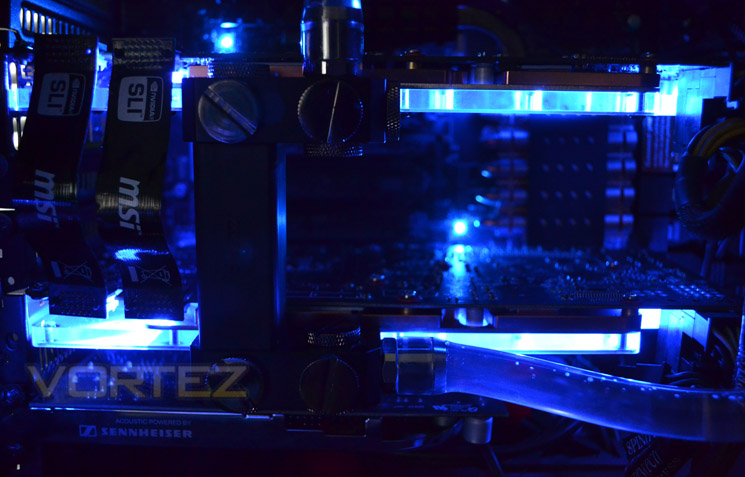
The lighting effect looks great and I’m sure with a little coaxing or widening of the hole they would fit bitter but it is not something you should have to do, especially given the cost of the waterblocks.
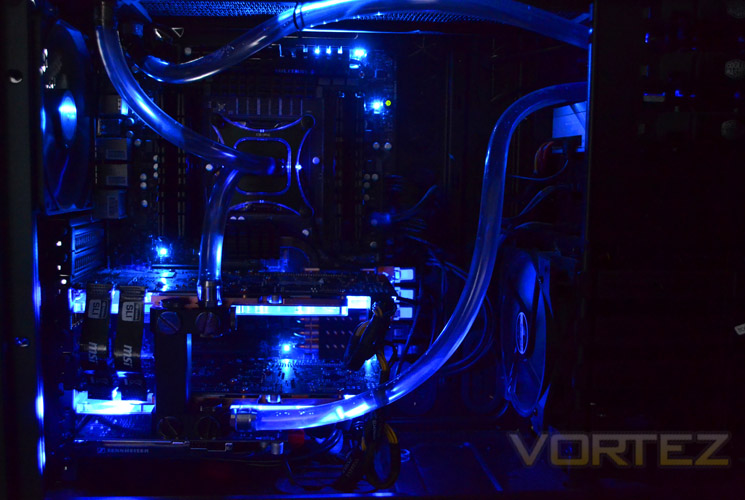
A thing of beauty I’m sure you will agree. The LEDs are not too bright nor too dim and should you be a wizard with a soldering iron, can easily be replaced to colours of your preference.
We left the system in this state for 24 hours to give it plenty of time for any air to have been bled from the blocks, tubing and radiator then began our tests…
Test Setup
Test Bench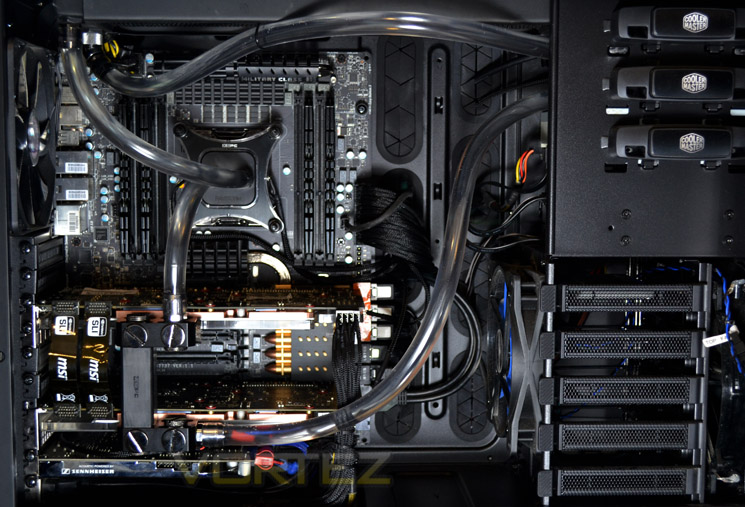
Motherboard: MSI X79 Big Bang X-Power II
CPU: Intel Core i7-3960X Extreme Edition
RAM – 32GB (4x8GB) Kingston HyperX Beast 2400Mhz @ 1866MHz 11-11-11-30
Power Supply – ANTEC High Current Pro 1200W
Hard Drive – Kingston HyperX 240GB SSD
GPU 1 – ZOTAC GTX680 2GB GDDR5
GPU 1 – EVGA SC Signature GTX680 2GB GDDR5
Temperature monitoring & recording
To accurately measure a coolers’ performance we use the ‘delta’ temperature. This is worked out by taking the ambient temperature away from the resultant temperature. So for example if a core temperature reading was 80c and the ambient temperature is 22c, the delta temp would be 80-22 = 58c. Delta temperature readings are used as this will eradicate (for the most part) the impact of ambient temperatures. An accurate thermometer is required to measure ambient (room) temp by which delta temperatures are calculated. The test room is cooled by air conditioning set to 20c however, room temperatures can still vary by up to a couple of degrees so a recording is taken at the beginning, middle and end of testing with an average reading calculated.
Idle temperatures are recorded with the system fully booted after a 20 minute idle time (no programs running save for identical background programs and processes). The max recorded temperature is then recorded using EVGA Precision X.
Load temperatures are recorded by using Unigine Heaven infinte loops. Heaven will be run at the maximum resolution for our monitor (2560×1600) with 8xAA to fully load up the GPU. Once the temperature curve flat lines as viewed via EVGA Precision, a final temperature reading minus the ambient temperature to give us the delta load temperature will be taken.
Results
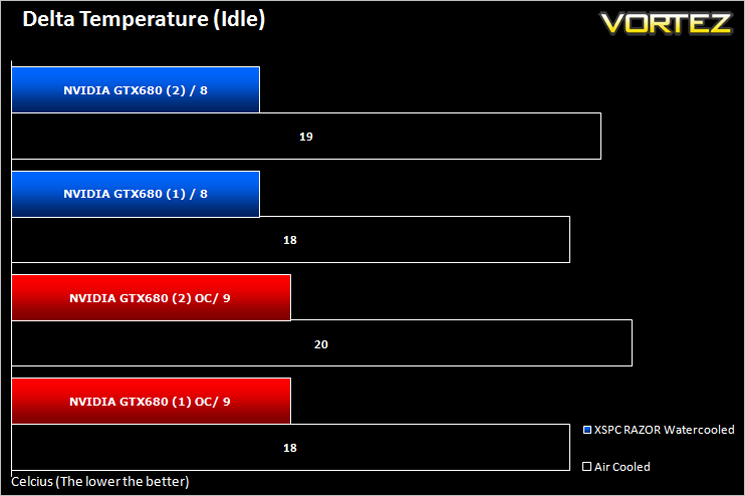
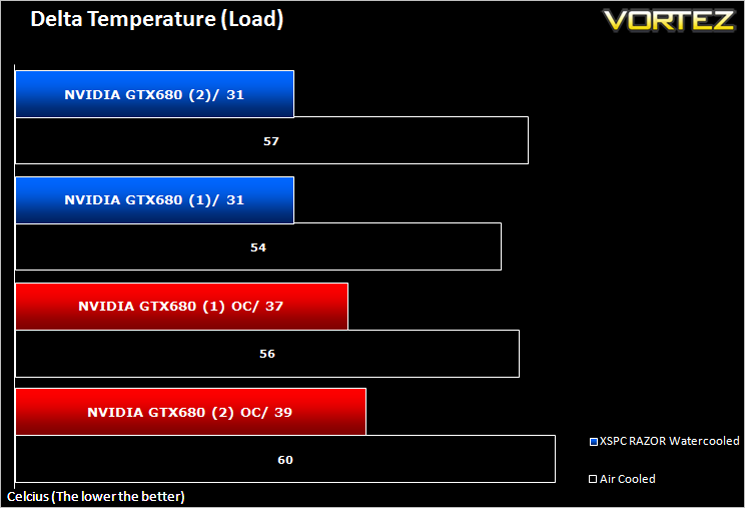
As you can see from the graphs above, replacing the standard air-cooling with the XSPC RAZOR waterblocks had the dramatic effect of almost halving the temperatures. Add to this the cards boosted/overclocked significantly higher than before (100MHz) thanks in part to confidently raising the voltage and it is a no brainer that adding XSPC watercooling to graphics cards benefits both cooling AND performance!
Conclusion
There is no denying that watercooling adds to the aesthetics of a PC. Removal of bulky, unsightly cooling makes for a very attractive layout allowing you to feast your eyes upon those expensive components you have invested in. Add a smattering of LEDs and the effect is enhanced more.
The XSPC Razor GTX680 waterblocks look devine, even without the LEDs with the brushed aluminium upper faceplate. Sadly, in a modern PC case the only time you are likely to see these are if you have your case upside down or in BTX format. Thankfully, XSPC have had the foresight to add LEDs to the waterblocks so even though you may not see the lush faceplates, you will still have the pleasure of looking upon the electric blue acrylic sandwiched between the faceplate and the copper base.
Sadly, our sample had a minor defect with the LEDs which while not a deal breaker (at least XSPC include LEDs) it spoilt an otherwise pleasurable experience. Fitting the blocks was easy thanks to the detailed instructions and the optional Flow Bridge adaptors were a perfect match and highly recommended if you intend on watercooling SLI/Crossfire GPU’s.
Performance was as expected amazing when compared to aircooling but the performance and aesthetics come at a steep cost: £95.99 (x2) + £10.19. So for the kit we reviewed today you are looking at paying around the £200 mark which is nothing to be scoffed at, especially if you don’t have a custom watercooling loop to add these components to which will set you back at least another £150.
However, when you consider the price of graphics cards today, the pressure to overclock and overvolt them to within an inch of their lives, it pays to have that little bit of insurance in knowing that temperatures will not be an issue and may well extend the life of your components. Add to this the high price of copper, the very impressive performance benefits and the gorgeous looks and £200 soon becomes a little more easy to swallow.
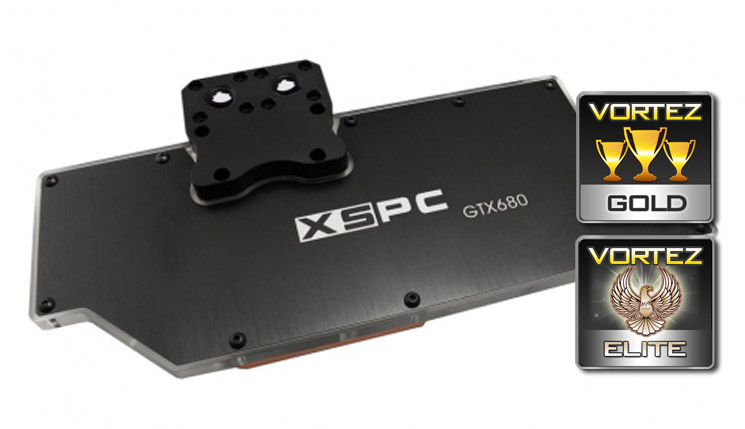
To summarise, the XSPC Razor waterblocks not only look divine, they have performance to match. If a little more attention were given to the manufacturing process (machining finish and LED drill holes) then this would be an a Vortez platinum product. As it stands it is granted our coveted Gold and Elite awards
Pros
+ Stunning Aesthetics
+ Exceptional Performance
+ Near Silent alternative to aircooling
+ Higher Overclocks Possible
Cons
– No included G1/4 fittings (barbs/compression)
– LED holes too small
– Some machining evident
– Expensive
+ Stunning Aesthetics
+ Exceptional Performance
+ Near Silent alternative to aircooling
+ Higher Overclocks Possible
Cons
– No included G1/4 fittings (barbs/compression)
– LED holes too small
– Some machining evident
– Expensive

Click here for an explanation of our awards at Vortez.net.


