Alphacool certainly aren’t new to the watercooling scene with years of experience producing high-end components, however, their introduction to the all-in-one loop is relatively recent, today we look at their second iteration of the Eisbaer 240.

Product on Review: Alphacool Eisbaer LT 240
Manufacturer: Alphacool
Street Price: GBP £84.99 / USD $94.99 / AU $122.99
Alphacool are a dominant name within the enthusiast watercooling segment, offering custom parts for bespoke loops as well as producing parts for OEMs, but not wishing to lose out on the all-in-one market, Alphacool released their Eisbaer range.
Today we look at the Eisbaer LT, the 2nd generation of semi-customisable watercooling loop from Alphacool. Featuring an all-copper radiator, with twice the heat capacity of aluminium for better cooling, performance should be good, and pairing that with a cross slot structured cooler and pump, we should be on to a winner here.
Other features include kink-resistant tubing for routing in tight cases and Eiswind 120mm fans which provide substantial static pressure, specifically useful on watercooling radiators.
All of that is well and good, and fairly run of the mill for an all-in-one cooling loop, but the fancy feature here is the ability to add in components via the modular design. Using a G1/4” thread, additional radiators or heatsinks can be installed into the loop for devices like GPUs or motherboard cooling.
At £84.99 in the UK, ($94.99 in the US and $122.99 in Australia), the cooling loop is neither expensive nor cheap, though the performance and usability of the expansion options will show how worthy it is of the price tag.
Alphacool on the Eisbaer LT:
Just like the Eisbaer, the Eisbaer LT distinguishes itself from the usual AIO mix in that Alphacool relied on normal custom components as much as possible during development. This allows the Eisbaer LT to be expanded on not just with the Eisbaer Ready quick connectors but also with connectors using standard G1/4” threads. These can be replaced with other models at any time. Another highlight is the new 25mm thin Slim Radiator, made entirely of copper. Since copper has twice the heat capacity of aluminium, optimal cooling is guaranteed.
Technical Specifications
MANUFACTURER: Alphacool
MODEL: Eisbaer LT 240
SOCKET SUPPORT:
Intel: LGA775, LGA1150, LGA1151, LGA1155, LGA1156, LGA1366, LGA2011, LGA2066.
AMD: AM2, AM2+, AM3, AM3+,FM1, FM2, FM2+, AM4.
CPU BLOCK: Base Material: Copper
PUMP:
Pump RPM: 2600 +/- 10%
Maximum flow rate: 70 L/h
Maximum pressure head: 0.85 m
RADIATOR:
Dimensions: 270 mm x 120 mm x 25 mm
Material: Copper
FAN:
Model: Eiswind 12
Dimensions: 120 mm x 120 mm x 25 mm
Fan Speed: 550 – 1700 RPM (+/-10%)
Fan Airflow: 63.85 CFM
Fan Noise: 29 dBA
FEATURES:
Quick release connectors for effortless expansion
Slim 25 mm thick copper radiator
Standard G1/4″ fittings
Static pressure optimized fans
WARRANTY: Two years
MODEL: Eisbaer LT 240
SOCKET SUPPORT:
Intel: LGA775, LGA1150, LGA1151, LGA1155, LGA1156, LGA1366, LGA2011, LGA2066.
AMD: AM2, AM2+, AM3, AM3+,FM1, FM2, FM2+, AM4.
CPU BLOCK: Base Material: Copper
PUMP:
Pump RPM: 2600 +/- 10%
Maximum flow rate: 70 L/h
Maximum pressure head: 0.85 m
RADIATOR:
Dimensions: 270 mm x 120 mm x 25 mm
Material: Copper
FAN:
Model: Eiswind 12
Dimensions: 120 mm x 120 mm x 25 mm
Fan Speed: 550 – 1700 RPM (+/-10%)
Fan Airflow: 63.85 CFM
Fan Noise: 29 dBA
FEATURES:
Quick release connectors for effortless expansion
Slim 25 mm thick copper radiator
Standard G1/4″ fittings
Static pressure optimized fans
WARRANTY: Two years
Packaging & Bundle
Aside from some dark, arty style shots of the heatsink and connections, the front of the box doesn’t really give much away, other than a massive list of supported AMD and Intel sockets.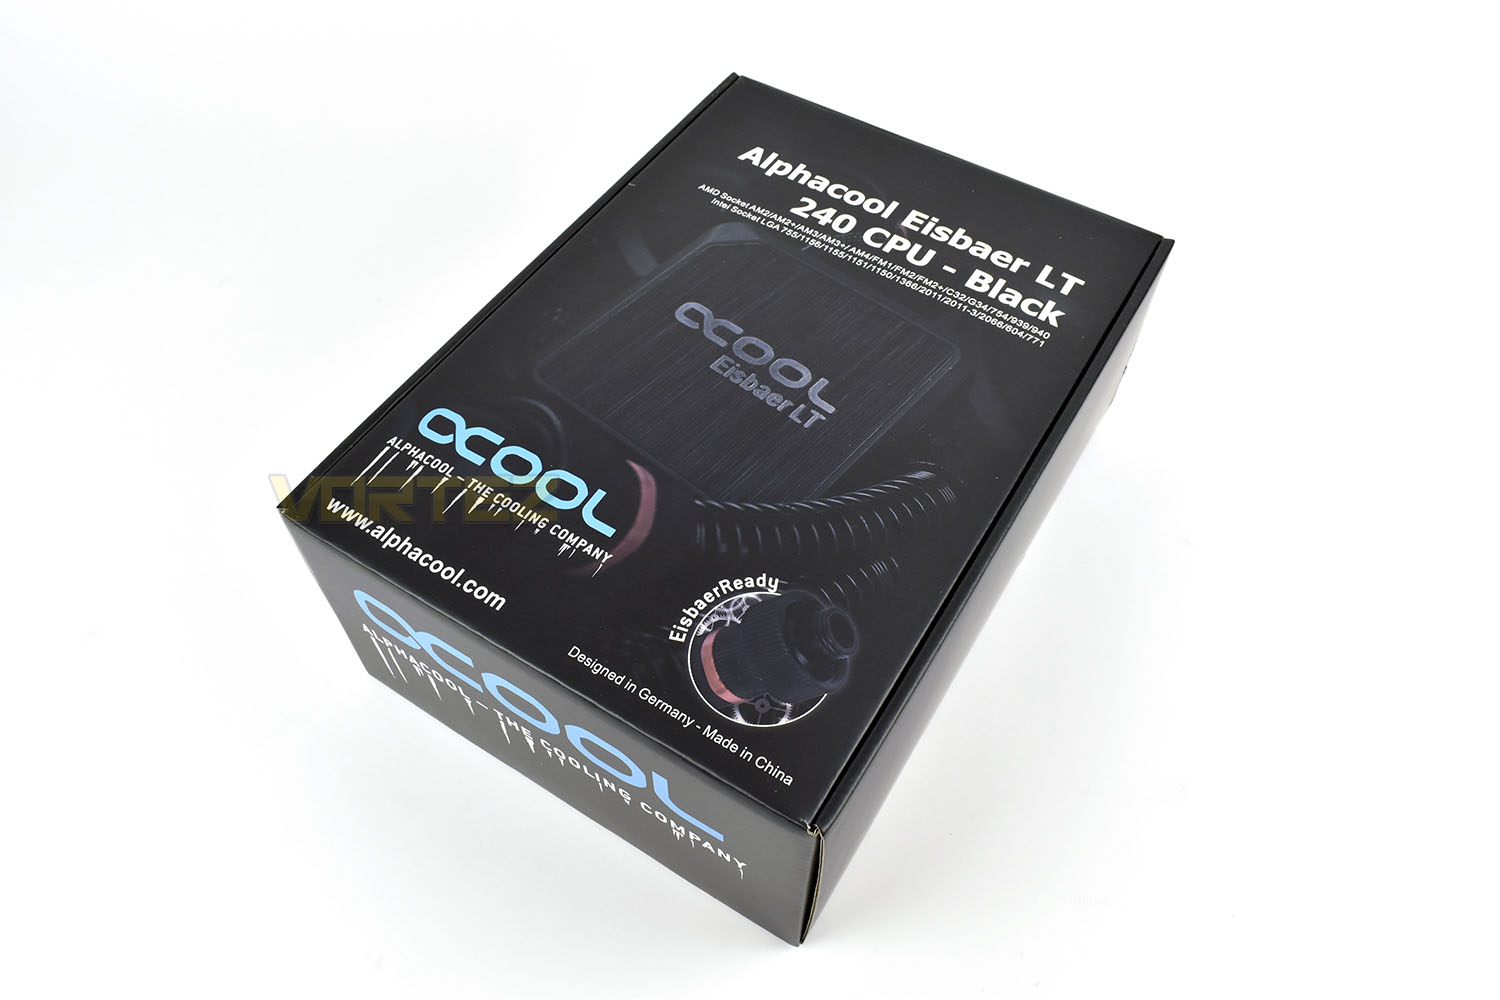
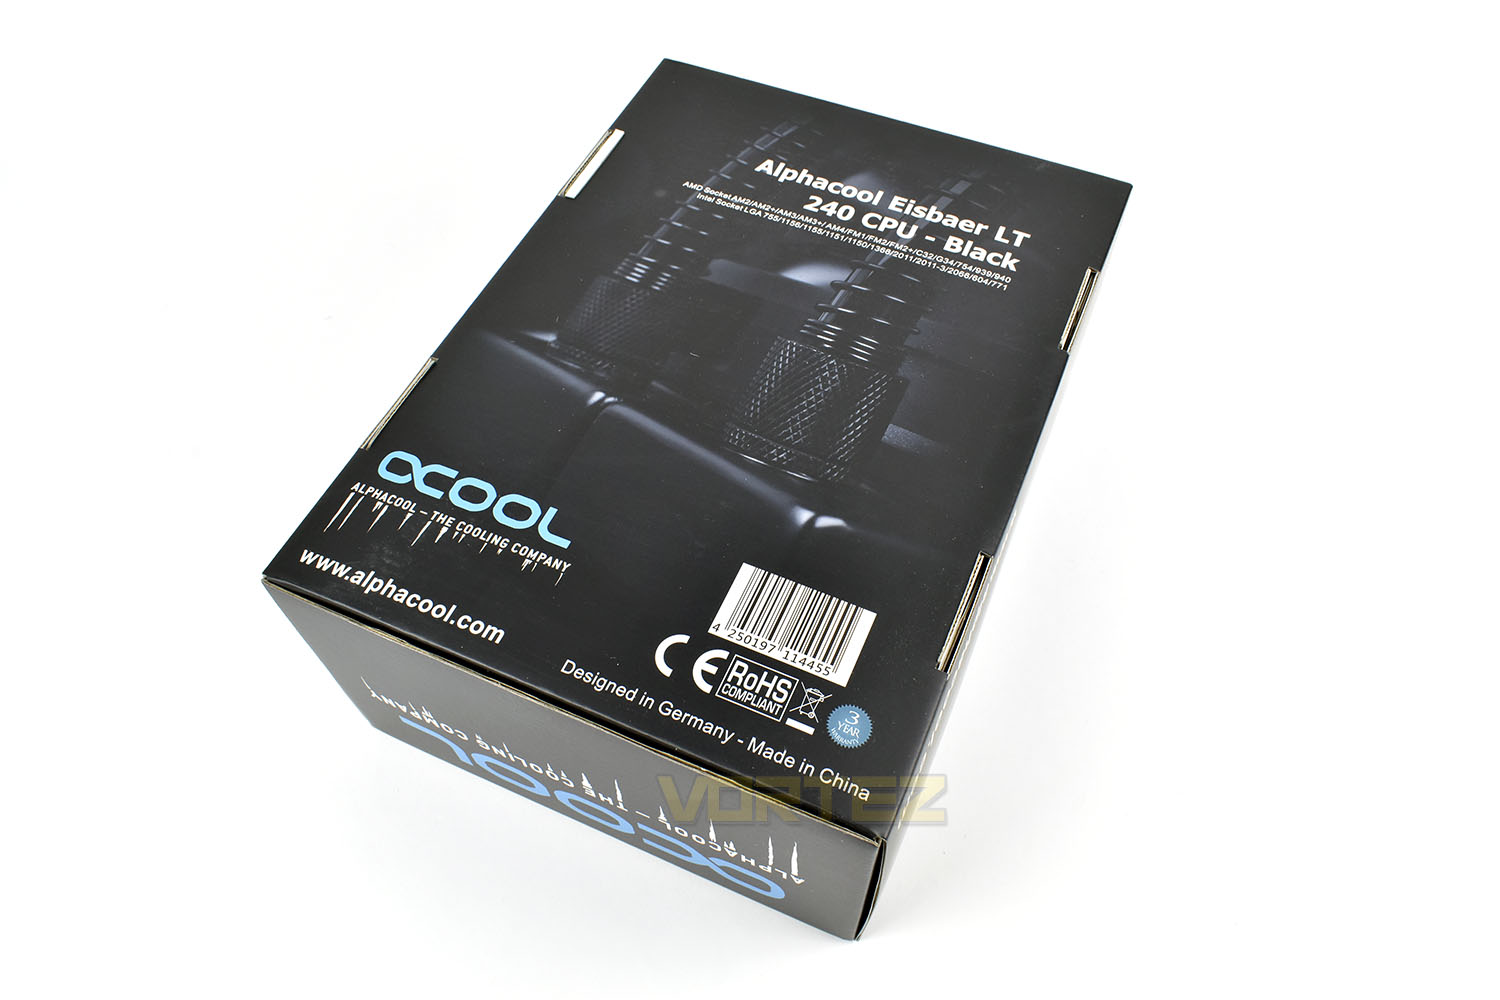
The rear is absolutely no different. The sides of the box don’t give any actual information either.
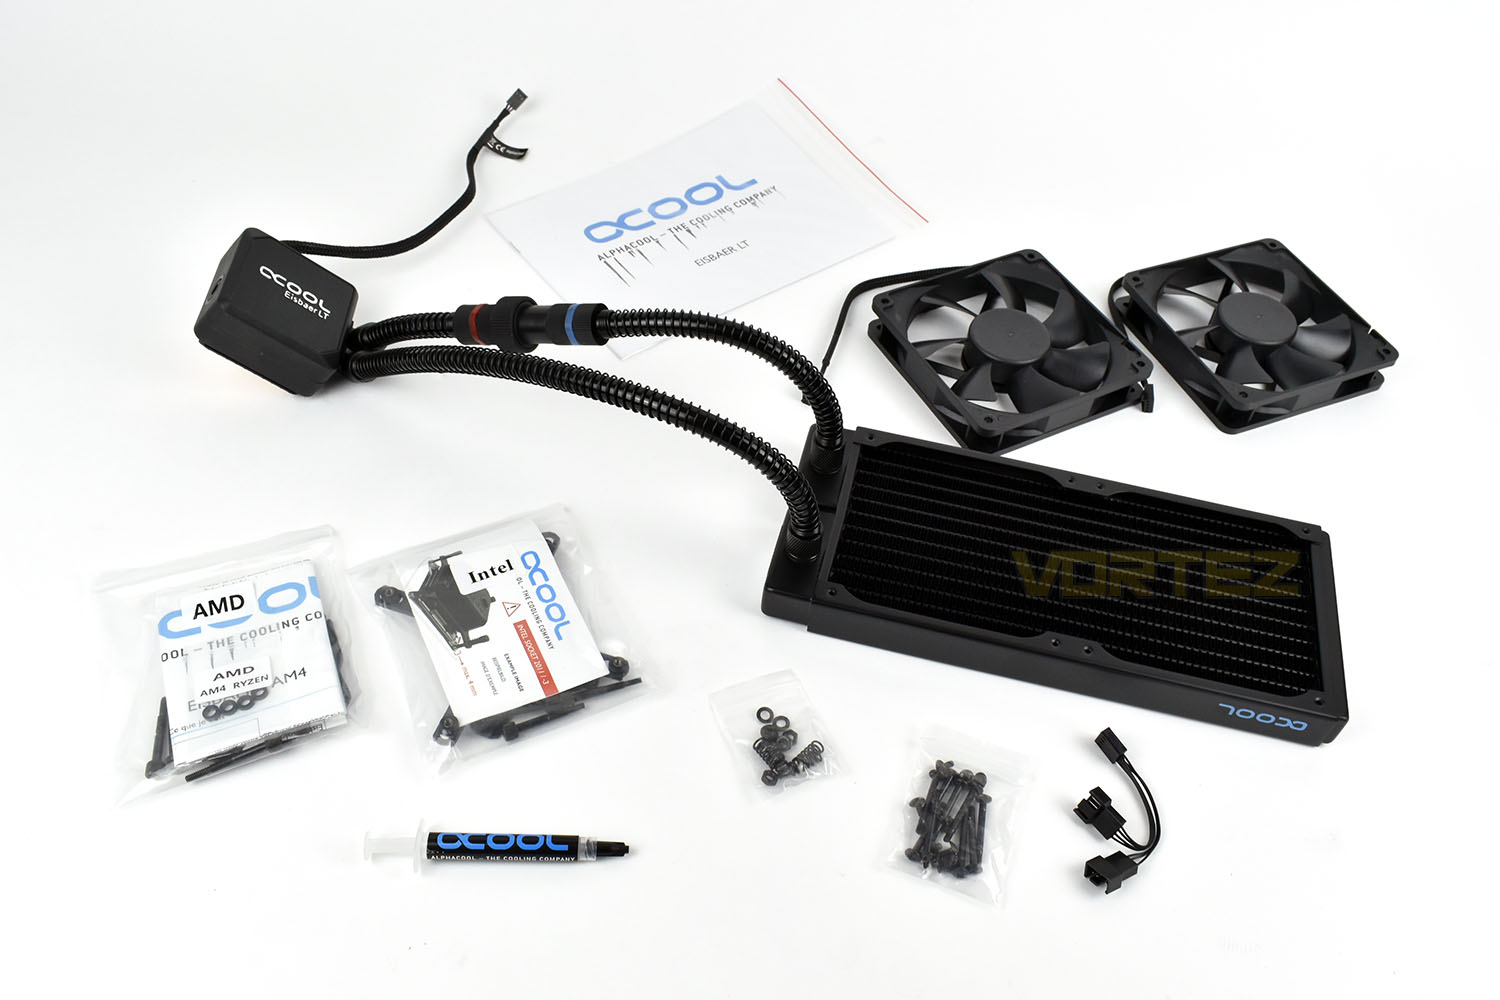
Included with the Eisbaer LT is a whole bunch of mounting hardware as well as a full colour instruction manual, with clear images, for all of Intel and AMD’s current socket types, a full-size tube of Alphacool thermal paste, two of their Eiswind 120mm fans and a fan splitter.
Closer Look
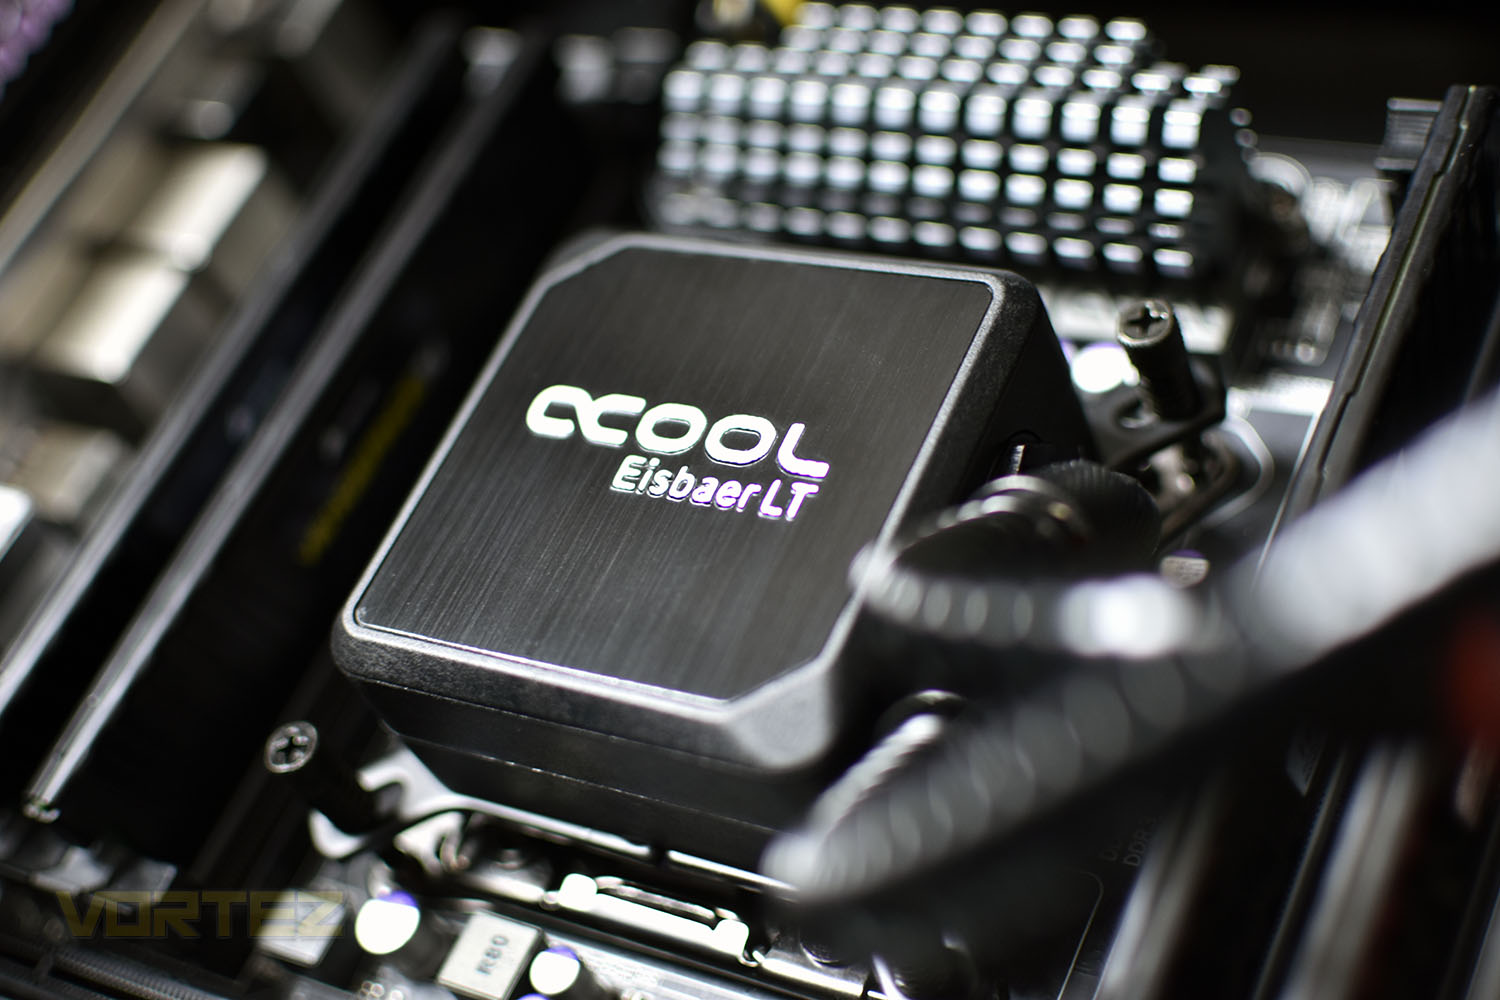
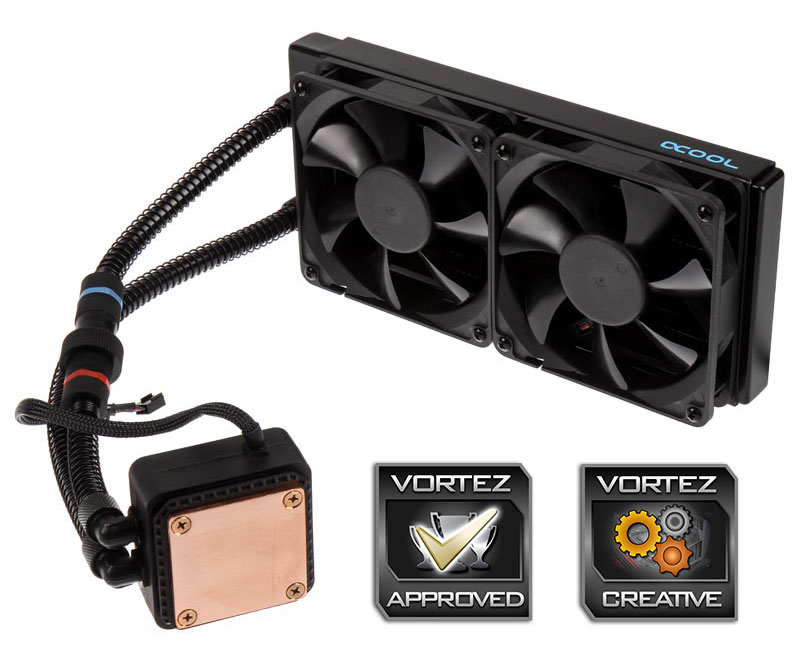
Moving onto the cooling loop, we’ll start by looking at the heatsink/pump unit. This is topped with a brushed steel insert with the Alphacool Eisbaer LT logo stamped on top. The pump enclosure is relatively small and very sleek looking compared to most AIO loops. No RGB lighting in sight, either.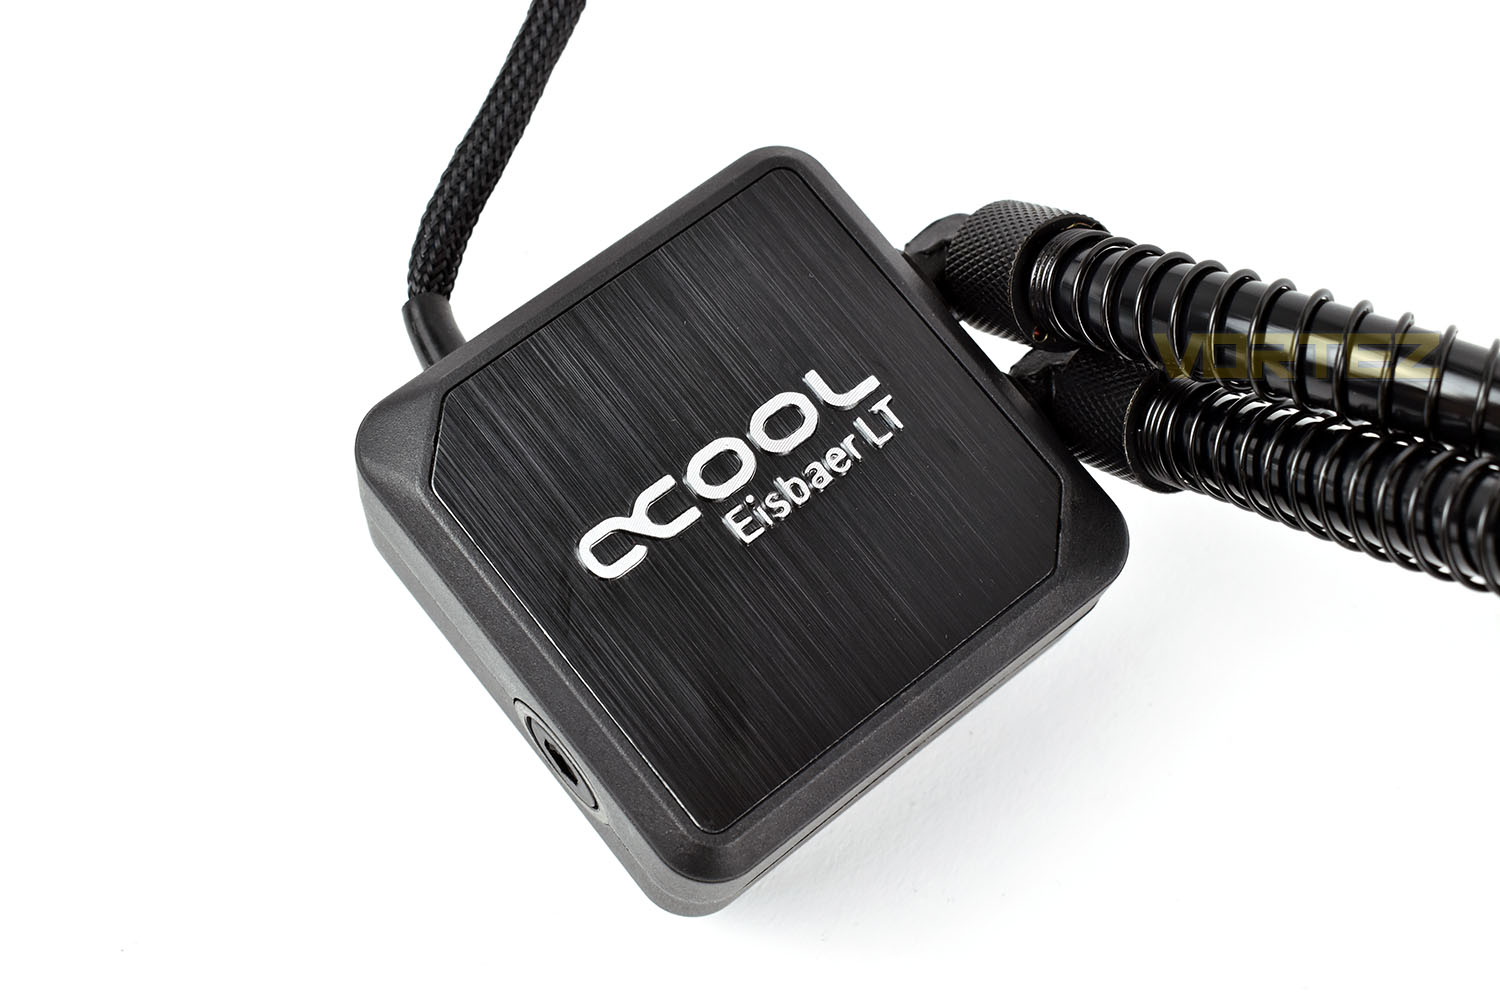
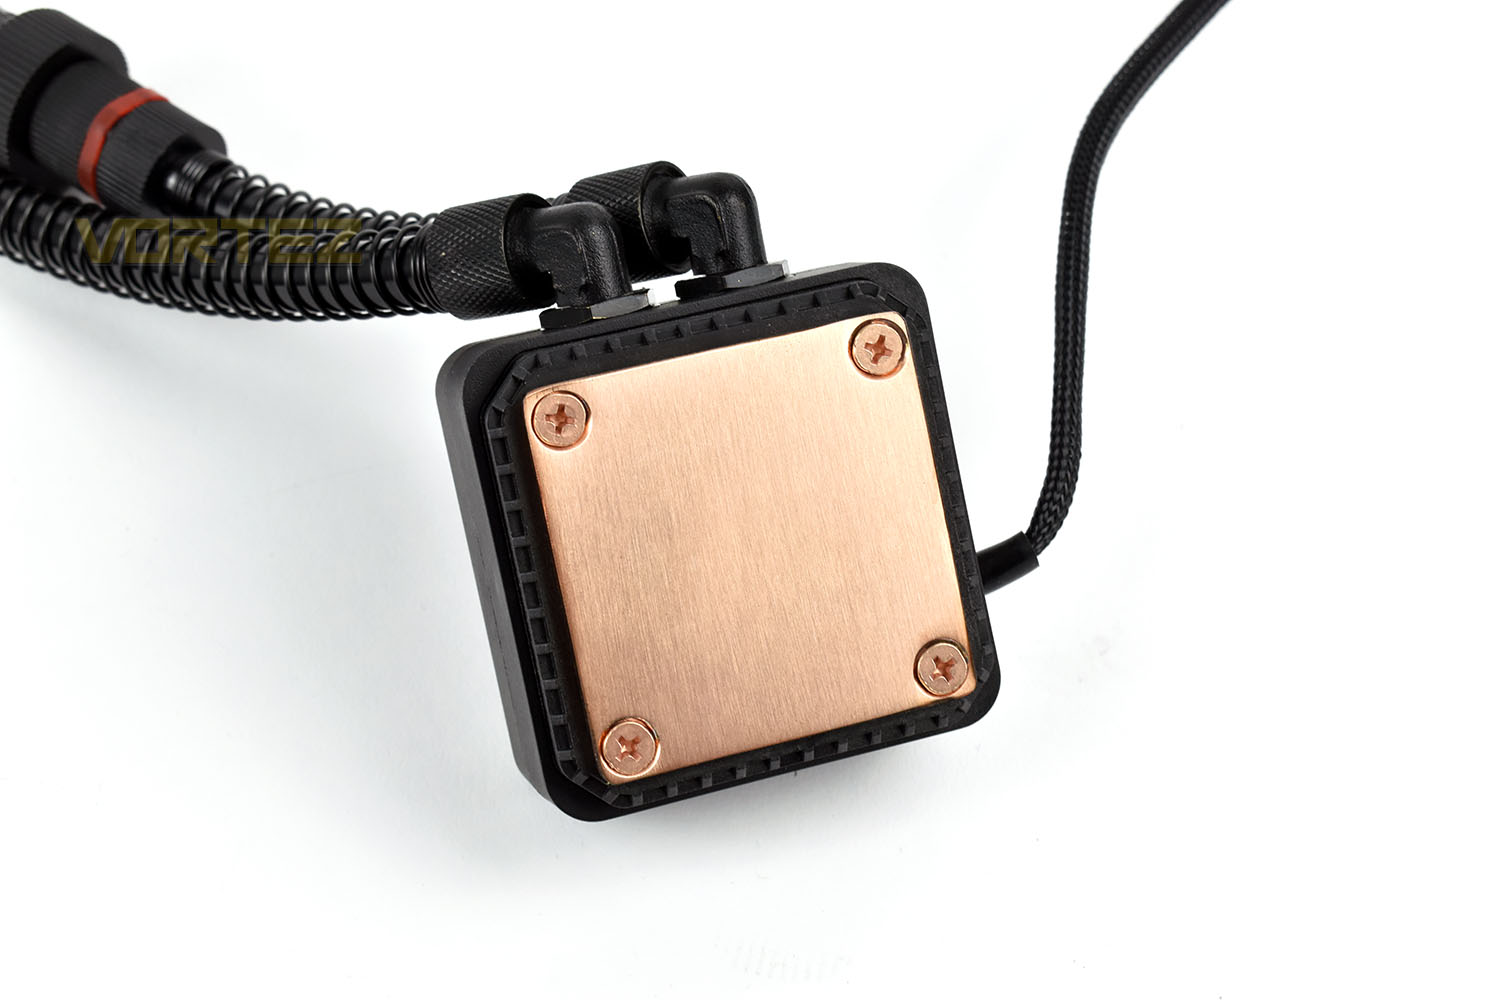
The cold plate on the bottom is a solid piece of copper, with copper screws holding things in place.
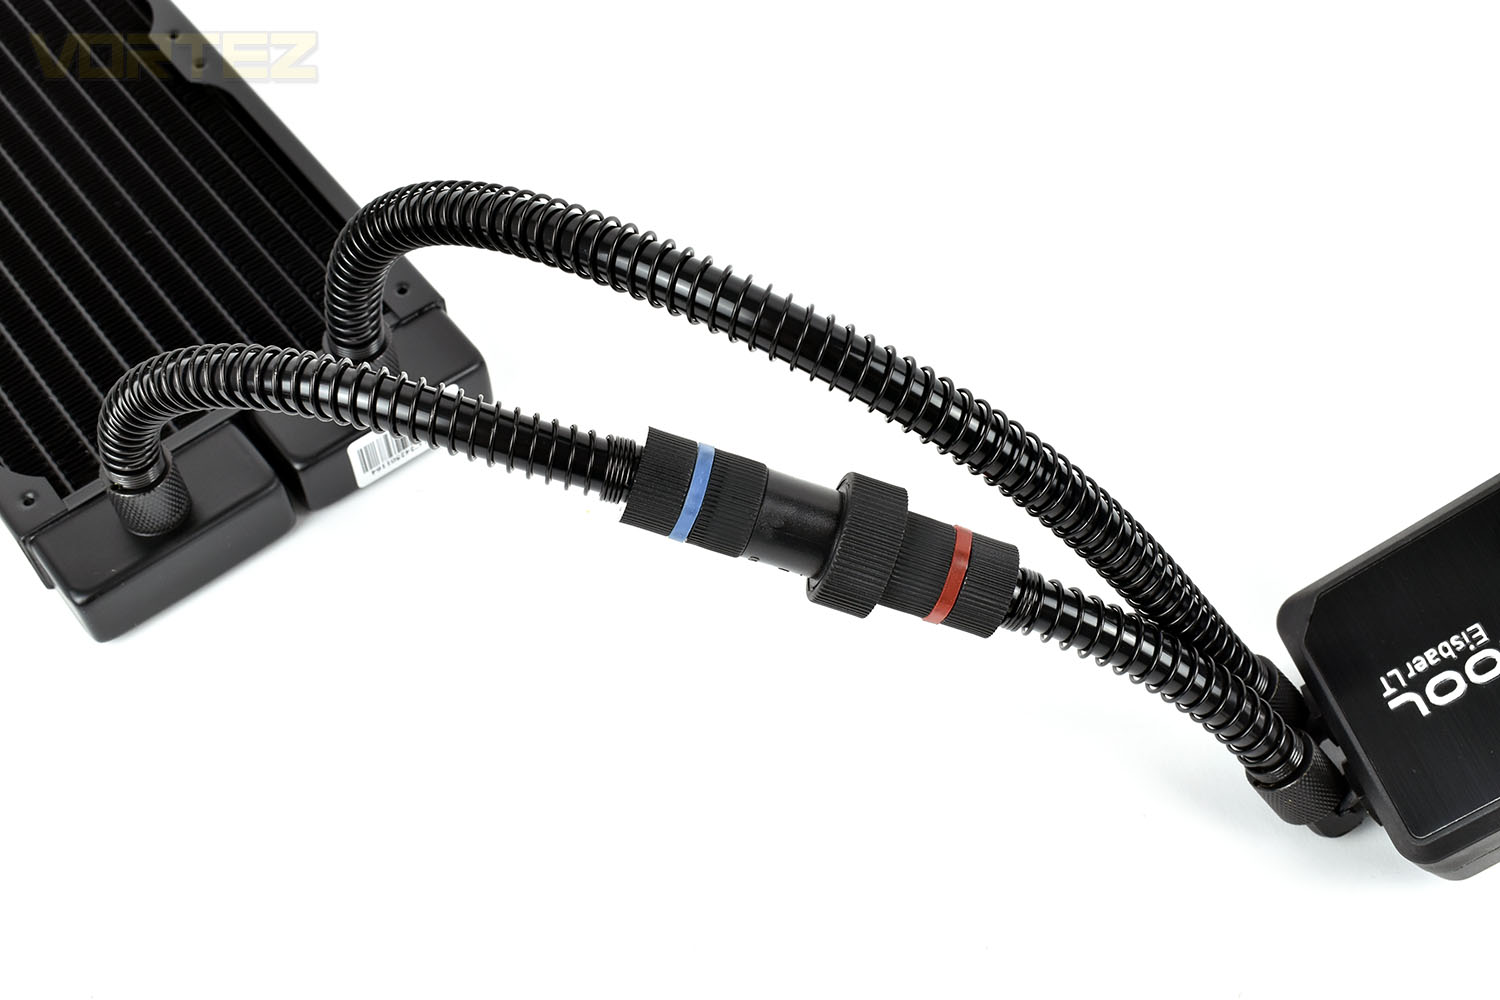
Forming a connection between the pump enclosure and 240mm radiator is a pair of anti-kink pipes. One of the tubes obviously differs from the other with the quick release G1/4” connection, allowing you to add in components quickly and easily.
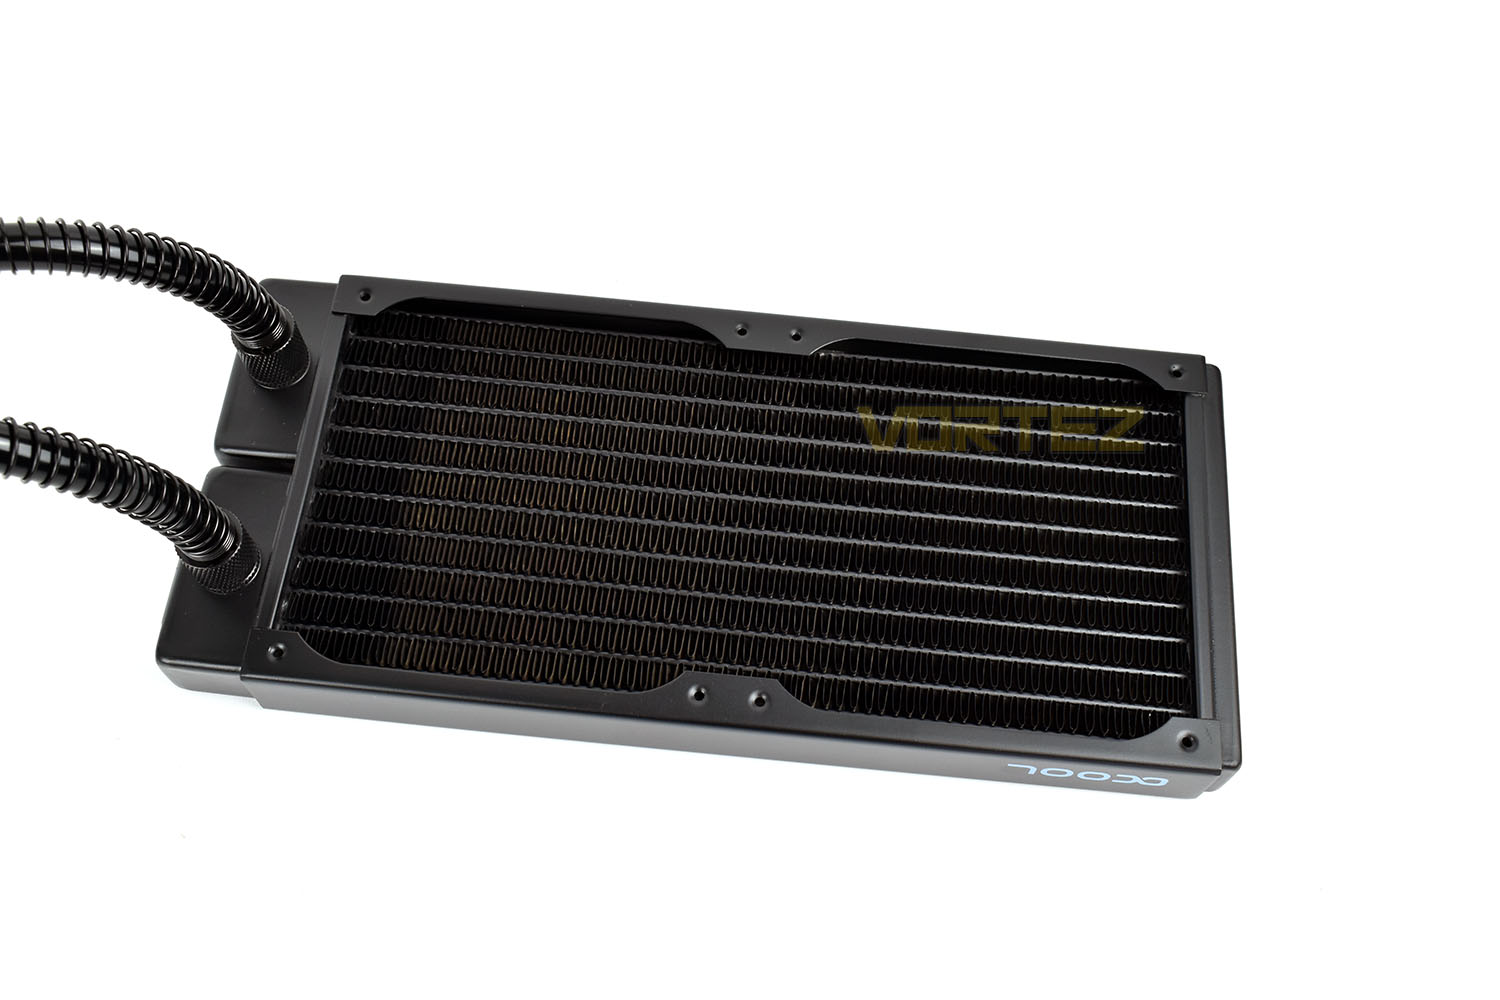
The radiator, constructed entirely from copper for better heat transference, is only 25mm thick, or roughly as thick as a typical case fan. You can actually see the copper colour through the thin paint on the radiator fins in the centre.
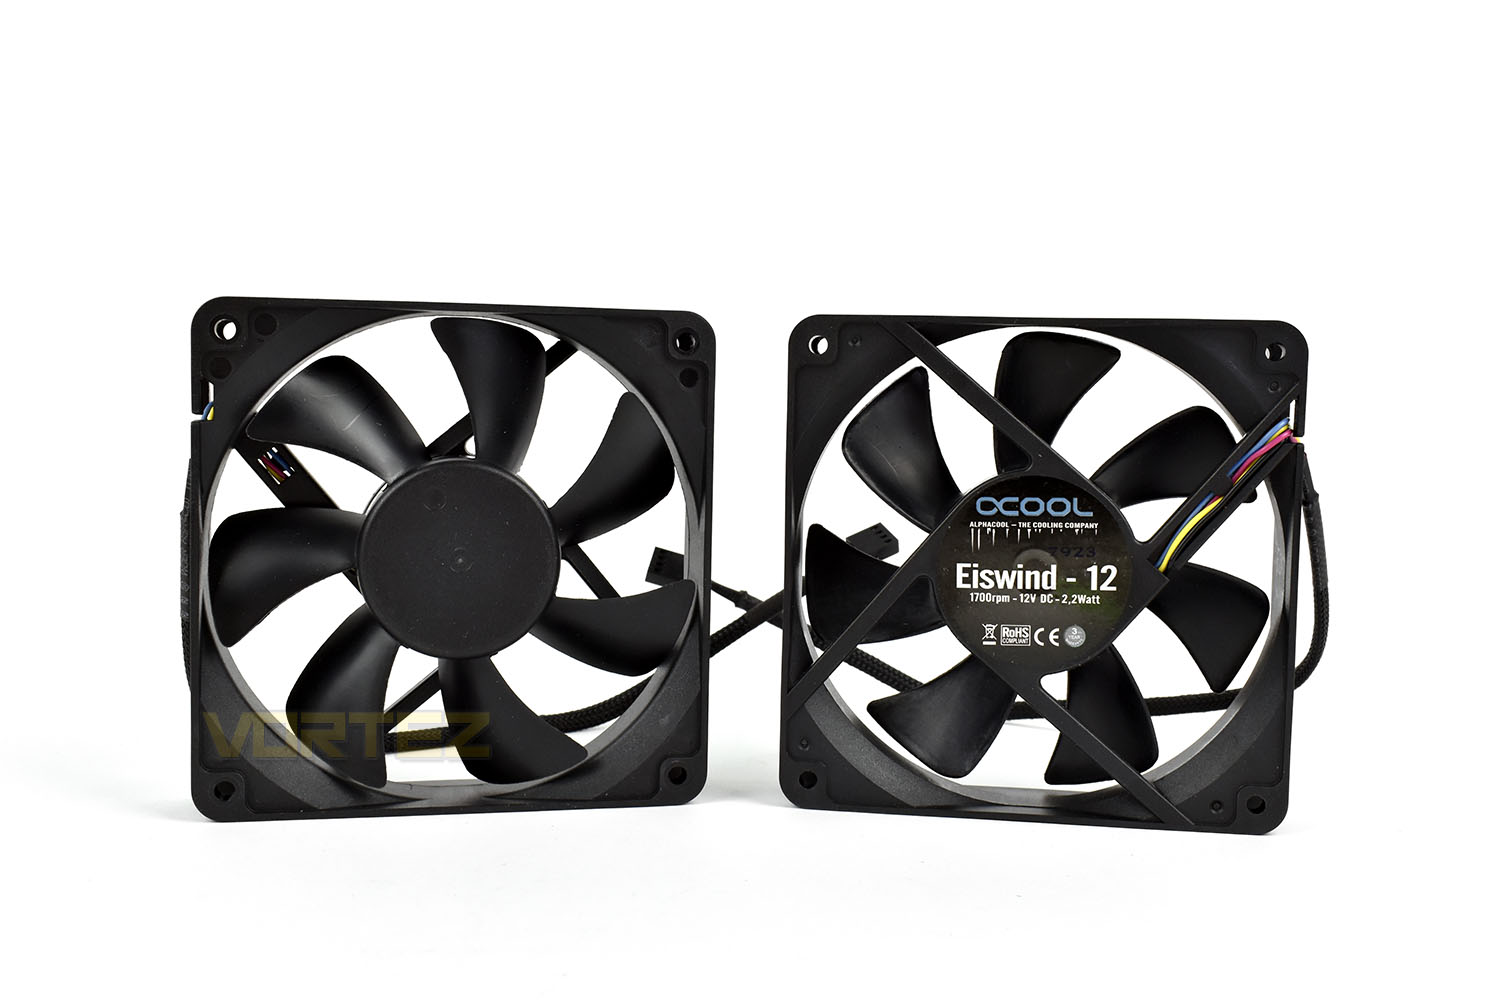
The pair of Eiswind 120mm case fans sport 7 fins each with a fairly tight lip clearance from the enclosure, but again, no RGB lighting here either, helping to keep costs down as well as maintaining a clean and simple aesthetic.
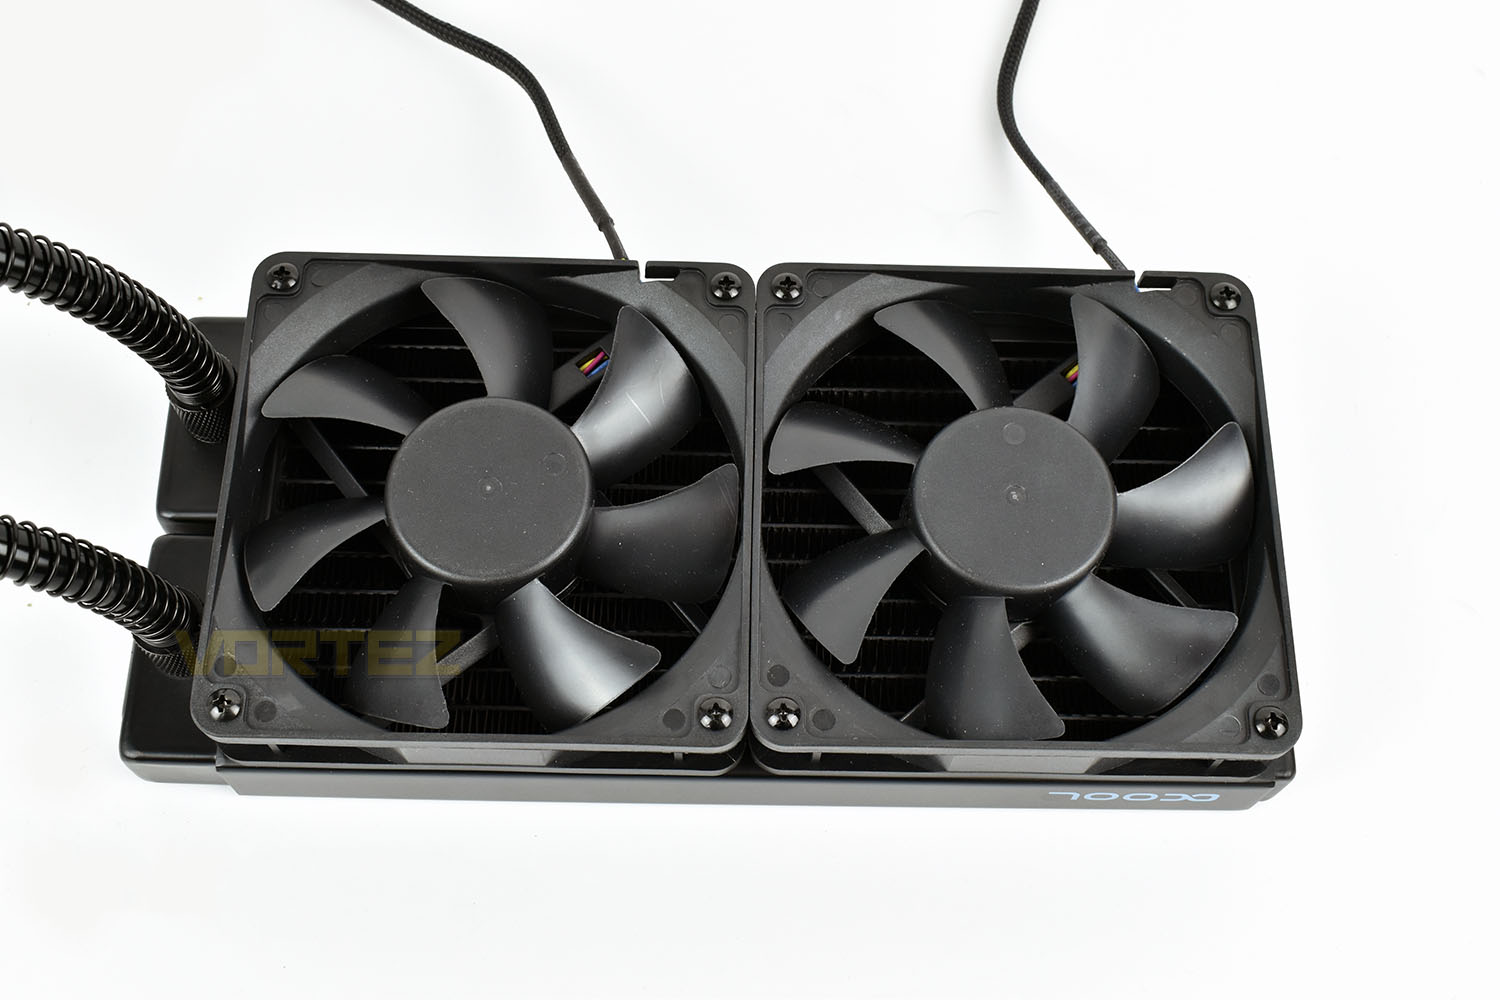
Finally, attaching the fans with the included screws, the simplicity of their design sadly makes the cooler appear a bit cheap and nasty. An Alphacool sticker in the centre hubs would’ve been an improvement, at the very least. Also, if you look carefully, you can see that the fans aren’t quite true to each other, meaning the mounting slots haven’t been machined perfectly.
Installation
The first part of the installation is clipping into place the relevant AMD or Intel brackets into the channels around the pump/CPU block. These are locked into place using tight tolerances, rubber inlays and a jigsaw style lock at the meeting point of each piece.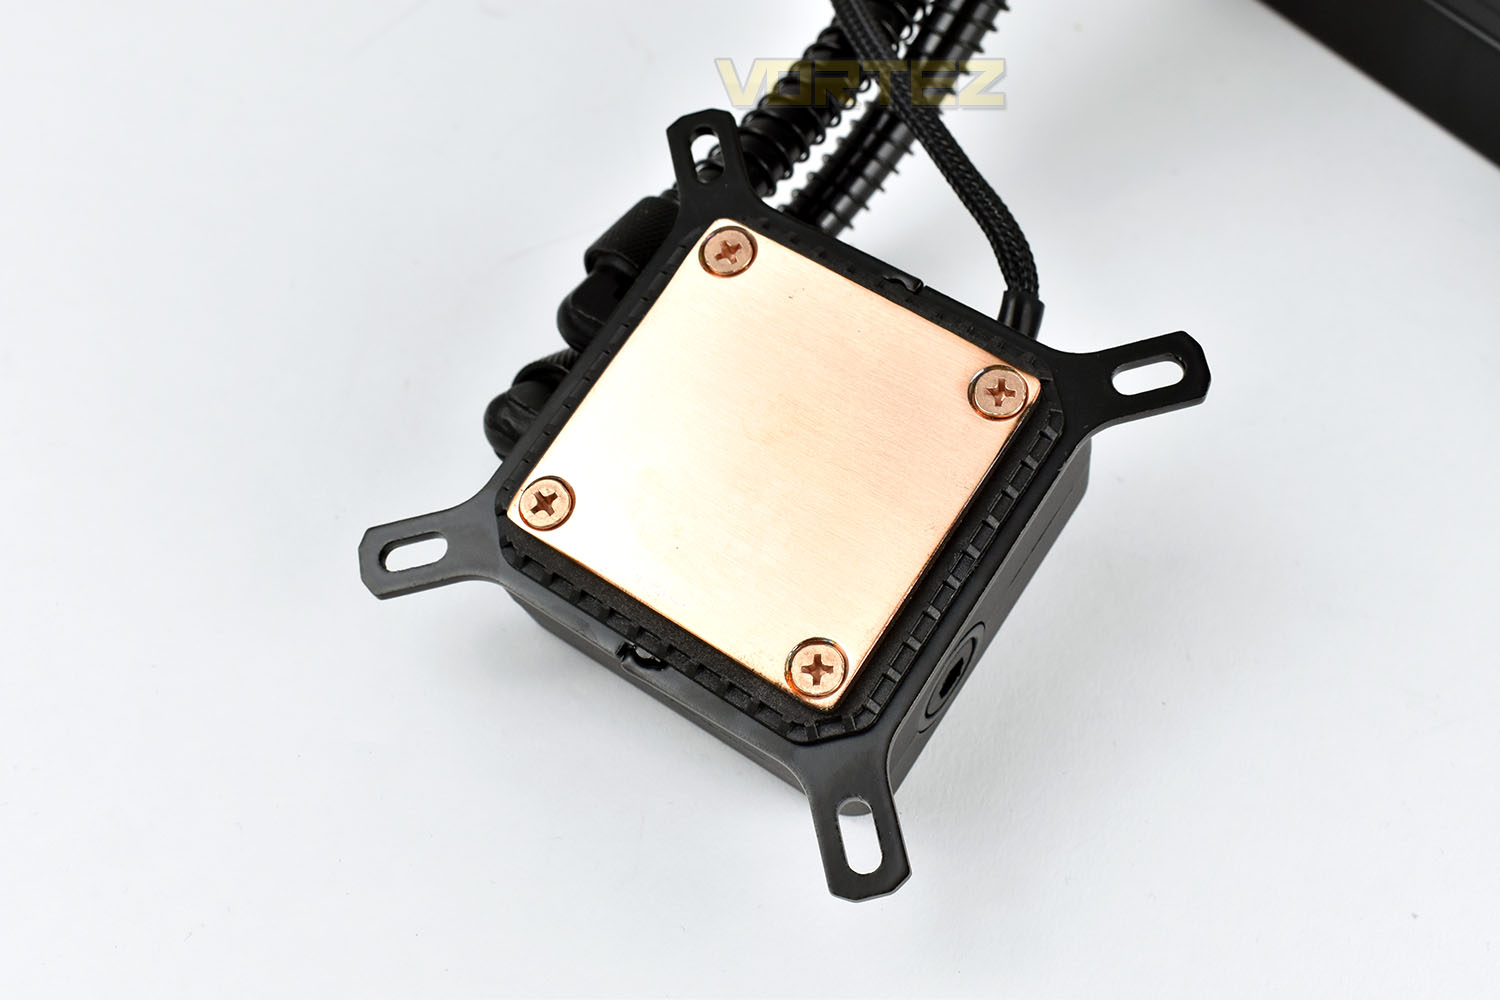
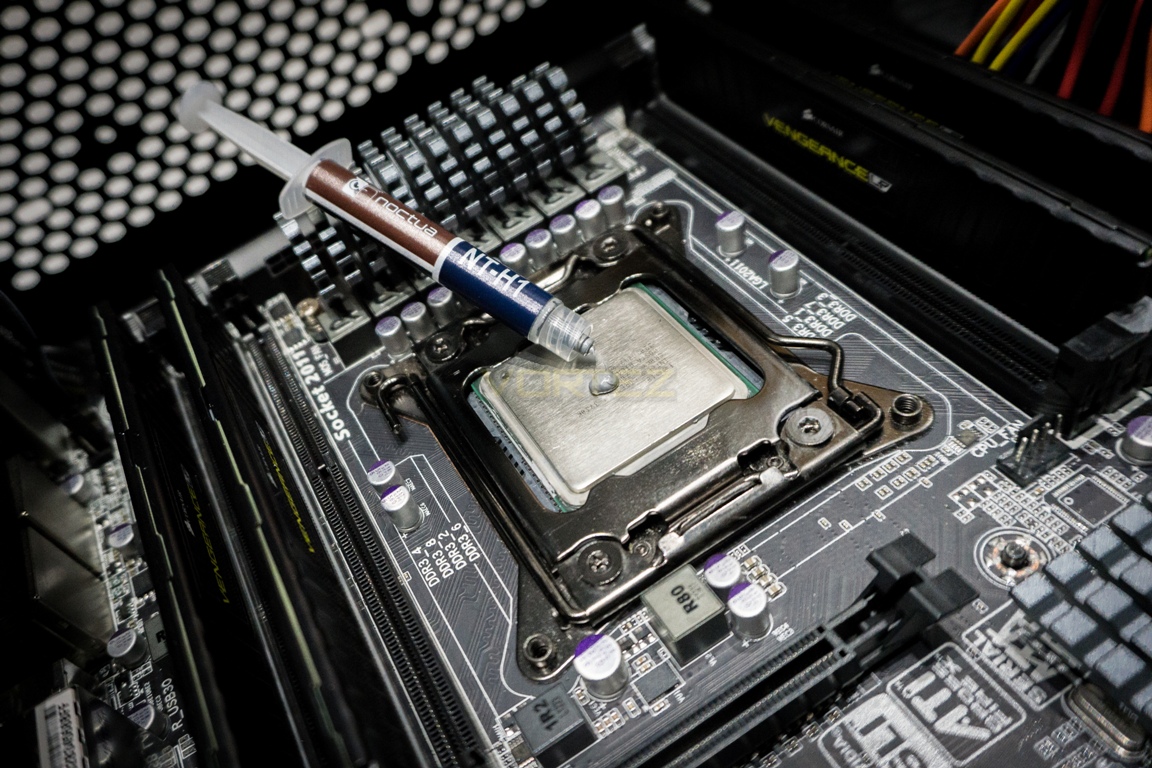
Next up is installing the thermal paste. Alphacool provide a tube of their own specific formula, but as regular readers will know, we stick to using Noctua’s NT-H1 paste to ensure our tests are as fair and comparable as possible.
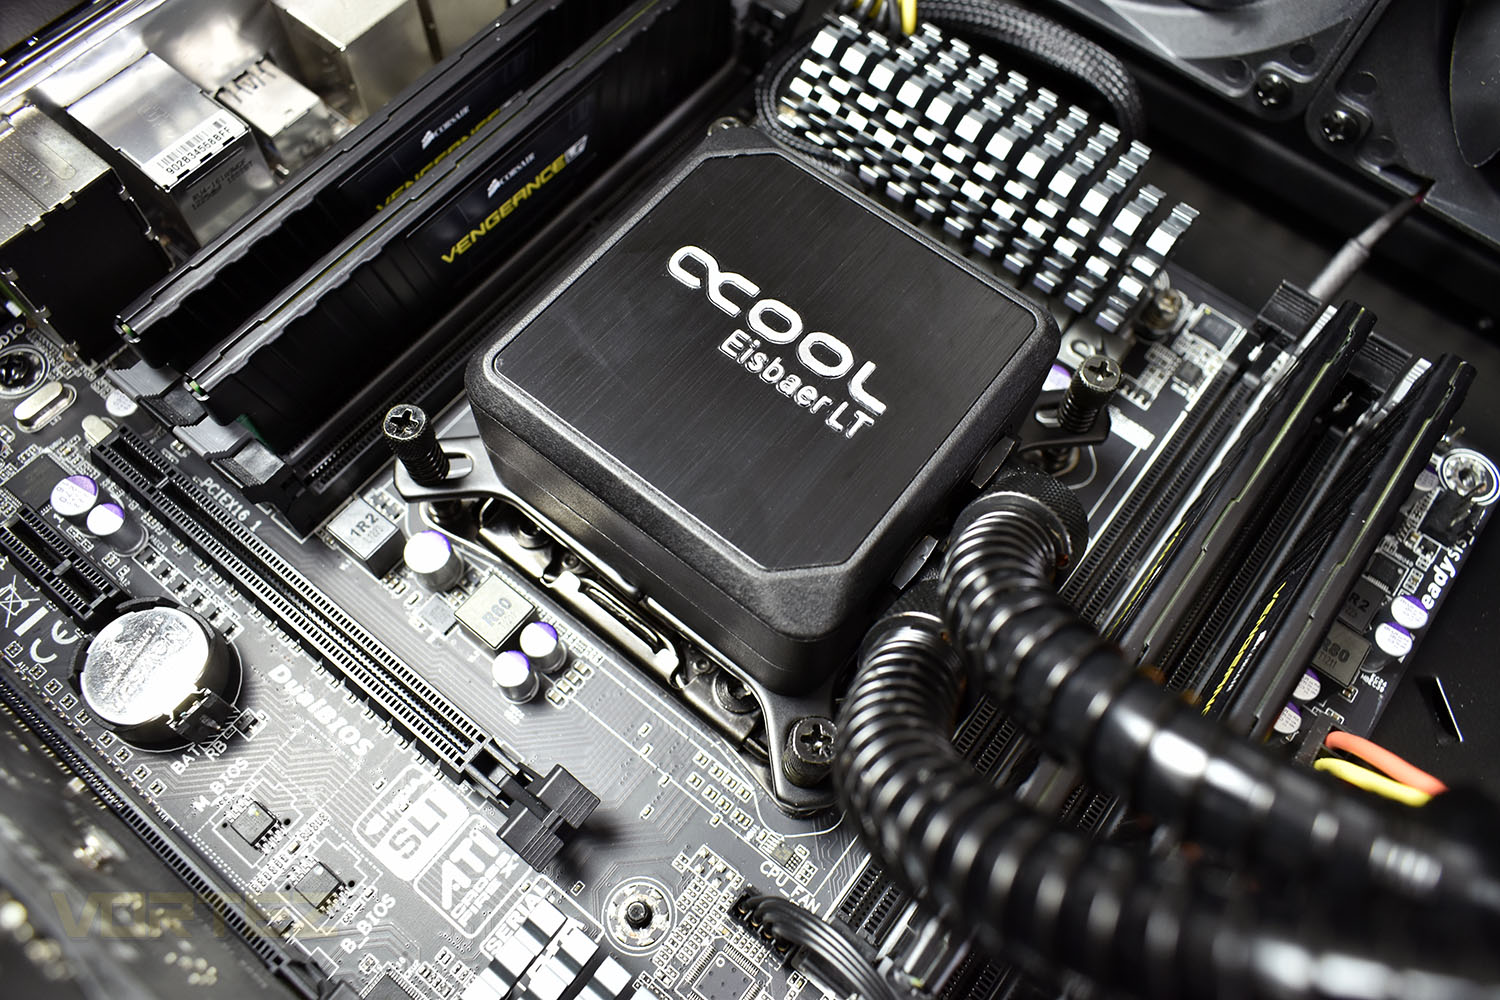
Installing the pump enclosure is a simple task, requiring you to insert the screws through the included springs and then hand-tighten to the socket. Alphacool obviously include back plates for both AMD and Intel sockets. It’s then just a case of tightening up the mounts as evenly as possible, though the screws do some of that work for you, helping to average out the load.
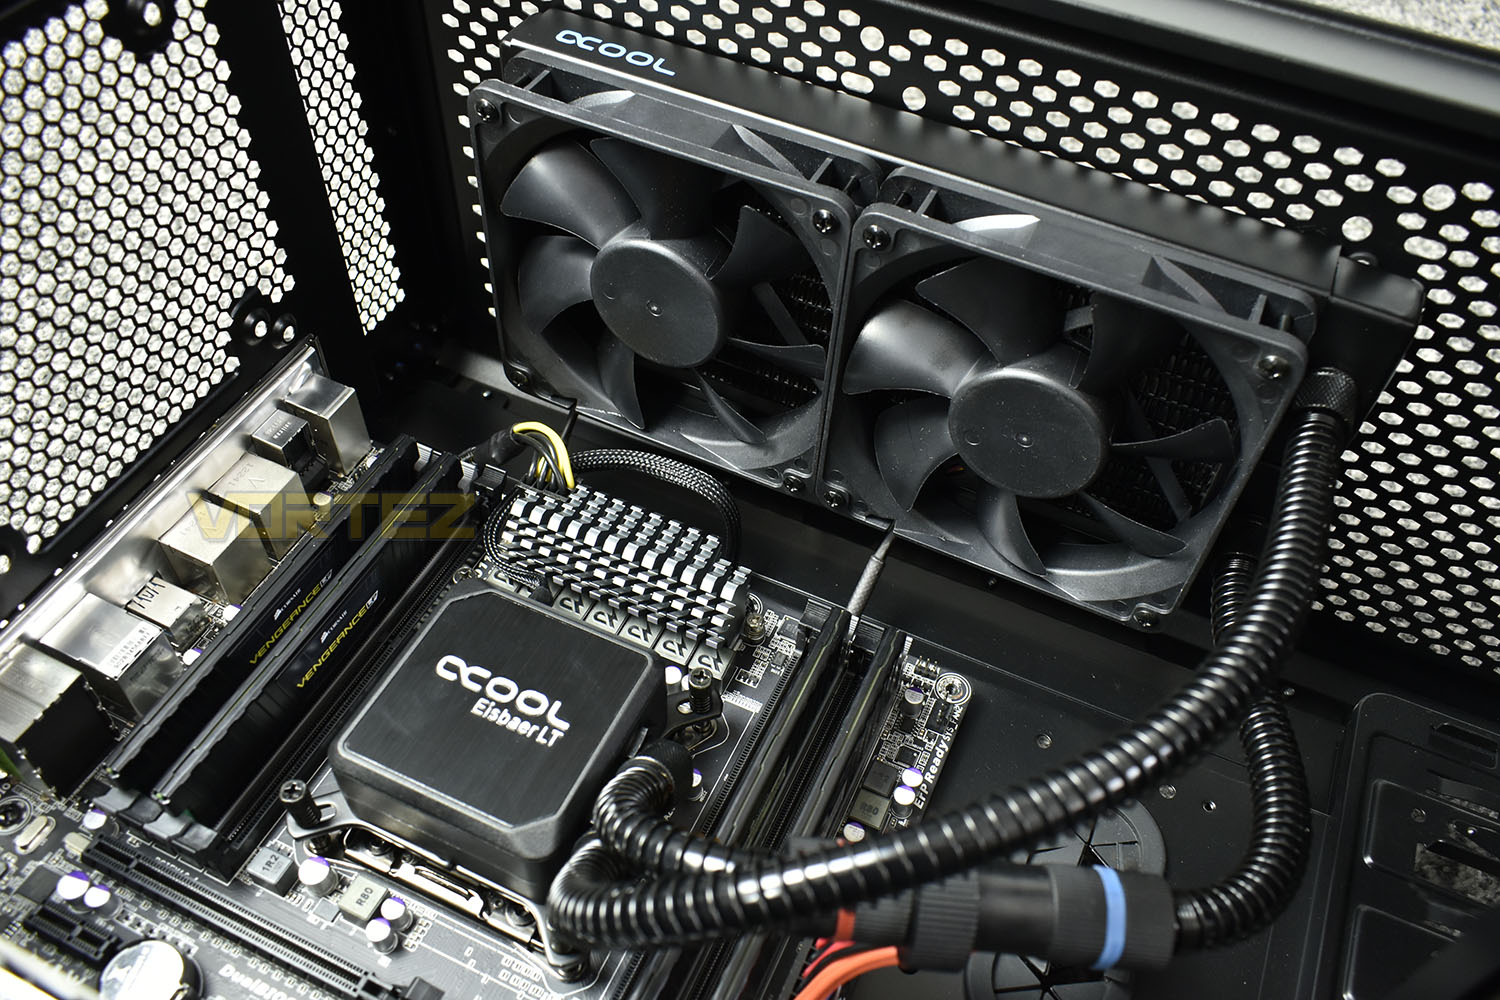
Finally, to mounting the radiator in the roof of the case. This is the exact same process as any other radiator, with 8 small screws fixing it to the 240mm slot on our Corsair chassis.
Test Setup & Methodology
We have recently made changes to our cooling department and the associated testing methodology, so please note that the number of results shown will increase over time as we add additional products. We hope that these results will appear clearer to the majority of our readership and look forward to building upon the baselines that we currently have.We perform two individual testing routines with each CPU cooler that we receive – temperatures and acoustics. The system used is as follows and all tests are performed at stock 3.8 GHz and overclocked 4.4 GHz frequencies.
Processor – Intel Core i7-3930K
Motherboard – Gigabyte X79-UP4
Memory – 8GB Corsair Vengeance LP 1600MHz CL9
Video Card – Sapphire Radeon HD 6850 1GB
Power Supply – NZXT Hale90 650W
Storage Drive – Kingston HyperX 240GB SATA III SSD
Case – Corsair Carbide 760T
Monitor ASUS ROG SWIFT PG278Q
Motherboard – Gigabyte X79-UP4
Memory – 8GB Corsair Vengeance LP 1600MHz CL9
Video Card – Sapphire Radeon HD 6850 1GB
Power Supply – NZXT Hale90 650W
Storage Drive – Kingston HyperX 240GB SATA III SSD
Case – Corsair Carbide 760T
Monitor ASUS ROG SWIFT PG278Q
To keep our tests consistent, we always review CPU coolers as they come out of the box – with their factory cooling fans, as the manufacturer intended and as the consumer expects. It should, however, be noted that we do not use supplied thermal paste but instead, Noctua NT-H1 paste to, again, ensure consistency. The paste is applied and the CPU allowed to run for a couple of hours, at idle, to give the thermal compound some time to “bed in.”
In the first test, we record idle and load temperatures as shown by the most current version of the Real Temp monitoring utility. The test system is booted to the Windows desktop and left to idle for 20 minutes to ensure temperatures have stabilised. The average core temperatures are then recorded over a 1 minute period and averaged across the six cores. We then perform a continuous 20 minute AIDA 64 stress test. The maximum absolute core temperatures are recorded immediately after the test has completed and averaged across the six cores. All results are displayed as delta temperatures – these are calculated by subtracting the ambient room temperature from the average core temperatures recorded. For temperature testing, the Corsair 760T chassis door is closed and has all three systems fans powered on to simulate real-world conditions.
Our second test follows a similar methodology to the first, with the key difference being that the Corsair 760T chassis door is now left open and all three systems fans are disabled. This allows for the CPU cooler fans acoustic profiles to be captured in isolation. From cold, the system is again booted to the Windows desktop and left to idle for 20 minutes to ensure temperatures have stabilised. The acoustic level is then recorded at a distance of 20cm from the CPU cooler and where the individual result is an average level over a 1 minute period. We then perform our continuous 20 minutes AIDA 64 stress test. Acoustic levels are again recorded at a distance of 20cm from the CPU cooler and where the individual result is an average level over a 1 minute period.
Benchmarks – Thermal Results
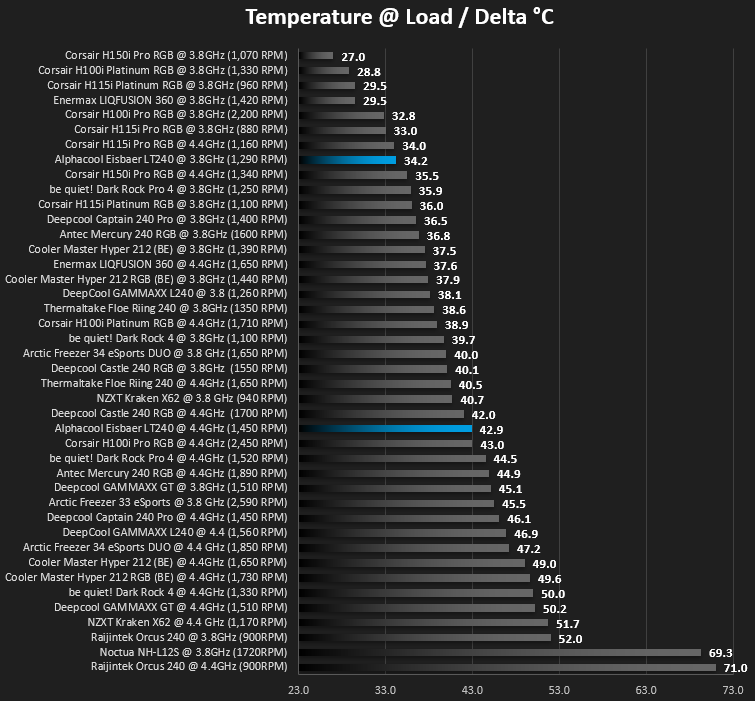
As mentioned on the previous page, we give the system a couple of hours to bed in, as we do with all of our cooling system reviews, to ensure things are as even and fair as possible. It also helps to give the system some time to equalise so that temperatures are normal and the CPU isn’t working on anything in the background, such as searching for updates.We then take an idle reading, both at 3.8GHz and our overclocked 4.4GHz profiles.
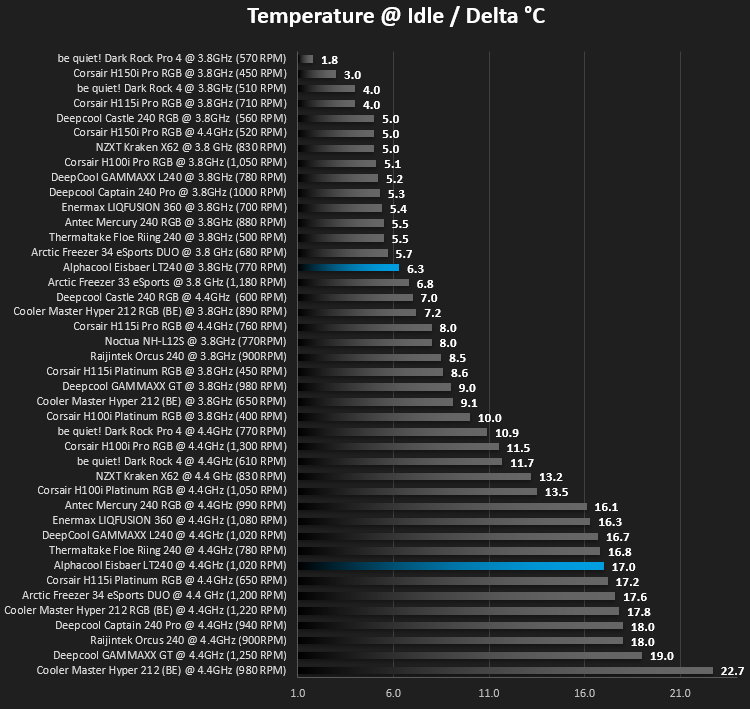
It’s then given a blast of 20 minutes with AIDA 64 and measure the temperatures again, taking a reading over 60 seconds then averaging across the six cores.
Benchmarks – Acoustic Results
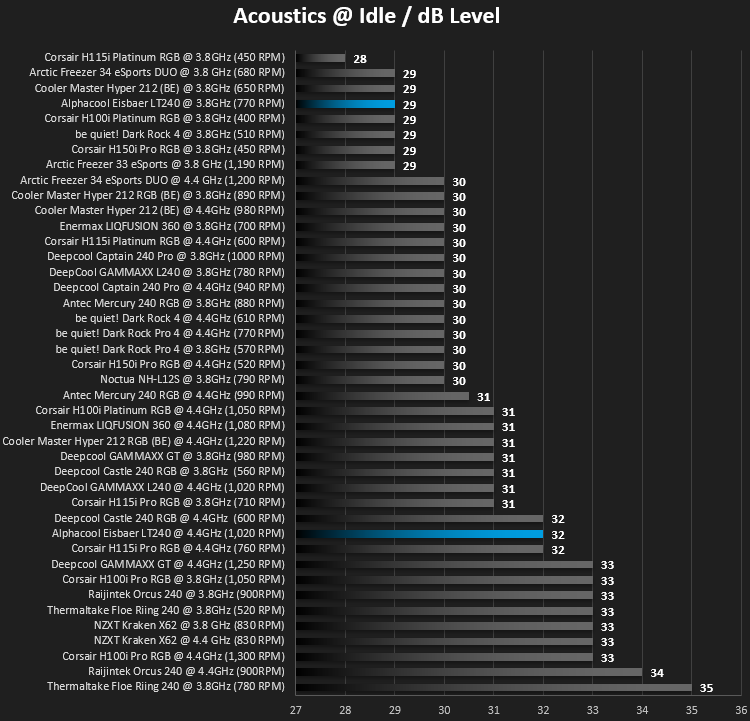
Moving onto acoustics, we take a measurement of the fan output at the same time as the temperature readings.We measure the noise output with the system at rest.
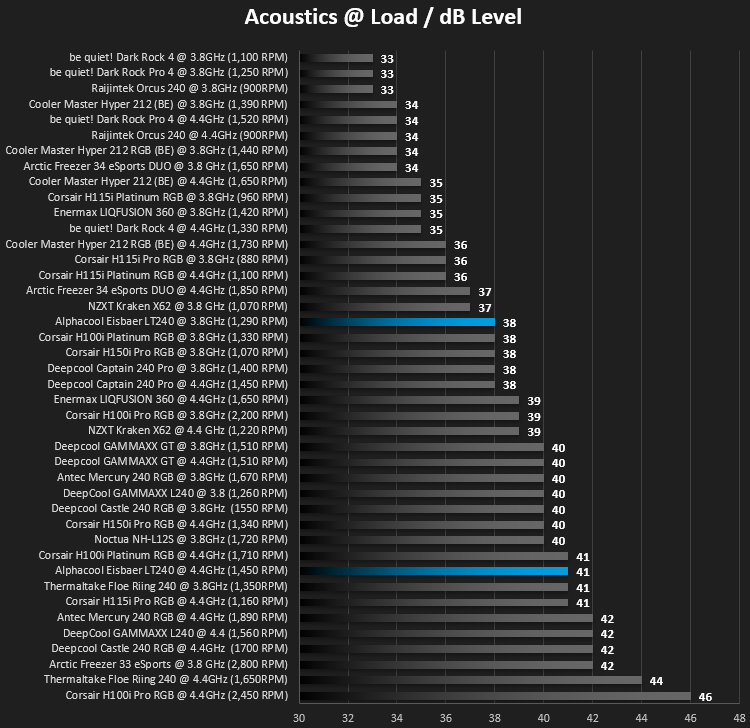
Then once the 20 minutes of AIDA 64 comes to an end, we measure the CPU temperature over 60 seconds and take the noise measurement below.
Conclusion
With this being the first Alphacool product we’ve looked at for several years, we weren’t entirely sure of what to expect, so as ever, we went into it with a totally open mind and found ourselves pleasantly surprised on the whole.First off, installation and assembly was simple and straight forward, aided by clear and concise instructions and good quality screws and fittings. The Eiswind fans not quite lining up is purely an aesthetic problem and won’t cause any difference in performance but it does bring into question, almost at the very start of the assembly process, as to whether corners have been cut to keep the total cost down.
Performance was a bit of a mixed bag; looking at acoustics first, considering the 135W TDP of the Core i7 3930K, the cooler does a great job keeping this quiet at stock speeds, raising to no more than 38 dB(A) after 20 minutes of AIDA 64’s stability test, however, once overclocked to 4.4GHz, which sees power usage rise to around 170W, things do get a little noisier at both idle and load, though still better or equal to more expensive coolers. Temperatures, on the other hand, are coped with remarkably well for a 240mm radiator, there’s not much that beats it while also remaining below it in the acoustics graph. This could likely be attributed to its all-copper construction.
Finally, the overall build quality feels decent, particularly for the cost of the loop including the quick release tubing connection. The pump housing feels solid and looks great with the brushed steel insert on the top. The fans, however, aren’t quite up to scratch, they both look and feel cheap.
Good news for those who still don’t like RGB lighting, you won’t find a single LED on this loop! You can decide if that’s a pro or con.
One last note, the addition of the quick release connection gets a creative award from us; we’ve not seen this on a cooling loop before and really enjoy the idea of adding in extra parts in the future.
Overall, the Eisbaer 240LT offers very good performance for a reasonable price, and with the option to add in extra hardware further down the line, this could be a good stop-gap for users hoping to step into the world of custom loops.
Pros
+ Good performance
+ Decent audible levels
+ Easy to install
+ No RGB
+ Anti-kink tubing for small builds
+ Quick connectors for easy expansion
Cons
– No RGB
– Fans aren’t straight when installed
– Eiswind 120mm fans look and feel cheap
+ Good performance
+ Decent audible levels
+ Easy to install
+ No RGB
+ Anti-kink tubing for small builds
+ Quick connectors for easy expansion
Cons
– No RGB
– Fans aren’t straight when installed
– Eiswind 120mm fans look and feel cheap
Click here for an explanation of our awards at Vortez.net.
Stay connected with the Vortez Social Media pages: