







Featuring dual water pumps, dual 120mm cooling fans and a large 280mm radiator – can this new AIO beat all other liquid CPU coolers we have yet tested?

Product on Review: KUHLER H2O 1250
Manufacturer and Sponsor: Antec
Street Price: £95
Antec has been a forerunner in the computing industry since the 1980s and are well-known for their reliable power supplies, interesting computer chassis and performance related cooling products. Just recently Antec’s KUHLER H2O product line has been refreshed with a plethora of interesting new liquid CPU Coolers and today we are to look at the biggest unit within the series, 1250.
Antec’s new KUHLER H2O 1250 is a AIO featuring a 280mm radiator and dual 120mm cooling fans. Antec has turned the tables with 1250 by including two pumps, mounting to the cooling fans in a bid to maximise cooling potential. It doesn’t end there either, the water block has a handy RGB LED on the CPU block which can be adjusted via Antec GRID software.
Antec on their KUHLER H2O 1250
The Antec KÜHLER H2O 1250 provides maximum-performance liquid cooling for your CPU and delivers best-in-class performance in a quick, easy-to-install package. Unlike traditional liquid cooling systems, this self-contained unit comes prefilled and requires no maintenance. Two 120 mm voltage-controlled (PWM) fans and dual extra-large pumps ensure quiet, efficient cooling, while the 240 mm radiator maximizes cooling surface area to dissipate heat from the highest performance CPUs on the market. Lastly, the included Antec Grid™ software helps you monitor and control the Antec KÜHLER H2O 1250’s performance and allows you to customize its stylish RGB LED. Designed to unlock the maximum potential of your CPU, the Antec KÜHLER H2O 1220 delivers exceptional cooling when you need it the most.
Technical Specifications
Fan Speed
600 – 2400RPM
Radiator Dimensions
280mm x 120mm x 27mm
Fan Dimensions (2 total)
120mm x 25mm x 27mm
Cold Plate + Pump Height
26mm
Tubing Length
300mm
Cooling Liquid
Safe, environmentally-friendly, anti-corrosive
Weight
1.3kg
Warranty
3 years
600 – 2400RPM
Radiator Dimensions
280mm x 120mm x 27mm
Fan Dimensions (2 total)
120mm x 25mm x 27mm
Cold Plate + Pump Height
26mm
Tubing Length
300mm
Cooling Liquid
Safe, environmentally-friendly, anti-corrosive
Weight
1.3kg
Warranty
3 years
Packaging & Bundle
1250 arrives in a bright and colourful box which has an artistic depiction of the cooler on the front and lists all supported sockets. On the sides and back there is information surrounding the performance and technical specifications of the cooler.
Inside, all components are sat inside an eggshell type box. The cooler itself is covered in a clear plastic sheet with padding to prevent the fans from spinning.
Packaging for KUHLER H2O 1250
Since 1250 is compatible with multiple socket types there are mounting components for both AMD and Intel options. The supported sockets include:
Intel LGA 775, 1150, 1155, 1156, 1366, 2011
AMD AM2, AM2+, AM3, AM3+, FM1, FM2
Accompanying the components is an instructions guide for installing the cooler and a CD which has Antec GRID software – this software allows the fan speed and lighting to be modified.
Support for multiple sockets
Closer Look
1250 utilises a 280mm radiator and two 120mm cooling fans are actually already mounted to the radiator, along with two dedicated water-pumps. The tubes which carry the liquid connect and route between the radiator-block and pump-block. This is a step away from typical AIO coolers which usually have the pump mounted the block as one unit.
When we approached Antec about changing the cooling fans they said to us that with this model if the fans fail, the whole unit will need to be RMA’d. They hinted at the next version having the option to swap out the cooling fans.
Dual 142mm cooling fans with integrated pumps
1250 uses a large 280mm radiator
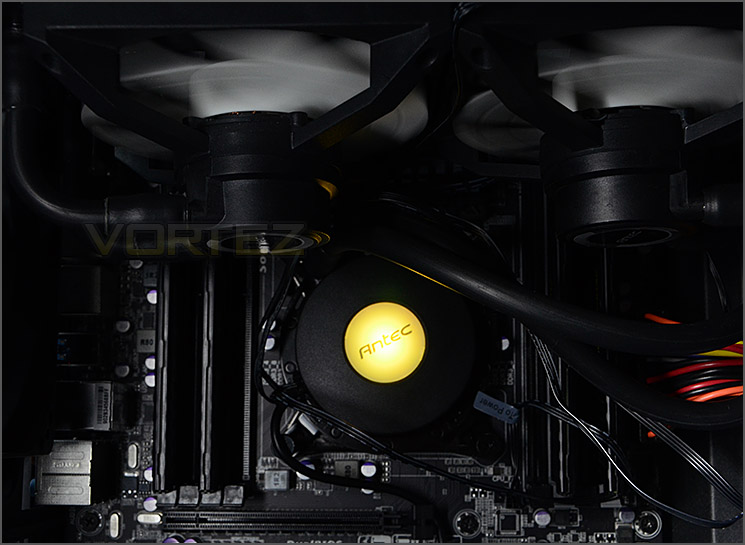
Due to the pumps being mounted to the cooling fans, the CPU block can employ a low-profile design. The top side has the Antec logo which sits on an RGB LED – this can be modified within Antec GRID software to a colour of your preference.
Since there is PWM and LED functionality it is necessary to have a series of cables (Y-cable, fan cables, pump power and USB header). This perhaps one of the niggles or drawbacks of 1250, because it can be tedious having to tuck these cables away and have them trailing across the motherboard.
The underside of the CPU block uses a copper baseplate which has pre-applied thermal compound paste for out of the box usage.
RGB lighting for the top of the CPU block
Copper baseplate and pre-applied thermal compound paste
ANTEC GRID Software
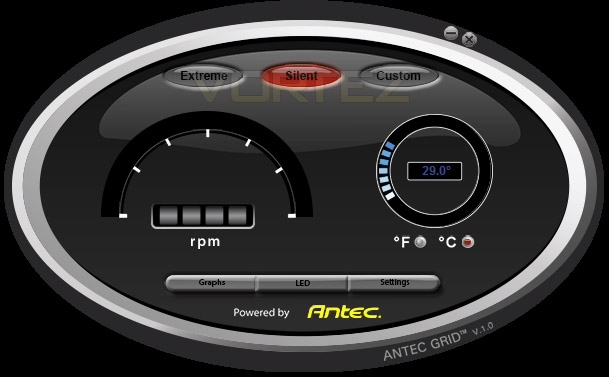
Antec include a software CD with 1250 which allows the temperatures to be monitored, fan speeds to be controlled and RGB LED lighting to be customised. There are three options for the fan speed management ‘EXTREME’, ‘SILENT’ and ‘CUSTOM’. If you are looking for the best performance then Extreme is the option to go with. If you are keen to maintain low-noise then silence is the better option in this case and then with the Custom setting you can actually specify what speed you would like the fans to run at.
During our testing of GRID, the software performed inconsistently – working on some occasions and not working on others. Due to this we were unable to obtain any screenshots of the other pages. You can see GRID below – showing no figures for the fan speed (which it displayed when it didn’t work).
Installation Process
In order to demonstrate the installation process for 1250 we are installing the cooler on the Intel LGA2011 socket.
The first step in the processing of installing 1250 is to attach the bracket to the CPU block. This bracket can be switched between AMD or Intel socket type, attaching the bracket can be tricky whilst trying to keep the arms in the set position as they are a little loose with the fitment.
Socket bracket is attached firstly
Next, the radiator needs to be attached to the computer chassis. For all our tests we use the Corsair 500R, so there is allocation at the top for mounting different sized radiators including 280mm. Unfortunately the heatsinks on our test motherboard – GIGABYTE X79-UP4 collides with 1250’s fans/pumps, pushing the mounting holes on the radiator away from the case. The combination of pump and fan extend to 10cm but the distance which causes obstruction is 5cm. As a result, we had to tie the radiator into place in order to complete testing.
Mounting holes do not line up due to motherboard heatsink obstruction
The offending heatsink
The last stage in the process is to apply the four LGA 2011 screws between the bracket arms and the motherboard. It’s advisable to complete one turn for each screw and in a diagonal process in order to apply even pressure.
1250 installed on LGA 2011 motherboard
Overall, we’re slightly concerned that our combination of hardware prevented 1250 from being installed properly, with mounting screws. This problem is due to the sheer size of the fans/pumps – the heatsink on the LGA 2011 motherboard is actually quite average in size.
Installed – Memory Clearance
Even though our radiator was at a slightly different position due to it being tied into place as opposed to using the mounting holes, we can still observe the memory clearance. We have used low-profile modules to demonstrate clearance limitations.
There is approximately 2-3cm of space above this low-profile memory kit between the modules touch the 1250 cooling fan. Bearing this in mind, we recommend using a low-profile kit with 1250.
We advise using a low-profile memory kit
Test Setup & Methodology
Test System
CPU – Intel Core i7-3930K (3.6GHz)
Motherboard – GIGABYTE X79-UP4
Memory – 8GB Corsair Vengeance LP 1600MHz CL9
Graphics – Sapphire Radeon HD 6850 1GB
PSU – NZXT Hale90 650W
Hard Drive – Kingston HyperX 240GB SATA III SSD
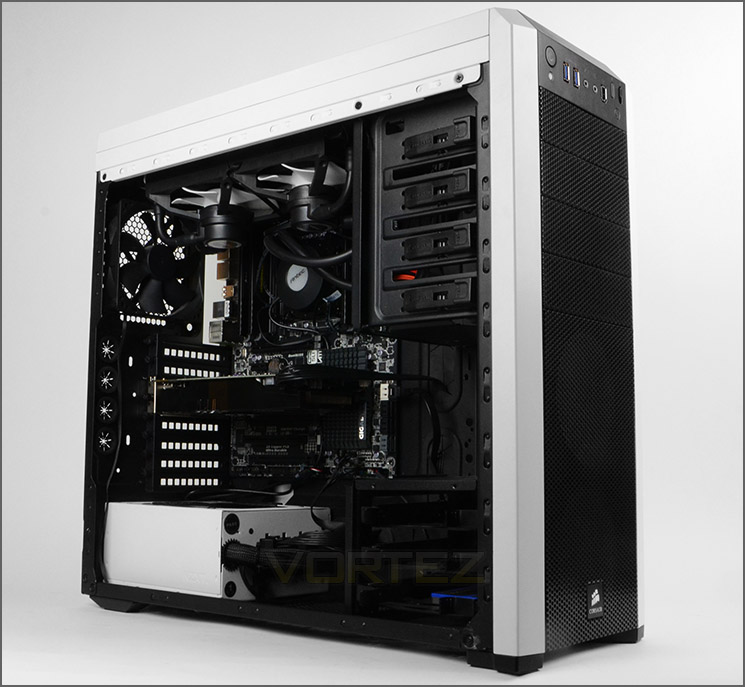
Case – Corsair Carbide 500R White
Motherboard – GIGABYTE X79-UP4
Memory – 8GB Corsair Vengeance LP 1600MHz CL9
Graphics – Sapphire Radeon HD 6850 1GB
PSU – NZXT Hale90 650W
Hard Drive – Kingston HyperX 240GB SATA III SSD
Case – Corsair Carbide 500R White
CPU Coolers
Alpenföhn Matterhorn Pure(120mm Wingboost: 300-1200RPM)
Alpenföhn K2 (120mm Wingboost: 500-1500RPM, 140mm Wingboost: 300-1100RPM)
Alpenföhn Gotthard (140mm Wingboost: 300-1100RPM)
Noctua NH-D14 (120mm NF-P12 PWM + 140mm NF-P14 PWM: up to 1200RPM)
Thermalright SilverArrow SB-E Extreme (Dual TY-143 fans – 600-2500RPM)
Corsair Hydro H100 (Dual 120mm fans – low: 1300RPM, mid: 2000RPM, high: 2600RPM Push Config)
SilverStone HE01 (140mm PWM fan – 500RPM-1200RPM – 500RPM-2000RPM)
be quiet! Dark Rock Pro 2 (135mm + 120mm PWM Fans – up to 1500RPM and 1700RPM)
Thermaltake Water 2.0 Pro (Dual 120mm PWM fans – up to 2000RPM)
Corsair Hydro Series H100i (Dual 120mm fans – up to 2700RPM Push Config)
Be Quiet! Shadow Rock TopFlow(1x 135mm PWM fan – up to 1500RPM)
SilverStone HE02 (Passive – optional fan used: Noctua NF-F12 120mm PWM)
Corsair H55 (Single 120mm fan – 1700RPM Exhaust Push)
Cooler Master Seidon 120M (Single 120mm fan – Up to 2500RPM Exhaust Push)
Zalman CNPS11X Extreme (Single 120mm fan – Up to 1950RPM)
Phanteks PH-TC12DX (Dual 120mm fans – 600-1800RPM)
Noctua NH-U14S (Single 140mm cooling fan – 300-1500RPM)
SilverStone TD03 (Dual 120mm fans – 1500-2500RPM)
Thermaltake]Thermaltake NiC C5 (Dual 120mm fans – 1000RPM – 2000RPM)
Raijintek EreBoss (Single 140mm fan – 1100RPM – 1600RPM)
GamerStorm Lucifer (Single 140mm fan – 800-1500RPM)
Cooler Master V8 GTS (Dual 140mm fans – 600-1600RPM)
Antec KUHLER H2O 1250 (Dual 120mm cooling fans – 600-2400RPM)
Program Suite
Real Temp – Maximum temperature analysis
LinX 0.6.4 – Applies thorough stress test to CPU
CPU-Z – Confirmation of CPU frequency/voltage
AIDA64 Extreme Edition – Confirmation of temperatures/fan speeds
Testing methodology
Testing will be based on temperatures recorded by Real Temp after 20 passes of LinX stress test. The maximum absolute temperatures will be recorded after the test and averaged over the 6 cores. The delta is then calculated by subtracting the ambient temperature recorded near the intake fans from the average temperature calculated. Tests are conducted with the Intel i7 3930K at its default 3.6GHz stock speed and overclocked to 4.6GHz @ 1.42V. The tests are done inside the Corsair Carbide 500R chassis to simulate real world conditions. To keep the tests standardised we are using Noctua’s NT-H1 thermal paste on all coolers.
CPU coolers are reviewed as they come out of the box – with their factory cooling fans, as the manufacturer intended and as the consumer expects.
Additional tests include a passive test where the cooling fans are taken away from the heatsink and a comparison between the cooler used with stock thermal paste against our Noctua NT-H1 paste.
A kind thank you to Noctua for supplying us with NT-H1 thermal compound.
Results – Stock Performance
With settings at stock on our Intel Core i7-3930K, the 1250 manages to effectively cool the CPU. The result places the Antec cooler among the best AIO coolers currently on the market.
Fan Speed: 1700RPM – Extreme setting used in Antec GRID software. Fan noise is noticeable, verging on disruptive.
Results – Overclocked Performance
Demonstrating good consistency; 1250 delivers more great results when the CPU is overclocked to a significant milestone. Again, showing admirable capabilities!
Fan Speed: 2200RPM – Extreme setting used in Antec GRID software. Fan noise is very noisy and disruptive.
Results – Passive Performance
Unfortunately, just like other AIO coolers – cooling fans are essential for heat dissipation, 1250 struggles to passively cool the Intel Sandy Bridge-E.
Results – Thermal Performance Comparison
Most CPU coolers come accompanied with thermal paste provided by the manufacturer. For our CPU cooling tests we use Noctua’s NT-H1, so to offer up some interesting analysis we test the thermal paste given with 1250 against NT-H1 to see which gives the best results during stock and overclocked performance and the results really aren’t that much different, the Noctua paste is only slightly better – the results are nominal.
Conclusion
It’s been a while since we last reviewed anything from Antec, and especially from their cooling range but today we’ve jumped straight in at the deep end with a high-end offering from Antec’s new KUHLER H2O range.
The 1250 breaks out of conventional AIO design by having not only have two water pumps but also having them mounted directly onto the cooling fans. This combination of dual pump operation and 2400RPM cooling fans presented some excellent results in our benchmark tests with Intel’s demanding Core i7-3930K. The 1250 demonstrated great thermal control by being consistently good – the stock and overclocked results were both admirable results.
Having software to manage fan speeds is a great idea, although in our experience we found it to be quite buggy. Sometimes it worked, sometimes it didn’t. When it did work, it allowed us to tweak the RGB LED lighting on the 1250 CPU block – this is a novel idea since hardware enthusiasts are very keen nowadays to coordinate hardware and create specific colour-schemes. Having one set colour would lock this down but Antec have thought outside of the box with this feature.

Unfortunately we had problems mounting 1250 inside our Corsair 500R because the cooling fans/pumps were obstructed by the heatsinks on our test motherboard – GIGABYTE X79-UP4. The mounting holes could not be aligned properly due to this problem and so we were forced to tie the radiator into place to complete the testing stage of the review. What is surprising is that the heatsinks on our GIGABYTE motherboard are not by any means oversized. (Some LGA1155 motherboards do not have heatsinks at the top of the board so this particular issue can be forgotten about.)
For the moment, Antec have said that the cooling fans cannot be swapped out – therefore if the cooling fans fail the whole unit will need to be RMA’d. Future versions hope to allow for an exchange of cooling fans.
Coming in at a cost of £95, 1250 is a price just underneath the highly revered Corsair H100i. Although the performance difference is very similar, 1250 is let down by installation niggles and unreliable software.
Antec’s new H2O 1250 performs brilliantly, showing that it can consistently keep temperatures under control even with a substantial overclock in place. Unfortunately this success is short-lived by poor software and a cumbersome installation (dependant on motherboard).
Pros
+ Excellent performance
+ RGB customisation
+ Software allows fan speed management
+ 3 years warranty
Cons
– Poor memory clearance
– Conflict with motherboard heatsinks (top)
– Buggy software
– Lots of cabling
– Cannot swap out cooling fans
+ Excellent performance
+ RGB customisation
+ Software allows fan speed management
+ 3 years warranty
Cons
– Poor memory clearance
– Conflict with motherboard heatsinks (top)
– Buggy software
– Lots of cabling
– Cannot swap out cooling fans

Click here for an explanation of our awards at Vortez.net.


