We’ve reviewed a few different coolers from Arctic over the years, with the most recent being the Freezer 33 eSports. Today we look at the latest revision, the Freezer 34 eSports, featuring Arctic’s latest BioniX P120 fans.

Product on Review: Arctic Freezer 34 eSports DUO
Manufacturer: Arctic
Street Price: GBP £34.99 / USD $39.99
Arctic, within the enthusiast market, are a well-known brand. PC Builders have been using their kit for years, with their thermal paste being arguably one of the most popular of all time. Today we look at the latest air-cooling tower from them, the Freezer 34 eSports DUO.
The cooler is available in four different colours, red, yellow, green and the one we’ll be looking at today, white. All four models share the same price tag, at £34.99 in the UK and $39.99 in the US, for that you receive two fans which RRP for £13.99 each along with an industry leading 10-year warranty.
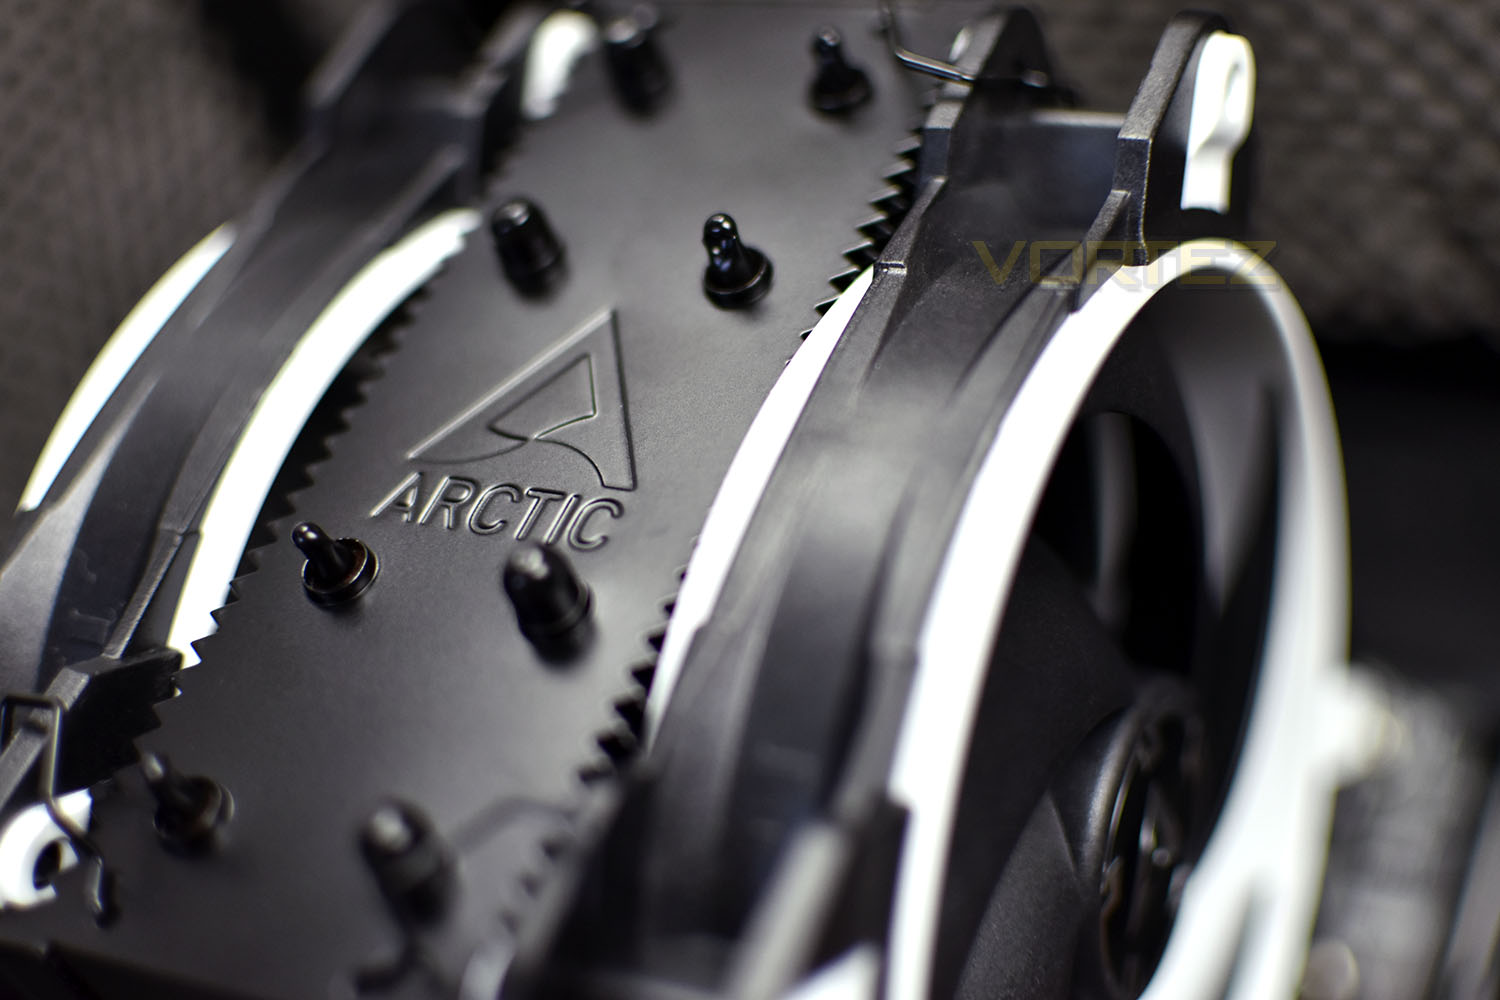
The 34 eSports DUO gets its name, at least in part, for the pair of fans strapped to the heatsink in a push-pull configuration. We’ve actually reviewed the Arctic BioniX P120 fans separately and were rather impressed by their performance, so to then bolt these to their Freezer 34 cooler should present some decent performance.
We reviewed the Freezer 33 eSports, featuring the same dual fan layout, back in 2017, so we’ll get straight to it and see how it performs compared to the previous generation.
Arctic on the Freezer 34 eSports DUO:
With two powerful, pressure-optimised BioniX P-fans and its updated, thermal-coated heatsink, the Freezer 34 eSports DUO offers a lot of performance for a fair price. In internal tests levelled to 28 dB(A), the Freezer 34 eSports DUO was able to surpass many competitors, even much bigger and more expensive double tower cooling solutions. More information about our performance test and the max.
Technical Specifications
SpecificationsHeat Pipe: Direct Touch Ø6mm x 4
Heatsink Material: Aluminium Fins x 54, Thickness: 0.4 mm
Thermal Compound: Pre-applied MX-4
Fan: 2x 120 mm, 200 – 2,100 RPM (Controlled by PWM), 0 db fan mode below 5% PWM
Bearing: Fluid Dynamic Bearing
Noise Level: 0.5 Sone (@ 2,100 RPM)
Current / Voltage: 0.13A /12V DC
Recommended for TDP up to: 210 Watts
Dimensions: 124(L) x 103(W) x 157(H)mm
Net Weight: 764 g
Socket Compatibility:
Intel ® 2066*, 2011(-3), 115x
AMD AM4
Heatsink Material: Aluminium Fins x 54, Thickness: 0.4 mm
Thermal Compound: Pre-applied MX-4
Fan: 2x 120 mm, 200 – 2,100 RPM (Controlled by PWM), 0 db fan mode below 5% PWM
Bearing: Fluid Dynamic Bearing
Noise Level: 0.5 Sone (@ 2,100 RPM)
Current / Voltage: 0.13A /12V DC
Recommended for TDP up to: 210 Watts
Dimensions: 124(L) x 103(W) x 157(H)mm
Net Weight: 764 g
Socket Compatibility:
Intel ® 2066*, 2011(-3), 115x
AMD AM4
Packaging & Bundle
Arctic keeps the colour scheme simple as an indication of the choice inside, relating to the red, yellow, green or white options. There’s an image of the cooler on the front of the box as well as some brief information. They also make sure you notice the 10-year warranty which is a fairly lengthy warranty.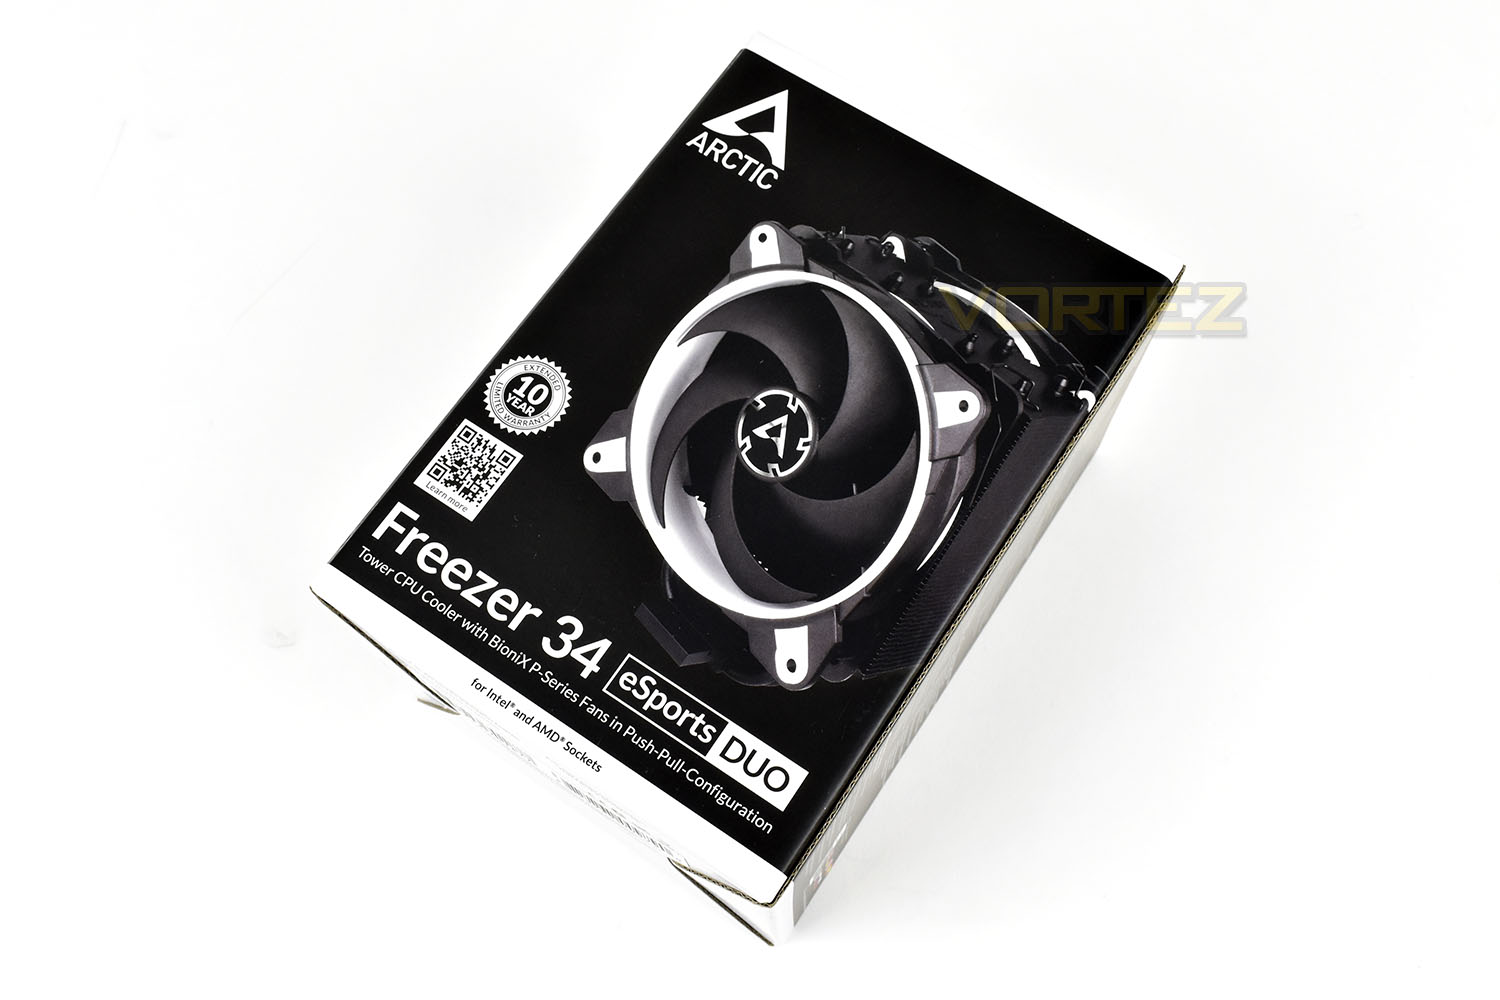
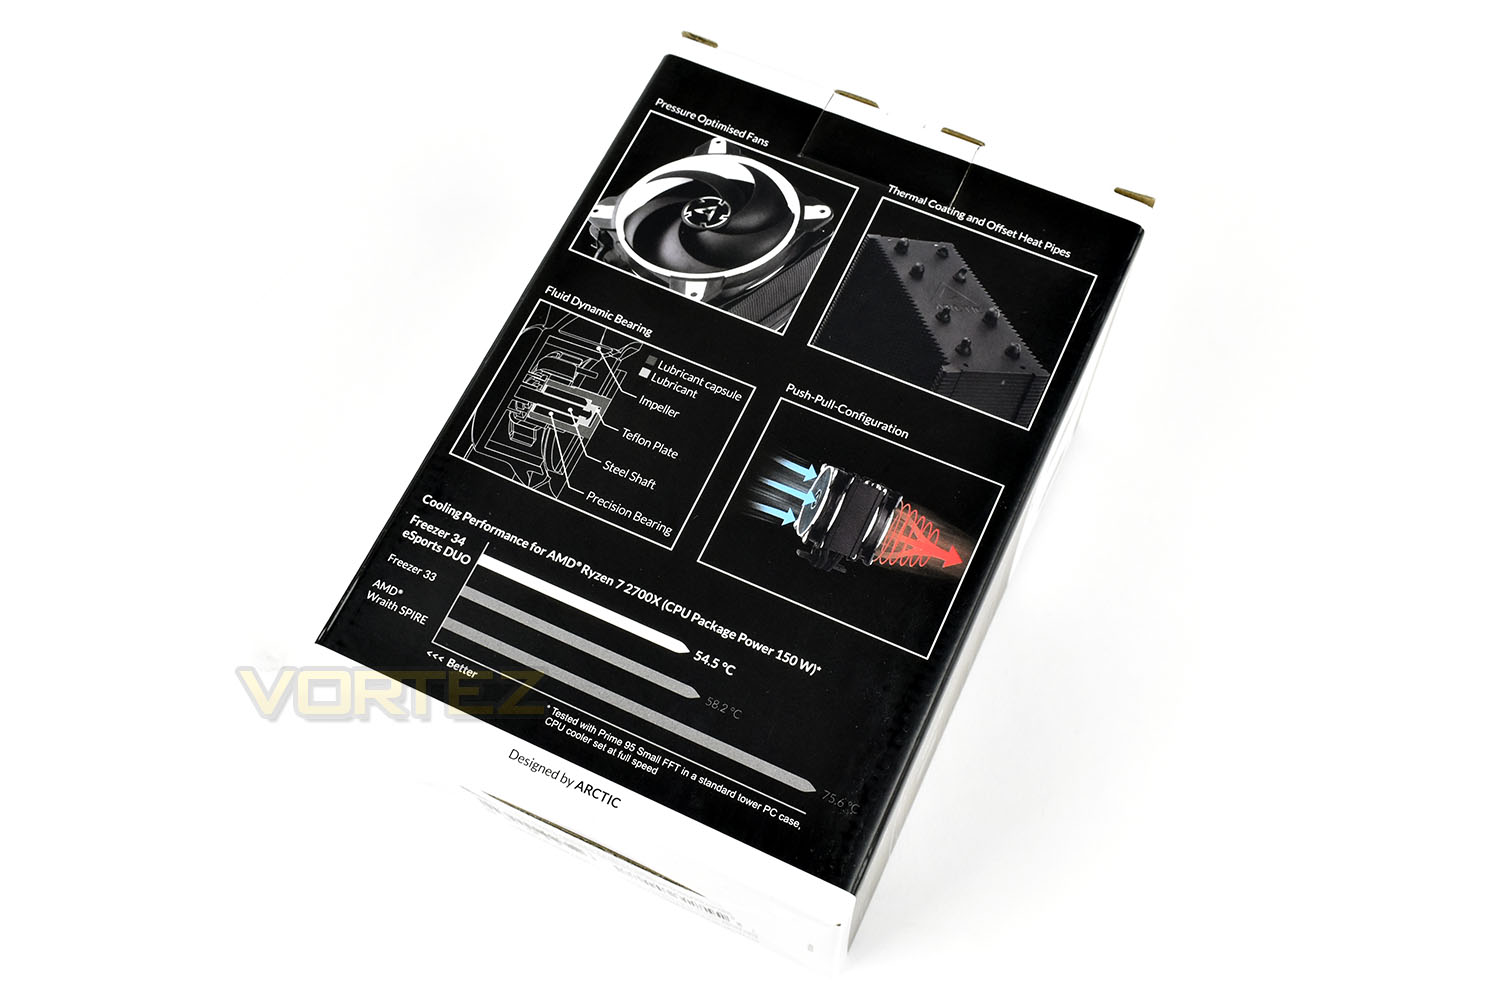
The rear gives some diagrams and a comparison table showing how the cooler compares to the previous generation as well as the AMD Wraith Spire which is included with the AMD Ryzen CPUs.
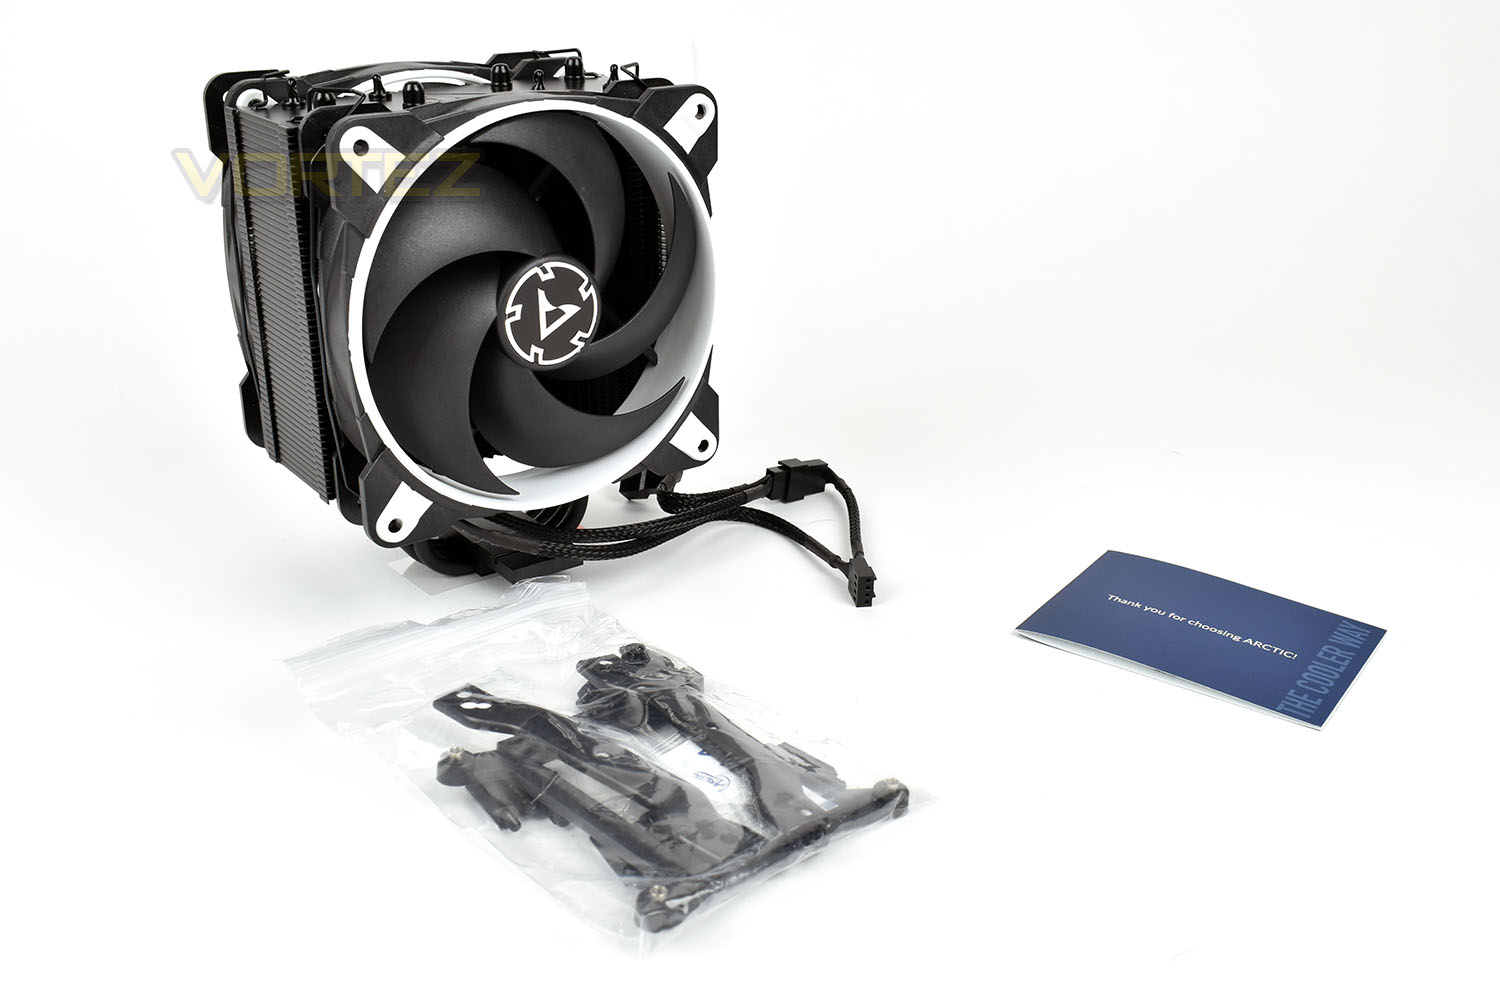
Along with the cooler with its pair of BioniX P120 fans, you get all the mounting hardware you need for all three of the mainstream Intel sockets and AMD’s AM4 socket. There’s also a small thank you note from Arctic as well as a QR card taking you to their instructions page. This is an effort to reduce their environmental footprint.
Closer Look
First off, removing the fans shows the naked heatsink. The heatsink is comprised of 54 aluminium fins measuring 0.4mm in thickness, with the heat being transmitted from the CPU to said fins via four 6mm heat pipes.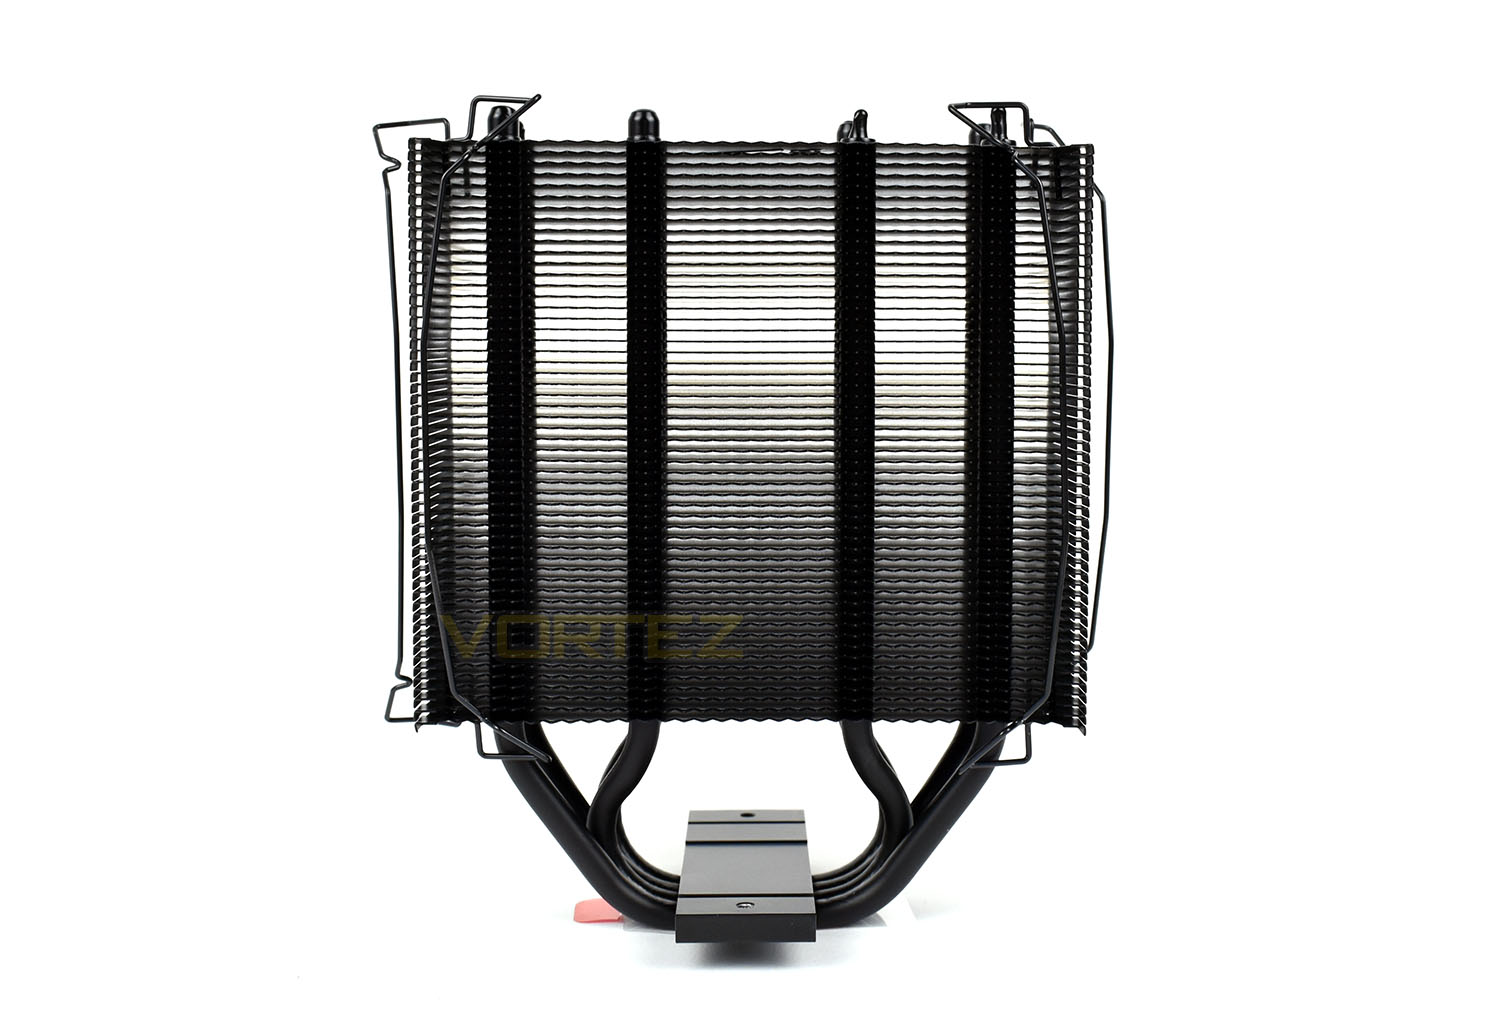
The side profile makes the closed fin design evident, helping to channel the air directly through the heatsink instead of it washing out of the sides; this should help the “pull” fan to do its job more effectively, removing the hot air and increasing flow through the fins.
Those wire fan mountings are clipped into the heatsink and cannot be removed, meaning you must use the cooler with two fans, but they do work with several other types of fan that we tried, from various manufacturers.
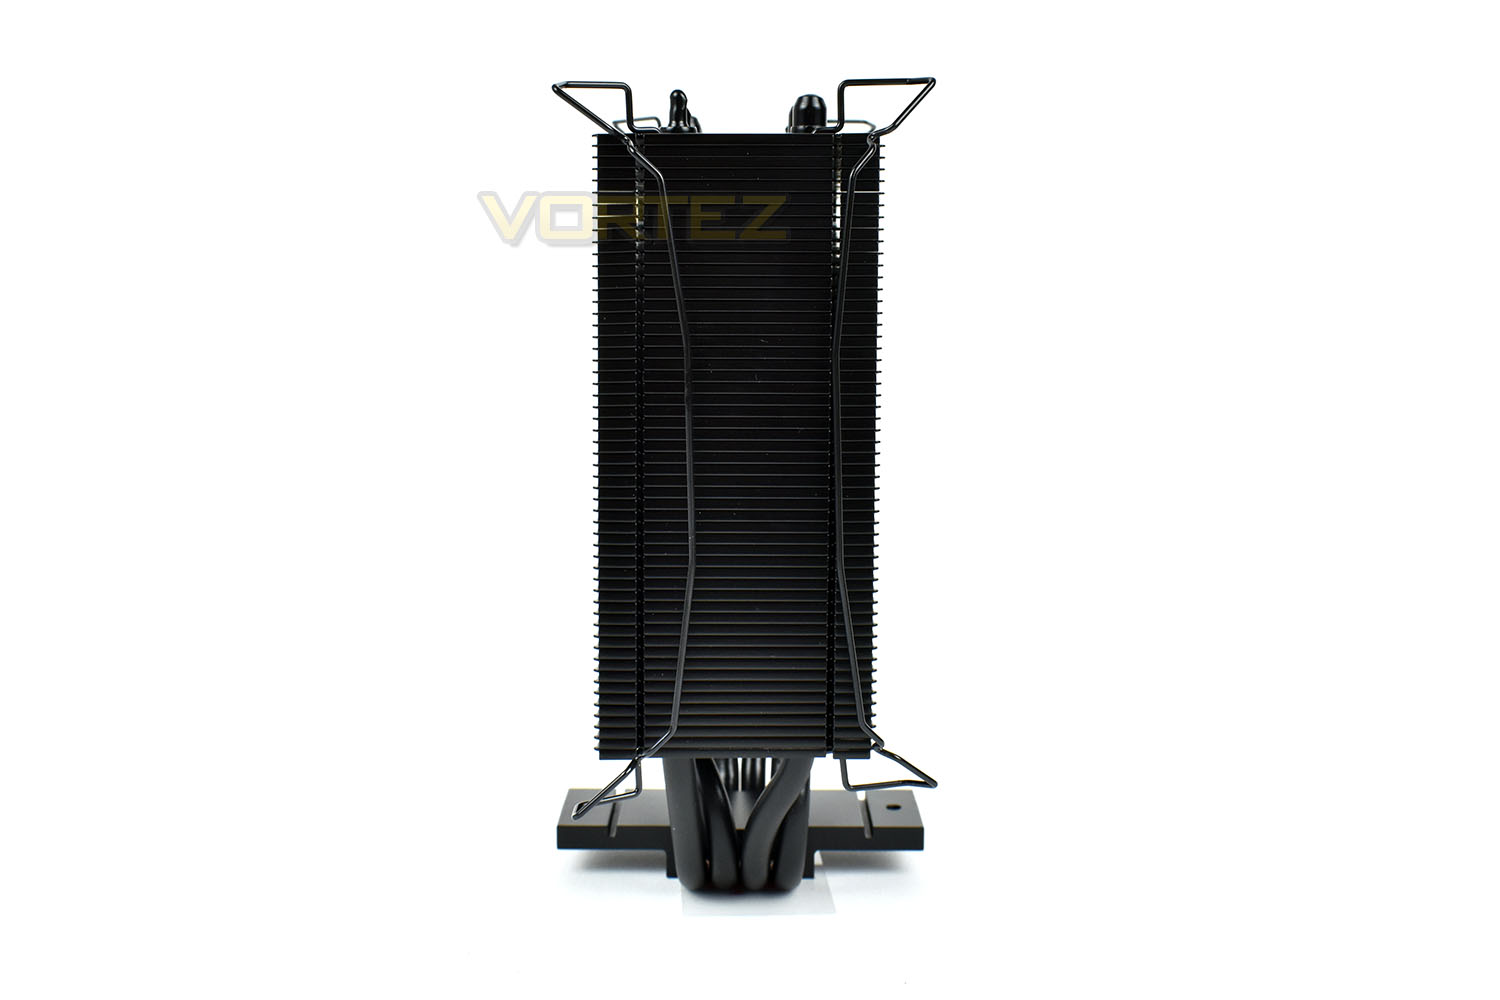
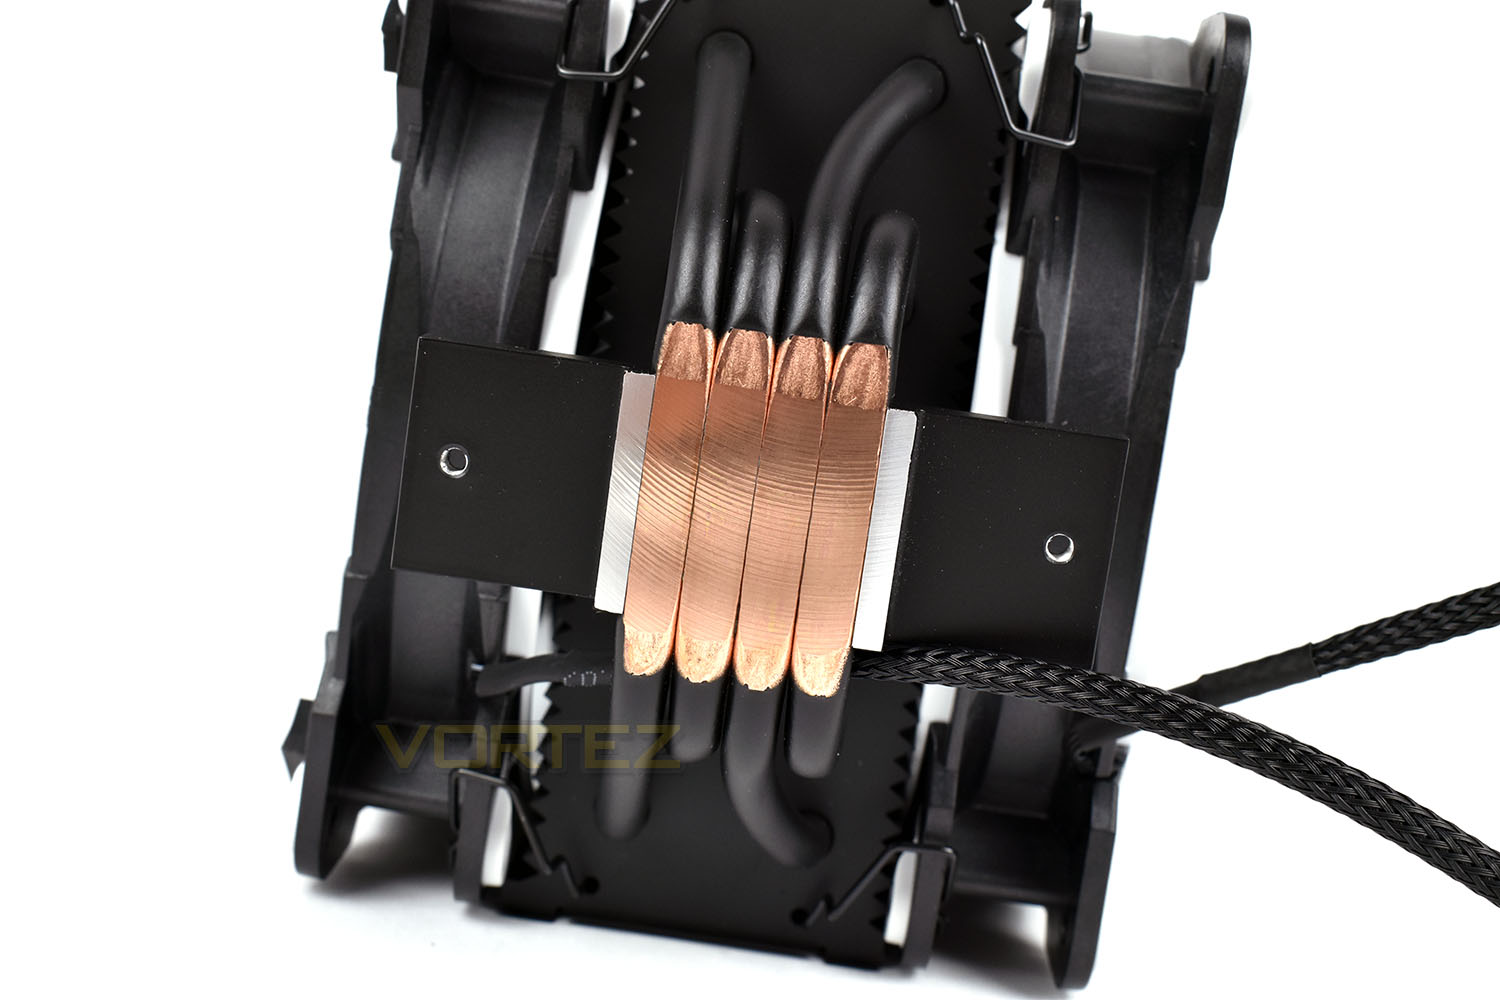
The bottom of the heat pipes, providing direct contact with the CPU, have been machined to a flat finish, this generally helps to improve the thermal transfer and overall performance by minimising any distance for the heat to travel.
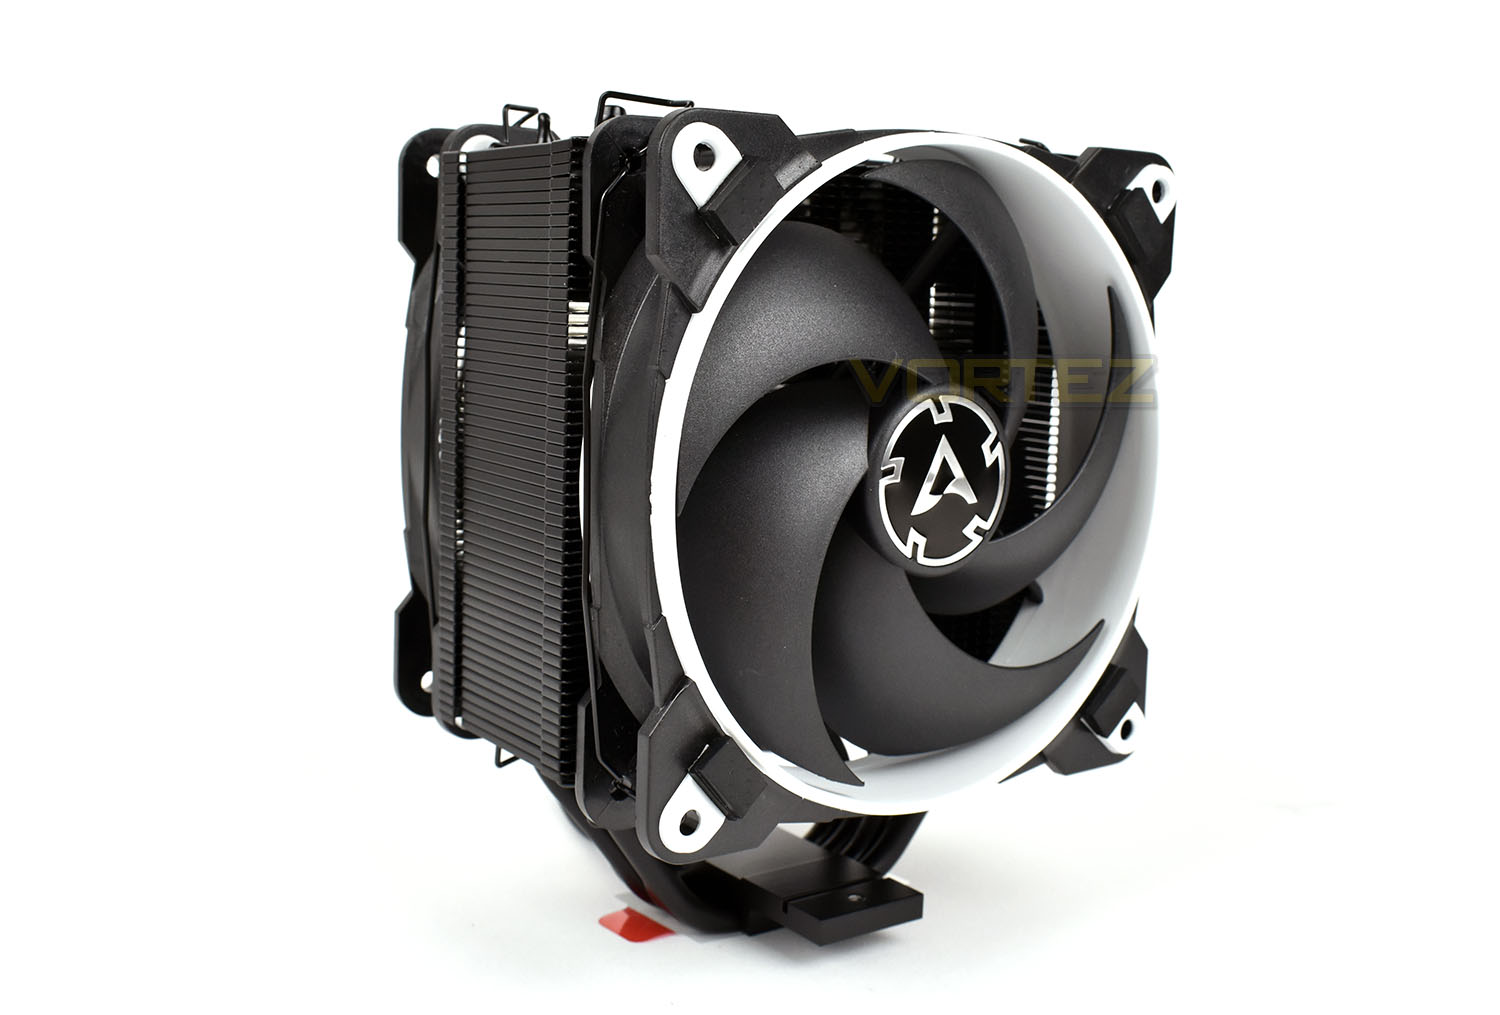
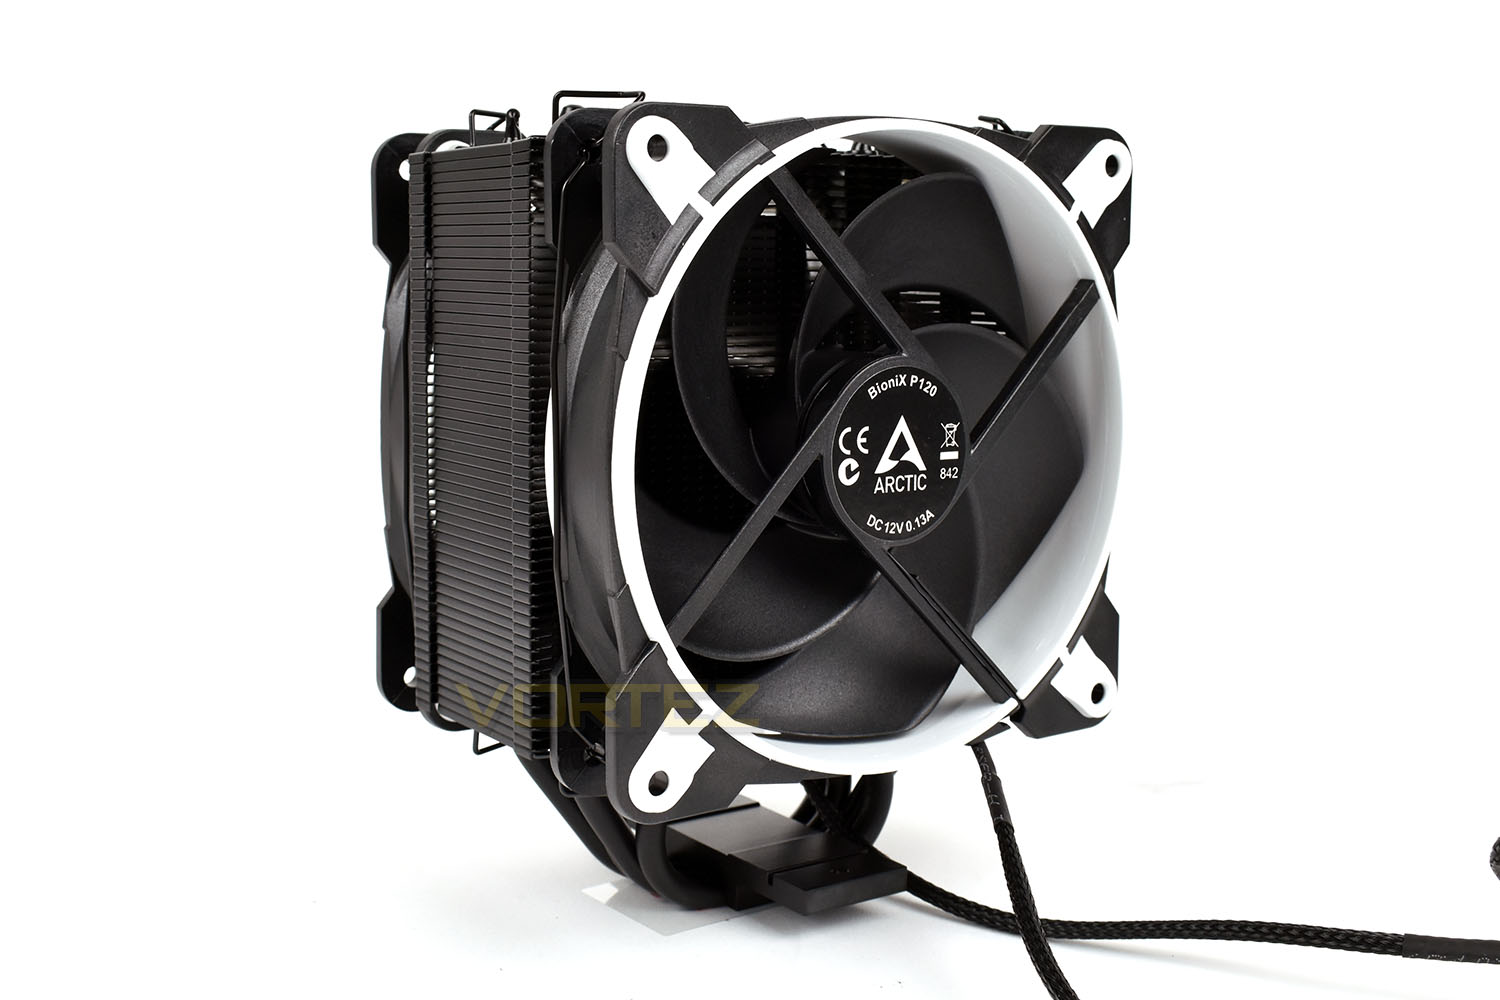
Reattaching the fans, the cooler looks much bigger. Measuring roughly 125mm x 105mm x 155mm, this should be compatible with most cases while providing plenty of airflow through the two BioniX P120 fans.
Installation
Firstly, while installing a cooler of this kind of design is generally considered a simple task, with few steps required, however, if you purchased this as a complete novice, you might find the process overwhelming, to say the least. Having said that, thanks to previous experience, the procedure was easy enough to figure out.EDIT (25/02/19): After receiving correspondence from Arctic regarding our review, they questioned us on the absence of any instructions. Unfortunately, we missed the small card that arrives with the cooler as it was tucked under a piece of cardboard in the bottom of the box. For this, we would like to apologise to our readers and to Arctic; instructions are included on a small card containing a QR code, this is part of an effort to reduce their environmental footprint, and thanks to animations and clear, simple menus, we actually found they were more effective than a traditional paper layout.
We start off by installing the four standoffs to our LGA 2011 socket and then apply the Noctua NT-H1 thermal paste. We use this to remove any variance from our testing, as best as possible.
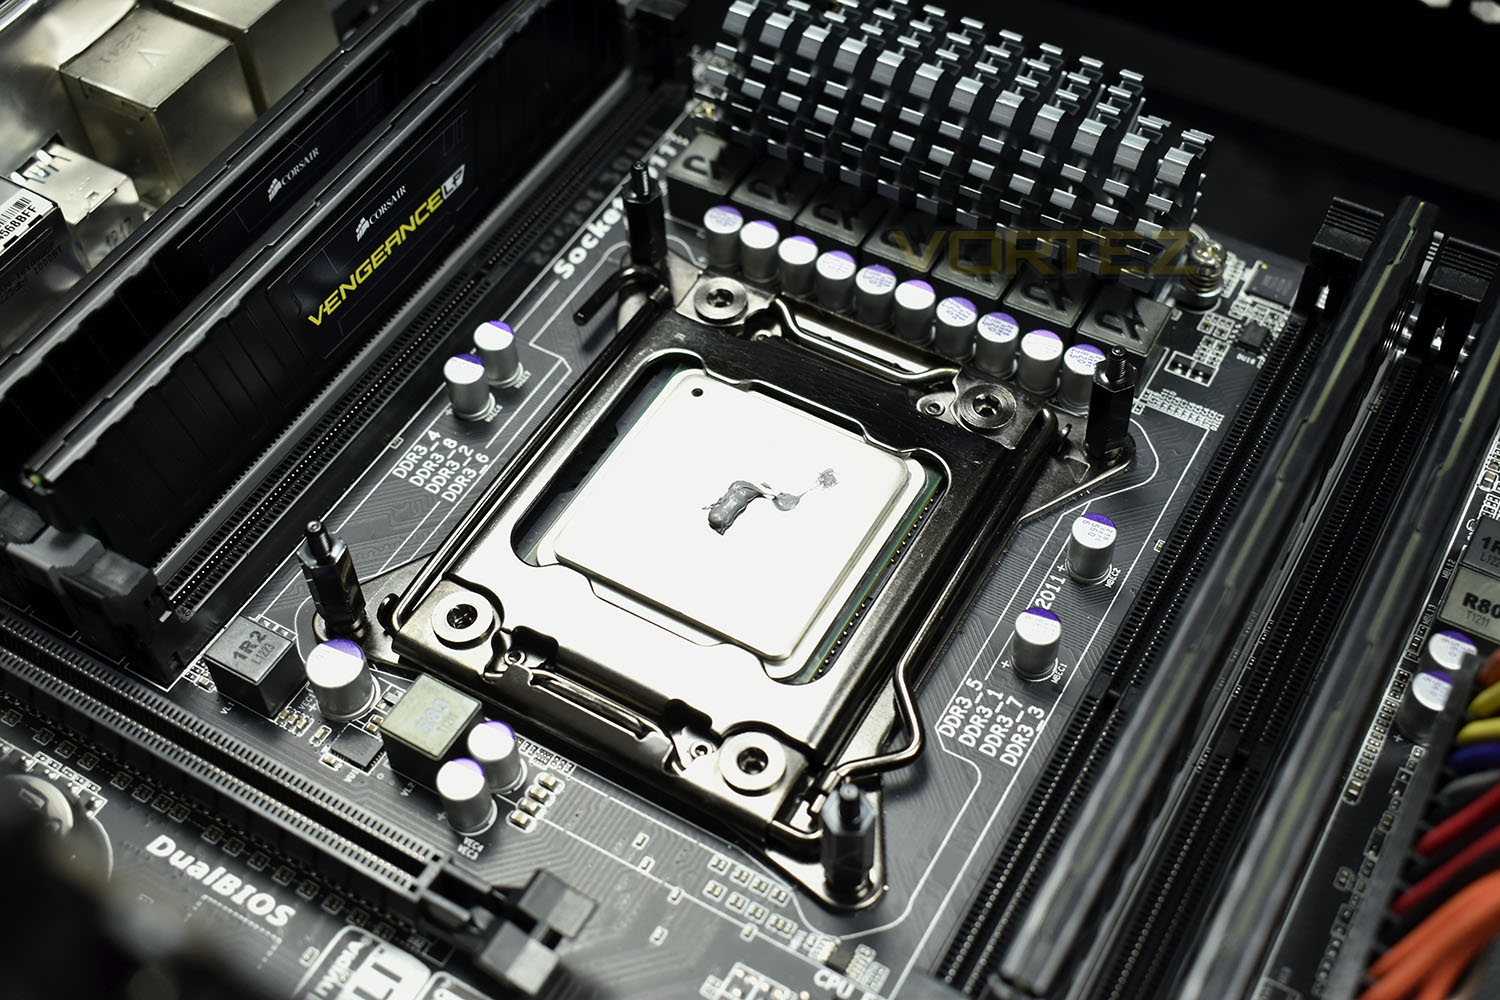
It’s then a case of attaching the included bracket to the cooler and bolting it down onto the motherboard, ensuring to apply even turns in a diagonal fashion; this helps to ensure the thermal paste is evenly distributed.
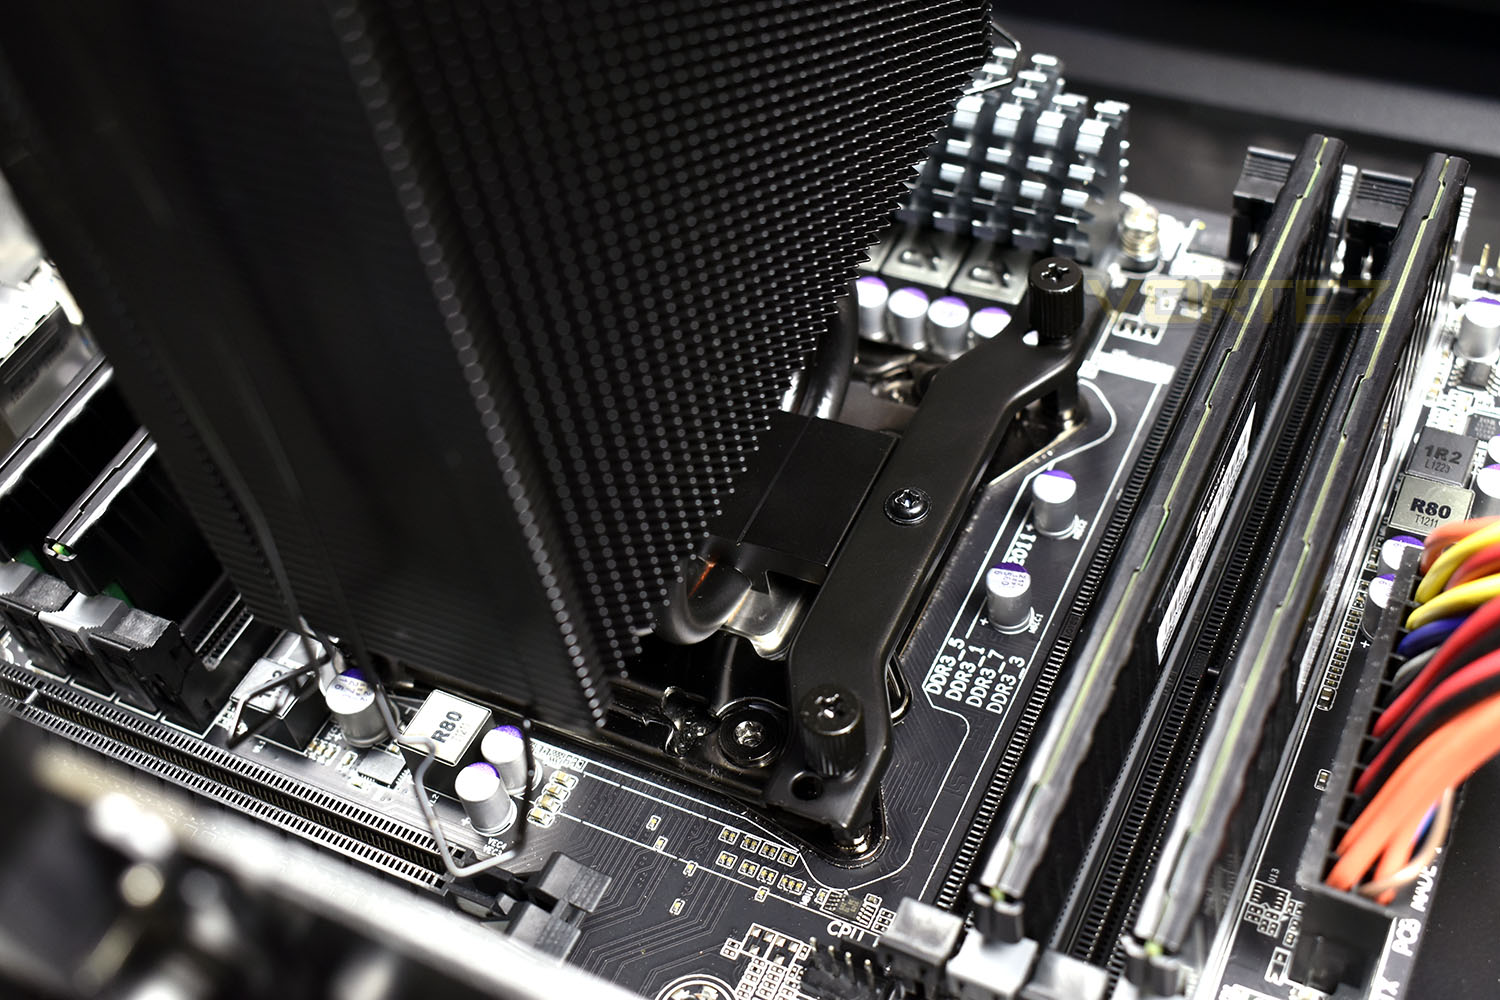
Finally, the fans need to be placed in series, ensuring both are directing airflow in the same direction, and clipped into place using the fixed wire brackets.
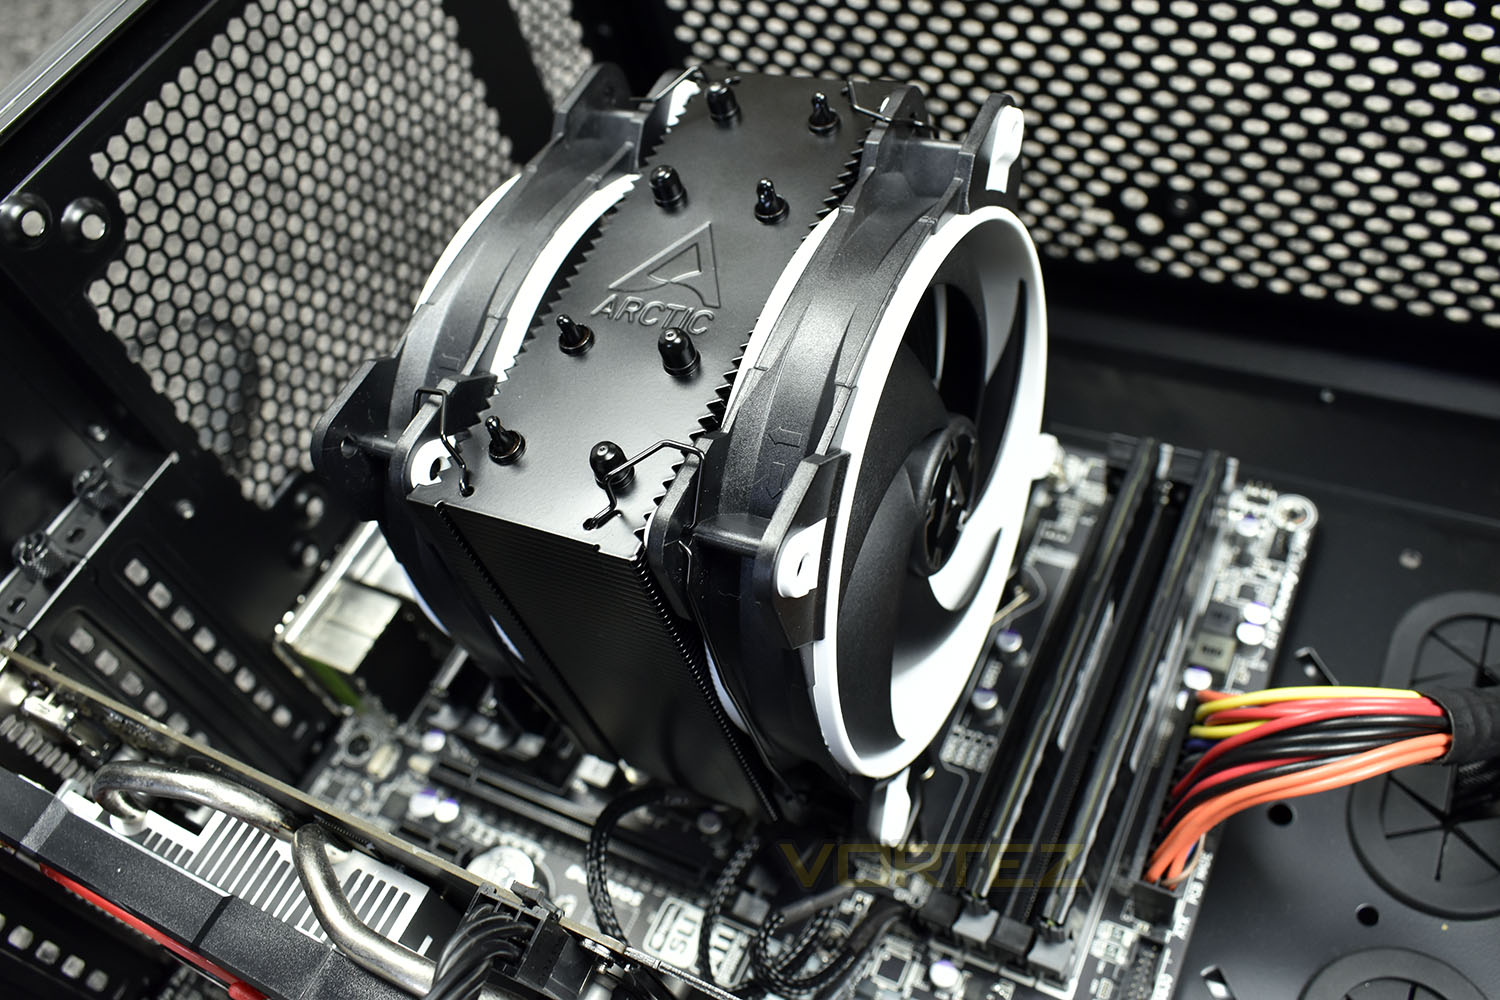
The process is simple, especially thanks to the fixed fan clips,
Test Setup & Methodology:
We perform two individual testing routines with each CPU cooler that we receive – temperatures and acoustics. The system used is as follows and all tests are performed at stock 3.8 GHz and overclocked 4.4 GHz frequencies.Processor – Intel Core i7-3930K
Motherboard – Gigabyte X79-UP4
Memory – 8GB Corsair Vengeance LP 1600MHz CL9
Video Card – Sapphire Radeon HD 6850 1GB
Power Supply – NZXT Hale90 650W
Storage Drive – Kingston HyperX 240GB SATA III SSD
Case – Corsair Carbide 760T
Monitor ASUS ROG SWIFT PG278Q
Motherboard – Gigabyte X79-UP4
Memory – 8GB Corsair Vengeance LP 1600MHz CL9
Video Card – Sapphire Radeon HD 6850 1GB
Power Supply – NZXT Hale90 650W
Storage Drive – Kingston HyperX 240GB SATA III SSD
Case – Corsair Carbide 760T
Monitor ASUS ROG SWIFT PG278Q
To keep our tests consistent, we always review CPU coolers as they come out of the box – with their factory cooling fans, as the manufacturer intended and as the consumer expects. It should, however, be noted that we do not use supplied thermal paste but instead, Noctua NT-H1 paste to, again, ensure consistency. The paste is applied and the CPU allowed to run for a couple of hours, at idle, to give the thermal compound some time to “bed in.”
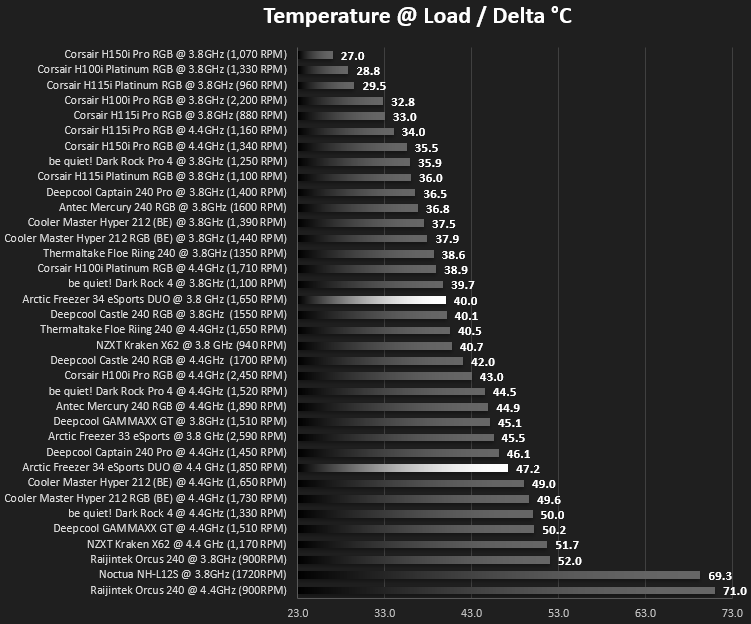
In the first test, we record idle and load temperatures as shown by the most current version of the Real Temp monitoring utility. The test system is booted to the Windows desktop and left to idle for 20 minutes to ensure temperatures have stabilised. The average core temperatures are then recorded over a 1 minute period and averaged across the six cores. We then perform a continuous 20 minute AIDA 64 stress test. The maximum absolute core temperatures are recorded immediately after the test has completed and averaged across the six cores. All results are displayed as delta temperatures – these are calculated by subtracting the ambient room temperature from the average core temperatures recorded. For temperature testing, the Corsair 760T chassis door is closed and has all three systems fans powered on to simulate real-world conditions.
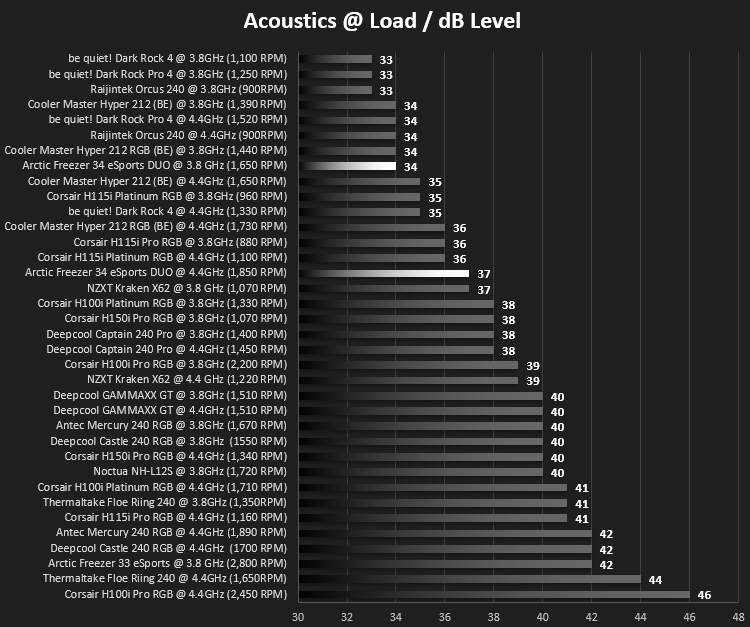
Our second test follows a similar methodology to the first, with the key difference being that the Corsair 760T chassis door is now left open and all three systems fans are disabled. This allows for the CPU cooler fans acoustic profiles to be captured in isolation. From cold, the system is again booted to the Windows desktop and left to idle for 20 minutes to ensure temperatures have stabilised. The acoustic level is then recorded at a distance of 20cm from the CPU cooler and where the individual result is an average level over a 1 minute period. We then perform our continuous 20 minutes AIDA 64 stress test. Acoustic levels are again recorded at a distance of 20cm from the CPU cooler and where the individual result is an average level over a 1 minute period.
Benchmarks – Thermal Results
We start off by letting the CPU cooler “bed in” for a couple of hours, to ensure the paste has time to move around and form an even layer, after which an idle result is taken.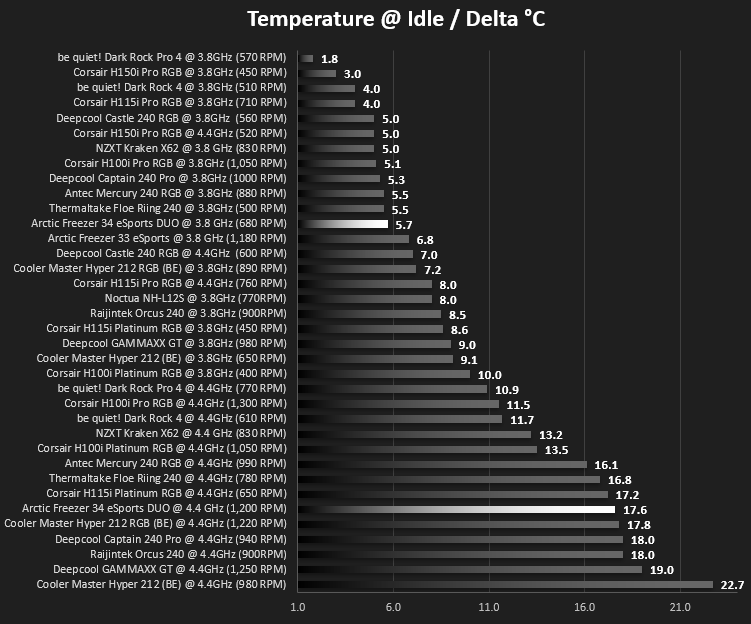
We then launch AIDA64 and set off the stability test. After 20 minutes, we record the average core temperature.
Benchmarks – Acoustic Results
We measure the idle acoustics after allowing the system to boot and come to rest, usually around two hours after booting when we begin testing the idle and load temperatures. This ensures any processes are done and complete, giving a true idle measurement.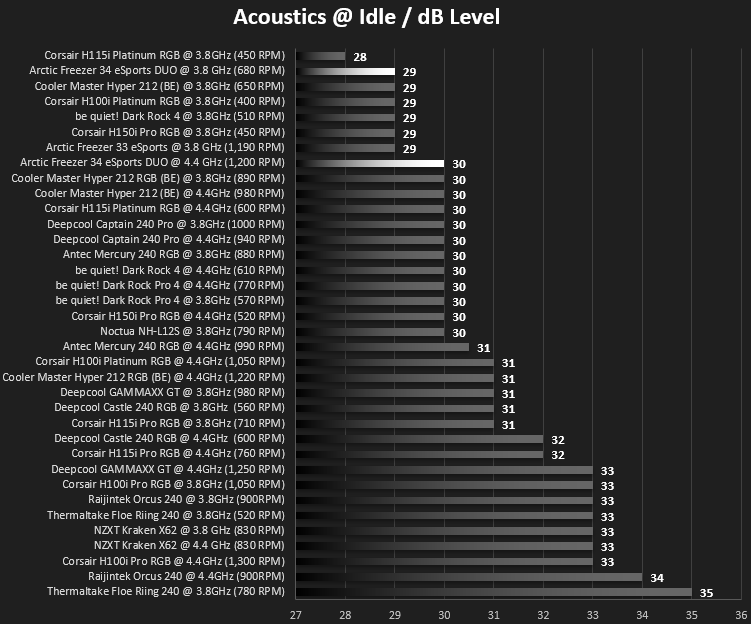
We then take the load acoustics measurement right at the end of the 20 minutes AIDA 64 stability test.
Conclusion
The Freezer 34 eSports DUO is put together rather well, with a simple and easy installation in mind,The choice of colours certainly isn’t a negative either, available in red, yellow and green as well as the white we reviewed. We were lucky enough to review the yellow version of the Freezer 33 which looked fantastic.
Overall performance, considering its relative low cost and inclusion of two decent fans, was great. We found it sitting well in our charts and made a strong case against the Hyper 212 Black Edition which we consider to be its main contender, though that does then beg the question what that second fan is doing if it’s only really matching, and not beating, the Hyper 212.
Compared to the previous model, with the revised fans, and their much more managed PWM profiles, the Freezer 34 is definitely an improvement with huge improvements in fan noise and even managing our overclocked profile this time around, after struggling so much last time.
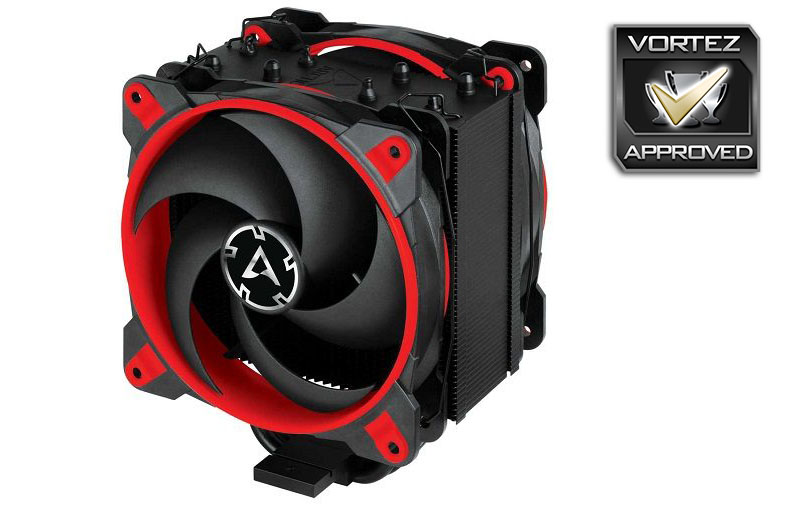
The Cooler Master Hyper 212 offers up a strong fight, but the Freezer 34 looks fantastic in the system and arrives with a whopping 10-year warranty.
Pros
+ Looks great
+ Choice of colours
+ Good performance
+ Quiet cooling
+ 10-year warranty
+ Easy to follow instructions with animations
Cons
– Slightly more expensive than the Hyper 212 Black Edition
+ Looks great
+ Choice of colours
+ Good performance
+ Quiet cooling
+ 10-year warranty
+ Easy to follow instructions with animations
Cons
– Slightly more expensive than the Hyper 212 Black Edition
Click here for an explanation of our awards at Vortez.net.
Stay connected with the Vortez Social Media pages: