







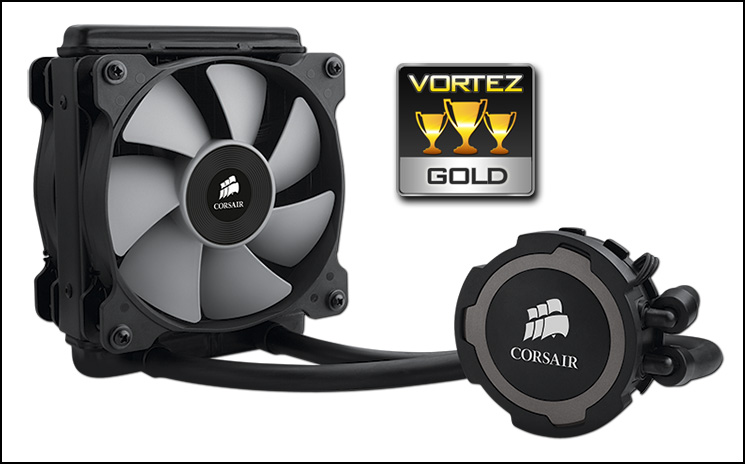
Tackling the mid-range, the H75 is a liquid CPU cooler (AIO) which features a new Asetek design, 120mm radiator and dual SP120L cooling fans.

Product On Review: Hydro Series H75
Manufacturer and Sponsor: Corsair
Street Price: £65 GBP / $85 USD
The age of liquid CPU coolers is well and truly upon is, numerous brands are now involved in this energetic market space none more so than Corsair. Their Hydro Series is a product line which is now synonymous with self-contained liquid CPU coolers and is a range which is responsible for projecting the brand to prominence only a few years ago. In October, Corsair announced a new model within the series named H75 and today we are to look at this new AIO (All-in-One) CPU cooler.
The Hydro Series H75 is a liquid CPU cooler which is comprised of a slim-line 120mm radiator, two SP120L cooling fans and a newly design Asetek pump and mounting system. The Hydro Series has impressed before, can it continue to with this new model?
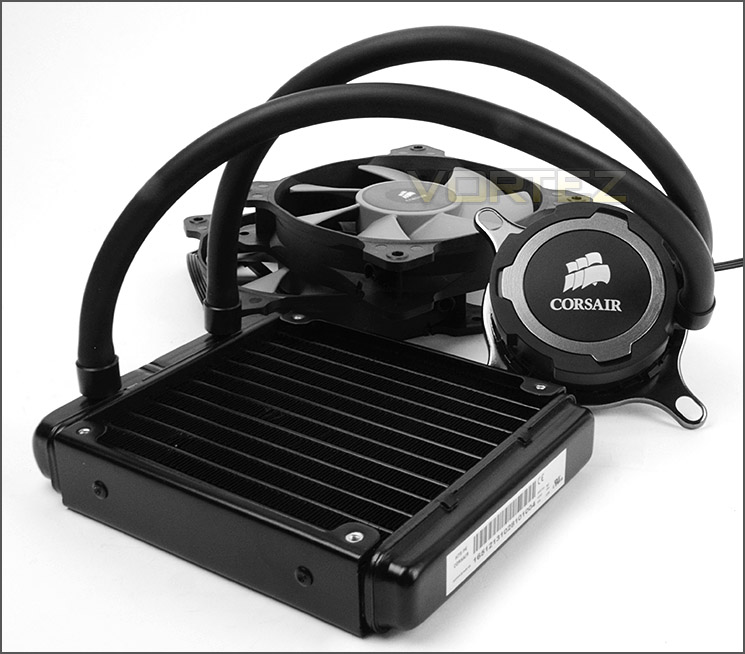
Corsair on their H75
Hydro Series H75 provides effective and efficient liquid CPU cooling in a compact size. The 120mm radiator has a thickness of only 25mm and is paired with standard diameter, kink-resistant tubing for compatibility with smaller cases and tighter spaces. The dual SP120L 120mm fans support PWM motherboard fan headers, so your motherboard can automatically control fan speeds based on CPU temperature. The tool-free mounting system has broad Intel and AMD socket compatibility. A copper microfin coldplate and high-quality ceramic bearing pump help provide reliable, low-noise heat transfer away from your CPU. And, like all Hydro Series liquid CPU coolers, Hydro Series H75 is completely self-contained and never needs filling or maintenance.
Technical Specifications
Warranty
Five years
Cold Plate Material
Copper
Fan Specification
120mm (x2)
Socket Support
AMD AM2, AMD AM3, AMD FM1, AMD FM2,
Intel LGA 1150, Intel LGA 1155, Intel LGA 1156, Intel LGA 1366, Intel LGA 2011
Radiator Material
Aluminum
Tubing
Standard diameter, kink-resistant tubing
Radiator dimensions
120mm x 152mm x 25mm
Fan dimensions
120mm x 120mm x 25mm
Fan speed
2000 RPM
Fan airflow
54 CFM
Fan dBA
31.4 dBA
Fan static pressure
2.8 mm/H20
Five years
Cold Plate Material
Copper
Fan Specification
120mm (x2)
Socket Support
AMD AM2, AMD AM3, AMD FM1, AMD FM2,
Intel LGA 1150, Intel LGA 1155, Intel LGA 1156, Intel LGA 1366, Intel LGA 2011
Radiator Material
Aluminum
Tubing
Standard diameter, kink-resistant tubing
Radiator dimensions
120mm x 152mm x 25mm
Fan dimensions
120mm x 120mm x 25mm
Fan speed
2000 RPM
Fan airflow
54 CFM
Fan dBA
31.4 dBA
Fan static pressure
2.8 mm/H20
Packaging, Bundle & Fans
The Hydro Series H75 arrives in a nicely presented box which has a depiction of the CPU cooler on the front whilst the sides contain the dimensions, features and what comes in the box.
Inside, Corsair has placed the major components inside a cardboard tray and covered in a clear plastic sheet. The mounting kit and accessories have their own little packet too.
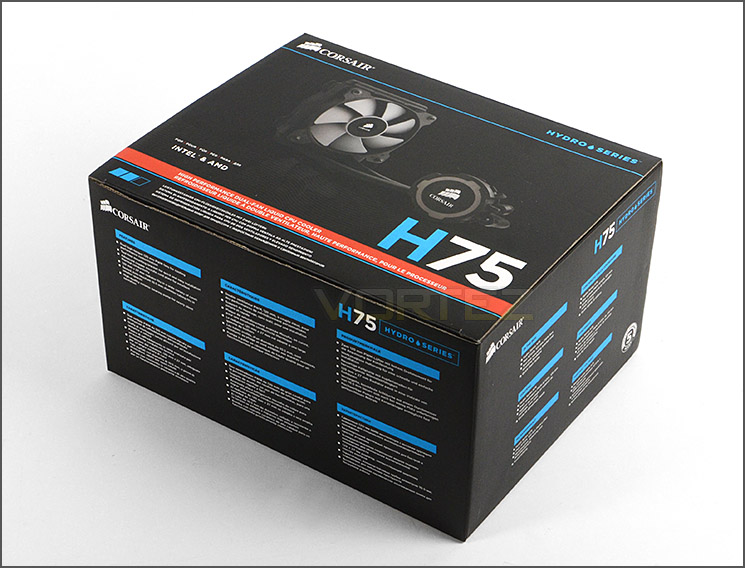
Packaging for H75
Along with the radiator, pump and tubing there are an assortment of included items which make up the accessories bundle. These items consist of the following:
• Mounting components for multiple sockets
• Dual SP120L 120mm PWM fans
• User Installation Guide
• Warranty Leaflet
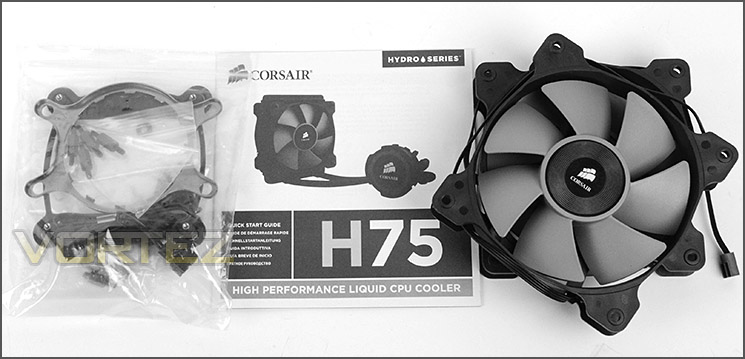
Included items for installing H75
Unlike most liquid coolers which are 120mm in specification, the H75 actually comes with dual SP120L 120mm PWM fans rather than just the one.
The SP120L is a seven-blade PWM cooling fan capable of up to 2000RPM. Corsair also provide a Y-cable so that both fans can operate from a single fan header on the motherboard.
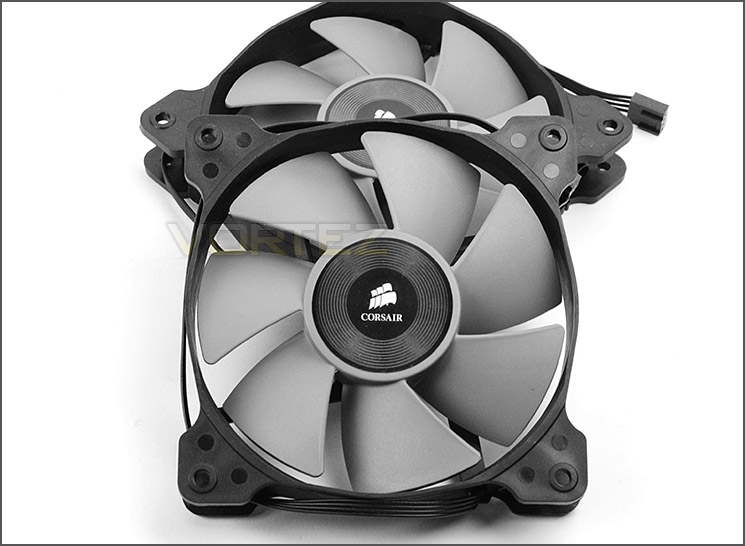
Two SP120L 120mm PWM fans
Closer Look
H75 utilises a 25mm x 120mm radiator which is uses aluminium for its material of choice. Having such a low-profile radiator allows this cooler to be installed within cases which are smaller and where there is perhaps less space. The dimensions also provide even more clearance so that adding a push/pull configuration will not cause clearance issues.
25mm x 120mm radiator is the basis for H75
Corsair has pre-installed the Intel bracket and retention ring to the pump/block of H75 since this socket type is the most common choice nowadays. H75 uses anti-kink tubing which can be easily pivoted for different mounting orientations.
The pump itself is mounted to the block and has the Corsair emblem stamped on the face a sleek brushed aluminium feature encircling this logo. Corsair are using an Asetek design but H75 uses a new and improved pump compared to previous Hydro coolers.
On the underside, the CPU block uses a full copper design and has a thin layer of pre-applied thermal compound paste so that you can get up and running quickly.
Nicely designed pump with pre-installed Intel bracket
Copper CPU block with pre-applied thermal paste
Installation Process
In order to demonstrate the installation process for H75 we are installing the cooler on the Intel LGA2011 socket.
The first step to installing H75 is to apply four stand-off screws to the four corners of the socket plate.
Four stand-off screws are applied to LGA2011 motherboard
Next we need to remove the chassis rear exhaust cooling fan and place one of the 120mm cooling fans into position whilst aligning the radiator and screw in four of the oversized screws between both items. This can be tricky to do at first – the best thing to do is attach one screw first and only screw in to the point when it bites, then you can screw in the other screws and still move both items if the mounting holes do not line up properly etc. The last part of this step is to attach the second 120mm cooling fan onto the other side of the radiator – again using extra-long screws. It’s important to get the cooling fans facing the correct way so that you have push-pull configuration. Corsair inscribe airflow directional arrows onto the fans to help with this.
Radiator and fans installed where the rear exhaust cooling fan sits
The final step in the installation process is to place the CPU block over the CPU, lining up the bracket over the stand-off screws and then attaching and tightening four screws. When attaching these screws, do so in a diagonal routine so that even pressure is applied.
Attaching CPU block to the CPU
Overall, we’re very happy with how quick and easy the installation process is with H75.
Installed – Memory Clearance
Having installed H75, we can now identify what memory clearance is available. This is likely to only concern those with LGA2011 motherboards since on other motherboards such as LGA1155 the memory slots are not present on the side nearest to the rear IO section.
There is approximately 5.5cm of clearance for memory kits which have bigger heatsinks on them – we are using a low-profile kit to demonstrate this.
Memory clearance for LGA2011
Test Setup & Methodology
Test System
CPU – Intel Core i7-3930K (3.6GHz)
Motherboard – GIGABYTE X79-UP4
Memory – 8GB Corsair Vengeance LP 1600MHz CL9
Graphics – Sapphire Radeon HD 6850 1GB
PSU – NZXT Hale90 650W
Hard Drive – Kingston HyperX 240GB SATA III SSD
Case – Corsair Carbide 500R White
Motherboard – GIGABYTE X79-UP4
Memory – 8GB Corsair Vengeance LP 1600MHz CL9
Graphics – Sapphire Radeon HD 6850 1GB
PSU – NZXT Hale90 650W
Hard Drive – Kingston HyperX 240GB SATA III SSD
Case – Corsair Carbide 500R White
CPU Coolers
Alpenföhn Matterhorn Pure(120mm Wingboost: 300-1200RPM)
Alpenföhn K2 (120mm Wingboost: 500-1500RPM, 140mm Wingboost: 300-1100RPM)
Alpenföhn Gotthard (140mm Wingboost: 300-1100RPM)
Noctua NH-D14 (120mm NF-P12 PWM + 140mm NF-P14 PWM: up to 1200RPM)
Thermalright SilverArrow SB-E Extreme (Dual TY-143 fans – 600-2500RPM)
Corsair Hydro H100 (Dual 120mm fans – low: 1300RPM, mid: 2000RPM, high: 2600RPM Push Config)
SilverStone HE01 (140mm PWM fan – 500RPM-1200RPM – 500RPM-2000RPM)
be quiet! Dark Rock Pro 2 (135mm + 120mm PWM Fans – up to 1500RPM and 1700RPM)
Thermaltake Water 2.0 Pro (Dual 120mm PWM fans – up to 2000RPM)
Corsair Hydro Series H100i (Dual 120mm fans – up to 2700RPM Push Config)
Be Quiet! Shadow Rock TopFlow(1x 135mm PWM fan – up to 1500RPM)
SilverStone HE02 (Passive – optional fan used: Noctua NF-F12 120mm PWM)
Corsair H55 (Single 120mm fan – 1700RPM Exhaust Push)
Cooler Master Seidon 120M (Single 120mm fan – Up to 2500RPM Exhaust Push)
Zalman CNPS11X Extreme (Single 120mm fan – Up to 1950RPM)
Phanteks PH-TC12DX (Dual 120mm fans – 600-1800RPM)
Noctua NH-U14S (Single 140mm cooling fan – 300-1500RPM)
SilverStone TD03 (Dual 120mm fans – 1500-2500RPM)
Thermaltake]Thermaltake NiC C5 (Dual 120mm fans – 1000RPM – 2000RPM)
Raijintek EreBoss (Single 140mm fan – 1100RPM – 1600RPM)
GamerStorm Lucifer (Single 140mm fan – 800-1500RPM)
Cooler Master V8 GTS (Dual 140mm fans – 600-1600RPM)
Antec KUHLER H2O 1250 (Dual 120mm cooling fans – 600-2400RPM)
Corsair H75 (Dual 120mm cooling fans – 600-2000RPM)
Program Suite
Real Temp – Maximum temperature analysis
LinX 0.6.4 – Applies thorough stress test to CPU
CPU-Z – Confirmation of CPU frequency/voltage
AIDA64 Extreme Edition – Confirmation of temperatures/fan speeds
Testing methodology
Testing will be based on temperatures recorded by Real Temp after 20 passes of LinX stress test. The maximum absolute temperatures will be recorded after the test and averaged over the 6 cores. The delta is then calculated by subtracting the ambient temperature recorded near the intake fans from the average temperature calculated. Tests are conducted with the Intel i7 3930K at its default 3.6GHz stock speed and overclocked to 4.6GHz @ 1.42V. The tests are done inside the Corsair Carbide 500R chassis to simulate real world conditions. To keep the tests standardised we are using Noctua’s NT-H1 thermal paste on all coolers.
CPU coolers are reviewed as they come out of the box – with their factory cooling fans, as the manufacturer intended and as the consumer expects.
Additional tests include a passive test where the cooling fans are taken away from the heatsink and a comparison between the cooler used with stock thermal paste against our Noctua NT-H1 paste.
A kind thank you to Noctua for supplying us with NT-H1 thermal compound.
Results – Stock Performance
Having the CPU at stock settings, the H75 provides an effective solution for cooling our Intel Core i7-3930K. Comparing H75 to previously reviewed coolers, it is placed among other high-end air coolers.
Fan Speed: 1500RPM during stock settings – noise is just noticeable but isn’t disruptive by any means.
Results – Overclocked Performance
Stepping things up and applying a substantial overclock to the CPU the H75 moves its way up the league. We’re impressed by how well H75 effectively cools the CPU under a demanding scenario.
Fan Speed: 1900RPM – Noise levels are less tolerable with the fan operating at almost 100%.
Results – Passive Performance
Just like other liquid coolers, H75 isn’t suitable for using passively, without cooling fans attached.
Results – Thermal Paste Performance Comparison
Most CPU coolers come accompanied with thermal paste provided by the manufacturer. For our CPU cooling tests we use Noctua’s NT-H1, so to offer up some interesting analysis we test the thermal paste given with H75 against NT-H1 to see which gives the best results during stock and overclocked performance and the results really aren’t that much different, the Noctua paste is only slightly better!
Conclusion
The Hydro Series has been an extremely successful venture for Corsair, projecting them into the limelight in the CPU cooler market in the last three years. Having models for entry level, mid-range and high-end has ensured complete domination for the brand.
The H75 is another successful attempt for Corsair. For those who desire a step-up from the H60, H75 retains the streamline design but brings with it the bonus of having dual 120mm cooling fans for a push-pull configuration. Having performed an indepth analysis on H75 we can confirm this cooler does a great job when used in stock and overclocked scenarios.
Applying a substantial overclock to the Intel Core i7-3930K, H75 excelled in bringing down the temperatures. The new Asetek pump clearly provides improvements and even more so when the unit is put under more demanding usage.
Having dual SP120L PWM fans which are capable of up to 2000RPM, the H75 delivers on the performance level but noise can be a negative factor (depending how far you go with the overclock of course). Using H75 with stock settings the noise levels are definitely tolerable but when we applied that significant overclock the SP120Ls began to be disruptive when operating at 100%.
Other aspects which we really like about Corsair’s H75 is the fact the instructions manual is easy to follow and that the cooler is simple to install. Due to H75 being self-contained (just like other Hydro units) there is the advantage of never needing to perform a maintenance service which can only be a bonus.
The H75 is priced at £65 / $85 which we think isn’t too bad at all when you consider how flexible this cooler is – supporting multiple sockets and coming with dual SP120Ls. Compared to other flagship air coolers, H75 performs similar but has the added benefits such as complete memory clearance.
Corsair’s new H75 tackles the mid-range with prowess by demonstrating it can handle high-end processors with challenging overclocks. Backed by a lengthy 5 years warranty and delivering on aesthetics, build quality and ease of installation, H75 deserves nothing less than our gold award.
Pros
+ Pristine aesthetics
+ Easy to install
+ Brilliant clearance for memory
+ Good build quality
+ Great performance
+ Maintenance free
+ 5 years warranty
Cons
– Fans are loud when overclocked (100%)
+ Pristine aesthetics
+ Easy to install
+ Brilliant clearance for memory
+ Good build quality
+ Great performance
+ Maintenance free
+ 5 years warranty
Cons
– Fans are loud when overclocked (100%)

Click here for an explanation of our awards at Vortez.net.


