NZXT have revamped their Tempest chassis from the Crafted Series. Will the Tempest 410 Elite continue in the footsteps of success or fail in the eye of the storm?

Product on Review : Tempest 410 Elite
Manufacturer and Sponsor : NZXT
Street Price: £69 inc. VAT (GBP)
NZXT are back with another release – this time from the Crafted Series. The original Tempest and Tempest EVO achieved much success for its great design and features. NZXT are back with yet another version of the popular Tempest named the Tempest 410. The Tempest 410 is available in standard and Elite versions. The standard comes with 2 pre-installed fans and a solid side panel whilst the Elite comes with 3 pre-installed fans and a Perspex side panel window – the difference in cost between both models is just £5.
The Tempest 410 Elite we are going to be reviewing today promises to be an entertaining mid-tower with USB 3.0 support, resilient air cooling and a unique look that settles between the minimalist and gamer style. Will the Tempest 410 follow in the successful footsteps of the Tempest and Tempest EVO? Let’s find out!
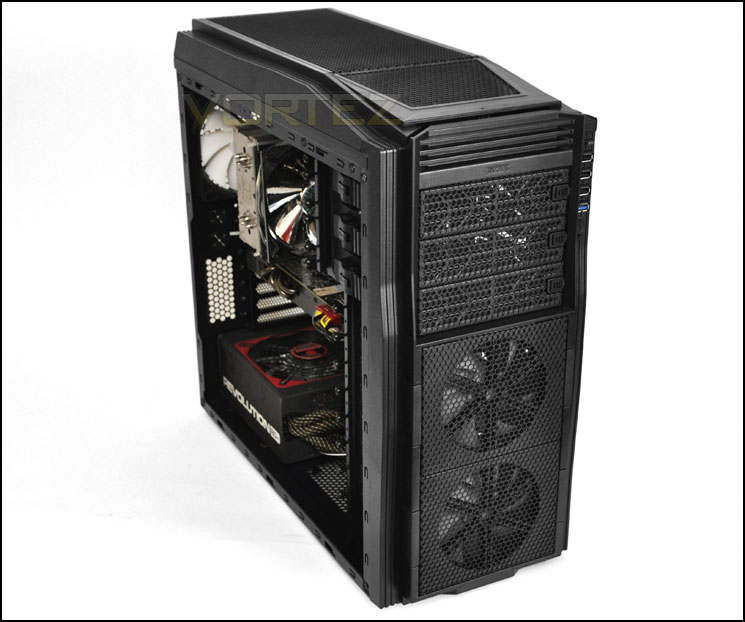
NZXT’s take on Tempest 410 Elite
About NZXT
Technical Specifications & Features
Features
• Large honeycomb steel mesh design for optimal airflow
• Dual radiator support for all-in-one liquid cooling solutions
• Latest Audio, USB 2.0, and USB 3.0 internal support
• Dual touch powered 120mm front fans equipped with easily removable filters for easy maintenance
• Large clear side windows allows for viewing of CPU and components
CASE TYPE Mid Tower Steel
FRONT PANEL MATERIAL Plastic/Steel
DIMENSIONS (W x H x D) 215 x 481 X 496mm
VGA Clearance Maximum 315mm w/o HDD, 290mm w/ bracket, 250mm w/ HDD installed
CPU Heatsink Support 170mm
COOLING SYSTEM
FRONT 2 X 120mm @ 1200rpm (2x included)
REAR 1 X 120mm @ 1200rpm (1x included)
TOP 2 X 120/140mm
BOTTOM 1 x 120mm
DRIVE BAYS 3 EXTERNAL 5.25″ DRIVE BAYS
8 INTERNAL 3.5″/2.5″ Slots
MATERIAL(S) Steel with painted interior
EXPANSION SLOTS 7
WEIGHT 7.8KG
MOTHERBOARD SUPPORT ATX, MICRO-ATX, MINI ATX, FLEX ATX, MINI ITX
Packaging & First Look
As we have seen with other NZXT products, the Tempest 410 Elite is presented to us in an eco-friendly package design. The front has a depiction of the case whilst the rear has the features and specifications.
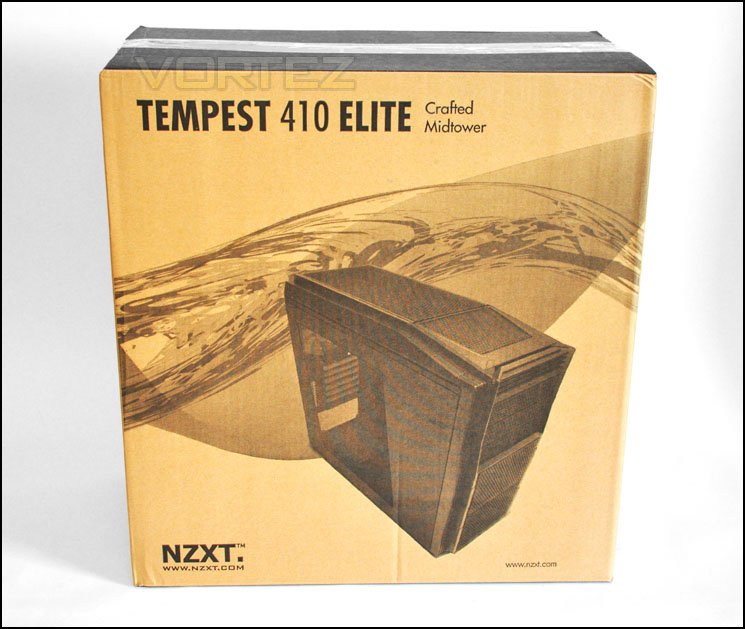
The eco-friendly packaging
Within the package we have a small bundle of accessories that include an instruction manual, screws and some cable ties. Inside the packaging the case is covered in a clear plastic cover and kept intact during transit with 2 polystyrene pillars.
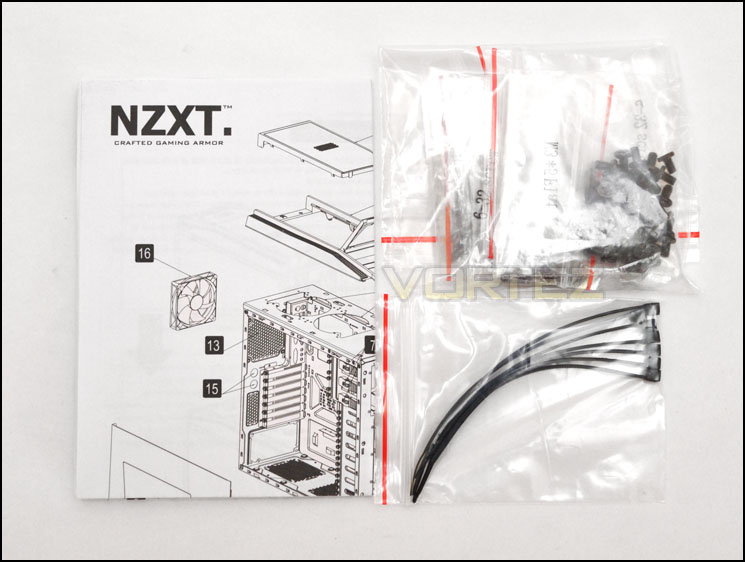
The accessories bundle for Tempest 410 Elite
Taking the case out of its packaging we can get our first glimpse of the Tempest 410 Elite. Its overall design retains a slot in-between minimalist and gamer styling. The case has a smooth look with a Perspex window on the prominent side panel for displaying your expensive hardware or just keeping an eye on things. Fans of the original Tempest case will really like what NZXT have done with the exterior.
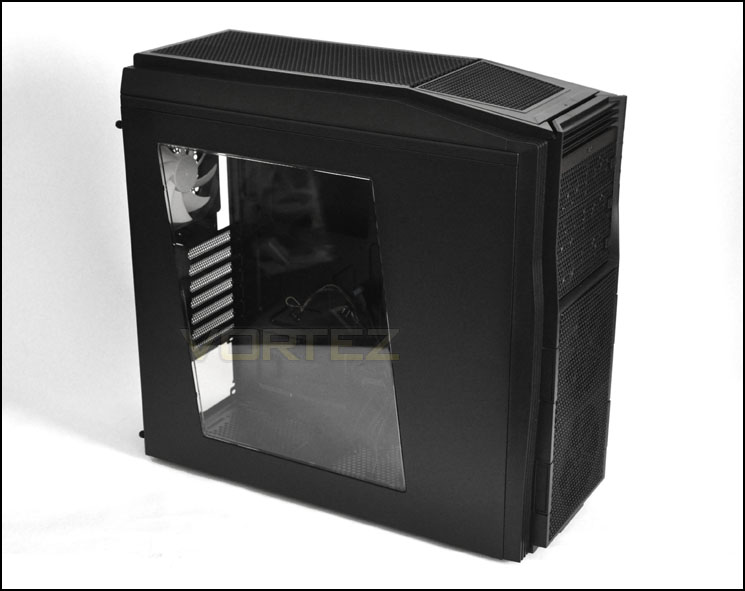
The prominent side panel with large Perspex window
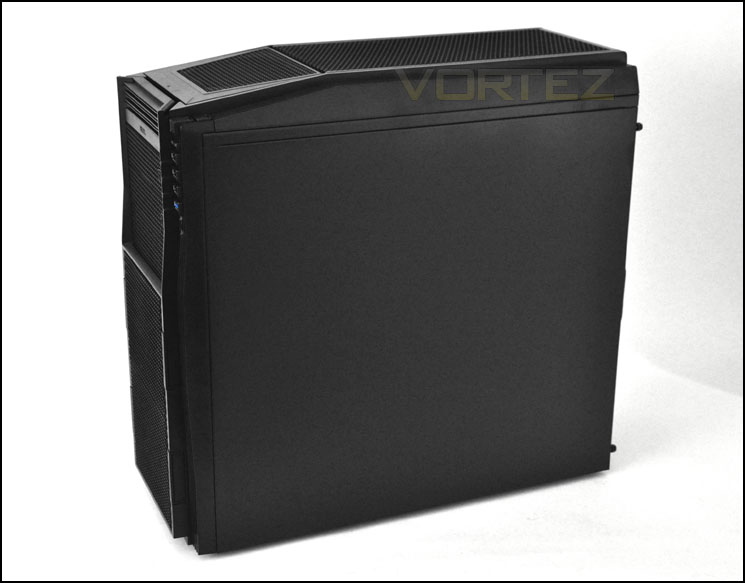
The left side of Tempest 410 Elite
Exterior
Moving in for a closer look of the exterior we can see from the front is made up mostly of mesh. In the lower regions you can see there are dual 120mm intake fans. These fans are actually removable from the front. Above this we have 3x 5.25” drive bays that are again removable from the front.
Looking at the rear of Tempest 410 Elite, the bottom has space for mounting a PSU. Above this there are 7x PCI expansion slot covers each featuring mesh ventilation for better airflow. Beside this we have 2x circular rubber grommets for tubing or cabling and then above the 120mm rear exhaust fan.
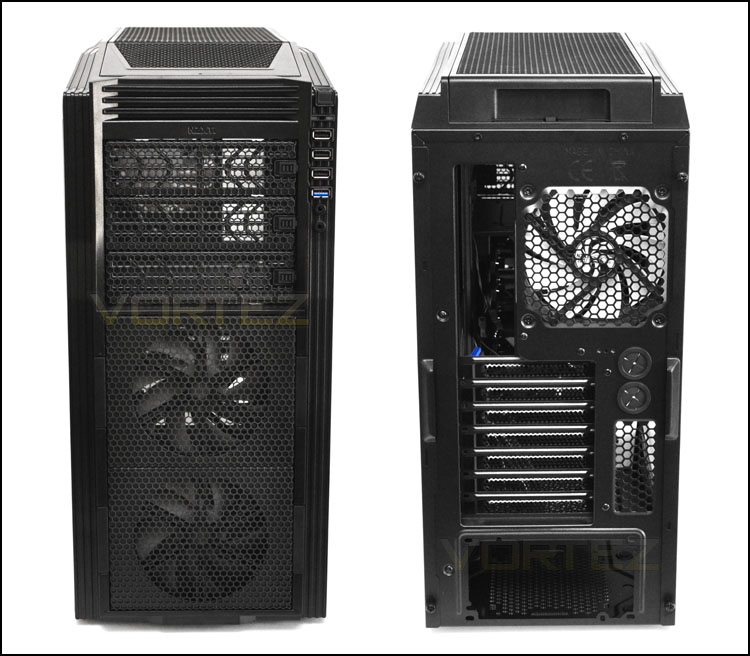
The front and back of Temptest 410 Elite
The front panel connectivity is delivered via a strip down the right-hand side of the case. The available ports are:
• Power & Reset Buttons
• 3x USB 2.0 Ports
• 1x USB 3.0 Port
• Headphone & Microphone Jack
The USB 3.0 port here connects to the USB 3.0 header on the motherboard. All of the ports here are well hidden and NZXT have done well to fit them in such a space.
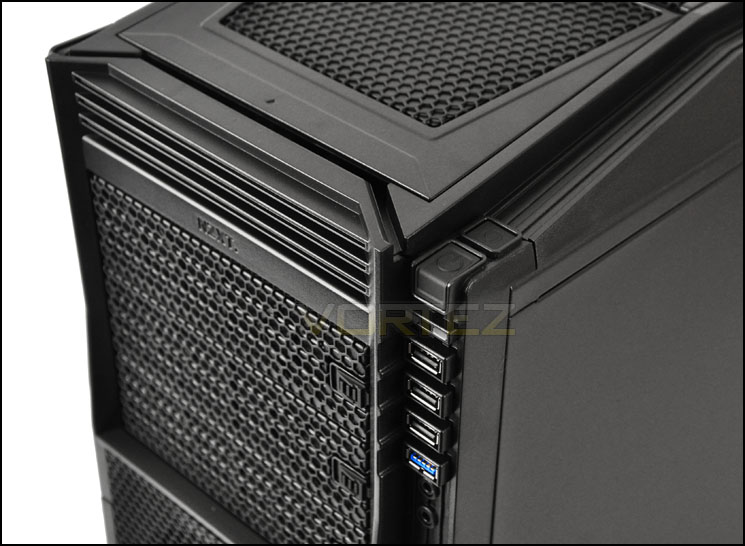
The front panel connectivity on Tempest 410 Elite
At the top of Tempest 410 Elite there is a compartment with a lid that can be opened out to reveal space for storing small items such as memory sticks, keys, money etc. To open the lid on this compartment the top just needs to be pressed down and it will pop up.
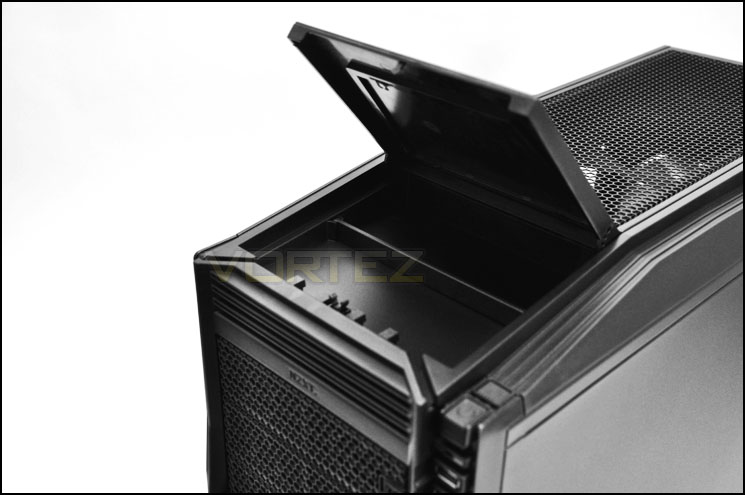
A top compartment for storing small items
The top of Tempest 410 Elite is covered in a perforated mesh panel. On the underside of this panel we can mount dual 140/120mm fans for air cooling. The top panel here can be unclipped by pulling the back section in an upwards fashion – this gives you quick and easy access to the fans at the top of the case.
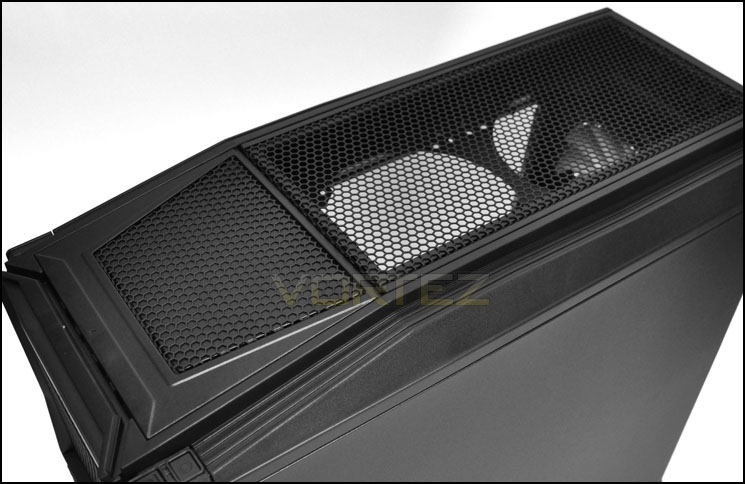
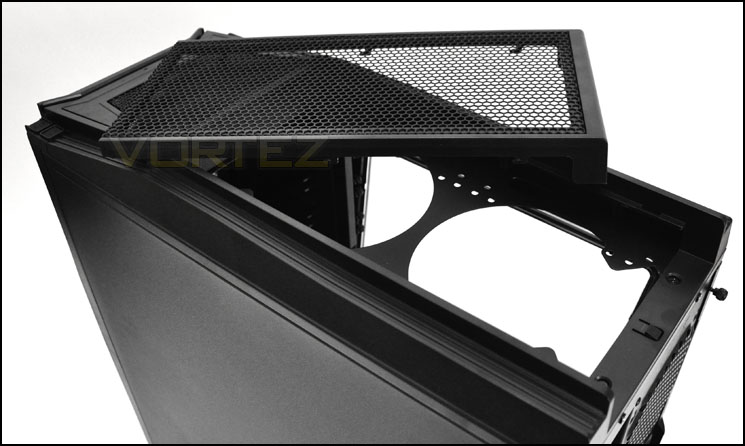
The top section of Tempest 410 Elite is removable
Finally, on the underside of Tempest 410 Elite we have 4x rubber feet and an area marked out for the PSU fan with dust/air filter and another perforated mesh section for attaching a bottom-mounted 120mm fan within the case.
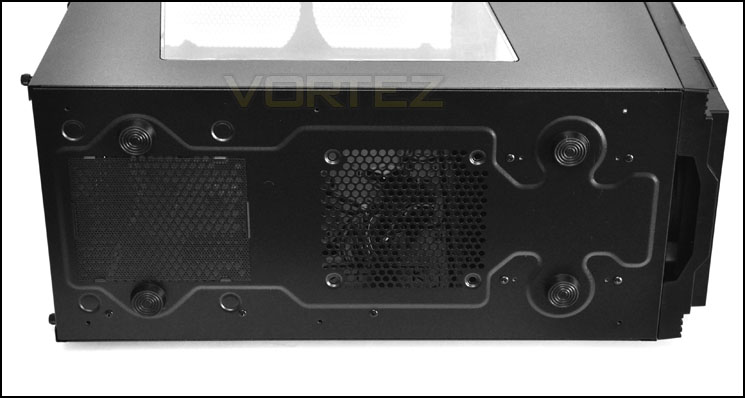
The underside of Tempest 410 Elite
Interior
Removing the side panel reveals a well-designed internal layout with cable management holes using rubber grommets. There are tool-less design mechanisms throughout for attaching devices and a motherboard specification guide for different standards – ATX, mATX etc.
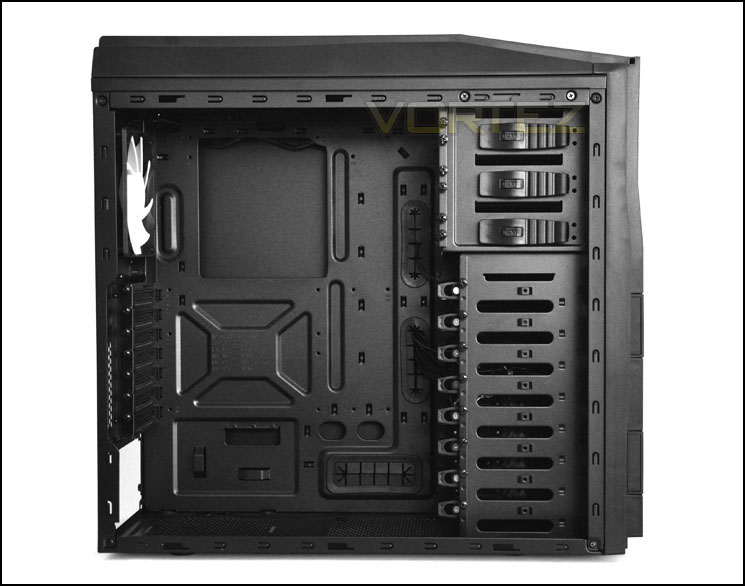
Tempest 410 Elite side panel removed
Moving inside for a closer look there is an area marked out for mounting a PSU at the bottom of the case. The underside has an air/fan filter and there are thin anti-vibration pads to avoid scratching or vibration during operation.
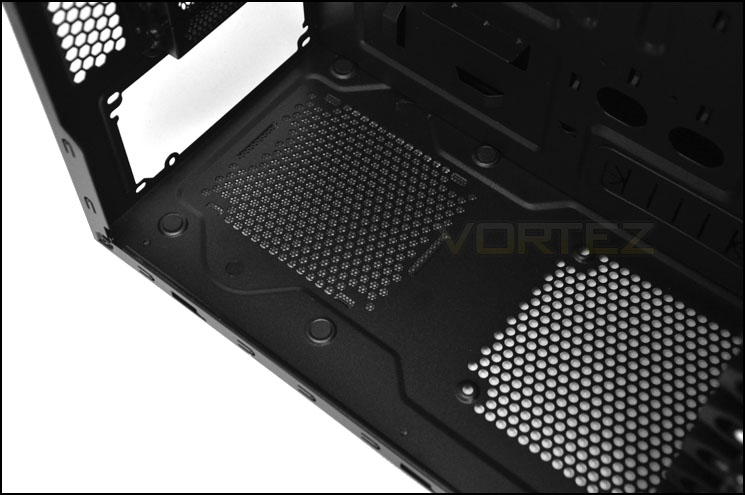
Area for mounting PSU at the bottom
Further up there are 7x PCI slot covers with mesh ventilation for better airflow. Each of these PCI slot covers has a thumbscrew for quick and easy removal.
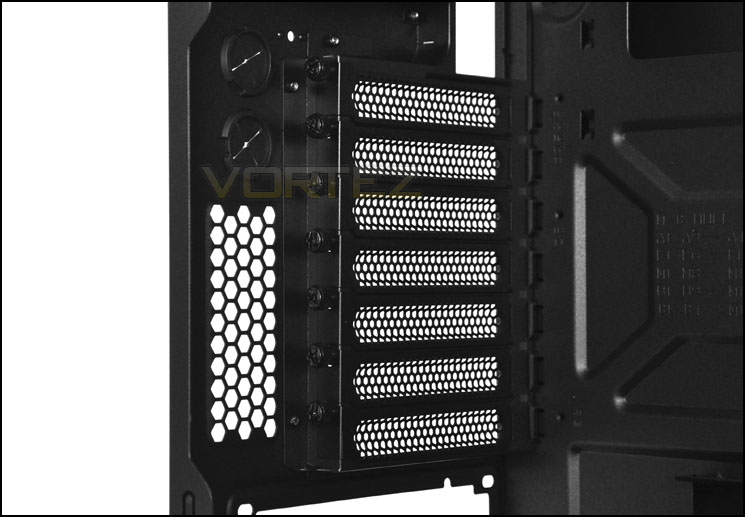
7x PCI slots with mesh ventilation and thumbscrews
In terms of cooling – there is a 120mm rear exhaust fan and 2x slots for 140/120mm fans at the very top of Tempest 410 Elite. There are no filters for these fan placements.
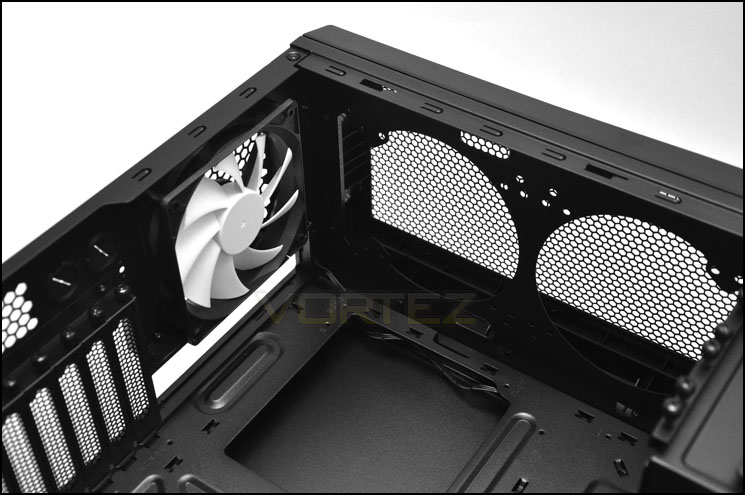
Air cooling options within Tempest 410 Elite
Interior (Continued)
On the other side of Tempest 410 Elite there are 3x optical drive bays with tool-less drive mechanisms that we have been accustomed with on NZXT cases before. In the default position the mechanism is in a closed state. The button just needs to be slid to the left and the bracket pressed in to allow the drive to move into the bay. Once the bracket is moved back into position it will then push pins into the mounting holes on the drive.
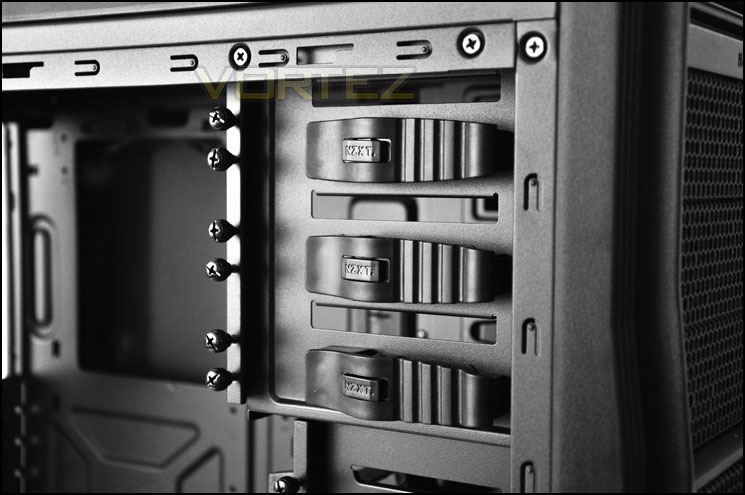
Easy to use tool-less mechanisms for optical drives
Beneath the optical drive bays there is a HDD cage that can accommodate up to 8x 2.5/3.5” drives. Each HDD has to be installed within a tray – these trays are accessible via the front of the case by removing one of the hot-swappable 120mm fans.
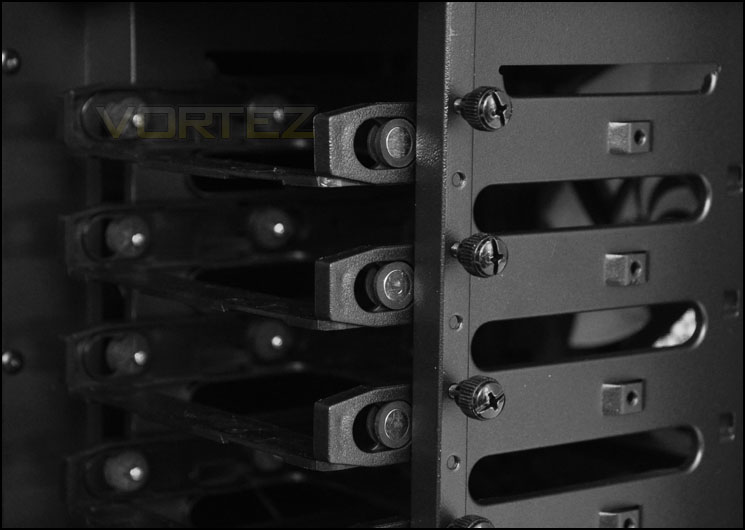
The HDD cage can host up to 8x 2.5/3.5” drives
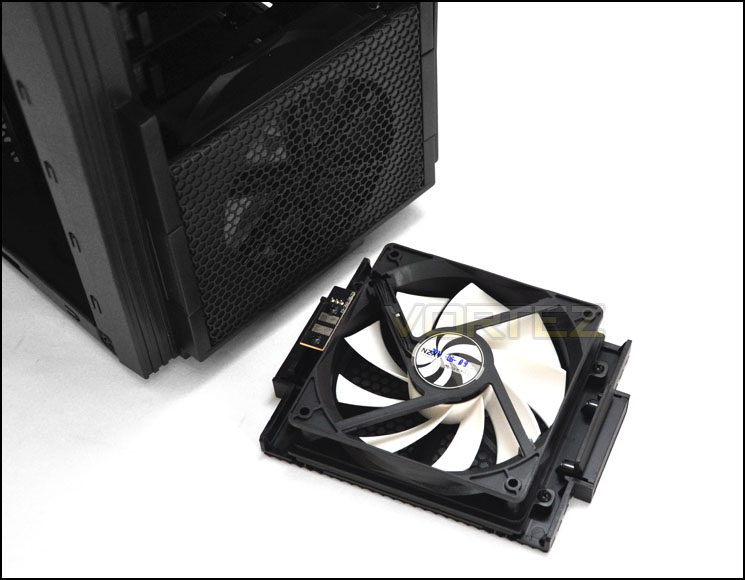
Fans are removable from front and give access to HDD trays
These fans are given connectivity via 3-pin headers that are found on the inside of the Tempest 410 Elite. Both fans have this 3-pin connector that links to a Molex connector. So to power both fans the PSU will need to be used to deliver the power directly.
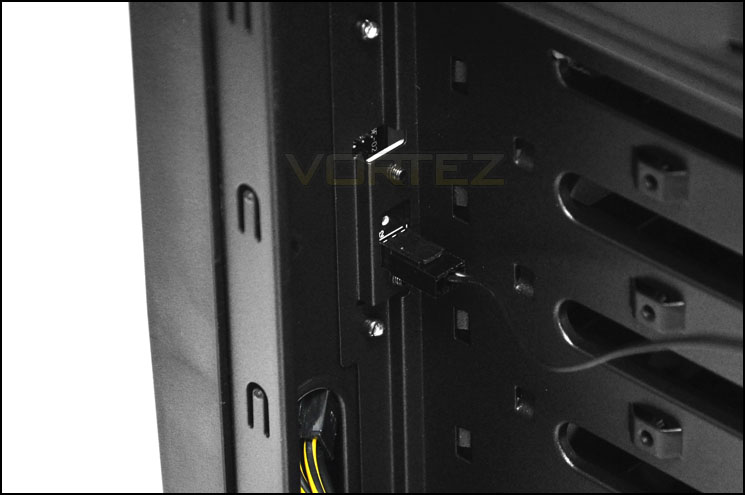
Fan connectivity for front 120mm fans
Installation
Installing kit inside Tempest 410 Elite is painless. From start to finish I encountered no real problems. The only criticism I would have is that the rubber mounts on the cable management cut-outs do fall off when pushing cables through. Getting them back on can be a little tricky. Around the back, we can route all of the cables through without a hitch – even the thickest of cables will comfortably fit with the side panel on. The E-ATX CPU power cable will route around the back and feed in through the top of the motherboard tray.
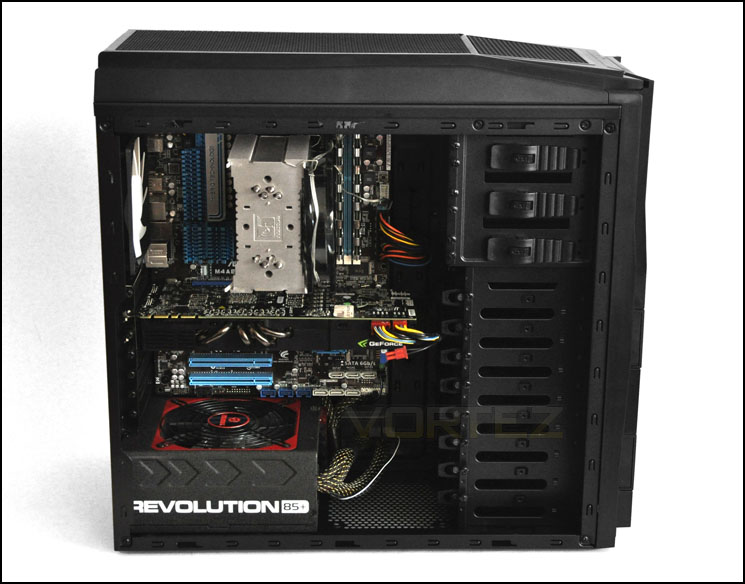
Plenty of space for high-end hardware
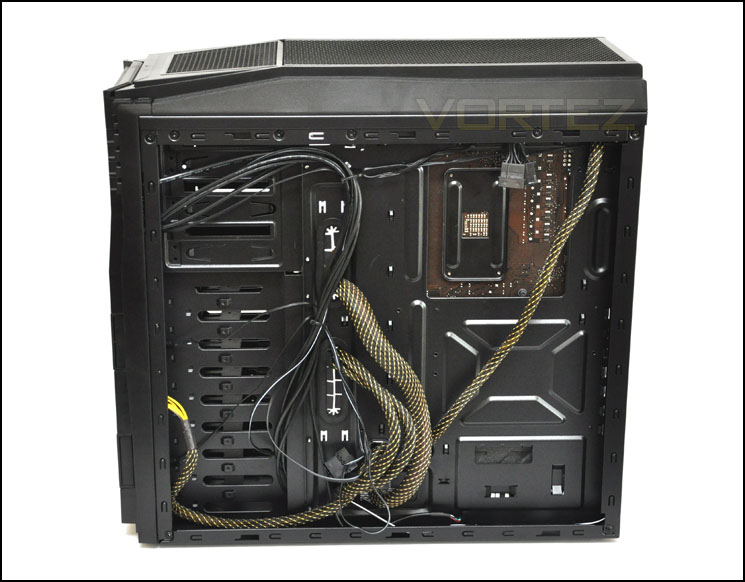
Behind the motherboard tray cables can be routed
As mentioned earlier, HDDs are installed via the HDD trays behind the front mounted fans. These trays can take 2.5/3.5” drives – the drive simply slips into a tray and the pins slot into the mounting holes on the drive. Or if installing a 2.5” drive, there are screw holes for securing the HDD.
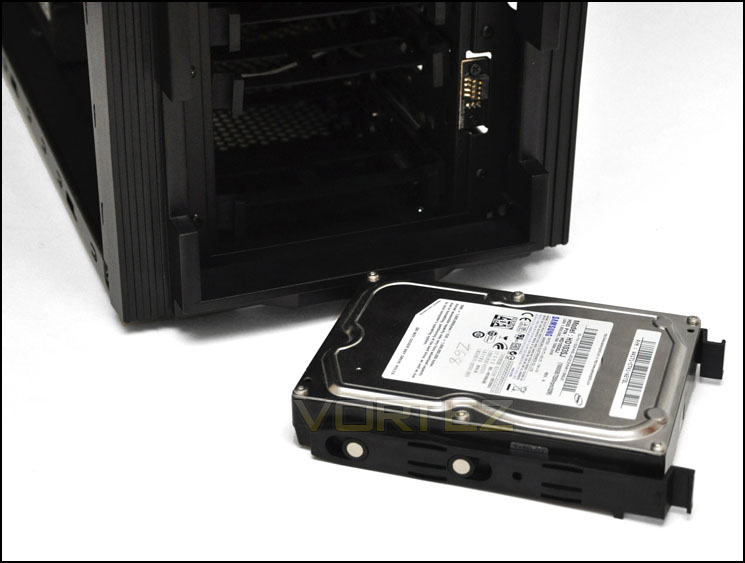
Installing the HDD front the front
In terms of clearance the Tempest 410 Elite can accommodate a maximum of 11” for graphics card length. This will mean that larger cards such as AMD HD6990 will not fit with the HDD trays present. If the graphics card is less than 4.3” in width then in essence it should tuck away inside the HDD cage with the trays removed.
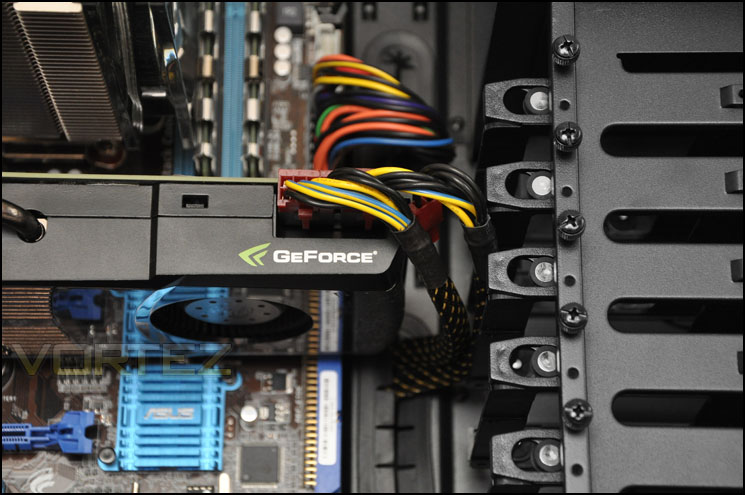
GPU clearance within Tempest 410 Elite
For CPU cooler clearance we have a maximum height of 170mm – the CPU cooler used here is the Noctua NH-U12P so there is more than adequate space here. Those with popular coolers such as the Noctua NH-D14 and Thermalright Silver Arrow will be able to install these coolers inside Tempest 410 Elite as they are 160mm in height.
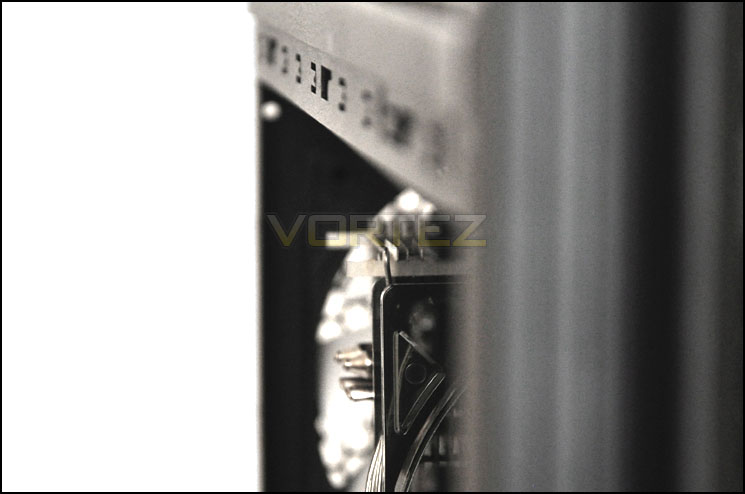
CPU Cooler clearance offers up to 170mm
Behind the motherboard tray we have up to 2.5cm of clearance to the side panel, this is a generous amount of space and allows for plenty of cabling to sit behind the motherboard tray. This is one of the biggest clearance gaps we have come across in our case reviews and is welcomed with open-arms.
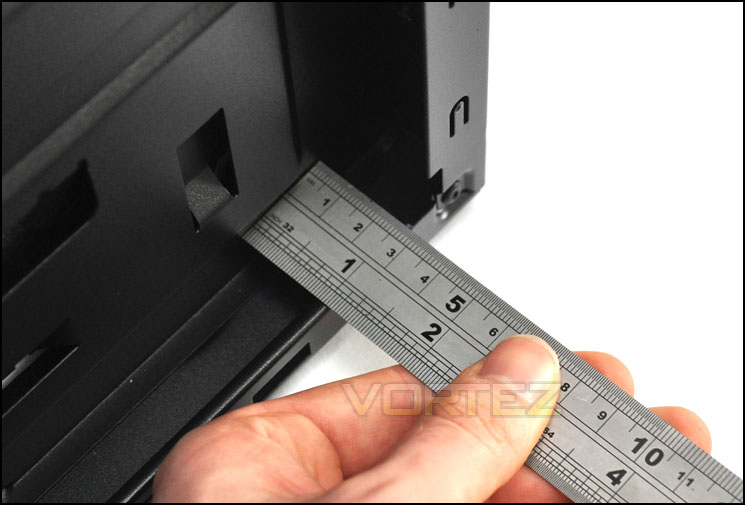
Clearance behind the motherboard tray is 2.5cm
Thermal Performance Testing
The Tempest 410 Elite has 3x 120mm fans pre-installed and also has a number of other options throughout its chassis for additional fan cooling. Following a traditional air-cooling layout the Tempest 410 Elite should offer good cooling performance.
To discover the thermal performance of the Tempest 410 Elite I will record idle temperatures after 20 minutes from a cold boot. I will then stress the system and temperatures will again be monitored after 30 minutes have elapsed.
System Components
CPU AMD Phenom II X6 1055T 2.8GHz
Motherboard ASUS M4A89TD PRO
Graphics ZOTAC NVIDIA GTX 480 AMP
Memory 4GB Mushkin EM3-10666 DDR3
HDD Samsung Spinpoint 500GB SATA-II
PSU Enermax Revolution 85+ 850W
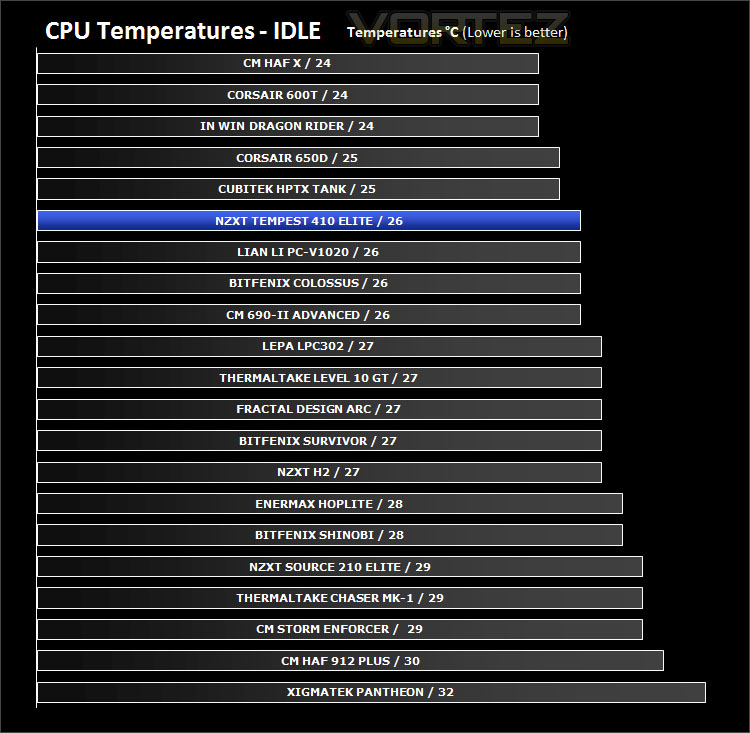
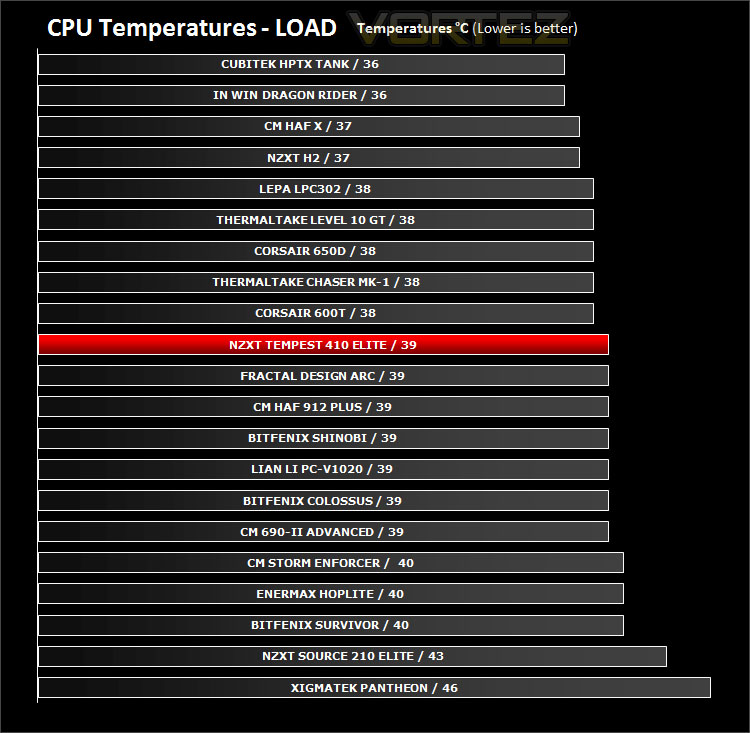
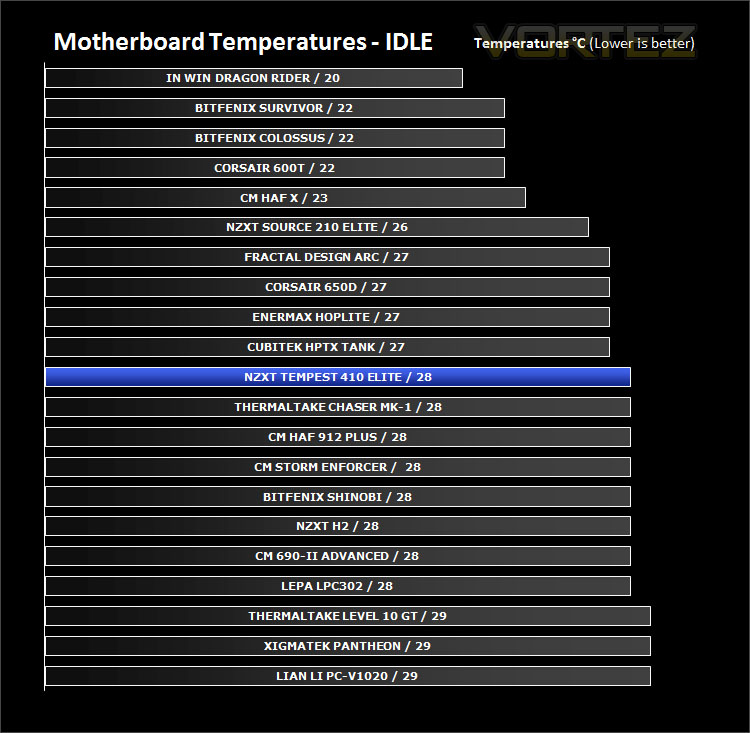
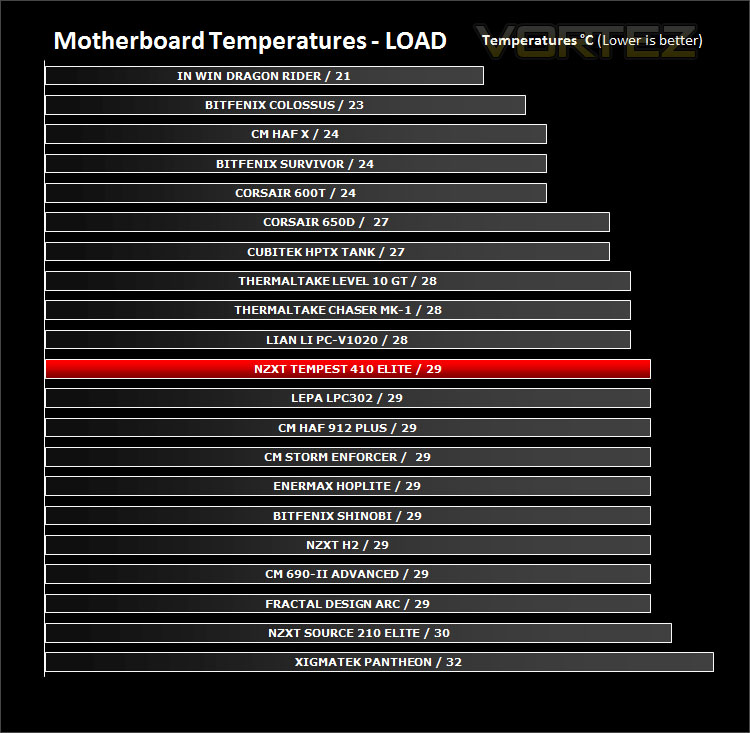
The Tempest 410 Elite does very well in the thermal performance tests. The fans used within the case are well known for delivering good results at low-noise operation.
Conclusion
Often with sequels there is an air of disappointment. Building on previous success and continuing with a re-design is a bold move. Often those who try fail but NZXT have succeeded with this revamp.
The Tempest 410 Elite slots directly in between the discreet and gamer styling whilst offering a roomy mid-tower interior. It may not be to everyone’s taste due to the amount of plastic on the front and top but its feature-set should outweigh this. The top features a removable panel to gain easy access to the top cooling fan slots and the top also has a hidden compartment for storing those essentials such as memory sticks, memory cards, money, keys etc.
Not only is the device installation tool-less but so are the front mounted fans. The front lends a similar feature found on the NZXT H2 with hot-swappable fans – this makes getting the fan filters and the HDDs out from the HDD cage very easy. The only thing you need to use your screwdriver on is the motherboard installation.
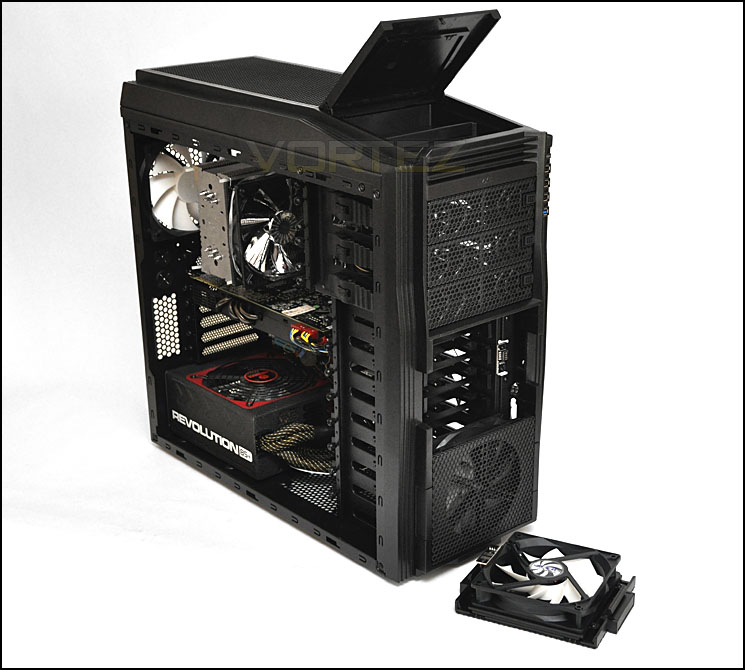
Priced at £69.99 inc. VAT (GBP) the Tempest 410 Elite is a good value for money option with 3 pre-installed fans, a sleek design and countless tool-less design options within. The only aspect that is lacking is the cable management grommets which I found to fall off a little too easy when routing cables through – but this is something quite easily fixed.
The bottom line is Tempest 410 Elite is a good contender for the mid-tower category. It has some nice touches – hot swappable fans, good clearance on components and delivers impressive air cooling performance.
+ 3 pre-installed fans
+ Hot swappable fans at front
+ Tool-less design throughout
+ Very roomy behind motherboard tray
+ Well thought out design
Cons
– Style involves quite a lot of plastic
– Rubber mounts/grommets on cable management holes can slip off easy


Click here for an explanation of our awards at Vortez.net.