







It’s time to level up! We take a look at Thermaltake’s Full Tower Chassis the Level 10 GT (VN10001W2N). The smaller brother to the original BMW inspired Level 10 tower.
Product on Review: Level 10 GT
Manufacturer: Thermaltake
Street Price: £200 inc. VAT (GBP) (At time of review)

Being unique, heavy, featuring a complex design and working with big name BMW meant that the cost of the Level 10 soared way beyond what many would spend on a chassis. Now, Thermaltake are back with a simplified version of the original Level 10 – the Level 10 GT. In essence this is the smaller brother of the original design and comes with a smaller price tag too. We first saw the Level 10 GT at CeBIT 2011 and since then we have been keen to review this new product. So let’s begin our analysis of the Level 10 GT from Thermaltake.
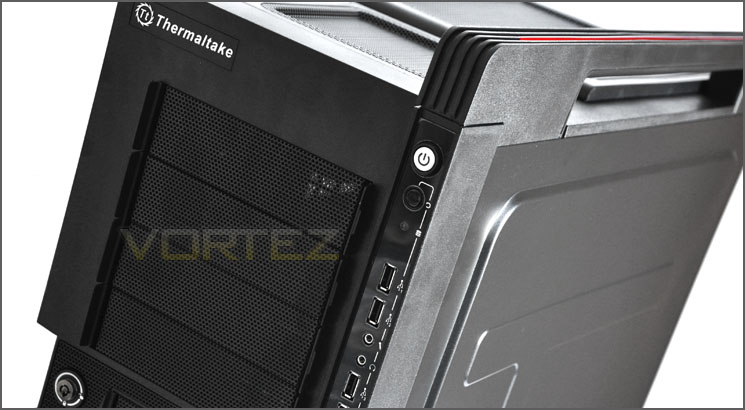
Thermaltakes take on the Level 10 GT:
Following the high-profile launch of Level 10 Super Gaming Modular Case, the design collaboration between Thermaltake and BMW Group DesignworksUSA, in 2009, Thermaltake looks to invigorate the PC enthusiasts with the latest Level 10 GT computer case. The design language of the Level 10 GT expresses a passion for visual aesthetics deriving from demanding and immersive game play and multimedia entertainment enthusiasm. Modern games and entertainment applications also require highly advanced hardware configurations, which at the same time request more space and optimized ventilation than conventional hardware.
Technical Specifications
Case Type
– Full Tower
Material
– SECC
Front Bezel Material
– Plastic
Color
– Exterior: BLACK
– Interior: BLACK
Side Panel
– Window
Motherboard Support
– Micro ATX
– ATX
– Extended ATX
Motherboard Tray
– 5.25″ Drive Bay x 4
– Ext. 3.5″ Drive Bay x 1
– Int. 3.5″ Drive Bay x 5
– Expansion Slots 8
Front I/O Ports
– USB 3.0 x 2
– USB 2.0 x 4
– eSATA x 1
– HD Audio x 1
Cooling System
Front (intake)
– 200 x 200 x 20 mm ColorShift Fan x 1 (600~800RPM, 13~15dBA)
Rear (exhaust)
– 140 x 140 x 25 mm Turbo Fan (1000PRM, 16 dBA)
Top (exhaust)
– 200 x 200 x 30 mm ColorShift Fan (600~800RPM, 13~15dBA)
Side (intake)
– 200 x 200 x 30 ColorShift Fan (600~800RPM), 13~15dBA)
Bottom (intake)
– 120 x 120 x 25mm (optional)
Liquid Cooling Capable
– Yes
Liquid Cooling Embedded
Power Supply Supported
– Standard PS2
Dimension (H*W*D)
– 584 x 282 x 590 mm
Net Weight
– 28.0 lbs
Security Lock
– Front HDD Access
– Side Panel
– Rear peripherals
Packaging & First Look
The Level 10 GT arrives in a nicely designed case box – emphasising USB3.0 integration. Although there is an outline of a BMW, unlike the original Level 10 the GT isn’t in collaboration with BMW but Thermaltake are still keen to take advantage of that previous partnership. There are some further details on the sides and back as always, and inside the case is kept fixed in place via polystyrene pillars and protected with a black cloth cover.
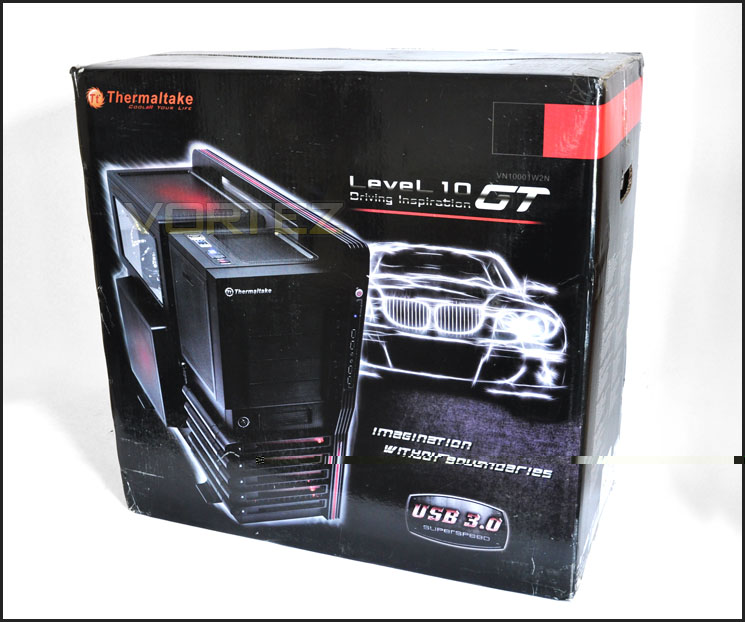
Level 10 GT packaging
Inside the actual case we have an accessories kit with a series of items such as: instructions manual, product catalogue, headset holder, cable tidies, 8-pin to 8-pin and 4-pin and various screw types for different devices.
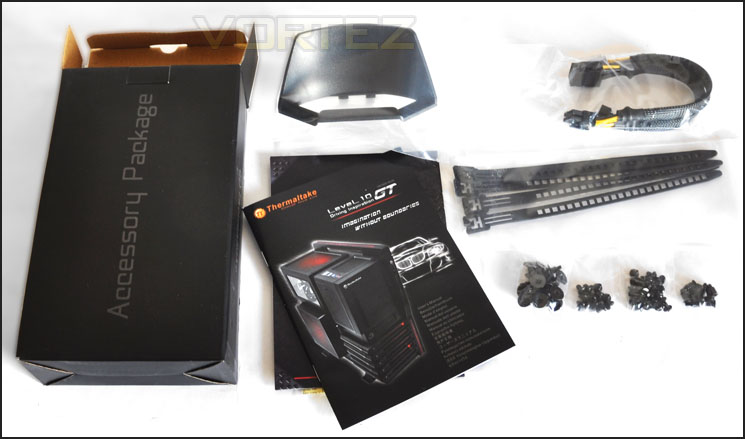
The accessories bundle that comes with the Level 10 GT
Moving to the case, we get our first glimpse of the Level 10 GT’s visual appearance. Judging by the width of the box I knew the case would be considerably wide. The Level 10 GT is essentially the little brother to the original Level 10. The original Level 10 has a much more radical design arrangement and can definitely be deemed as having a totally unique design layout – the GT at least resembles the layout of a traditional case although it does carry with it some traits from the original case – it’s just smaller, lighter and looks more “case-like” compared to its elder.
As you can see from the prominent side, we have 5 external HDD trays located on the side. A large extended box/mesh panel that houses a large 200mm fan (with removable dust filter), some locking mechanisms and a Perspex window to view hardware inside.
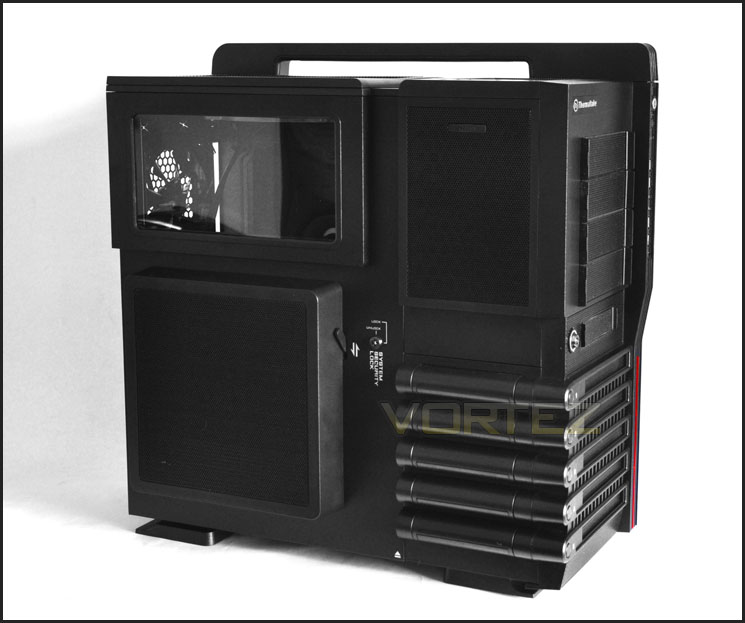
The prominent side has plenty of features
Over the other side the side panel has no distinguishing features as such but does have some typography, some finely placed lines and contours and a carry handle for moving the case around.
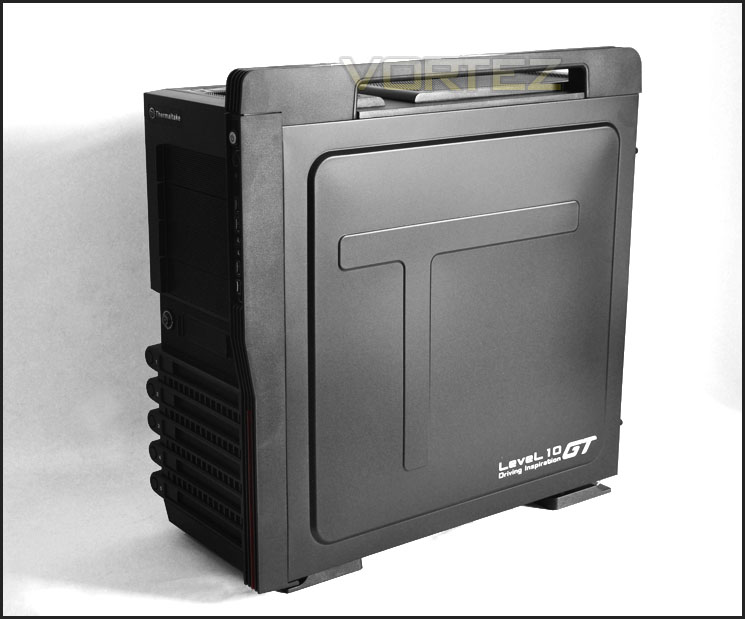
The reverse side with carry handle
From our initial look there’s no doubting the Level 10 GT has plenty of features to talk about but let’s take a closer look now at the exterior and interior.
Exterior
The front and back of the Level 10 GT doesn’t look all that attractive. The front particularly looks and appears to be quite plastic. At the front we have 5 designated bays for installing the HDD from the side. Each of these bays has a mesh panel to encourage ventilation and to provide intake for the 200mm fan (600~800RPM, 13~15dBA) that is positioned behind each of these bays. Above this we have a small 3.5” cover giving functionality for an SD card reader or similar device. Next to this there is a key lock mechanism for securing the front fascia. Above we have a series of 5.25” bays – 4 in total, each coming with clips on either side for easy removal from outside of the case. Along the far side we have a series of FP connectivity including: power/reset button, activity LEDs, 4 x USB2.0 ports and HD audio jacks (headphone/microphone). Further back, running along the same panel we have a handle at the top of the case, this just allows for easy transportation.
Around the back of the Level 10 GT we have a space at the very bottom for mounting the PSU and a bracket for fastening cables. Moving up we have 8 PCI expansion slot covers each with ventilation for better airflow, all of the covers here are given added security/stability via an additional bracket. A 140mm fan has been positioned for the rear exhaust and above this 3 rubber grommets to accommodate water-cooling thus giving you more options for cooling.
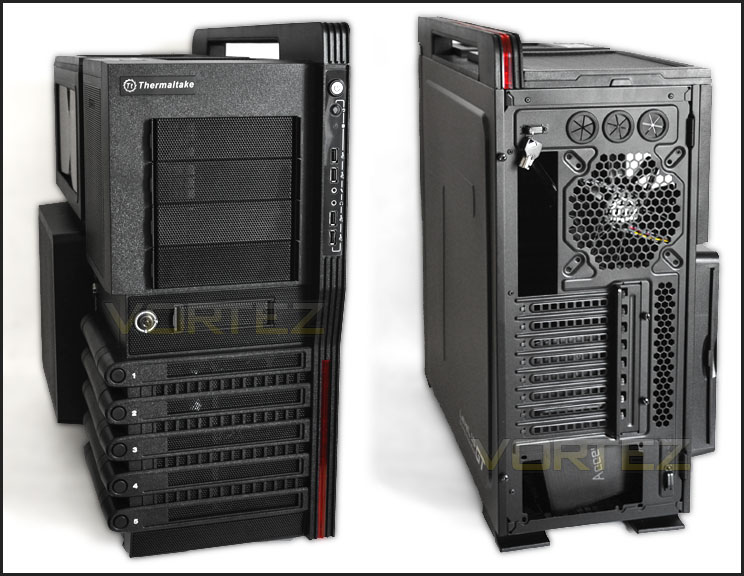
The front and back of the Level 10 GT
On the underside of the Level 10 GT we have 4 rotating feet each having non-slip rubberised pads. Covering over half the length of the case we also have a removable dust filter this can be taken out very easily and cleaned if necessary.
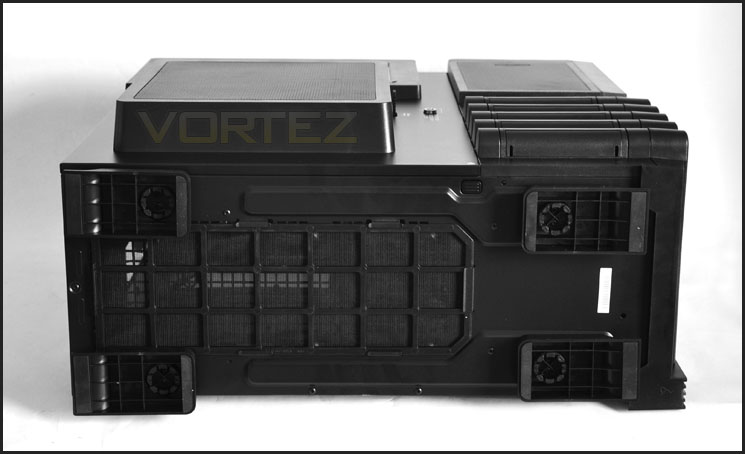
The underside of the Level 10 GT with removable large dust filter
At the top of the case we have part 1 of the connectivity controls. Here we can take advantage of eSATA, USB3.0 (via USB3.0 motherboard header) high and low fan speed control (for all 200mm fans) and LED control for each of the fans too.
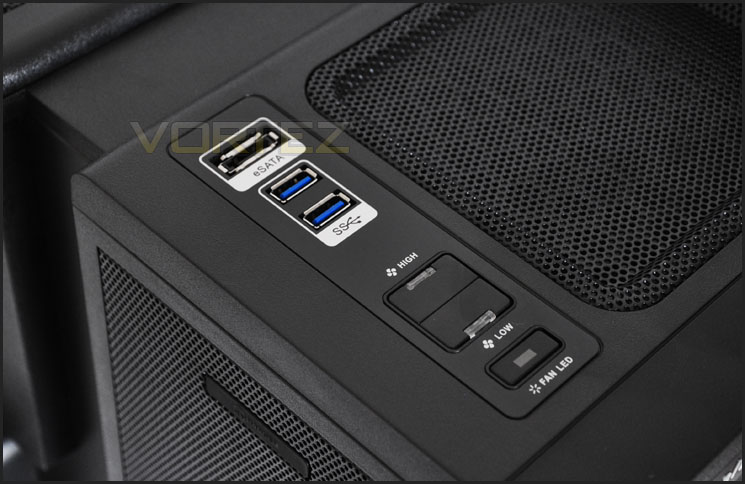
Front panel connectivity including LED and fan control
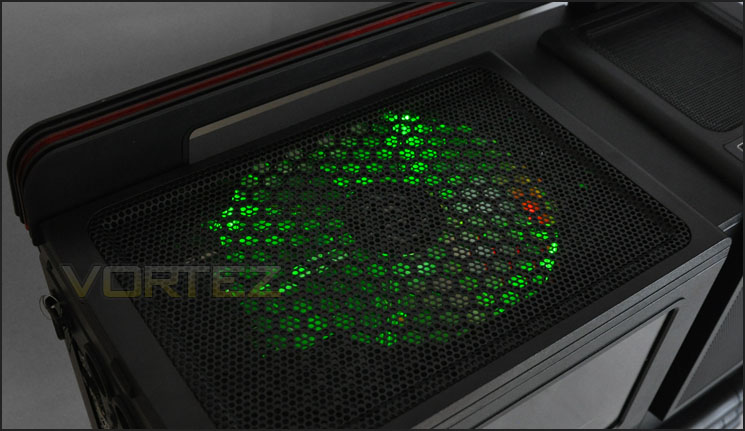
Further back there is a large mesh panel that provides ventilation for the top mounted 200mm fan. This doesn’t have a dust filter attached.
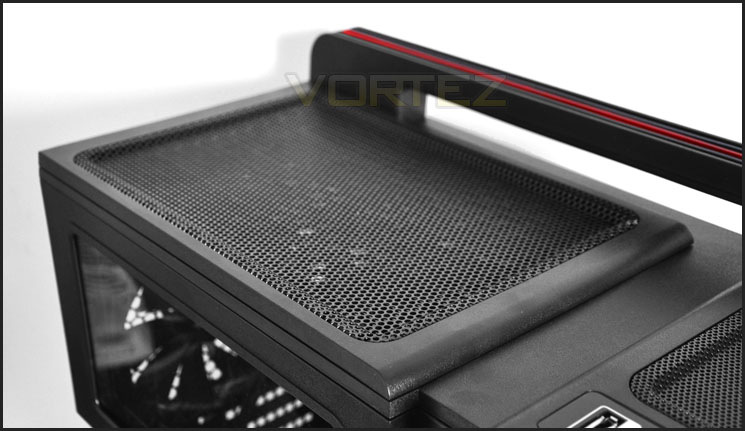
The top of the Level 10 GT
Exterior (Continued)
If you haven’t already noticed, security is a big thing with the Level 10 GT. Thermaltake have been keen to ensure that there are plenty of methods to keep theft to an absolute minimum and I really like this ethos. At the back of the Level 10 GT we have 2 brackets that cables can be fed through, the bracket at the very top of the rear of the case has 2 keys hanging from it. These are both used to secure the side and front panels.
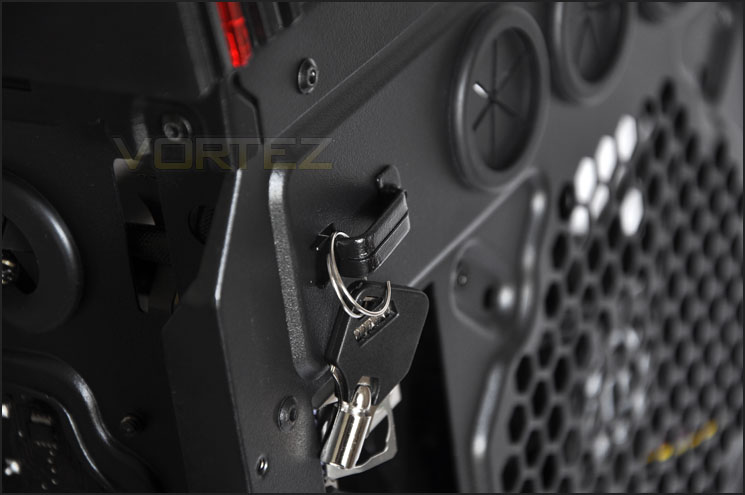
Security is a top priority with the Level 10 GT
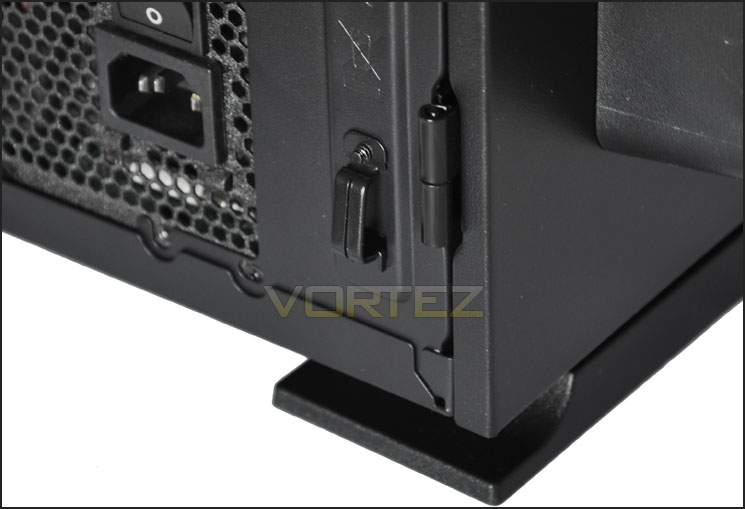
Anti-theft brackets stop thieves stealing peripherals such as gaming mice
Typically to get a side panel open we would remove thumbscrews from the rear of the case but with the Level 10 GT we have a different method. The prominent side has a door, to open this we need to unlock using the key and then press a button on the underside of the case. Great ideas to keep your hardware safe, either at home or at a LAN party.
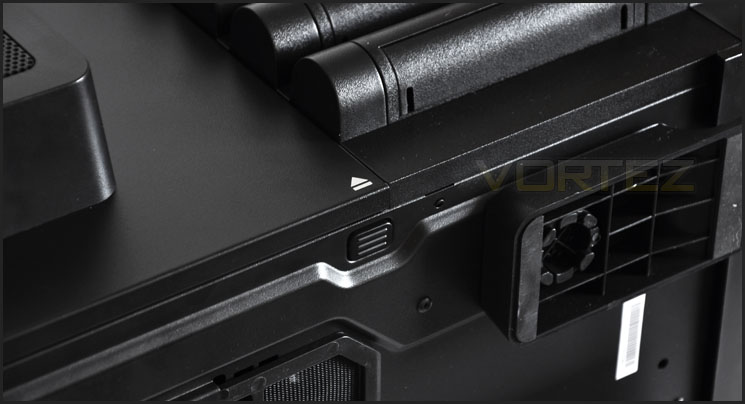
Button on the underside needs to be pressed to open side panel door
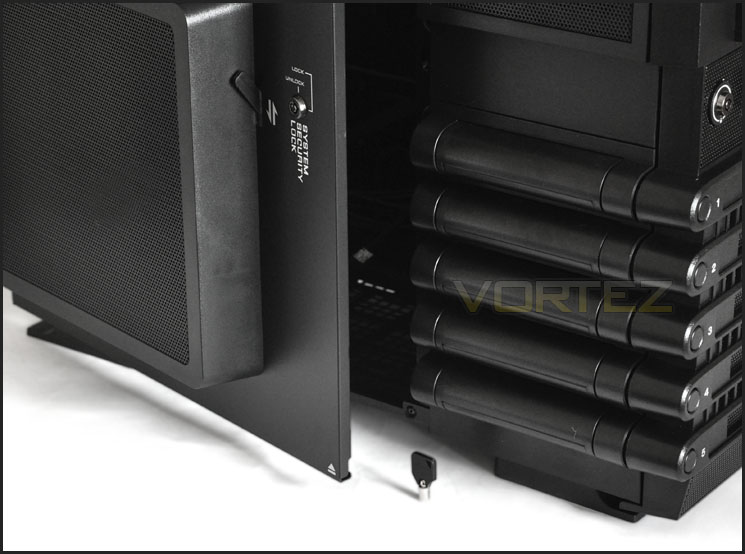
A key must be used to turn the lock into the “unlock” position
Now that we have taken a good look at the outside of the Level 10 GT, let’s go in for a closer look at the internals and see what Thermaltake have integrated.
Interior
With the side panel door open we can now take a look at the inside of the Level 10 GT. From an initial look the internal layout looks good. There are cut-outs around the motherboard tray including rubber grommets to keep things clean and tidy and a large CPU cooler backplate cut-out. Around the back there appears to be plenty of cable management hooks and quite oddly there are optical drive bay mechanisms on this side rather than the other side – this appears to be a move away from traditional case design but one that is quite sensible as the button on the optical drive is often on the right side, often pressing the button causes the drive to move back if there are no screws in place to keep the drive still. This should combat this slight niggle. Beneath this we also have a series of eSATA power cables pre-installed for hot swapping the HDDs into the bays. Overall, a nice layout with some great design choices. Let’s move in for a closer look.
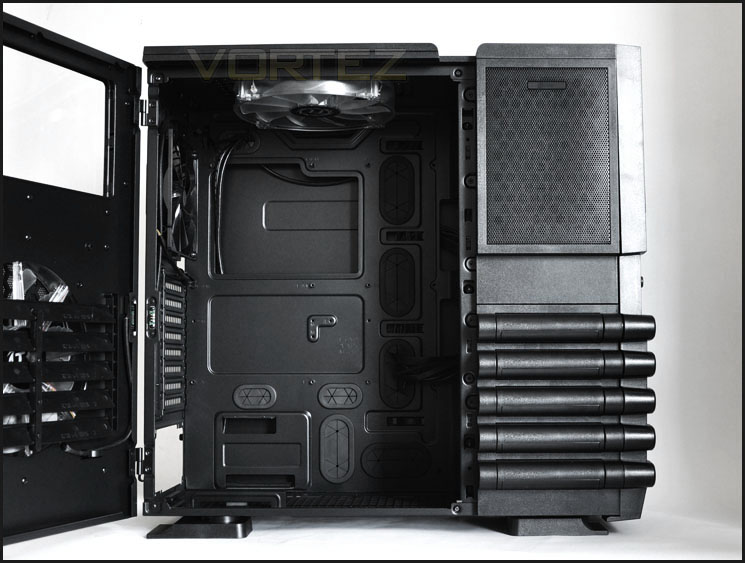
The pane door open to reveal the spacious interior
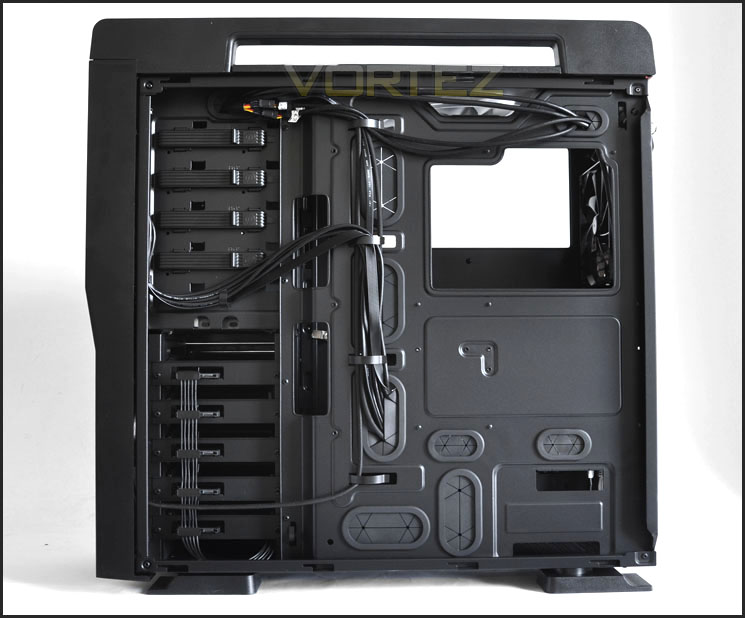
Behind the motherboard tray cable management holes and large CPU cooler backplate cut-out
On the inside of the side door panel we have a large 200mm fan pre-installed (600~800RPM, 13~15dBA). This fan has the ability to change colour. Behind it we have a 5 fin airflow adjuster.
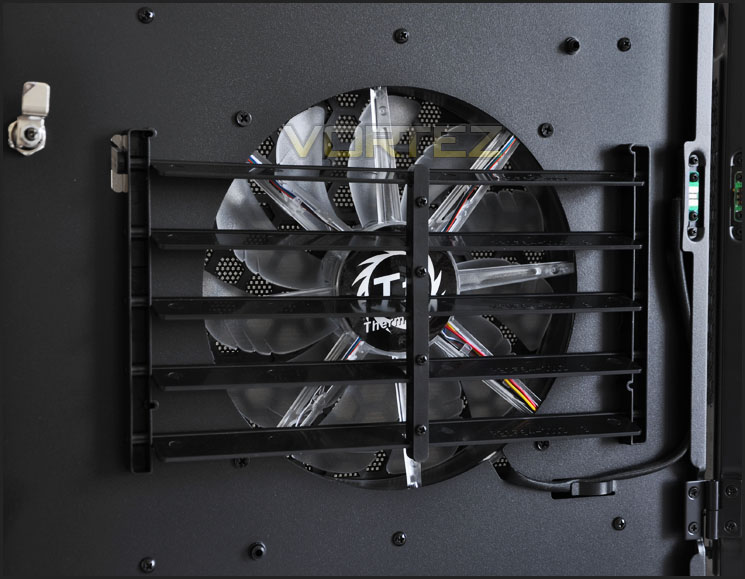
The side panel door with 200mm colorshift fan
Moving into the Level 10 GT for a closer look we can see that the bottom has an area marked out for a bottom mounted PSU. Sadly though there is no anti-vibration pads in this area so it’s going to be metal-on-metal. As already mentioned, beneath this we have a large, removable dust filter.
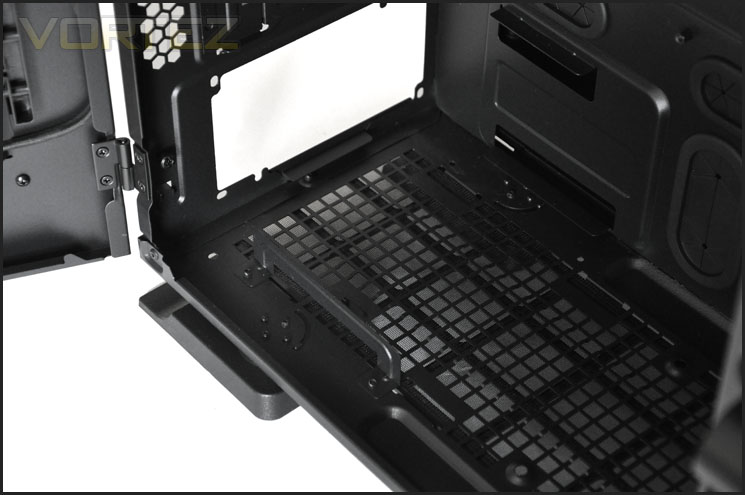
PSU seating area
Interior (Continued)
As previously mentioned the Level 10 GT has 8 PCI slot covers, each having ventilation and secured via thumbscrews and a bracket. This bracket will need to be removed before you can install a graphics card due to not being able to remove the thumbscrews. Although this may improve security slightly, it’s going to be a hassle getting things in and out of the case frequently.
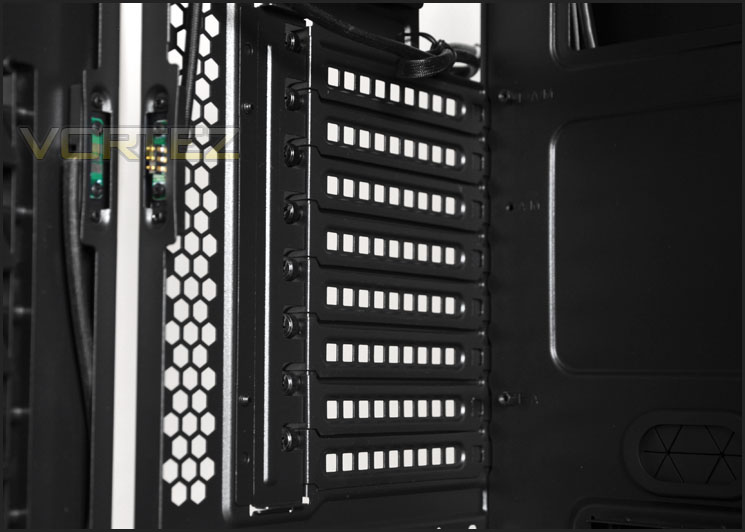
The 8 PCI slot covers
For cooling, the Level 10 GT takes advantage of a 140mm rear exhaust fan (3-pin – 1000RPM – 16dBA) and a top mounted exhaust – 200mm colorshift fan (600~800RPM, 13~15dBA).
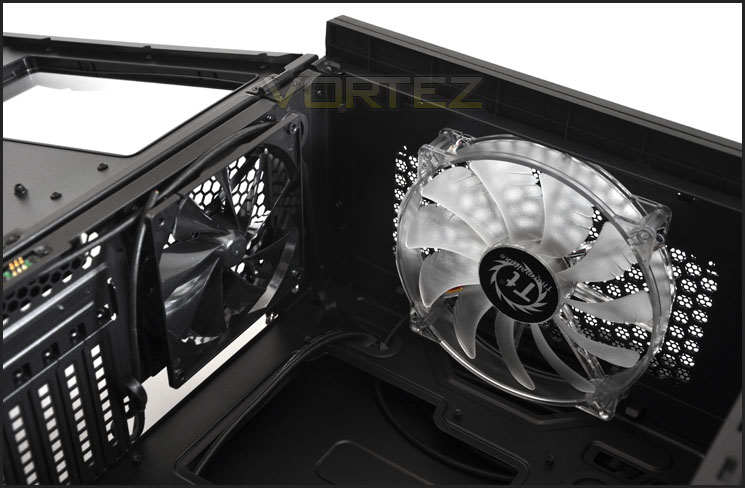
Some of the cooling fans inside the Level 10 GT
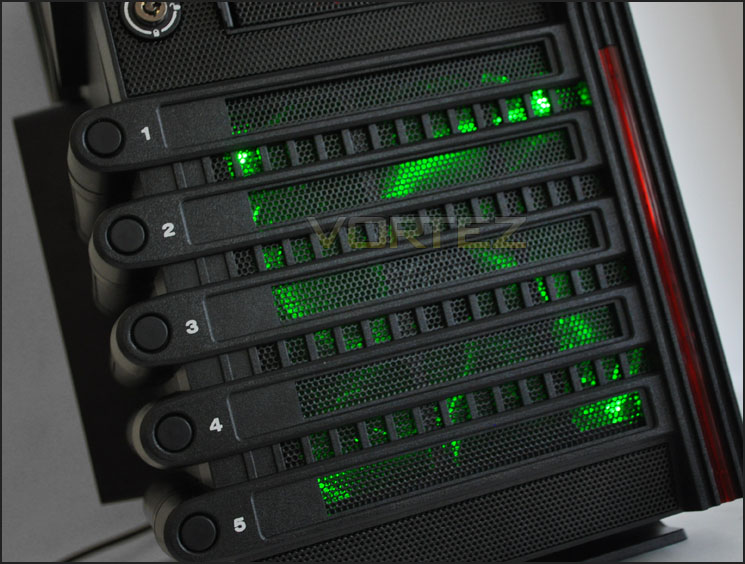
At the front of the Level 10 GT we have 5 buttons, each of these can be pressed in and a HDD tray from the side can be extracted. During the installation section of this review I will show how to install a HDD into the case. In essence, the drive just slots into the tray and then the tray is softly pressed in – the drive will then connect with pre-installed eSATA power at the other side, thus making all of these trays hot-swappable.
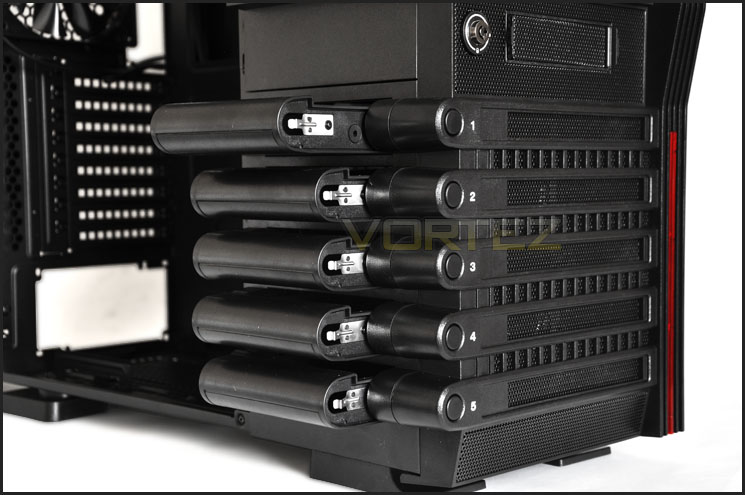
Hot swappable HDD installation
Installation
From start to finish installing kit inside the Level 10 GT is easy, I did come across one problem however – getting the side panel to fit on the alternate side due to there being little clearance behind the motherboard tray but apart from this the Level 10 GT is a pleasure to work with.
As you can see from the photograph below, there is plenty of room inside the Level 10 GT and it will accommodate bigger motherboards such as extended ATX.
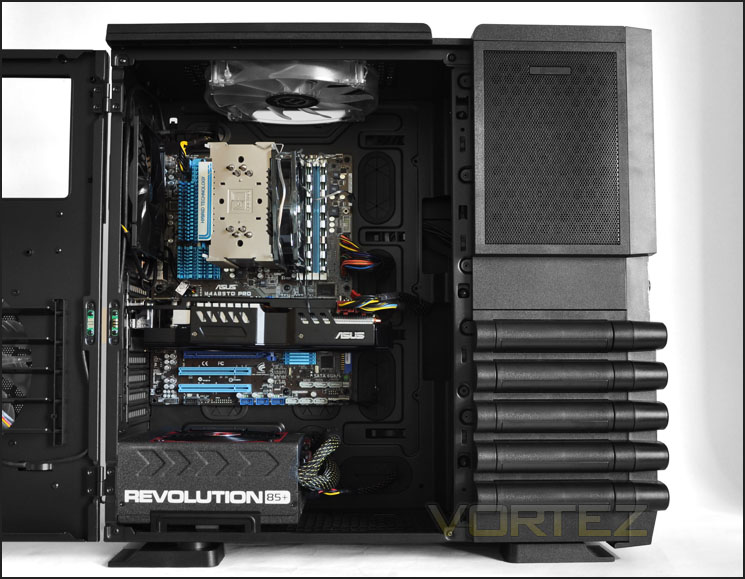
Install complete and plenty of space
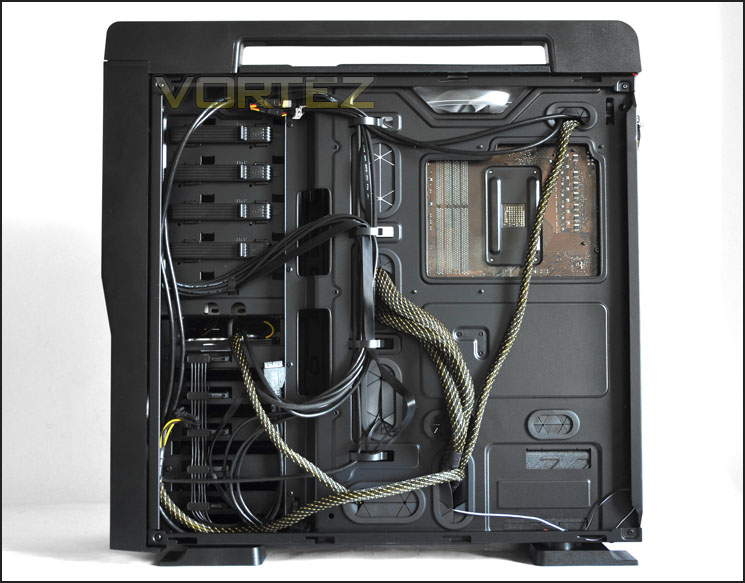
Not so much room behind the motherboard tray
In terms of clearance the GPU (ASUS HD6950 DirectCU II 11”+) has just under 9cm of clearance, so the Level 10 GT will house the longest graphics cards currently on the market such as the AMD 6990. Over with the CPU cooler (Noctua NH-U12P 158mm height) we have some 3.5cm of clearance between the top of the cooler and the side panel door. So again, we can fit big CPU coolers such as the Noctua NH-D14 and Thermalright Silver Arrow which are both 160mm in height.
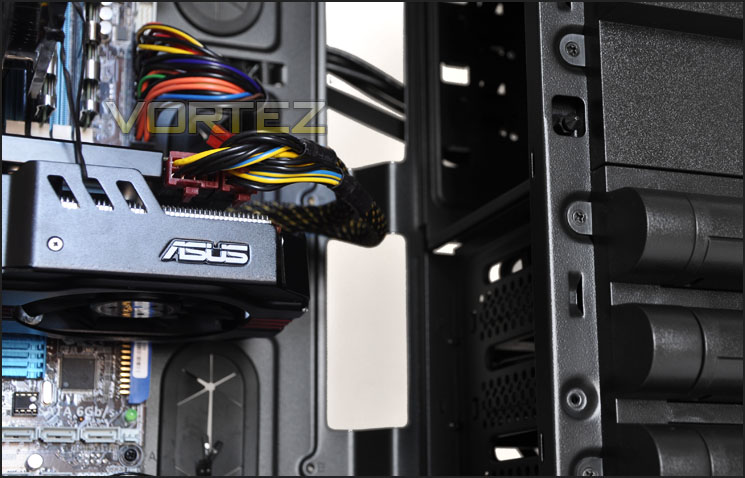
GPU clearance is very good – up to 9cm for ASUS HD6950 Direct CU II
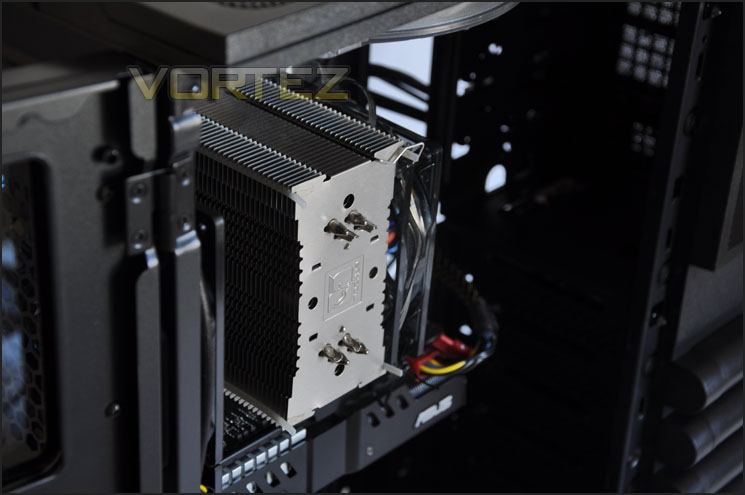
CPU cooler clearance is good – up to 3.5cm for Noctua NH-U12P
Behind the motherboard tray there is 2.3cm of clearance but the back of the motherboard tray does have raised areas. Ideally I would have liked to see more clearance in this area as getting cables tucked away wasn’t as easy as it could have been – getting the side panel back on was a little bit of an issue.
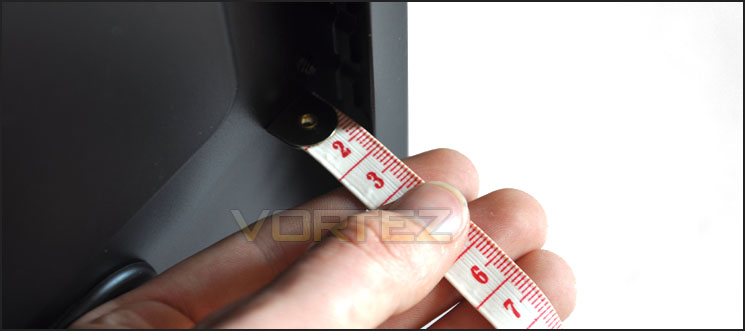
Clearance behind the motherboard tray
Installation (Continued)
To get a HDD installed within the Level 10 GT you need to attach your 2.5/3.5” drive to one of the trays. In the photograph below you can see there are holes marked out for both sizes of drive – I chose to go with a 3.5” drive and the mounting screws drop onto the sides. Once the drive is securely in place within the tray, it just slides into the side of the case and clicks into place once the SATA power is lined up.
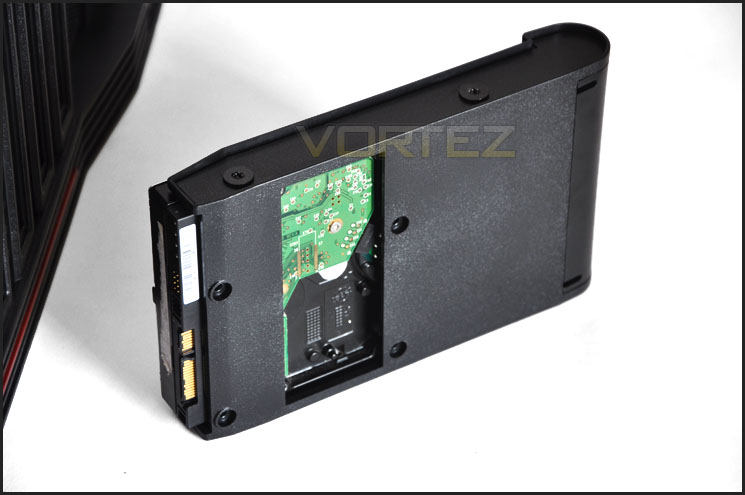
Installing a 3.5” HDD into the tray
Within the accessories bundle Thermaltake have included a headset holder. This clips into the side of the case to provide a platform for holding your headset – quite a nice idea, certainly useful for gamers.
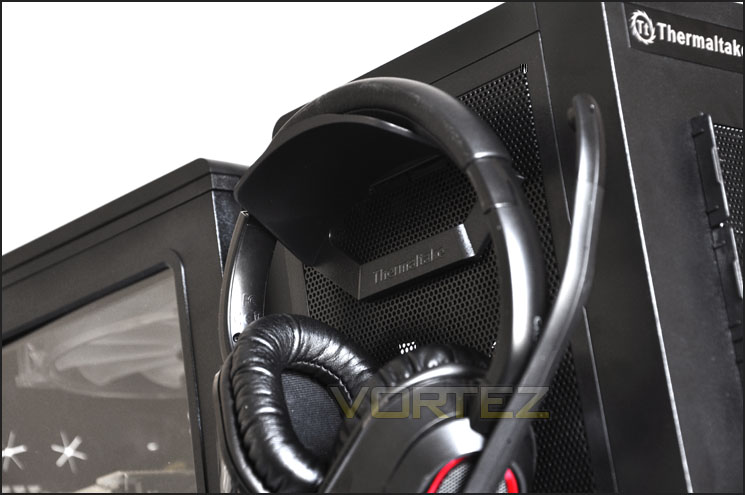
Headset holder is very handy
To install graphics cards or any PCI card inside the Level 10 GT you are going to have to remove the bracket that secures things in place. Although this does add some security to the system it’s also quite frustrating to have to do this every time something needs swapping out. Simply having it removed all of the time means there will be a large hole at the back of the case and this will only attract dirt and dust, so you really have no option but to use this bracket.
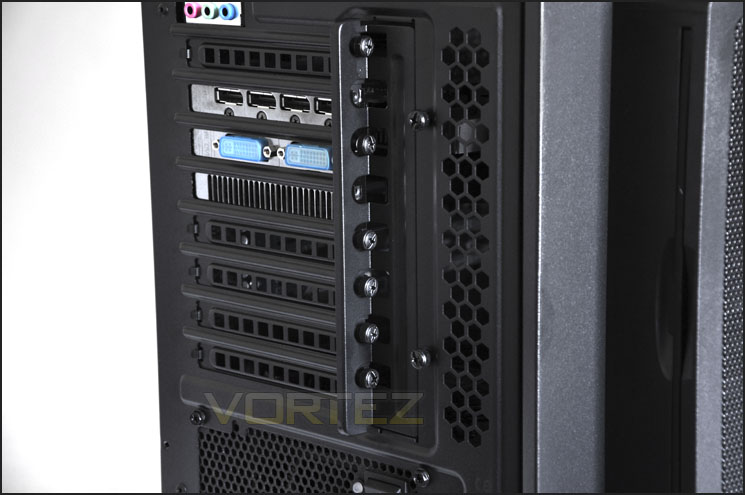
The PCI bracket installed
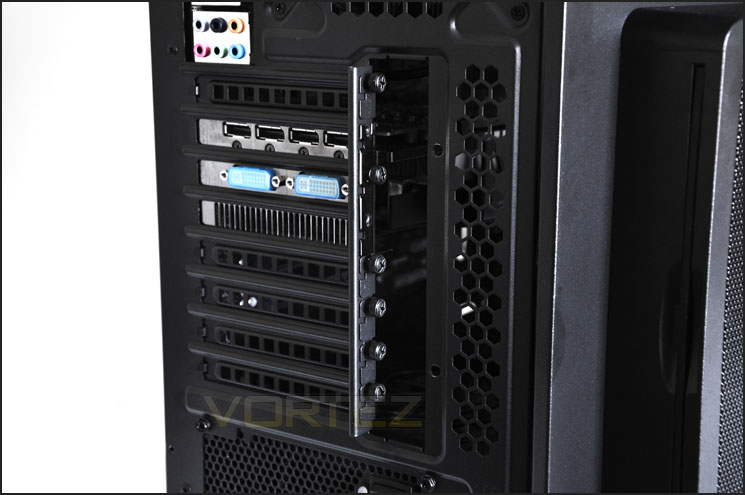
PCI bracket removed
Powered UP (Lighting)
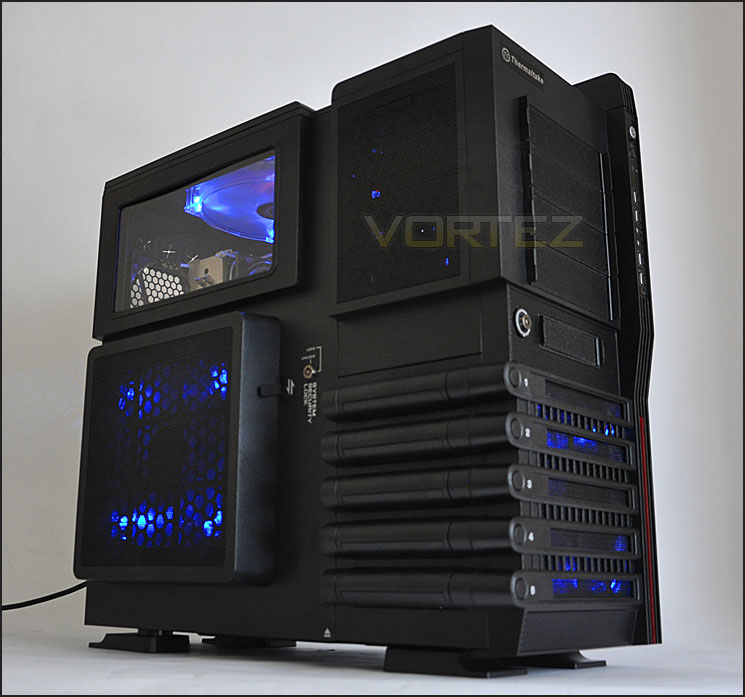
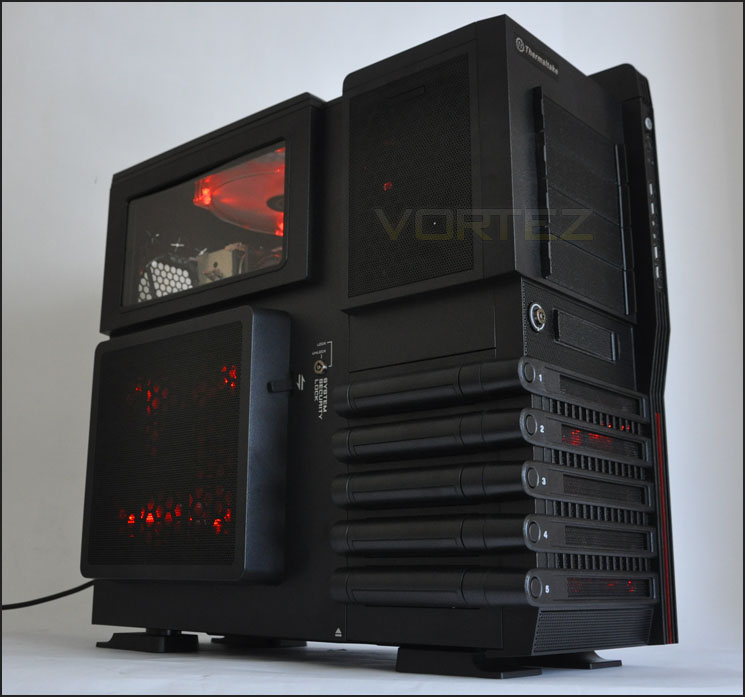
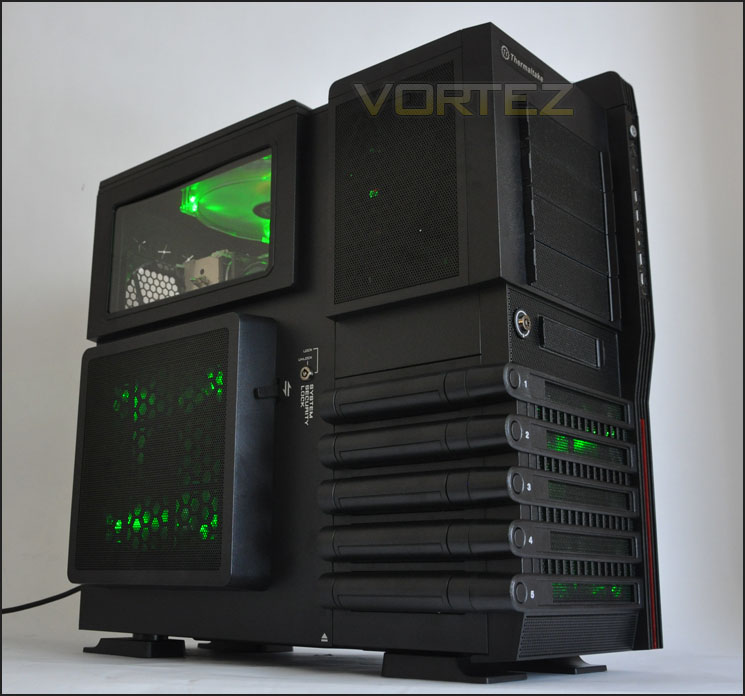
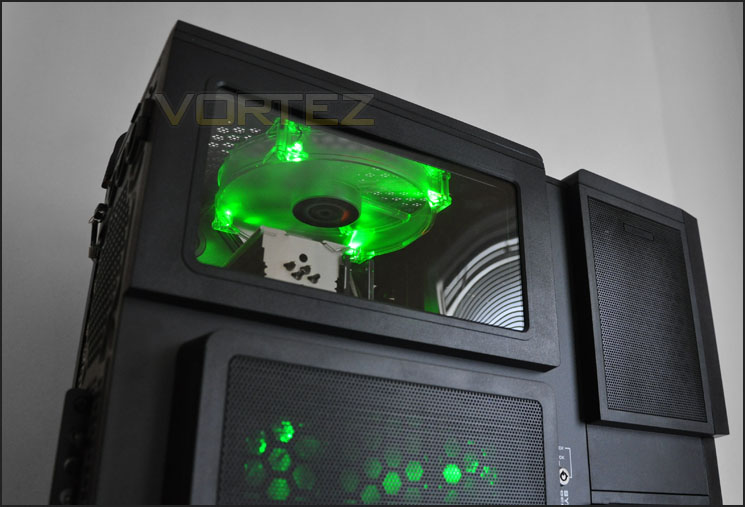
The Level 10 GT is a visually aggressive looking gamer case. On the outside it oozes plenty of character – especially as we have 3 pre-installed LED fans to take advantage of. Powering up the system we can manipulate these fans to having blue, red or green colours and a series of different orientations – flashes, pulses and rotations. See here for more details (Scroll down)
So here is Level 10 GT powered up. As you will appreciate this adds plenty of ambience to a dark room!
Thermal Performance Testing
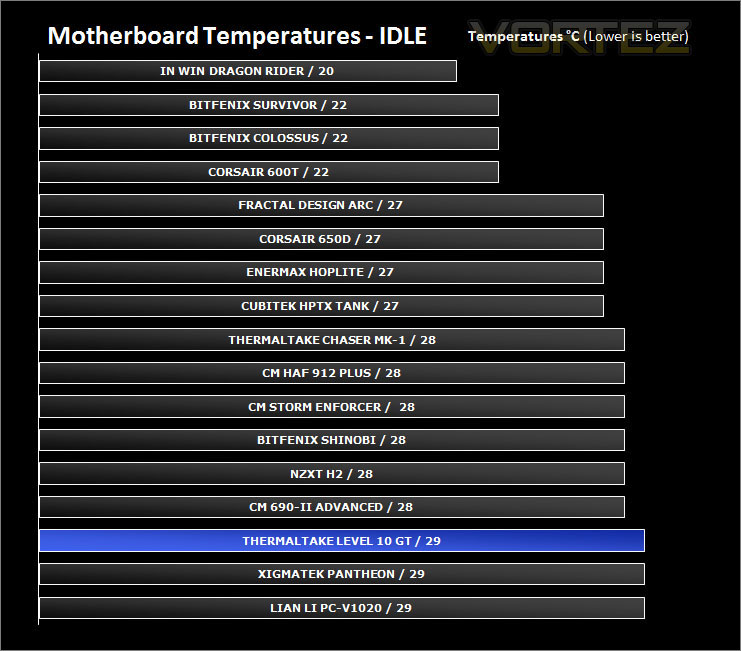
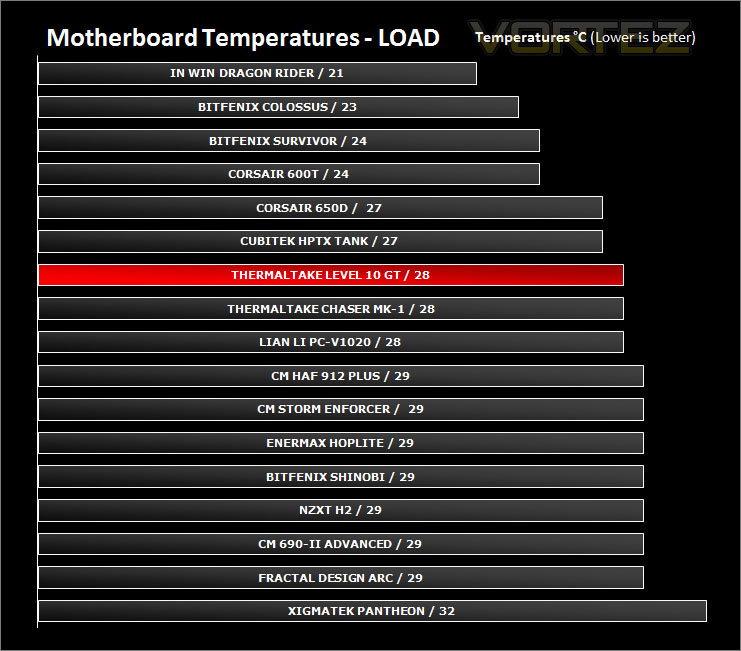
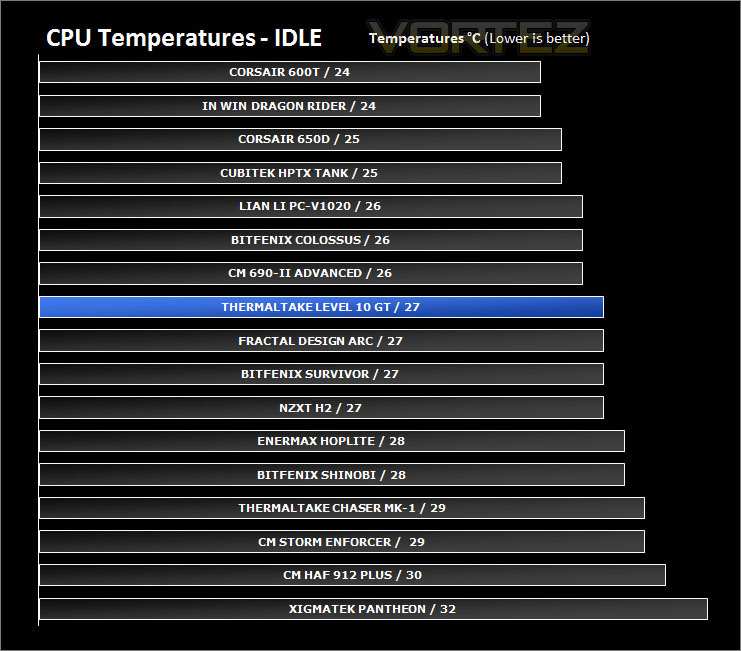
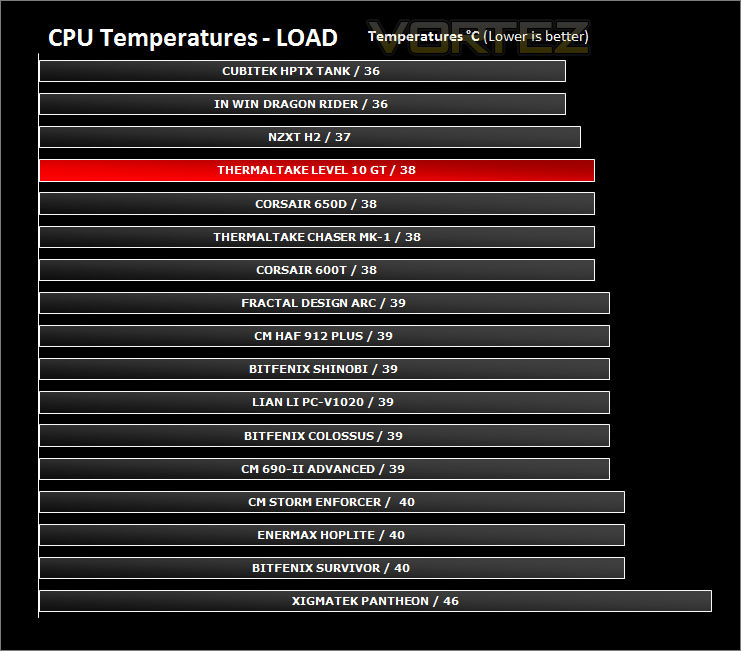
With 4 pre-installed fans and 3 of the 4 being 200mm in size, the Level 10 GT should deliver some great thermal performance figures. For the purpose of testing we will be setting the fans to low (600RPM) on the front panel control.
To discover the thermal performance of the Level 10 GT I will record idle temperatures after 20 minutes from a cold boot. I will then stress the system and temperatures will again be monitored after 30 minutes have elapsed. Fans will be set to low and side vent open.
System Components
CPU AMD Phenom II X6 1055T 2.8GHz
Motherboard ASUS M4A89TD PRO
Graphics ZOTAC NVIDIA GTX 480
Memory 4GB Mushkin EM3-10666 DDR3
HDD Samsung Spinpoint 500GB SATA-II
PSU Enermax Revolution 85+ 850W
Conclusion
Thermaltake’s Level 10 GT is a great all round case with some security conscious design concepts and all the space you need to get high-end hardware inside the chassis. It may not have the same “wow” factor that the original Level 10 brought, but we now have a much more affordable representation and a design not too far away from the original design.
The Level 10 GT is marketed towards the extreme gamer, those that perhaps attend LAN parties – it comes with an easy to transport handle and has all the security features you could ever want, causing would-be thieves to take their grubby hands of your much loved rig. Its visual appearance may not suit everyone’s taste but being a gamer case it certainly fits the bill with the LED control and colorshift fans giving you the option of choosing the colour to have glowing from each of the 200mm fans.
Getting kit inside the Level 10 GT is easy and we have tool-less mechanisms throughout the case to assist with hassle-free installations. Even the optical drive bay fixings have been put on the alternate side to provide more stability when pressing the eject button on your drive.
The only real negatives to mention about the Level 10 GT is the limited space behind the motherboard tray. You have to carefully arrange cables in order to have the side panel fit properly. It takes a considerable amount of time to feed the cables away from obstructing the side panel. The other item worth mentioning is the PCI bracket system which needs to be removed every time a device is moved/installed. It does add a degree of security but it’s also quite frustrating to have to do every time something is changed.
Priced at around £200 inc VAT (GBP) many are going to argue, is the Level 10 GT worth this kind of money for all the plastic fascia’s that are involved? For around this price-point there are finely crafted aluminium cases that can be had and so ideally the Level 10 GT needs to drop in price in order for it to be deemed as a good value for money route.
The bottom line is: The Level 10 GT is a large case that will accommodate long graphics cards, big CPU coolers and other high-end kit such as extended ATX motherboards. It has a unique appearance that is sure to get the attention at LAN parties!
Pros
+ Large and spacious
+ Security mechanisms throughout
+ Lots of front panel controls inc. USB3.0 via motherboard header
+ Good thermal performance
Cons
– Limited space behind the motherboard tray
– Lots of plastic but still lots of money
+ Large and spacious
+ Security mechanisms throughout
+ Lots of front panel controls inc. USB3.0 via motherboard header
+ Good thermal performance
Cons
– Limited space behind the motherboard tray
– Lots of plastic but still lots of money


